Good Morning! Today I have a fun card with a cute group of snow people from the Stampin’ Up! Snowbody Better cling stamp set. No, we haven’t had any snow yet, but this is such a cute set, I had to break it out!! Plus I wanted to use it with the pretty Sale A Bration Penguin Playmates DSP before Sale A Bration ends in a couple of days! You can find the supplies I used at the bottom of my post along with the sizes of cardstock used.

I embossed a panel of the Misty Moonlight striped designer series paper from the Penguin Playmates designer series paper with the Tasteful Textile 3D embossing folder – it’s hard to see, but it gives the DSP a special feel in person. I adhered the panel to a Basic White mat.
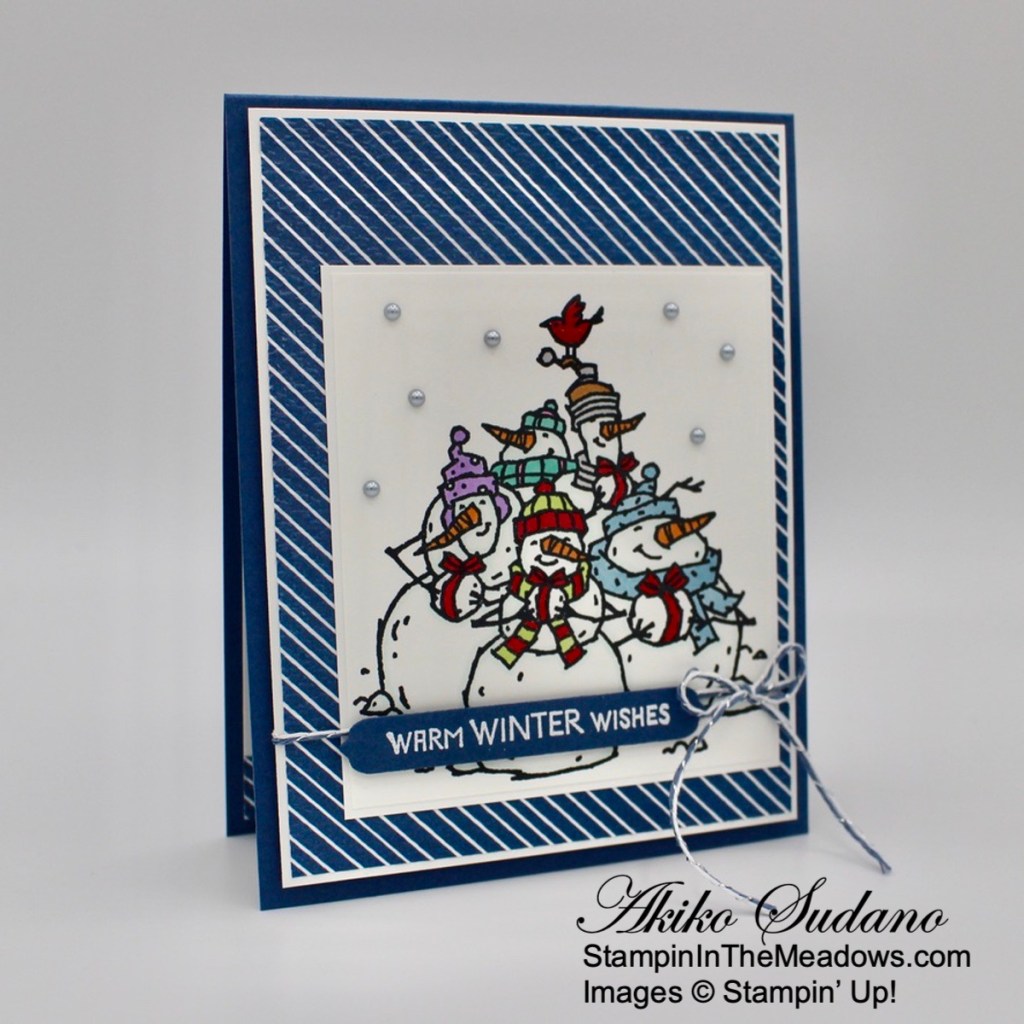
I stamped the fun group of snow people from the Stampin’ Up! Snowbody Better cling stamp set in Memento Tuxedo Black ink on a Basic White panel and colored it with Stampin’ Blends. I used Balmy Blue, Granny Apple Green, Real Red, Highland Heather, Soft Suede, Bermuda Bay, Pumpkin Pie and Smoky Slate. i outlined the image and the inside of the snow people with my light Pool Party Stampin’ Blend to give it some chilly contrast. I adhered the snow people to a Basic White mat and then adhered them to the striped DSP panel.

I wrapped the panel with a length of Misty Moonlight and silver Baker’s twine and made a bow on the side. I stamped the sentiment from the Stampin’ Up! Snowbody Better stamp set in VersaMark ink on a Misty moonlight strip and sprinkled it with white embossing powder. I shook off the excess and heat set the powder with my heat tool. I cut the sentiment out with the Messages die and adhered it to the snow people panel with dimensionals over the twine. I adhered the panel to the front of a Misty Moonlight card base and adhered silver metallic pearls to the snow people panel.

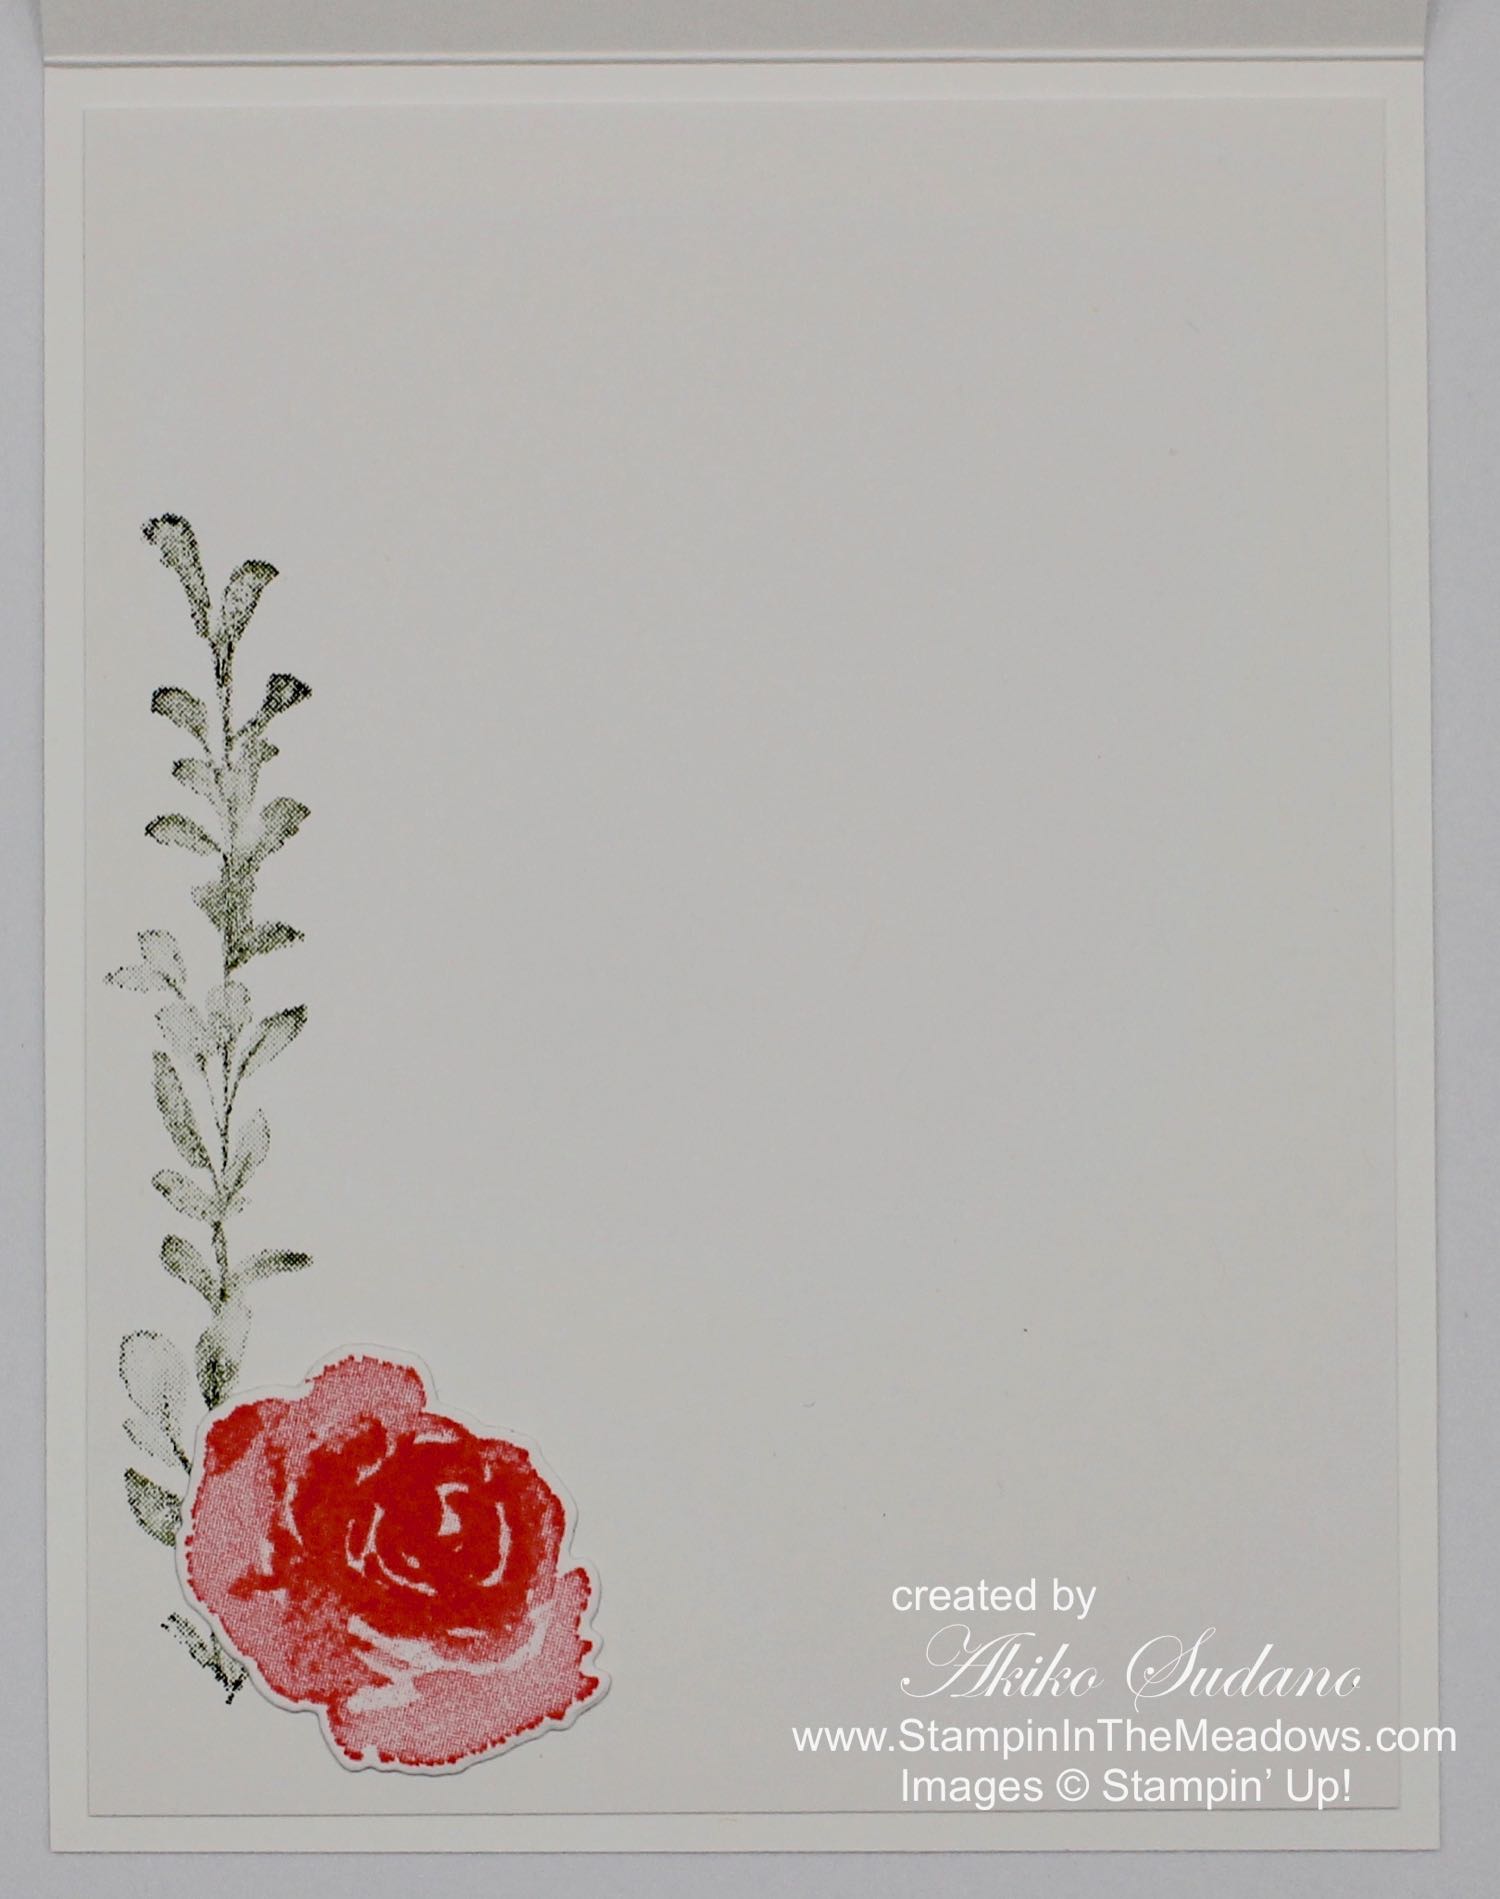
For the inside of the card, I stamped some snowflakes in Pool Party around the top of a Basic White panel. I stamped the sentiment from the Stampin’ Up! Snowbody Better stamp set in Misty Moonlight and the bird and snowball in Memento Tuxedo Black. I colored the bird and snowflake ribbon with my Real Red Stampin’ Blend and adhered a strip of embossed Misty Moonlight striped DSP to the bottom. I adhered the panel to the inside of the card.

The Stampin’ Up! Snowbody Better stamp set is really cute and it’s a perfect set for sending winter time greetings. I’m not ready for snow yet, but these happy little guys are great for getting in the mood for winter fun.
3 More Days Left for Sale A Bration!
Sale A Bration ends September 30, so hurry to get in on Stampin’ Up!’s best promotion. Click on the picture below to view the Sale A Bration brochure:

Current Host Code: U6K4RBB4
Use this host code when you order $50 or more and receive a free gift from me! The free gift is your choice of any item valued up to $10.00 in the 2021 – 2022 Annual Catalog or the July – December 2021 Mini Catalog!
If your order is over $150, please do not use the host code since you’ll receive your own Host Dollars plus I’ll still send you the free gift! This host code can be used by anyone, no club or commitment required. Let me know if you have any questions.
If you need any stamping supplies, I’d be very happy to be your Demonstrator. Just click on the Shop Now button on the right side of the screen to go directly to my online store or contact me if you have any questions.
Thanks for stopping by and Happy Stamping!
Akiko
- Visit my online store here
- See the current Stampin’ Up! clearance rack specials here
- Earn FREE Stampin’ Up! products through my Wildflower Frequent Shopper Program – my way of saying thank you to my online frequent shopper customers.
- Have any questions? I’d be happy to help, click here to contact me.
Cardstock Cuts for this project:
- Misty Moonlight – 4-1/4″ x 11″ card base scored at 5-1/2″, 3/4″ x 3-1/4″ (label)
- Basic White – two 4″ x 5-1/4″ panels (inside panel and front mat), 3-1/4″ x 3-5/8″ (snow people panel), 3-3/8″ x 3-3/4″ (snow people mat)
- Penguin Playmates DSP – 3-7/8″ x 5-1/8″ (front background), 1/2″ x 4″ (inside trim)
Stampin’ Up! products used in this project:


 Designer Series Paper")


")


")
")


")


 Designer Series Paper")


 Braided Linen Trim")


")


 Glittered Organdy Ribbon")


 Braided Linen Trim")