Stampin’ Up! Gumball Greetings for the Happy Inkin’ Thursday Blog Hop

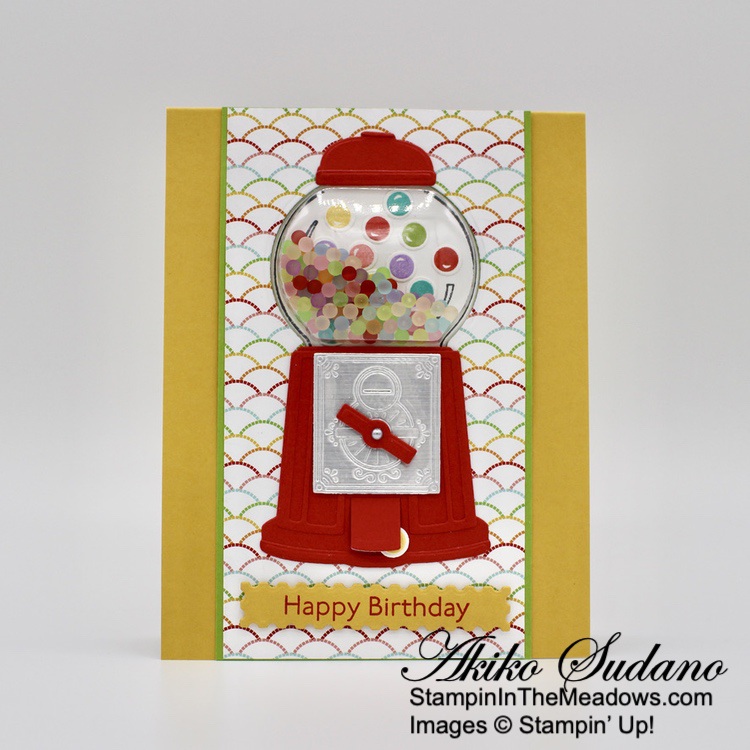
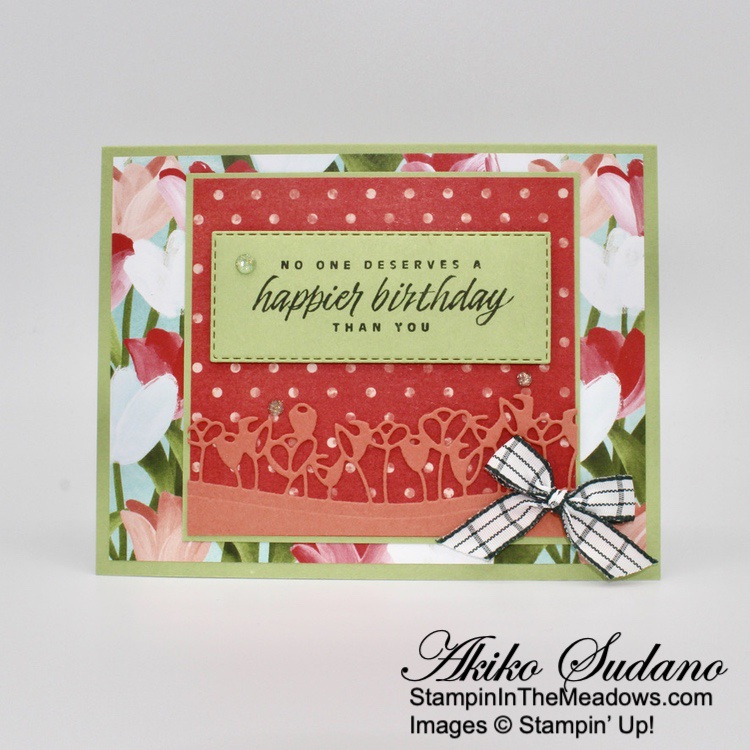
Good morning and welcome to the Happy Inkin’ Thursday Blog Hop! For today card, I used the fun Stampin’ Up! Gumball Greetings bundle to make a shaker birthday card. I used the Gumball Machine shaker dome and filled it with the Frosted beads. I also used the Pattern Party designer series paper for the background. You can find the supplies I used at the bottom of my post along with the sizes of cardstock used.

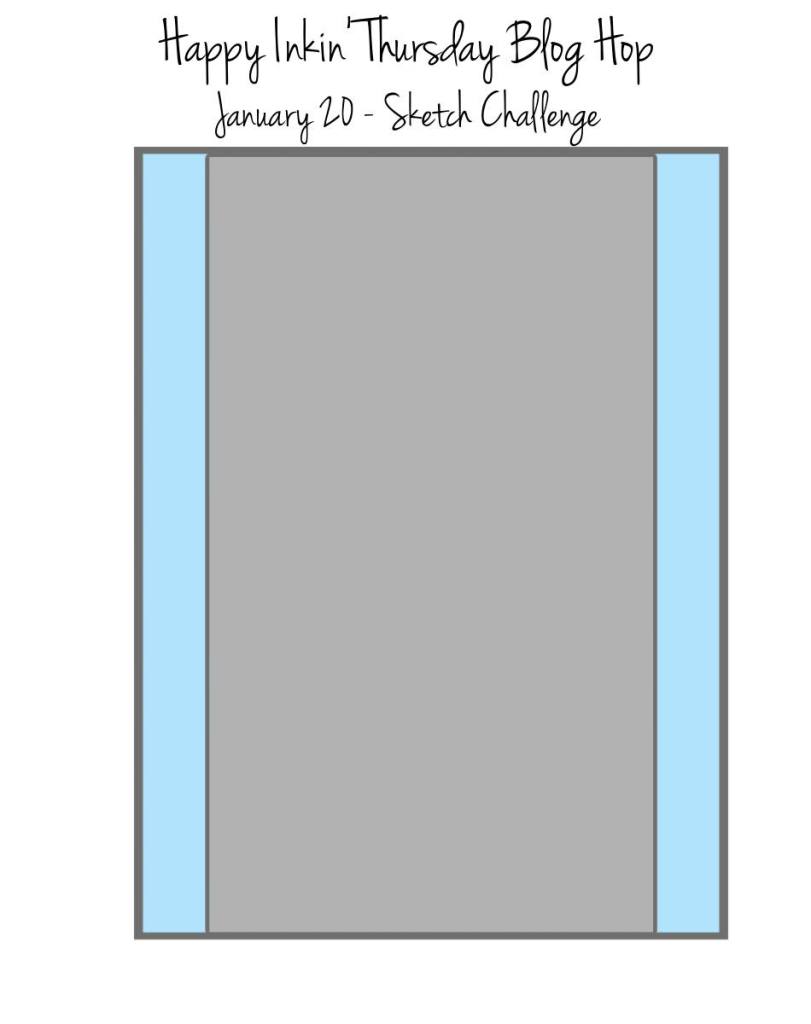
We have a sketch challenge this week – here is the pretty sketch we are using:

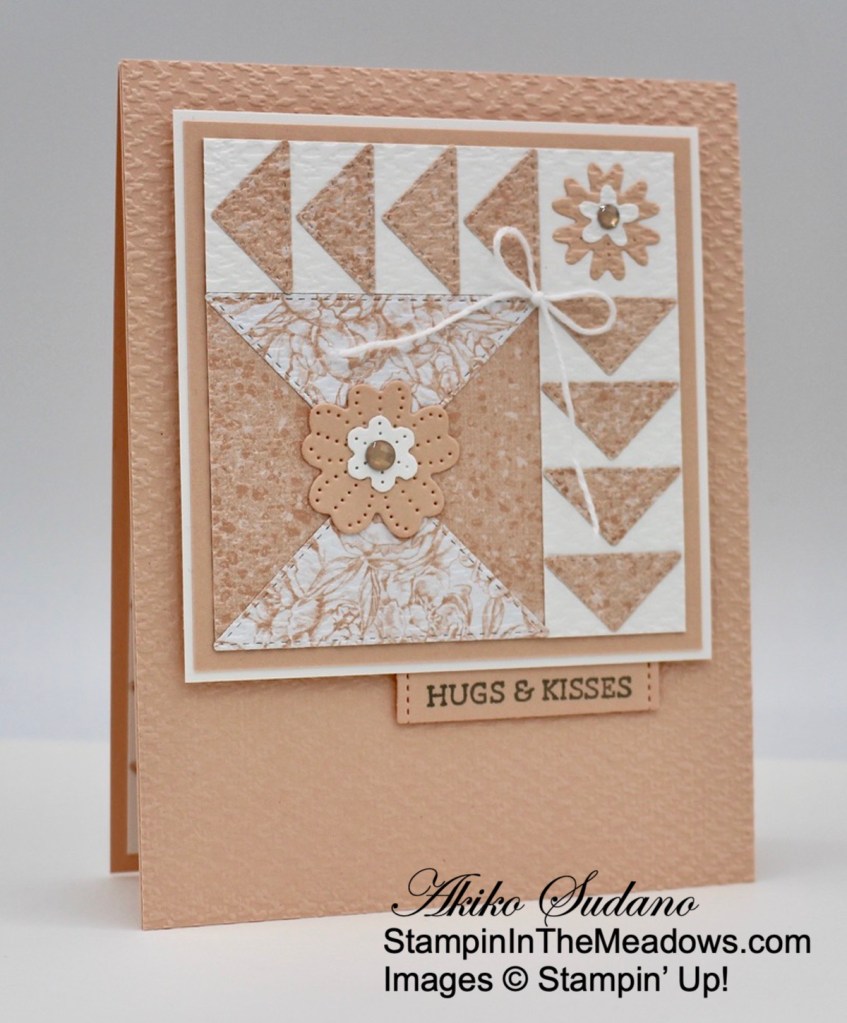
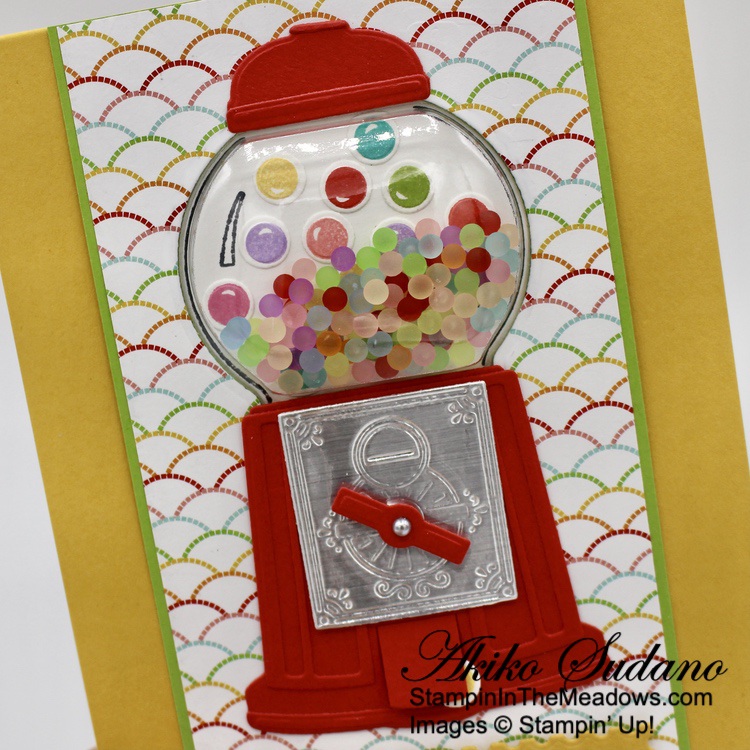
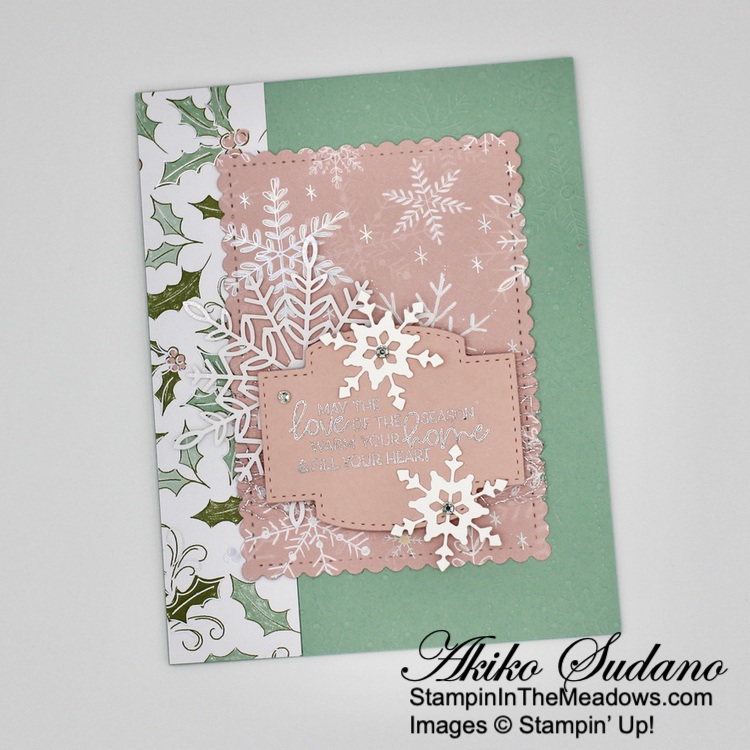
I stamped the gumball dome from the Stampin’ Up! Gumball Greetings photopolymer stamp set in Memento Tuxedo Black on a Basic White panel. I stamped several gumballs in Poppy Parade, Bermuda Bay, Granny Apple Green, Highland Heather, Flirty Flamingo and Daffodil Delight and cut them out with the coordinating die. I adhered them to the stamped gumball dome back with liquid glue and put a pile of frosted beads in the middle. I peeled off the adhesive backing from one of the plastic gumball shaker domes and adhered it to the stamped dome, securing the frosted beads inside.

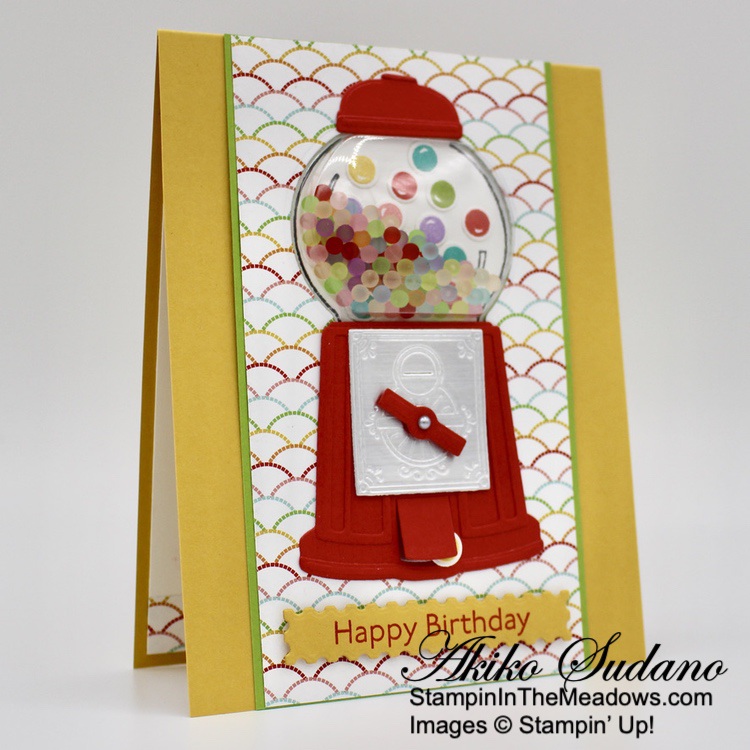
I cut a panel of Pattern Party designer series paper with the gumball dome die from the Stampin’ Up! Gumball Greetings bundle and pulled the adhesive strip covering off the front of the shaker dome. I adhered the shaker dome to the back of the die cut DSP and then adhered it to a Granny Apple Green mat. I adhered it to the front of a Crushed curry card base with liquid glue. I cut the gumball dome top, base, handle and trim pieces from Poppy Parade. I adhered the trim pieces to the dome top and the base – this gives the gumball machine some nice dimension! I adhered the base to the card front under the dome and the top to the top of the dome. I lifted the gumball opening slightly and adhered a stamped gumball under it with a glue dot.

I cut some silver foil with the coin plate die from the Stampin’ Up! Gumball Greetings bundle and adhered it to the gumball machine base with dimensionals. I cut the spinner from Poppy Parade and popped it on the machine with dimensionals. I finished the spinner with a silver metallic pearl. I stamped the sentiment from the Art Gallery photopolymer stamp set in Poppy Parade on a strip of Crushed Curry and cut it out with the label from the Floral Gallery dies. I adhered it to the card front with dimensionals.

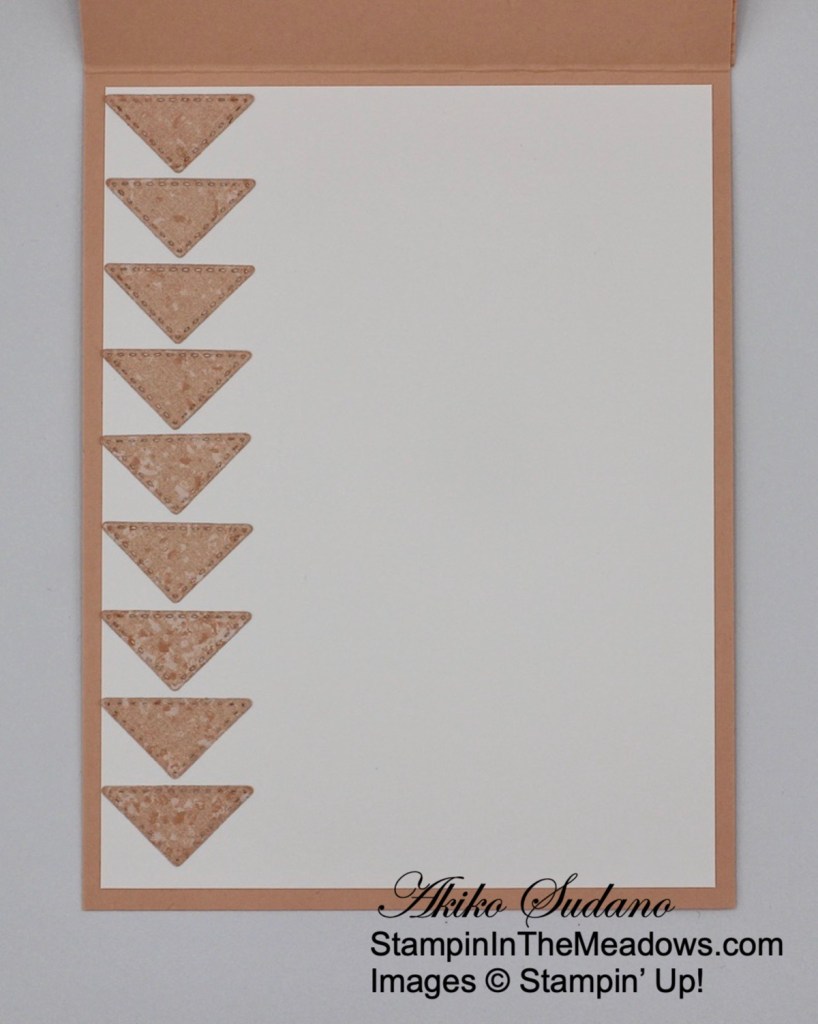
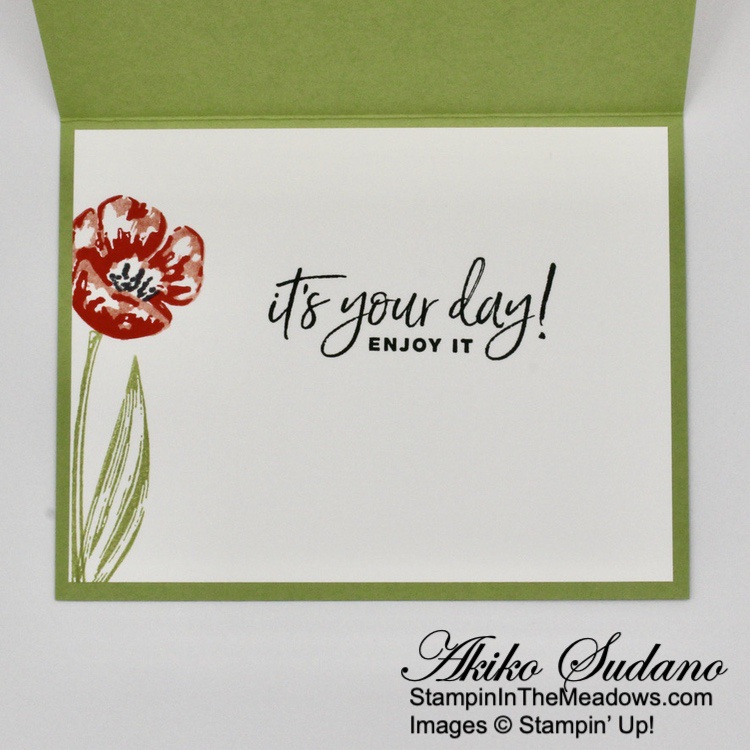
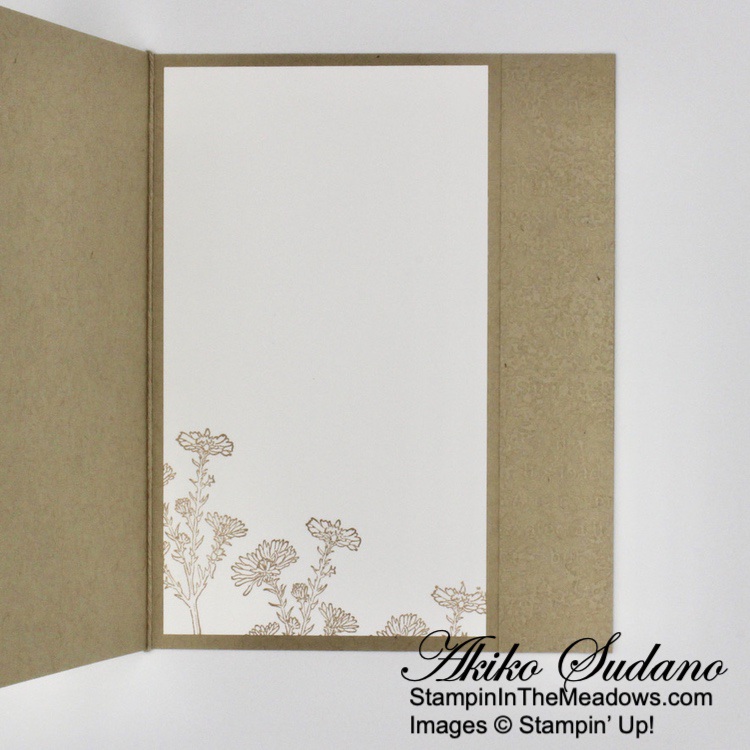
For the inside, I stamped the gumball machine from the Stampin’ Up! Gumball Greetings stamp set in Memento Tuxedo Black ink on a Basic White panel and colored it with Poppy Parade, Daffodil Delight, Bermuda Bay, Highland Heather, Granny Apple Green and Flirty Flamingo Stampin’ Blends. I stamped the sentiment from the stamp set in Bermuda Bay ink next to the gumball machine and trimmed the bottom with a strip of the Pattern Party DSP. I adhered the panel to the inside of the card.

The Gumball Greetings bundle is so much

On with the Hop! Click on the Next Blog button to move forward to see the beautiful project Karen Ksenzakovic has created.

If you get lost along the way, here are the participants for the hop:


Earn Free Products During Sale-A-Bration: Jan 4 – Feb 28 2022!

Sale-A-Bration is one of Stampin’ Up!’s biggest promotions of the year with fun for everyone!  There are fantastic Sale-A-Bration specials for Shopping, Hosting and Joining! And it’s happening through February 28, 2022!

SHOP 

During Sale-A-Bration you get to choose a FREE Sale-A-Bration product with every $50 or $100 you spend (before Shipping and tax). There are 7 items that are available for free with every $50 you spend and 2 items that are available for free with every $100 you spend.

HOST

Host a party during Sale-A-Bration and both you and your guests can earn FREE Sale-A-Bration products! Plus, place any party or personal order of $300 or more and receive the exclusive Calming Camellia cling stamp set for FREE! And you can even host a virtual party! Drop me an email at apsudano@stampininthemeadows.com if you are interested in setting up a host code for yourself to see if you can collect $300 in orders from yourself and your stamping friends to get that FREE stamp set!  I’m happy to set up a code just for you!

JOIN

And there is an awesome joining special during Sale-A-Bration! When you join as a Stampin’ Up! Demonstrator, you pay $99 for your starter kit and you get to choose $125 in product from any current catalog plus your starter kit ships for free! And if you join during Sale-A-Bration you get to pick two additional stamp sets to add to your starter kit for free! Contact me if you have any questions about joining and I’ll be happy to tell you more!


Current Host Code: 2YHH339E

Use this host code when you order $50 or more and receive a free gift from me!  The free gift is your choice of any item valued up to $10.00 in the 2021 – 2022 Annual Catalog or the July – December 2021 Mini Catalog including some of the host stamp sets!

If your order is over $150, please do not use the host code since you’ll receive your own Host Dollars plus I’ll still send you the free gift!  This host code can be used by anyone, no club or commitment required. Let me know if you have any questions.


If you need any stamping supplies, I’d be very happy to be your Demonstrator.  Just click on the Shop Now button on the right side of the screen to go directly to my online store or contact me if you have any questions. 

Thanks for stopping by and Happy Stamping!

Akiko

  • Visit my online store here
  • See the current Stampin’ Up! clearance rack specials here
  • Earn FREE Stampin’ Up! products through my Wildflower Frequent Shopper Program – my way of saying thank you to my online frequent shopper customers.
  • Have any questions? I’d be happy to help, click here to contact me.

Cardstock Cuts for this project:

  • Crushed Curry – 4-1/4″ x 11″ card base scored at 5-1/2″, 1″ x 3″ (label)
  • Silver Foil – 1-1/2″ x 1-1/2″ (die cut gumball machine panel), 3/4″ x 1″ (gumball machine flap liner)
  • Granny Apple Green – 3-1/8″ x 5-1/2″ (front mat)
  • Poppy Parade – 3-1/4″ x 4-1/4″ (gumball machine die cuts)
  • Basic White – 4″ x 5-1/4″ (inside panel), 1″ x 6″ (gum-balls), 2-1/2″ x 2-3/4″ (shaker dome backing)
  • Pattern Party DSP – 3″ x 5-1/2″ (front background)

Stampin’ Up! products used in this project:


Stampin’ Up! Flowering Tulips for the Happy Inkin’ Thursday Blog Hop

Good morning and welcome to the Happy Inkin’ Thursday Blog Hop! For today’s card, I used the brand new Stampin’ Up! Flowering Tulips bundle with the Flowering Fields designer series paper to make a cheery Birthday card. You can find the supplies I used at the bottom of my post along with the sizes of cardstock used.

We have a sketch this week – here is the pretty sketch we are using:

I adhered a panel of colorful Flowering Fields designer series paper to the front of a Pear Pizzazz card base. I cut a strip of Calypso Coral card stock with the tulip border die from the Stampin’ Up! Flowering Tulips bundle and adhered it to a polka dot panel of Flowering Fields DSP. I adhered the layered DSP panel to a Pear Pizzazz mat.

I stamped the sentiment from the Stampin’ Up! Flowering Fields photopolymer stamp set in Evening Evergreen ink and cut it out with the Stitched Rectangle die. I adhered it to the card front with dimensionals.

I finished the card front with Genial Gems and a bow made with the pretty Evening Evergreen Windowpane Check ribbon.

For the inside of the card, I stamped the tulip from the Stampin’ Up! Flowering Tulips stamp set in Poppy Parade, Calypso Coral, Memento Tuxedo Black and Pear Pizzazz on the side of a Basic White panel. I stamped the sentiment from the Happiest of Birthdays stamp set in Evening Evergreen in the middle of the panel. I adhered the panel to the inside of the card.

With the versatile Stampin’ Up! Flowering Tulips multi-step photopolymer stamp set, it’s easy to create pretty multicolored flowers! And when paired with the coordinating Tulips dies, you can make dimensional flowers as well!

On with the Hop! Click on the Next Blog button to move forward to see the beautiful project Karen Ksenzakovic has created.

If you get lost along the way, here are the participants for the hop:


Current Host Code: 2YHH339E

Use this host code when you order $50 or more and receive a free gift from me!  The free gift is your choice of any item valued up to $10.00 in the 2021 – 2022 Annual Catalog or the July – December 2021 Mini Catalog including some of the host stamp sets!

If your order is over $150, please do not use the host code since you’ll receive your own Host Dollars plus I’ll still send you the free gift!  This host code can be used by anyone, no club or commitment required. Let me know if you have any questions.


If you need any stamping supplies, I’d be very happy to be your Demonstrator.  Just click on the Shop Now button on the right side of the screen to go directly to my online store or contact me if you have any questions. 

Thanks for stopping by and Happy Stamping!

Akiko

  • Visit my online store here
  • See the current Stampin’ Up! clearance rack specials here
  • Earn FREE Stampin’ Up! products through my Wildflower Frequent Shopper Program – my way of saying thank you to my online frequent shopper customers.
  • Have any questions? I’d be happy to help, click here to contact me.

Cardstock Cuts for this project:

  • Pear Pizzazz – 5-1/2″ x 8-1/2″ card base scored at 4-1/4″, 3-5/8″ x 3-7/8″ (front mat), 1-3/4″ x 4″ (label)
  • Calypso Coral – 1-1/2″ x 3-3/4″ (die cut tulips)
  • Basic White – 4″ x 5-1/4″ (inside panel)
  • Flowering Fields DSP – 4″ x 5-1/4″ (front background), 3-1/2″ x 3-3/4″ (front inset

Stampin’ Up! products used in this project:


Stampin’ Up! Plentiful Plants for the Happy Inkin’ Thursday Blog Hop

Good morning and welcome to the Happy Inkin’ Thursday Blog Hop! For today card, I used the beautiful Stampin’ Up! Plentiful Plants bundle to make a Love You card. Do you have indoor plants? I used to have lots of them, but I’ve lost my green thumb these days. It’s sad because they really brighten things up on dreary winter days. I’ll have to look into this again. But anyway, you can find the supplies I used at the bottom of my post along with the sizes of cardstock used.

We have a special challenge this week – we’re all making fun fold cards! My fun fold is an accordion card inspired by Cindy Brumbaugh at CindyLeeBee Designs.

I adhered panels of Bloom Where You’re Planted designer series paper to each of the scored panels of the Just Jade card base. I stamped the sentiment from the Stampin’ Up! Plentiful Plants photopolymer stamp set in Evening Evergreen in the top corner of the brick design Bloom Where You’re Planted DSP and adhered it to the right side of the scored Cinnamon Cider mini card. I stamped the leaf spray in Just Jade on the top corner of the wood panelling design Bloom Where You’re Planted DSP and adhered it to the right side of the Cinnamon Cider mini card.

I stamped the sentiment from the Stampin’ Up! Plentiful Plants stamp set in Evening Evergreen ink in the top corner of a Basic White panel and stamped the other top corner with a vine in Garden Green ink. I adhered the panel to a Just Jade mat and adhered it to the inside of the card. I adhered strips of Tear & Tape to the edges of the Cinnamon Cider mini card and pulled off the covers and adhered it to the first inside fold by lining it up with the inside panel. I closed the folds and pulled the covers off the Tear & Tape and folded the Cinnamon Cider mini card over the front flap to adhere it.

I stamped the 5 leaf cluster from the Stampin’ Up! Plentiful Plants stamp set in Garden Green on Basic White and cut it out with the coordinating die. I stamped the large pot in Cajun Craze and fussy cut it with my paper snips. I cut a panel of Sahara Sand with the hanging basket die and adhered the plant and pot to the basket with liquid glue. I adhered the basket to the card front with liquid glue. I cut a Cinnamon Cider panel with the vase die and adhered it with liquid glue. I cut an Evening Evergreen panel with the leafy die and adhered it on top of the pot with liquid glue. I finished the front with 3 metallic butterflies from the upcoming Jan-Jun 2022 Mini Catalog (available Jan 4, 2022).

I stamped the 3 leaf plant in Garden Green on Basic White and cut it out with the coordinating die. I stamped the planter in Cinnamon cider and cut it out with the coordinating die. I adhered the plant to the back of the planter and adhered them both to the inside flap of the card. I adhered a die cut Sahara Sand vase next to the plant

I adhered some more empty Sahara Sand die cut vases to the bottom of the inside panel under the Basic White panel, so that they kind of peek out when the card is folded closed.

This fun fold is 1/4″ narrower than a standard A2 card, but it still fits in a standard envelope, with plenty of room for the accordion fold and card front embellishments. And it was so much fun using the different patterns in the Bloom Where You’re Planted DSP and the Stampin’ Up! Plentiful Plants bundle to make a verdant card to inspire winter indoor gardens!

On with the Hop! Click on the Next Blog button to move forward to see the beautiful project Karen Ksenzakovic has created.

If you get lost along the way, here are the participants for the hop:


Current Host Code: 2YHH339E

Use this host code when you order $50 or more and receive a free gift from me!  The free gift is your choice of any item valued up to $10.00 in the 2021 – 2022 Annual Catalog or the July – December 2021 Mini Catalog including some of the host stamp sets!

If your order is over $150, please do not use the host code since you’ll receive your own Host Dollars plus I’ll still send you the free gift!  This host code can be used by anyone, no club or commitment required. Let me know if you have any questions.


If you need any stamping supplies, I’d be very happy to be your Demonstrator.  Just click on the Shop Now button on the right side of the screen to go directly to my online store or contact me if you have any questions. 

Thanks for stopping by and Happy Stamping!

Akiko

  • Visit my online store here
  • See the current Stampin’ Up! clearance rack specials here
  • Earn FREE Stampin’ Up! products through my Wildflower Frequent Shopper Program – my way of saying thank you to my online frequent shopper customers.
  • Have any questions? I’d be happy to help, click here to contact me.

Cardstock Cuts for this project:

  • Just Jade – 5-1/2″ x 11″ card base scored at 1-3/4″, 3-1/2″, 5-1/4″, and 7″, 3″ x 3-3/4″ (inside mat)
  • Cinnamon Cider – 3-3/4″ x 6″ mini card scored at 3″, 1″ x 1″ (die cut pot)
  • Evening Evergreen – 1-1/4″ x 1-1/2″ (die cut plant)
  • Sahara Sand – 1-3/4″ x 4-1/4″ (die cut plant hanger and small pots)
  • Basic White – 2-3/4″ x 3-1/2″ (inside panel), 2″ x 6″ (stamped plants and pots)
  • Bloom Where You’re Planted DSP – 3-3/4″ x 5-1/4″ (inside background), four 1-1/2″ x 5-1/4″ strips (accordion fold panels), two 2-3/4″ x 3-1/2″ panels (mini card panels)

Stampin’ Up! products used in this project:


Stampin’ Up! Artistically Inked for the Happy Inkin’ Thursday Blog Hop

Good morning and welcome to the Happy Inkin’ Thursday Blog Hop! Here’s a festive Holiday Thank You card made with the beautiful sentiment from the Stampin’ Up! Artistically Inked stamp set and Sweet Stockings designer series paper. You can find the supplies I used at the bottom of my post along with the sizes of cardstock used.

We have a sketch this week – here is the pretty sketch we are using:

I adhered a strip of Sweet Stockings designer series paper to the front of a Cherry Cobbler card base.

I cut another panel with the Stitched Rectangles dies and adhered it to an Evening Evergreen mat. I adhered the panel to the front of the card base with dimensionals.

I stamped the sentiment from the Stampin’ Up! Artistically inked cling stamp set in Early Evergreen ink on an Old Olive panel. I cut it out with another Stitched Rectangle die and adhered it to an Evening Evergreen mat. I adhered the label to the card front and accented it with Evening Evergreen Matte Decorative dots.

For the inside of the card, I stamped the sentiment from the Handsomely Suited cling stamp set in Evening Evergreen on the bottom of a Basic White panel. I adhered a strip of Sweet Stockings DSP to the side and adhered the panel to the inside of the card.

The sentiments from the Stampin’ Up! Artistically Inked stamp set are really pretty and pair nicely with holiday designer series paper for a quick thank you or note card that is festive.

On with the Hop! Click on the Next Blog button to move forward to see the beautiful project Karen Ksenzakovic has created.

If you get lost along the way, here are the participants for the hop:


Current Host Code: H6UDQF6U

Use this host code when you order $50 or more and receive a free gift from me!  The free gift is your choice of any item valued up to $10.00 in the 2021 – 2022 Annual Catalog or the July – December 2021 Mini Catalog including some of the host stamp sets!

If your order is over $150, please do not use the host code since you’ll receive your own Host Dollars plus I’ll still send you the free gift!  This host code can be used by anyone, no club or commitment required. Let me know if you have any questions.


If you need any stamping supplies, I’d be very happy to be your Demonstrator.  Just click on the Shop Now button on the right side of the screen to go directly to my online store or contact me if you have any questions. 

Thanks for stopping by and Happy Stamping!

Akiko

  • Visit my online store here
  • See the current Stampin’ Up! clearance rack specials here
  • Earn FREE Stampin’ Up! products through my Wildflower Frequent Shopper Program – my way of saying thank you to my online frequent shopper customers.
  • Have any questions? I’d be happy to help, click here to contact me.

Cardstock Cuts for this project:

  • Cherry Cobbler – 5-1/2″ x 8-1/2″ card base scored at 4-1/4″
  • Evening Evergreen – 3-1/8″ x 4-1/2″ (front mat), 1-1/8″ x 2-1/2″ (label mat)
  • Old Olive – 1-1/2″ x 3″ (label)
  • Basic White – 4″ x 5-1/4″ (inside panel)
  • Sweet Stockings DSP – 2″ x 4-1/4″ (front stripe), 3-1/4″ x 4-3/4″ (panel), 3/4″ x 4″ (inside trim)

Stampin’ Up! products used in this project:


Stampin’ Up! Whimsical Trees for the Happy Inkin’ Thursday Blog Hop

Good morning and welcome to the Happy Inkin’ Thursday Blog Hop! For today card, I used the beautiful Stampin’ Up! Whimsical Trees bundle set to make a Christmas card. I paired it with the Whimsy & Wonder specialty designer series paper and beautiful Wonderful Snowflakes for a pink and mint snowflake card. You can find the supplies I used at the bottom of my post along with the sizes of cardstock used.

And we have a theme challenge this week and our theme is Snow/Winter:

I embossed a panel of Mint Macaron with the pretty snowflakes in the Wintry 3D embossing folders and adhered it to the right side of the front of a Mint Macaron card base. I adhered a strip of the pretty Whimsy & Wonder specialty DSP to the left side.

I cut a panel of the Whimsy & Wonder specialty designer series paper with the largest scalloped rectangle from the Stitched So Sweetly dies. I wrapped it with Silver Mesh ribbon, adhering it in the back. I adhered the panel to the card front with liquid glue. I adhered a Wonderful Snowflake on top of the ribbon. I stamped the sentiment from the Stampin’ Up! Whimsical Trees cling stamp set in Versamark ink on a Blushing Bride panel. I sprinkled it with silver embossing powder and shook off the excess. I heat set the powder with my heat tool and cut it out with the Stitched So Sweetly die when it cooled.

I cut two snowflakes from Basic White using the small snowflake die from the So Many Snowflakes dies and adhered them to the label with liquid glue. I popped the label on the card front with dimensionals and adhered some rhinestones to the snowflakes and label.

For the inside of the card, I stamped the little bough from the Stampin’ Up! Whimsical Trees stamp set in Mossy Meadow in the top corner of a Basic White panel. I colored it with Mint Macaron and Flirty Flamingo Stampin Blends. I inked up part of the sentiment stamp from the Frosted Gingerbread photopolymer stamp set in Mossy Meadow and stamped it on the panel. I adhered a strip of Whimsy & Wonder specialty DSP to the side of the panel and adhered the panel to the inside of the card.

The Whimsy and Wonder specialty DSP is beautiful and I really love the non-traditional Christmas colors! The Stampin’ Up! Whimsical Trees stamp set coordinates perfectly and the greenery, ornaments and Christmas tree images give you lots of options for different themed Christmas cards – all of them beautiful!

On with the Hop! Click on the Next Blog button to move forward to see the beautiful project Karen Ksenzakovic has created.

If you get lost along the way, here are the participants for the hop:


Current Host Code: H6UDQF6U

Use this host code when you order $50 or more and receive a free gift from me!  The free gift is your choice of any item valued up to $10.00 in the 2021 – 2022 Annual Catalog or the July – December 2021 Mini Catalog including some of the host stamp sets!

If your order is over $150, please do not use the host code since you’ll receive your own Host Dollars plus I’ll still send you the free gift!  This host code can be used by anyone, no club or commitment required. Let me know if you have any questions.


If you need any stamping supplies, I’d be very happy to be your Demonstrator.  Just click on the Shop Now button on the right side of the screen to go directly to my online store or contact me if you have any questions. 

Thanks for stopping by and Happy Stamping!

Akiko

  • Visit my online store here
  • See the current Stampin’ Up! clearance rack specials here
  • Earn FREE Stampin’ Up! products through my Wildflower Frequent Shopper Program – my way of saying thank you to my online frequent shopper customers.
  • Have any questions? I’d be happy to help, click here to contact me.

Cardstock Cuts for this project:

  • Mint Macaron – 4-1/4″ x 11″ card base scored at 5-1/2″, 3″ x 5-1/2″ (embossed background)
  • Blushing Bride – 2-1/4″ x 3″ (label)
  • Basic White – 4″ x 5-1/4″ (inside panel), 1-1/4″ x 2-1/2″ (die cut snowflakes)
  • Whimsy & Wonder specialty DSP – 3-1/4″ x 4-1/2″ (scalloped rectangle), 1-1/4″ x 5-1/2″ (front stripe) 3/4″ x 5-1/4″ (inside trim)

Stampin’ Up! products used in this project:


Stampin’ Up! Nature’s Harvest Thank You Card for the Happy Inkin’ Thursday Blog Hop

Good morning and Happy Thanksgiving!! And welcome to the Happy Inkin’ Thursday Blog Hop! For today card, I used the wonderful Stampin’ Up! Nature’s Harvest cling stamp set to make a Thank You card. I paired it with the Harvest Meadows designer series paper and Meadow dies for a simple, fun take on our sketch challenge. You can find the supplies I used at the bottom of my post along with the sizes of cardstock used.

And we have a sketch challenge this week. Here’s the pretty sketch we are using:

I cut 1″ off the side of the front of a Crumb Cake card base and embossed it with the Timeworn Type 3D embossing folder. I adhered it to the right side of the inside of the card with liquid glue.

I cut a Basic White panel with the scalloped border die from the Penned Flowers dies and adhered it to the card front with liquid glue. I adhered a panel of Harvest Meadows designer series paper to the front so that the stitching and scallop border showed behind it. I cut another Basic White panel with the flower from the Meadows dies and adhered it to the front with liquid glue.

I stamped the sentiment from the Stampin’ Up! Nature’s Harvest cling stamp set using Early Espresso ink on a Crumb Cake panel and cut it out with the smallest Scalloped Contours dies. I adhered it to the card front with dimensionals and added a clear epoxy diamond to the label. I finished the card by wrapping the fold with a length of Crumb Cake baker’s twine and tying a bow.

For the inside of the card, I stamped the little wildflowers from the Stampin’ Up! Nature’s Harvest stamp set in Crumb Cake ink on the bottom of a Basic White panel and adhered it to the inside of the card.

I love the simple branches on this DSP and wanted to use today’s card to say thanks to all my blog friends. I hope you have a wonderful Thanksgiving Holiday – Be safe and enjoy!!

On with the Hop! Click on the Next Blog button to move forward to see the beautiful project Karen Ksenzakovic has created.

If you get lost along the way, here are the participants for the hop:


Current Host Code: PYA3MMQ6

Use this host code when you order $50 or more and receive a free gift from me!  The free gift is your choice of any item valued up to $10.00 in the 2021 – 2022 Annual Catalog or the July – December 2021 Mini Catalog including some of the host stamp sets!

If your order is over $150, please do not use the host code since you’ll receive your own Host Dollars plus I’ll still send you the free gift!  This host code can be used by anyone, no club or commitment required. Let me know if you have any questions.


If you need any stamping supplies, I’d be very happy to be your Demonstrator.  Just click on the Shop Now button on the right side of the screen to go directly to my online store or contact me if you have any questions. 

Thanks for stopping by and Happy Stamping!

Akiko

  • Visit my online store here
  • See the current Stampin’ Up! clearance rack specials here
  • Earn FREE Stampin’ Up! products through my Wildflower Frequent Shopper Program – my way of saying thank you to my online frequent shopper customers.
  • Have any questions? I’d be happy to help, click here to contact me.

Cardstock Cuts for this project:

  • Crumb Cake – 5-1/2″ x 8-1/2″ card base scored at 4-1/4″ (Cut 1″ off the right front edge), 1-1/2″ x 3″ (label)
  • Basic White – 5-1/2″ x 3-1/2″ (front scalloped edge layer), 2″ x 4-1/2″ (die cut flower), 3″ x 4-1/4″ (inside panel)
  • Harvest Meadow DSP – 3-1/4″ x 5-1/2″ (front background)

Stampin’ Up! products used in this project:


Stampin’ Up! Poinsettia Petals for the Happy Inkin’ Thursday Blog Hop

Good morning and welcome to the Happy Inkin’ Thursday Blog Hop! I used the Stampin’ Up! Poinsettia Petals bundle to make another poinsettia Christmas card. For today’s poinsettias, I used the Snowy White Velvet paper to make a poinsettia with a velvety texture – the dies cut the velvet paper beautifully! You can find the supplies I used at the bottom of my post along with the sizes of cardstock used.

We have a sketch challenge this week and here’s the pretty sketch we are using:

I cut a panel of Painted Christmas designer series paper with the Scalloped Contours die and adhered it to the front of an Evening Evergreen card base with liquid glue. I cut the three largest poinsettia clusters from the Snowy White Velvet paper using the embossing insets. I gently curled the petals backwards and adhered the centers with liquid glue.

I adhered the poinsettia to the card front with glue dots. I cut the berry sprig using from the dark side of the Poppy Parade Ombre specialty paper and adhered it to the card front with glue dots, tucking it under the flower. I cut two of the leaves from the Poinsettia dies with the embossing insets from Evening Evergreen and gently curved them before adhering them with glue dots under the flower.

I stamped the sentiment from the Stampin’ Up! Poinsettia Petals photopolymer stamp set in Real Red on Soft Sea Foam. I cut out the sentiment with the smallest Scalloped Contour die using the two step method and adhered it on the card with dimensionals and glue dots. I finished the card front with three Garden Gems.

For the inside of the card, I stamped the sentiment from the Stampin’ Up! Poinsettia Petals stamp set in Real Red on Basic White. I stamped the little holly flourish from the Whimsical Trees stamp set next to the sentiment in Soft Sea Foam and trimmed the bottom of the panel with a strip of the Painted Christmas DSP. I adhered the panel to the inside of the card.

The die cut poinsettia from the Stampin’ Up! Poinsettia Petals stamp set and Poinsettia dies are my all time favorite die cut poinsettia for Christmas cards. A single die cut poinsettia that is so dramatic – especially when cut from a specialty paper like the velvet!

On with the Hop! Click on the Next Blog button to move forward to see the beautiful project Karen Ksenzakovic has created.

If you get lost along the way, here are the participants for the hop:


Current Host Code: PYA3MMQ6

Use this host code when you order $50 or more and receive a free gift from me!  The free gift is your choice of any item valued up to $10.00 in the 2021 – 2022 Annual Catalog or the July – December 2021 Mini Catalog including some of the host stamp sets!

If your order is over $150, please do not use the host code since you’ll receive your own Host Dollars plus I’ll still send you the free gift!  This host code can be used by anyone, no club or commitment required. Let me know if you have any questions.


If you need any stamping supplies, I’d be very happy to be your Demonstrator.  Just click on the Shop Now button on the right side of the screen to go directly to my online store or contact me if you have any questions. 

Thanks for stopping by and Happy Stamping!

Akiko

  • Visit my online store here
  • See the current Stampin’ Up! clearance rack specials here
  • Earn FREE Stampin’ Up! products through my Wildflower Frequent Shopper Program – my way of saying thank you to my online frequent shopper customers.
  • Have any questions? I’d be happy to help, click here to contact me.

Cardstock Cuts for this project:

  • Evening Evergreen – 5-1/2″ x 8-1/2″ card base scored at 4-1/4″, 2-1/4″ x 3″ (die cut leaves)
  • Snowy White Velvet – 3-1/2″ x 8-1/2″ (poinsettia petal clusters)
  • Soft Sea Foam – 1-1/2″ x 3″ (label)
  • Red Ombre specialty glitter – 1-1/2″ x 3″ (berry sprig)
  • Basic White – 4″ x 5-1/4″ (inside panel)
  • Painted Christmas DSP – 3-1/4″ x 4-3/4″ (die cut scalloped rectangle, 1/2″ x 5-1/4″ (inside trim)

Stampin’ Up! products used in this project:


Stampin’ Up! Inspired Thoughts Christmas Card Video Tutorial

Good Morning! I used the Stampin’ Up! Inspired Thoughts stamp set with the Christmas Trees dies and elegant Peaceful Place specialty designer series paper to make a CAS (clean and simple) Christmas card in grays and white with silver foil. I did this during my Facebook Live yesterday afternoon. You can find the supplies I used at the bottom of my post along with the sizes of cardstock used.

My card was also inspired by the layout in Freshly Made Sketches #510:

Here is the video of my Facebook Live from yesterday afternoon. I also posted a copy of the video in my YouTube channel and you can view it here if you prefer.

I adhered a panel of the pretty Peaceful Place specialty designer series paper on a Thick Basic White card base. I adhered another panel of the DSP, with Smoky Slate diamonds on top.

I stamped the sentiment from the Stampin’ Up! Inspired Thoughts cling stamp set in Versamark ink on a vellum cardstock panel. I sprinkled it with silver embossing powder and shook off the excess. I heat set the powder with my heat tool until it was shiny and cut it out with the third largest Layering Circle die.

I put some adhesive sheets on the back of silver foil panels and cut out two trees using the Christmas Trees dies. I peeled off the adhesive sheets and adhered the trees to the vellum die cut circle. I adhered the die cut circle to the card front with glue dots placed behind the trees and in places where I would add some enamel shapes. I adhered three clear enamel diamond shapes over the glue dots.

For the inside of the card, I stamped the sentiment from the Stampin’ Up! Inspired Thoughts stamp set in Smoky Slate ink on the inside of the card base. I cut out another tree from the Peaceful Place specialty DSP and adhered it next to the sentiment.

The Peaceful Place specialty DSP is so elegant and perfect for Christmas cards. I love the contrast of the shiny silver foil with the matte vellum and the simple font in the Stampin’ Up! Inspired Thoughts stamp set is perfect with the modern, clean elegance of this design.


The November Paper Pumpkin Kit is Gifts Galore!

We all love to see piles of presents on Christmas morning. Make that your reality with the Gifts Galore Paper Pumpkin Kit! With classic Christmas sentiments, bright and festive colors, a sweet snowman, a tree with all the trimmings, or a playful pile of presents, you’ll have everything you need to make eye-catching treat packages that are sure to spread Christmas cheer. Each Gifts Galore box contains enough supplies to create nine treat packages—three each of three designs—and nine food-safe bags that are adorably styled for easy Christmas gifting. There’s plenty of joy to share with Gifts Galore!

Here are the Details:

  • Kit contains enough supplies to create nine treat packages—three each of three designs—and nine food-safe bags. 
  • This all-inclusive kit includes printed die cuts, die-cut boxes, cellophane treat bags, adhesive, and more!
  • Includes an exclusive stamp set and a Classic Stampin’ Spot

Coordinating Colors: Evening Evergreen, Flirty Flamingo, Old Olive, Pool Party, Poppy Parade

If you’re interested in subscribing to Paper Pumpkin, you can either sign up for a subscription where you are billed monthly for your kit or you can purchase a prepaid subscription in my online store. To see more information and to sign up for the monthly subscription click here. To see the options for prepaid subscriptions in my online store, click here.

Sign up deadline for the November 2021 kit is November 10, 2021. Supplies may be limited toward the end of the subscription period. 


Enter and explore Eden with the Eden’s Garden Collection! This delightful and desirable collection includes early-release products from the January–June 2022 Mini Catalog—a bundle of stamps and dies that’s blooming with beauty and bounty. Plus, exclusive products you can’t uncover anywhere else—a pack of paper patterned with green and gold, a set of specialty sheets for gift-giving and textured touches, and a sparkling set of gleaming gems!

Click on the image below to download a flyer with all the details or click HERE to shop the Eden’s Garden Collection now in my Online Store.


Current Host Code: PYA3MMQ6

Use this host code when you order $50 or more and receive a free gift from me!  The free gift is your choice of any item valued up to $10.00 in the 2021-2022 Annual Catalog or the July – December 2021 Mini Catalog!

If your order is over $150, please do not use the host code since you’ll receive your own Host Dollars plus I’ll still send you the free gift!  This host code can be used by anyone, no club or commitment required. Let me know if you have any questions.


If you need any stamping supplies, I’d be very happy to be your Demonstrator.  Just click on the Shop Now button on the right side of the screen to go directly to my online store or contact me if you have any questions.  Happy Stamping!

Thanks for stopping by and have a great week!

Akiko

  • Visit my online store here
  • See the current Stampin’ Up! clearance rack specials here
  • Earn FREE Stampin’ Up! products through my Wildflower Frequent Shopper Program – my way of saying thank you to my online frequent shopper customers.
  • Have any questions? I’d be happy to help, click here to contact me.

Cardstock Cuts for this project:

  • Thick Basic White – 4-1/4″ x 11″ card base scored at 5-1/2″
  • Silver Metallic – 3/4″ x 3″ (light tree die cut), 1-1/4″ x 2-1/2″ (dark tree die cut)
  • Vellum – 3″ x 3″ (die cut circle)
  • Peaceful Place specialty DSP – 3″ x 4″ (front background), 1-3/4″ x 4″ (front stripe), 1-1/4″ x 2-1/2″ (inside tree die cut)

Stampin’ Up! products used in this project:


Stampin’ Up! Hand Penned Petals Video Tutorial

Good Morning! The Stampin’ Up! Hand Penned Petals bundle is one of the prettiest floral stamp sets in the 2021-2022 Annual Catalog, especially paired with the Hand Penned designer series paper. But with the cooler weather coming on, I was hesitant to play with it, thinking it was too Springy. Then I realized that the paper with the Cinnamon Cider flowers really had an Autumn feel, so I decided to try making a Fall Thank You card with this pretty set. You can find the supplies I used at the bottom of my post along with the sizes of cardstock used.

My card was also inspired by the great sketch in Inspire.Create.Challenge #102:

Here is the video of my Facebook Live from yesterday afternoon. I also posted a copy of the video in my YouTube channel and you can view it here if you prefer.

I adhered a panel of the Cinnamon Cider Hand Penned designer series paper to a Basic Black mat with liquid glue and then adhered the layered panel to the front of a Cinnamon Cider card base. I cut a circle from Basic White with the largest Layering Circles die and a scalloped circle from Cinnamon cider using the largest scalloped circle die. I adhered these together and adhered it to the card front with liquid glue.

I stamped the flower from the Stampin’ Up! Hand Penned Petals photopolymer stamp set in Memento Tuxedo Black ink on Basic White. I colored the flowers with Stampin’ Blends – dark Daffodil Delight, light Balmy Blue, dark Mint Macaron and I blended light Pumpkin Pie and light Cinnamon Cider on the large flower. I cut out the flower with the coordinating die and adhered it to the card front with dimensionals.

I punched the end of the Cinnamon Cider label with the Banners Pick A Punch and stamped the sentiment in Memento Tuxedo Black. I adhered the label to the card front with dimensionals and glue dots. I finished the card front with champagne rhinestones.

For the inside of the card, I stamped the flower stems from the Stampin’ Up! Hand Penned Petals stamp set in Memento Tuxedo Black on a Basic White panel. I stamped the flower head in Cinnamon Cider after stamping off twice and the leaves in Mint Macaron after stamping off once. I trimmed the bottom with a strip of Hand Penned DSP and adhered the panel to the inside of the card.

I It’s nice to have floral Thank You cards for fall and the Stampin’ Up! Hand Penned Petals makes the prettiest!


Current Host Code: PYA3MMQ6

Use this host code when you order $50 or more and receive a free gift from me!  The free gift is your choice of any item valued up to $10.00 in the 2021-2022 Annual Catalog or the July – December 2021 Mini Catalog!

If your order is over $150, please do not use the host code since you’ll receive your own Host Dollars plus I’ll still send you the free gift!  This host code can be used by anyone, no club or commitment required. Let me know if you have any questions.


If you need any stamping supplies, I’d be very happy to be your Demonstrator.  Just click on the Shop Now button on the right side of the screen to go directly to my online store or contact me if you have any questions.  Happy Stamping!

Thanks for stopping by and have a great week!

Akiko

  • Visit my online store here
  • See the current Stampin’ Up! clearance rack specials here
  • Earn FREE Stampin’ Up! products through my Wildflower Frequent Shopper Program – my way of saying thank you to my online frequent shopper customers.
  • Have any questions? I’d be happy to help, click here to contact me.

Cardstock Cuts for this project:

  • Cinnamon Cider – 4-1/4″ x 11″ card base scored at 5-1/2“, 3/4″ x 2″ (label), 3-1/4″ x 3-1/4” (scalloped circle)
  • Basic Black – 4″ x 5-1/4″ (front mat)
  • Basic White – 4″ x 5-1/4″ (inside panel), 3-1/4″ x 3-1/4″ (circle), 3″ x 3″ (die cut flower)
  • Hand Penned DSP – 3-7/8″ x 5-1/8″ (front background), 1/2″ x 4″ (inside trim)

Stampin’ Up! products used in this project:


Stampin’ Up! Oval Occasions With Triangles Quilt Card

Good morning!  I have always enjoyed making cards with quilt designs and today I use a sentiment from the Stampin’ Up! Oval Occasions stamp set on a quilt card.  I played with the Stitched Triangles dies and the retiring Peony Garden designer series paper to experiment and come up with a quilt square block for my card. You can find the supplies I used at the bottom of my post along with the sizes of cardstock used.

What do you think?  This was a lot of fun and a lot of experimenting, but I’m pretty happy with the result.  I started with a square of the speckled Petal Pink Peony Garden designer series paper and adhered strips of Basic White along the right side and top.  I cut two of the second smallest right triangles from the Stitched Triangles dies from the floral Peony Garden paper and adhered them to the lower left corner of the panel. I cut 8 of the smallest right triangle from the Stitched Triangles dies and adhered them to the top and side of the panel in the Flying Geese quilt pattern.  

I cut the flower from the Pierced Blooms dies and adhered it to the top right corner. I cut a small Pierced Blooms dies flower and adhered it on top. Then I embossed the panel with the Tasteful Textile 3D embossing folder and adhered it to a Petal Pink mat to border the square. Then I adhered it to a Basic White panel for another border. I cut the larger pierced flower from Petal Pink and the smaller flower from Basic White and adhered it to the lower left square.

I embossed a Petal Pink panel and adhered it to the front of a Petal Pink card base. I stamped the sentiment from the Stampin’ Up! Oval Occasions stamp set and cut it out with the Messages Die. This is the label that has stitched sides and it was easy to do – just line up the stamped card stock with the label and run it through your die cutting machine. I adhered the label to the back of the quilt panel and adhered it to the card front with dimensionals. I finished the front with two Elegant Gems on the flowers and a white twine bow.


For the inside of the card, I cut 8 more speckled triangles with the smallest right triangle die and adhered them to the side of a Basic White panel in the Flying Geese pattern. I adhered the panel to the inside of the card.

I loved the Christmas Quilt bundle that Stampin’ Up! had a few years back! This took more effort, but allowed me to be more creative in coming up with a design! I wanted to incorporate the Pierced Blooms flower dies because they resemble appliqué flowers and the Tasteful Textile 3D embossing folder gives a fabric-like texture that really adds to the quilted look. What could be nicer than sending a quilt with hugs and kisses?


Stampin’ Up! Last Chance Sale is going on NOW!

Stampin’ Up! has posted the list of items from the 2020-2021 Annual catalog that are retiring and some of the items are on sale! Retiring items will be available only white supplies last! If you love great deals, now is the perfect time to shop.

To download a PDF with the Retiring Items List, click here.

To download an excel file with the Retiring Items List, click here.

Head to my Online Store to get the retiring items you need before they sell out!

The new 2021-2022 Annual Catalog will open for orders on May 4, 2021 and by then it will be too late!


Current Host Code: ARFDXWP4

Use this host code when you order $50 or more and receive a free gift from me!  The free gift is your choice of any item valued up to $10.00 in the 2020 – 2021 Annual Catalog or in the Jan-Jun 2021 Mini Catalog!

If your order is over $150, please do not use the host code since you’ll receive your own Host Dollars plus I’ll still send you the free gift!  This host code can be used by anyone, no club or commitment required.  Let me know if you have any questions.


If you need any stamping supplies, I’d be very happy to be your Demonstrator.  Just click on the Shop Now button on the right side of the screen to go directly to my online store or contact me if you have any questions. 

Thanks for stopping by and Happy Stamping!

Akiko

  • Visit my online store here
  • See the current Stampin’ Up! clearance rack specials here
  • Earn FREE Stampin’ Up! products through my Wildflower Frequent Shopper Program – my way of saying thank you to my online frequent shopper customers.
  • Have any questions? I’d be happy to help, click here to contact me.

Cardstock Cuts for this project:

  • Petal Pink – 4-1/4″ x 11″ card base scored at 5-1/2″, 4-1/4″ x 5-1/2″ (embossed background), 3-1/2″ x 3-1/2″ (quilt border), 1-1/4″ x 2-1/4″ (die cut flowers), 1″ x 2-1/4″ (label)
  • Basic White – 4″ x 5-1/4″ (inside panel), 3-5/8″ x 3-5/8″ (quilt border), 1″ x 3-1/4″ (quilt block side), 1″ x 2-1/4″ (quilt top side), 1″ x 2″ (small die cut flowers)
  • Peony Garden DSP – 3-1/4″ x 3-1/4″ (speckled quilt block), two 1″ x 5″ (speckled small triangles), 2″ x 2-1/4″ (floral large triangles)

Stampin’ Up! products used in this project: