Stampin’ Up! Witty-cisms for the Happy Inkin’ Thursday Blog Hop

Good Morning! Welcome to another Happy Inkin’ Thursday Blog Hop! Today I made a cheerful thank you card using the fun Stampin’ Up! Witty-cisms cling stamp set along with the bright Dinoroar designer series paper.

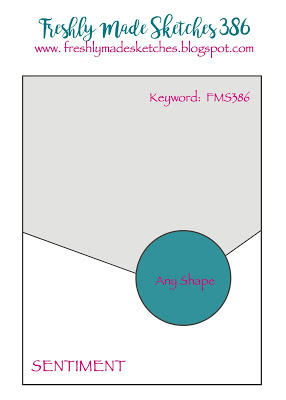
We have a sketch challenge this week, and here is the sketch we are using:

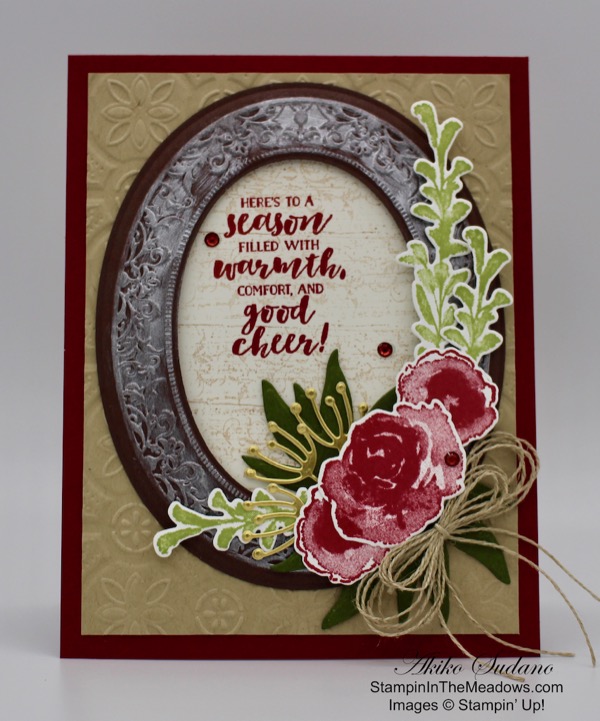
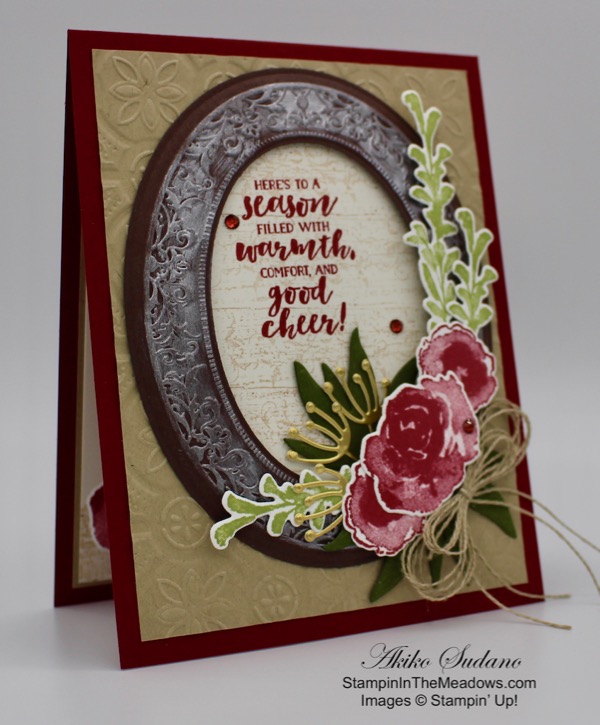
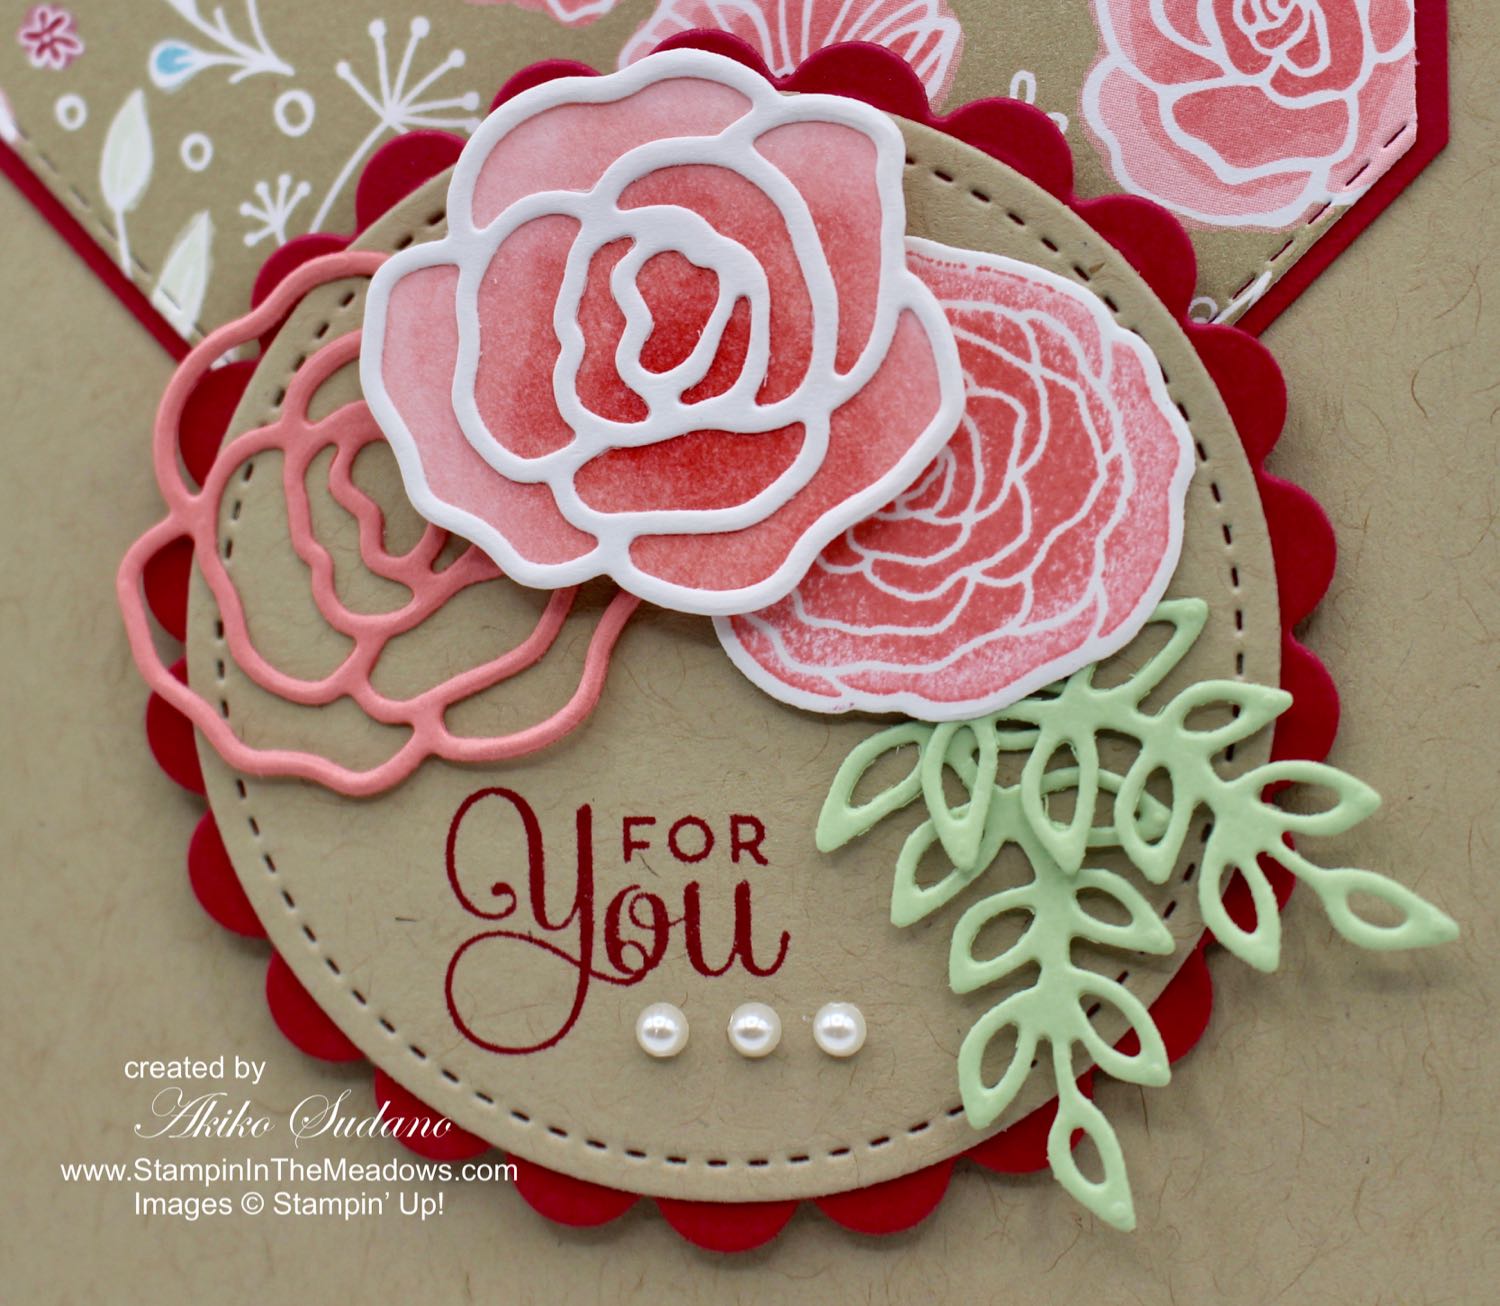
Who would have thought you could mix dinosaurs with strawberries? But this pretty paper in the Dinoroar designer series paper pack was so bright and cheerful and it reminded me of my old kitchen wallpaper, so I thought it would be perfect with strawberries! So I cut a panel and adhered it to a Lovely Lipstick card base with multipurpose liquid glue.

I stamped the strawberry thank you image from the Stampin’ Up! Witty-cisms cling stamp set in Memento Tuxedo Black ink on a panel of Whisper White and colored it with the Lovely Lipstick and Old Olive Stampin’ Blends. I made a highlight in the center of the berry with the Stampin’ Blends Color Lifter. Then I cut it out with the second largest circle from the Stitched Shapes Dies. I cut a scalloped circle with the Layering Circles Dies from Pretty Peacock and adhered it to the back with snail. I punched four leaf clusters from Old Olive card stock with the Leaf Punch.

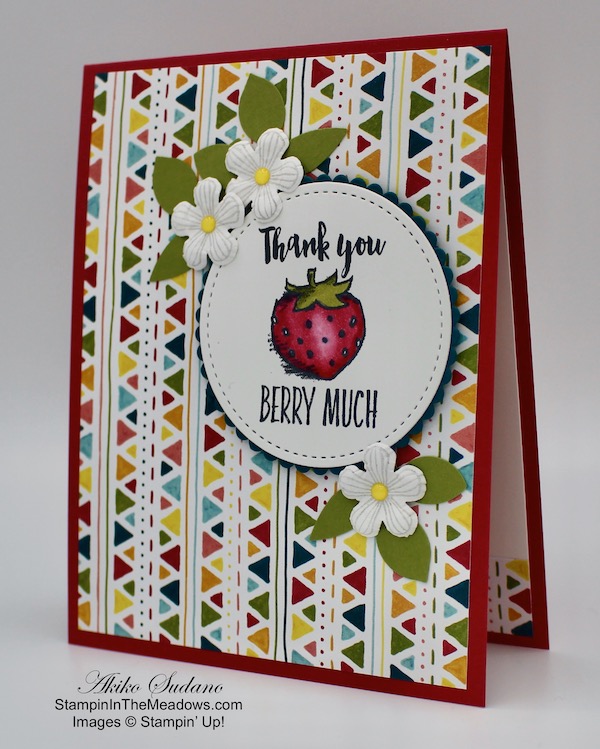
I stamped four little flowers from the Sale-A-Bration Thoughtful Blooms stamp set in stamped-off Smoky Slate ink on Whisper White. I punched them out with the Sale-A-Bration Small Bloom Punch. I curled the petals of three flowers with the large ball in the Take Your Pick tool and my mouse pad. I turned the flower upside down and rolled little circles in each petal until it puffed out. Then I turned it right side up and pressed in the center. I finished off the centers with a Pineapple Punch enamel dot. I arranged the leaf clusters and adhered them to the card front with multipurpose liquid glue. I adhered the layered circle with dimensionals and finally stuck on each flower with a glue dot.

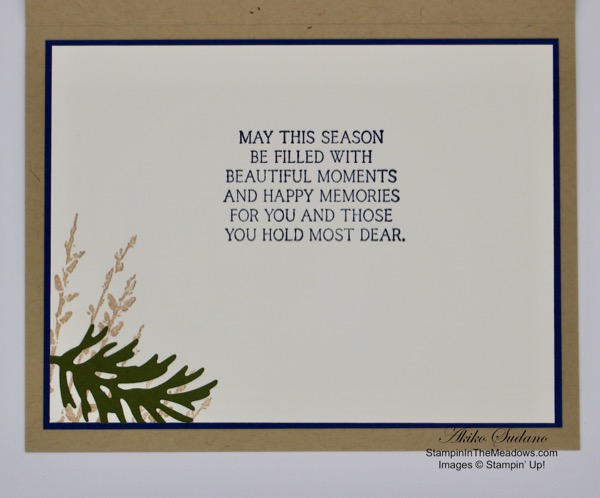
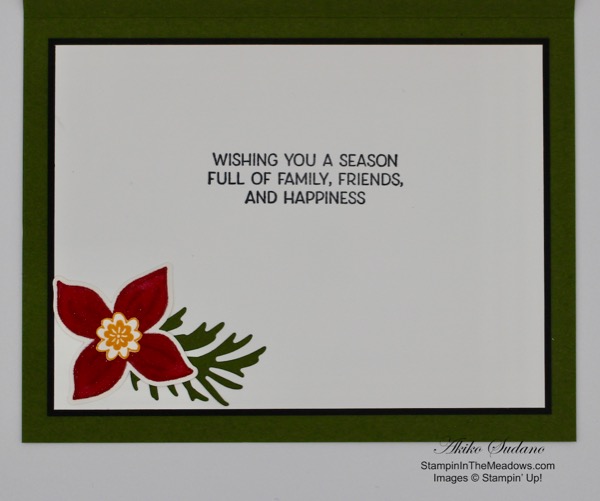
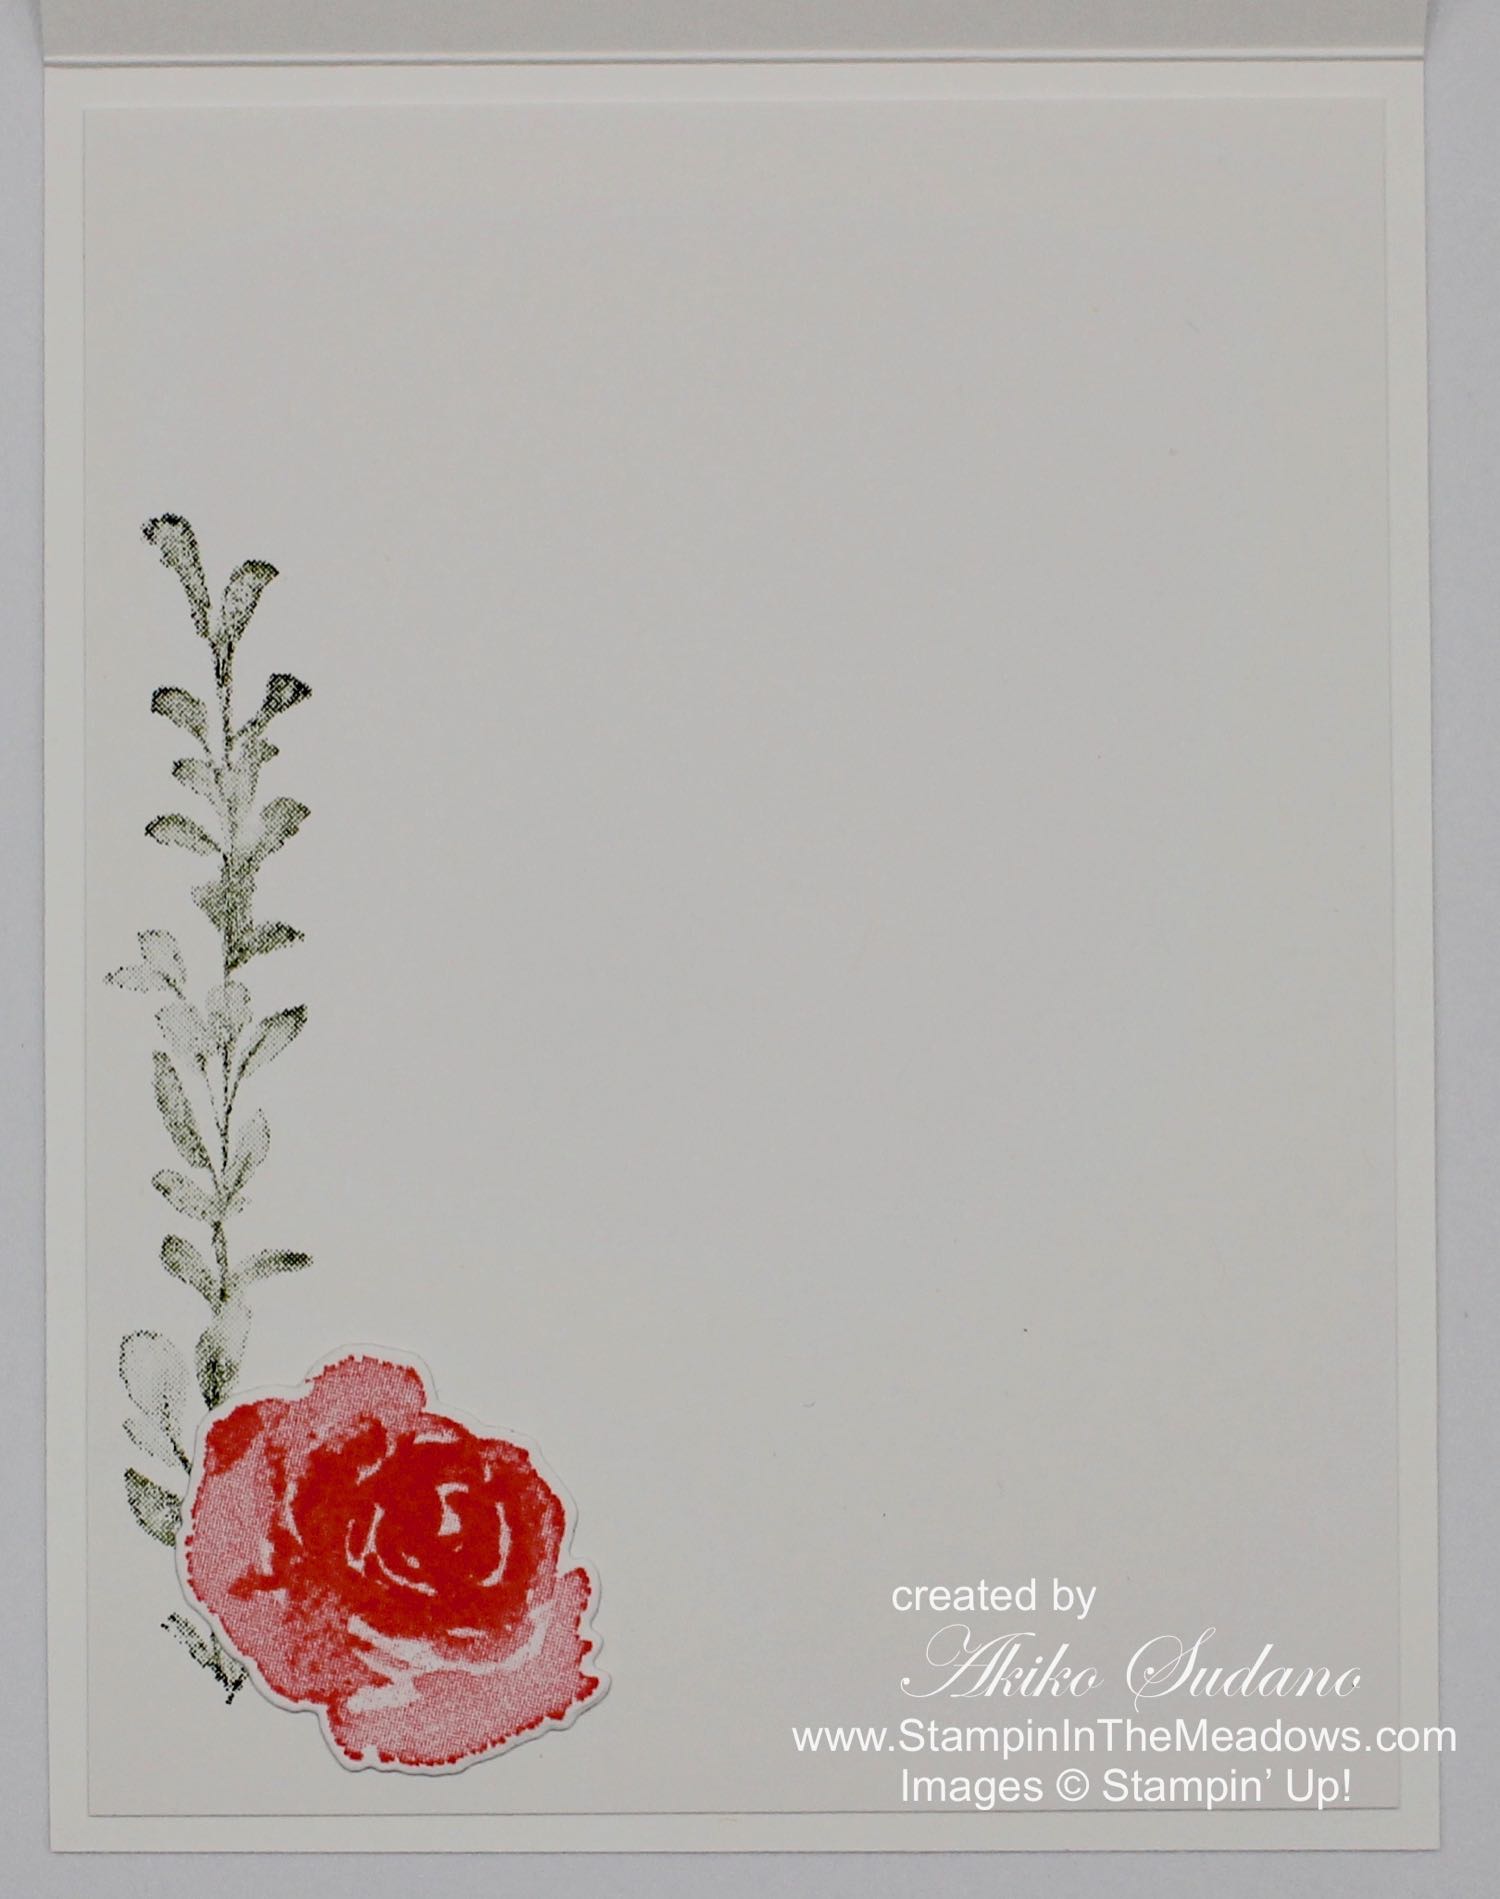
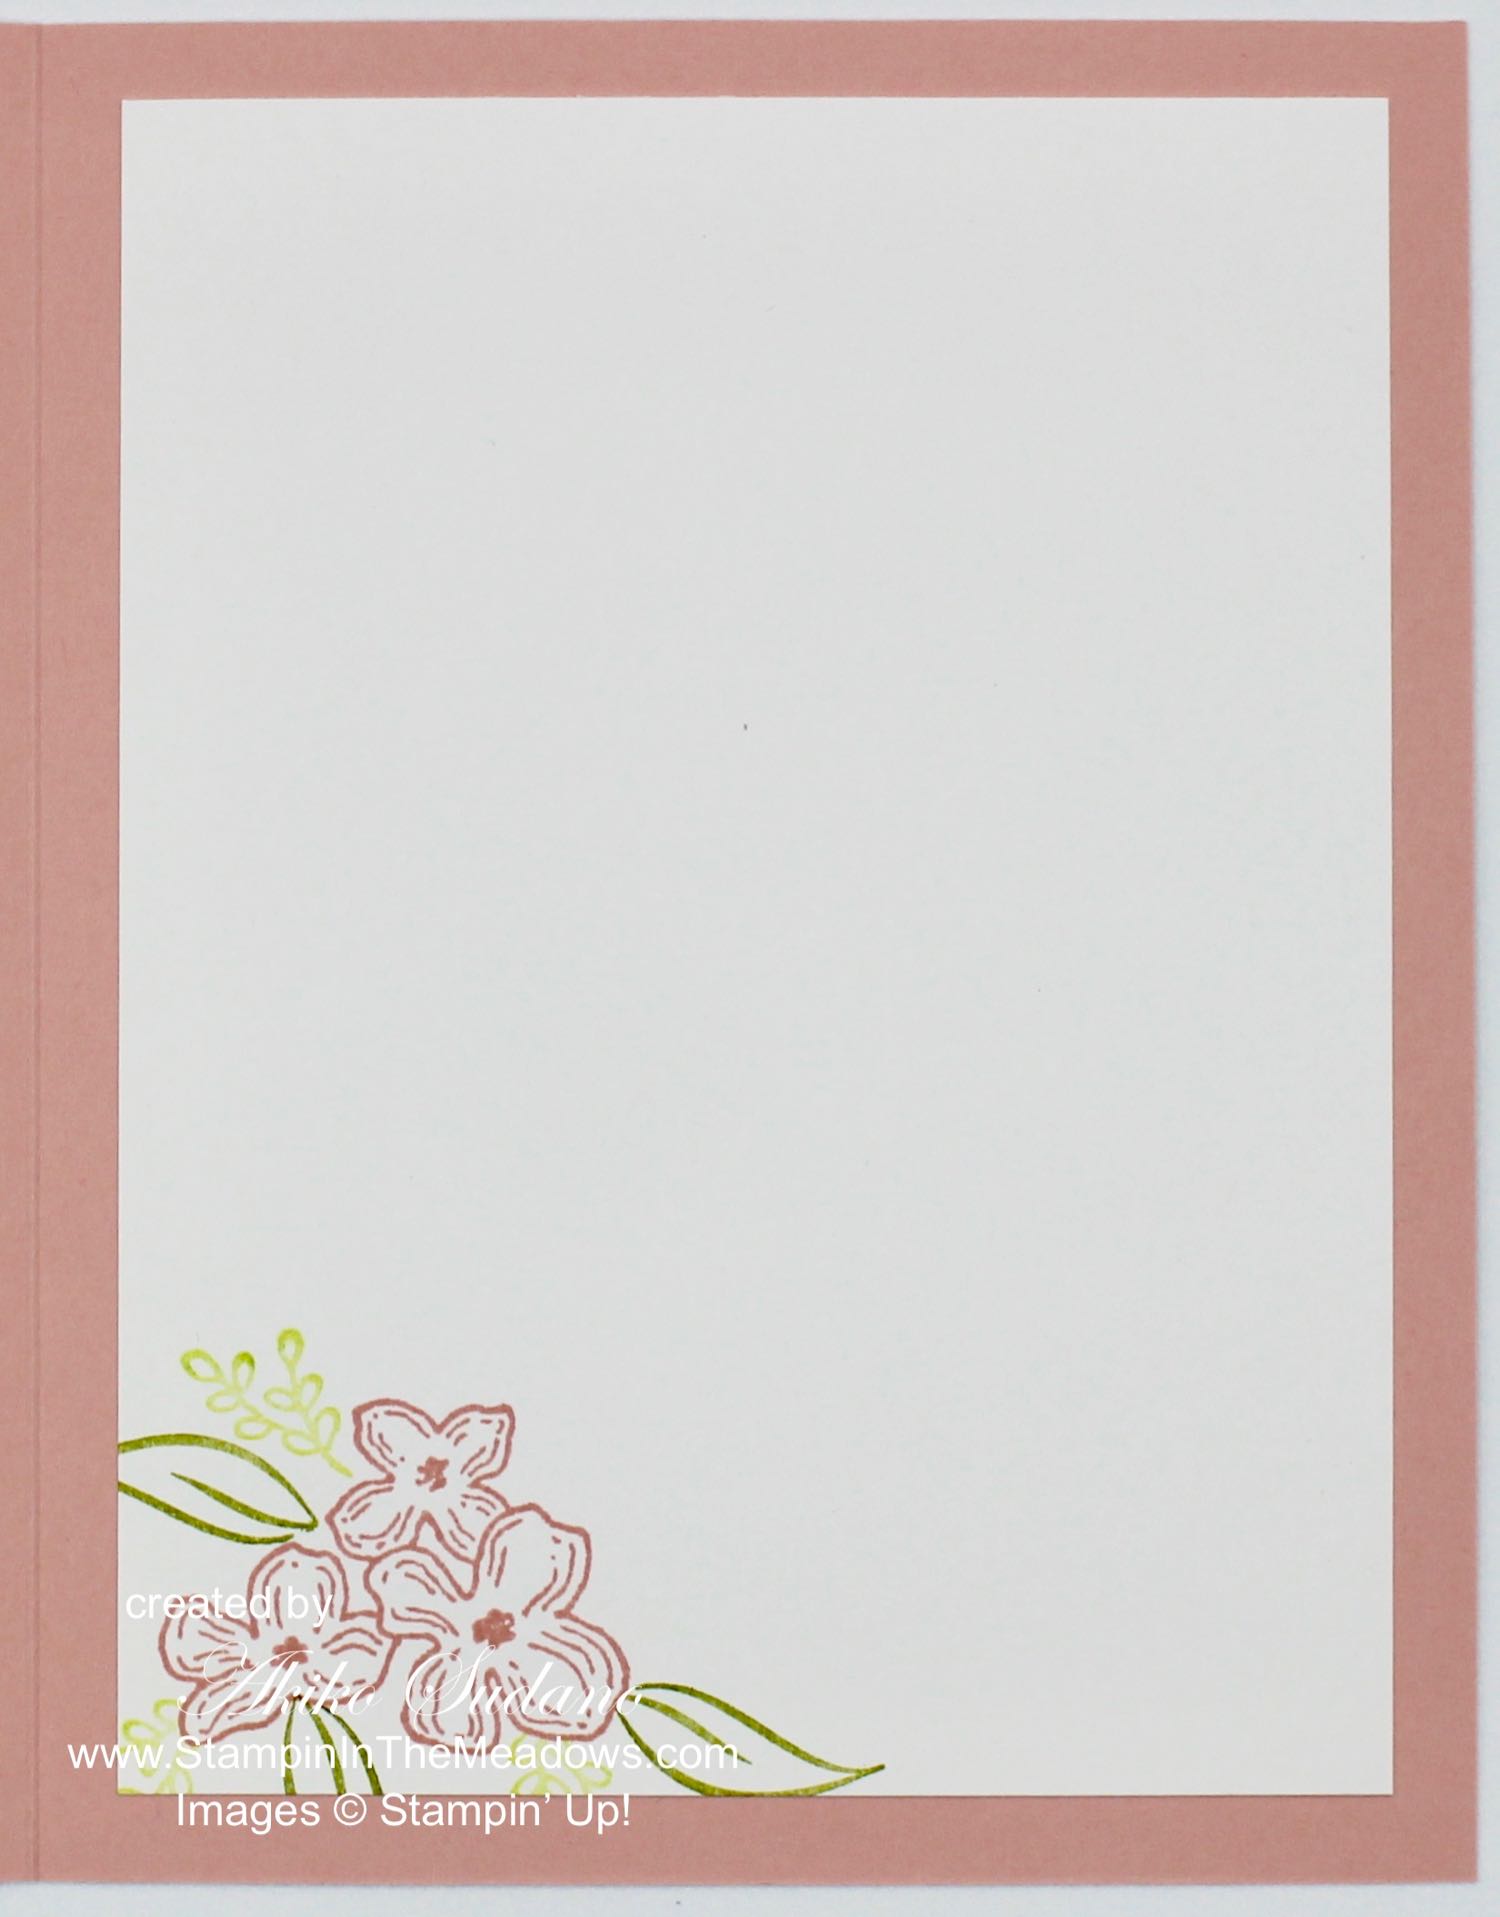
For the inside of the card, I adhered the last leaf cluster to a Whisper White panel with multipurpose liquid glue. I added a strip of the colorful Dinoroar DSP to the bottom and added the last flower. I cut a small circle of Pineapple Punch card stock with the large flower die from the Sending Flowers Dies and adhered it to the center of the flower. I think if I had a 1/8″ or 1/4″ hole punch, I would have used it instead, but I made the best of what I had available. Finally I stamped and colored another strawberry from the Stampin’ Up! Witty-cisms stamp set and my Old Olive and Lovely Lipstick Stampin’ Blends. I fussy cut the strawberry and adhered it next to the flower. I adhered the panel to the inside of the card with snail.

The Stampin’ Up! Witty-cisms cling stamp set has fun images mixed with punny sentiments to create light hearted cards for different occasions.

On with the Hop! Click the Next button below to visit Karen Ksenzakovic’s blog.

And just in case you get lost along the way, here’s a list of the team members participating in the hop today:


March 1 – 15 Host Code: BQCVV2RG

Use this host code when you order $50 or more and receive a free gift from me!  The gift is your choice of any item valued up to $10.00 in the 2019-20 Annual Catalog or in the 2020 January-June Mini Catalog!  That includes some of the Host Exclusive stamp sets!

If your order is over $150, please do not use the host code since you’ll receive your own Host Dollars plus I’ll send you the free gift!  This host code can be used by anyone, no commitment required.  Let me know if you have any questions.


If you need any stamping supplies, I’d be very happy to be your Demonstrator.  Just click on the Shop Now button on the right side of the screen to go directly to my online store or contact me if you have any questions.  Happy Stamping!

Thanks for visiting!

Akiko

  • Visit my online store here
  • See the current Stampin’ Up! clearance rack specials here
  • Earn FREE Stampin’ Up! products through my Wildflower Frequent Shopper Program – my way of saying thank you to my frequent shopper online customers.
  • Sign up for my weekly newsletter here
  • Have any questions? I’d be happy to help, click here to contact me.

Cardstock Cuts for this project:

  • Lovely Lipstick – 4-1/4″ x 11″ card base scored at 5-1/2″
  • Pretty Peacock – 3″ x 3″ (scalloped circle mat)
  • Old Olive – 3″ x 3″ (punched leaves)
  • Pineapple Punch – 1″ x 1″ (inside flower center)
  • Whisper White – 4″ x 5-1/4″ (inside panel), 3″ x 3″ (stamped strawberry circle), 3″ x 3-1/4 (flowers and fussy cut strawberry)
  • Dinoroar DSP – 4″ x 5-1/4″ (background), 3/4″ x 4″ (inside trim)

Stampin’ Up! products used in this project:


Stampin’ Up! Country Road with Beautiful Boughs for the Happy Inkin’ Thursday Blog Hop

Happy Thanksgiving! Welcome to another Happy Inkin’ Thursday Blog Hop! I used the Stampin’ Up! Country Road stamp set along with the Beautiful Boughs dies to create a country themed Christmas Card for this week’s challenge. Here is my card:

We have a color challenge this week, and here is color palette we are using:

I started by stamping the horse weather vane from the Stampin’ Up! Country Road stamp set in Versamark Ink on a panel of Very Vanilla. I sprinkled it with Copper embossing powder and heat set. I stamped the grain stamp along the left side and bottom in Crumb Cake ink. I blotted the weather vane with a paper towel to remove wet Crumb Cake ink so it wouldn’t smear. I stamped the wagon wheel in Soft Suede ink. I sponged the sky in Night of Navy, Balmy Blue, Calypso Coral and Mango Melody so that it would look like an evening sunset. I sponged Crumb Cake ink along the bottom. I adhered the image to a Night of Navy mat with liquid glue and then to a Crumb Cake card base with dimensionals.

I cut the berry branch using the Beautiful Bouquet dies from Real Red Glimmer paper. I cut the medium branch from the Stampin’ Up! Beautiful Boughs dies from Mossy Meadow. I snipped the berry branch in two and adhered the pieces behind the Mossy Meadow branch between the boughs with glue dots. I adhered the branch and berries to the card front with glue dots. I stamped the Blessed Christmas Wishes sentiment from the Stampin’ Up! Itty Bitty Christmas stamp set in Real Red ink on a strip of Very Vanilla. I trimmed the ends and adhered it to a Night of Navy mat and then to the bottom of the card front using liquid glue.

I made two pinecones with the small pine cone dies from the Beautiful Boughs dies. I used Crumb cake for the background and Soft Suede for the front. I adhered them to the bough with glue dots. I adhered a short length of copper trim with glue dots and made a bow with the Real Red ribbon and adhered it with a glue dot. I finished the label off with a Night of Navy rhinestone.

I decorated the inside of the card with a Very Vanilla panel stamped with the sentiment from the Toile Christmas stamp set in Night of Navy ink. I stamped the grain from the Stampin’ Up! Country Road stamp set in Crumb Cake ink and added a small Mossy Meadow bough from the Beautiful Boughs dies. I adhered the panel to a Night of Navy mat and then to the inside of the card with liquid glue.

I hope you like the card and that you have a wonderful time with family and friends!

On with the Hop! Click the Next button below to visit Karen Ksenzakovic’s blog.

And just in case you get lost along the way, here’s a list of the team members participating in the hop today:


November 16 – 30 Host Code: 462PVWKY

Use this host code when you order $50 or more and receive a free gift from me!  The gift is your choice of any item valued up to $10.00 in the 2019-20 Annual Catalog or in the 2019 Holiday Catalog!  That includes some of the Host Exclusive stamp sets!

If your order is over $150, please do not use the host code since you’ll receive your own Host Dollars plus I’ll send you the free gift!  This host code can be used by anyone, no commitment required.  Let me know if you have any questions.


If you need any stamping supplies, I’d be very happy to be your Demonstrator.  Just click on the Shop Now button on the right side of the screen to go directly to my online store or contact me if you have any questions.  Happy Stamping!

Thanks for taking the time to visit!

Akiko

  • Visit my online store here
  • See the current Stampin’ Up! clearance rack specials here
  • Earn FREE Stampin’ Up! products through my Wildflower Frequent Shopper Program – my way of saying thank you to my frequent shopper online customers.
  • Sign up for my weekly newsletter here
  • Have any questions? I’d be happy to help, click here to contact me.

Cardstock Cuts for this project:

  • Crumb Cake – 5 1/2″ x 8 1/2″, 1 1/2″ x 2″
  • Night of Navy – 3 7/8″ x 5 1/8″, 5/8″ x 3 1/2″
  • Mossy Meadow – 2 1/2″ x 3″
  • Very Vanilla – (2) 3 3/4″ x 5″, 1/2″ x 3″
  • Soft Suede – 1 1/2″ x 2″
  • Real Red Glimmer – 2″ x 2 1/2″

Stampin’ Up! products used in this project:


Stampin’ Up! First Frost Christmas Card for the Happy Inkin’ Thursday Blog Hop

Good Morning! Welcome to another Happy Inkin’ Thursday Blog Hop! I used the beautiful Stampin’ Up! First Frost cling stamp set for my card today. Here is my card:

We have a color challenge this week, and here is the color palette we are using:

I started with a Cherry Cobbler card base and adhered a Crumb Cake panel that was run through the Tin Tile embossing folder on top. Then I cut and embossed an oval frame from the Heirloom Frames dies in Early Espresso. I sponged some shimmery white paint on the carved part of the frame, but unfortunately, the shimmer doesn’t show very well in the pictures – in real life it has a silvery glow.

I cut a panel of very vanilla with the largest oval from the Layering Ovals dies. I stamped the long flourish stamp from the Woven Heirlooms stamp set several times across the oval with Crumb Cake ink stamped off twice. I stamped the sentiment from the Stampin’ Up! First Frost stamp set in the upper right corner of the oval with Cherry Cobbler ink. I adhered the oval to the card base with liquid glue and the frame on top of it with dimensionals.

I stamped two large roses and two small roses from the Stampin’ Up! First Frost stamp set in Cherry Cobbler ink on Whisper White and cut them out with the matching dies from the Frosted Bouquet dies. I stamped three of the long stems from the First Frost stamp set in Pear Pizzazz ink on Whisper White and cut them out with the matching die. I cut the bottoms off of two of them to shorten them. I die cut three of the leaf clusters from the Frosted Bouquet dies in Mossy Meadow and cut them in half. Finally I cut three of the sprigs from the Frosted Frames dies from gold foil.

I arranged a top and bottom halves of one of the Mossy Meadow leaves for the inside of the frame and attached them with liquid glue, tucking them under the frame. I added two of the gold foil sprigs. I arranged the Pear Pizzazz long stems and attached them with glue dots. I tucked two of the Mossy tops under the outside of the frame, adhering them with glue dots. I adhered the last gold sprig with liquid glue and the three roses with glue dots. I made a bow with linen thread (I used Mary Deatherages’s beautiful design – Thank you Mary!) and adhered it with a glue dot. I finished the card front with three Cherry Cobbler rhinestones.

I decorated the inside of the card by stamping a Very Vanilla panel with the Merry Christmas greeting from the Merry Christmas to All stamp set in Cherry Cobbler. I stamped another stem in Pear Pizzazz on the left side and the long flourish across the bottom in Crumb Cake (after stamping off twice). I added the final large die cut rose from the Stampin’ Up! First Frost stamp set with liquid glue and adhered it to a Crumb Cake mat before adding it to the inside of the card.

The First Frost stamp set and dies are so beautiful and I love every card that I’ve made with them. And this is the first time I’ve used the Woven Heirlooms bundle and it is definitely a favorite. I hope you like this card and that it inspires you to work on your own Christmas cards. We’ll need to send them out before you know it.

On with the Hop! Click the Next button below to visit Karen Ksenzakovic’s blog.

And just in case you get lost along the way, here’s a list of the team members participating in the hop today:


November 1 – 15 Host Code: WR4KJJM4

November 15 – 30 Host Code: 462PVWKY

Use this host code when you order $50.00 or more and receive a free gift from me!  The gift is your choice of any item valued up to $10.00 in the 2019-20 Annual Catalog or in the 2019 Holiday Catalog!  That includes some of the Host Exclusive stamp sets!

If your order is over $150, please do not use the host code since you’ll receive your own Host Dollars plus I’ll send you the free gift!  This host code can be used by anyone, no commitment required.  Let me know if you have any questions.


If you need any stamping supplies, I’d be very happy to be your Demonstrator.  Just click on the Shop Now button on the right side of the screen to go directly to my online store or contact me if you have any questions.  Happy Stamping!

Thanks for visiting!

Akiko

  • Visit my online store here
  • See the current Stampin’ Up! clearance rack specials here
  • Earn FREE Stampin’ Up! products through my Wildflower Frequent Shopper Program – my way of saying thank you to my frequent shopper online customers.
  • Sign up for my weekly newsletter here
  • Have any questions? I’d be happy to help, click here to contact me.

Cardstock Cuts for this project:

  • Cherry Cobbler – 4 1/4″ x 11″
  • Crumb Cake – 3 3/4″ x 5″ (embossed), 3 7/8″ x 5 1/8″ (inside mat)
  • Early Espresso – 4 1/4″ x 5 1/2″
  • Very Vanilla – 3 3/4″ x 5″ (inside), 3 1/4″ x 4 1/2″
  • Whisper White – 3 3/4″ x 5″ (stems), 2″ x 6″ (roses)
  • Mossy Meadow – 3″ x 6″
  • Gold Foil – 2″ x 3″

Stampin’ Up! products used in this project:


Stampin’ Up! Pop of Petals Christmas Card for the Happy Inkin’ Thursday Blog Hop

Good Morning! Today I made a Christmas Card using the Stampin’ Up! Pop of Petals stamp set and Four Petal Punch for the Happy Inkin’ Thursday Blog Hop. These flowers reminded me of poinsettias and I love poinsettia Christmas cards, so I made a background full of poinsettias for my card today.

We have a sketch challenge in the Blog Hop this week, and here is the sketch we are using:

I started by stamping 18 of the flowers from the Stampin’ Up! Pop of Petals stamp set in Cherry Cobbler ink on shimmery white card stock. I punched them out with the four petal punch and colored them with the Cherry Cobbler Light Stampin’ Blends. I stamped 18 of the flower centers in Mango Melody ink on shimmery white card stock and fussy cut then with my paper snips. I adhered a flower center to each Cherry Cobbler flower.

I took a panel of Whisper White and embossed it with the tufted embossing folder and arranged the flowers all over the embossed panel, going off the edges. I adhered them with liquid glue and trimmed the flowers to be even with the embossed panel. I adhered it to a Basic Black mat with liquid glue and then to a Mossy Meadow card base with dimensionals.

I die cut the medium branch from the Beautiful Boughs dies from a panel of Mossy Meadow and the small pine cone pieces from Crumb Cake and Soft Suede. I colored a strip of the Whisper White Flax ribbon with Light Mango Melody Stampin’ Blends and trimmed the ends. I stamped the Sentiment from the Peaceful Boughs stamp set in Memento Tuxedo Black ink on Cherry Cobbler and die cut it with the small label from the Beautiful Boughs dies. I arranged the pieces on the bottom of the card front and adhered them with glue dots and dimensionals. I finished off the arrangement with a tied strip of the polka dot tulle ribbon and yellow gems.

I decorated the inside of the card by adhering a small die cut Mossy Meadow branch from the Beautiful Boughs dies and another flower to a Whisper White panel. I stamped the sentiment from the Frosted Foliage stamp set in Memento Tuxedo Black ink and added a Basic Black mat before adhering it to the inside of the card.

It’s hard to see the diamond pattern from the Tufted Embossing folder or the shimmer on the flowers, but these textures add depth and richness to the background.

On with the Hop! Click the Next button below to visit Karen Ksenzakovic’s blog.

And just in case you get lost along the way, here’s a list of the team members participating in the hop today:


November 1 – 15 Host Code: WR4KJJM4

Use this host code when you order and receive a free gift from me!  If your order is over $150, please do not use this code, but you’ll still get the free gift.  The free gift is your choice of any item valued up to $10.00 in the 2018-19 Annual Catalog or in the 2019 Occasions Catalog!  That includes some of the Host Exclusive stamp sets!


If you need any stamping supplies, I’d be very happy to be your Demonstrator.  Just click on the Shop Now button on the right side of the screen to go directly to my online store or contact me if you have any questions.  Happy Stamping!

Thanks for visiting!

Akiko

  • Visit my online store here
  • See the current Stampin’ Up! clearance rack specials here
  • Earn FREE Stampin’ Up! products through my Wildflower Frequent Shopper Program – my way of saying thank you to my frequent shopper online customers.
  • Have any questions? I’d be happy to help, click here to contact me.

Cardstock Cuts for this project:

  • Mossy Meadow – 5 1/2″ x 8 1/2″, 3 1/2″ x 3 1/2″
  • Shimmery White – 4 1/2″ x 11″
  • Basic Black – 4″ x 5 1/4″, 3 3/4″ x 5″
  • Whisper White – 3 7/8″ x 5 1/8″, 3 5/8″ x 4 7/8″
  • Cherry Cobbler – 1 1/2″ x 3 3/4″
  • Soft Suede – 1 1/4″ x 1 1/4″
  • Crumb Cake – 1 1/4″ x 1 1/4″

Stampin’ Up! products used in this project:


Stampin’ Up! Pop of Petals Thank You Card

Good Morning! I need some thank you cards and I have been working on a post for later this week using the Stampin’ Up! Pop of Petals stamp set. I found a pretty card on Pinterest that was made by Tammy Beard of StampinSavvy.com here and was inspired to make one similar but with fall colors. I’m not sure I succeeded, but it was a lot of fun playing with different colors and stamping a card rather than relying on die cuts.

Here’s the Facebook Live video where I demonstrated how to make the card.

In the video, I used the Stampin’ Up! Pop of Petals stamp set to make the Rich Razzleberry and Mango Melody card with the Mossy Meadow leaves. I started by stamping the Mango Melody flowers, and then the Rich Razzleberry flowers, and then filling in with leaves. I finish off the card front by stamping the sentiment from the Stampin’ Up! Love what you Do in Memento Tuxedo Black and I use the Stamparatus so that I can stamp twice to get good coverage. I also show how to curve the petals on the punched flower so that you can get a dimensional look. And I used a black sharpie so that I wouldn’t harm the tip of my Stampin’ Blend on the faceted gems to color it black before applying it to the center flower.

I also posted the video to my YouTube channel and you can view it here.

It was fun to make a card that had a lot of stamping and was not for Christmas. And you’ll note that I did make two boo boos by rocking the leaf stamp instead of bringing it straight up and down – now I have an example for why you shouldn’t do this. Finally, thank you Tammy for the wonderful inspiration!


November 1 – 15 Host Code: WR4KJJM4

Use this host code when you order and receive a free gift from me!  If your order is over $150, please do not use this code, but you’ll still get the free gift.  The free gift is your choice of any item valued up to $10.00 in the 2018-19 Annual Catalog or in the 2019 Occasions Catalog!  That includes some of the Host Exclusive stamp sets!


If you need any stamping supplies, I’d be very happy to be your Demonstrator.  Just click on the Shop Now button on the right side of the screen to go directly to my online store or contact me if you have any questions.  Happy Stamping!

Thanks for stopping by and have a great week!

Akiko

  • Visit my online store here
  • See the current Stampin’ Up! clearance rack specials here
  • Earn FREE Stampin’ Up! products through my Wildflower Frequent Shopper Program – my way of saying thank you to my frequent shopper online customers.
  • Have any questions? I’d be happy to help, click here to contact me.

Cardstock Cuts for this project:

  • Rich Razzleberry – 4 1/4″ x 11″
  • Mango Melody – 4 1/4″ x 11″
  • Whisper White – (4) 3 3/4″ x 5″, (2) 2″ x 2″ scraps
  • Garden Green – 3 7/8″ x 5 1/8″
  • Mossy Meadow – 3 7/8″ x 5 1/8″

Stampin’ Up! products used in this project:


First Frost Best Wishes Card

Hello and Happy Friday! Today’s card is a simple white on white card with the beautiful floral images from the First Frost stamp and die set. The best wishes theme can used to celebrate many different special occasions.

I started by embossing the smaller piece of Whisper White cardstock with the Subtle embossing folder and then adhered it to one of the larger pieces. I then took a piece of satin Whisper White ribbon from my stash and used snail adhesive to attach and wrap it around the embossed panel. I adhered the panel to a Thick Whisper White card base using dimensionals.

I took the smaller piece of Thick Whisper White cardstock and using one of the stitched rectangles die, I die cut a panel for the flower and sentiment. The piece that I needed was longer than the die, so I carefully placed the die on one end of my paper and then cut about 2/3 the way through. Then I moved the die to the other end and was careful to align the stitches and die cut about half way through from the opposite direction. This resulted in a longer stitched rectangle. It took me a couple of times practicing on scrap paper to figure out how many times to turn the crank so that I cut enough, but didn’t cut the end.

I stamped the leaves and sentiment using Mossy Meadow on the die cut rectangle. I stamped the beautiful large rose image in Flirty Flamingo and cut it out with the matching die. I popped the rose on the stitched rectangle panel with dimensionals.

I popped the stitched rectangle on the embossed background using dimensionals again, then took another piece of the satin Whisper White ribbon to tie a bow and attached it next to the panel using a glue dot.

I used the clear Wink of Stella on the rose to add some shimmer and finished it off with a trio of faux pearls.

On the inside of the card, I took the leafy stem stamp and inked it in Mossy Meadow and after stamping off twice, I stamped it along the left side of the inside panel. I took another Flirty Flamingo rose and adhered it to the inside panel before adhering it to the inside of the card.

Luckily, the First Frost set will be returning in the new catalog. The white on white makes for a very elegant card, while the different textures and layers keep it interesting. And the clear Wink of Stella is perfect for adding a touch of sparkle to any flower. Thanks for visiting today!


Limited Time Specials

Don’t forget the big Stampin’ Up! promotions currently going on. I just received my Everything is Rosy Medley and will post a card using it next week. The products are so beautiful! Also check out the Last Chance to get your favorite retiring items from the 2018 Annual Catalog and 2019 Occasions Catalog. You can find all the details and links on my Stampin’ Up! Promotions page.


May 1 – 15 Host Code: 4KT9DVDU

Use this host code when you order and receive a free gift from me!  If your order is over $150, please do not use this code, but you’ll still get the free gift.  The free gift is your choice of any item valued up to $10.00 in the 2018-19 Annual Catalog or in the 2019 Occasions Catalog!  That includes some of the Host Exclusive stamp sets!


If you need any stamping supplies, I’d be very happy to be your Demonstrator.  Just click on the Shop Now button on the right side of the screen to go directly to my online store or contact me if you have any questions.  Happy Stamping!

  • Visit my online store here
  • See the current Stampin’ Up! clearance rack specials here
  • Earn FREE Stampin’ Up! products through my Wildflower Frequent Buyer Program – my way of saying thank you to my frequent shopper online customers.
  • Have any questions? I’d be happy to help, click here to contact me.

Cardstock Cuts for this project:

  • Thick Whisper Whisper White – 4 1/4″ x 11″, 4 1/4″ x 2 1/2″
  • Whisper White – 2 pieces 4″ x 5 1/4″, 3 7/8″ x 5 1/8″

Stampin’ Up! products used in this project:


Cake Soiree and All My Love DSP For You Card

Good Morning! The star of today’s card is the All My Love DSP, along with the roses from the Cake Soiree stamp and die set. As a bonus, the font is so beautiful!

The layout for the card is inspired by Freshly Made Sketches #386. I was surprised and pleased at how the sharp angles of the sketch complement the soft floral themes in the DSP and rose die cuts.

Starting with the DSP with the roses and Crumb Cake background, I cut a rectangle. Then, I placed the large rectangle die from the Stitched Rectangles dies on an angle at the bottom. I was careful, not to overlap the top of the die with the top edge of the paper, because I didn’t want it to be cut. Then I ran it through my die cutting machine and got a lovely stitched edge on the bottom. I then adhered it to the Lovely Lipstick mat and carefully trimmed the angled bottom on my paper cutter.

I die cut the large rose from the Cake Soiree die cuts in Whisper White and Flirty Flamingo. I used one of the leftover pieces to trace the image on a piece of Whisper White. Then I colored it using the Flirty Flamingo Stampin’ Blends. I colored the center with the dark marker. Then using the light marker, I blended the color outward and colored the rest. I then cut it out with paper snips and adhered it to the back of the white die cut with the fine tipped glue pen. I left the Flirty Flamingo die cut without a backing.

Then I stamped the solid rose using Flirty Flamingo on Whisper White. First, I inked up the stamp and stamped it off. Then, using an ink dauber, I added more ink to the center of the stamp. This gave me an image with a darker center. I used the matching die to cut it out. I was really pleased at how well these roses matched the DSP!

I die cut a stitched circle from Crumb Cake, and stamped the sentiment in Lovely Lipstick. I die cut a scalloped circle from Lovely Lipstick and mounted it to the back of the stitched circle. I die cut some of the open leaves using some old Pistachio Pudding scraps and attached them to the back of the solid rose with a glue dot. I then arranged the roses and and added pearl accents, popping the center rose with dimensionals. I adhered the circle to the card front using dimensionals.

The inside of the card is pretty simple, only being accented with a strip of the floral DSP and matted with Lovely Lipstick.

In using this stamp set, I felt that I should make a cake card because the cake is so beautiful. But the roses go well with the DSP and make a nice statement on their own. I will just have cake cards later! Thanks for stopping by!


May 1 – 15 Host Code: 4KT9DVDU

Use this host code when you order and receive a free gift from me!  If your order is over $150, please do not use this code, but you’ll still get the free gift.  The free gift is your choice of any item valued up to $10.00 in the 2018-19 Annual Catalog or in the 2019 Occasions Catalog!  That includes some of the Host Exclusive stamp sets!


If you need any stamping supplies, I’d be very happy to be your Demonstrator.  Just click on the Shop Now button on the right side of the screen to go directly to my online store or contact me if you have any questions.  Happy Stamping!

  • Visit my online store here
  • See the current Stampin’ Up! clearance rack specials here
  • Earn FREE Stampin’ Up! products through my Wildflower Frequent Buyer Program – my way of saying thank you to my frequent shopper online customers.
  • Have any questions? I’d be happy to help, click here to contact me.

Cardstock Cuts for this project:

  • Crumb Cake – 4 1/4″ x 11″ card base, 2 1/2″ square scrap for stitched circle label
  • Lovely Lipstick – 3 7/8″ x 4 1/4″, 3 1/2″ x 5″, 2 3/4″ square scrap for scalloped circle label
  • Flirty Flamingo – 2″ square scrap for rose die cut
  • Whisper White – 3 3/8″ x 4 7/8″, 3 2″ square scraps for rose die cuts
  • All My Love DSP – 3 3/4″ x 4″, 3 3/8″ x 1/2″

Stampin’ Up! products used in this project:


Floral Frames Birthday Card

Today’s card is a flowery birthday card using the Floral Frames Bundle and the Delightfully Detailed Laser Cut DSP.

I cut the small floral panel from the Delightfully Detailed laser cut specialty paper and adhered it to a blushing bride card base using the fine tipped glue pen. This made a pretty background for the Floral Frames die cut.

Then I started assembling the frame. This die set has a circular main frame die with some leaves branching out and some sets of leaves. When you die cut them, they leave a light embossed look, giving each leaf texture. They’re really pretty. I cut the frame out of Pear Pizzazz and the other leaves out of Lemon Lime Twist and Old Olive. The three light greens go well with the Blushing Bride.

I adhered these to the card with multipurpose glue. I stamped the Happy Birthday greeting from the All That You Are stamp set in Blushing Bride ink on Whisper White cardstock and die cut it with one of the circles from the Stitched Shapes die cut set. I centered it on the circle frame and popped it up with a couple of dimensionals.

I stamped the flowers from the Floral Frames stamp set in Blushing Bride ink on Blushing Bride cardstock and die cut them with the matching dies. I adhered them using glue dots and dimensionals. I added pearls to the flower centers and made a bow from some old pink and white ribbon from my stash and adhered it with a glue dot.

I stamped the inside corner with a trio of the flowers in Blushing Bride. I masked the flowers and stamped the leaves. The big leaves are from the All That You Are stamp set, stamped in Old Olive and the little sprigs are from the Floral Frames, stamped in Lemon Lime Twist.

The die cuts in this retiring set are really pretty with three different leaf sets that work great in a variety of bouquet arrangements.


May 1 – 15 Host Code: 4KT9DVDU

Use this host code when you order and receive a free gift from me!  If your order is over $150, please do not use this code, but you’ll still get the free gift.  The free gift is your choice of any item valued up to $10.00 in the 2018-19 Annual Catalog or in the 2019 Occasions Catalog!  That includes some of the Host Exclusive stamp sets!


If you need any stamping supplies, I’d be very happy to be your Demonstrator.  Just click on the Shop Now button on the right side of the screen to go directly to my online store or contact me if you have any questions.  Happy Stamping!

  • Visit my online store here
  • See the current Stampin’ Up! clearance rack specials here
  • Earn FREE Stampin’ Up! products through my Wildflower Frequent Buyer Program – my way of saying thank you to my frequent buyer online customers.
  • Have any questions? I’d be happy to help, click here to contact me.

Stampin’ Up! products used in this project:


One Wild Ride Birthday Card

Today’s card is a fun masculine birthday card featuring the motorcycle from the One Wild Ride stamp set from Stampin’ Up!

On a Tranquil Tide card base, I stamped the tire tread across the bottom in Memento Tuxedo Black ink. I cut a strip of the map DSP from the Classic Garage paper pack, matted it in Basic Black and adhered it to the side with snail.

Using one of the Stitched Rectangle dies, I cut a rectangle and stamped the motorcycle image along with the birthday wishes sentiment in black. I stamped the Route 66 sign in Real Red and fussy cut it and glued it to the top corner.

I matted the motorcycle with black and adhered it to the card front using dimensionals. I added three of the Silver Metallic Pearls to finish off the card front.

On the inside of the card, I stamped the sentiment and another Route 66 sign. I finished the bottom with a strip of the map DSP and matted it in black before adhering it to the inside.

This fun stamp set is on the retiring list and won’t be available much longer. It has a lot of great images for making masculine cards. I had to use the Route 66 sign in my design to commemorate the year I spent in Albuquerque – a great place to ride motorcycles!


April 16 – 30 Host Code: X2NF4DNX

May 1 – 15 Host Code: 4KT9DVDU

Use this host code when you order and receive a free gift from me!  If your order is over $150, please do not use this code, but you’ll still get the free gift.  The free gift is your choice of any item valued up to $10.00 in the 2018-19 Annual Catalog or in the 2019 Occasions Catalog!  That includes some of the Host Exclusive stamp sets!


If you need any stamping supplies, I’d be very happy to be your Demonstrator.  Just click on the Shop Now button on the right side of the screen to go directly to my online store or contact me if you have any questions.  Happy Stamping!

  • Visit my online store here
  • See the current Stampin’ Up! clearance rack specials here
  • Earn FREE Stampin’ Up! products through my Wildflower Frequent Buyer Program – my way of saying thank you to my frequent buyer online customers.
  • Have any questions? I’d be happy to help, click here to contact me.

Stampin’ Up! products used in this project:


Springtime Lovely as a Tree

For today’s card I used a longtime Stampin’ Up! favorite that is retiring, Lovely as a Tree. In the current annual catalog they show a technique where you color embossing paste with a re-inker and dab it for a textured look. I was inspired by the new Spring growth on the trees nearby and decided to try it using light green ink.

The only light green re-inker I have is the retired Stampin’ Up! color Pistachio Pudding, so I decided to use that since I also have an ink pad in the same color. I wanted to use a light green to represent new leaves in Spring. So I put some embossing paste in a little cup with some drops of re-inker and mixed it up. I stamped the tree line in Soft Suede on a panel of Whisper White and sponged the ground in Pistachio Pudding and the sky in Soft Sky (another retired color). Then I dabbed the tinted embossing paste on the tree branches.

I also used another oldie but goodie for the background paper – Everyday Enchantment designer series paper.  The blue swallows on the paper really go well with the Spring theme of the card.  I cut mats out of Old Olive cardstock (luckily still available) for the background and picture panel. I mounted the background panel and mat on a Pear Pizzaz card base. I cut a little banner and stamped the sentiment with versamark ink, sprinkled it with white embossing powder and heat set.

The new Old Olive linen thread was wrapped twice around the picture panel and tied in a bow before popping it on the background with dimensionals. Notice how I flush mounted it on the left side?

The inside of the card is trimmed in more of the Everyday Enchantment dsp and matted again with Old Olive.

It’s sad to say good bye to iconic favorites such as Lovely as a Tree, and it was fun to team it up with other retired oldies but goodies from my stash. The tinted embossing paste was a great new technique to add texture and color to the trees and was pretty easy.

There are still fabulous tree stamp sets that Stampin’ Up! will carry over into the new catalog such as Winter Woods and Rooted in Nature. I think the tinted embossing paste technique will work well on these sets, too.

Thanks for visiting and helping me bid farewell to Lovely as a Tree!


April 16 – 30 Host Code: X2NF4DNX

Use this host code when you order and receive a free gift from me!  If your order is over $150, please do not use this code, but you’ll still get the free gift.  The free gift is your choice of any item valued up to $10.00 in the 2018-19 Annual Catalog or in the 2019 Occasions Catalog!  That includes some of the Host Exclusive stamp sets!


If you need any stamping supplies, I’d be very happy to be your Demonstrator.  Just click on the Shop Now button on the right side of the screen to go directly to my online store or contact me if you have any questions.  Happy Stamping!

  • Visit my online store here
  • See the current Stampin’ Up! clearance rack specials here
  • Earn FREE Stampin’ Up! products through my Wildflower Frequent Buyer Program – my way of saying thank you to my frequent buyer online customers.
  • Have any questions? I’d be happy to help, click here to contact me.

Stampin’ Up! products used in this project: