
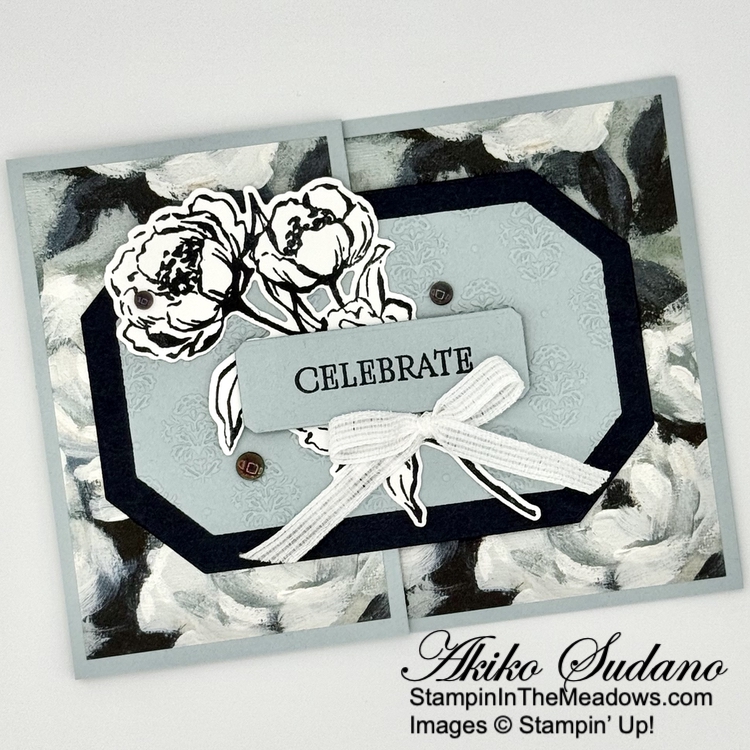
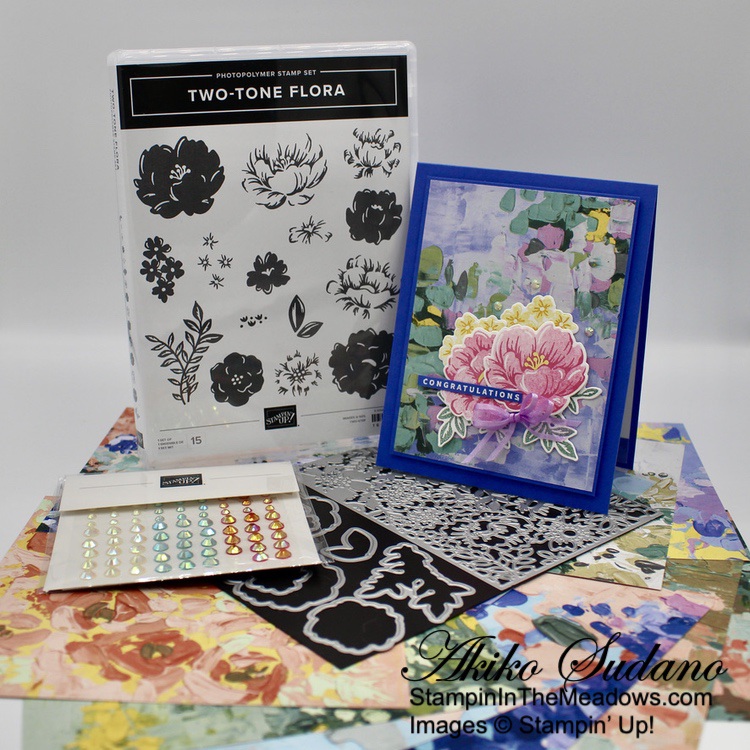
Good Morning and welcome to the Happy Inkin’ Thursday Blog Hop! The Stampin’ Up! Gallery Blooms bundle is another new bundle from the upcoming Stampin’ Up! 2025-2026 Annual Catalog that will be available on May 6, 2025. I used it with the retiring Countryside Coners dies and some pretty vintage floral Beautiful Gallery 6″ x 6″ designer series paper to make a Z-fold Wedding card for today. You can find the currently available supplies I used along with card stock cuts at the bottom of my post. Note: My supply list may not be very useful since most of the items I used are from the upcoming Annual Catalog.

This week’s challenge is to make a fun fold card!
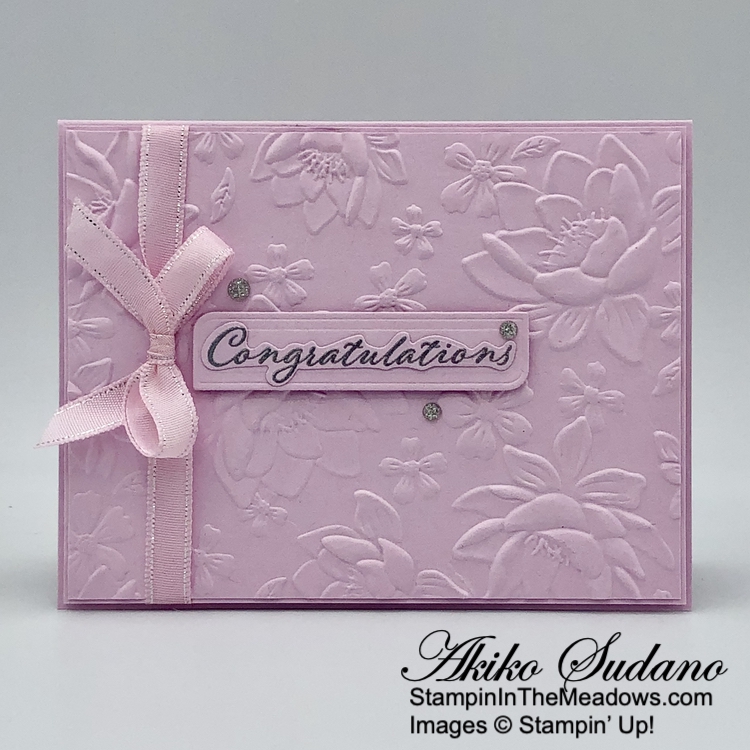
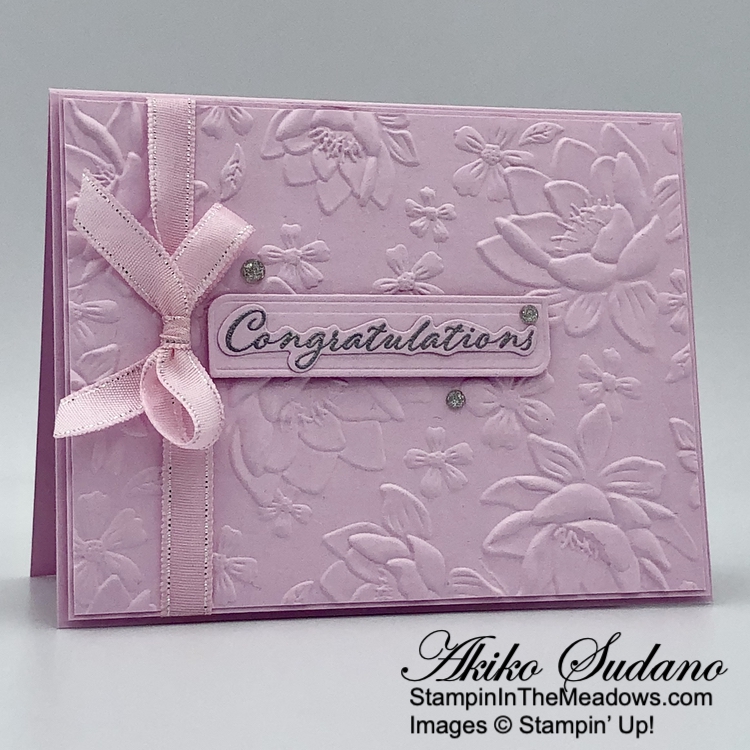
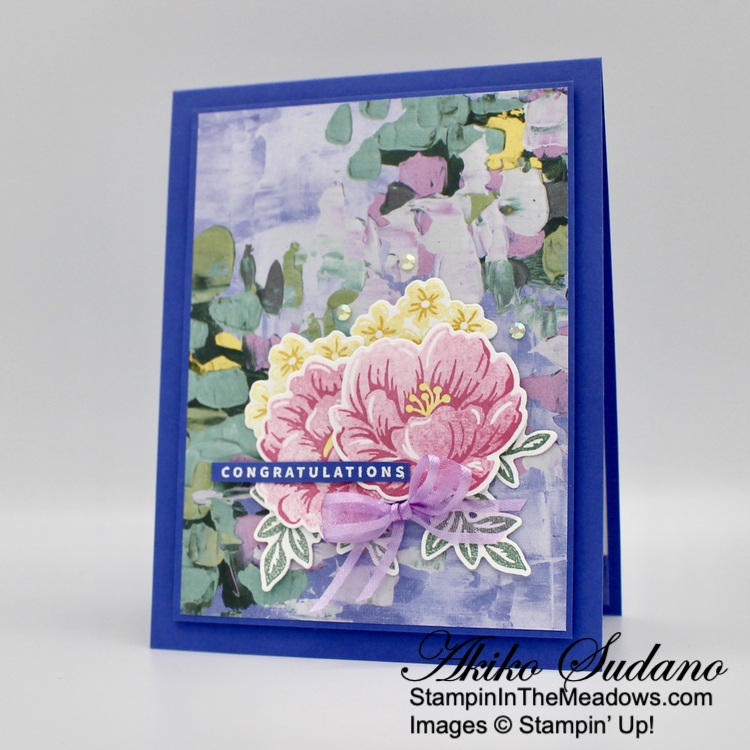
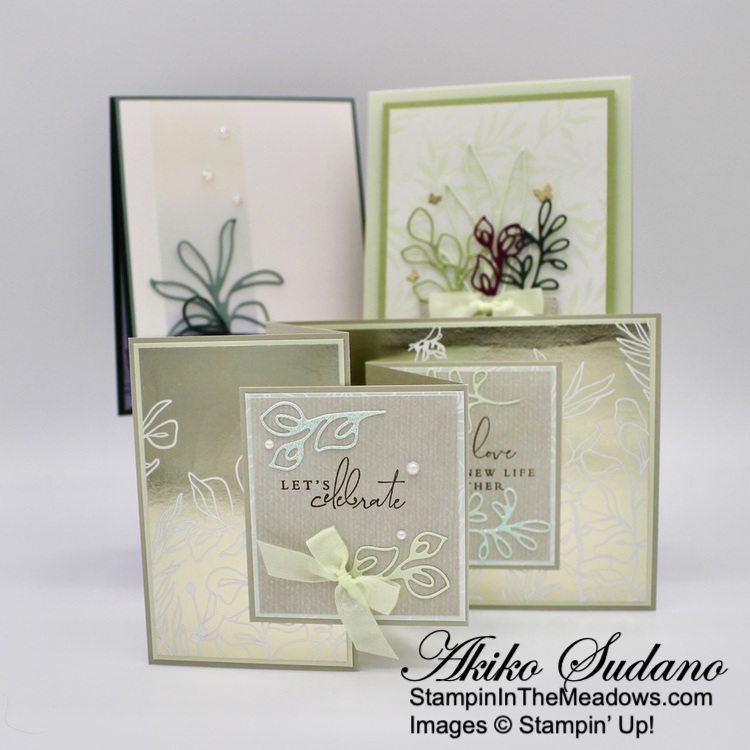
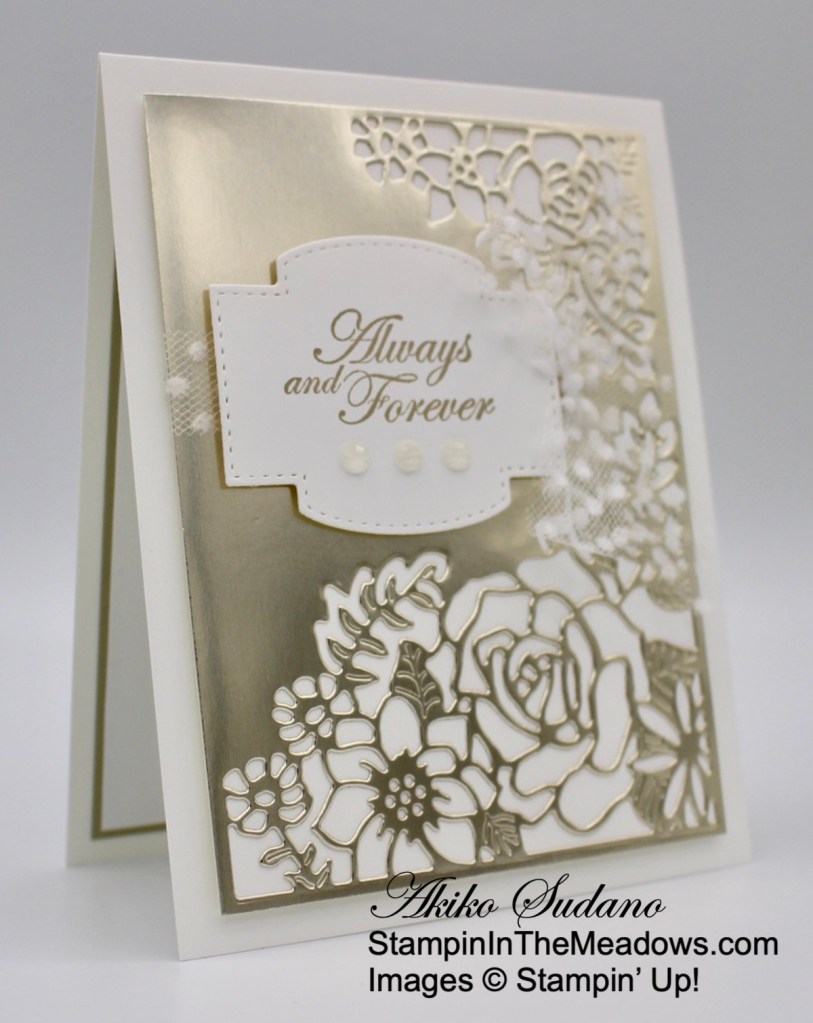
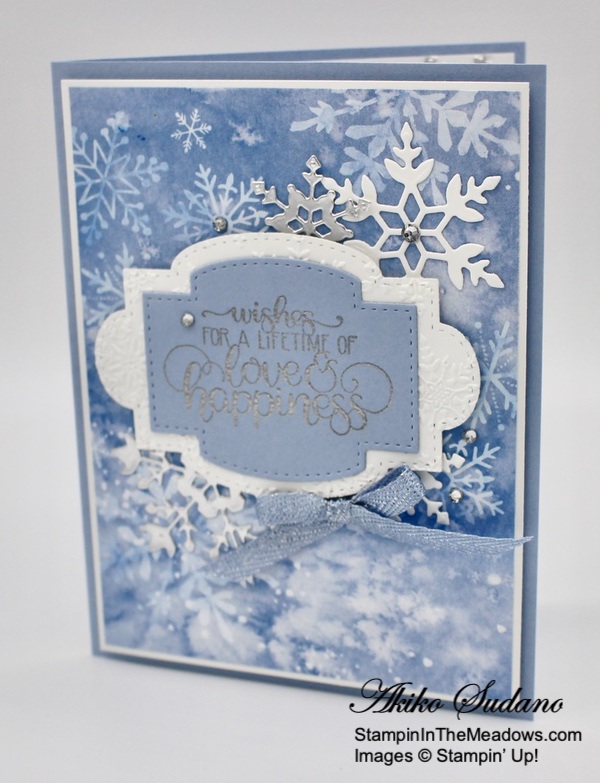
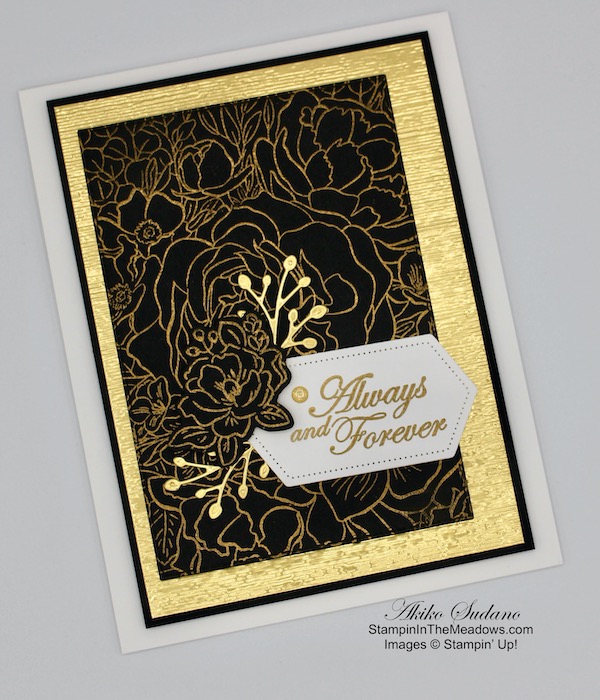
After scoring and burnishing the Cloud Cover card base, I adhered floral panels of Beautiful Gallery 6″ x 6″ designer series paper to the front flap and back panel with liquid glue. I embossed a Cloud Cover panel with the new Damask Designs embossing folder and adhered it to the middle section.
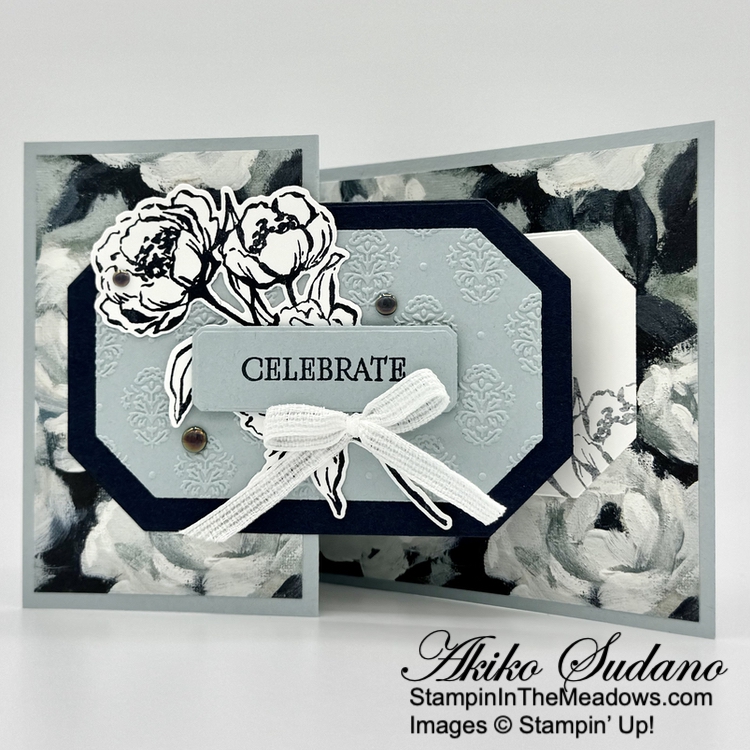
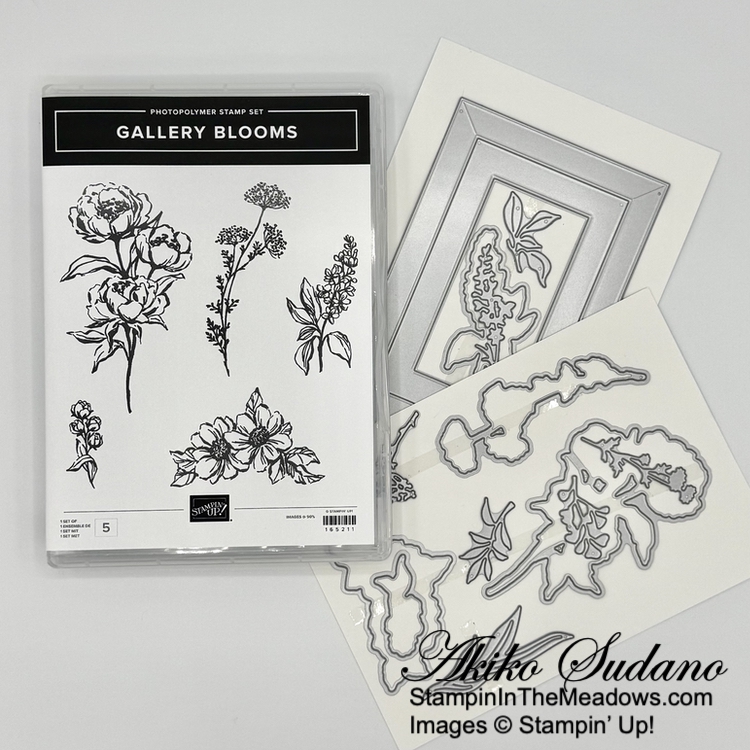
I cut a Secret Sky panel with the second largest retiring Countryside Corners die and cut a Cloud Cover panel with the third largest die. I embossed the Cloud Cover die cut with the Damask Designs embossing folder and adhered it to the larger die cut. I adhered the layered die cuts to the card front flap with liquid glue. I stamped the large roses from the Stampin’ Up! Gallery Blooms stamp set using Secret Sky ink on Basic White and cut it out with the coordinating die. I adhered it to the embossed panel with glue dots.
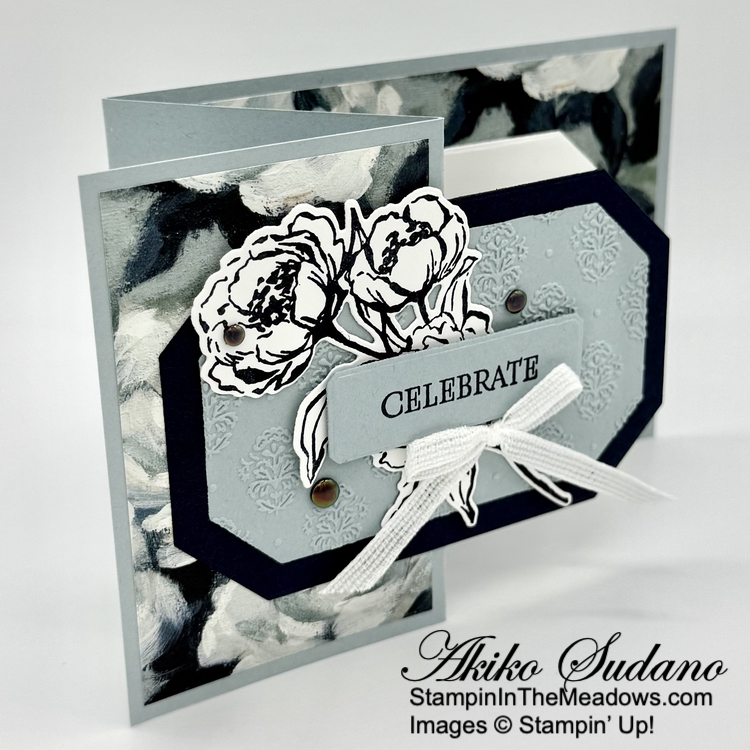
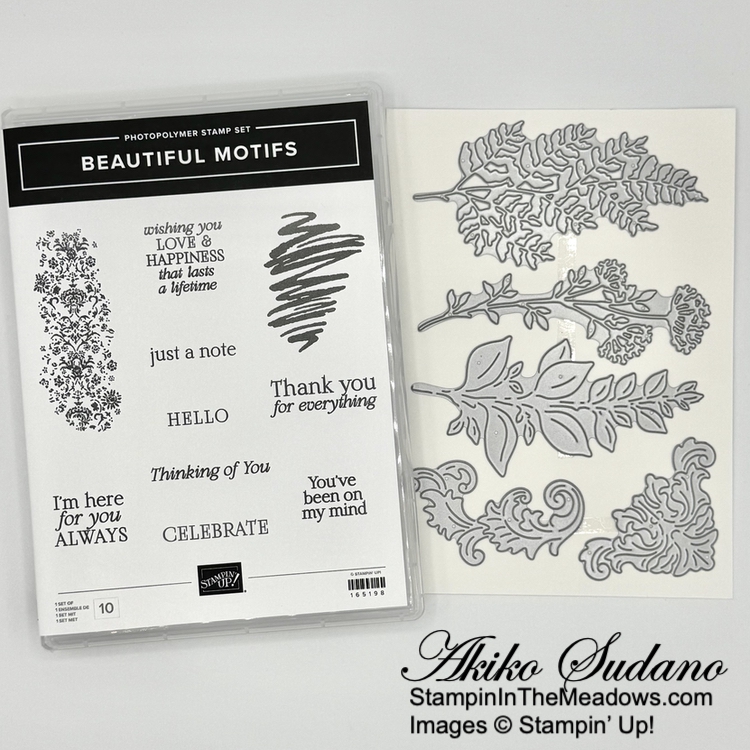
I stamped the sentiment from the Beautiful Motifs stamp set using Secret Sea ink on Cloud Cover and cut it out with the small Countryside Corners die. I adhered it to the card with dimensionals and finished with a white bow and Secret Sea dots.

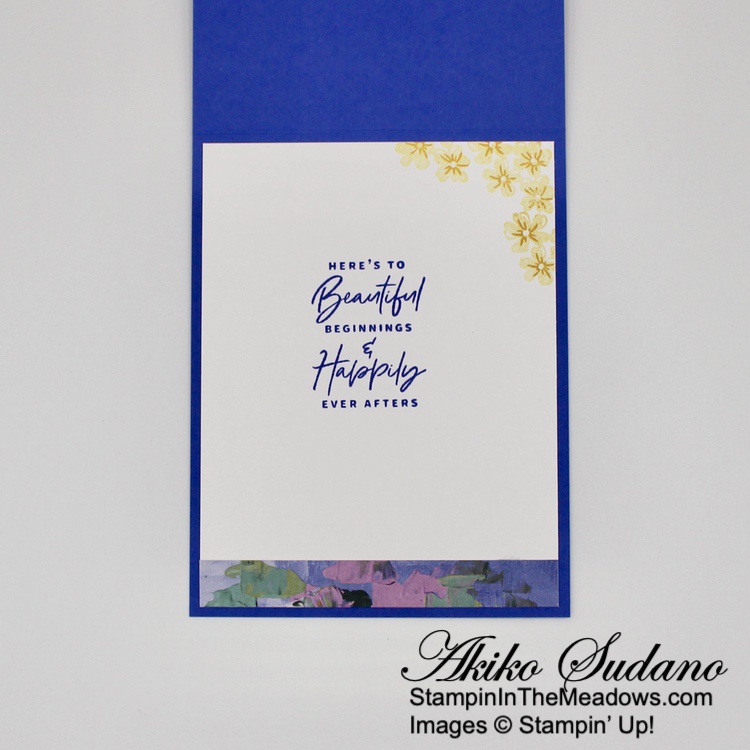
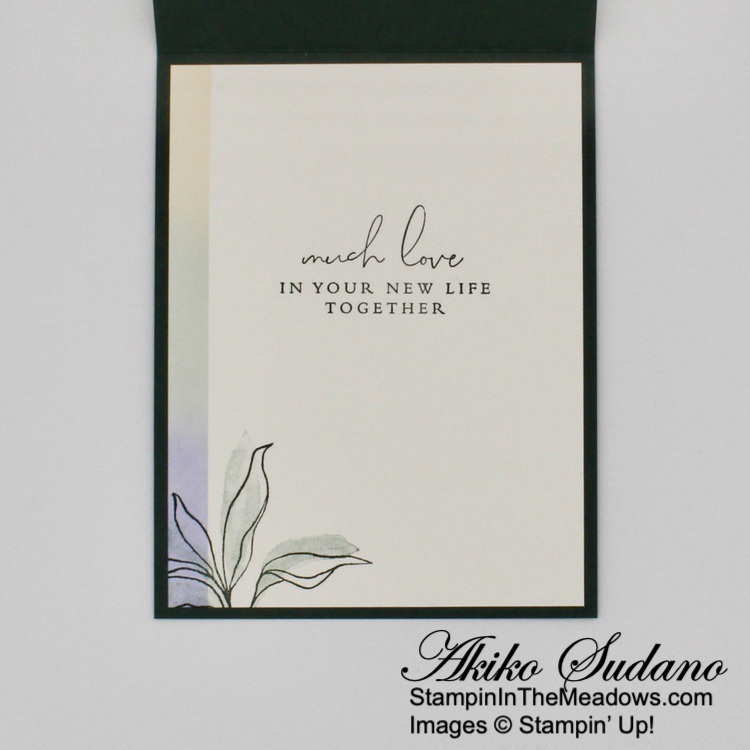
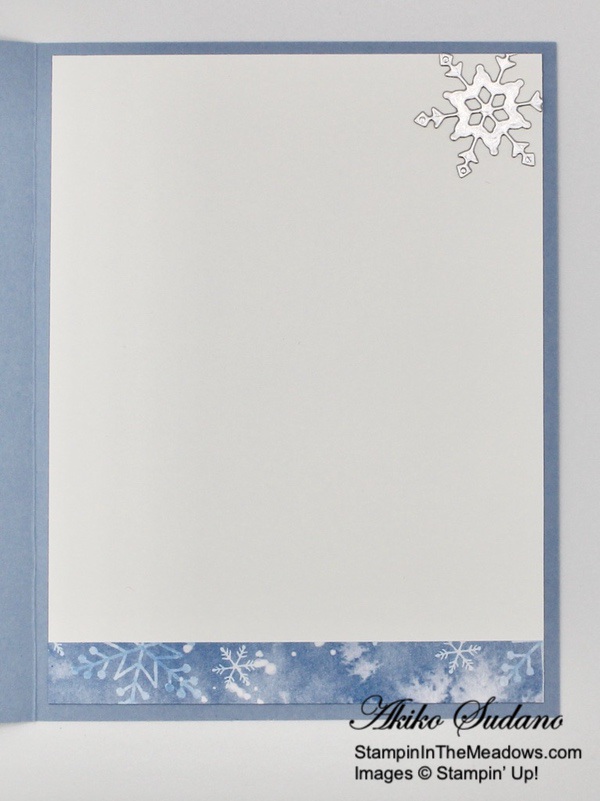
For the inside of the card, stamped the sentiment from the Beautiful Motifs stamp set using Secret Sea ink on Basic White. I used twice stamped off Secret Sea ink to stamp the large floral from the Stampin’ Up! Gallery Blooms stamp set in the corner and cut it out with the third largest Countryside corners die. I adhered it to the back panel of the card with liquid glue so it is hidden when the card is closed.
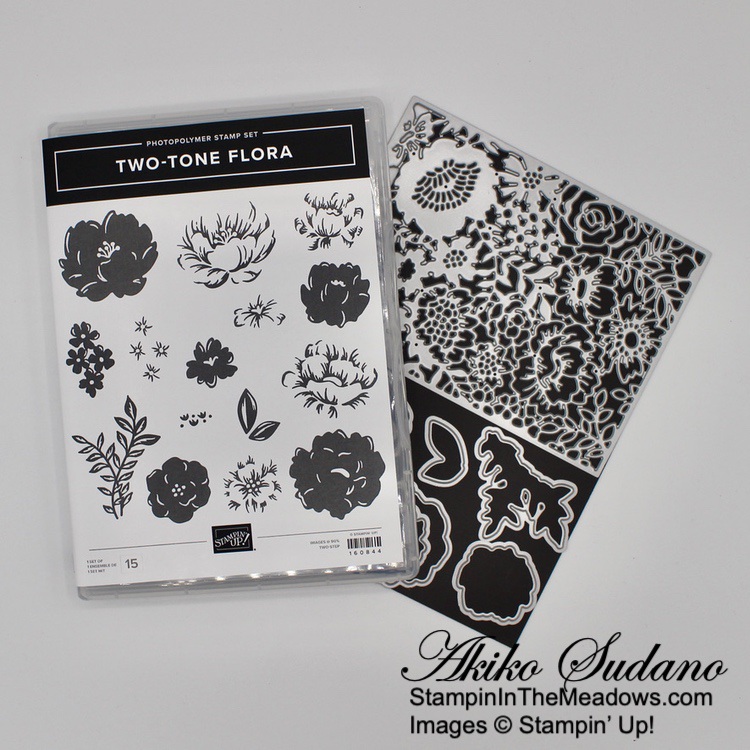
The Stampin’ Up! Gallery Blooms bundle has beautiful florals with a vintage feel and wonderful coordinating dies. And it has a pretty double frame die that makes your cards look like they belong in an art museum. Here is the stamp set and dies:
And here is the Gallery Motifs bundle:
These bundles and the Beautiful Gallery 6″ x 6″ designer series paper are part of the new Beautiful Gallery Suite in the upcoming Stampin’ Up! 2025-2026 Annual Catalog that will be available on May 6.
On with the Hop! Click on the Next Blog button to move forward to see the beautiful project Karen Ksenzakovic has created.

If you get lost along the way, here are the participants for the hop:
- Amy Koenders
- Mary Deatherage
- Karen Finkle
- Akiko Sudano <– You Are Here
- Karen Ksenzakovic
- Tara Carpenter
- Terry Lynn Bright
If you need any stamping supplies, I’d be very happy to be your Demonstrator. Just click on the Shop Now button on the right side of the screen to go directly to my online store or contact me if you have any questions.
Thanks for stopping by and Happy Stamping!
Akiko
- Visit my online store here
- See the current Stampin’ Up! Last Chance items here
- Have any questions? I’d be happy to help, click here to contact me.
Cardstock Cuts for this project:
- Cloud Cover – 4-1/4″ x 11″ card base, scored at 2-3/4″ and 5-1/2″, 2-1/2″ x 4″ (embossed panel), 2-3/4″ x 4-1/4″ (embossed die cut), 1″ x 3″ (label
- Secret Sea – 3-1/4″ x 4-3/4″ (die cut mat)
- Basic White – 2-3/4″ x 4-1/4″ (inside die cut)
- Beautiful Gallery 6″ x 6″ DSP – 4″ x 5-1/4″ (inside background), 2-1/2″ x 4″ (front flap panel)
Stampin’ Up! products used in this project:
Product List![Countryside Corners Dies [ 161471 ]](https://assets1.tamsnetwork.com/images/EC042017NF/161471s.jpg "Countryside Corners Dies [ 161471 ]")
![Basic White 8 1/2" X 11" Cardstock [ 166780 ]](https://assets1.tamsnetwork.com/images/EC042017NF/166780s.jpg "Basic White 8 1/2\" X 11\" Cardstock [ 166780 ]")
![White 1/4" (6.4 Mm) Ribbon [ 165562 ]](https://assets1.tamsnetwork.com/images/EC042017NF/165562s.jpg "White 1/4\" (6.4 Mm) Ribbon [ 165562 ]")


")


 Specialty Paper")


 Sheer Ribbon Combo Pack")

")


")


 Specialty Designer Series Paper")


 Grosgrain Ribbon")


")
")
 Designer Series Paper")


 Satin Shimmer Ribbon")


 Open Weave Ribbon")


 Specialty Paper")


")

")


 Polka Dot Tulle Ribbon")


 Metallic Ribbon")


 Glittered Organdy Ribbon")


")


