Stampin’ Up! Dove of Hope Christmas Card

Good Morning! Today I have another sneak peek of a beautiful new bundle from the new Aug-Dec 2020 Mini Catalog. It’s called the Stampin’ Up! Dove of Hope Bundle and it comes with the Dove of Hope cling stamp set and the Detailed Dove Dies. This bundle will be available next week on Aug 4 – YAY!!! You can find the supplies used to create this card at the bottom of my post along with the sizes of cardstock used.

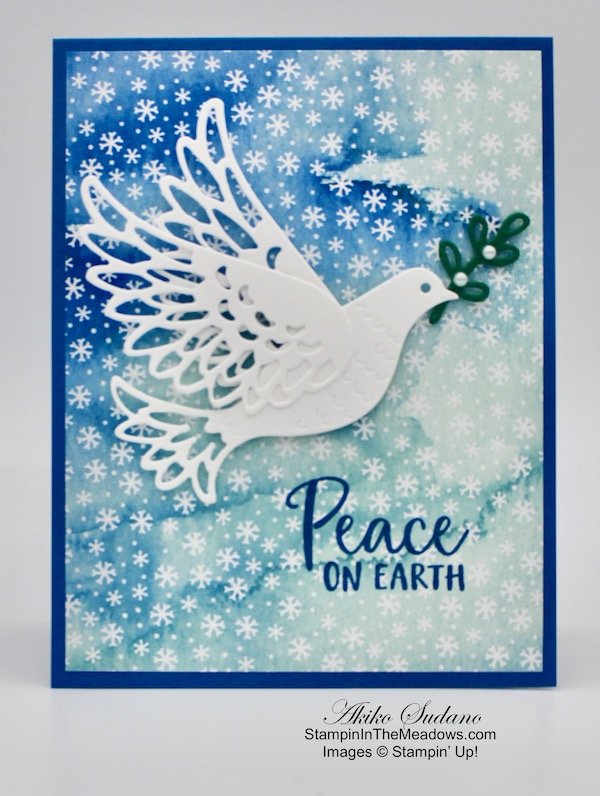
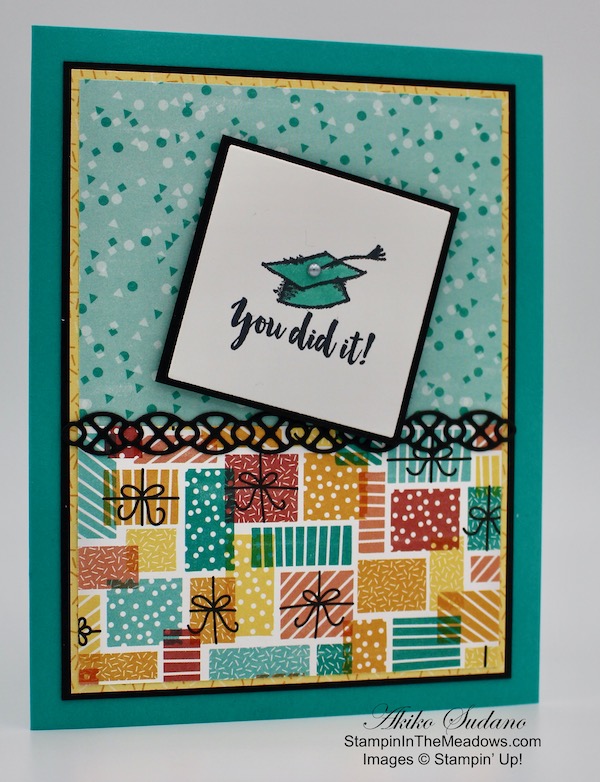
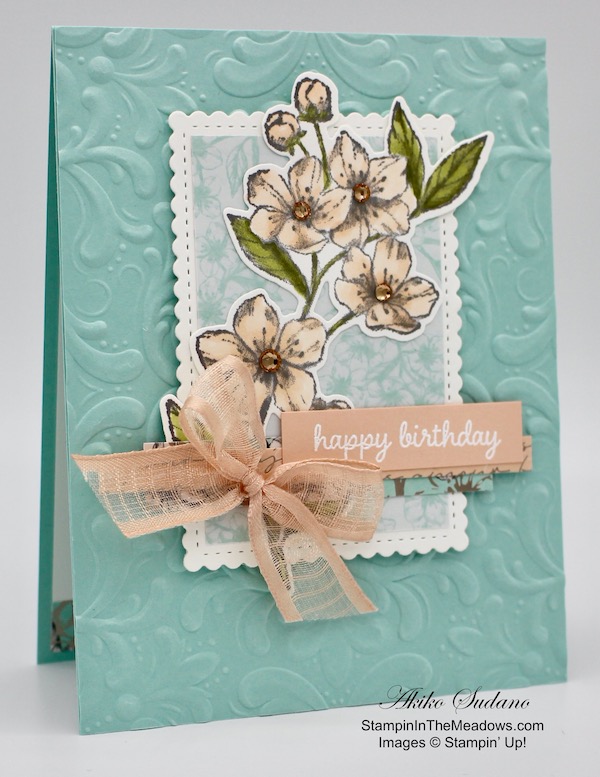
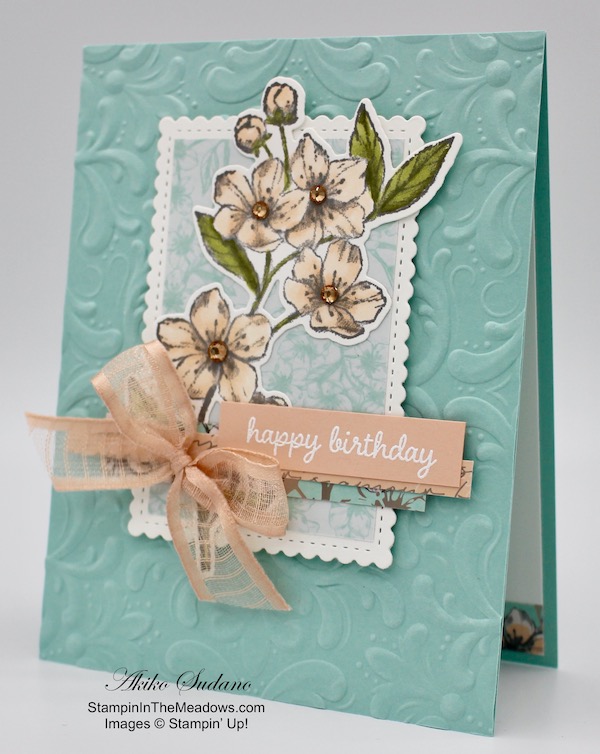
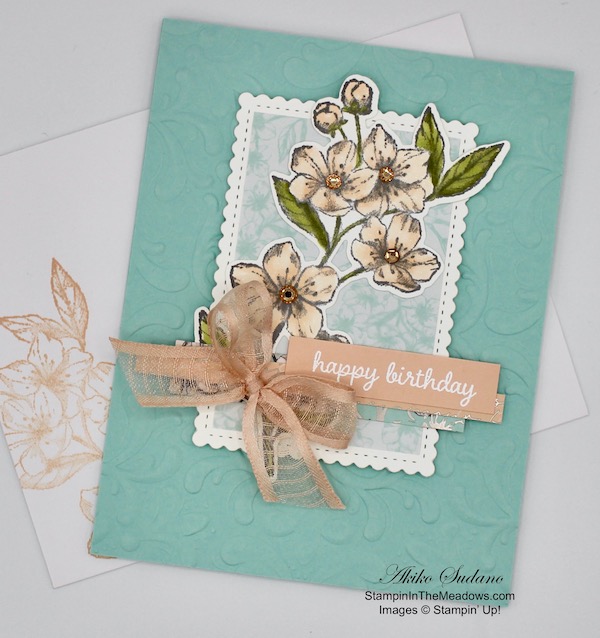
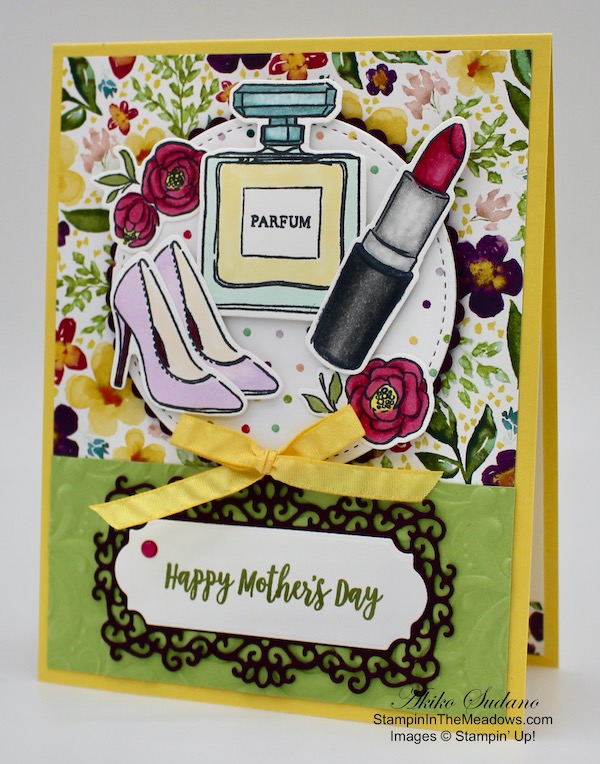
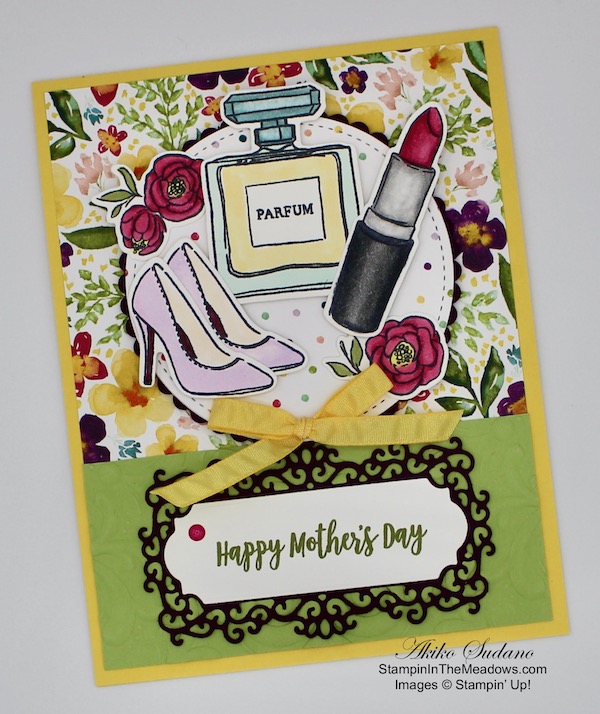
I stamped the Peace on Earth sentiment from the Stampin’ Up! Dove of Hope stamp set in Pacific Point ink on a panel of the new Snowflake Splendor designer series paper and adhered the panel to the front of a Pacific Point card base.

I cut out the dove body and two wings from the Detailed Dove Dies from Thick Whisper White card stock and adhered the wings to the body with liquid glue. I cut the small branch from Shaded Spruce card stock and adhered it to the beak with a dot of liquid glue. I adhered the bird to the card front with dimensionals.

I finished off the card front with two small pearls on the branch.

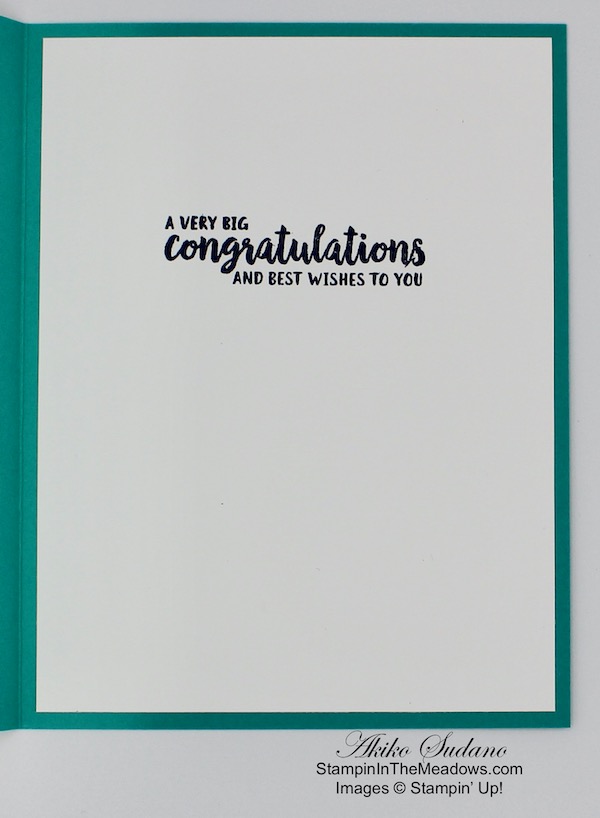
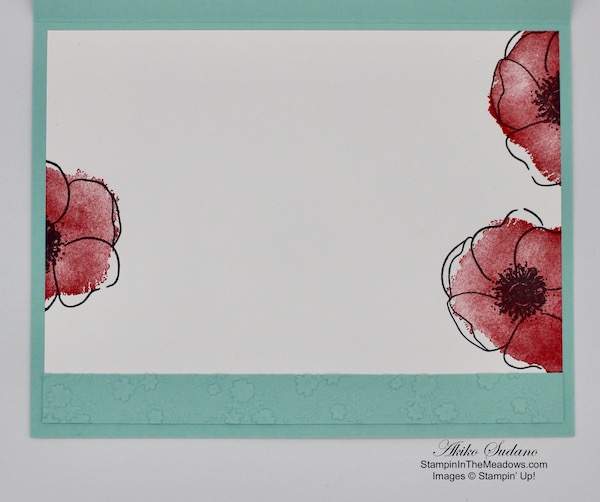
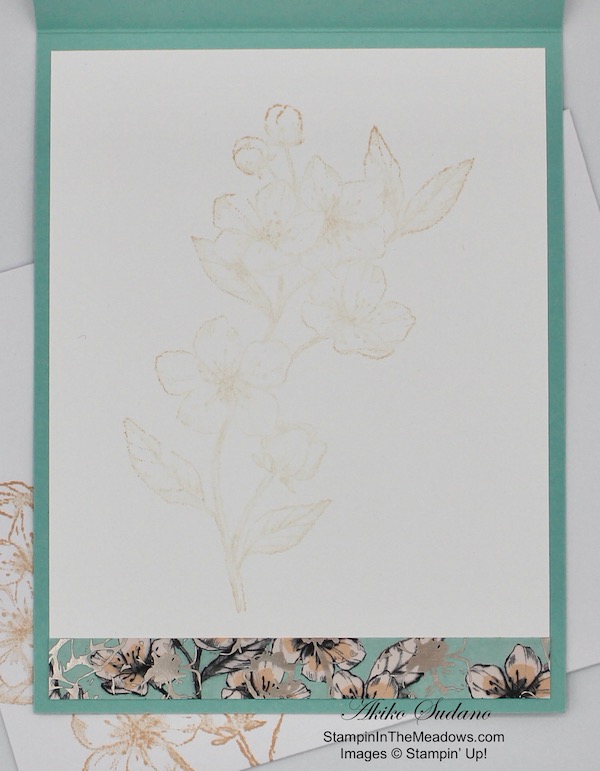
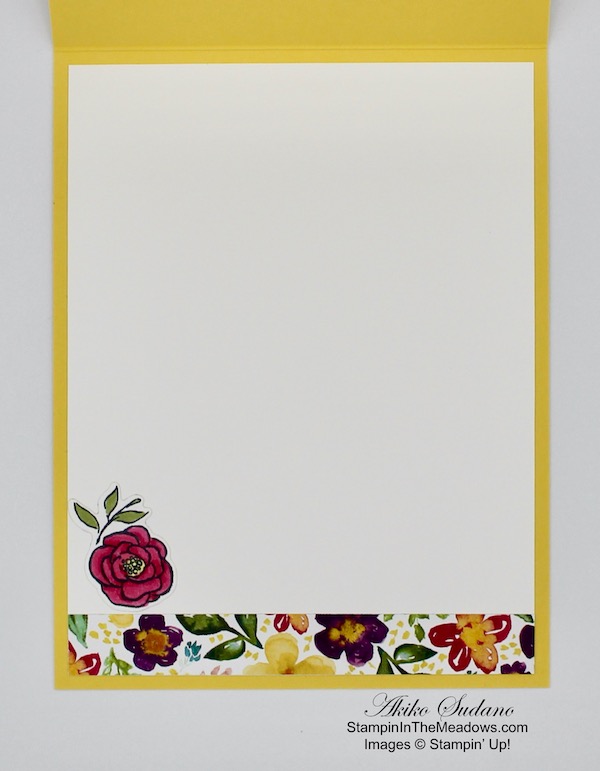
I stamped the sentiment from the Stampin’ Up! Dove of Hope stamp set in Pacific Point ink on a Whisper White panel. I stamped dove in Pool Party ink after stamping off, and trimmed the bottom with a strip of the Snowflake Splendor DSP. I adhered the panel to the inside of the card with Stampin’ Seal.

This was another simple Christmas card, but the dove die cut is so elegant and beautiful that it doesn’t need much.


Stampin’ In The Meadows August-December 2020 Mini Catalog Product Shares

The Stampin’ In The Meadows product shares for the new Mini Catalog are still available, but they’re filling up fast! If you would like samples of all the new products from the new August-December 2020 Mini Catalog, check it out. I am offering 6×6 samples of all the new designer series papers for $25 + $7 Priority Shipping and samples of all the new embellishments for $26 + $7 Priority Shipping. And if you want both, you can get an I WANT IT ALL share for $51 + $7 Priority Shipping.

Visit my New Catalog Product Shares Page to get the full details of what is included. Fill out the order form or drop me an email if you have questions. Ordering deadline is August 2. Please note that I can only ship to addresses in the US.


Stampin Up! Bonus Days are back!

It’s the last week to earn coupon codes in the Bonus Days promotion. If you need a refresher on this promotion, here’s how it works: For every $50 (before shipping and tax) you spend between today and August 3, you earn a $5 USD Bonus Days coupon code that can be redeemed between August 4 and August 31. There’s no limit on how many coupon codes you can earn or redeem, but they must be redeemed by August 31. For full details, see my Promotions Page.


July 16 – 31 Host Code: FD627X9W

Use this host code when you order $50 or more and receive a free gift from me!  The gift is your choice of any item valued up to $10.00 in the 2020-21 Annual Catalog!

If your order is over $150, please do not use the host code since you’ll receive your own Host Dollars plus I’ll still send you the free gift!  This host code can be used by anyone, no commitment required.  Let me know if you have any questions.


If you need any stamping supplies, I’d be very happy to be your Demonstrator.  Just click on the Shop Now Button on the right side of the screen to go directly to my Online store or contact me if you have any questions.  Happy Stamping!

Thanks for stopping by and have a great day!

Akiko

  • Visit my Online store here
  • See the current Stampin’ Up! clearance rack specials here
  • Earn FREE Stampin’ Up! products through my Wildflower Frequent Shopper Program – my way of saying thank you to my frequent shopper online customers.
  • Sign up for my monthly newsletter here
  • Have any questions? I’d be happy to help, click here to contact me.

Cardstock Cuts for this project:

  • Pacific Point – 4-1/4″ x 11″ card base scored at 5-1/2″
  • Shaded Spruce – 1″ x 1-1/2″ (branch die cut)
  • Thick Whisper White – 3″ x 5-1/4″ (dove die cuts)
  • Whisper White – 4″ x 5-1/4″ (inside panel)
  • Snowflake Splendor DSP – 4″ x 5-1/4″ (front background), 1/2″ x 4″ (inside trim)

Stampin’ Up! products used in this project:


Stampin’ Up! Layered With Kindness for the Happy Inkin’ Thursday Blog Hop

Good Morning! Welcome to another Happy Inkin’ Thursday Blog Hop! I’m using bunch of retiring favorites for my card today along with a sneak peek of a new one :

We have a color challenge this week, and here is the color palette we are using:

I started by stamping the flower from the Stampin’ Up! Layered With Kindness stamp set in Mango Melody randomly on a strip of Whisper White card stock. I stamped the single leaf in Old Olive after stamping off randomly among the Mango Melody flowers. I used the light So Saffron Stampin’ Blend to color the area between the flowers in a circular motion. Then I embossed it with the Subtle 3D embossing folder. This resulted in some custom designer series paper that matched the color palette for today’s blog hop! I used the lacy border from the Ornate Borders Dies to cut two lacy borders from Mango Melody card stock and adhered them to the back of the stamped and embossed strip.

I embossed a panel of So Saffron card stock with the beautiful Country Floral 3D embossing folder. Since this embossing folder causes shrinkage, I cut the panel 1/4″ longer than the final size and trimmed it to the correct length after embossing. I adhered the embossed panel to a Whisper White panel with liquid glue and adhered the stamped and embossed layered strip on top with liquid glue. I adhered the layered panel to a So Saffron card base with dimensionals.

I stamped the fancy happy birthday label from the Stampin’ Up! Layered With Kindness stamp set on a small Mango Melody Panel with VersaMark Ink. I sprinkled it with white embossing powder and heat set with the heat tool until it was shiny. I cut it out with the Label Me Lovely Punch. I stamped the Thank You sentiment from the Stampin’ Up! Layered With Kindness stamp set in Old Olive ink on a Whisper White strip and cut it out with the Label Me Fancy Punch. I adhered it to the Mango Melody label with dimensionals. I cut out the leaf spray from Old Olive card stock with the die from the Forever Flourishing Dies that will be available in the new 2020-2021 Annual Catalog on June 1. I adhered the leaves behind the label with liquid glue. I adhered the layered label to the card front with dimensionals on the right side and liquid glue on the left side. I finished it off with a White bow.

For the inside I stamped, embossed and colored a strip of Whisper White card stock so that it matched the panel on the card front. I adhered it to a Whisper White panel and then to the inside of the card.

Sadly, the Stampin’ Up! Layered with Kindness stamp set is retiring along with the beautiful Country Floral embossing folder. Both of these items are still available as Last Chance products until they sell out or through June 2, so check them out in my Online Store.

On with the Hop! Click the Next button below to visit Karen Ksenzakovic’s blog.

And just in case you get lost along the way, here’s a list of the team members participating in the hop today:


Stampin’ Up! Last Chance Products are going fast!

Stampin’ Up has posted the Last Chance Products – the retiring items from the 2019-2020 Annual Catalog and January-June 2020 Mini Catalog in preparation for the release of the new 2020-2021 Annual Catalog. The items on the lists are only available while supplies last through June 2!  And some of the items are available at a discount!!

Click on the picture below to head over to my Online Store to shop the retiring products:

Have fun shopping and let me know if you have any questions!


May 16 – 31 Host Code: Z6VYEYYK

Use this host code when you order $50 or more and receive a free gift from me!  The gift is your choice of any item valued up to $10.00 in the 2019-20 Annual Catalog or in the 2020 January-June Mini Catalog!  That includes some of the Host Exclusive stamp sets!

If your order is over $150, please do not use the host code since you’ll receive your own Host Dollars plus I’ll still send you the free gift!  This host code can be used by anyone, no commitment required.  Let me know if you have any questions.


If you need any stamping supplies, I’d be very happy to be your Demonstrator.  Just click on the Shop Now Button on the right side of the screen to go directly to my online store or contact me if you have any questions.  Happy Stamping!

Thanks for visiting!

Akiko

  • Visit my online store here
  • See the current Stampin’ Up! clearance rack specials here
  • Earn FREE Stampin’ Up! products through my Wildflower Frequent Shopper Program – my way of saying thank you to my frequent shopper online customers.
  • Sign up for my weekly newsletter here
  • Have any questions? I’d be happy to help, click here to contact me.

Cardstock Cuts for this project:

  • So Saffron – 4-1/4″ x 11″ card base scored at 5-1/2″, 3-7/8″ x 5-1/4″ (embossed panel trimmed to 5-1/8″ after embossing)
  • Mango Melody – 1-1/4″ x 5-1/8″ (2 die cut borders), 2-1/2″ x 2-1/2″ (punched label)
  • Old Olive – 1-1/2″ x 3″ (leaf spray die cut)
  • Whisper White – (2) 4″ x 5-1/4″ (inside panel and front mat), 1-1/2″ x 5-1/8″ (stamped & embossed floral strip), 1/2″ x 4″ (inside stamped & embossed trim), 1-1/2″ x 3″ (label)

Stampin’ Up! products used in this project:


Stampin’ Up! Witty-cisms Graduation Card

Good Morning! Today’a card is a graduation card made with the Stampin’ Up! Witty-cisms cling stamp set. This stamp set is on the retiring list so it is available while supplies last, but it is full of cute and clever images and sentiments. Cards made with this stamp set are sure to bring a smile to anyone receiving them. You can find the supplies used to create this card at the bottom of my post along with the sizes of cardstock used.

I adhered a panel of the Daffodil Delight confetti paper from the Birthday Bonanza designer series paper to a Basic Black mat with multipurpose liquid glue. I adhered the Bermuda Bay confetti paper on top and the present paper on the bottom. I cut the fancy border from the Nature’s Thoughts dies from Basic Black and adhered it across the seam. I adhered the layered panel on a Bermuda Bay card base with multipurpose liquid glue.

I stamped the graduation cap image from the Stampin’ Up! Witty-cisms stamp set in Memento Tuxedo Black ink on a Whisper White panel and colored the cap with Bermuda Bay Stampin’ Blend. I cut it out with the Layering Squares die. I adhered it to a Basic Black mat and popped it on the card with dimensionals. I finished the cap with a silver metallic pearl.

A simple, fun card to celebrate a graduation made with the Stampin’ Up! Witty-cisms cling stamp set and the colorful Birthday Bonanza designer series paper!

I chose the congratulations sentiment from the Beautiful Friendship photopolymer stamp set for the inside of the card since the font was similar to the one on the front. I stamped it with Memento Tuxedo Black ink on a Whisper White panel before adhering it to the inside of the card with multipurpose liquid glue.

Both the Stampin’ Up! Witty-cisms stamp set and the Birthday Bonanza designer series paper are on the retiring list and are available while supplies last until June 2. Check out the Last Chance Products in my Online Store to get yours while you can.


Stampin’ Up! Last Chance Products are going fast!

Stampin’ Up has posted the Last Chance Products – the retiring items from the 2019-2020 Annual Catalog and January-June 2020 Mini Catalog in preparation for the release of the new 2020-2021 Annual Catalog. The items on the lists are only available while supplies last through June 2!  And some of the items are available at a discount!!

Click on the picture below to head over to my Online Store to shop the retiring products:

Have fun shopping and let me know if you have any questions!


The June 2020 Paper Pumpkin kit is an exclusive Sara-inspired to help you #sharesunshine. It includes supplies for eight handmade cards and is specially designed to help you create a box full of cheer. Once you’ve made all the cards, use any leftover pieces to decorate the box. Fill it with yellow goodies, add the included adhesive label, address it to someone special, and brighten their life with a little sunshine!

  • The kit contains supplies for 8 cards and envelopes (2 cards of 4 designs) 
    • Card size: 4-1/4″ x 5-1/2″
    • Envelope size: 4-1/2″ x 5-3/4″

Coordinating Colors: Basic Black, Bumblebee, Crushed Curry, Poppy Parade, Shaded Spruce, White, and Gold 

If you’re interested in subscribing to Paper Pumpkin, you can either sign up for a subscription where you are billed monthly for your kit or you can purchase a prepaid subscription in my online store. To see more information and to sign up for the monthly subscription click here. To see the options for prepaid subscriptions in my online store, click here.

Sign up deadline for the June 2020 kit is June 10, 2020. Supplies may be limited toward the end of the subscription period.


May 16 – 31 Host Code: Z6VYEYYK

Use this host code when you order $50 or more and receive a free gift from me!  The gift is your choice of any item valued up to $10.00 in the 2019-20 Annual Catalog or in the 2020 January-June Mini Catalog!  That includes some of the Host Exclusive stamp sets!

If your order is over $150, please do not use the host code since you’ll receive your own Host Dollars plus I’ll still send you the free gift!  This host code can be used by anyone, no commitment required.  Let me know if you have any questions.


If you need any stamping supplies, I’d be very happy to be your Demonstrator.  Just click on the Shop Now Button on the right side of the screen to go directly to my Online store or contact me if you have any questions.  Happy Stamping!

Thanks for stopping by and have a great day!

Akiko

  • Visit my Online store here
  • See the current Stampin’ Up! clearance rack specials here
  • Earn FREE Stampin’ Up! products through my Wildflower Frequent Shopper Program – my way of saying thank you to my frequent shopper online customers.
  • Sign up for my monthly newsletter here
  • Have any questions? I’d be happy to help, click here to contact me.

Cardstock Cuts for this project:

  • Bermuda Bay – 5-1/2″ x 8-1/2″ card base scored at 4-1/4″
  • Basic Black – 3-3/4″ x 5″ (front mat), 2″ x 2″ (cap mat), 1/2″ x 4″ (die cut border)
  • Whisper White – 4″ x 5-1/4″ (inside panel)
  • Birthday Bonanza DSP – 3-5/8″ x 4-7/8″ (Daffodil Delight confetti), 2″ x 3-1/2″ (presents), 2-3/4″ x 3-1/2″ (Bermuda Bay confetti)

Stampin’ Up! products used in this project:


Stampin’ Up! Peaceful Moments for the Happy Inkin’ Thursday Blog Hop

Good Morning! Welcome to another Happy Inkin’ Thursday Blog Hop! When I was a little girl, my Father was in the Air Force and we lived on a lot of Air Force bases. I will always remember seeing the Veterans selling the little paper poppy flowers outside the Commissary and BX to raise money, and when Stampin’ Up! first brought out the Peaceful Poppies Suite, this was the first thing it brought to mind. So with Memorial Day coming up, I found it fitting to use the Stampin’ Up! Peaceful Moments poppy dies for my card today.

We have a sketch challenge this week, and here is the card sketch we are using – I thought it was the perfect sketch for bringing out the poppies again:

I embossed a strip of Pool Party card stock with the Ornate Floral 3D embossing folder and adhered it to the top of the Pool Party striped paper from the Peaceful Poppies designer series paper. I adhered the panel to a Pool Party card base.

I prepared the poppy die cuts using the Poppy Moments Dies. I cut one of the large flower and three small ones. I cut the solid pieces from Poppy Parade card stock and the outline pieces from Real Red card stock. I cut the centers from Basic Black card stock. I assembled the poppies by adhering the outline flowers to the solid flowers using dots of multipurpose liquid glue in the centers. I adhered the Basic Black flower centers with dots of multipurpose liquid glue, using both circle centers for the large poppy. I arranged the flowers across the card and adhered them with dimensionals.

I stamped the Always Remember sentiment from the Stampin’ Up! Peaceful Moments stamp set in Real Red ink on a strip of Whisper White. I trimmed the end in a fishtail banner. I trimmed the end of a Whisper White flag ribbon and Real Red satin ribbon in a similar fashion. I adhered the ribbons together with glue dots along with the sentiment. I adhered the layered label to the card base with glue dots. I finished the card front with three red rhinestone jewels.

I stamped the large outline poppy from the Painted Poppies stamp set in Memento tuxedo ink on a Whisper White panel. I used the solid stamp to ‘color’ the poppy by stamping it with Real Red ink. I embossed a strip of Pool Party with the Ornate Floral 3D embossing folder and adhered it to the bottom and adhered the panel to the inside of the card.

I remember as a little girl making my donation and getting the pretty little poppy flower. And years later when visiting my Mom, I remember finding poppy flowers in an old music box. Be safe and enjoy your Memorial Day Weekend!

On with the Hop! Click the Next button below to visit Karen Ksenzakovic’s blog.

And just in case you get lost along the way, here’s a list of the team members participating in the hop today:


May 16 – 31 Host Code: Z6VYEYYK

Use this host code when you order $50 or more and receive a free gift from me!  The gift is your choice of any item valued up to $10.00 in the 2019-20 Annual Catalog or in the 2020 January-June Mini Catalog!  That includes some of the Host Exclusive stamp sets!

If your order is over $150, please do not use the host code since you’ll receive your own Host Dollars plus I’ll still send you the free gift!  This host code can be used by anyone, no commitment required.  Let me know if you have any questions.


If you need any stamping supplies, I’d be very happy to be your Demonstrator.  Just click on the Shop Now Button on the right side of the screen to go directly to my online store or contact me if you have any questions.  Happy Stamping!

Thanks for visiting!

Akiko

  • Visit my online store here
  • See the current Stampin’ Up! clearance rack specials here
  • Earn FREE Stampin’ Up! products through my Wildflower Frequent Shopper Program – my way of saying thank you to my frequent shopper online customers.
  • Sign up for my weekly newsletter here
  • Have any questions? I’d be happy to help, click here to contact me.

Cardstock Cuts for this project:

  • Pool Party – 5-1/2″ x 8-1/2″ card base scored at 4-1/4″, 1-1/4″ x 5-1/4″ (embossed front), 1/2″ x 5-1/4″ (inside trim)
  • Poppy Parade – 4″ x 4-1/2″ (solid poppy die cuts)
  • Real Red – 4″ x 4-1/2″ (outline poppy die cuts)
  • Basic Black – 1″ x 3-1/2″ (poppy center die cuts)
  • Whisper White – 4″ x 5-1/4″ (inside panel), 1/2″ x 2″ (label)
  • Peaceful Poppies DSP – 4″ x 5-1/4″ (card front background)

Stampin’ Up! products used in this project:


Stampin’ Up! Outdoor Barbecue Birthday Card for the Happy Inkin’ Thursday Blog Hop

Good Morning! Welcome to the Happy Inkin’ Thursday Blog Hop! When I saw the Stampin’ Up! Outdoor Barbecue cling stamp set, I knew I had to have it. The men in my family love to cook and the barbecue grill is their main tool. So today’s card is dedicated to them! You can find the supplies I used to create this card at the bottom of my post along with the sizes of cardstock used.

We have a color challenge for the hop this week, and here is the color palette we are using:

My layout was inspired by CAS(E) this Sketch #371:

I adhered a panel of the Night of Navy Plaid Country Club designer series paper to a Night of Navy card base with multipurpose liquid glue. I embossed a Garden Green square with the Corrugated 3D embossing folder and adhered it to the panel with multipurpose liquid glue. I used the Layering Ovals Dies to cut Sahara Sand and Night of Navy Ovals for the background.

I stamped the grill from the Stampin’ Up! Outdoor Barbecue stamp set in Memento Tuxedo Black on a Whisper White panel. I also stamped the top of the grill in Memento Tuxedo Black on a Basic Gray panel and fussy cut it out. I fussy cut the Whisper White grill, making two pieces – the top and bottom. I colored the bottom with Smoky Slate Stampin Blends and the Whisper White top with Ivory (shelf) and Real Red (chimney) Stampin Blends and adhered the Basic Gray hood on top. I positioned the grill parts on the Sahara Sand panel and stamped the flame from the Stampin’ Up! Outdoor Barbecue stamp set in Daffodil Delight.

I adhered the Sahara Sand oval to the Night of Navy oval with multipurpose liquid glue. I attached the bottom of the grill with multipurpose liquid glue and the top with dimensionals. I adhered the oval to the card base with multipurpose liquid glue. I stamped the sentiment from the Stampin’ Up! Outdoor Barbecue stamp set in Night of Navy ink on a strip of Whisper White. I cut it out with the long small Stitched Rectangle Die and adhered it to the card front with multipurpose liquid glue.

For the inside of the card, I stamped the sentiment from the Band Together stamp set in Night of Navy ink on a panel of Whisper White. I stamped the burger in the bottom corner and colored it with Granny Apple Green, Poppy Parade, Pumpkin Pie and Ivory Stampin Blends. I adhered a strip of the Night of Navy plaid DSP to the bottom and adhered it to a Garden Green mat with multipurpose liquid glue. I adhered the layered panel to the inside of the card.

Sadly, the Stampin’ Up! Outdoor Barbecue stamp set is on the retiring list and won’t be around for much longer, but I am so ready for a summer cook out! The menu can be burgers & hot dogs, or steaks, or ribs or even grilled veggies. What’s your favorite summer cook out dish?

On with the Hop! Click the Next button below to visit Karen Ksenzakovic’s blog.

And just in case you get lost along the way, here’s a list of the team members participating in the hop today:


Stampin’ Up! Last Chance Products are Going Fast!

Stampin’ Up has posted the retirement lists for the 2019-2020 Annual Catalog and January-June 2020 Mini Catalog in preparation for the release of the new 2020-2021 Annual Catalog. The items on the lists are only available while supplies last from now through June 2!  And some of the items are available at a discount!!

Click on the picture below to head over to my Online Store to shop the retiring products:

Have fun shopping and let me know if you have any questions!


The June Paper Pumpkin Kit is a Box of Sunshine!

What is a Box of Sunshine? It is a box filled with yellow, happy fun things to cheer the recipient! The June Paper Pumpkin kit is an exclusive Sara-inspired to help you #sharesunshine. It includes supplies for eight handmade cards and is specially designed to help you create a box full of cheer. Once you’ve made all the cards, use any leftover pieces to decorate the box. Fill it with yellow goodies, add the included adhesive label, address it to someone special, and brighten their life with a little sunshine! See my Promotions page for all the details.

If you’re interested in subscribing to Paper Pumpkin, you can either sign up for a subscription where you are billed monthly for your kit or you can purchase a prepaid subscription in my online store. To see more information and to sign up for the monthly subscription click here. To see the options for prepaid subscriptions in my online store, click here.


May 1 – 15 Host Code: T323M33B

May 16 – 31 Host Code: Z6VYEYYK

Use this host code when you order $50 or more and receive a free gift from me!  The gift is your choice of any item valued up to $10.00 in the 2019-20 Annual Catalog or in the 2020 January-June Mini Catalog!  That includes some of the Host Exclusive stamp sets!

If your order is over $150, please do not use the host code since you’ll receive your own Host Dollars plus I’ll still send you the free gift!  This host code can be used by anyone, no commitment required.  Let me know if you have any questions.


If you need any stamping supplies, I’d be very happy to be your Demonstrator.  Just click on the Shop Now Button on the right side of the screen to go directly to my online store or contact me if you have any questions.  Happy Stamping!

Thanks for visiting!

Akiko

  • Visit my online store here
  • See the current Stampin’ Up! clearance rack specials here
  • Earn FREE Stampin’ Up! products through my Wildflower Frequent Shopper Program – my way of saying thank you to my frequent shopper online customers.
  • Sign up for my weekly newsletter here
  • Have any questions? I’d be happy to help, click here to contact me.

Cardstock Cuts for this project:

  • Night of Navy – 4-1/4″ x 11″ card base scored at 5-1/2″, 3″ x 4″ (oval die cut)
  • Garden Green – 3-3/4″ x 3-3/4″ (embossed panel), 4″ x 5-1/4″ (inside mat)
  • Sahara Sand – 2-1/2″ x 3-1/2″ (oval die cut)
  • Basic Gray – 1-1/2″ x 2″ (grill hood)
  • Whisper White – 3-3/4″ x 5″ (inside panel), 2-1/2″ x 3″ (grill), 1″ x 3″ (label)

Stampin’ Up! products used in this project:


Stampin’ Up! Forever Blossoms Birthday Card for the Happy Inkin’ Thursday Blog Hop

Good Morning! Welcome to the Happy Inkin’ Thursday Blog Hop! I have several birthdays coming up so I made a birthday card to share today and I had to use the beautiful Stampin’ Up! Forever Blossoms bundle. You can find the supplies I used to create this card at the bottom of my post along with the sizes of cardstock used.

We have a sketch challenge for the hop this week, and here is the sketch we are using:

I embossed a Pool Party panel with the Parisian Flourish 3D embossing folder and adhered it to a Pool Party card base with multipurpose liquid glue. I cut a stitched scalloped rectangle from Whisper White card stock with the Stitched So Sweetly Dies. I cut a panel of the pool party cherry blossoms paper from the Parisian Blossoms specialty designer series paper and adhered it to the die cut with multipurpose liquid glue. I adhered the panel on the card front with dimensionals.

I stamped the cherry blossom branch from the Stampin’ Up! Forever Blossoms cling stamp set in Basic Gray ink on a Whisper White panel and cut it out with the coordinating die from the Cherry Blossoms Dies. I colored the flowers and buds with the Petal Pink Stampin’ Blends and the leaves and stems with the Old Olive Stampin’ Blends. I brushed the clear Wink of Stella on the flowers and buds to give it a little sparkle and added Champagne rhinestones to the flower centers. I adhered the branch to the middle panel with multipurpose liquid glue.

I stamped the happy birthday sentiment from the Timeless Tulips stamp set on a strip of Petal Pink card stock using VersaMark Ink. I sprinkled it with white embossing powder and heat set until shiny. I layered it on strips of Parisian Blossoms DSP and adhered them all together with glue dots. I adhered the strips on the panel with more glue dots and finished it off with a pretty Petal Pink bow!

For the inside of the card, I stamped the cherry blossom branch in Petal Pink ink (after stamping off once) on a Whisper White panel. I trimmed the bottom with a strip of the foil cherry blossom DSP and adhered the panel to the inside of the card with multipurpose liquid glue. I also stamped the cherry blossom branch on a Whisper White envelope in Petal Pink ink so that it would match.

The Stampin’ Up! Forever Blossoms stamp set and Cherry Blossoms Dies make the most beautiful feminine birthday cards! I am so glad that they will be carrying over into the new 2020-2021 Annual Catalog.

On with the Hop! Click the Next button below to visit Karen Ksenzakovic’s blog.

And just in case you get lost along the way, here’s a list of the team members participating in the hop today:


May 1 – 15 Host Code: T323M33B

Use this host code when you order $50 or more and receive a free gift from me!  The gift is your choice of any item valued up to $10.00 in the 2019-20 Annual Catalog or in the 2020 January-June Mini Catalog!  That includes some of the Host Exclusive stamp sets!

If your order is over $150, please do not use the host code since you’ll receive your own Host Dollars plus I’ll still send you the free gift!  This host code can be used by anyone, no commitment required.  Let me know if you have any questions.


If you need any stamping supplies, I’d be very happy to be your Demonstrator.  Just click on the Shop Now Button on the right side of the screen to go directly to my online store or contact me if you have any questions.  Happy Stamping!

Thanks for visiting!

Akiko

  • Visit my online store here
  • See the current Stampin’ Up! clearance rack specials here
  • Earn FREE Stampin’ Up! products through my Wildflower Frequent Shopper Program – my way of saying thank you to my frequent shopper online customers.
  • Sign up for my weekly newsletter here
  • Have any questions? I’d be happy to help, click here to contact me.

Cardstock Cuts for this project:

  • Pool Party – 4-1/4″ x 11″ card base scored at 5-1/2″, 4-1/4″ x 5-1/2″ (embossed panel)
  • Whisper White – 4″ x 5-1/4″ (inside panel), 2-5/8″ x 3-3/4″ (scalloped rectangle), 2-1/2″ x 4-1/2″ (cherry blossom branch die cut)
  • Petal Pink – 1/2″ x 2″ (label)
  • Parisian Blossoms DSP – 2-1/8″ x 3-1/4″ (blossom panel), 1/2″ x 4″ (inside trim), 1/2″ x 3″ (foil flowers), 1/4″ x 4″ (foil words)

Stampin’ Up! products used in this project:


Stampin’ Up! Welcome Easter New Baby Card

Good Morning! Today I am sharing a fun new baby card made with the cute little lamb from the Stampin’ Up! Welcome Easter cling stamp set. This set has three really cute baby animals, some accent stamps and wonderful sentiments for Easter or celebrating little ones. Sadly is it being retired, so I just had to make a colorful baby card. You can find the supplies I used to create this card at the bottom of my post along with the sizes of cardstock used.

I adhered a panel of the polka dot paper from the Best Dressed designer series paper to a Pear Pizzazz mat and layered Dinoroar designer series paper pieces on top of it at wonky angles. I cut three stitched hearts using the little heart die from the retiring Stitched Labels Dies from Pear Pizzazz, Mango Melody and Lovely Lipstick card stock and adhered them around the card because babies and hearts go together – right? I adhered the decorated panel to a Daffodil Delight Card base with dimensionals.

I stamped the sentiment in Pear Pizzazz ink on a Whisper White panel and cut it out with the die from the Stitched Rectangle Dies. I added glue dots on the back and attached some ribbon and added a Pretty Peacock rhinestone before adhering it to the card with more glue dots.

I stamped the little lamb from the Stampin’ Up! Welcome Easter stamp set in Basic Gray ink on a Whisper White. I colored it with Light Old Olive, Light Petal Pink and Ivory Stampin’ Blend markers and cut it out with a Layering Circle Die. I cut a scalloped circle from Pretty Peacock and adhered it to the back and popped the lamb on the card with dimensionals.

I adhered a strip of the polka dot Best Dressed DSP to the bottom of a Whisper White panel and added three more hearts to the top corner. I adhered the panel to a Pear Pizzazz mat and then to the inside of the card with multipurpose liquid glue.

Baby cards are always good for a smile and I think any of the baby animals from the Stampin’ Up! Welcome Easter stamp set would have been cute. And fun, colorful designer series paper always goes great in a baby card! Thanks for stopping by and have a great day!


Stampin’ Up! 2019-20 Annual Catalog and January-June 2020 Mini Catalog Retiring Lists Have Posted!

Stampin’ Up has posted the retirement lists for the 2019-2020 Annual Catalog and January-June 2020 Mini Catalog today in preparation for the release of the new 2020-2021 Annual Catalog. The items on the lists are only available while supplies last from now through June 2!  And some of the items are available at a discount!!

Click on the picture below to head over to my Online Store to shop the retiring products:

Have fun shopping and let me know if you have any questions!


May 1 – 15 Host Code: T323M33B

Use this host code when you order $50 or more and receive a free gift from me!  The gift is your choice of any item valued up to $10.00 in the 2019-20 Annual Catalog or in the 2020 January-June Mini Catalog!  That includes some of the Host Exclusive stamp sets!

If your order is over $150, please do not use the host code since you’ll receive your own Host Dollars plus I’ll still send you the free gift!  This host code can be used by anyone, no commitment required.  Let me know if you have any questions.


If you need any stamping supplies, I’d be very happy to be your Demonstrator.  Just click on the Shop Now Button on the right side of the screen to go directly to my Online store or contact me if you have any questions.  Happy Stamping!

Thanks for stopping by and have a great day!

Akiko

  • Visit my Online store here
  • See the current Stampin’ Up! clearance rack specials here
  • Earn FREE Stampin’ Up! products through my Wildflower Frequent Shopper Program – my way of saying thank you to my frequent shopper online customers.
  • Sign up for my monthly newsletter here
  • Have any questions? I’d be happy to help, click here to contact me.

Cardstock Cuts for this project:

  • Daffodil Delight – 4-1/4″ x 11″ card base scored at 5-1/2″
  • Pear Pizzazz – (2) 4″ x 5-1/4″ (mats), 1″ x 2″ (heart die cuts)
  • Mango Melody – 1″ x 2″ (heart die cuts)
  • Lovely Lipstick – 1″ x 2″ (heart die cuts)
  • Pretty Peacock – 3″ x 3″ (lamb mat)
  • Whisper White – 3-7/8″ x 5-1/8″ (inside panel), 1-3/4″ x 2-1/4″ (label), 3″ x 3″ (lamb)
  • Best Dressed DSP – 3-7/8″ x 5-1/8″ (front background), 1/2″ x 3-7/8″ (inside trim)
  • Dinoroar DSP – 2″ x 3-3/4″ (triangles), 3/4″ x 4″ (semicircles)

Stampin’ Up! products used in this project:


Stampin’ Up! Tropical Oasis Memories and More Note Cards

Good Morning! Today I have a set of four fun note cards made with the Stampin’ Up! Tropical Memories and More card pack. You can find the supplies used to create this card at the bottom of my post along with the sizes of cardstock used.

The Memories and More card packs by Stampin’ Up! have 6″ x 4″ and 3″ x 4″ double sided cards that all coordinate and special laser cut stickers. This has the following advantages:

  • It makes card making easy and quick for the beginner paper crafter or busy person with limited crafting time.
  • The cards are perfectly sized and designed for Memory Keeping Journal pocket pages and Scrapbooking.

And the Stampin’ Up! Tropical Oasis Memories and More card pack has great nostalgic images that perfectly capture a relaxing tropical paradise! Here are four cards that I made using some of the cards in the card pack:

I wanted to make a simple set of 4 note cards with a tropical theme and I used the Magnolia Lane Large Specialty Cards and Envelopes. These are made from a thinner craft paper but with a pretty white foil decoration and the rustic feel goes well with the tropical theme. I ended up covering up the white foil on the cards, but you can see it trimming the envelope sides. The size of the card bases is 4-1/4″ x 6-1/4″, so they go perfectly with the large cards in the Memories and More card packs.

My concept was to use a 3″ x 4″ card with a cute image and surround it with a coordinating all over design so I started by selecting 4 of the 3″ x 4″ cards. I couldn’t find good backgrounds for all of them, so I looked through the Tropical Oasis designer series paper and found good matches. For this card, I paired the cute ukulele image with the lily Tropical Oasis designer series paper cut to 4″ x 6″. I used Shaded Spruce to mat the small card and adhered everything with multipurpose liquid glue.

With this card, I used Shaded Spruce as a mat again and paired the hibiscus and frangipani with the 4″ x 6″ bird of paradise card from the Stampin’ Up! Tropical Oasis Memories and More card pack.

I feel bad so many beaches are closed, but in carefree times, this is a great idea. And I love these vintage station wagons! I paired this cute 3″ x 4″ Stampin’ Up! Tropical Oasis Memories and More card with an Early Espresso mat and the cute station wagon paper from the Tropical Oasis designer series paper for the background.

For my final card in the set, I chose this fabulous flamingo and paired it with the flamingo background 4″ x 6″ Stampin’ Up! Memories and More card. I used Shaded Spruce for the mat.

For the inside of each card, I cut a 4″ x 6″ panel of Whisper White and trimmed the bottom with the same papers as the background. I added one of the flower stickers to the top corner and that was it. Quick and easy way to create a fun note card set.

Isn’t this a fun set of note cards? I have really enjoyed playing with the Stampin’ Up! Memories and More card packs because they are so versatile and add another dimension to coordinating with other products in the same suite. And there are still so many cute images left in the card pack that I still need to put to good use.


April 1 – 15 Host Code: N39D7TBK

April 16 – 30 Host Code: SJ9ZJ46Z

Use this host code when you order $50 or more and receive a free gift from me!  The gift is your choice of any item valued up to $10.00 in the 2019-20 Annual Catalog or in the 2020 January-June Mini Catalog!  That includes some of the Host Exclusive stamp sets!

If your order is over $150, please do not use the host code since you’ll receive your own Host Dollars plus I’ll send you the free gift!  This host code can be used by anyone, no commitment required.  Let me know if you have any questions.


If you need any stamping supplies, I’d be very happy to be your Demonstrator.  Just click on the Shop Now button on the right side of the screen to go directly to my online store or contact me if you have any questions.  Happy Stamping!

Thanks for stopping by and have a great day!

Akiko

  • Visit my online store here
  • See the current Stampin’ Up! clearance rack specials here
  • Earn FREE Stampin’ Up! products through my Wildflower Frequent Shopper Program – my way of saying thank you to my frequent shopper online customers.
  • Sign up for my weekly newsletter here
  • Have any questions? I’d be happy to help, click here to contact me.

Cardstock Cuts for this project:

  • Shaded Spruce – (3) 3-1/8″ x 4-1/8″
  • Early Espresso – 3-1/8″ x 4-1/8″
  • Whisper White – (4) 4″ x 6″ (inside panels)
  • Tropical Oasis DSP – (2) 4″ x 6″ (front backgrounds), (2) 1/2″ x 4″ (inside trims)

Stampin’ Up! products used in this project:


Stampin’ Up! Dressed To Impress Mother’s Day Card for the Inkin’ Krew Monthly Blog Hop

Good Morning! Today is the day for the Monthly Inkin’ Krew Team Blog Hop and our theme for the month is ‘For the Girls/Ladies”. So my card uses the Stampin’ Up! Dressed To Impress bundle to create a girly-girl Mother’s Day card. You can find the supplies used to create this card at the bottom of my post along with the sizes of cardstock used.

I embossed a small panel of Pear Pizzazz card stock with the Parisian Flourish 3D embossing folder and adhered it to the bottom of a panel of floral Best Dressed designer series paper with multipurpose liquid glue. Then I adhered the panel to a Daffodil Delight card base with multipurpose liquid glue. I stamped the Happy Mother’s Day sentiment from the Stampin’ Up! Dressed To Impress in Old Olive ink on a strip of Whisper White and cut it out with the die from the Ornate Frames Dies. I cut the coordinating fancy background frame from Blackberry Bliss card stock and adhered the label on top. I adhered the layered label to the bottom of the card with multipurpose liquid glue and finished it with a Lovely Lipstick enamel dot.

I used the largest stitched circle die from the Stitched Shapes Dies to cut a circle in the dotted Best Dressed designer series paper. I adhered this to a Blackberry Bliss scalloped circle cut from the Layering Circles Dies and then to the card base with dimensionals. I stamped each of the flowers from the Stampin’ Up! Dressed To Impress photopolymer stamp set in Memento Tuxedo Black ink on Whisper White and cut them out with the coordinating die from the All Dressed Up Dies. I colored them with Lovely Lipstick, Light Mossy Meadow and Light Daffodil Delight Stampin’ Blends and adhered them to the dotted circle with multipurpose liquid glue.

I stamped two shoes, the perfume bottle and the lipstick from the Stampin’ Up! Dressed To Impress stamp set in Memento Tuxedo Black in on Whisper White and cut them out with the dies from the All Dressed Up Dies. I colored the shoes with Light Purple Posey, Light Petal Pink and Dark Blackberry Bliss Stampin’ Blends and glued them together. I colored the lipstick with Light Basic Black, Light and Dark Smoky Slate and Light and Dark Lively Lipstick Stampin’ Blends. I colored the perfume bottle with Light Pretty Peacock, Light So Saffron and Light Pool Party Stampin Blends. While coloring with the Stampin’ Blends, I used the color lifter to add highlights. I adhered the layered shoes, perfume bottle and lipstick to the circle with dimensionals. I added a Daffodil Delight ruched ribbon bow with a glue dot to finish the card front.

For the inside of the card, I trimmed a strip of the floral Best Dressed designer series paper to the bottom of a Whisper White panel and adhered it to the inside of the card. I made another flower die cut like the ones on the front and adhered it to the corner.

In retrospect, I think today’s card is a little over the top. Do you know anyone who owns a pair of lavender heels? But I also think we should go over the top for our moms, especially on Mother’s Day. So I’ll pick another time to show restraint.

On with the Hop. Be sure to check out each team member’s project. Click on the Next Blog button to move forward to Leslie Larkin’s project or click the Previous Blog button to move back to see the project that Mary Deatherage created. Have fun and Happy Stamping!

And here is the complete list of Blog Hop participants in case you get lost along the way:


April 1 – 15 Host Code: N39D7TBK

Use this host code when you order $50 or more and receive a free gift from me!  The gift is your choice of any item valued up to $10.00 in the 2019-20 Annual Catalog or in the 2020 January-June Mini Catalog!  That includes some of the Host Exclusive stamp sets!

If your order is over $150, please do not use the host code since you’ll receive your own Host Dollars plus I’ll send you the free gift!  This host code can be used by anyone, no commitment required.  Let me know if you have any questions.


If you need any stamping supplies, I’d be very happy to be your Demonstrator.  Just click on the Shop Now button on the right side of the screen to go directly to my online store or contact me if you have any questions.  Happy Stamping!

Thanks for stopping by and have a great day!

Akiko

  • Visit my online store here
  • See the current Stampin’ Up! clearance rack specials here
  • Earn FREE Stampin’ Up! products through my Wildflower Frequent Shopper Program – my way of saying thank you to my frequent shopper online customers.
  • Sign up for my weekly newsletter here
  • Have any questions? I’d be happy to help, click here to contact me.

Cardstock Cuts for this project:

  • Daffodil Delight – 4-1/4″ x 11″ card base scored at 5-1/2
  • Pear Pizzazz – 2″ x 4″ (embossed panel)
  • Blackberry Bliss – 3-1/2″ x 3-1/2″ (scalloped circle), 2″ x 3-1/2″ (fancy label mat)
  • Whisper White – 4″ x 5-1/4″ (inside panel), 1-1/4″ x 3-1/2″ (label), 3″ x 7″ (Dressed to Impress die cuts)
  • Best Dressed DSP – 4″ x 5-1/4″ (front background), 1/2″ x 4″ (inside trim) 3-1/2″ x 3-1/2″ (polka dot circle)

Stampin’ Up! products used in this project:


Stampin’ Up! Beautifully Braided Kindness Card

Good Morning! Today I’m sharing a card made with the pretty Stampin’ Up! Beautifully Braided photopolymer stamp set. This stamp set has a beautiful leaf branch and wonderful sentiments. You can find the supplies used to create this card at the bottom of my post along with the sizes of cardstock used.

I stamped the leaf branch several times in Pear Pizzazz ink on a Whisper White panel. The stamp is very large, so I used my Stamparatus. It is a photopolymer stamp set, so you can see through it and place it before stamping to get the arrangement that you want to fill the panel. I colored the leaves with the Light So Saffron, berries with Light Rich Razzleberry and the stems with the Light Old Olive Stampin’ Blends. Then I colored the background with the Light Soft Sea Foam Stampin’ Blend.

I stamped the sentiment from the Stampin’ Up! Beautifully Braided stamp set in Pear Pizzazz ink on Whisper White. I adhered it to a Pear Pizzazz mat with multipurpose liquid glue and then to the stamped panel. I adhered the stamped panel to another Pear Pizzazz mat with multipurpose liquid glue and then popped it on a Soft Seafoam card base with dimensionals. I added a green rhinestone to the label to finish the front.

I decorated the inside by stamping the border from the Stampin’ Up! Beautifully Braided stamp set in Pear Pizzazz ink on a Whisper White Panel. I stamped some leaves in Pear Pizzazz ink in the corner and colored it the same as the front panel. I adhered the panel to the inside of the card with multipurpose liquid glue.

The Stampin’ Up! Beautifully Braided stamp set also comes in a bundle with the Braided Border Punch.


April 1 – 15 Host Code: N39D7TBK

Use this host code when you order $50 or more and receive a free gift from me!  The gift is your choice of any item valued up to $10.00 in the 2019-20 Annual Catalog or in the 2020 January-June Mini Catalog!  That includes some of the Host Exclusive stamp sets!

If your order is over $150, please do not use the host code since you’ll receive your own Host Dollars plus I’ll send you the free gift!  This host code can be used by anyone, no commitment required.  Let me know if you have any questions.


If you need any stamping supplies, I’d be very happy to be your Demonstrator.  Just click on the Shop Now button on the right side of the screen to go directly to my online store or contact me if you have any questions.  Happy Stamping!

Thanks for stopping by and have a great day!

Akiko

  • Visit my online store here
  • See the current Stampin’ Up! clearance rack specials here
  • Earn FREE Stampin’ Up! products through my Wildflower Frequent Shopper Program – my way of saying thank you to my frequent shopper online customers.
  • Sign up for my weekly newsletter here
  • Have any questions? I’d be happy to help, click here to contact me.

Cardstock Cuts for this project:

  • Soft Seafoam – 4-1/4″ x 11″ card base scored at 5-1/2
  • Pear Pizzazz – 3-7/8″ x 5-1/8″ (front mat), 7/8″ x 3-3/4″ (label mat),
  • Whisper White – 3-3/4″ x 5″ (front panel), 3/4″ x 3-3/4″ (label)

Stampin’ Up! products used in this project: