Good Morning! The Stampin’ Up! Terrific Toadstools bundle is from the new Mini Catalog is a whimsical and fun mushroom themed stamp set that coordinates with the Sale-A-Bration Toadstool Gardens designer series paper. Sale-A-Bration is ending soon, so I decided to make this fun-fold hello card with these products. You can find the products I used at the bottom of my post along with the card stock sizes.

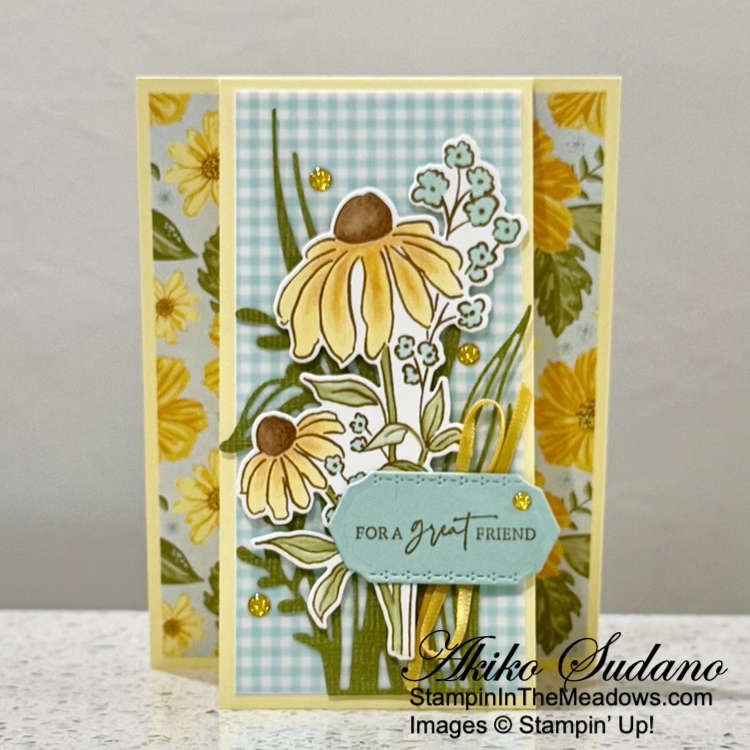
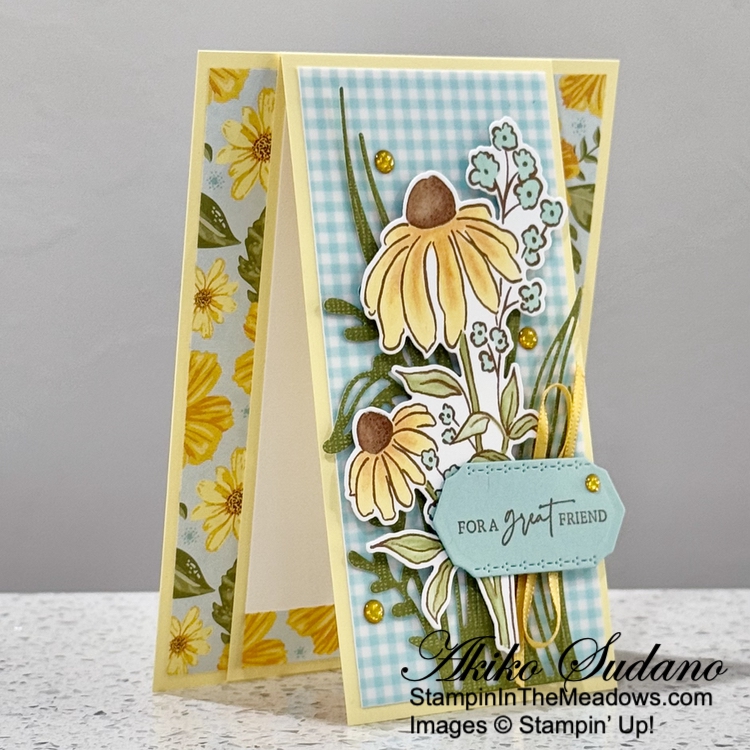
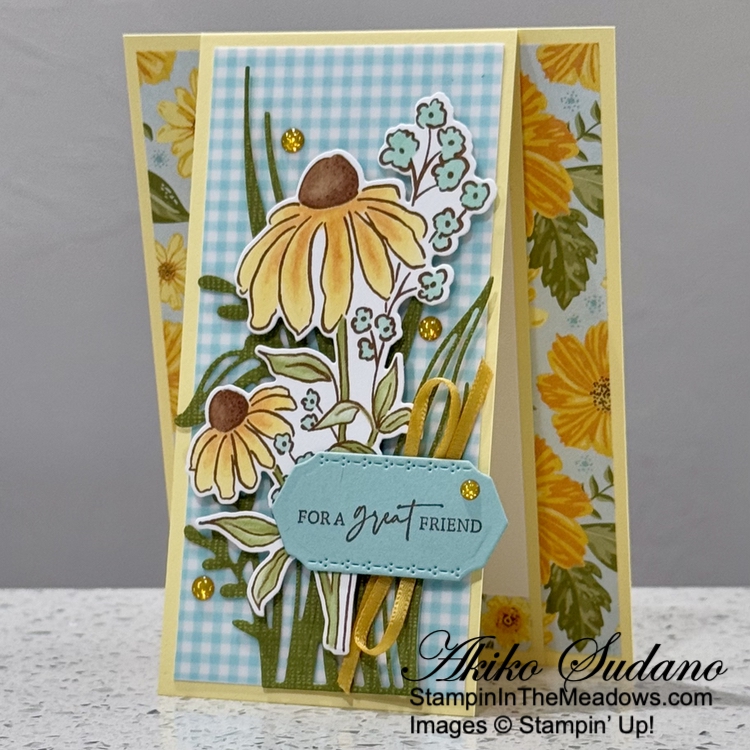
I adhered panels of Toadstool Gardens designer series paper to Pebbled Path mats before adhering them to the front and end sections of a Melon Mambo card base. I adhered striped patterns of the DSP to the middle sections (see picture below). I used the second largest circle from the Stylish Shapes dies to cut a Gray Granite panel of the DSP and adhered it to the center panel with liquid glue.

I used the leaf sprigs from the Delicate Forest dies to cut a granny Apple Green panel and adhered them to the card with liquid glue. I stamped the mushroom caps from the Stampin’ Up! Terrific Toadstools bundle using Melon Mambo and Pumpkin Pie inks on Basic White and punched them out with the Terrific Toadstools punch. I stamped the mushroom stems using Gray Granite ink on Basic White and fussy cut them with my paper snips. I adhered the stems to the caps with liquid glue and popped them on the card with dimensionals.
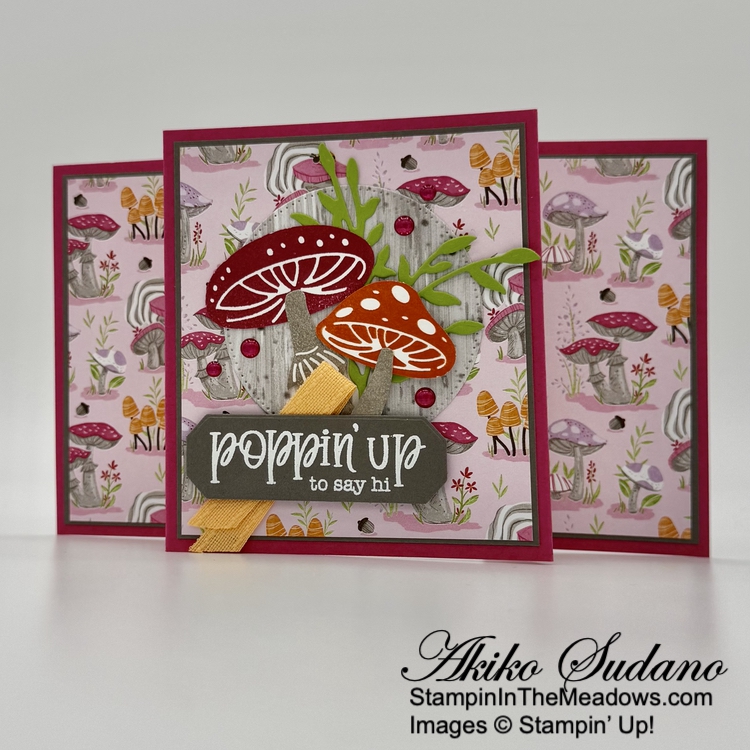
I stamped the sentiment from the Stampin’ Up! Terrific Toadstools stamp set using Versamark ink on Pebbled Path card stock. I sprinkled it with white embossing powder, shook off the excess and heated it with my heat tool. I cut it out with the short label die from the Delicate Forest dies. I folded a length of Peach Pie ribbon and adhered it to the back of the label with glue dots and popped the label on the card with dimensionals. I finished the card with Melon Mambo glossy dots.
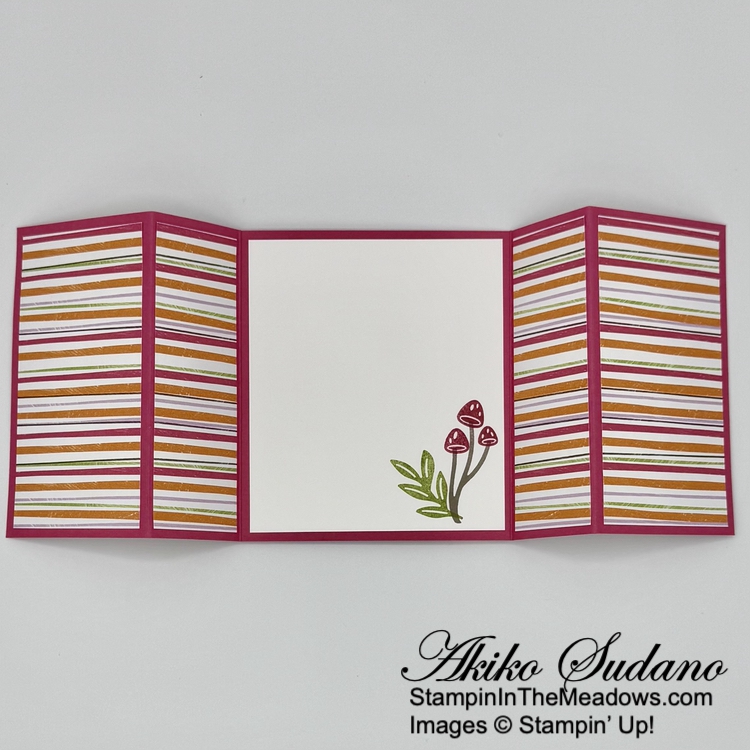
The inside panel is on the back of the front center panel and I stamped the mushroom, stems and leaf sprig from the Stampin’ Up! Terrific Toadstools stamp set in Melon Mambo, Gray Granite and Granny Apple Green inks on Basic White. I adhered the panel to the card and adhered panels of the striped Toadstool Gardens DSP to each of the back panels.
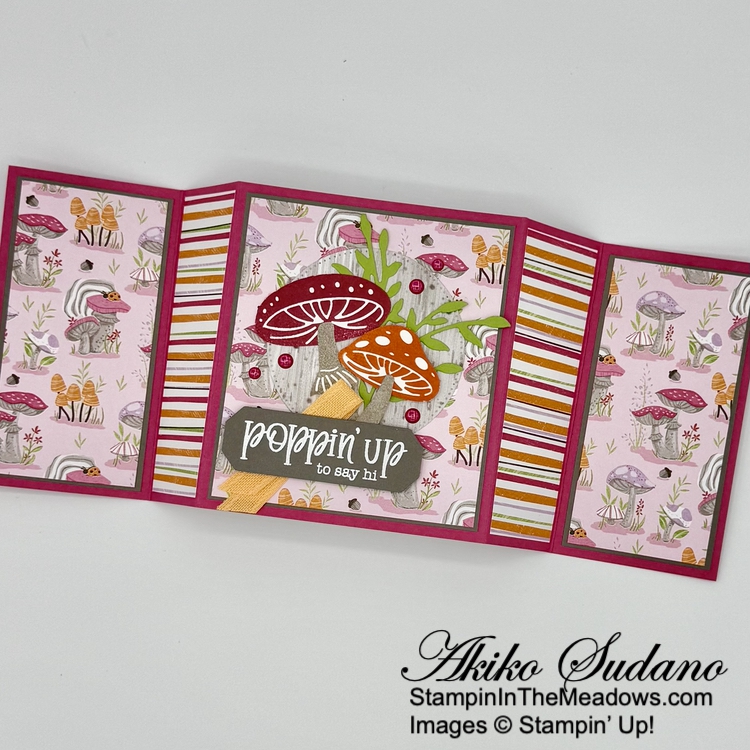
The Stampin’ Up! Terrific Toadstools bundle has different style mushroom tops and stems for you to mix and match to create your own mushrooms. And there are cute little ladybugs that you can stamp too! The punch punches out the mushrooms without the white border, so it’s pretty easy to use. This is the last week to get the Toadstool Gardens 6″ x 6″ designer series paper for FREE as a Sale-A-Bration item. It is a bright and colorful set of papers that are perfect for Spring. This is part of the reason I like this fun fold card so much, it shows off the pretty DSP!
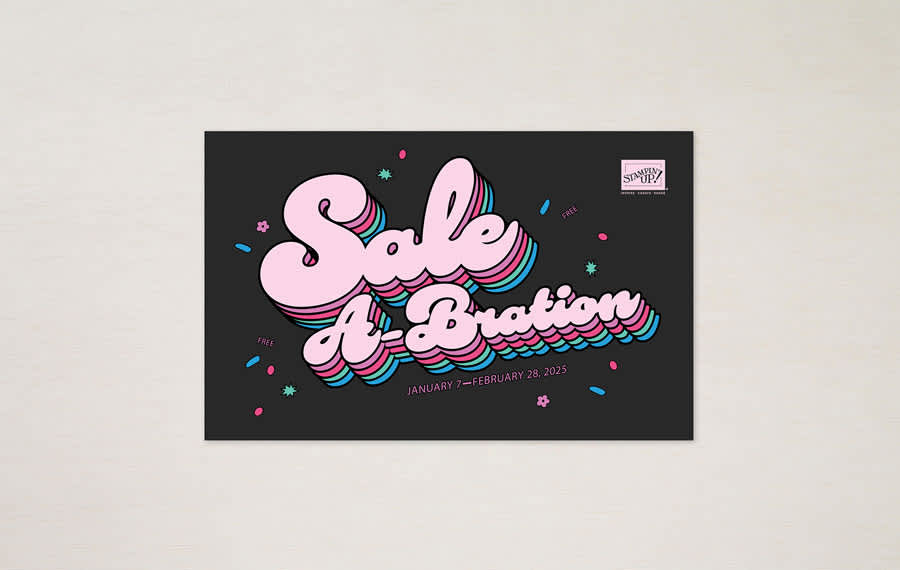
Last Week for Sale-A-Bration !!
Sale-A-Bration is the biggest Stampin’ Up! promotion of the year. The best part of Sale-A-Bration is that you earn FREE items for every $60 worth of products you purchase. There are items that you get for $60 and there are items you can get for $120. You can select your FREE Sale-A-Bration items when you checkout.
Another benefit of Sale-A-Bration is when you host a workshop with sales over $300 or have an individual order over $300, you get to choose an additional $30 worth of products from the Stampin’ Up! catalog or Online Store for FREE!
And Sale-A-Bration is the best time to join Stampin’ Up! as a new Demonstrator. During Sale-A-Bration, new Demonstrators who purchase a starter kit by choosing $125 worth of products for only $99 (includes shipping) have two FREE bonus options to add to your starter kit.
- Option 1: Your choice of TWO marker sets from our Stampin’ Write Marker Assortments (Brights, Neutrals, Regals, Subtles), PLUS the Handmade Designs stamp set, a beautiful stamp set exclusively designed to work with them.
- Option 2: Your Choice of an additional $30 in FREE products
Sale-A-Bration runs through February 28, 2025. Visit my Online Store to start shopping now.
Current Host Code: FYMGA4AN
Use this host code when you order $50 or more and receive a Thank You gift from me! The free gift is your choice of any item currently available valued up to $10.00.
If your order is over $150, please do not use the host code since you’ll receive your own Host Dollars plus I’ll still send you the Thank You gift! This host code can be used by anyone, no club or commitment required. Let me know if you have any questions.
If you need any stamping supplies, I’d be very happy to be your Demonstrator. Just click on the Shop Now Button on the right side of the screen to go directly to my Online store or contact me if you have any questions. Happy Stamping!
Thanks for stopping by and have a great day!
Akiko
- Visit my online store here
- See the current Stampin’ Up! Last Chance items here
- Earn FREE Stampin’ Up! products through my Wildflower Frequent Shopper Program – my way of saying thank you to my online frequent shopper customers.
- Have any questions? I’d be happy to help, click here to contact me.
Cardstock Cuts for this project:
- Melon Mambo – 4-1/4″ x 11″ card base scored at 2-1/4″, 3-5/8″, 7-3/8″ and 8-3/4″
- Pebbled Path – 3-1/2″ x 4″ (front center panel mat), two 2″ x 4″ panels (side DSP mats), 1-1/4″ x 3-1/4″ (label)
- Granny Apple Green – 2″ x 2-3/4″ (die cut leaf sprigs)
- Basic White – 3-1/2″ x 4″ (back center panel), 1-1/4″ x 4-1/2″ (punched mushroom caps), 1″ x 3-1/2″ (fussy cut mushroom stems)
- Toadstool Gardens 6″ x 6″ DSP – 3-3/8″ x 3-7/8″ (center panel background), two 1-7/8″ x 3-7/8″ (side panels), two 2″ x 4″ panels (back side panels), four 1-1/4″ x 4″ (front and back middle panels), 2-3/4″ x 2-3/4″ (die cut circle)
Stampin’ Up! products used in this project:
")


 Designer Series Paper")


 Bordered Ribbon")


")
")

 Designer Series Paper")