Stampin’ Up! Simply Succulents Video Tutorial

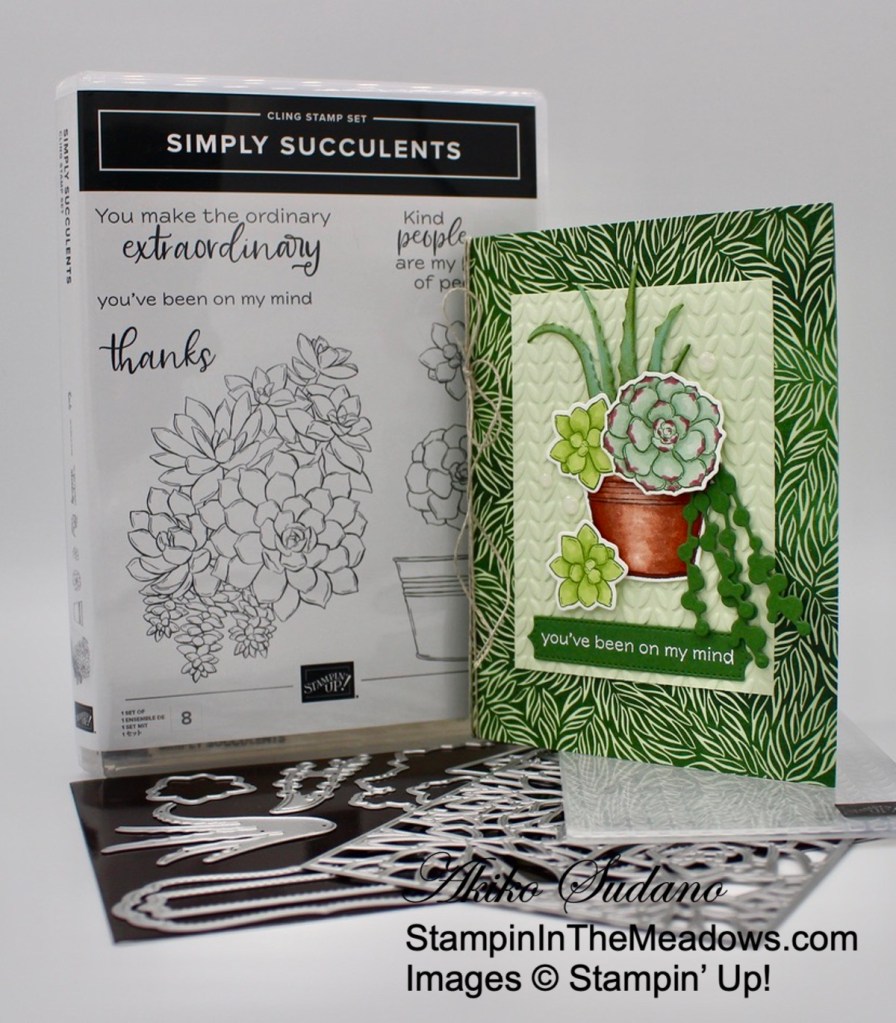
Good Morning! The Stampin’ Up! Simply Succulents bundle is new in the Jan-Jun 2021 Mini Catalog that comes out tomorrow! And it’s a great bundle! I made a simple thinking of you card with the bundle, but it’s very versatile and there’s so much more that you can do with it that I’ll be writing about in the future. You can find the currently available supplies I used at the bottom of my post along with the sizes of cardstock used.

I also entered today’s card in the Sunday Stamps SSC247 color challenge.

Here is the Facebook Live video showing how I made the card:

I posted a copy of the video in my YouTube channel here so you can view it there if you prefer.

I started by adhering a panel of the Forever Greenery designer series paper to the front of a Garden Green card base. I embossed a Soft Sea Foam panel with the Greenery Embossing Folder and adhered it to the card front. I used the Potted Succulents Dies from the Stampin’ Up! Simply Succulents bundle to cut the aloe from Mint Macaron and two of the long pearl succulents from Garden Green. I stamped the pot from the Stampin’ Up! Simply Succulents cling stamp set in Memento Tuxedo Black ink on Whisper White and cut it out with the coordinating die.

I stamped the sentiment from the Stampin’ Up! Simply Succulents stamp set in Versamark ink on a strip of Garden green and sprinkled it with white embossing powder. I heat set the embossing powder until shiny and cut the sentiment out with the coordinating pretty stitched label die. I adhered the label to the bottom of the embossed panel with glue dots. I stamped two of the large succulents and three of the smaller ones in Garden Green ink on Whisper White. I used Stampin’ Blends to color the succulents and pot – Mint Macaron and dark Rococo Rose on the large succulent, Granny Apple Green on the small succulent and Cajun Craze and the Color lifter on the Pot. See the video for the blending techniques I used – these are fairly simple blending techniques that are pretty forgiving and give you nice results.

I adhered the pot to the card front with glue dots. I sponged the edges of the aloe with Old Olive ink and adhered it with a glue dot. Next came the pearl succulents and the small succulent that were adhered with glue dots. I adhered the large succulent and the small one at the bottom of the pot with dimensionals. I added three white Elegant faceted Gems to the card front and finished the card with a double wrapped linen thread bow.

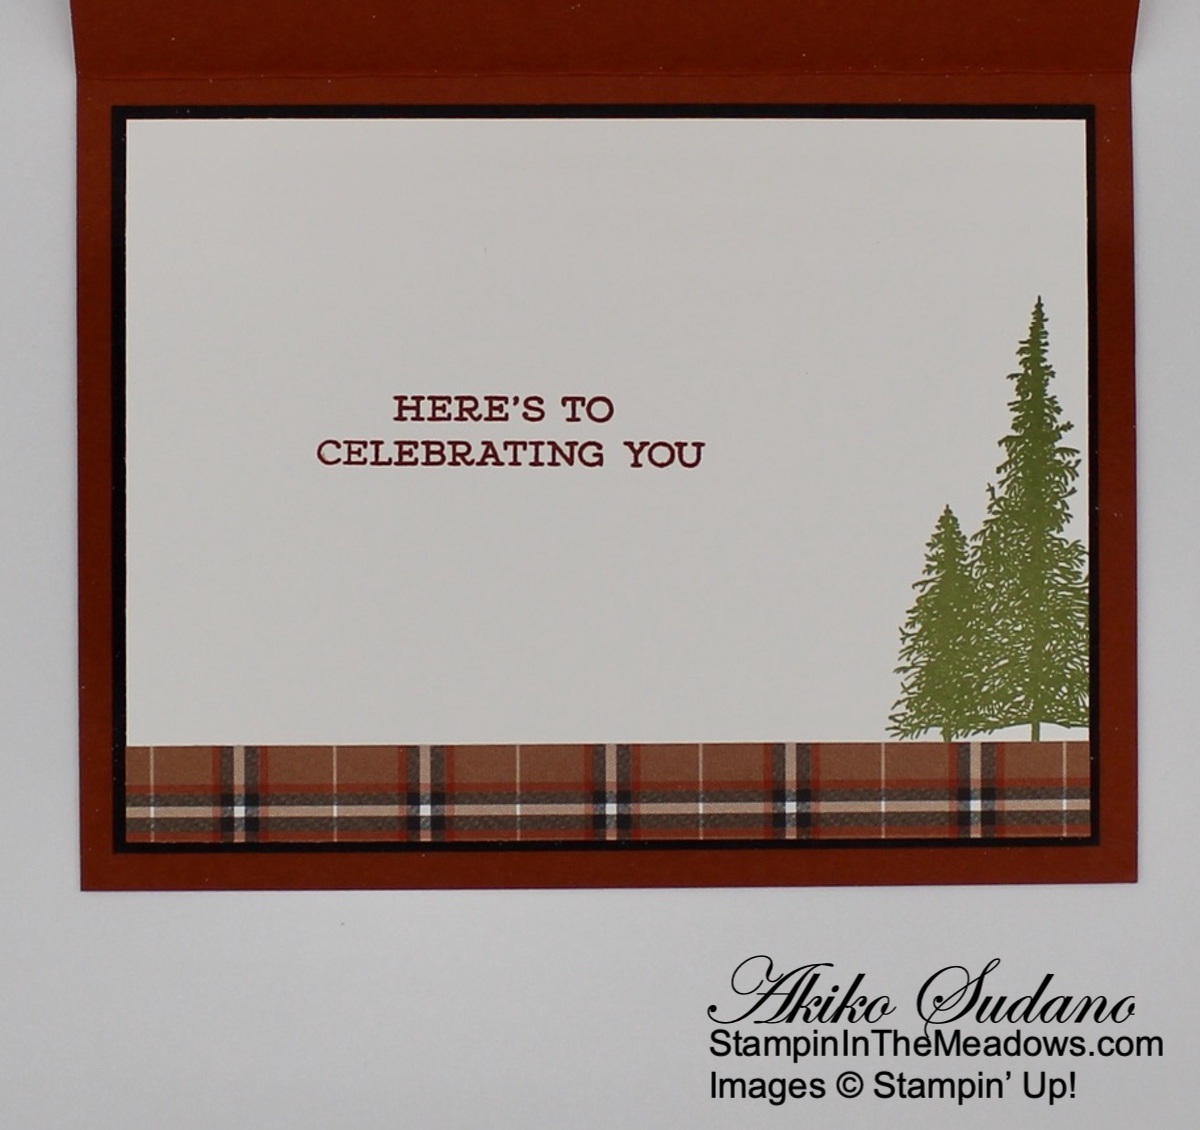
For the inside, I adhered a strip of the Forever Greenery designer series paper to the bottom of a Whisper White panel and adhered the last two colored succulents to the bottom. I adhered the panel to the inside of the card.

The Stampin’ Up! Simply Succulents bundle is a beautiful set with wonderful images and sweet sentiments. And the dies are fabulous with a die to cut out each image and pretty stitched label dies that fit each sentiment. And I can’t forget the large background die – that is sure to make beautiful cards!


January 1 – 15 Host Code: 4YZ2J366

Use this host code when you order $50 or more and receive a free gift from me!  The free gift is your choice of any item valued up to $10.00 in the 2019 – 2020 Annual Catalog or in the Aug-Dec 2020 Mini Catalog!  That includes some of the Host Exclusive stamp sets!

If your order is over $150, please do not use the host code since you’ll receive your own Host Dollars plus I’ll still send you the free gift!  This host code can be used by anyone, no club or commitment required.  Let me know if you have any questions.


If you need any stamping supplies, I’d be very happy to be your Demonstrator.  Just click on the Shop Now button on the right side of the screen to go directly to my online store or contact me if you have any questions.  Happy Stamping!

Thanks for stopping by and have a great week!

Akiko

  • Visit my online store here
  • See the current Stampin’ Up! clearance rack specials here
  • Earn FREE Stampin’ Up! products through my Wildflower Frequent Shopper Program – my way of saying thank you to my online frequent shopper customers.
  • Sign up for my weekly newsletter here
  • Have any questions? I’d be happy to help, click here to contact me.

Cardstock Cuts for this project:

  • Garden Green – 5-1/2″ x 8-1/2″ card base scored at 4-1/4″, 2″ x 2-1/2″ (pearl succulent die cuts), 1″ x 3″ (label)
  • Mint Macaron – 2-1/4″ x 2-1/2″ (aloe die cut)
  • Soft Sea Foam – 3″ x 4″ (embossed panel)
  • Whisper White – 3-3/4″ x 5″ (inside panel), 1-3/4″ x 6″ (succulent die cuts), 1-3/4″ x 1-3/4″ (flower pot die cut)
  • Forever Greenery DSP – 4-1/4″ x 5-1/2″ (front background), 1/2″ x 3-3/4″ (inside trim)

Stampin’ Up! products used in this project:


Stampin’ Up! Sweet Strawberry Thank You Card

Happy New Year! I have a Thank You card for today made with the Stampin’ Up! Sweet Strawberry bundle from the upcoming Jan-Jun 2021 Mini Catalog that is coming out on Jan 5! This is such a sweet and versatile bundle and I can’t wait until everyone can pick it up! You can find the currently available supplies used to create this card and the card stock cuts at the bottom of this post.

I embossed a Whisper White panel with the Meadow Moments embossing folder. This is one of the new slim embossing folders and I had to emboss the panel twice, so I did the top first and then the bottom. There’s a seam under the strip of Poppy Parade designer series paper, but I wanted the entire panel embossed with the sweet butterflies and flowers and planned to cover the seam anyway, so it didn’t matter. I adhered a strip of Poppy Parade DSP from the Brights 6″ x 6″ designer series paper pack across the embossed panel and adhered it to the front of a Poppy Parade card base.

I the strawberries from the Stampin’ Up! Sweet Strawberry photopolymer stamp set, both the outline stamp and the filler stamp, in Poppy Parade ink on Whisper White and cut it out with the Strawberry Builder punch. I also stamped the stem and two leaves using Granny Apple Green ink on Whisper White and cut them out with the punch. I adhered the stem to the strawberry. I cut out a Whisper White stitched circle using the Stitched Shapes Dies and a Poppy Parade scalloped circle using the Layering circles dies. I adhered these together and adhered the leaves on top with liquid glue. I popped the strawberry on top with dimensionals.

I stamped the sentiment from the Stampin’ Up! Sweet Strawberry stamp set in Poppy Parade ink on a Whisper White strip and trimmed the ends with the Banners Pick a Punch. I adhered the label to the DSP with liquid glue and popped the little circle with the strawberry on top with dimensionals.

For the inside of the card, I stamped the sentiment from the Stampin’ Up! Sweet Strawberry stamp set in Poppy Parade ink on a Whisper White panel. I added a strip of Poppy Parade designer series paper to the bottom and stamped and punched out another strawberry and stem that I adhered to the bottom. I adhered the panel to the inside of the card.

The Stampin’ Up! Sweet Strawberry bundle is a wonderful set of two step stamps that can be punched out. And there are two sizes of flowers – the smaller one can be punched out with the Strawberry Builder punch and the larger one with the small blossom punch – how fun is that!! In addition, the sentiments are fabulous! Take a look at the picture below.


January 1 – 15 Host Code: 4YZ2J366

Use this host code when you order $50 or more and receive a free gift from me!  The gift is your choice of any item valued up to $10.00 in the 2020-21 Annual Catalog or the Aug – Dec 2020 Mini Catalog.

If your order is over $150, please do not use the host code since you’ll receive your own Host Dollars plus I’ll still send you the free gift!  This host code can be used by anyone, no commitment required.  Let me know if you have any questions.


If you need any stamping supplies, I’d be very happy to be your Demonstrator.  Just click on the Shop Now Button on the right side of the screen to go directly to my Online store or contact me if you have any questions.  Happy Stamping!

Thanks for stopping by and have a great weekend!

Akiko

  • Visit my Online store here
  • See the current Stampin’ Up! clearance rack specials here
  • Earn FREE Stampin’ Up! products through my Wildflower Frequent Shopper Program – my way of saying thank you to my frequent shopper online customers.
  • Sign up for my monthly newsletter here
  • Have any questions? I’d be happy to help, click here to contact me.

Cardstock Cuts for this project:

  • Poppy Parade – 4-1/4″ x 11″ card base scored at 5-1/2″, 2-1/2″ x 2-1/2″ (scalloped circle die cut)
  • Whisper White – two 4″ x 5-1/4″ panel (embossed front background and inside panel), 2-1/2″ x 2-1/2″ (stitched circle die cut), 1/2″ x 3-1/2″ label, 1-1/2″ x 3-1/2″ (punched strawberries), 1″ x 3″ (punched stems) 1-1/4″ x 3-1/2″ (punched leaves)
  • Brights 6″ x 6″ DSP – 2-1/4″ x 4″ (front stripe), 1/2″ x 4″ (inside trim)

Stampin’ Up! products used in this project:


Stampin’ Up! Hydrangea Haven for the Happy Inkin’ Thursday Blog Hop

Hello and welcome to the Happy Inkin’ Thursday Blog Hop I have a sneak peek of the pretty new Stampin’ Up! Hydrangea Haven bundle and the new Hydrangea Hill designer series paper from the new Jan-Jun 2021 Mini Catalog. You can find the currently available supplies used to create this card at the bottom of my post along with the sizes of cardstock used.

We have a theme challenge this week, and the theme is that we are to use something new for our projects! So the Stampin’ Up! Hydrangea Haven bundle is perfect for today’s project!

I adhered a panel of the new Hydrangea Hill designer series paper to the front of a Highland Heather card base. I used the fancy die cut from the Ornate Layers Dies to cut out a large frame from Whisper White and adhered a smaller panel of Hydrangea Hill DSP to the center. I popped it on the card front with dimensionals.

I stamped the lined hydrangea image from the Stampin’ Up! Hydrangea Haven photopolymer stamp set in Memento Tuxedo Black ink on Thick Whisper White card stock and colored it with Highland Heather and Old Olive Stampin’ Blends. I cut it out with the corresponding die from the Hydrangea Dies.

I stamped the sentiment from the Stampin’ Up! Hydrangea Haven stamp set in Memento Tuxedo Black ink on Crumb Cake card stock and cut it out with the little tag die. I tied it around the die cut flower with linen thread and adhered the flower to the card front with dimensionals. I made a fluffy bow with more linen thread and adhered it to the flower to finish the card front.

I stamped the outline hydrangea flowers in the corners of a Whisper White panel using Memento Tuxedo Black ink and stamped over them with Highland Heather ink and the corresponding solid image stamp. I stamped the sentiment in Memento Tuxedo Black ink and added a strip of Hydrangea Hill to the bottom before adhering it to the inside of the card.

The new Stampin’ Up! Hydrangea Haven bundle looks like it’s going to be very versatile and fun to play with. And the sentiments are really sweet, and I love that several of them are small enough to be stamped on the little flower tag like I did today. Check out the bundle in the picture below and remember that it will be available for purchase next week on January 5! Yay!!

On with the Hop! Click the Next button below to visit Karen Ksenzakovic’s blog.

And just in case you get lost along the way, here’s a list of the team members participating in the hop today:


December 16 – 31 Host Code: E7SDCMYW

January 1 – 15 Host Code: 4YZ2J366

Use this host code when you order $50 or more and receive a free gift from me!  The gift is your choice of any item valued up to $10.00 in the 2019-20 Annual Catalog or in the 2020 January-June Mini Catalog!  That includes some of the Host Exclusive stamp sets!

If your order is over $150, please do not use the host code since you’ll receive your own Host Dollars plus I’ll still send you the free gift!  This host code can be used by anyone, no commitment required.  Let me know if you have any questions.


If you need any stamping supplies, I’d be very happy to be your Demonstrator.  Just click on the Shop Now Button on the right side of the screen to go directly to my online store or contact me if you have any questions.  Happy Stamping!

Thanks for visiting!

Akiko

  • Visit my online store here
  • See the current Stampin’ Up! clearance rack specials here
  • Earn FREE Stampin’ Up! products through my Wildflower Frequent Shopper Program – my way of saying thank you to my frequent shopper online customers.
  • Sign up for my weekly newsletter here
  • Have any questions? I’d be happy to help, click here to contact me.

Cardstock Cuts for this project:

  • Highland Heather – 4-1/2″ x 11″ card base scored at 5-1/2″
  • Thick Whisper White – 3-1/4″ x 4-1/4″ (hydrangea die cut)
  • Crumb Cake – 1″ x 1-1/2″ (tag)
  • Whisper White – 4″ x 5-1/4″ (inside panel), 3-1/2″ x 5″ (ornate layers panel)
  • Hydrangea Hill DSP – 4″ x 5-1/4″ panel (front background), 1/2″ x 3-3/4″ (inside trim), 2-1/4″ x 3-5/8″ (ornate layers inside panel)

Stampin’ Up! products used in this project:


Stampin’ Up! Heartfelt Valentine’s Day Card

Good Morning! I have a Valentine’s Day card for today made with the Stampin’ Up! Heartfelt bundle and the Detailed Hearts die. And I used some of the pretty Rococo Rose foil from the Love You Always foil sheets in the new January – June 2021 Mini Catalog. You can find the supplies used to create this card and the card stock cuts at the bottom of this post.

I cut a panel of Rococo Rose foil with the Detailed Hearts dies and adhered it to the front of a Rococo Rose card base with dots of liquid glue. Save the little foil hearts that get punched out – I used some of them as embellishments for this card.

I stamped the heart from the Stampin’ Up! Heartfelt stamp set in Rococo Rose ink on Whisper White and punched it out with the plain heart punch. I adhered it to a Rococo Rose scalloped heart punched out with the scalloped heart punch and adhered some foil hearts to the front.

I adhered the layered heart to the front of the card with dimensionals.

For the inside of the card, I stamped the arrow from the Stampin’ Up! Heartfelt stamp set in Smoky Slate across the top of a Whisper White panel. I stamped the sentiments from the Stampin’ Up! Heartfelt stamp set in Rococo Rose ink and adhered foil hearts around the top. I adhered the panel to the inside of the card.

The Stampin’ Up! Heartfelt stamp set is currently available, and there are lots of new cute Valentine’s Day themed stamp sets and accessories in the new January – June 2021 Mini Catalog, premiering on January 5, 2021. I am so ready!!😊


Stampin’ In The Meadows January – June 2021 Mini Catalog New Product Shares Now Open

Do you want all of the great new products in the new January – June 2021 Mini Catalog but can’t afford everything?  Let’s do a share!  I’m placing an order early on January 5 for all the papers, ribbons and embellishments and I’m going to use the expedited shipping option so I get them fast. When I receive the order, I will cut and bundle the products and have the shares on their way to you by January 15. Go to my New Catalog Product Shares page to get the full details and to join. Please note, I can only ship to addresses within the US. Deadline to sign up for a share is January 3, 2021.


The January Paper Pumpkin Kit is Sending Hearts!

Love is in the air! Send a little love to someone special with the Sending Hearts Paper Pumpkin Kit. From heaps of heart-shaped elements to paper pieces in red and pink, this month’s kit has everything you need to create eight adorable cards—with coordinating envelopes—for Valentine’s Day, anniversaries, and every celebration of love in between!  And with the add-on—called Little Love Boxes—there’s even more love to share! Click here to see the flyer for the cute Little Love Boxes.

If you’re interested in subscribing to Paper Pumpkin, you can either sign up for a subscription where you are billed monthly for your kit or you can purchase a prepaid subscription in my Online Store. To see more information and to sign up for the monthly subscription click here. To see the options for prepaid subscriptions in my Online Store, click here.

Sign up deadline for the January 2021 kit is January 10, 2021. Supplies may be limited toward the end of the subscription period.


December 16 – 31 Host Code: E7SDCMYW

Use this host code when you order $50 or more and receive a free gift from me!  The gift is your choice of any item valued up to $10.00 in the 2020-21 Annual Catalog or the Aug – Dec 2020 Mini Catalog. This includes some of the host exclusive sets!

If your order is over $150, please do not use the host code since you’ll receive your own Host Dollars plus I’ll still send you the free gift!  This host code can be used by anyone, no commitment required.  Let me know if you have any questions.


If you need any stamping supplies, I’d be very happy to be your Demonstrator.  Just click on the Shop Now Button on the right side of the screen to go directly to my Online store or contact me if you have any questions.  Happy Stamping!

Thanks for stopping by and have a great weekend!

Akiko

  • Visit my Online store here
  • See the current Stampin’ Up! clearance rack specials here
  • Earn FREE Stampin’ Up! products through my Wildflower Frequent Shopper Program – my way of saying thank you to my frequent shopper online customers.
  • Sign up for my monthly newsletter here
  • Have any questions? I’d be happy to help, click here to contact me.

Cardstock Cuts for this project:

  • Rococo Rose – 4-1/4″ x 11″ card base scored at 5-1/2″, 2-1/2″ x 2-1/2″ (punched scalloped heart)
  • Whisper White – 4″ x 5-1/4″ panel (inside panel), 2-1/2″ x 2-1/2″ (heart)
  • Love You Always foil sheet (available Jan 5) – 3-7/8″ x 3-5-1/4″

Stampin’ Up! products used in this project:


Stampin’ Up! Berry Blessings Video Tutorial

Good Morning! Sale A Bration is just around the corner, starting on January 5, 2021 and I have a sneak peek of a fabulous item that you can get. It’s the Stampin’ Up! Berry Blessings stamp set and Berry Delightful designer series paper. This is the card I made during my Facebook Live video tutorial yesterday afternoon and I use both items to make it. You can find the currently available supplies I used at the bottom of my post along with the sizes of cardstock used.

Here is the Facebook Live video showing how I made the card:

I posted a copy of the video in my YouTube channel here so you can view it there if you prefer.

I started by embossing a panel of Night of Navy with the Subtle 3D embossing folder and adhering it to a Night of Navy card base. It’s too bad the the additional texture isn’t very visible in the photos, because this embossing folder adds beautiful striations to the front that contrast with the white lacy edge. I adhered a Whisper White panel to the back of the Berry Delightful designer series paper and adhered two strips of Whisper White that were cut with the Ornate Borders lacy die. I popped the panel on the card front with dimensionals.

I stamped the blueberries using stamps from the Stampin’ Up! Berry Blessings photopolymer stamp set on the Thick Whisper White panel. I stamped the leaves first, the outline in Shaded Spruce and the fill in Granny Apple Green. I stamped the blueberries in Night of Navy for the outline and Pacific Point for the filler. It’s fairly easy to position the filler stamps over the darker stamped outline images. I cut the image out with the large Octagon frame from the Hippo and Friends Dies and adhered it to the card front with dimensionals.

I added a Night of Navy bow with glue dots and three rhinestone gems to finish the card front.

I stamped the filler leaves and blueberries from the Stampin’ Up! Berry Blessings stamp set in Granny Apple Green and Pacific Point in the corners of a Whisper White panel after stamping off. The soft look without the outline images is a nice contrast and shows the versatility of this pretty stamp set. I stamped the sentiment from the Stampin’ Up! Berry Blessings stamp set in Night of Navy and adhered the panel to the inside of the card.

The Stampin’ Up! Berry Blessings stamp set comes with the Berry Delightful designer series paper as a Sale A Bration item that is free with the purchase of $100 (before shipping and taxes) beginning on January 5, 2021. Sale A Bration is Stampin’ Up!’s biggest promotion of the year and runs through the end of February! You can see this pretty stamp set in the picture below with samples of the Berry Delightful DSP – note that the samples are 6″ x 6″ but the real DSP pack comes with 12 sheets of 12″ x 12″ double sided designer series paper!

I hope you consider this set as your Sale A Bration free item – I’m sure you won’t be disappointed!


Stampin’ In The Meadows January – June 2021 Mini Catalog New Product Shares Now Open

Do you want all of the great new products in the new January – June 2021 Mini Catalog but can’t afford everything?  Let’s do a share!  I’m placing an order early on January 5 for all the papers, ribbons and embellishments and I’m going to use the expedited shipping option so I get them fast. When I receive the order, I will cut and bundle the products and have the shares on their way to you by January 15. Go to my New Catalog Product Shares page to get the full details and to join. Please note, I can only ship to addresses within the US. Deadline to sign up for a share is January 3, 2021.


December 16 – 31 Host Code: E7SDCMYW

Use this host code when you order $50 or more and receive a free gift from me!  The free gift is your choice of any item valued up to $10.00 in the 2019 – 2020 Annual Catalog or in the Aug-Dec 2020 Mini Catalog!  That includes some of the Host Exclusive stamp sets!

If your order is over $150, please do not use the host code since you’ll receive your own Host Dollars plus I’ll still send you the free gift!  This host code can be used by anyone, no club or commitment required.  Let me know if you have any questions.


If you need any stamping supplies, I’d be very happy to be your Demonstrator.  Just click on the Shop Now button on the right side of the screen to go directly to my online store or contact me if you have any questions.  Happy Stamping!

Thanks for stopping by and have a great week!

Akiko

  • Visit my online store here
  • See the current Stampin’ Up! clearance rack specials here
  • Earn FREE Stampin’ Up! products through my Wildflower Frequent Shopper Program – my way of saying thank you to my online frequent shopper customers.
  • Sign up for my weekly newsletter here
  • Have any questions? I’d be happy to help, click here to contact me.

Cardstock Cuts for this project:

  • Night of Navy – 4-1/4″ x 11″ card base scored at 5-1/2″
  • Thick Whisper White – 2-1/2″ x 3-1/2″ (label)
  • Whisper White – 4″ x 5-1/4″ (inside panel), 3-3/4″ x 4-1/4″ (front DSP backing), two 3/4″ x 4-1/4″ (lacy trim)
  • Berry Delightful DSP – 3-3/4″ x 4-1/4″ (front background)

Stampin’ Up! products used in this project:


Merry Christmas!

Good Morning and Merry Christmas. I hope you and your families have a wonderful, safe holiday.

Enjoy this look back at some of this year’s Christmas cards! Click on the pictures to see the details in the original blog post.

The Poinsettia Petals bundle was a new addition this year with the prettiest poinsettia ever!

The In The Pines Bundle was another beauty that was introduced and sadly retired after just one season – I’m sure they’ll bring back something equally as beautiful next year!

The Snowflake Wishes was another beautiful new bundle with stunning snowflake dies.

And there were lots of other new and returning stamp sets and bundles and pretty designer series papers to make Christmas cards this year!

Of course the Arrange A Wreath bundle made beautiful Christmas cards, as well as wreath cards for any season!

I hope that you’ve enjoyed making Christmas cards with the Stampin’ Up! products from this year’s catalogs and found some new favorites to add to your stash! And thank you so much for following my card making journey! Merry Christmas!


December 16 – 31 Host Code: E7SDCMYW

Use this host code when you order $50 or more and receive a free gift from me!  The gift is your choice of any item valued up to $10.00 in the 2020-21 Annual Catalog or the Aug – Dec 2020 Mini Catalog. This includes some of the host exclusive sets!

If your order is over $150, please do not use the host code since you’ll receive your own Host Dollars plus I’ll still send you the free gift!  This host code can be used by anyone, no commitment required.  Let me know if you have any questions.


If you need any stamping supplies, I’d be very happy to be your Demonstrator.  Just click on the Shop Now Button on the right side of the screen to go directly to my Online store or contact me if you have any questions.  Happy Stamping!

Akiko

  • Visit my Online store here
  • See the current Stampin’ Up! clearance rack specials here
  • Earn FREE Stampin’ Up! products through my Wildflower Frequent Shopper Program – my way of saying thank you to my frequent shopper online customers.
  • Sign up for my monthly newsletter here
  • Have any questions? I’d be happy to help, click here to contact me.

Stampin’ Up! Floating and Fluttering for the Happy Inkin’ Thursday Blog Hop

Good Morning and welcome to the Happy Inkin’ Thursday Blog Hop! I have a sneak peek of the new Stampin’ Up! Floating And Fluttering bundle from the new Jan-Jun 2021 Mini Catalog. This is a pretty new butterfly bundle that I used to make an easy floating frame type of card, well just the inside part. Take a close look at the pictures and you’ll see that the butterflies are floating above the black patterned DSP with dimensionals. You can find the currently available supplies used to create this card at the bottom of my post along with the sizes of cardstock used.

We have a sketch challenge this week, and here is the pretty sketch we are using for our projects:

I embossed a panel of So Saffron card stock with the Tasteful Textile 3D embossing folder and adhered it to the front of a So Saffron card base. I cut a panel of the the new True Love designer series paper (available January 5, 2021) from the new Jan-Jun 2021 Mini Catalog with the Stitched Rectangles Die.

I stamped two of the butterflies stamp from the Stampin’ Up! Floating And Fluttering photopolymer stamp set in Memento Tuxedo Black ink on Whisper White. I colored them with Stampin’ Blends – Granny Apple Green, Mango Melody, Pumpkin Pie, Night of Navy, Balmy Blue, Highland Heather, Poppy Parade, So Saffron, Bermuda Bay and Pool Party. I cut them out with the coordinating dies and laid them together and cut out the outline with the same Stitched Rectangle die that I used to cut out the True Love DSP.

I adhered the butterfly die cuts to the DSP with dimensionals – this gives them the appearance of floating above the DSP. I stamped the sentiment from the Floral Essence photopolymer stamp set in Versamark ink on a Basic Black panel and sprinkled it with white embossing powder. I heat set the embossing powder until it was shiny and cut it out with the die from the Tasteful Labels dies. I adhered it to the card with glue dots and finished the card with three pearl gemstones.

I stamped the butterfly and leaf sprig from the Stampin’ Up! Floating And Fluttering stamp set in Memento Tuxedo Black ink on Whisper White and colored them with Stampin’ Blends. I cut them out with the individual coordinating dies. I adhered a strip of the True Love DSP to the bottom of a Whisper White panel and adhered the leaf sprig and butterfly on top. I adhered the panel to a Basic Black mat and then to the inside of the card.

The new Stampin’ Up! Floating And Fluttering stamp set is a two step set with the big stamp with the outline images and lots of solid image stamps so you can use different colors on each butterfly and leaf sprig. The Fluttering Dies that come in the bundle has dies to cut out the butterfly grouping and dies to cut out each butterfly and leaf sprig individually (like I did for the inside of this card) – it’s so different! There is also a frame stamp and die and the pretty embossed butterfly die. You can see them all in the picture below and they will be available on January 5, 2021 when the new Jan-Jun 2021 Mini Catalog launches!

On with the Hop! Click the Next button below to visit Karen Ksenzakovic’s blog.

And just in case you get lost along the way, here’s a list of the team members participating in the hop today:


December 16 – 31 Host Code: E7SDCMYW

Use this host code when you order $50 or more and receive a free gift from me!  The gift is your choice of any item valued up to $10.00 in the 2019-20 Annual Catalog or in the 2020 January-June Mini Catalog!  That includes some of the Host Exclusive stamp sets!

If your order is over $150, please do not use the host code since you’ll receive your own Host Dollars plus I’ll still send you the free gift!  This host code can be used by anyone, no commitment required.  Let me know if you have any questions.


If you need any stamping supplies, I’d be very happy to be your Demonstrator.  Just click on the Shop Now Button on the right side of the screen to go directly to my online store or contact me if you have any questions.  Happy Stamping!

Thanks for visiting!

Akiko

  • Visit my online store here
  • See the current Stampin’ Up! clearance rack specials here
  • Earn FREE Stampin’ Up! products through my Wildflower Frequent Shopper Program – my way of saying thank you to my frequent shopper online customers.
  • Sign up for my weekly newsletter here
  • Have any questions? I’d be happy to help, click here to contact me.

Cardstock Cuts for this project:

  • So Saffron – 4-1/2″ x 11″ card base scored at 5-1/2″, 4-1/4″ x 5-1/2″ (embossed background)
  • Basic Black – 2″ x 2″ (label), 3-7/8″ x 5-1/8″ (inside mat)
  • Whisper White – 3-3/4″ x 5″ (inside panel)
  • True Love DSP – 3″ x 4-1/4″ panel (stitched rectangle), 1/2″ x 3-3/4″ (inside trim)

Stampin’ Up! products used in this project:


Stampin’ Up! Gorgeous Posies Get Well Card

Good Morning! Last week I made the cards from the Stampin’ Up! Gorgeous Posies kit (you can see the cards from the kit here) and I said that the stamp set is beautiful and makes pretty cards on it’s own. So Today, I’m using the stamps by themselves to make a pretty floral get well card in Blushing Bride! You can find the supplies used to create this card and the card stock cuts at the bottom of this post.

I embossed a panel of Blushing Bride with the Ornate Floral 3D Embossing folder and adhered it to the front of a Blushing Bride card base. I stamped the large flower, leaves and small flowers from the Stampin’ Up! Gorgeous Posies cling stamp set in Blushing Bride, Soft Sea Foam, Highland Heather (stamped off), and Shaded Spruce (stamped off) on a small Whisper White panel.

I stamped the sentiment from the Stampin’ Up! Gorgeous Posies stamp set in Versamark ink on the top of the panel and sprinkled it with gold embossing powder. I heat set the embossing powder until it was shiny. I also stamped and fussy cut a second large Blushing Bride flower on Whisper White and gold embossed the flower center dots. I cut a Whisper White panel with the second largest scalloped rectangle and adhered the stamped panel on top with liquid glue. I popped the second Blushing Bride flower on top of the panel with dimensionals.

I adhered the floral panel to the card front with dimensionals. I made a bow with the Whisper White and Gold ribbon from the Stampin’ Up! Gorgeous Posies kit and adhered it with a glue dot. I brushed the Blushing Bride flower with clear Wink of Stella to give it some sparkle and adhered a pearl from the new Pastel Pearls from the upcoming Jan-June 2021 Mini Catalog.

For the inside of the card, I stamped the flowers and leaves from the Stampin’ Up! Gorgeous Posies stamp set (using the same colors as on the card front) on a Whisper White panel. I used Bumblebee ink to stamp the flower centers instead of gold embossing. I adhered the panel to the inside of the card.

This is a pretty, frilly, girly get well card that is sure to lift the spirits of a flower loving woman feeling under the weather. And there is plenty of room on the inside to write a personal message. I used the same colors as the kit – it’s easy because they are listed on the instructions – but you don’t have to. Thanks for stopping by on this busy week!!


Stampin’ In The Meadows January – June 2021 Mini Catalog New Product Shares Now Open

Do you want all of the great new products in the new January – June 2021 Mini Catalog but can’t afford everything?  Let’s do a share!  I’m placing an order early on January 5 for all the papers, ribbons and embellishments and I’m going to use the expedited shipping option so I get them fast. When I receive the order, I will cut and bundle the products and have the shares on their way to you by January 15. Go to my New Catalog Product Shares page to get the full details and to join. Please note, I can only ship to addresses within the US. Deadline to sign up for a share is January 3, 2021.


The January Paper Pumpkin Kit is Sending Hearts!

Love is in the air! Send a little love to someone special with the Sending Hearts Paper Pumpkin Kit. From heaps of heart-shaped elements to paper pieces in red and pink, this month’s kit has everything you need to create eight adorable cards—with coordinating envelopes—for Valentine’s Day, anniversaries, and every celebration of love in between!  And with the add-on—called Little Love Boxes—there’s even more love to share! Click here to see the flyer for the cute Little Love Boxes.

If you’re interested in subscribing to Paper Pumpkin, you can either sign up for a subscription where you are billed monthly for your kit or you can purchase a prepaid subscription in my Online Store. To see more information and to sign up for the monthly subscription click here. To see the options for prepaid subscriptions in my Online Store, click here.

Sign up deadline for the January 2021 kit is January 10, 2021. Supplies may be limited toward the end of the subscription period.


Stampin’ Up!’s Giant Year-End Closeout Is Going On Now!

If you love Great Deals like I do, then the Giant Year-End Closeout event is the perfect time to shop. You’ll get deep discounts on your favorite products (up to 50% off some items) from the August–December 2020 Mini Catalog. Head over to my Online Store to check out the sale.  The retiring items are only available while supplies last! And many popular items have already been sold out!


December 16 – 31 Host Code: E7SDCMYW

Use this host code when you order $50 or more and receive a free gift from me!  The gift is your choice of any item valued up to $10.00 in the 2020-21 Annual Catalog or the Aug – Dec 2020 Mini Catalog. This includes some of the host exclusive sets!

If your order is over $150, please do not use the host code since you’ll receive your own Host Dollars plus I’ll still send you the free gift!  This host code can be used by anyone, no commitment required.  Let me know if you have any questions.


If you need any stamping supplies, I’d be very happy to be your Demonstrator.  Just click on the Shop Now Button on the right side of the screen to go directly to my Online store or contact me if you have any questions.  Happy Stamping!

Thanks for stopping by and have a great weekend!

Akiko

  • Visit my Online store here
  • See the current Stampin’ Up! clearance rack specials here
  • Earn FREE Stampin’ Up! products through my Wildflower Frequent Shopper Program – my way of saying thank you to my frequent shopper online customers.
  • Sign up for my monthly newsletter here
  • Have any questions? I’d be happy to help, click here to contact me.

Cardstock Cuts for this project:

  • Blushing Bride – 4-1/4″ x 11″ card base scored at 5-1/2″, 4″ x 5-1/4″ (embossed front background)
  • Whisper White – 4″ x 5-1/4″ panel (inside panel), 2-3/4″ x 4″ (die cut panel), 2-1/8″ x 3-1/4″ (stamped panel), 2″ x 2″ (fussy cut flower)

Stampin’ Up! products used in this project:


Stampin’ Up! Fancy Phrases Count My Blessings Card

Good Morning! Today’s card uses the sentiments from the pretty Stampin’ Up! Fancy Phrases cling stamp set along with some upcoming Sale A Bration designer series paper and a butterfly from the new Fluttering Dies from the new Jan-Jun 2021 Mini Catalog. Sale A Bration starts on January 5, 2021 and that’s when the pretty new Paper Blooms designer series paper will be available along with all the new products from the Jan-June 2021 Mini Catalog. You can find the currently available supplies used to create this card and the card stock cuts at the bottom of this post.

I adhered a panel of the new Sale A Bration Paper Blooms designer series paper to a Night of Navy mat with Stampin’ Seal. The Paper Blooms DSP will be FREE with a $50 purchase during Sale A Bration. I wrapped a length of Denim ribbon around the panel, securing it in the back.

I stamped the sentiment from the Stampin’ Up! Fancy Phrases stamp set in Night of Navy ink on a Rococo Rose panel and cut it out with the die from the Tasteful Labels Dies. I also cut out the butterfly from the embossing die from the new Fluttering Dies from a Seaside Spray panel – isn’t it pretty!! These dies are from the new Jan-June 2021 Mini Catalog and will be available on Jan 5, 2021. I adhered the butterfly to the label with a glue dot and adhered the label to the DSP panel with dimensionals.

I made a bow with the Denim ribbon and adhered it with a glue dot and popped the panel on the front of a Rococo Rose card base with dimensionals. I finished the front with pink iridescent adhesive sequins.

For the inside of the card, I stamped the sentiment from the Stampin’ Up! Fancy Phrases stamp set in Rococo Rose ink on a Whisper White panel. I used the Confetti Flowers punch to punch some small flowers from the leftover scraps of Rococo Rose and Seaside Spray panels and used the Night of Navy Stampin’ Blend to color the centers. I adhered them to the card with liquid glue and trimmed the bottom with a strip of the Paper Blooms DSP. I adhered the panel to the inside of the card.

I didn’t even use the pretty floral images from the Stampin’ Up! Fancy Phrases stamp set – that will have to wait for another time. But I love this sentiment to send to a special friend, so I chose it to go with the pretty embossed butterfly and the simple floral DSP. I can’t wait for January 5!


Stampin’ In The Meadows January – June 2021 Mini Catalog New Product Shares Now Open

Do you want all of the great new products in the new January – June 2021 Mini Catalog but can’t afford everything?  Let’s do a share!  I’m placing an order early on January 5 for all the papers, ribbons and embellishments and I’m going to use the expedited shipping option so I get them fast. When I receive the order, I will cut and bundle the products and have the shares on their way to you by January 15. Go to my New Catalog Product Shares page to get the full details and to join. Please note, I can only ship to addresses within the US. Deadline to sign up for a share is January 3, 2021.


The January Paper Pumpkin Kit is Sending Hearts!

Love is in the air! Send a little love to someone special with the Sending Hearts Paper Pumpkin Kit. From heaps of heart-shaped elements to paper pieces in red and pink, this month’s kit has everything you need to create eight adorable cards—with coordinating envelopes—for Valentine’s Day, anniversaries, and every celebration of love in between!  And with the add-on—called Little Love Boxes—there’s even more love to share! Click here to see the flyer for the cute Little Love Boxes.

If you’re interested in subscribing to Paper Pumpkin, you can either sign up for a subscription where you are billed monthly for your kit or you can purchase a prepaid subscription in my Online Store. To see more information and to sign up for the monthly subscription click here. To see the options for prepaid subscriptions in my Online Store, click here.

Sign up deadline for the January 2021 kit is January 10, 2021. Supplies may be limited toward the end of the subscription period.


Stampin’ Up!’s Giant Year-End Closeout Is Going On Now!

If you love Great Deals like I do, then the Giant Year-End Closeout event is the perfect time to shop. You’ll get deep discounts on your favorite products (up to 50% off some items) from the August–December 2020 Mini Catalog. Head over to my Online Store to check out the sale.  The retiring items are only available while supplies last! And many popular items have already been sold out!


December 16 – 31 Host Code: E7SDCMYW

Use this host code when you order $50 or more and receive a free gift from me!  The gift is your choice of any item valued up to $10.00 in the 2020-21 Annual Catalog or the Aug – Dec 2020 Mini Catalog. This includes some of the host exclusive sets!

If your order is over $150, please do not use the host code since you’ll receive your own Host Dollars plus I’ll still send you the free gift!  This host code can be used by anyone, no commitment required.  Let me know if you have any questions.


If you need any stamping supplies, I’d be very happy to be your Demonstrator.  Just click on the Shop Now Button on the right side of the screen to go directly to my Online store or contact me if you have any questions.  Happy Stamping!

Thanks for stopping by and have a great weekend!

Akiko

  • Visit my Online store here
  • See the current Stampin’ Up! clearance rack specials here
  • Earn FREE Stampin’ Up! products through my Wildflower Frequent Shopper Program – my way of saying thank you to my frequent shopper online customers.
  • Sign up for my monthly newsletter here
  • Have any questions? I’d be happy to help, click here to contact me.

Cardstock Cuts for this project:

  • Rococo Rose – 4-1/4″ x 11″ card base scored at 5-1/2″, 2″ x 2-3/4″ (label & punched flowers)
  • Seaside Spray – 1-1/2″ x 2″ (die cut butterfly & punched flowers)
  • Night Of Navy – 3-7/8″ x 5-1/8″ (front mat)
  • Whisper White – 4″ x 5-1/4″ panel (inside panel)
  • Paper Blooms DSP (available Jan 5, 2021) – 3-3/4″ x 5″ (front background), 1/2″ x 4″ (inside trim)

Stampin’ Up! products used in this project:


Stampin’ Up! Mountain Air Birthday Card Video Tutorial

Good Morning! Today’s card uses the Stampin’ Up! Mountain Air photopolymer stamp set to make snow capped mountains for a western landscape birthday card. This is the card I made during my Facebook Live video tutorial yesterday afternoon and you can find the supplies I used to create this card at the bottom of my post along with the sizes of cardstock used.

Here is the Facebook Live video showing how I made the card:

I posted a copy of the video in my YouTube channel here so you can view it there if you prefer.

I was also inspired by the sketch from Freshly Made Sketches #466:


I set up the mountain range stamp from the Stampin’ Up! Mountain Air stamp set in my Stamparatus and secured Whisper White card stock with both magnets so it wouldn’t move. I stamped the mountains in Sahara Sand ink and then wiped the stamp and inked the top of the mountains with Versamark ink and stamped again. I sprinkled white embossing powder on the Versamark and heat set the embossing powder until it was shiny. I masked the mountains and used the new blending brushes that will be coming in the new Jan-Jun Mini Catalog to color the sky with Balmy Blue and Pacific Point inks. I love how brilliant the Pacific Point makes the sky and contrasts with the snow caps!

I masked off the sky and the embossed mountain tops and used a blending brush again to apply Crumb Cake ink on the rest of the card stock. I stamped the tree line from the Stampin’ Up! Mountain Air stamp set in Crumb Cake ink along the bottom of the mountains. I stamped the double tree stamp in Old Olive and the single tree stamp in Mossy Meadow to create the forest in the foreground, stamping off to create depth. I cleaned the tree stamp and then I stamped over the small trees at the bottom of the mountains in Mossy Meadow ink by inking up just the tip of the single tree stamp. Finally, I stamped the little birds in Memento Tuxedo Black ink and adhered the panel to a Basic Black mat.

I trimmed the end of a Sahara Sand strip with the Banners Pick A Punch and stamped the sentiment from the Pallet Thoughts stamp set in Cajun Craze ink. I adhered two leaves from the In Good Taste elements and a double bow made with linen thread with glue dots to the corner of the panel. I adhered the label over the embellishments with glue dots. I adhered a panel of Plaid Tidings 6″ x 6″ designer series paper to the front of a Cajun Craze card base and popped the mountain panel on top with dimensionals.

I stamped the sentiment from the Friend Like You photopolymer stamp set in Cajun Craze in on a Whisper White panel. I stamped thee double tree from the Stampin’ Up! Mountain Air stamp set in Old Olive ink on the side of the panel and trimmed the bottom with a strip of the Plaid Tidings 6″ x 6″ DSP. I adhered the panel to a Basic Black mat and then to the inside of the card with Stampin’ Seal.

The white embossed mountain tops are so dramatic against the blue sky and in life the shine from the embossed lines is pretty. I think that next time I should try this with a crooked line at the bottom of the snow rather than a straight line, what do you think?


Stampin’ In The Meadows January – June 2021 Mini Catalog New Product Shares Now Open

Do you want all of the great new products in the new January – June 2021 Mini Catalog but can’t afford everything?  Let’s do a share!  I’m placing an order early on January 5 for all the papers, ribbons and embellishments and I’m going to use the expedited shipping option so I get them fast. When I receive the order, I will cut and bundle the products and have the shares on their way to you by January 15. Go to my New Catalog Product Shares page to get the full details and to join. Please note, I can only ship to addresses within the US. Deadline to sign up for a share is January 3, 2021.


Stampin’ In The Meadows Online Host Club Openings Starting January 1

The Stampin’ In The Meadows Online Host Club is a good way to build up your Stampin’ Up supplies a little at a time without breaking the bank. You make a commitment to join the club for 6 months and place a minimum $25 order each month. A random host is chosen for each month and when you are the host, you get the Stampin’ Rewards Host Dollars for additional products. You can also give your Host Code to your Stampin’ Friends to increase your host rewards! For complete details, see my Online Host Club Page. You can also contact me at (484) 356-5031 or drop me an email at apsudano@stampininthemeadows.com.  

Sign up Deadline is Monday December 28, 2020.


Stampin’ Up!’s Giant Year-End Closeout Is Going On Now!

If you love Great Deals like I do, then the Giant Year-End Closeout event is the perfect time to shop. You’ll get deep discounts on your favorite products (up to 50% off some items) from the August–December 2020 Mini Catalog. Head over to my Online Store to check out the sale.  The retiring items are only available while supplies last! And many popular items have already been sold out!


December 16 – 31 Host Code: E7SDCMYW

Use this host code when you order $50 or more and receive a free gift from me!  The free gift is your choice of any item valued up to $10.00 in the 2019 – 2020 Annual Catalog or in the Aug-Dec 2020 Mini Catalog!  That includes some of the Host Exclusive stamp sets!

If your order is over $150, please do not use the host code since you’ll receive your own Host Dollars plus I’ll still send you the free gift!  This host code can be used by anyone, no club or commitment required.  Let me know if you have any questions.


If you need any stamping supplies, I’d be very happy to be your Demonstrator.  Just click on the Shop Now button on the right side of the screen to go directly to my online store or contact me if you have any questions.  Happy Stamping!

Thanks for stopping by and have a great week!

Akiko

  • Visit my online store here
  • See the current Stampin’ Up! clearance rack specials here
  • Earn FREE Stampin’ Up! products through my Wildflower Frequent Shopper Program – my way of saying thank you to my online frequent shopper customers.
  • Sign up for my weekly newsletter here
  • Have any questions? I’d be happy to help, click here to contact me.

Cardstock Cuts for this project:

  • Cajun Craze – 5-1/2″ x 8-1/2″ card base scored at4-1/4″
  • Basic Black – 7/8″ x 4-3/4″ (front mat), 3-7/8″ x 5-1/8″ (inside mat)
  • Sahara Sand – 1/2″ x 3″ (label)
  • Whisper White – 3-3/4″ x 5″ (inside panel), 3-3/4″ x 4-5/8″ (front panel)
  • Plaid Tidings 6″ x 6″ DSP – 2-3/4″ x 5-1/8″” (front background strip), 1/2″ x 5″ (inside trim)

Stampin’ Up! products used in this project: