Stampin’ Up! Flowing Flowers Mother’s Day Card for the Inkin’ Krew Blog Hop

Good morning! Welcome to the April Inkin’ Krew Team Blog Hop! The theme for this month’s hop is “For the Ladies/Girls” so I made a Mother’s Day card with the pretty flowers from the Stampin’ Up! Flowing Flowers cling stamp set and the sentiments from the retiring Timeless Tulips photopolymer stamp set! You can find the supplies I used at the bottom of my post along with the sizes of cardstock used.
I embossed a panel of Pale Papaya shimmer vellum with the Pretty Flowers embossing folder and adhered it to the front of a Thick Basic White card Base. I applied liquid glue just to the middle section that would be covered by the scalloped rectangle.

I cut a panel of Basic White with the largest scalloped rectangle from the retiring Stitched So Sweetly dies. I stamped the smallest flower cluster from the Stampin’ Up! Flowing Flowers stamp set three times in Pale Papaya in the lower corner of the scalloped rectangle. I stamped the largest flower in Polished Pink on a Basic White panel and fussy cut it out.

I used the new In Color Parakeet Party (available May 3) to stamp the leaves from the medium flower in the Stampin’ Up! Flowing Flowers stamp set twice on Basic White. I fussy cut the leaves and adhered them to the scalloped rectangle. I adhered the fussy cut flower over the leaves with dimensionals and adhered the panel to the card front with liquid glue. I tucked a white crinkle ribbon bow under the flower, adhering it with a glue dot.

I stamped the pretty Mother’s day sentiment from the Timeless Tulips stamp set in Polished Pink on Basic White and cut it out with the smallest scalloped rectangle from the Stitched So Sweetly dies. I adhered it to the card front with glue dots and dimensionals and finished the card front with iridescent rhinestones – the glints of pink and yellow are perfect with this card!

For the inside of the card, I stamped the sentiment from the Timeless Tulips stamp set in Polished Pink on a Basic White panel. I stamped the medium flower from the Stampin’ Up! Flowing Flowers stamp set in Pale Papaya in the corner of the panel and adhered the panel to a Pale Papaya mat. I adhered the panel to the inside of the card.

The sentiments from the retiring Timeless Tulips stamp set are so sweet and pretty and the retiring Stitched So Sweetly dies are pretty as well. I have used them a lot, so check them out before they’re gone for good!

On With The Hop! Click on the Next Blog button to move forward to Jaimie Babarczy’s project or click the Previous Blog button to move back to see the project that Karen Ksenzakovic created.

If you get lost along the way, here are the participants for the hop:


Current Host Code: 6Y7ZDRM7

Use this host code when you order $50 or more and receive a free gift from me!  The free gift is your choice of any item currently available valued up to $10.00 in the 2021 – 2022 Annual Catalog or the January-June 2022 Mini Catalog!

If your order is over $150, please do not use the host code since you’ll receive your own Host Dollars plus I’ll still send you the free gift!  This host code can be used by anyone, no club or commitment required. Let me know if you have any questions


If you need any stamping supplies, I’d be very happy to be your Demonstrator.  Just click on the Shop Now button on the right side of the screen to go directly to my online store or contact me if you have any questions. 

Thanks for stopping by and Happy Stamping!

Akiko

  • Visit my online store here
  • See the current Stampin’ Up! clearance rack specials here
  • Earn FREE Stampin’ Up! products through my Wildflower Frequent Shopper Program – my way of saying thank you to my online frequent shopper customers.
  • Have any questions? I’d be happy to help, click here to contact me.

Cardstock Cuts for this project:

  • Thick Basic White – 4-1/4″ x 11″ card base scored at 5-1/2″
  • 2021-2023 In Color Shimmer Vellum – 4″ x 5-1/4″ (embossed background)
  • Pale Papaya – 4″ x 5-1/4″ (inside mat)
  • Basic White – 3-3/4″ x 5″ (inside panel), 3-1/4″ x 4-1/4″ (scalloped rectangle), 2-3/4″ x 2-3/4″ (fussy cut flower), 2″ x 3″ (fussy cut leaves), 1-1/4″ x 2-1/4″ (label)

Stampin’ Up! products used in this project:


Stampin’ Up! Wrapped Bouquet for the Happy Inkin’ Thursday Blog Hop

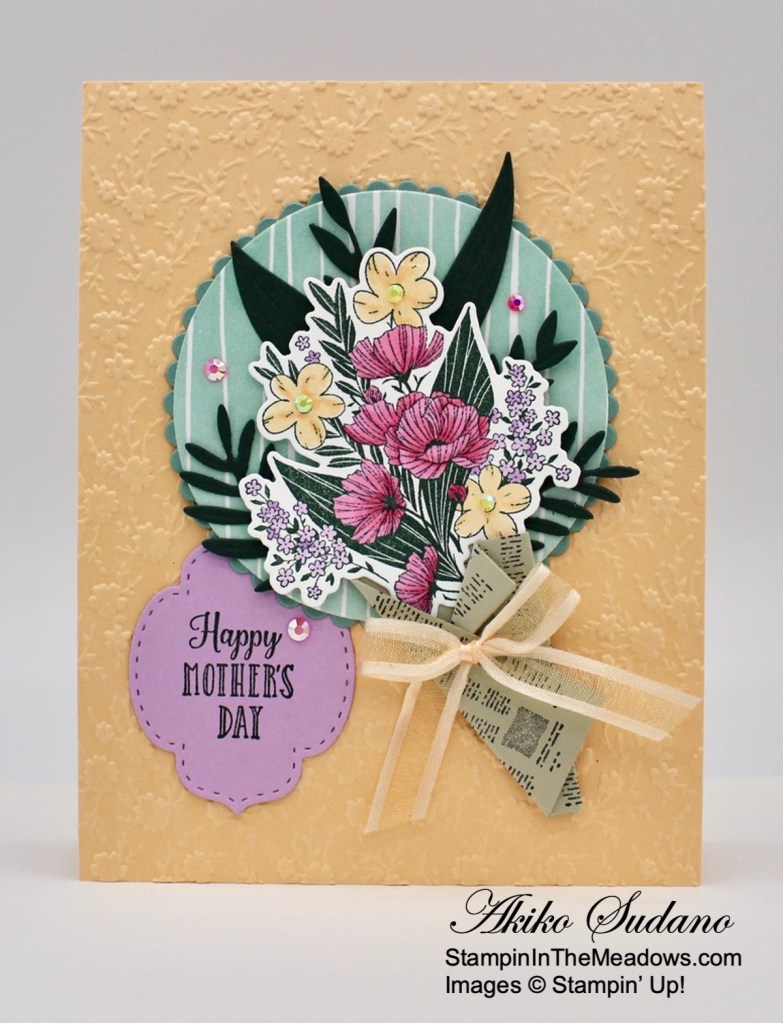
Good Morning and welcome to the Happy Inkin’ Thursday Blog Hop! How are you loving the new Stampin’ Up! 2021-2022 Annual Catalog? Today’s card is made with the Stampin’ Up! Wrapped Bouquet bundle from the Jan-Jun Mini Catalog, but it does use all the new 2021-2023 In Colors! And it celebrates Mother’s Day because you have to give flowers for Mother’s Day! You can find the supplies used to create this card at the bottom of my post along with the sizes of cardstock used.

We have a color challenge this week that uses the new 2021 – 2023 In Colors – How Fun!

My card is also inspired by the current challenge at The Card Concept #154 – Happy Mother’s Day. It is a Clean and Layered card that reminds me of the beautiful bouquet in their Inspiration Picture:

I embossed a panel of Pale Papaya with the Ornate Floral 3D embossing folder and adhered it to the front of a Pale Papaya card base. I cut a panel of the Hand-Penned designer series paper with the largest circle from the Circle Layering dies and cut the largest scalloped circle from Soft Succulent card stock. I adhered these together and adhered them to the card front, leaving the lower left corner free to tuck the label under later.

I stamped the bouquet from the Stampin’ Up! Wrapped Bouquet cling stamp set in Evening Evergreen on a Basic White panel and colored the flowers with the Polished Pink, Pale Papaya and Fresh Freesia Stampin’ Blends. I cut it out with the coordinating die. I also cut the newspaper from Sahara Sand and stamped the newsprint stamp in Memento Tuxedo Black ink on both sides. I folded it along the score lines and secured it on the inside with glue dots. I tucked the flowers inside and adhered them with glue dots. I cut the leaves from Evening Evergreen card stock – one set of broad leaves, one set of long leaves and two of the small curled ferns. I arranged the leaves and flowers on the circle and adhered the leaves with glue dots and the flowers with dimensionals.

I stamped the sentiment from the Stampin’ Up! Wrapped Bouquet stamp set in Evening Evergreen ink on a Fresh Freesia panel and cut it out with the die from the Stitched So Sweetly dies. I adhered it to the card front with glue dots, tucking it under the layered circle. I added three 2021-2023 In Color jewels in Polished Pink and used the Pale Papaya jewels in the flower centers. I finished it off with the Pale Papaya bow.

For the inside of the card, I stamped the bouquet form the Stampin’ Up! Wrapped Bouquet stamp set in Evening Evergreen ink along the border of a Basic White panel. I stamped the sentiment in Evening Evergreen as well and colored the flowers with the Polished Pink, Pale Papaya and Fresh Freesia Stampin’ Blends like the bouquet on the card front. I adhered the panel to the inside of the card.

The Stampin’ Up! Wrapped Bouquet is a wonderfully different bundle and I’m really impressed at how easily it goes together with beautiful results. This is a bouquet that will impress any Mother for Mother’s Day!

On with the Hop! Click the Next button below to visit Karen Ksenzakovic’s blog.

And just in case you get lost along the way, here’s a list of the team members participating in the hop today:


Current Host Code: YGDSB9H4

Use this host code when you order $50 or more and receive a free gift from me!  The gift is your choice of any item valued up to $10.00 in the 2021-2022 Annual Catalog or in the 2021 January-June Mini Catalog!

If your order is over $150, please do not use the host code since you’ll receive your own Host Dollars plus I’ll still send you the free gift!  This host code can be used by anyone, no commitment required.  Let me know if you have any questions.


If you need any stamping supplies, I’d be very happy to be your Demonstrator.  Just click on the Shop Now Button on the right side of the screen to go directly to my online store or contact me if you have any questions.  Happy Stamping!

Thanks for visiting!

Akiko

  • Visit my online store here
  • See the current Stampin’ Up! clearance rack specials here
  • Earn FREE Stampin’ Up! products through my Wildflower Frequent Shopper Program – my way of saying thank you to my frequent shopper online customers.
  • Have any questions? I’d be happy to help, click here to contact me.

Cardstock Cuts for this project:

  • Pale Papaya – 4-1/4″ x 11″ card base scored at 5-1/2″, 4-1/4″ x 5-1/2″ (embossed background)
  • Fresh Freesia – 1-3/4″ x 2-1/2″ (label)
  • Soft Succulent – 3-1/2″ x 3-1/2″ (scalloped circle die cut)
  • Sahara Sand – 2-1/2″ x 2-1/2″ (newspaper wrapping)
  • Evening Evergreen – 2″ x 6″ (die cut leaves)
  • Basic White – 4″ x 5-1/4″ (inside panel), 2-3/4″ x 3″ (flowers)
  • Hand-Penned DSP – 3-1/4″ x 4-3/4″ (die cut circle)

Stampin’ Up! products used in this project:


Stampin’ Up! A Wish for Everything Video Tutorial

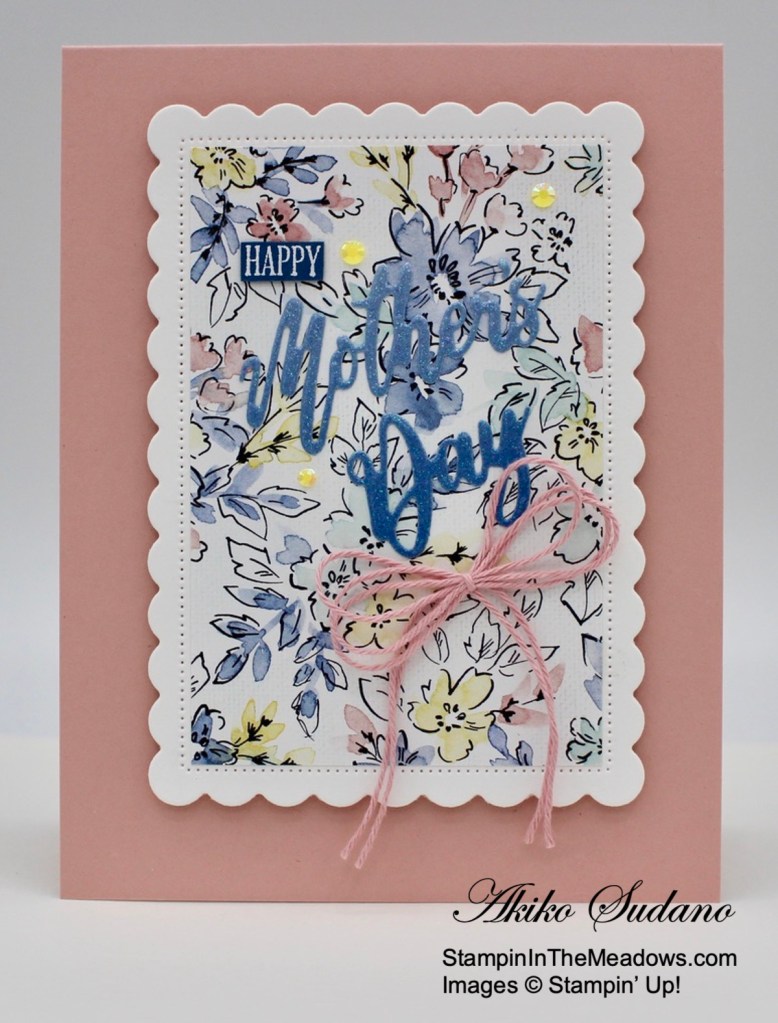
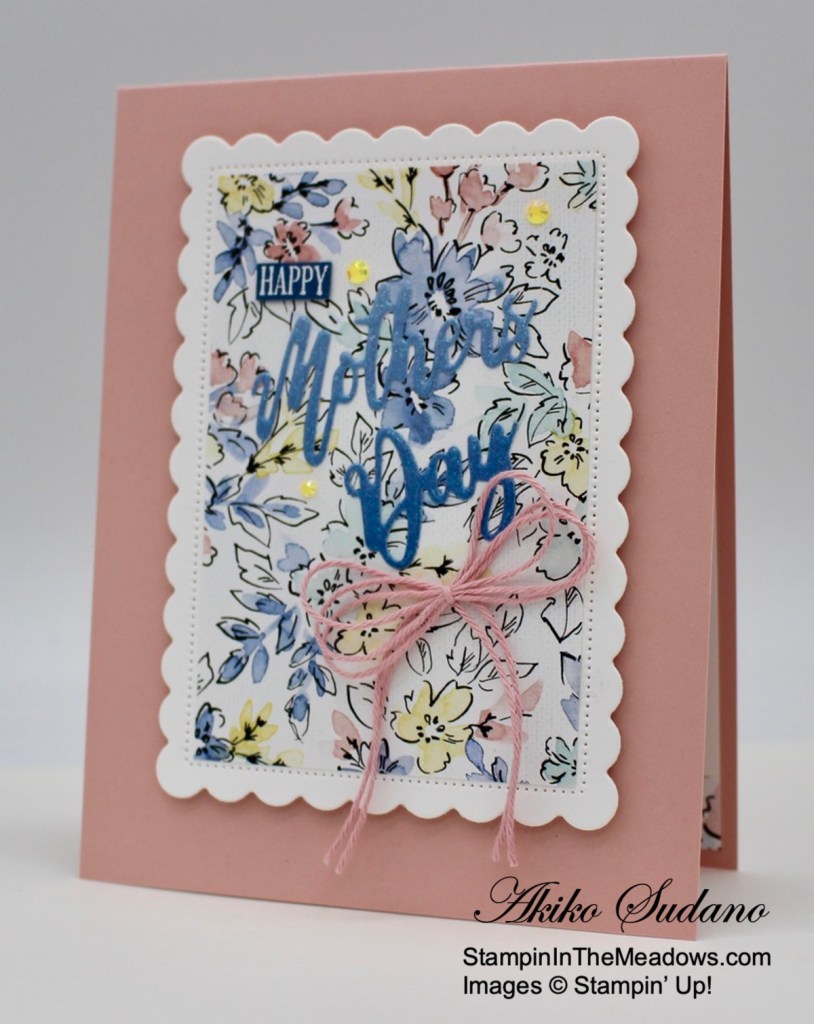
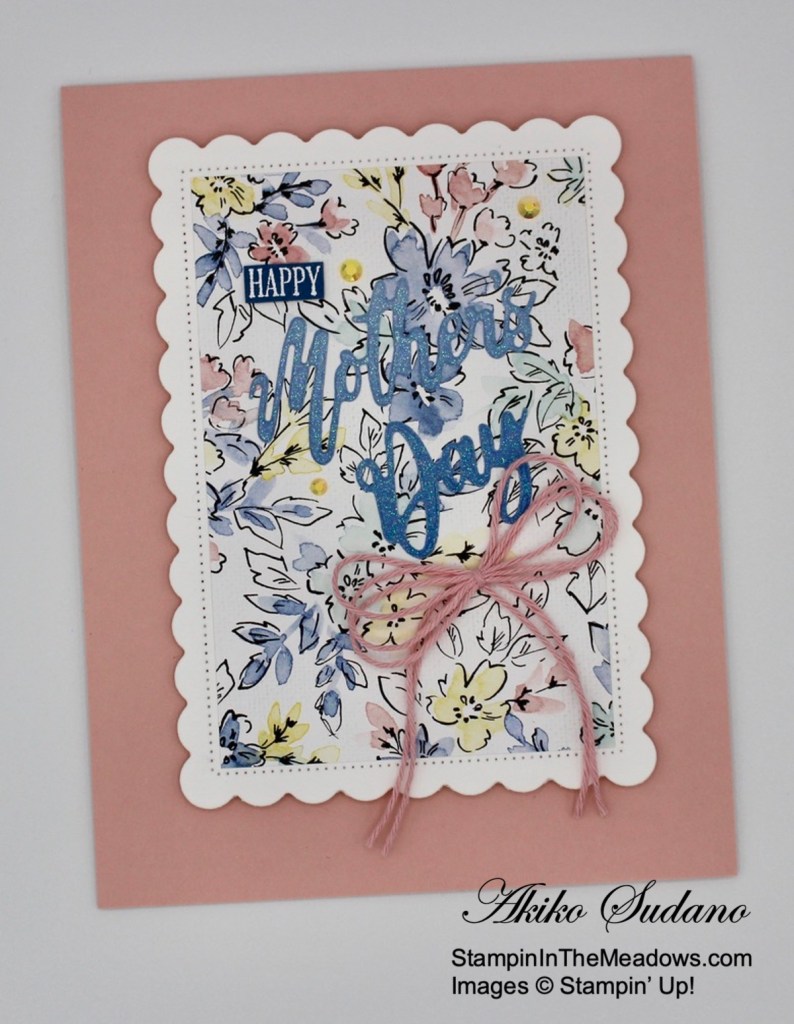
Good Morning! I hope you had a great weekend. Today I’m mixing the old with the new for a Mother’s Day card that I made during my Facebook Live yesterday afternoon. I used the wonderful Stampin’ Up! A Wish for Everything cling stamp set and the coordinating Word Wishes dies for the sentiments on my card. I paired them with the pretty new Hand-Penned designer series paper, the beautiful Ombre specialty paper, the new In Color jewels and the Scalloped Contours dies for a simple Mother’s Day with lots of shine! You can find the currently available supplies I used at the bottom of my post along with the sizes of cardstock used. Note that all of the new In Colors and products will be available when the new 2021 – 2022 Annual Catalog goes live tomorrow!

Here is the Facebook Live video showing how I made the card:

I posted a copy of the video in my YouTube channel here so you can view it there if you prefer.

I cut a panel of Basic White with the second largest Scalloped Contours dies and adhered a panel of Hand-Penned designer series paper to the front. I stamped the sentiment from the Stampin’ Up! A Wish for Everything stamp set in Versamark Ink on a Misty Moonlight panel. I sprinkled it with white embossing powder and heat set until shiny. I trimmed it closely with my paper snips.

I adhered an adhesive panel to the back of a Misty Moonlight panel of Ombre specialty paper and die cut the Mother’s Day words dies from the Word Wishes dies with the lightest color on top. I peeled the backing off the die cut words and adhered them to the scalloped panel. Don’t forget the apostrophe! I adhered the embossed Happy label to the panel to complete my sentiment.

I adhered the panel to the front of a Blushing Bride card base with dimensionals. I made a triple bow with Blushing Bride twine and adhered it to the card and finished it with three Pale Papaya iridencent In Color Jewels.

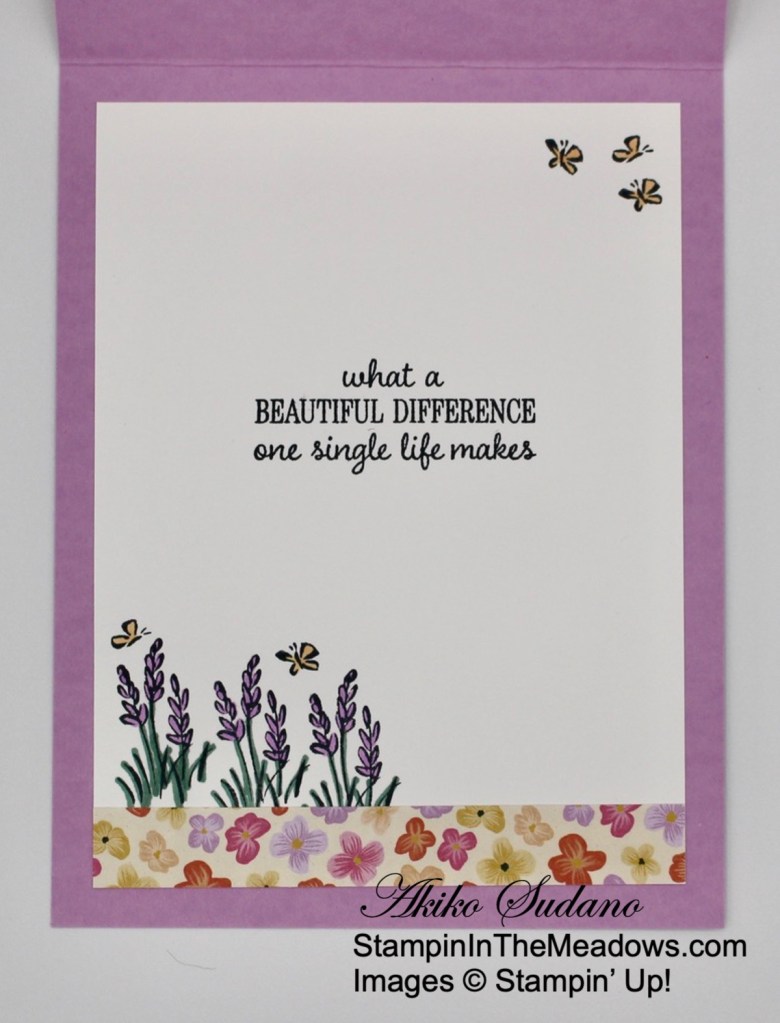
For the inside, I stamped the the flower bundle from the new Hand-Penned Petals photopolymer stamp set in Blushing Bride ink on a Basic White panel. I stamped the sentiment from the Stampin’ Up! A Wish for Everything stamp set in Misty Moonlight ink next to the flowers and trimmed the bottom with a strip of Hand-Penned DSP. I adhered the panel to the inside of the card.

The Stampin’ Up! A Wish for Everything stamp set and Word Wishes dies are a Stampin’ Up! classic pair. I’m so glad that they are being carried forward in the new 2021-2022 Annual Catalog.


Last Day for Stampin’ Up!’s Last Chance Sale!

Stampin’ Up! has posted the list of items from the 2020-2021 Annual catalog that are retiring and some of the items are on sale! Retiring items will be available only white supplies last! If you love great deals, now is the perfect time to shop.

To download a PDF with the Retiring Items List, click here.

Head to my Online Store to get your favorite items before they sell out!


Connect, Craft & Collect $25 Starting May 4, 2021!

The Connect, Craft & Collect $25 promotion starts on May 4, 2021. From May 4 – June 14, 2021, qualifying Stampin’ Up! orders and parties over $250 will receive $25 in BONUS Stampin’ Rewards!

Here is the Host Dollars chart for the promotion:

Full details can be found on my Stampin’ Up! Promotions page. Let me know if you have any questions. Email me if you’re interested in setting up a host code for yourself to see if you can collect $250 in orders from yourself and your stamping friends!  I’m happy to set up a code just for you!


Join+ Also Starting May 4, 2021!

May is a fabulous time to join Stampin’ Up! as new team members get even MORE FREE products in their customizable Starter Kit. From 4–31 May, new team members can get $125 $155 worth of products for only $99 + free business supplies + free shipping + all the fun being a Stampin’ Up! Demonstrator! See the complete details on my Stampin’ Up! Promotions page.

If you have any questions about joining or being a Stampin’ Up! Demonstrator, please drop me a note and I’ll be happy to talk to you about the benefits of joining my team. If you would like additional information about joining check out my Join My Team Page.


Current Host Code: YGDSB9H4

Use this host code when you order $50 or more and receive a free gift from me!  The free gift is your choice of any item valued up to $10.00 in the 2021-2022 Annual Catalog or in the Jan-Jun 2021 Mini Catalog!

If your order is over $150, please do not use the host code since you’ll receive your own Host Dollars plus I’ll still send you the free gift!  This host code can be used by anyone, no club or commitment required.  Let me know if you have any questions.


If you need any stamping supplies, I’d be very happy to be your Demonstrator.  Just click on the Shop Now button on the right side of the screen to go directly to my online store or contact me if you have any questions.  Happy Stamping!

Thanks for stopping by and have a great week!

Akiko

  • Visit my online store here
  • See the current Stampin’ Up! clearance rack specials here
  • Earn FREE Stampin’ Up! products through my Wildflower Frequent Shopper Program – my way of saying thank you to my online frequent shopper customers.
  • Have any questions? I’d be happy to help, click here to contact me.

Cardstock Cuts for this project:

  • Blushing Bride – 4-1/4″ x 11″ card base scored at 5-1/2″
  • Misty Moonlight – 1″ x 1″ (happy label)
  • Basic White – 4″ x 5-1/4″ (inside panel), 3-1/4″ x 4-1/2″ (scalloped rectangle)
  • Ombre Specialty Paper – 2-1/4″ x 2-1/4″ (die cut words)
  • Hand Penned DSP – 2-5/8″ x 3-15/16″ (floral background), 1-1/4″ x 4″ (inside trim)

Stampin’ Up! products used in this project:


Stampin’ Up! Beautiful Moments Mother’s Day Card

Good morning! Mother’s Day is just around the corner and the Stampin’ Up! Beautiful Moments cling stamp set is perfect for creating a special card for the occasion. I used the stamp set with the pretty floral and gingham from the new Pansy Petals designer series paper and the new Fresh Freesia and Pale Papaya In Color card stocks. These will be available on May 4 when the new 2021-2022 Annual Catalog debuts. You can find the other supplies I used at the bottom of my post along with the sizes of cardstock used.

I cut both long ends of a strip of Pale Papaya card stock with the stitched scalloped edge from the Stitched Be Mine dies and adhered it to the back 0f the Fresh Freesia gingham paper from the Pansy Petals designer series paper. I adhered the layered strip to a panel of the floral paper on the reverse. I adhered the layered panel to the front of a Fresh Freesia card base. I used blending brushes to apply Balmy Blue and Crumb Cake inks on a panel of Basic White and stamped the mother and daughter from the Stampin’ Up! Beautiful Moments cling stamp set in Memento Tuxedo Black ink on the panel. I stamped the birds in the sky.

I stamped the mother and daughter from the Stampin’ Up! Beautiful Moments stamp set again on a Basic White panel and colored it with Stampin’ Blends, Petal Pink, Soft Suede, Pale Papaya and Fresh Freesia. I fussy cut the ladies and popped it on the blended panel with dimensionals. I used the middle scalloped rectangle from the Scalloped Contours dies (Also from the upcoming 2021-2022 Annual Catalog and available on May 4, 2021) to cut a Pale Papaya panel and adhered the ladies on top.

I sentiment from the Timeless Tulips photopolymer stamp set in Memento Tuxedo Black ink on a Pale Papaya panel and cut it out with the smallest Stitched So Sweetly die using the two step die cutting method. I adhered it to the bottom of the panel with glue dots and adhered the mother and daughter panel on the left side with dimensionals. I added a bow with the new Fresh Freesia open weave ribbon and a couple of the new Loose Flower Flourishes, both available on May 4, 2021.


For the inside of the card, I stamped the sentiment from the Timeless Tulips stamp set in Memento Tuxedo Black ink on Basic White. I stamped the flower three times on the bottom corner and stamped some butterflies. I colored the images with new In Color Stampin’ Blends – Pale Papaya, Fresh Freesia and Soft Succulent. I finished the inside with a strip of the floral Pansy Petals DSP and adhered the panel to the inside of the card.

The Stampin’ Up! Beautiful Moments stamp set has beautiful images and sweet sentiments. I think it’s perfect for Mother’s Day and pairs beautifully with new products from the upcoming 2021-2022 Annual Catalog.


Stampin’ Up! Last Chance Sale is going on NOW!

Stampin’ Up! has posted the list of items from the 2020-2021 Annual catalog that are retiring and some of the items are on sale! Retiring items will be available only white supplies last! If you love great deals, now is the perfect time to shop.

To download a PDF with the Retiring Items List, click here.

To download an excel file with the Retiring Items List, click here.

Head to my Online Store to get the retiring items you need before they sell out!

The new 2021-2022 Annual Catalog will open for orders on May 4, 2021 and by then it will be too late!


Current Host Code: ARFDXWP4

Use this host code when you order $50 or more and receive a free gift from me!  The free gift is your choice of any item valued up to $10.00 in the 2020 – 2021 Annual Catalog or in the Jan-Jun 2021 Mini Catalog!

If your order is over $150, please do not use the host code since you’ll receive your own Host Dollars plus I’ll still send you the free gift!  This host code can be used by anyone, no club or commitment required.  Let me know if you have any questions.


If you need any stamping supplies, I’d be very happy to be your Demonstrator.  Just click on the Shop Now button on the right side of the screen to go directly to my online store or contact me if you have any questions. 

Thanks for stopping by and Happy Stamping!

Akiko

  • Visit my online store here
  • See the current Stampin’ Up! clearance rack specials here
  • Earn FREE Stampin’ Up! products through my Wildflower Frequent Shopper Program – my way of saying thank you to my online frequent shopper customers.
  • Have any questions? I’d be happy to help, click here to contact me.

Cardstock Cuts for this project:

  • Fresh Freesia – 4-1/4″ x 11″ card base scored at 5-1/2″
  • Pale Papaya – 2-3/4″ x 4-1/4″ (scalloped die cut), 1-3/8″ x 3-3/4″ (scalloped strip), 1″ x 3″ (label)
  • Basic White – 3-3/4″ x 5″ (inside panel), two 2-1/8″ x 3-5/16″ panels (stamped mother and daughter)
  • Pansy Petals DSP – 3-3/4″ x 5″ (front floral background), 1″ x 3-3/4″ (gingham strip), 1/2″ x 3-3/4″ (inside trim)

Stampin’ Up! products used in this project:


Stampin’ Up! Bloom and Grow for the Happy Inkin’ Thursday Blog Hop

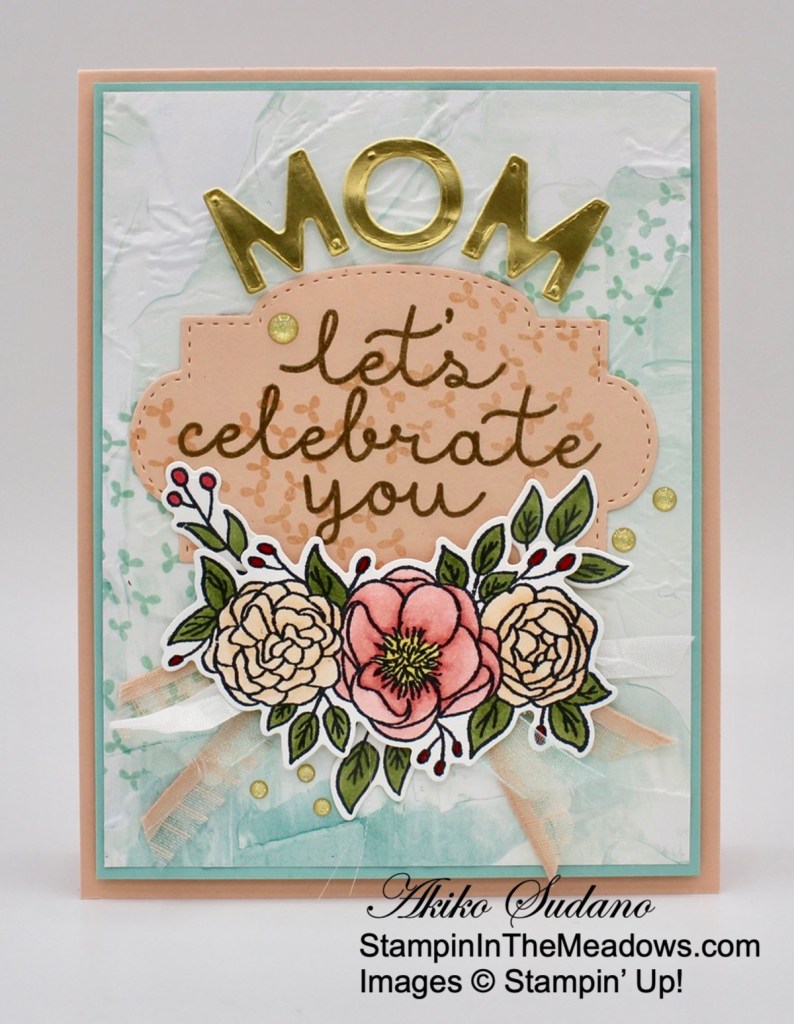
Good Morning and welcome to the Happy Inkin’ Thursday Blog Hop! I made a Mother’s Day card with the pretty Stampin’ Up! Bloom and Grow photopolymer stamp set and Budding Blooms dies. I also use the Playful Alphabet dies to make a gold foil MOM for the top of the card – definitely a Mother’s Day card! You can find the supplies used to create this card at the bottom of my post along with the sizes of cardstock used.

We have a color challenge this week and here is the pretty color palette we are using – I used all the colors for today’s card:

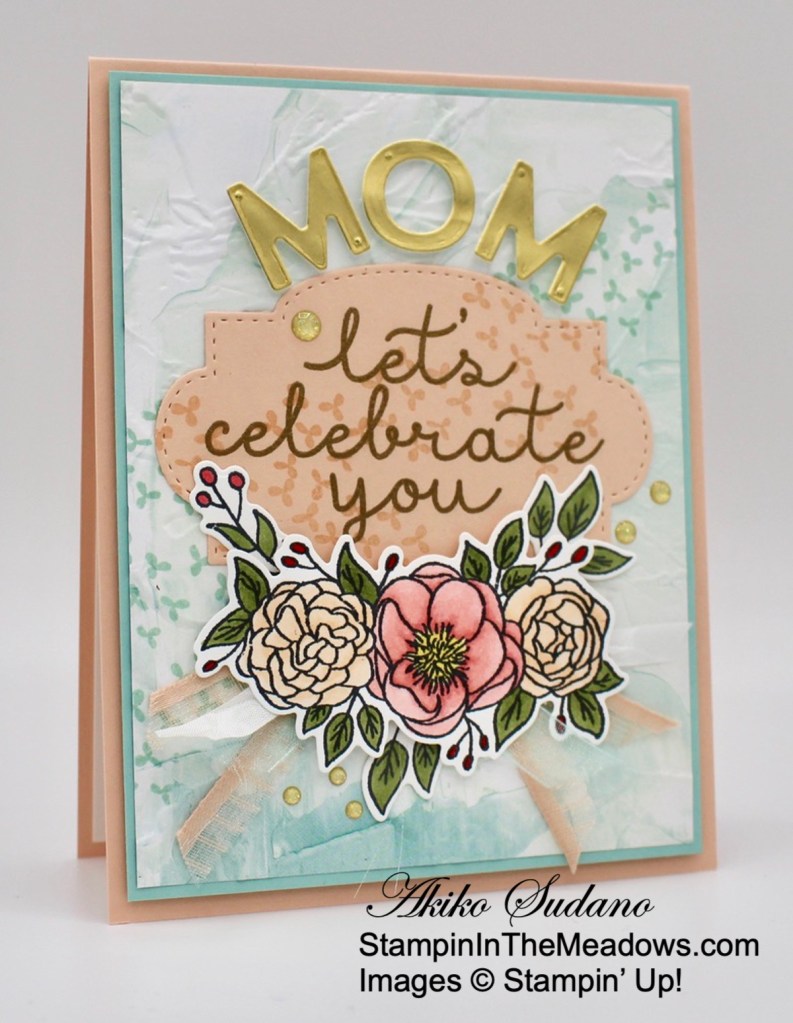
I stamped a Fine Art Floral designer series paper with a Pool Party spray of the floral cluster stamp from the Stampin’ Up! Bloom and Grow stamp set and embossed it with the Painted Texture 3D embossing folder. I adhered it to a Pool Party mat and then popped it to the front of a Petal Pink card base. I stamped the sentiment in Versamark ink on a Petal Pink panel and sprinkled it with gold embossing powder. I heat set the embossing powder until shiny and cut out the label with the Stitched So Sweetly die. I stamped the floral cluster stamp across the label in Petal Pink and wiped the embossed lettering and adhered it to the card front.

I cut out the letters for ‘MOM’ using the Playful Alphabet dies and Gold Foil and adhered the letters to the card front over the label with dimensionals. I stamped the floral spray from the Stampin’ Up! Bloom and Grow stamp set in Memento Tuxedo Black in on Basic White and cut it out with the coordinating die from the Budding Blooms dies. I also stamped two leaf sprigs and a berry and leaf sprig in Memento Tuxedo Black ink and cut them out with the coordinating dies. I colored all the die cut florals with Mossy Meadow for the leaves, Poppy Parade for the berries and I colored the flowers in Flirty Flamingo, Daffodil Delight and Petal Pink.

I cut a length of Petal Pink striped organdy ribbon in half and made a knot in the middle. I also tied a knot in Pool Party and White ribbon and adhered them to the card front with glue dots. I adhered the leaf clusters and leaf and berry cluster to the card front with glue dots and popped the floral spray on top with dimensionals. I was careful to avoid the ribbons so that I would get good adhesion with the dimensionals. I finished the flowers with clear Wink of Stella to add some sparkle and added some gold glitter enamel dots.

For the inside of the card, I stamped the sentiments from the Timeless Tulips photopolymer stamps in Pool Party on a Basic White panel. I stamped the floral spray from the Stampin’ Up! Bloom and Grow stamp set in Memento Tuxedo Black ink at the top of the panel and colored it the same as the one on the card front. I adhered the panel to the inside of the card.

The pretty flowers in the Stampin’ Up! Bloom and Grow stamp set are perfect for Mother’s Day and the sentiments in this stamp set and the Timeless Tulips stamp set are perfect for celebrating Mom with the love and appreciation she deserves on her special day!

On with the Hop! Click the Next button below to visit Karen Ksenzakovic’s blog.

And just in case you get lost along the way, here’s a list of the team members participating in the hop today:


Current Host Code: ARFDXWP4

Use this host code when you order $50 or more and receive a free gift from me!  The gift is your choice of any item valued up to $10.00 in the 2020-2021 Annual Catalog or in the 2021 January-June Mini Catalog!

If your order is over $150, please do not use the host code since you’ll receive your own Host Dollars plus I’ll still send you the free gift!  This host code can be used by anyone, no commitment required.  Let me know if you have any questions.


If you need any stamping supplies, I’d be very happy to be your Demonstrator.  Just click on the Shop Now Button on the right side of the screen to go directly to my online store or contact me if you have any questions.  Happy Stamping!

Thanks for visiting!

Akiko

  • Visit my online store here
  • See the current Stampin’ Up! clearance rack specials here
  • Earn FREE Stampin’ Up! products through my Wildflower Frequent Shopper Program – my way of saying thank you to my frequent shopper online customers.
  • Sign up for my weekly newsletter here
  • Have any questions? I’d be happy to help, click here to contact me.

Cardstock Cuts for this project:

  • Petal Pink – 4-1/4″ x 11″ card base scored at 5-1/2″, 2-3/4″ x 3-3/4″ (label)
  • Pool Party – 4″ x 5-1/4″ (front mat)
  • Basic White – 4″ x 5-1/4″ (inside panel), 2″ x 3-1/4″ (floral spray die cut), 1″ x 3-1/2″ (sprigs die cuts)
  • Gold Foil – 1″ x 2-1/2″ (die cut letters)
  • Fine Art Floral DSP – 3-1/4″ x 4-1/4″ (die cut panel)

Stampin’ Up! products used in this project:


Stampin’ Up! Tea Together Mother’s Day Card Video Tutorial

Good Morning! Today I’m sharing a card that I made yesterday afternoon during my Facebook Live Tutorial. The lovely Stampin’ Up! Tea Together cling stamp set and coordinating Tea Time Dies only came out last year, but they are on the retiring list – and the dies come with a 60% discount!! It’s a sweet set and with two weeks to Mother’s Day, it seemed the right stamp set to play with. You can find the supplies used to create this card at the bottom of my post along with the sizes of cardstock used.

Here is the Facebook Live video showing how I made the card:

I also posted the video to my YouTube Channel and you can view it here.

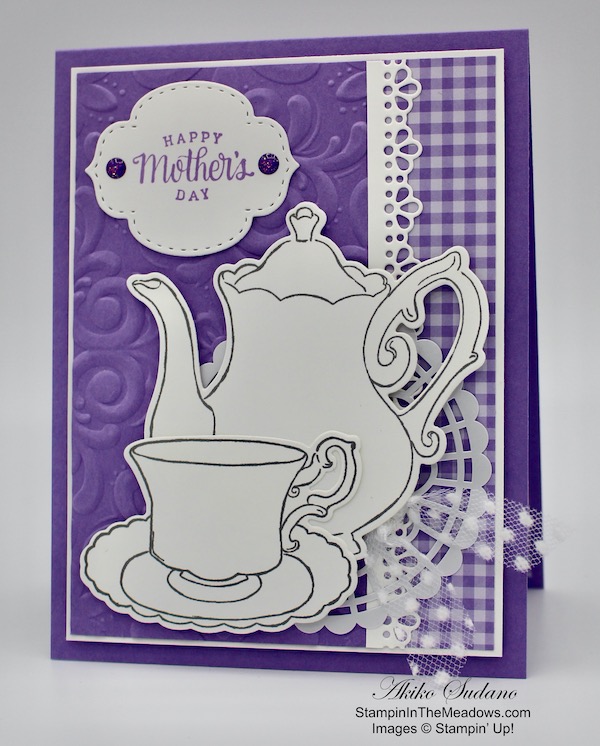
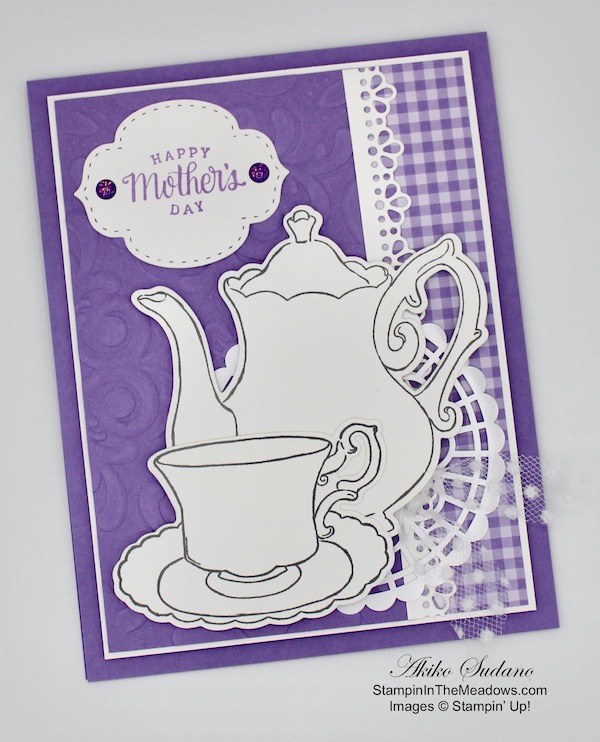
I started by running a panel of Highland Heather card stock through the Parisian Flourish embossing folder and adhering it to the left side of a Whisper White panel. I adhered a strip of Highland Heather gingham next to it. I cut a Whisper White lacy border using the die from the Ornate Borders Dies and adhered it between the layers. I popped the layered panel on a Highland Heather card base with dimensionals.

I stamped the sentiment from the Stampin’ Up! Tea Together cling stamp set in Highland Heather ink on a Whisper White panel. I cut it out with the Stitched So Sweetly die and adhered it to the card with liquid glue. I accented it with two Highland Heather glitter enamel dots.

I stamped the teapot and teacup from the Stampin’ Up! Tea Together stamp set in Basic Gray ink on Whisper White card stock and cut them out with the coordinating dies. I adhered a pearlized doily to the card front with multipurpose liquid glue and adhered the teapot and teacup with dimensionals and some liquid glue behind the teacup where it overlapped the teapot. I finished off the front with some tied off polka dot tulle ribbon.

I stamped the sweet sentiment from the Stampin’ Up! Tea Together stamp set on the side of a Whisper White panel in Highland Heather ink. Next to it, I stamped the large rose in Basic Gray ink. I colored the rose with Highland Heather Stampin’ Blends and the leaves with Light Granny Apple Green Stampin’ Blend. I added a strip of Highland heather to the bottom and adhered the panel to the inside of the card.

So many products used in today’s card are on the current retiring list and I was worried that not all of them would still be available at publication time. Sadly, I just learned that the gingham paper that is part of the Subtles 6″ x 6″ DSP is sold out. Many products are going quickly, so hurry over to my Online Store to check out what you’ve been waiting to buy before it’s gone!


Stampin’ Up! 2019-20 Annual Catalog and January-June 2020 Mini Catalog Retiring Lists Have Posted!

Stampin’ Up has posted the retirement lists for the 2019-2020 Annual Catalog and January-June 2020 Mini Catalog today in preparation for the release of the new 2020-2021 Annual Catalog. The items on the lists are only available while supplies last from now through June 2!  And some of the items are available at a discount!!

Click on the picture below to head over to my Online Store to shop the retiring products:

Have fun shopping and let me know if you have any questions!


Stampin’ Up! Ornate Garden Suite Early Release available for ordering NOW!

Stampin’ Up! has a beautiful new early release product suite from the upcoming Annual Catalog and it’s available to order now!! Click the image below to see a PDF brochure of all the products that are available with this beautiful suite or go to the Ornate Garden page in my Online Store to place your order now.


April 16 – 30 Host Code: SJ9ZJ46Z

Use this host code when you order $50+ and receive a free gift from me!  If your order is over $150, please do not use this code, but you’ll still get the free gift.  The free gift is your choice of any item valued up to $10.00 in the 2019 – 2020 Annual Catalog or in the 2020 Mini Catalog!  That includes some of the Host Exclusive stamp sets!

If your order is over $150, please do not use the host code since you’ll receive your own Host Dollars plus I’ll send you the free gift!  This host code can be used by anyone, no club or commitment required.  Let me know if you have any questions.


If you need any stamping supplies, I’d be very happy to be your Demonstrator.  Just click on the Shop Now button on the right side of the screen to go directly to my online store or contact me if you have any questions.  Happy Stamping!

Thanks for stopping by and have a great week!

Akiko

  • Visit my online store here
  • See the current Stampin’ Up! clearance rack specials here
  • Earn FREE Stampin’ Up! products through my Wildflower Frequent Shopper Program – my way of saying thank you to my online frequent shopper customers.
  • Sign up for my weekly newsletter here
  • Have any questions? I’d be happy to help, click here to contact me.

Cardstock Cuts for this project:

  • Highland Heather – 4-1/4″ x 11″ card base scored at 5-1/2″, 2-3/4″ x 5-1/8″ (embossed panel)
  • Whisper White – 4″ x 5-1/4″ (inside panel), 3-7/8″ x 5-1/8″ (front mat), 4″ x 7″ (teapot, teacup and label die cuts), 1/2″ x 5″ (lace border die cut)
  • Subtles 6″ x 6″ Designer Series Paper – 1″ x 5″ (gingham front trim), 1/2″ x 4″ (gingham inside trim)

Stampin’ Up! products used in this project:


Stampin’ Up! Timeless Tulips Mother’s Day Card Video Tutorial

Good Morning! Today I am sharing a video tutorial that I made yesterday during my Sunday Facebook Live session. I made a Mother’s Day Card with the pretty Stampin’ Up! Timeless Tulips bundle. You can find the supplies used to create this card at the bottom of my post along with the sizes of cardstock used. Here is my card:

And here’s the Facebook Live video:

I also posted the video to YouTube and you can view it here if you prefer.

I started by embossing a panel of Soft Sea Foam card stock with the Parisian Flourish embossing folder. I adhered it to a So Saffron card base with snail. I trimmed the bottom of a strip of Perennial Essence designer series paper with the Banner Triple Punch and adhered it to the card with snail.

I stamped one of each tulip flower from the Stampin’ Up! Timeless Tulips stamp set in Daffodil Delight ink on Whisper White. I cut out the largest flower with the Tulip Builder punch and fussy cut the other two. I stamped three stems and two leaves using Pear Pizzazz ink on Whisper White and fussy cut them out. I cut a Whisper White Circle using the largest circle in the Stitched Shapes dies and a Soft Sea Foam scalloped circle using the Layering Circles dies. I adhered these together with snail.

I arranged the flowers and stems on the circle and adhered the stems with glue dots. I adhered the small tulips to the circle with multipurpose liquid glue and the large flower with dimensionals. I adhered the stems with multipurpose liquid glue and trimmed the ends. I attached the leaves. I stamped the sentiment in Pear Pizzazz ink on a Stitched So Sweetly die cut Whisper White label. I adhered the circle and label on the card front with dimensionals, including skinny ones under the stems. I finished the card with a Daffodil Delight ruched ribbon bow and a pearl colored with the dark Daffodil Delight Stampin Blend.

I stamped another tulip, stem and leaf on a Whisper White panel for the inside of the card. I added a strip of the Perennial Essence DSP to the bottom and adhered it to the inside of the card with snail.

I love bright yellow tulips in the Spring and I think they’re perfect for Mother’s Day! What will you make for Mother’s Day?


Sale-A-Bration Second Release Begins Tomorrow!

Tomorrow is the first day for Customers to get the Sale-A-Bration Second Release products. Yay!!! The second release consists of three additional stamp sets and two beautiful designer series paper packs that you can get for FREE with a $50 minimum purchase. Click on the picture below to see these new items and read on to get a refresher on the Sale-A-Bration details:

There are three ways to enjoy Sale-A-Bration benefits: Shop – Host – Join.

Sale-A-Bration Shopping Benefits

You earn FREE products for every $50 you spend (before shipping and taxes) during Sale-A-Bration. The Sale-A-Bration brochure has the products that you can choose to add to your order. And the more you spend, the more FREE products you can earn. There are two qualifying levels with spending thresholds, giving you flexibility to choose what you want.

For example, if you spend $150, then you can then choose three level 1 items or one level 1 and one level 2.

Head over to my online store to shop now.

Sale-A-Bration Host Benefits

Hosts with orders of $300 or more can receive the exclusive Little Ladybug Stamp Set (Item 152384).

  • Customer, workshop, and online orders qualify.
  • There is no limit as to how many qualifying orders you can place throughout the promotion.
  • Only one Little Ladybug Stamp Set can be redeemed per order. 
  • Only the host of the order will receive the free stamp set.
  • To qualify, orders must be opened from January 3, and closed by March 31.

Sale-A-Bration Joining Benefits

Recruits who join Stampin’ Up! as an independent Stampin’ Up! demonstrator between January 3–March 31, 2020, will receive the Mini Paper Cutter, a 6″ x 6″ Designer Series Paper sampler, and your choice of stamp set (Host stamp sets and Sale-A-Bration stamp sets not included.). 

  • The 6″ x 6″ Designer Series Paper Sampler in the Join offering has samples from the Lily Impressions Designer Series Paper (Sale-A-Bration brochure), Peaceful Poppies Designer Series Paper (January–June 2020 Mini Catalog), Country Club Designer Series Paper (January–June 2020 Mini Catalog), Birthday Bonanza Designer Series Paper (January–June 2020 Mini Catalog), Tropical Oasis Designer Series Paper (January–June 2020 Mini Catalog), Best Dress 6″ x 6″ Designer Series Paper (January–June 2020 Mini Catalog). 
  • 12 double-sided designs (two double-sided sheets from six different Designer Series Paper packs) QTY: 48 sheets total (four each of 12 designs)
  • Mini Paper Cutter Dimensions: 7-5/8″ x 5-3/8″ x 1-1/4″

And to sweeten the Joining offer, you can add items from the Sale-A-Bration second release to your Starter Kit if you join before March 3, 2020. 

For more details on the benefits of joining Stampin’ Up! as a Demonstrator, see my Join My Team page. There is a Join My Team button at the bottom where you can start the process. Please contact me if you have any questions. I’ll be happy to tell you more.


March 1 – 15 Host Code: BQCVV2RG

Use this host code when you order $50+ and receive a free gift from me!  If your order is over $150, please do not use this code, but you’ll still get the free gift.  The free gift is your choice of any item valued up to $10.00 in the 2019 – 2020 Annual Catalog or in the 2020 Mini Catalog!  That includes some of the Host Exclusive stamp sets!

If your order is over $150, please do not use the host code since you’ll receive your own Host Dollars plus I’ll send you the free gift!  This host code can be used by anyone, no club or commitment required.  Let me know if you have any questions.


If you need any stamping supplies, I’d be very happy to be your Demonstrator.  Just click on the Shop Now button on the right side of the screen to go directly to my online store or contact me if you have any questions.  Happy Stamping!

Thanks for stopping by and have a great week!

Akiko

  • Visit my online store here
  • See the current Stampin’ Up! clearance rack specials here
  • Earn FREE Stampin’ Up! products through my Wildflower Frequent Shopper Program – my way of saying thank you to my online frequent shopper customers.
  • Sign up for my weekly newsletter here
  • Have any questions? I’d be happy to help, click here to contact me.

Cardstock Cuts for this project:

  • So Saffron – 4-1/4″ x 11″ card base scored at 5-1/2″
  • Soft Sea Foam – 4″ x 5-1/4″ (embossed background), 3-1/2″ x 3-1/2″ (scalloped circle mat)
  • Whisper White – 4″ x 5-1/4″ (inside panel), 4″ x 4-1/2″ (flowers & stems), 3-1/4″ x 3-1/4″ (circle), 1-1/2″ x 2 1/2″ (label)
  • Perennial Essence DSP – 2″ x 5″ (banner), 1/2″ x 4″ (inside trim)

Stampin’ Up! products used in this project: