Stampin’ Up! Wildlife Wonder for the Inkin’ Krew Blog Hop

Good Morning! Welcome to the May Inkin’ Krew Team Blog Hop! The theme for this month’s hop is “For the Men/Boys” and I used the Stampin’ Up! Wildlife Wonder cling stamp set to make a masculine birthday card for our hop!

The Stampin’ Up! Wildlife Wonder cling stamp set is one of the returning favorite stamp sets in the new catalog. I combined it with the pretty Fresh As A Daisy designer series paper and some of the new 2023-2025 In Colors for a rugged outdoors look. You can find the supplies I used at the bottom of my post along with the sizes of cardstock used.

I adhered a panel of Fresh As A Daisy designer series paper to a Wild Wheat mat and adhered the layered panel to the front of a Pebbled Path card base with dimensionals.

I stamped the sentiment from the Stampin’ Up! Wildlife Wonder stamp set in Pebbled Path ink on the top of another Fresh As A Daisy DSP panel. I stamped the trees from the Grassy Grove stamp set in Pebbled Path ink on the side of the panel and adhered the panel to the card front with liquid glue.

I stamped the wolf from the Stampin’ Up! Wildlife Wonder stamp set in Pebbled Path ink on a Gray Granite panel and stamped the plant in Wild Wheat. I cut the image out with the second smallest Deckled Rectangles die and adhered it to a Wild Wheat mat with liquid glue. I adhered a short length of Wild Wheat ribbon to the card with Stampin’ Seal and adhered the wolf panel over it using dimensionals. I finished the card with three rustic metallic dots.

For the inside of the card, I stamped the sentiment from the Stampin’ Up! Wildlife Wonder stamp set in Pebbled Path ink ink on a Basic White panel. I stamped the plant next to the sentiment in Wild Wheat and adhered the panel to a Wild Wheat mat. I adhered the layered panel to the inside of the card with Stampin’ Seal.

If you look closely at the Fresh As A Daisy designer series paper, you will see that on the back of the pretty florals is a gentle brush stroke texture pattern that is great for subtle backgrounds and masculine cards.

On With The Hop! Click on the Next Blog button to move forward to Karen Finkle’s project or click the Previous Blog button to move back to see the project that Mary Deatherage created.

If you get lost along the way, here are the participants for the hop:


Current Host Code: TUMGKET9

Use this host code when you order $50 or more and receive a Thank You gift from me!  The free gift is your choice of any currently available item valued up to $10.00.

If your order is over $150, please do not use the host code since you’ll receive your own Host Dollars plus I’ll still send you the Thank You gift!  This host code can be used by anyone, no club or commitment required. Let me know if you have any questions.


If you need any stamping supplies, I’d be very happy to be your Demonstrator.  Just click on the Shop Now button on the right side of the screen to go directly to my online store or contact me if you have any questions.  Happy Stamping!

Thanks for stopping by and have a great week!

Akiko

  • Visit my online store here
  • See the current Stampin’ Up! clearance rack specials here
  • Earn FREE Stampin’ Up! products through my Wildflower Frequent Shopper Program – my way of saying thank you to my online frequent shopper customers.
  • Have any questions? I’d be happy to help, click here to contact me.

Cardstock Cuts for this project:

  • Pebbled Path – 5-1/2″ x 8-1/2″ card base scored at 4-1/4″
  • Wild Wheat – two 4″ x 5-1/4″ panels (front and inside mats)
  • Gray Granite – 2″ x 3-1/2″ (wolf panel)
  • Basic White – 3-7/8″ x 5-1/8″ (inside panel)
  • Fresh as a Daisy DSP – 3-7/8″ x 5-1/8″ (front background), 3″ x 4″ (outdoor panel)

Stampin’ Up! products used in this project:


Stampin’ Up! Flowers of Friendship for the Inkin’ Krew Blog Hop

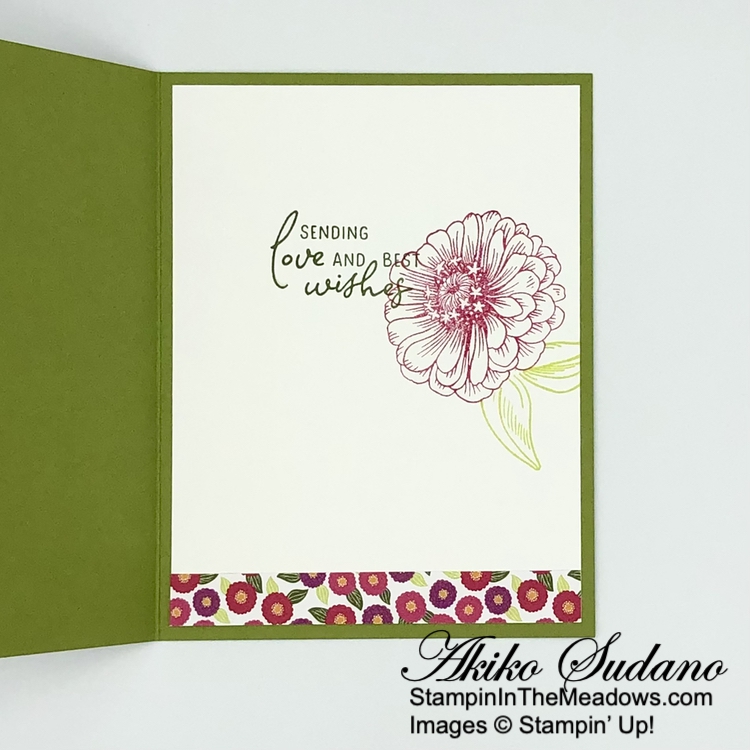
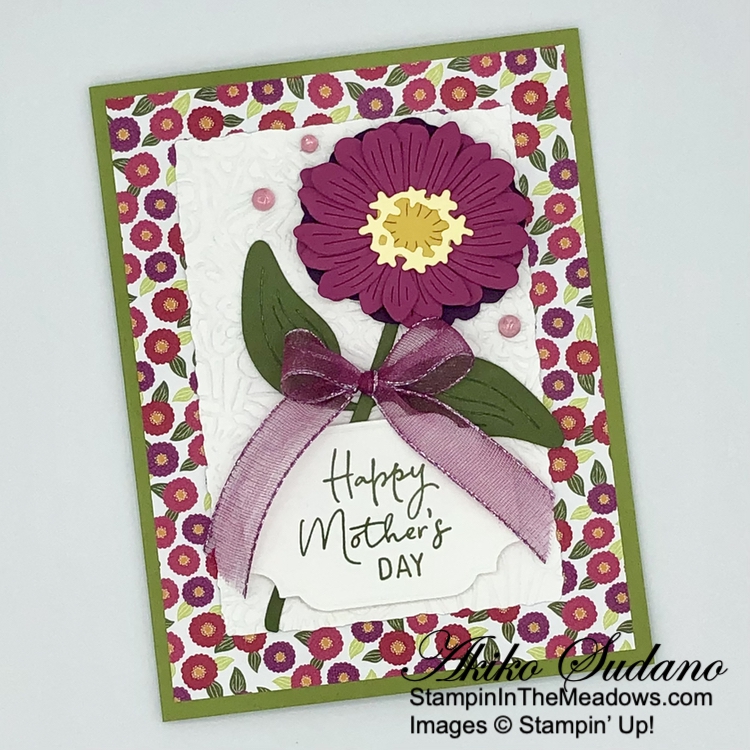
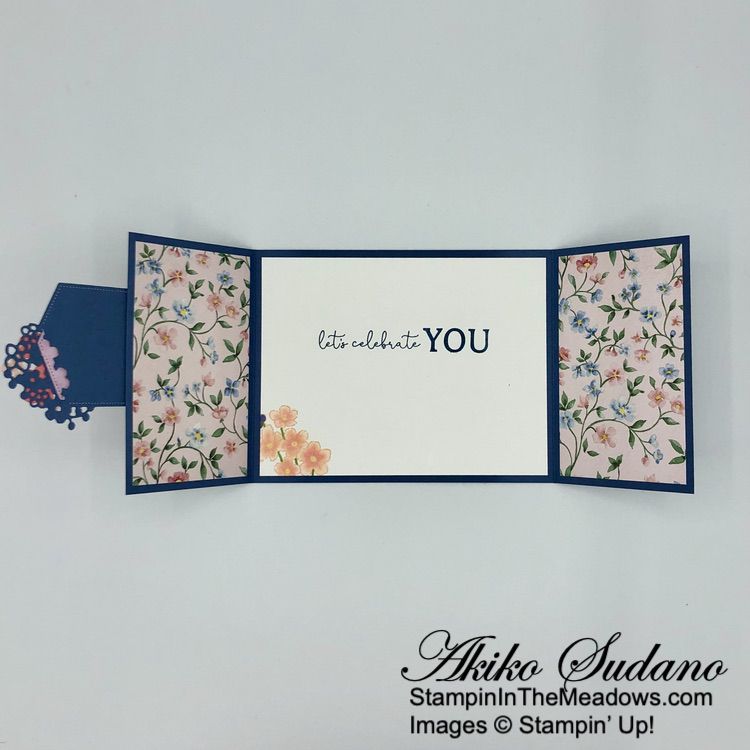
Good morning! Welcome to the April Inkin’ Krew Team Blog Hop! The theme for this month’s hop is “For the Ladies/Girls” and I used the sweet Stampin’ Up! Flowers of Friendship stamp set to make a simple Z-Fold Mother’s Day card. You can find the supplies I used at the bottom of my post along with the sizes of cardstock used.

I adhered a panels of Lovely in Linen designer series paper to each section of a Misty Moonlight card base. Stampin’ Up! is bringing Misty Moonlight out of retirement and it will join the Neutrals color family in the new catalog next month! I cut two panels of Basic White with the third largest scalloped rectangle in the Scalloped Contours dies – one for the inside panel and one for the front. For the front rectangle, I stamped the spatter stamp from the Color and Contour photopolymer stamp set using Pale Papaya ink in two corners.

I cut a panel of Soft Succulent Brushstroke specialty paper with the fern from the Meadows Dies and adhered it to the panel with liquid glue. I stamped two sets of the flower bouquet from the retiring Stampin’ Up! Flowers of Friendship photopolymer stamp set in Evening Evergreen ink on Basic White. I colored them with Stampin’ Blends – the leaves in light Soft Succulent and the flowers in Sweet Sorbet. Then I fussy cut them with my paper snips and this was the most challenging fussy cutting task that I have performed – it was good practice in patience. Then I adhered the flowers on the scalloped rectangle with dimensionals under the flowers and glue dots under the leaves. I did trim some of the bottoms so that they wouldn’t extend too far below the scalloped rectangle.

I folded a short length of Night of Navy Bordered ribbon and adhered it to the bottom of the bouquet with a dimensional. I stamped the sentiment from the retiring Celebrating You cling stamp set in Misty Moonlight ink on Pale Papaya. I cut it out with the label die from the retiring Geraniums dies and adhered it to the bottom of the scalloped rectangle with dimensionals.

I adhered the decorated scalloped rectangle to the card front with liquid glue, being careful to apply the glue to only half of the panel. I stamped the sentiment from the Happy Labels stamp set in Misty Moonlight ink in the lower corner of the second scalloped rectangle. Note that I only inked up half the sentiment.

I covered the scallops on the other lower corner with post-it notes and inked up the lone flower from the bouquet from the Stampin’ Up! Flowers of Friendship stamp set with Evening Evergreen ink. I stamped it and removed the post-it notes and only the area inside the stitching is stamped! I colored the flower and leaf with Sweet Sorbet and Soft Succulent Stampin’ Blends. I adhered the panel to the inside of the card with liquid glue, being careful to line it up behind the top scalloped rectangle.

I finished the card with red rhinestones and adhered a Starry Sky adhesive flower to the label.

I used a mix of so many different stamps and dies on this project – I love how the items work so well together. Some of these are retiring and some are new – I also love how you can mix retired products from your stash with new items to make beautiful cards – especially for Mother’s Day!

On With The Hop! Click on the Next Blog button to move forward to Karen Finkle’s project or click the Previous Blog button to move back to see the project that Mary Deatherage created.

If you get lost along the way, here are the participants for the hop:


Current Host Code: 6EDCPU4T

Use this host code when you order $50 or more and receive a free gift from me!  The free gift is your choice of any item currently available valued up to $10.00.

If your order is over $150, please do not use the host code since you’ll receive your own Host Dollars plus I’ll still send you the free gift!  This host code can be used by anyone, no club or commitment required. Let me know if you have any questions


If you need any stamping supplies, I’d be very happy to be your Demonstrator.  Just click on the Shop Now button on the right side of the screen to go directly to my online store or contact me if you have any questions. 

Thanks for stopping by and Happy Stamping!

Akiko

  • Visit my online store here
  • See the current Stampin’ Up! clearance rack specials here
  • Earn FREE Stampin’ Up! products through my Wildflower Frequent Shopper Program – my way of saying thank you to my online frequent shopper customers.
  • Have any questions? I’d be happy to help, click here to contact me.

Cardstock Cuts for this project:

  • Misty Moonlight – 5-1/2″ x 8-1/2″ card base scored at 2-1/8″ and 4-1/4″
  • Pale Papaya – 1-3/4″ x 3″ (label)
  • Brushstrokes Specialty – 2-1/4″ x 4-1/2″ (die cut fern)
  • Basic White – two 2-3/4″ x 4″ panels (scalloped rectangles), 4″ x 5″ (fussy cut flowers)
  • Lovely in Linen DSP – 4″ x 5-1/4″ (inside panel), two 1-7/8″ x 5-1 4″ panels (front and middle panels)

Stampin’ Up! products used in this project:


Stampin’ Up! Best Butterflies for the Inkin’ Krew Blog Hop

Good morning! Welcome to the February Inkin’ Krew Team Blog Hop! The theme for this month’s hop is “Celebrate Spring” and I used the sweet Stampin’ Up! Best Butterflies bundle to make a simple fun fold Birthday card. You can find the supplies I used at the bottom of my post along with the sizes of cardstock used.

I adhered a panel of Starry Sky Butterfly Kisses 6″ x 6″ designer series paper to a panel of Crushed Curry card stock with liquid glue. I adhered a panels of floral butterfly Butterfly Kisses 6″ x 6″ designer series paper to the front and inside panels of the Crushed Curry mini card and adhered the mini card to the front of the main card base with liquid glue.

I cut two Basic White circles with the second largest Stylish Shapes circle die. On the first one, I stamped the dots from the Stampin’ Up! Best Butterflies photopolymer stamp set in Crushed Curry ink several times. I cut a Fresh Freesia scalloped circle using the second largest scalloped circle from the Layering Circles die and adhered it to the back of the stamped Basic White circle with liquid glue. I adhered it to the mini card front flap, being careful to apply the adhesive to only one side of the circle.

I cut two sets of wings using the Butterfly Builder dies in the Stampin’ Up! Best Butterflies bundle from different patterns of the Butterfly Kisses 6″ x 6″ DSP. I cut a large butterfly body from Starry Sky and adhered the wings to the body with glue dots to make the large butterfly on the front. I adhered the butterfly to the circle with dimensionals.

I stamped the sentiment from the Sweetest Cherries stamp set in Versamark ink on Starry Sky. I sprinkled it with white embossing powder and shook off the excess. I heated the powder with my heat tool until it was bright and shiny and cut it out with the skinny long banner from the Stylish Shapes dies. I adhered it to the mini card, being careful to apply the adhesive to the left side of the label.

I stamped the sentiment from the Stampin’ Up! Best Butterflies stamp set in Starry Sky ink on the second die cut circle. I adhered the circle to the inside of the mini card under the front flap circle. I cut the large butterfly from Starry Sky and the smaller butterfly from Calypso Coral and adhered them to the inside with liquid glue.

I finished the card with gold adhesive sequins around the mini card. I like how I can extend the mini card front design into the inside with the die cuts, DSP and sequins!

A happy, colorful butterfly birthday card to Celebrate Spring! This was a fun card to make and the Stampin’ Up Best Butterflies bundle is fun to play with – you can make all sorts of butterflies!

On With The Hop! Click on the Next Blog button to move forward to Mary Deatherage’ project or click the Previous Blog button to move back to see the project that Tara Carpenter created.

If you get lost along the way, here are the participants for the hop:


Current Host Code: FWMXBD76

Use this host code when you order $50 or more and receive a free gift from me!  The free gift is your choice of any item currently available valued up to $10.00 in the 2022-2023 Annual Catalog or the January-April 2023 Mini Catalog!

If your order is over $150, please do not use the host code since you’ll receive your own Host Dollars plus I’ll still send you the free gift!  This host code can be used by anyone, no club or commitment required. Let me know if you have any questions


If you need any stamping supplies, I’d be very happy to be your Demonstrator.  Just click on the Shop Now button on the right side of the screen to go directly to my online store or contact me if you have any questions. 

Thanks for stopping by and Happy Stamping!

Akiko

  • Visit my online store here
  • See the current Stampin’ Up! clearance rack specials here
  • Earn FREE Stampin’ Up! products through my Wildflower Frequent Shopper Program – my way of saying thank you to my online frequent shopper customers.
  • Have any questions? I’d be happy to help, click here to contact me.

Cardstock Cuts for this project:

  • Crushed Curry – 4-1/4″ x 5-1/2″ main card base, 4-1/4″ x 5-1/4″ mini card base scored at 1-3/4″
  • Starry Sky – 1″ x 3-1/4″ (label), 1-1/2″ x 2-1/2″ (butterfly body), 2-1/2″ x 2-1/2″ (large die cut butterfly)
  • Fresh Freesia – 3-1/4″ x 3-1/4″ (scalloped circle die cut)
  • Calypso Coral – 1-1/2″ x 2″ (small die cut butterfly)
  • Basic White – 3″ x 6″ (die cut circles)
  • Butterfly Kisses 6″ x 6″ DSP – 4″ x 5-1/4″ (main card base background), two 1-3/4″ x 4″ (mini card flaps), 3″ x 4″ (mini card inside background), 2″ x 2″ (butterfly wings), 1-1/2″ x 2″ (butterfly wings)

Stampin’ Up! products used in this project:


Stampin’ Up! Petal Park for the Inkin’ Krew Blog Hop

Good morning! Welcome to the February Inkin’ Krew Team Blog Hop! The theme for this month’s hop is “Birthday” and I used the sweet Stampin’ Up! Petal Park bundle to make a simple fun fold Birthday card! You can find the supplies I used at the bottom of my post along with the sizes of cardstock used.

I adhered a panel of Balmy Blue Country Gingham 6″ x 6″ designer series paper to a panel of Balmy Blue card stock with liquid glue. I adhered a panel of Regency Park 6″ x 6″ designer series paper to the front of a 3″ mini card and adhered the mini card to the DSP panel with liquid glue.

I stamped the large leaf spray line image from the Stampin’ Up! Petal Park photopolymer stamp set in Shaded Spruce ink on Basic White and used stamped off Shaded Spruce ink to stamp the filler image. I cut it with the largest circle die from the Stylish Shapes dies.

I stamped the three large outline flowers from the Stampin’ Up! Petal Park stamp set in Night of Navy ink on Basic White. I stamped the filler flower image in Balmy Blue and cut the flowers out with the coordinating punch. I adhered the flowers to the die cut circle with dimensionals and adhered Milky Dots to the centers. I adhered the decorated circle to the card with liquid glue.

I stamped the birthday sentiment from the Sentimental Park stamp set in Versamark ink on a strip of Night of Navy. I sprinkled it with white embossing powder and shook off the excess. I heated the powder with my heat tool until it was bright and shiny. I cut the sentiment out with the small label die from the Sending dies, using the two step die cutting method. I adhered the label to the card with glue dots. I made a bow with Starry Sky metallic ribbon and tucked it under one of the flowers, adhering it with a glue dot. I finished the card with a dragonfly trinket, adhered with a glue dot.

For the inside of the card, I stamped the the flowers from the Stampin’ Up! Petal Park stamp set in Night of Navy in the corner of a Basic White panel. I stamped the flower filler image in Balmy Blue and the leaves in Shaded Spruce – full strength for the outline and stamped off for the filler. I stamped the sentiments from the Sentimental Park stamp set in Night of Navy and trimmed the bottom with a strip of Regency Park 6″ x 6″ DSP before adhering it to the inside of the card.

A pretty floral birthday wish with the beautiful Stampin’ Up! Petal Park bundle and Regency Park 6″ x 6″ DSP!

On With The Hop! Click on the Next Blog button to move forward to Amy Koenders’ project or click the Previous Blog button to move back to see the project that Mary Deatherage created.

If you get lost along the way, here are the participants for the hop:


Current Host Code: ZYNDU2N9

Use this host code when you order $50 or more and receive a free gift from me!  The free gift is your choice of any item currently available valued up to $10.00 in the 2022-2023 Annual Catalog or the January-April 2023 Mini Catalog!

If your order is over $150, please do not use the host code since you’ll receive your own Host Dollars plus I’ll still send you the free gift!  This host code can be used by anyone, no club or commitment required. Let me know if you have any questions


If you need any stamping supplies, I’d be very happy to be your Demonstrator.  Just click on the Shop Now button on the right side of the screen to go directly to my online store or contact me if you have any questions. 

Thanks for stopping by and Happy Stamping!

Akiko

  • Visit my online store here
  • See the current Stampin’ Up! clearance rack specials here
  • Earn FREE Stampin’ Up! products through my Wildflower Frequent Shopper Program – my way of saying thank you to my online frequent shopper customers.
  • Have any questions? I’d be happy to help, click here to contact me.

Cardstock Cuts for this project:

  • Balmy Blue – 4-1/4″ x 5″ main card base, 3″ x 11″ mini card base scored at 5-1/2″
  • Night of Navy – 3/4″ x 3″ (label)
  • Basic White – 2-3/4″ x 5-1/4″ (inside panel), 3-1/4″ x 3-1/4″ (die cut circle), 2-1/2″ x 3″ (punched flowers)
  • Country Gingham 6″ x 6″ DSP – 4″ x 5-1/4″ (main card base background)
  • Regency Park 6″ x 6″ DSP – 2-3/4″ x 5-1/4″ (mini card base background), 3/4″ x 2-3/4″ (inside trim)

Stampin’ Up! products used in this project:


Stampin’ Up! Two-Tone Flora for the Inkin’ Krew Blog Hop

Good morning! Welcome to the January Inkin’ Krew Team Blog Hop! The theme for this month’s hop is “Love” and I used the cute Stampin’ Up! Two-Tone Flora bundle to make a CAS (Clean and Simple) Valentine! You can find the supplies I used at the bottom of my post along with the sizes of cardstock used.

I stamped the large rose from the Stampin’ Up! Two-Tone Flora photopolymer stamp set in Polished Pink ink on Basic White. I stamped the detailed stamp first in full strength ink and then stamped the background stamp in stamped off ink. I cut it out with the coordinating die.

I stamped the double leaf stamp from the Stampin’ Up! Two-Tone Flora stamp set twice in Soft Succulent ink in the lower corner of a Basic White panel. I laid the die cut rose on the panel and stamped the sentiment from the Country Bouquet stamp set in Evening Evergreen ink to the side.

I adhered the stamped panel to an Evening Evergreen mat with liquid glue and adhered the die cut rose to the layered panel with dimensionals.

I adhered the panel to the front of a Thick Basic White card base with dimensionals. I finished the card with a Soft Succulent bow and three In Color Opal gems.

For the inside of the card, I stamped the the sentiment from the Country Bouquet stamp set in Evening Evergreen ink on a Basic White panel. I stamped the open hearts next to the sentiment in Polished Pink ink and adhered the panel to an Evening Evergreen mat before adhering it to the inside of the card.

A simple pink rose from the pretty Stampin’ Up! Two-Tone Flora bundle to say I love you. Perfect for Valentine’s Day!

On With The Hop! Click on the Next Blog button to move forward to Terry Lynn Bright’s project or click the Previous Blog button to move back to see the project that Karen Ksenzakovic created.

If you get lost along the way, here are the participants for the hop:


Current Host Code: ZYNDU2N9

Use this host code when you order $50 or more and receive a free gift from me!  The free gift is your choice of any item currently available valued up to $10.00 in the 2022-2023 Annual Catalog or the January-April 2023 Mini Catalog!

If your order is over $150, please do not use the host code since you’ll receive your own Host Dollars plus I’ll still send you the free gift!  This host code can be used by anyone, no club or commitment required. Let me know if you have any questions


If you need any stamping supplies, I’d be very happy to be your Demonstrator.  Just click on the Shop Now button on the right side of the screen to go directly to my online store or contact me if you have any questions. 

Thanks for stopping by and Happy Stamping!

Akiko

  • Visit my online store here
  • See the current Stampin’ Up! clearance rack specials here
  • Earn FREE Stampin’ Up! products through my Wildflower Frequent Shopper Program – my way of saying thank you to my online frequent shopper customers.
  • Have any questions? I’d be happy to help, click here to contact me.

Cardstock Cuts for this project:

  • Thick Basic White – 4-1/4″ x 11″ card base scored at 5-1/2″
  • Evening Evergreen – 3-3/4″ x” x 5″ (front mat), 3-7/8″ x 5-1/8″ (inside mat)
  • Basic White – 3-3/8″ x 4-7/8″ (front panel), 3-3/4″ x 5″ (inside panel), 2-1/4″ x 2-1/4″ (die cut flower)

Stampin’ Up! products used in this project:


Stampin’ Up! Sweet Songbirds for the Inkin’ Krew Blog Hop

Good morning! Welcome to the November Inkin’ Krew Team Blog Hop! The theme for this month’s hop is “Celebrate!” and I used the cute Stampin’ Up! Sweet Songbirds bundle to share my Winter celebrations! You can find the supplies I used at the bottom of my post along with the sizes of cardstock used.

I embossed a panel of Pool Party card stock with the snowflakes in the Wintry 3D embossing folder and adhered it to a panel of Storybook Gnomes designer series paper. I adhered the layered panel to a Real Red mat and adhered it all to the front of a Pool Party card base with liquid glue. I cut a Basic White panel with the Scalloped Contours die and stamped the sentiment from the Stampin’ Up! Sweet Songbirds cling stamp set in the corner using Soft Suede ink. I adhered it to the card front with dimensionals.

I cut the large branch die from the Decorated with Happiness bundle from Mossy Meadow and adhered it to the card with glue dots (including the lower branch on the DSP). I punched the bird from Real Red card stock with the Songbird Builder punch in the Stampin’ Up! Sweet Songbirds bundle and stamped the eyes in Memento Tuxedo Black ink. I punched a beak from Crushed Curry and a breast from Basic White and adhered them to the bird with liquid glue, along with the little wing.

I cut the small pinecones from Crumb Cake and the small detailed pinecones from Soft Suede using the Christmas Pines dies and adhered them together. I adhered the pinecones to the card with glue dots and adhered the little bird with diensionals.

I made a bow from Linen Thread and adhered it to the card front with a glue dot. I finished the card front with Pool Party Fine Sparkle gems.

For the inside of the card, I stamped the little bird from the Stampin’ Up! Sweet Songbirds stamp set in Real Red on a Basic White panel. I stamped the eyes in Memento Tuxedo Black and colored the beak with the Crushed Curry Stampin’ Write marker. I made a mask to cover the bird and stamped the small pine branch from the Decorated with Happiness stamp set in Mossy Meadow around the bird and in the upper corner. I stamped the Sentiment in Soft Suede and trimmed the bottom with a strip of Storybook Gnomes DSP before adhering the panel to the inside of the card.

I’ve wanted to use the pretty Stampin’ Up! Sweet Songbirds bundle for a winter bird card since the weather got cold. And the pine branch from the Decorated Pine dies makes the perfect perch!

On With The Hop! Click on the Next Blog button to move forward to Tara Carpenter project or click the Previous Blog button to move back to see the project that Terry Lynn Bright created.

If you get lost along the way, here are the participants for the hop:

  1. Jaimie Babarczy 
  2. Terry Lynn Bright 
  3. Akiko Sudano <– you are here
  4. Tara Carpenter 
  5. Carol Buckalew 
  6. Karen Finkle 
  7. Karen Ksenzakovic 
  8. Mary Deatherage 
  9. Jillian Good 
  10. Amy Koenders

Current Host Code: N6Z4VWV3

Use this host code when you order $50 or more and receive a free gift from me!  The free gift is your choice of any item currently available valued up to $10.00 in the 2022-2023 Annual Catalog or the July-December 2022 Mini Catalog!

If your order is over $150, please do not use the host code since you’ll receive your own Host Dollars plus I’ll still send you the free gift!  This host code can be used by anyone, no club or commitment required. Let me know if you have any questions


If you need any stamping supplies, I’d be very happy to be your Demonstrator.  Just click on the Shop Now button on the right side of the screen to go directly to my online store or contact me if you have any questions. 

Thanks for stopping by and Happy Stamping!

Akiko

  • Visit my online store here
  • See the current Stampin’ Up! clearance rack specials here
  • Earn FREE Stampin’ Up! products through my Wildflower Frequent Shopper Program – my way of saying thank you to my online frequent shopper customers.
  • Have any questions? I’d be happy to help, click here to contact me.

Cardstock Cuts for this project:

  • Pool Party – 4-1/4″ x 11″ card base scored at 5-1/2″, 1-3/4″ x 3-5/8″ (embossed stripe)
  • Real Red – 3-3/4″ x” x 5″ (front mat)
  • Soft Suede – 1″ x 2-1/2″ (detailed pine cone die cuts)
  • Crumb Cake – 1″ x 2-1/2″ (pine cone die cuts)
  • Crushed Curry – 1/2″ x 1-1/2″ (beak)
  • Mossy Meadow – 3″ x 4-1/4″ (pine branch)
  • Basic White – 3-3/4″ x 5″ (inside panel), 2-3/4″ x 4″ (scalloped rectangle), 1-1/4″ x 2″ (bird breast)
  • Storybook Gnomes DSP – 3-3/8″ x 4-7/8″ (front background), 1/2″ x 3-3/4″ (inside trim)

Stampin’ Up! products used in this project:


Stampin’ Up! Mistletoe Magic for the Inkin’ Krew Blog Hop

Good morning! Welcome to the November Inkin’ Krew Team Blog Hop! The theme for this month’s hop is “Merry Christmas or Happy Holidays” and I am sharing a Christmas card made with the pretty Stampin’ Up! Mistletoe Magic bundle. You can find the supplies I used at the bottom of my post along with the sizes of cardstock used.

I adhered a panel of Lights Aglow specialty designer series paper to a Cherry Cobbler mat with liquid glue and adhered the panel to the front of a Cherry Cobbler card base with Dimensionals.

I stamped the sentiment from the Stampin’ Up! Mistletoe Magic cling stamp set in Versamark ink on Cherry Cobbler card stock. I sprinkled it with white embossing powder and shook off the excess. I heated the powder with my heat tool until it was bright and shiny and cut it out with the label die from the Potted Succulents dies.

I cut a Pear Pizzazz panel with the mistletoe sprig die from the Stampin’ Up! Mistletoe Magic bundle. I cut several of the berry dies from white glimmer paper using the larger berry dies twice and smallest berry die once. I adhered the berries to the mistletoe sprig with liquid glue (I had several berries left over). There are spots on the sprig die cut where the berries go, and it’s pretty easy to tell.

I adhered the label to the card front with glue dots and adhered the layered mistletoe sprig on top with glue dots. I colored a length of linen thread with the dark Real Red Stampin’ Blend and made a bow. I adhered the bow to the sprig with a rolled up glue dot and finished the label with an iridescent pearl.

For the inside of the card, I stamped little mistletoe sprig from the Stampin’ Up! Mistletoe Magic stamp set in Pear Pizzazz ink in the corner of a Basic White panel. I colored the leaves and stem with the light Old Olive Stampin’ blend and the color lifter. I stamped the sentiment in Cherry Cobbler and trimmed the bottom with a strip of Lights Aglow specialty DSP. I adhered the panel to the inside of the card with Stampin’ Seal.

The Stampin’ Up! Mistletoe Magic bundle is a sweet and simple bundle with pretty images and dies and wonderful Christmas sentiments. The die cut mistletoe sprig came together easily and is really impressive with the white glimmer paper berries.

On With The Hop! Click on the Next Blog button to move forward to Karen Ksenzakovic’s project or click the Previous Blog button to move back to see the project that Amy Koenders created.

If you get lost along the way, here are the participants for the hop:


Current Host Code: F7CW3QU3

Use this host code when you order $50 or more and receive a free gift from me!  The free gift is your choice of any item currently available valued up to $10.00 in the 2022-2023 Annual Catalog or the July-December 2022 Mini Catalog!

If your order is over $150, please do not use the host code since you’ll receive your own Host Dollars plus I’ll still send you the free gift!  This host code can be used by anyone, no club or commitment required. Let me know if you have any questions


If you need any stamping supplies, I’d be very happy to be your Demonstrator.  Just click on the Shop Now button on the right side of the screen to go directly to my online store or contact me if you have any questions. 

Thanks for stopping by and Happy Stamping!

Akiko

  • Visit my online store here
  • See the current Stampin’ Up! clearance rack specials here
  • Earn FREE Stampin’ Up! products through my Wildflower Frequent Shopper Program – my way of saying thank you to my online frequent shopper customers.
  • Have any questions? I’d be happy to help, click here to contact me.

Cardstock Cuts for this project:

  • Cherry Cobbler – 4-1/4″ x 11″ card base scored at 5-1/2″, 4″ x 5-1/4″ (front mat), 1-1/2″ x 4″ (front label)
  • Pear Pizzazz – 2-1/4″ x 4-1/4″(die cut mistletoe)
  • White 6″ x 6″ Glimmer – 1″ x 3″ (die cut berries)
  • Basic White – 4″ x 5-1/4″ (inside panel)
  • Lights Aglow specialty 6″ x 6″ DSP – 3-7/8″ x 5-1/8″ (front background), 1/2″ x 4″ (inside trim)

Stampin’ Up! products used in this project:


Stampin’ Up! Scary Cute for the Inkin’ Krew Blog Hop

Good morning! Welcome to the September Inkin’ Krew Team Blog Hop! The theme for this month’s hop is “Halloween Fun” and I am using the wonderful Stampin’ Up! Scary Cute bundle for my Halloween Card. You can find the supplies I used at the bottom of my post along with the sizes of cardstock used.

I cut a fishtail bottom on a panel of Celebrate Everything designer series paper to make a banner and adhered it to the front of a Rich Razzleberry card base.

I used blending brushes to create the background for the haunted house. I applied Daffodil Delight, Pumpkin Pie, Rich Razzleberry and Night of Navy in layers building up the sky. I cut a mask for the hills and used it to cover the sky and applied Mossy Meadow ink with a blending brush to the bottom for the ground. I cut it out with the outline frame die from the Stampin’ Up! Scary Cute bundle. I cut out the haunted house from Basic Black and the moon from So Saffron and adhered them to the blended background die cut with liquid glue. I cut the frame from Basic Black and adhered it to the background with black dimensionals.

I adhered the little scene to the card front with liquid glue. I cut the bats from the Stampin’ Up! Scary Cute bundle from Basic Black and adhered three of them to the card front.

I wrapped the card front twice with black baker’s twine and made a bow. I stamped the sentiment from the Stampin’ Up! Scary Cute cling stamp set in Memento Tuxedo Black ink on Basic White and adhered it over the baker’s twine with black dimensionals.

For the inside of the card, I stamped little trick or treaters from the Stampin’ Up! Scary Cute stamp set in Rick Razzleberry ink on the bottom of a Basic White panel. I stamped the moon in Daffodil Delight and the sentiment in Memento Tuxedo Black. I adhered the rest of the bats with liquid glue and trimmed the bottom with a strip of Celebrate Everything DSP. I adhered the panel to the inside of the card.

The Stampin’ Up! Scary Cute bundle is such a cute and versatile Halloween set. The dies are wonderful, the trick or treater stamps are so cute in their costumes and the sentiments are perfect! They’re great for cards, tags and treat bag decorations.

On With The Hop! Click on the Next Blog button to move forward to Karen Finkle’s project or click the Previous Blog button to move back to see the project that Jillian Good created.

If you get lost along the way, here are the participants for the hop:


Current Host Code: JSUNSU6D

Use this host code when you order $50 or more and receive a free gift from me!  The free gift is your choice of any item currently available valued up to $10.00 in the 2022-2023 Annual Catalog or the July-December 2022 Mini Catalog!

If your order is over $150, please do not use the host code since you’ll receive your own Host Dollars plus I’ll still send you the free gift!  This host code can be used by anyone, no club or commitment required. Let me know if you have any questions


If you need any stamping supplies, I’d be very happy to be your Demonstrator.  Just click on the Shop Now button on the right side of the screen to go directly to my online store or contact me if you have any questions. 

Thanks for stopping by and Happy Stamping!

Akiko

  • Visit my online store here
  • See the current Stampin’ Up! clearance rack specials here
  • Earn FREE Stampin’ Up! products through my Wildflower Frequent Shopper Program – my way of saying thank you to my online frequent shopper customers.
  • Have any questions? I’d be happy to help, click here to contact me.

Cardstock Cuts for this project:

  • Rich Razzleberry – 4-1/4″ x 11″ card base scored at 5-1/2″
  • So Saffron – 1″ x 1″ (die cut moon)
  • Basic Black – 3″x 4″ (die cut frame and bats), 2″ x 2″ (die cut haunted house)
  • Basic White – 4″ x 5-1/4″ (inside panel), 3″ x 3-1/2″ (haunted house background), 1-1/4″ x 2-1/2″ (label)
  • Celebrate Everything DSP – 2-1/2″ x 5″ (front banner), 1/2″ x 4″ (inside trim)

Stampin’ Up! products used in this project:


Stampin’ Up! Season of Chic for the Inkin’ Krew Blog Hop

Good morning! Welcome to the August Inkin’ Krew Team Blog Hop! The theme for this month’s hop is “Fall Frenzy” and I am using the pretty Stampin’ Up! Season of Chic bundle with the sweet Sale-A-Bration Rings of Love designer series paper for a Fall Thinking of You card. You can find the supplies I used at the bottom of my post along with the sizes of cardstock used.

I adhered a panel of the pretty fall leaves Rings of Love designer series paper to a Poppy Parade mat with liquid glue and adhered it to the front of a Crushed Curry card base with dimensionals.

I inked up the leaf from the Stampin’ Up! Season of Chic photopolymer stamp set in Poppy Parade, stamped off on scratch paper and stamped it on a Basic White panel. I cut it out with the background leaf die from the Chic dies that come in the bundle and adhered a detailed Poppy Parade die cut leaf on top with liquid glue. I used the detailed leaf die to cut leaves from Soft Succulent and So Saffron and adhered all three leaves to the card front with glue dots.

I used the acorn and acorn cap dies from the Tree Rings Dies Hybrid Embossing folder set to cut the acorns from Crumb Cake and Soft Suede card stock and adhered them to the card front with glue dots.

I stamped the sentiment from the Stampin’ Up! Season of Chic stamp set in Soft Suede ink on Crushed Curry card stock. I cut it out with the die from the Painted Labels dies and adhered it to the card with dimensionals. I tied a short length of window pane check ribbon in a knot and adhered it with a glue dot. I finished the card with rustic metallic dots.

For the inside of the card, I stamped the leaves from the Stampin’ Up! Season of Chic Stamp set in stamped off Evening Evergreen and Crushed Curry in the corner of a Basic White panel. I trimmed the bottom with a strip of the pretty Rings of Love DSP before adhering it to the inside of the card.

The Sale-A-Bration Rings of Love designer series paper is so pretty with gorgeous colors and designs that go with so many stamp sets, such as today’s Stampin’ Up! Season of Chic. And you can get it free with a $50 order (before shipping and taxes) through the end of the month during Sale-A-Bration.

On With The Hop! Click on the Next Blog button to move forward to Carol Buckalew’s project or click the Previous Blog button to move back to see the project that Mary Deatherage created.

If you get lost along the way, here are the participants for the hop:

  1. Karen Finkle 
  2. Mary Deatherage 
  3. Akiko Sudano <– you are here
  4. Carol Buckalew 
  5. Tara Carpenter 
  6. Karen Ksenzakovic 
  7. Terry Lynn Bright 
  8. Jillian Good 
  9. Amy Koenders 

Current Host Code: 3XYTPTZC

Use this host code when you order $50 or more and receive a free gift from me!  The free gift is your choice of any item currently available valued up to $10.00 in the 2023 – 2023 Annual Catalog or the January-June 2022 Mini Catalog!

If your order is over $150, please do not use the host code since you’ll receive your own Host Dollars plus I’ll still send you the free gift!  This host code can be used by anyone, no club or commitment required. Let me know if you have any questions


If you need any stamping supplies, I’d be very happy to be your Demonstrator.  Just click on the Shop Now button on the right side of the screen to go directly to my online store or contact me if you have any questions. 

Thanks for stopping by and Happy Stamping!

Akiko

  • Visit my online store here
  • See the current Stampin’ Up! clearance rack specials here
  • Earn FREE Stampin’ Up! products through my Wildflower Frequent Shopper Program – my way of saying thank you to my online frequent shopper customers.
  • Have any questions? I’d be happy to help, click here to contact me.

Cardstock Cuts for this project:

  • Crushed Curry – 4-1/4″ x 11″ card base scored at 5-1/2″, 1-3/4″ x 3″ (label)
  • So Saffron – 1-1/4″ x 2-1/2″ (die cut leaf)
  • Crumb Cake – 1″ x 2″ (acorns)
  • Soft Suede – 3/4″ x 2-1/4″ (acorn tops)
  • Poppy Parade – 1-1/4″ x 2-1/2″ (die cut leaf), 4″ x 5-1/4″ (front mat)
  • Soft Succulent – 1-1/4″ x 2-1/2″ (die cut leaf)
  • Basic White – 4″ x 5-1/4″ (inside panel), 1-1/4″ x 2-1/2″ (die cut leaf)
  • Rings of Love DSP – 3-7/8″ x 5-1/8″ (front background), 1/2″ x 4″ (inside trim)

Stampin’ Up! products used in this project:


Stampin’ Up! Elephant Parade for the Inkin’ Krew Blog Hop

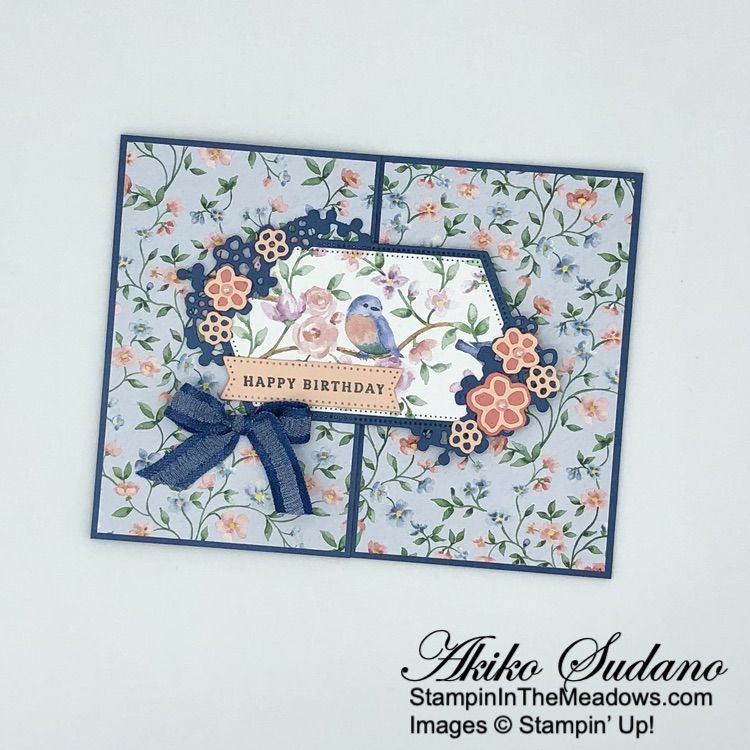
Good morning! Welcome to the June Inkin’ Krew Team Blog Hop! The theme for this month’s hop is “Happy Birthday” and I have a baby birthday card made with the sweet Stampin’ Up! Elephant Parade bundle from the new Annual Catalog. You can find the supplies I used at the bottom of my post along with the sizes of cardstock used.

I was also inspired by the pretty sketch in the Inspire.Create.Challenges #188:

I adhered a strip of Petal Pink floral Design A Daydream designer series paper to a Petal Pink mat and adhered it to another Petal Pink Design A Daydream DSP with liquid glue. I adhered the layered DSP to the front of a Petal Pink card base. I adhered a panel of leafy swirl Tea Boutique DSP to a Parakeet Party mat and adhered it to the card front with liquid glue.

I cut a Petal Pink panel with the second largest scalloped circle from the Layering Circles dies and stamped the sentiment from the Stampin’ Up! Elephant Parade cling stamp set in Garden Green on a Basic White panel. I cut it out with the second largest circle from the Stylish Shapes dies and I adhered the circles together with liquid glue.

I cut grass from Parakeet Party using the grass dies from the Elephant dies and adhered them to the layered circles. I stamped the sweet elephant from the Stampin’ Up! Elephant Parade stamp set on Basic White using Basic Gray ink and colored it with Petal Pink and Gray Granite Stampin’ Blends. I cut it out with the coordinating die and popped it on the layered circles with dimensionals.

I stamped the flower from the Stampin’ Up! Elephant Parade stamp set in Basic Gray ink and colored it with Tahitian Tide and Granny Apple Green Stampin’ Blends. I cut it out with the coordinating die and adhered it under the elephant’s trunk. I cut a Petal Pink bow and adhered it to the elephant’s head and adhered the layered circles to the card front with dimensionals. I finished it with three In Color matte dots.

For the inside of the card, I stamped the sentiments from the A Grand Kid cling stamp set in Basic Gray on a Basic White panel. I stamped the balloons from the Stampin’ Up! Elephant Parade stamp set in Basic Gray on the side of the panel in Basic Gray and colored them with Petal Pink, Parakeet Party and Tahitian Tide Stampin’ Blends before adhering it to the inside of the card.

The elephants in the Stampin’ Up! Elephant Parade bundle are so cute and sweet!! They’re perfect for children’s cards and for any occasion where you want a cute critter to send your message!

On With The Hop! Click on the Next Blog button to move forward to Karen Finkle’s project or click the Previous Blog button to move back to see the project that Tara Carpenter created.

If you get lost along the way, here are the participants for the hop:

  1. Jaimie Babarczy
  2. Carol Buckalew 
  3. Karen Ksenzakovic 
  4. Mary Deatherage 
  5. Karen Finkle 
  6. Terry Lynn Bright 
  7. Tara Carpenter 
  8. Jillian Good 
  9. Sue Prather
  10. Akiko Sudano. <– You are here
  11. Amy Koenders

Current Host Code: MHHQUNTF

Use this host code when you order $50 or more and receive a free gift from me!  The free gift is your choice of any item currently available valued up to $10.00 in the 2023 – 2023 Annual Catalog or the January-June 2022 Mini Catalog!

If your order is over $150, please do not use the host code since you’ll receive your own Host Dollars plus I’ll still send you the free gift!  This host code can be used by anyone, no club or commitment required. Let me know if you have any questions


If you need any stamping supplies, I’d be very happy to be your Demonstrator.  Just click on the Shop Now button on the right side of the screen to go directly to my online store or contact me if you have any questions. 

Thanks for stopping by and Happy Stamping!

Akiko

  • Visit my online store here
  • See the current Stampin’ Up! clearance rack specials here
  • Earn FREE Stampin’ Up! products through my Wildflower Frequent Shopper Program – my way of saying thank you to my online frequent shopper customers.
  • Have any questions? I’d be happy to help, click here to contact me.

Cardstock Cuts for this project:

  • Petal Pink – 5-1/2″ x 8-1/2″ card base scored at 4-1/4″, 3-1/4″ x 3-1/4″ (scalloped circle), 2-1/8″ x 5-1/4″ (DSP mat), 1″ x 1″ (die cut bow)
  • Parakeet Party – 2-1/8″ x 3-7/8″ (DSP mat), 1″ x 2-1/2″ (die cut grass)
  • Basic White – 4″ x 5-1/4″ (inside panel), 3″ x 3″ (die cut circle), 2″ x 2-1/4″ (die cut elephant), 1″ x 1″ (die cut flower)
  • Design a Daydream DSP – 4″ x 5-1/4″ (front background), 2″ x 5-1/4″ (front stripe)
  • Tea Boutique DSP – 2″ x 3-3/4″ (front DSP panel)

Stampin’ Up! products used in this project: