Good Monday Morning! I hope you had a wonderful weekend! Yesterday was a Stampin’ Up! Quiet Meadow day as I shared some Quiet Meadow projects made by the Stampin’ Up! Design team and made this pretty card during my Facebook Live yesterday afternoon. I took one of the Design Team’s cards and stepped it up – and used some sneak peeks of products from the upcoming July-December Mini Catalog that will be available August 3, 2021. You can find the currently available supplies I used at the bottom of my post along with the sizes of cardstock used.
Here is the Facebook Live video showing how I made the card:
I posted a copy of the video in my YouTube channel here so you can view it there if you prefer.
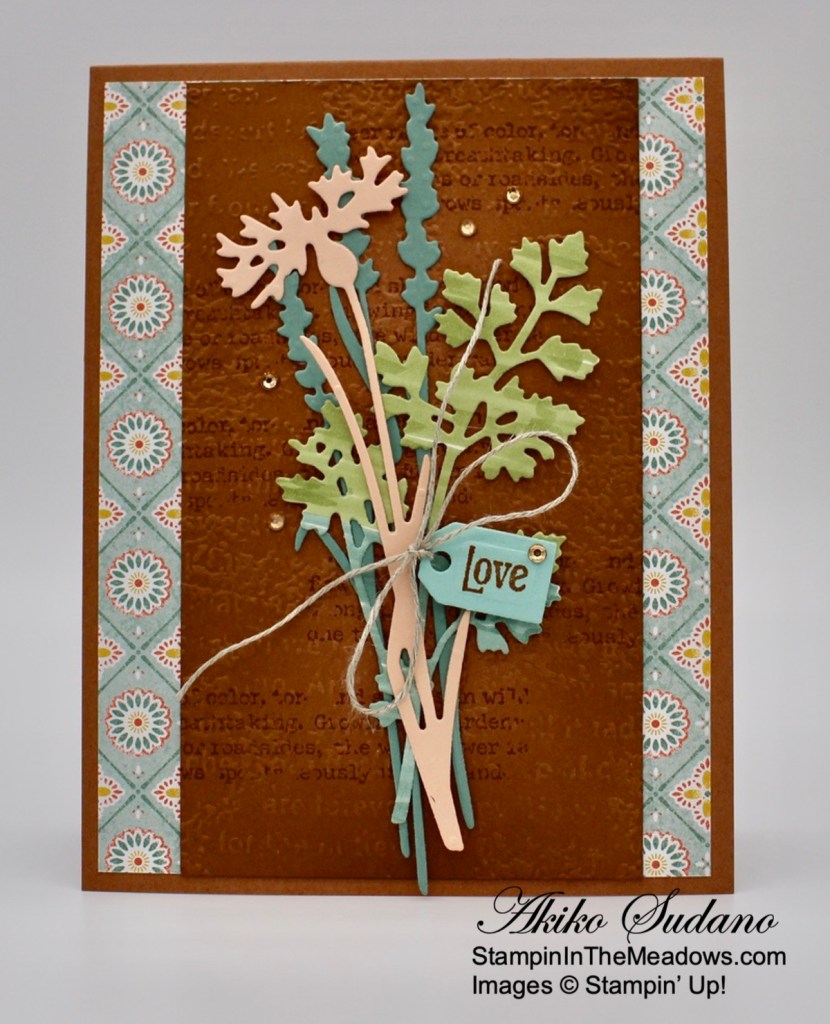
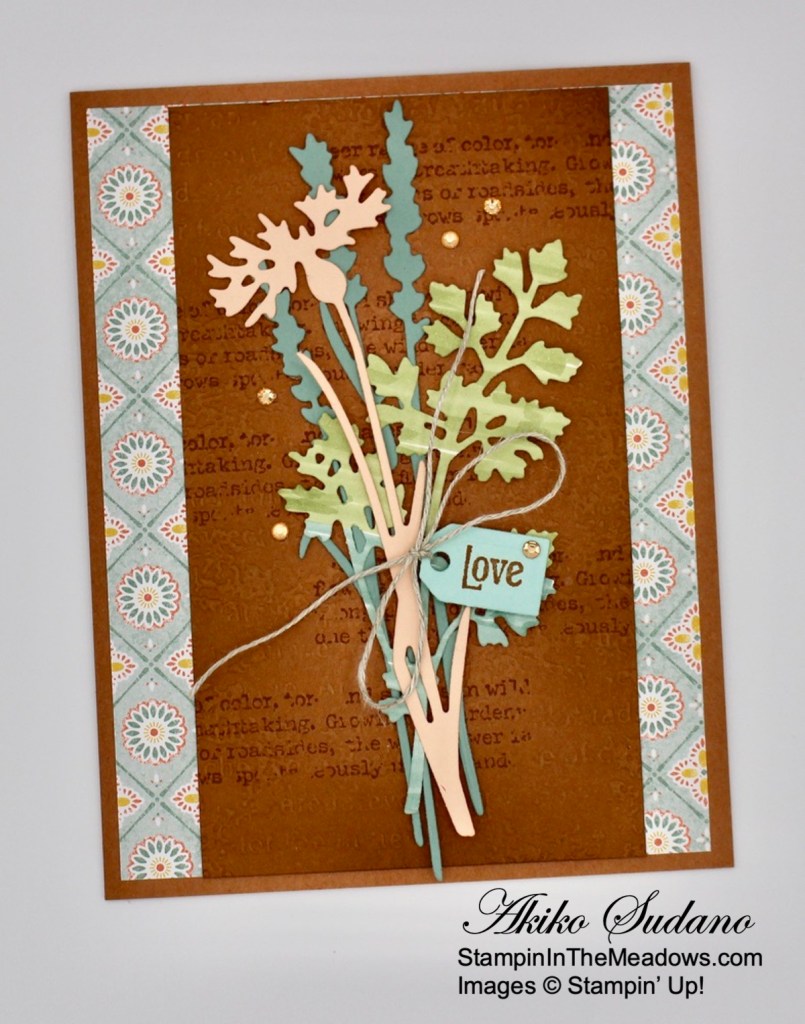
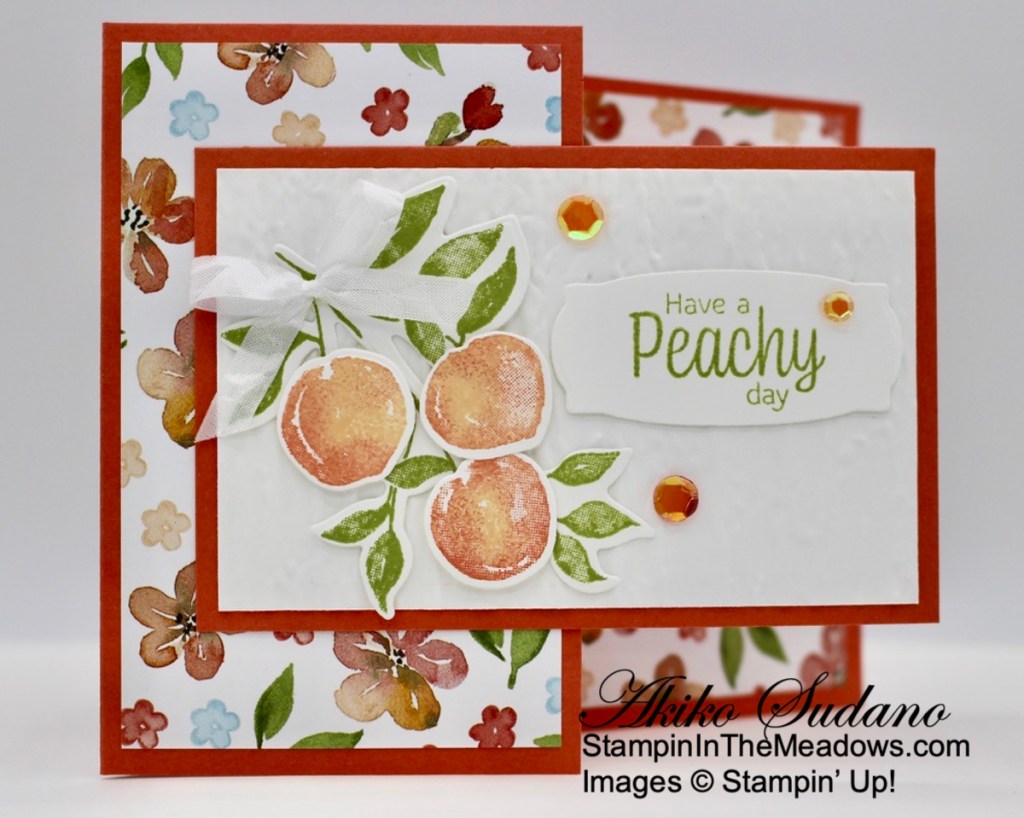
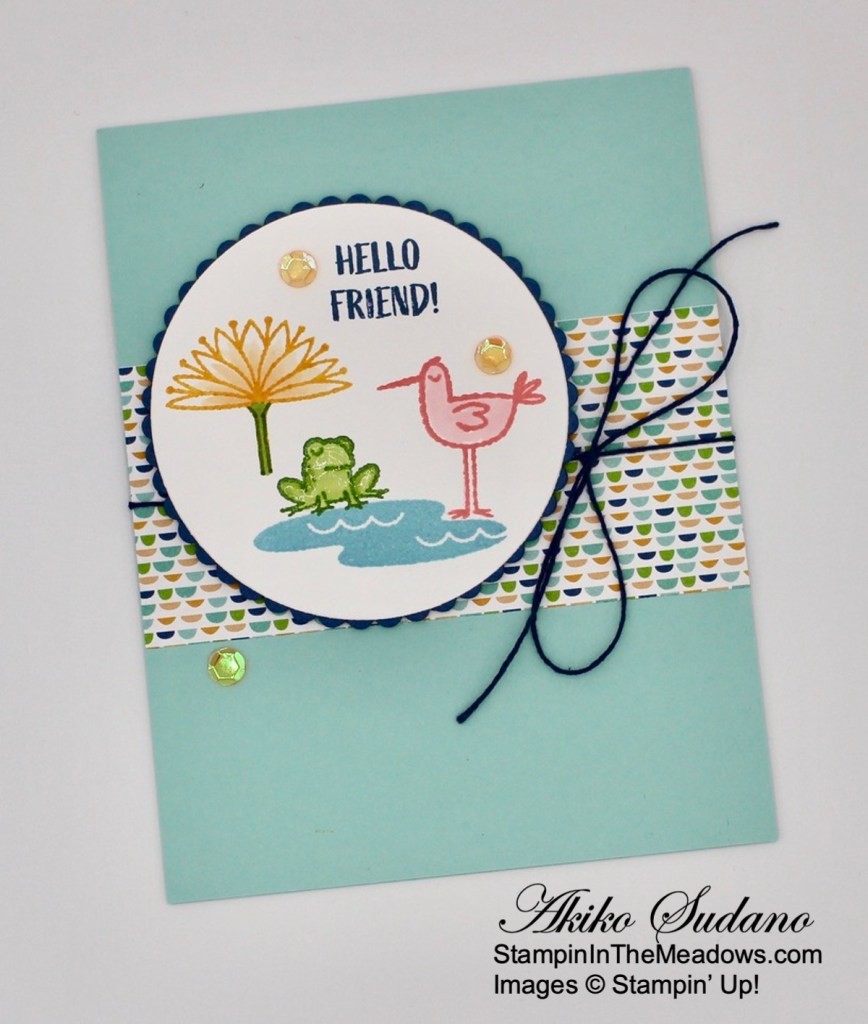
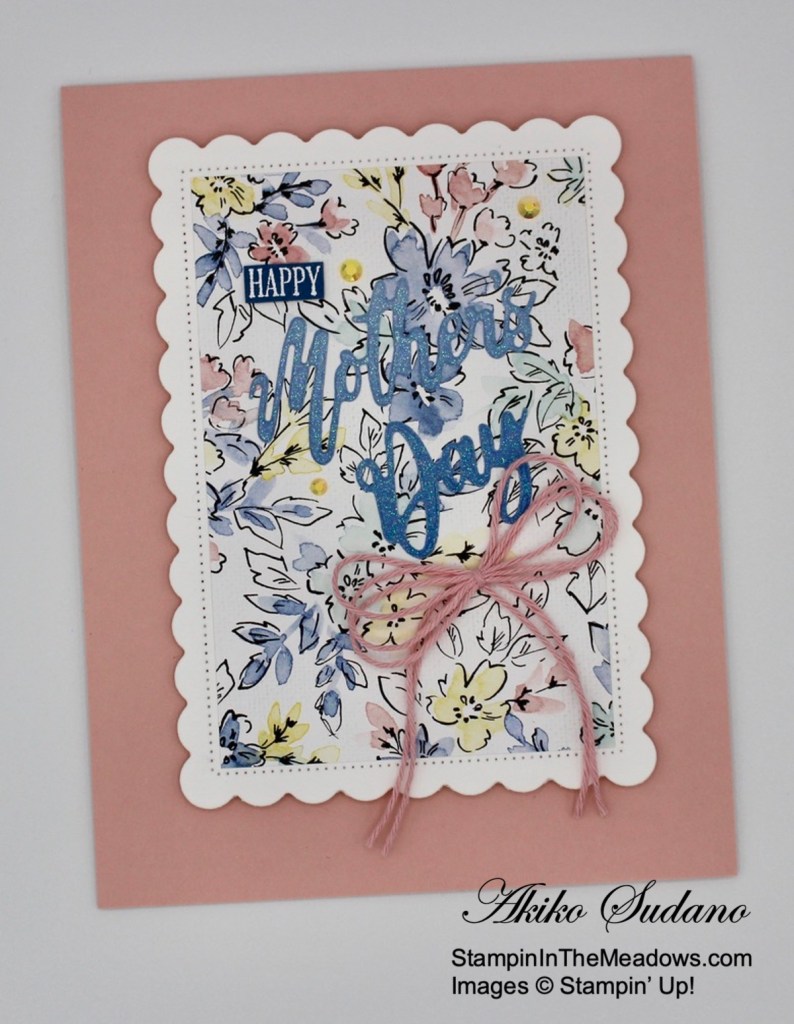
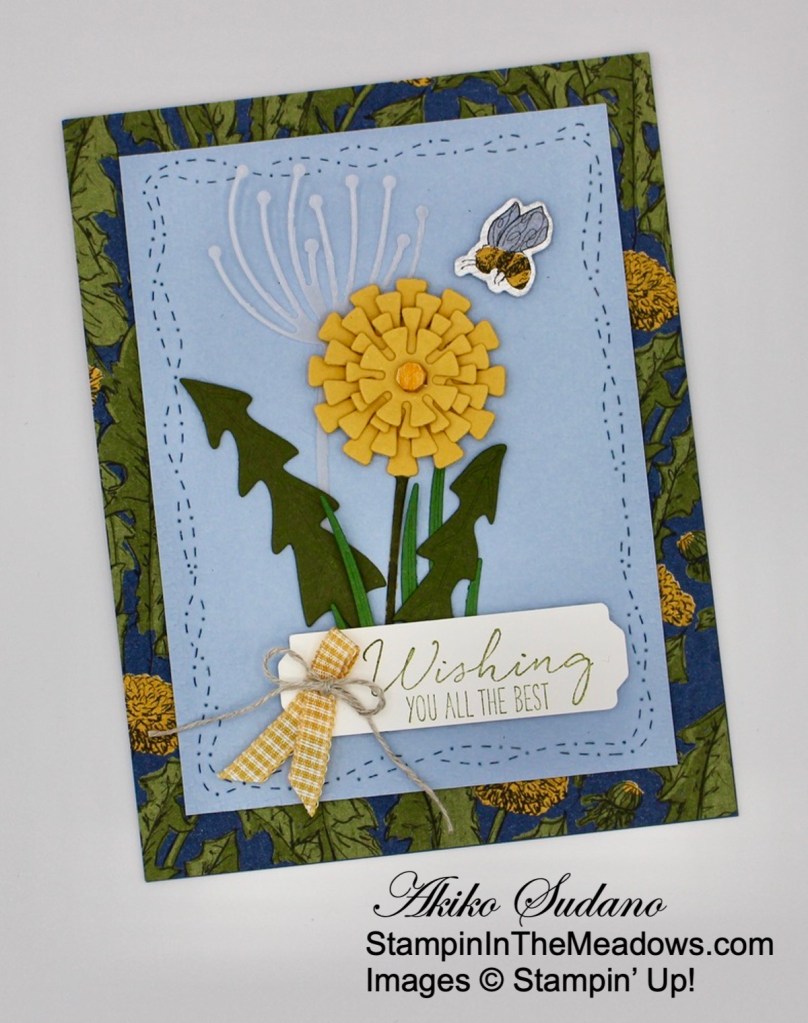
I adhered a panel of the pretty new Harvest Meadow designer series paper (available August 3, 2021) to the front of a Cinnamon Cider card base. I cut the triple stem wild flower die from the Harvest dies (available August 3, 2021) from Soft Succulent and the flower die from the Stampin’ Up! Quiet Meadow bundle from Petal Pink. I colored a Basic White panel with the light Mossy Meadow and dark Soft Succulent Stampin’ Blends and used it to cut the fern die from the Quiet Meadow bundle.
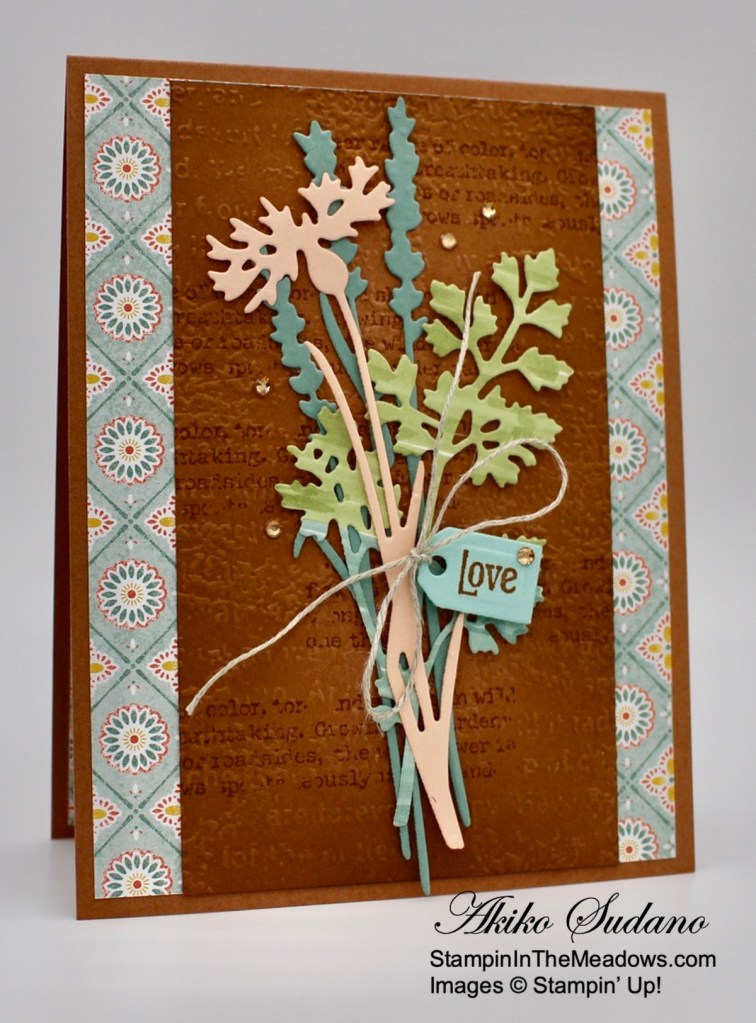
I stamped the words from the Stampin’ Up! Quiet Meadow cling stamp set in Cinnamon Cider on a Cinnamon Cider panel about 5 times randomly. Using a blending brush, I applied Soft Suede ink around the edge of the stamped panel to give it a distressed look. I embossed the panel with the Timeworn Type 3D embossing folder (available August 3, 2021) and adhered the panel to the card front with liquid glue.
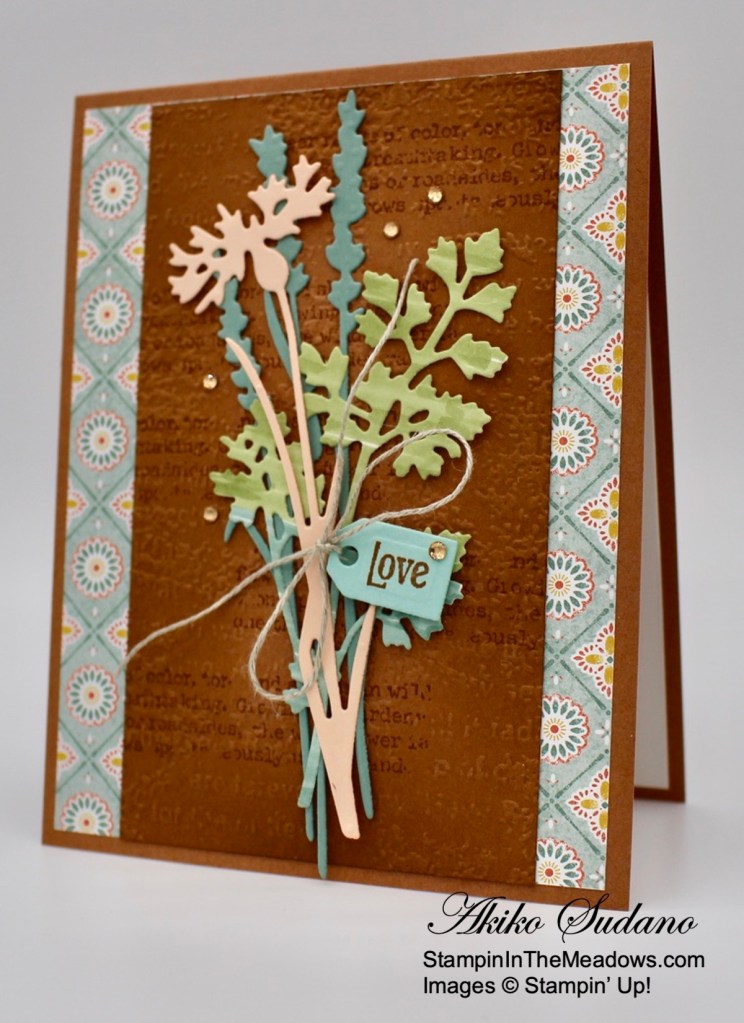
I stamped the sentiment from the Stampin’ Up! Quiet Meadow stamp set in Cinnamon Cider ink on Pool Party and cut it out with the little tag die. I wrapped a length of Linen Thread around the tag and tied a loopy bow. I used glue dots to adhere the Soft Succulent triple stem wild flower, hand colored fern and Petal Pink flower die cuts to the card front. I adhered the label with a dimensional and trimmed the bow. I finished the card front with five champagne rhinestones.

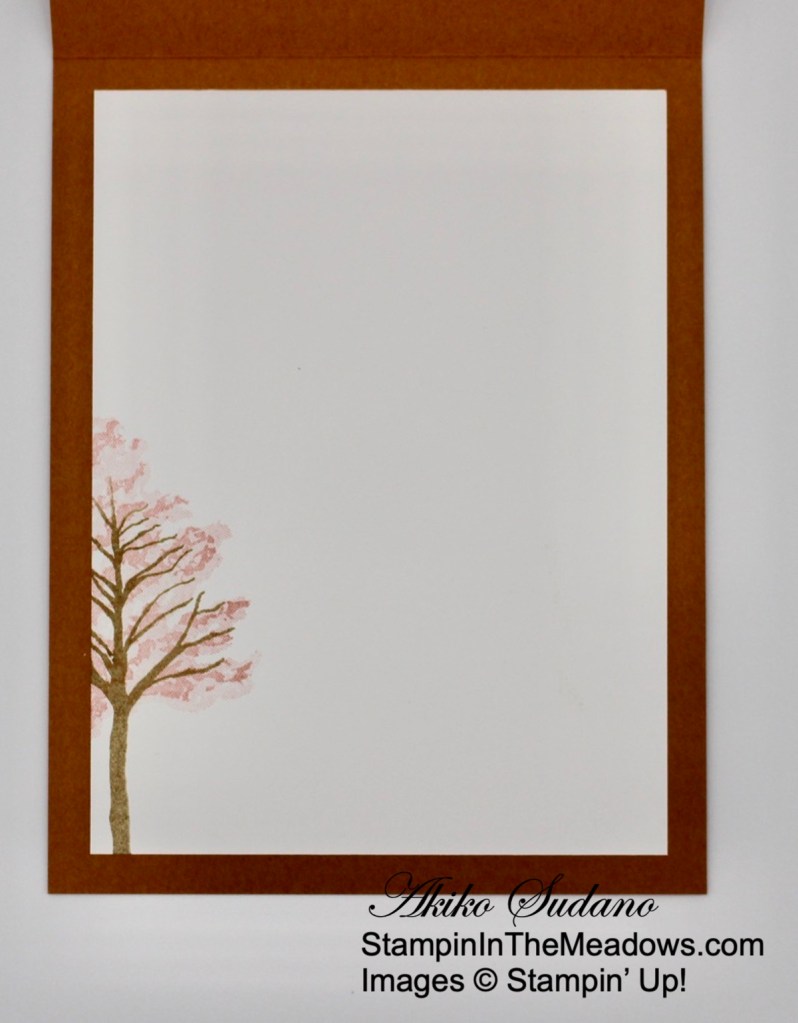
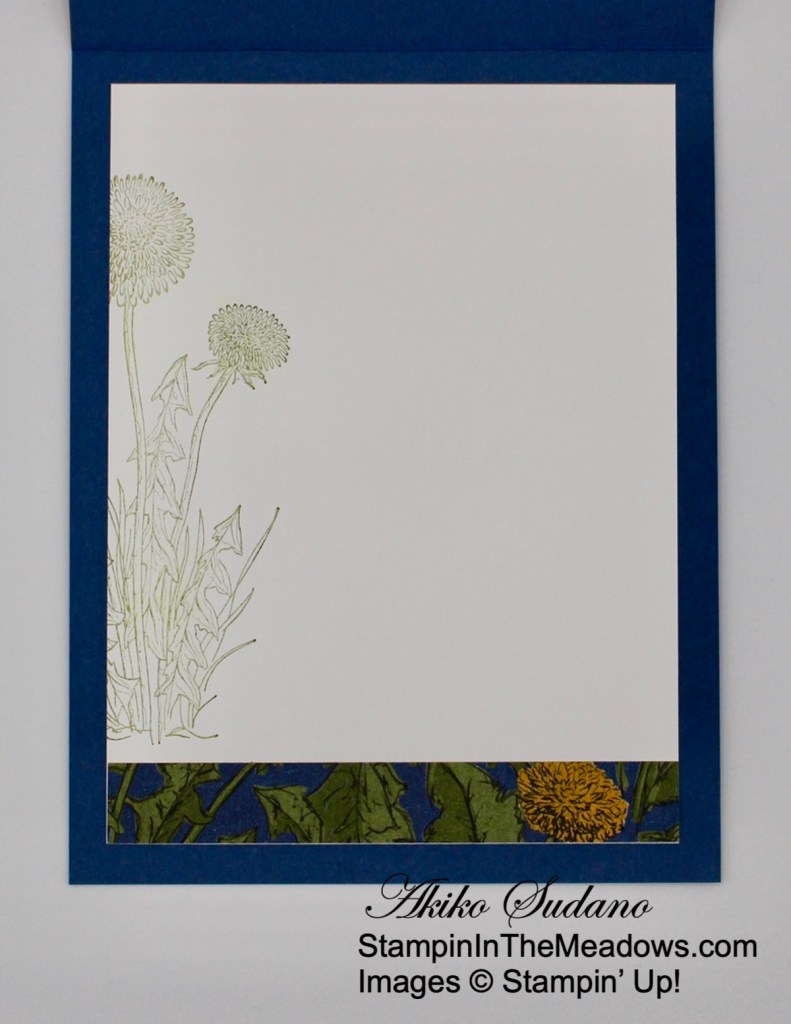
I stamped the large flower from the Stampin’ Up! Quiet Meadow stamp set in twice stamped off Soft Succulent ink three times on the side and bottom of a Basic White panel. I stamped the sentiment in Cinnamon Cider ink and adhered a strip of Harvest Meadow DSP (available August 3, 2021) along the side. I adhered the panel to the inside of the card with Stampin’ Seal.
The pretty Stampin’ Up! Quiet Meadow bundle makes gorgeous cards on it’s own, and I hope I’ve given you a glimpse of how beautifully the bundle goes with the products in the upcoming Harvest Meadow Suite (available August 3, 2021). Of course, I love wild flowers, so I think everybody needs these beautiful products, and I can’t wait for the new July-December Mini Catalog to come out on August 3!
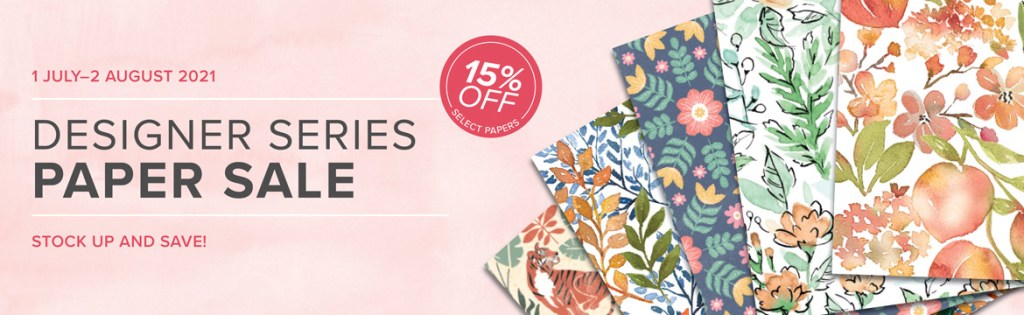
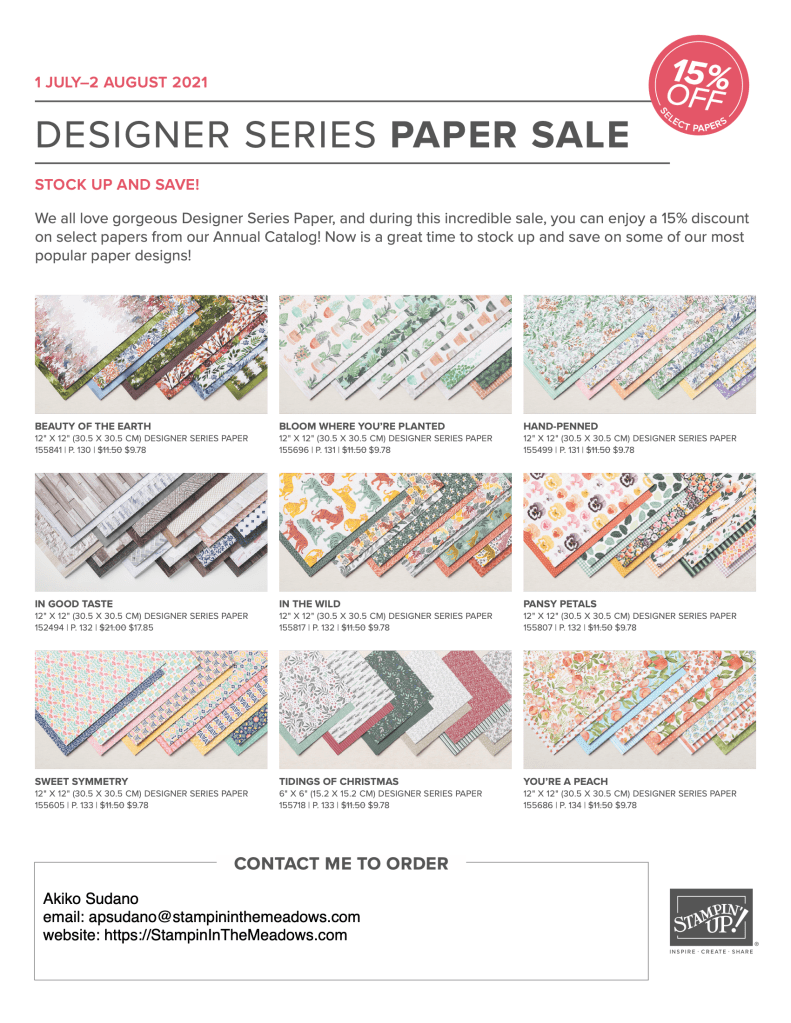
Stampin’ Up! Designer Series Paper Sale is Going on Now!
We all love gorgeous Designer Series Paper, and during this incredible sale, you can enjoy a 15% discount on select papers from the 2021–2022 Annual Catalog! Now is a great time to stock up and save on some of Stampin’ Up!’s most beautiful paper designs! Get all the details on my Promotions Page or click on the image below for a printable PDF Flyer:
Current Host Code: ZQAFXXXK
Use this host code when you order $50 or more and receive a free gift from me! The free gift is your choice of any item valued up to $10.00 in the 2021-2022 Annual Catalog!
If your order is over $150, please do not use the host code since you’ll receive your own Host Dollars plus I’ll still send you the free gift! This host code can be used by anyone, no club or commitment required. Let me know if you have any questions.
If you need any stamping supplies, I’d be very happy to be your Demonstrator. Just click on the Shop Now button on the right side of the screen to go directly to my online store or contact me if you have any questions. Happy Stamping!
Thanks for stopping by and have a great week!
Akiko
- Visit my online store here
- See the current Stampin’ Up! clearance rack specials here
- Earn FREE Stampin’ Up! products through my Wildflower Frequent Shopper Program – my way of saying thank you to my online frequent shopper customers.
- Have any questions? I’d be happy to help, click here to contact me.
Cardstock Cuts for this project:
- Cinnamon Cider – 4-1/4″ x 11″ card base scored at 5-1/2″, 3″ x 5-1/4″ (center panel)
- Petal Pink – 1-3/4″ x 4-3/4″ (flower die cut)
- Soft Succulent – 1-3/4″ x 5-1/2″ (triple stem die cut)
- Pool Party – 3/4″ x 1″ (label tag)
- Basic White – 4″ x 5-1/4″ (inside panel), 2-1/2″ x 4-1/2″ (colored fern die cut)
- Harvest Meadows DSP (available August 3, 2021) – 4″ x 5-1/4″ (front background), 1/2″ x 5-1/4″ (inside trim)
Stampin’ Up! products used in this project:
")


")


 Designer Series Paper")


")


 Crinkled Seam Binding Ribbon")


 Host Designer Series Paper")


")
")


 Designer Series Paper")


")


")


 Designer Series Paper")


")


 2020–2022 In Color Ribbon")


