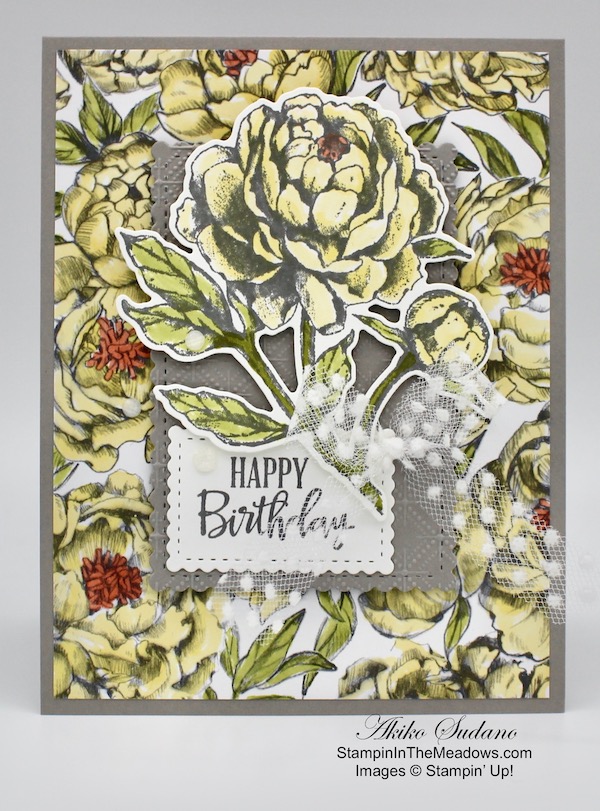
Good Morning! The retiring Stampin’ Up! Peaceful Moments cling stamp set has been one of the most versatile sentiment stamp sets for a while. It’s great for lots of occasions and uses some pretty fonts. It also coordinates well with the retiring Painted Labels dies, so I paired them with the roses in the Ready to Ride specialty designer series paper for a birthday card. You can find the supplies I used at the bottom of my post along with the sizes of cardstock used.
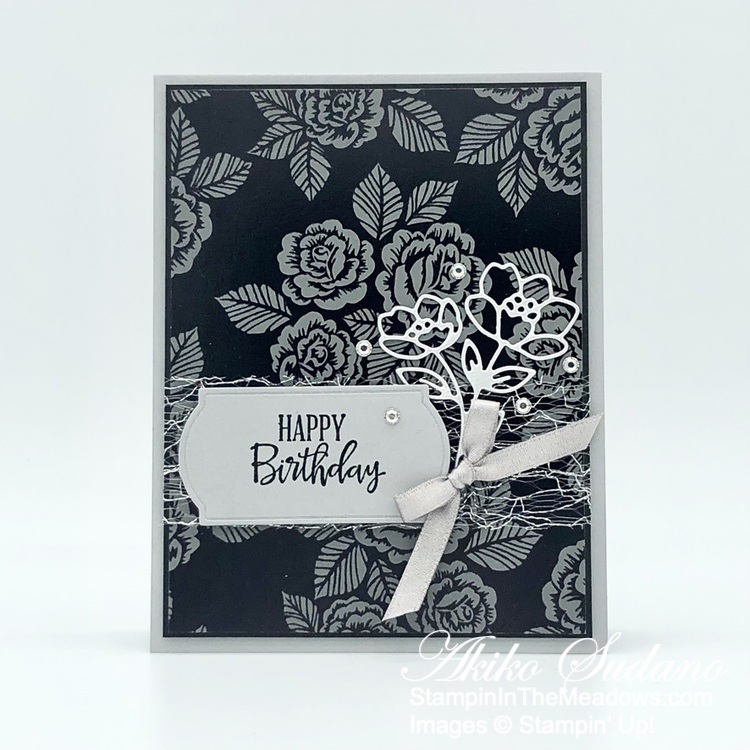
I adhered a panel of the rose Ready to Ride specialty designer series paper to a Basic Black mat with liquid glue and wrapped a length of silver mesh ribbon around it, securing it in the back with Stampin’ Seal. I adhered it to the front of a Smoky Slate card base with dimensionals.
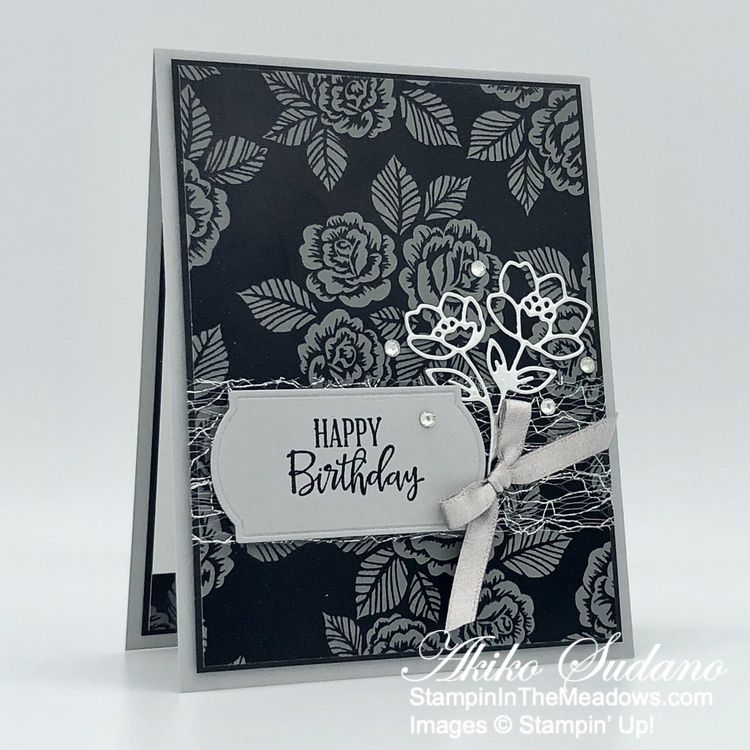
I stamped the sentiment from the Stampin’ Up! Peaceful Moments stamp set in Versamark ink on a Smoky Slate panel and sprinkled it with black embossing powder. I shook off the excess powder and heated it with my heat tool until it was bright and shiny. I cut it out with the label die from the Painted Labels dies and adhered it to the card with dimensionals.
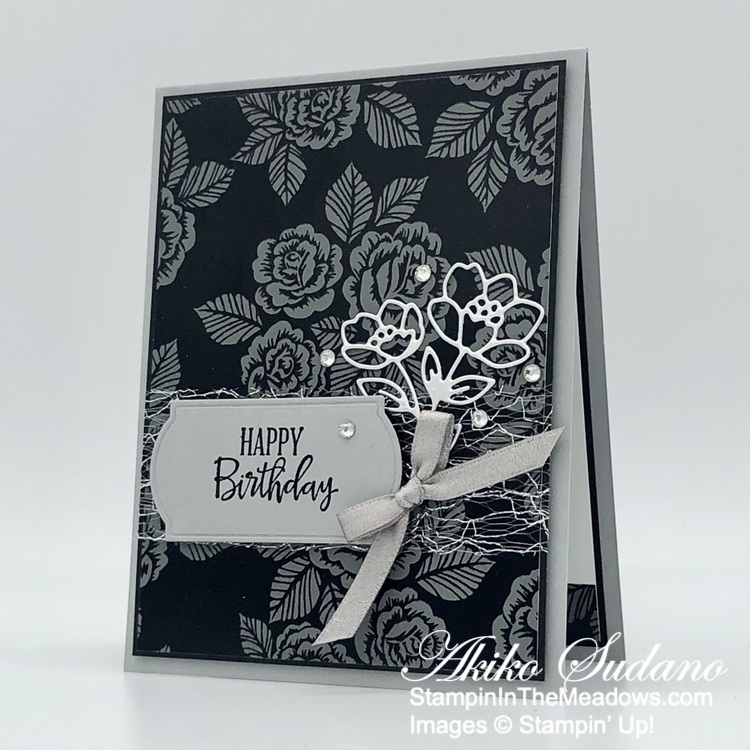
I used the small bouquet die from the Cottage Flowers dies to cut a silver foil panel and adhered the flowers to the card with dots of liquid glue. I adhered a Gray Granite bow to the card with glue dots and finished with rhinestone jewels.
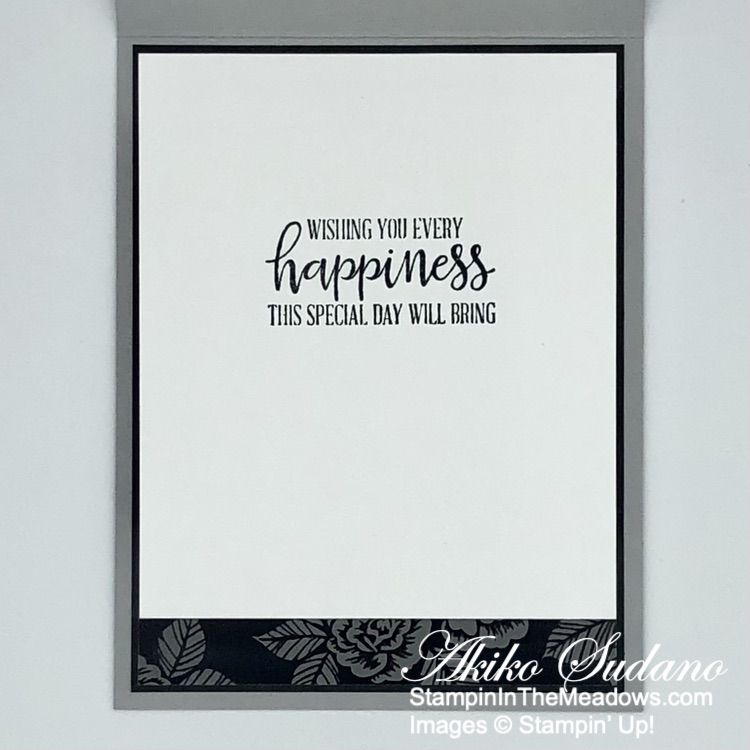
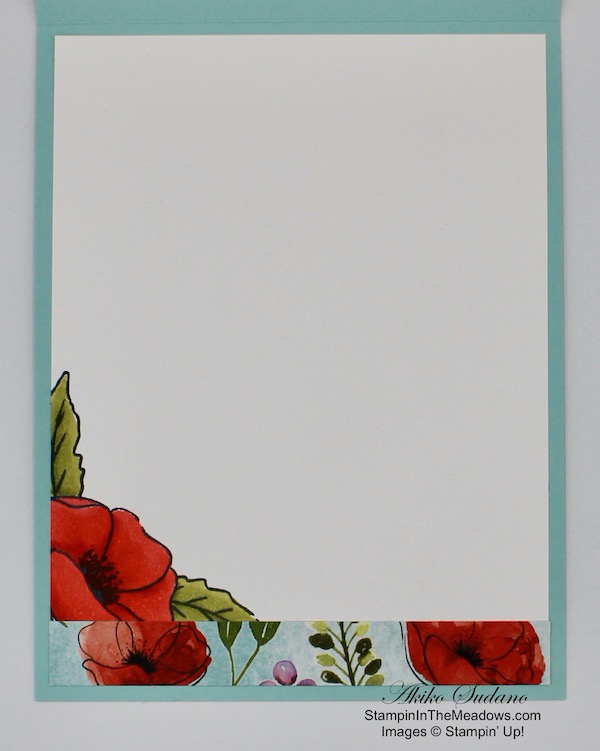
For the inside of the card, I stamped the sentiment from the Stampin’ Up! Peaceful Moments stamp set in Memento Tuxedo Black ink on a Basic White panel and trimmed the bottom with a strip of Ready to Ride DSP. I adhered the panel to a Basic Black mat and adhered it to the inside of the card with Stampin’ Seal.
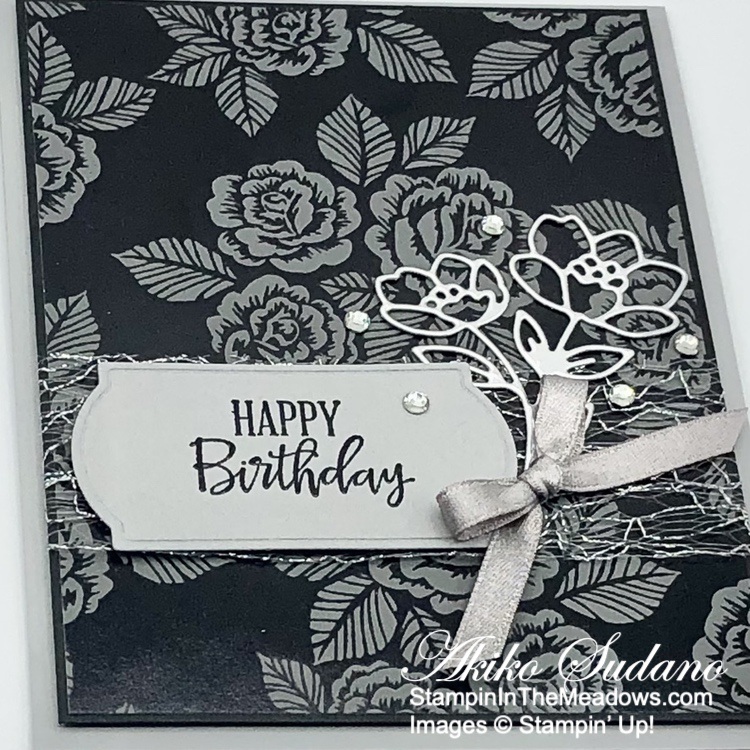
The sentiment from the Stampin’ Up! Peaceful Moments stamp set are perfect with the elegant roses in the Ready to Ride specialty designer series paper.
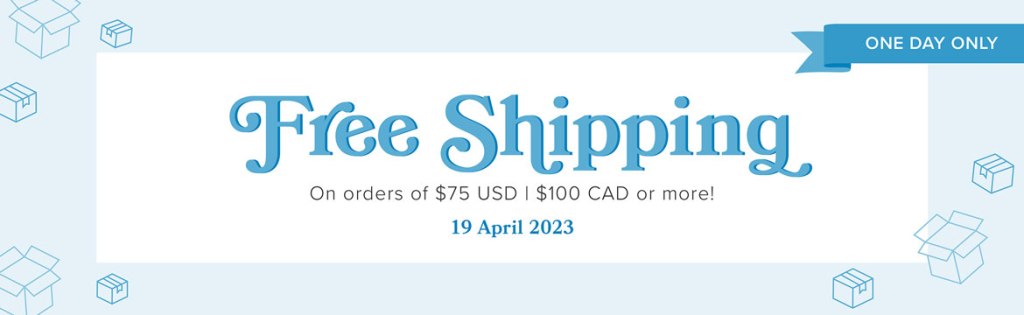
Stampin’ Up! Free Shipping On Orders of $75+ On April 19 Only!!
Time for you to stock up and save on your favorite Stampin’ Up! products! What’s the big occasion? On April 19 only, Stampin’ Up! is offering FREE shipping on orders totaling $75 or more (before shipping and taxes). This incredible deal lasts for just 24 hours, so get your orders placed on Wednesday, April 19 to get free shipping on your order of $75+!
Details:
- All order types qualify for this promotion.
- Free shipping applies after the qualifying amount of $75 has been met.
- The minimum qualifying amount to receive free shipping is $75 or more (before tax).
- If you are using a coupon code or product credit, please remember that they will lower the order’s retail amount. The order must still meet the qualifying threshold to be eligible for free shipping.
- Free shipping only applies during the 24-hour period the promotion is live in each market; this means that the order must be opened and closed on 19 April 2023.
- With the exception of a one-time monthly Paper Pumpkin subscription, all Stampin’ Up! products qualify for the free shipping promotion. Subscriptions billed and shipped this month will be charged for the normal amount ($24.50, shipping included) + tax.
- Prepaid 3, 6, or 12 month Paper Pumpkin subscriptions are eligible for FREE shipping under the same rules as all other Stampin’ Up! items during the promotion.
- The free shipping promotion does not cover the additional cost for expedited shipping.
- Please keep in mind, that with any product launch, the distribution center may fall behind our typical shipping time frames. In such cases, we will do all we can to return to our regular service levels as quickly as possible.
- Free shipping begins on Wednesday, April 19 at 12:01 AM (MT) and ends on Wednesday, April 19, 2023 at 11:59 PM (MT).

New 2023-2024 Annual Catalog Coming Soon!
The new Stampin’ Up! 2023-2024 Annual Catalog will debut on May 2, 2023! The Demonstrator pre-order is happening now, so there will be sneak peeks of wonderful new products and colors! I have sent out catalogs to my current customers. If you would like a copy, simply place an order and I will be happy to send you one, too!!
Get the complete details on the new 2023-2025 In Colors and the Color Refresh on my Stampin’ Up! Promotions Page.

Last Chance Products Sale Going On Now!
This Last Chance Products promotion includes two lists of products that will no longer be available once the catalogs retire on May 1, 2023. There will be one for the 2022-2023 Annual Catalog and one for the January-April 2023 Mini Catalog. For these retiring catalogs, you can find carryover products in the upcoming 2023-2024 Annual Catalog.
Items on the retiring list are only available while supplies last, so order soon to make sure that you are able to get the items that you are wanting! Some of the items will have sale prices listed with discounts up to 60% off.
Several wonderful retiring items have already sold out!
The last day to order from these catalogs will be May 1, 2023.
Click HERE to download a PDF of the Retiring Last Chance Products from the 2022-2023 Annual Catalog.
Click HERE to download a PDF of the Retiring Last Chance Products from the January-April 2023 Mini Catalog.
Current Host Code: 6EDCPU4T
Use this host code when you order $50 or more and receive a Thank You gift from me! The free gift is your choice of any currently available item valued up to $10.00.
If your order is over $150, please do not use the host code since you’ll receive your own Host Dollars plus I’ll still send you the Thank You gift! This host code can be used by anyone, no club or commitment required. Let me know if you have any questions.
If you need any stamping supplies, I’d be very happy to be your Demonstrator. Just click on the Shop Now button on the right side of the screen to go directly to my online store or contact me if you have any questions. Happy Stamping!
Thanks for stopping by and have a great week!
Akiko
- Visit my online store here
- See the current Stampin’ Up! clearance rack specials here
- Earn FREE Stampin’ Up! products through my Wildflower Frequent Shopper Program – my way of saying thank you to my online frequent shopper customers.
- Have any questions? I’d be happy to help, click here to contact me.
Cardstock Cuts for this project:
- Smoky Slate – 4-1/4″ x 11″ card base scored at 5-1/2″, 1-1/4″ x 3″ (label)
- Basic Black – two 4″ x 5-1/4″ panels (front and inside mats)
- Silver Foil – 2″ x 2″ (die cut flower)
- Basic White – 3-7/8″ x 5-1/8″ (inside panel), 2-1/2″ x 3-1/2″ (lacy die cut panel)
- Ready to Ride specialty DSP – 3-7/8″ x 5-1/8″ (front background), 1/2″ x 4″ (inside trim)
Stampin’ Up! products used in this project:
")


 Specialty Designer Series Paper")


 Specialty Pack")


 Shimmer Ribbon")


 Designer Series Paper")


")


 Designer Series Paper")


")


 Polka Dot Tulle Ribbon")


 Flax Ribbon")
 Double-Stitched Satin Ribbon")


 Crinkled Seam Binding Ribbon")