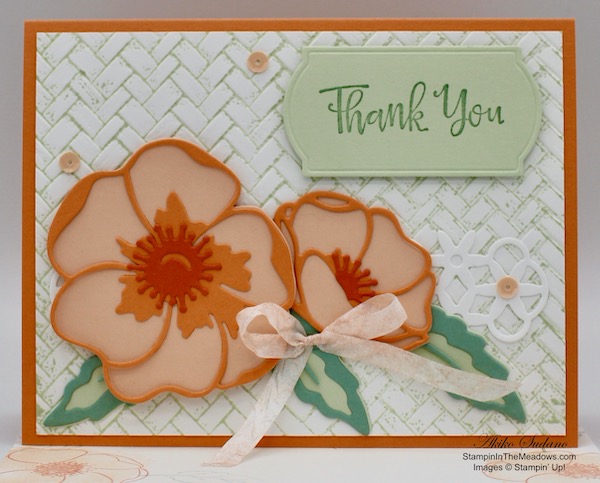
Good Morning! Today I am sharing a video tutorial that I made yesterday during my Sunday Facebook Live session. I made a Thank You Card with the pretty Stampin’ Up! Peaceful Moments and Painted Poppies bundles. You can find the supplies used to create this card at the bottom of my post along with the sizes of cardstock used. Here is my card:
And here’s the Facebook Live video:
I also posted the video to YouTube and you can view it here if you prefer.
I started by inking up my Coastal Weave Embossing Folder with Soft Sea Foam ink using the ink pad directly to the embossing folder. I carefully positioned a Whisper White panel in the embossing folder, closed it and ran it through the die cutting machine. This gave me the embossed panel with touches of Soft Sea Foam ink in the creases. I adhered the embossed panel to a Grapefruit Grove card base. I cut a Whisper White panel with the flower trellis die from the Wild Roses dies and adhered it to the lower part of the embossed panel with multipurpose liquid glue.

I die cut the flowers and leaves from the Peaceful Poppies dies and assembled them with multipurpose liquid glue. I cut the solid flowers from Petal Pink, the outline flowers from Grapefruit Grove and the centers from Calypso Coral. I cut the solid Leaves from Soft Sea Foam and the accent parts from Mint Macaron. I arranged the flowers and leaves on the card on top of the trellis and adhered all but the large flower with multipurpose liquid glue. I adhered the large flower with dimensionals.

I stamped the sentiment from the Stampin’ Up! Peaceful Moments stamp set in Mint Macaron ink on a panel of Soft Sea Foam. I cut it out with the small label die from the Painted Labels dies and adhered it to the card with dimensionals. I used the small spatter stamp from the Painted Poppies stamp set to stamp Calypso Coral ink on a length of Whisper White Crinkle Seam Binding ribbon to give it some color. I made a bow and attached it under the flowers with glue dots. I finished the card with three Petal Pink sequins.

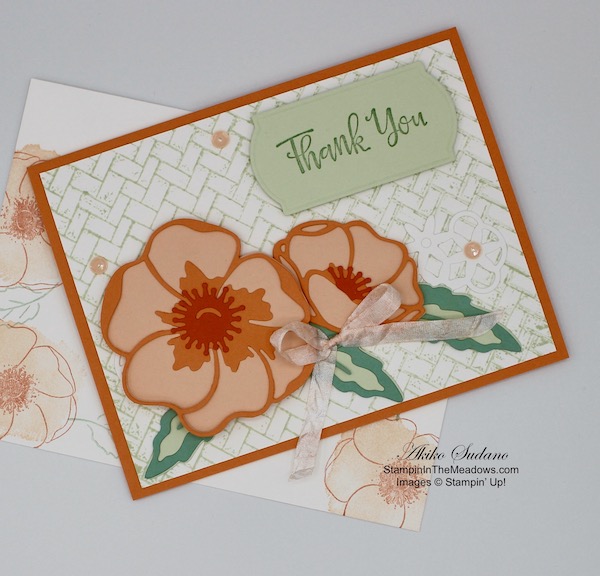
On the inside of the card I stamped three flowers from the Painted Poppies stamp set in Calypso Coral ink after stamping off on a panel of Whisper White. I used the splotch stamp from the set to color the poppies in Petal Pink ink. I stamped three leaves in Mint Macaron after stamping off and then adhered it to the inside of the card with snail. I stamped a Whisper White envelope the same way as the inside panel.

Tomorrow is the last day to sign up for the March 2020 Paper Pumpkin kit!
The theme is No Matter the weather and it celebrates a Paper Pumpkin milestone: our seventh year of delivering fun, easy, creative projects. To thank everyone who has helped us along the way, we’re including an additional FREE stamp set with every March kit. This means that every subscriber will receive two stamp sets!
The March 2020 kit will arrive in an exclusive, specially-designed box that subscribers will love! Think daffodils, raindrops, and a fresh spring vibe.
Here are the Details:
- Kit contains supplies for 12 cards and envelopes (4 cards of 3 designs)
- Notecard size: 5″ x 3-1/2″ (12.7 x 8.9 cm)
- Envelope size: 5-1/8″ x 3-5/8″ (13 x 9.2 cm)
- The additional stamp set coordinates with the March kit design; however, you do not need it to complete the March cards.
- The additional stamp set is a 4×6 footprint, which is larger than most Paper Pumpkin sets and is designed for use on a variety of crafting projects.
Coordinating Colors: Balmy Blue, Basic Gray, Calypso Coral, Grapefruit Grove, Gray Granite, Pear Pizzazz, Petal Pink, Shaded Spruce, and So Saffron
If you’re interested in subscribing to Paper Pumpkin, you can either sign up for a subscription where you are billed monthly for your kit or you can purchase a prepaid subscription in my online store. To see more information and to sign up for the monthly subscription click here. To see the options for prepaid subscriptions in my online store, click here.
As a bonus during Sale-A-Bration, purchasing a 3-month or longer prepaid subscription qualifies for FREE Sale-A-Bration products!
Sign up deadline for the March 2020 kit is tomorrow.
March 1 – 15 Host Code: BQCVV2RG
Use this host code when you order $50+ and receive a free gift from me! If your order is over $150, please do not use this code, but you’ll still get the free gift. The free gift is your choice of any item valued up to $10.00 in the 2019 – 2020 Annual Catalog or in the 2020 Mini Catalog! That includes some of the Host Exclusive stamp sets!
If your order is over $150, please do not use the host code since you’ll receive your own Host Dollars plus I’ll send you the free gift! This host code can be used by anyone, no club or commitment required. Let me know if you have any questions.
If you need any stamping supplies, I’d be very happy to be your Demonstrator. Just click on the Shop Now button on the right side of the screen to go directly to my online store or contact me if you have any questions. Happy Stamping!
Thanks for stopping by and have a great week!
Akiko
- Visit my online store here
- See the current Stampin’ Up! clearance rack specials here
- Earn FREE Stampin’ Up! products through my Wildflower Frequent Shopper Program – my way of saying thank you to my online frequent shopper customers.
- Sign up for my weekly newsletter here
- Have any questions? I’d be happy to help, click here to contact me.
Cardstock Cuts for this project:
- Grapefruit Grove – 5-1/2″ x 8-1/2″ card base scored at 4-1/4″, 3″ x 4-1/2″ (flower die cuts)
- Petal Pink – 3″ x 4-1/2″ (flower die cuts)
- Calypso Coral – 1-1/2″ x 3″ (flower center die cuts)
- Soft Sea Foam – 2-1/2″ x 3″ (leaf die cuts), 2-1/2″ x 3-1/2″ (label)
- Mint Macaron – 2-1/2″ x 3″ (leaf die cuts)
- Whisper White – (2) 4″ x 5-1/4″ (inside panel and embossed background), 1-1/2″ x 5 1/4″ (trellis die cut)
Stampin’ Up! products used in this project:
")


 Crinkled Seam Binding Ribbon")


So pretty Akiko! Your colors are perfect, love your design too! 🙂
Thank you Amy!!
Beautiful color combo, Akiko! The embossed background is perfect for the card, too.
Thank you!
Beautiful card as always!😊
Thank you!