Stampin’ Up! Fond of Autumn Just A Note Card

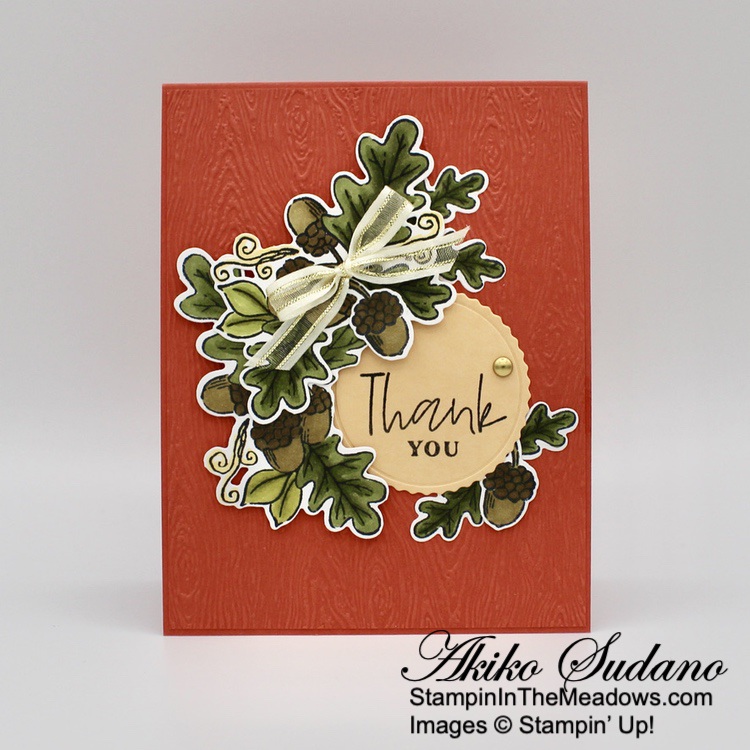
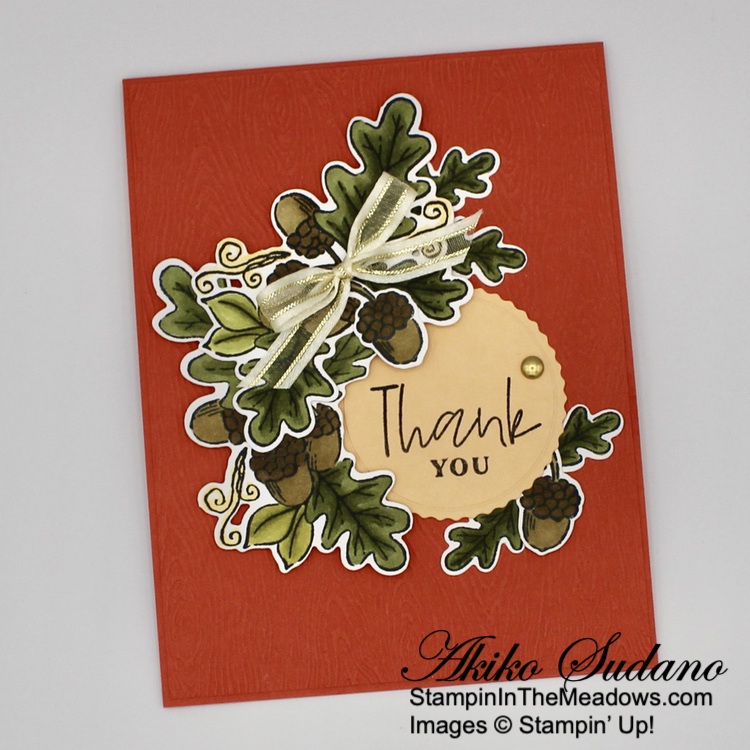
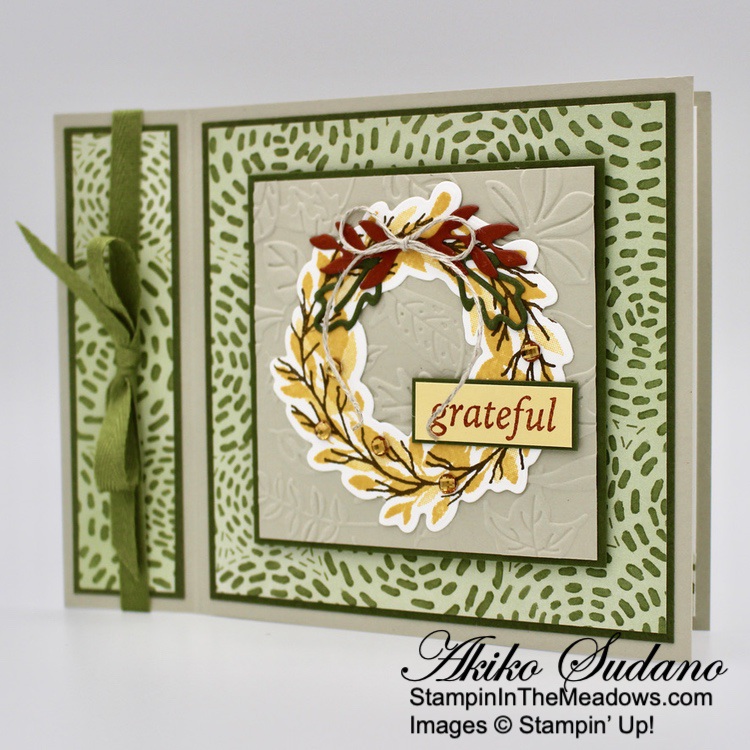
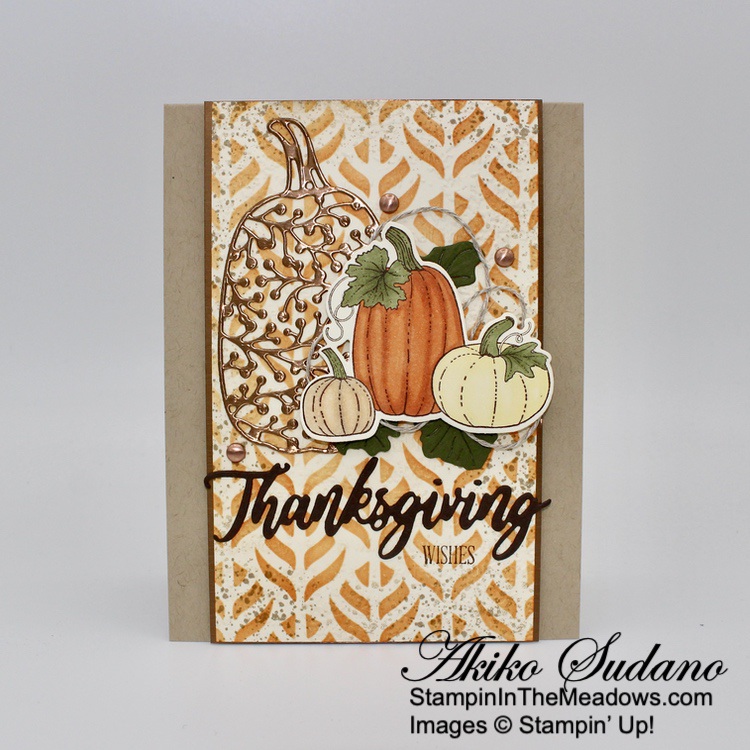
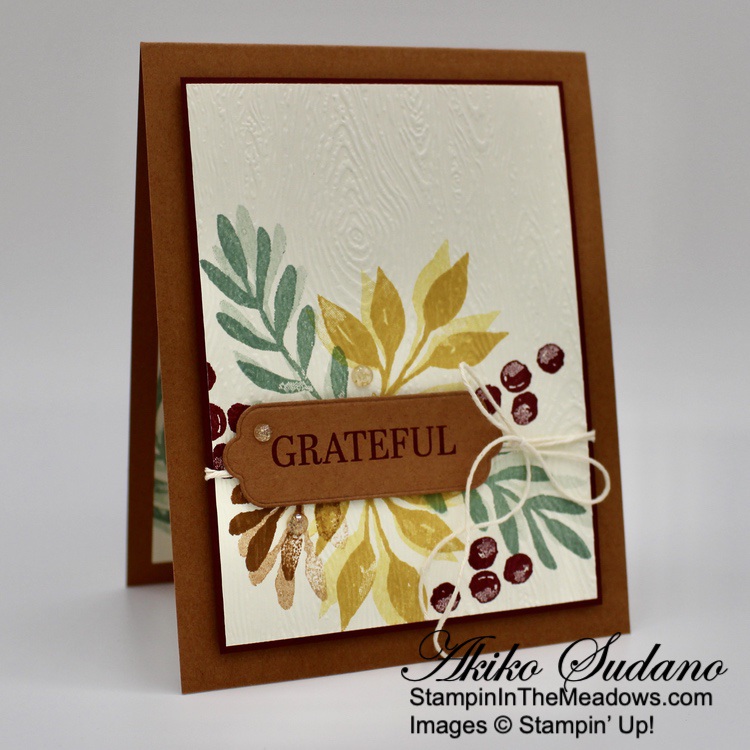
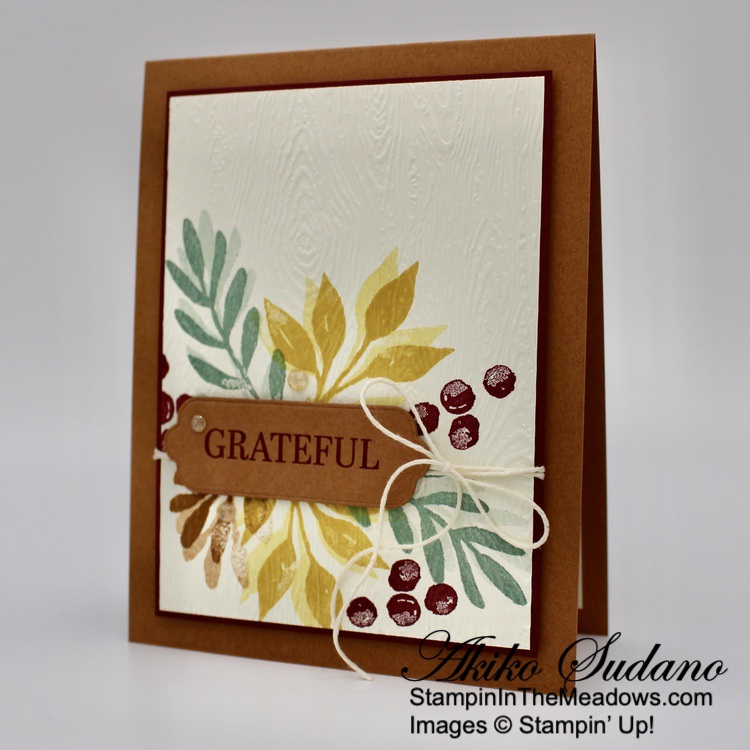
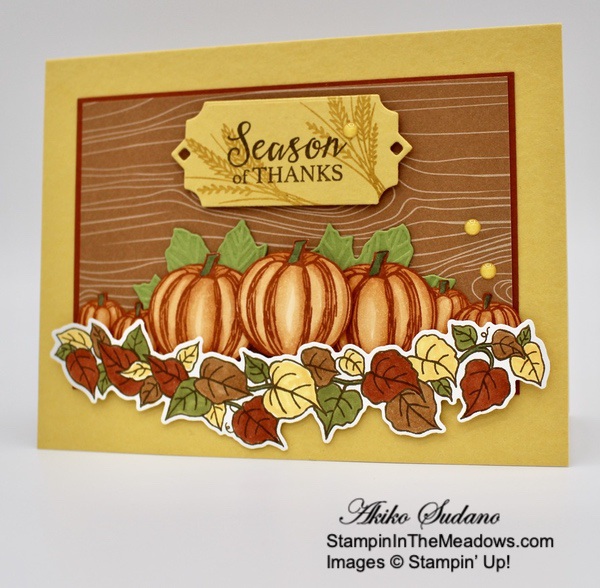
Good Morning! The Stampin’ Up! Fond Of Autumn bundle is a beautiful set and today I paired it with the Fabulous Frames dies and metallic foil for a Fall floral note card. You can find the supplies I used at the bottom of my post along with the sizes of cardstock used.

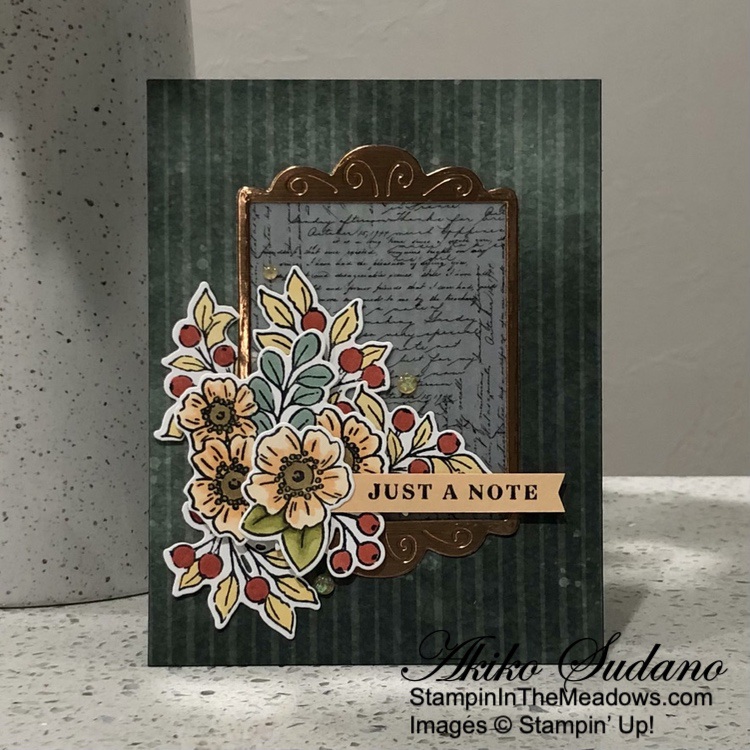
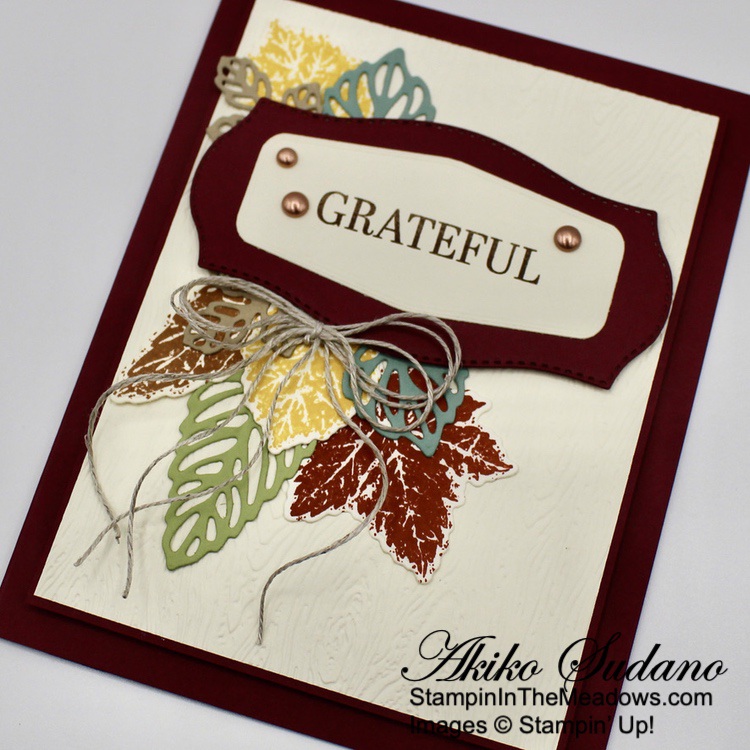
I adhered a panel of Evening Evergreen Boughs of Holly designer series paper to the front of an Evening Evergreen card base with liquid glue. I cut a panel of copper Brushed Metallic foil with the small scalloped frame from the Fabulous Frames dies. I adhered a panel of Layering Designs Vellum to the back of the frame with dots of liquid glue and adhered the frame to the front of the card with glue dots.

I stamped one of the large floral bouquet stamp from the Stampin’ Up! Fond Of Autumn stamp set in Memento Tuxedo Black ink on Basic White and I cut it out with the 4 section large die. I only needed two more berry sprigs, so I inked up the berry part of the stamp and stamped it on a smaller Basic White panel before cutting it out with the 4 section die. I colored the pieces with Stampin’ Blends. Cajun Craze for the berries, So Saffron for the berry leaves, Pale Papaya and Soft Suede for the flowers Soft Succulent and Old Olive for the flower leaves. I stamped the small single flower in Memento Tuxedo Black, cut it out with the coordinating die and colored it with Soft Suede, Pale Papaya and Old Olive Stampin’ Blends.

I arranged the berry clusters on the inside and outside of the frame and adhered them with glue dots. I adhered the large flower with dimensionals over the berries. I stamped the sentiment from the Stampin’ Up! Fond Of Autumn stamp set in Memento Tuxedo Black on the right end of a strip of Pale Papaya card stock. I used paper snips to trim the end and adhered it to the card with dimensionals and glue dots. I adhered the flower over the end of the label banner with glue dots and added three Pale Papaya Opal Gems around the bouquet.

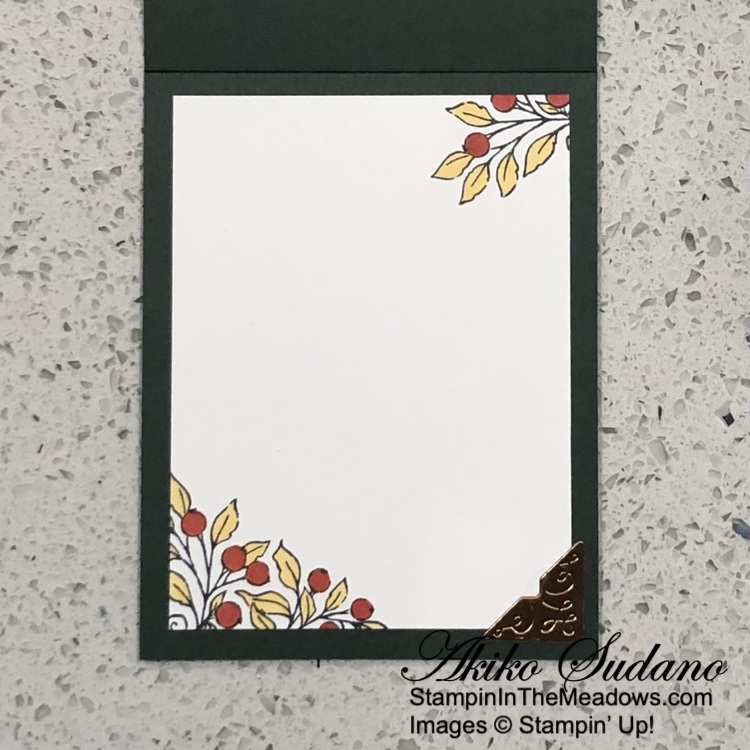
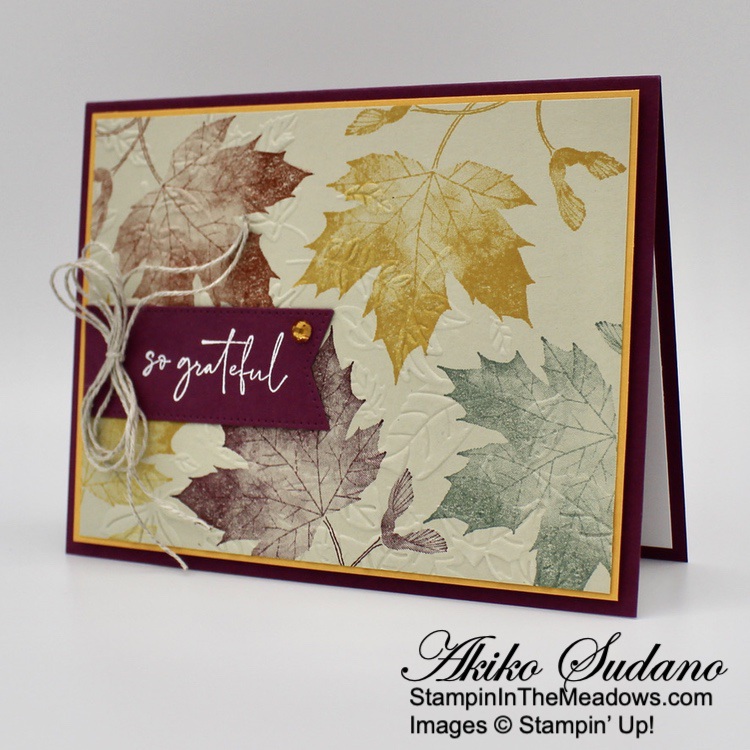
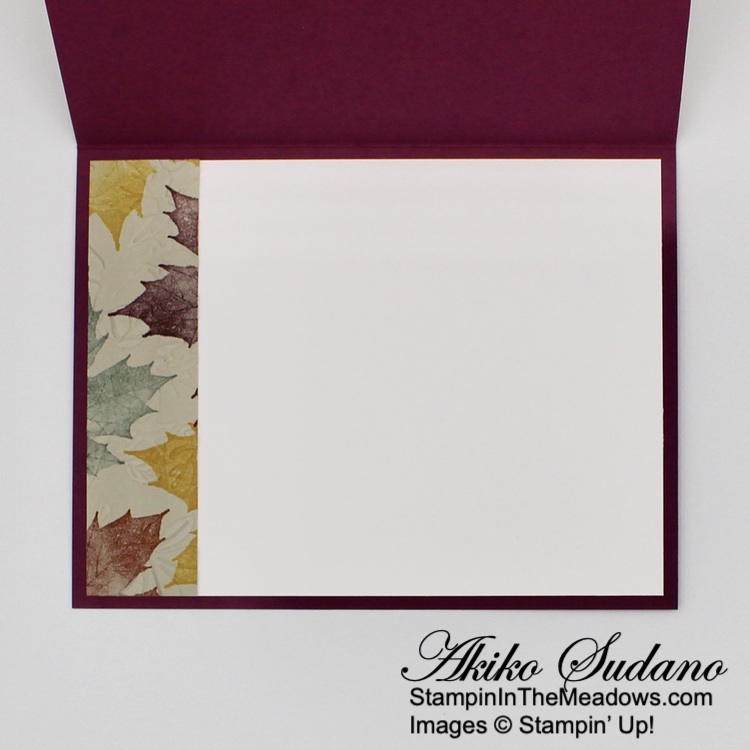
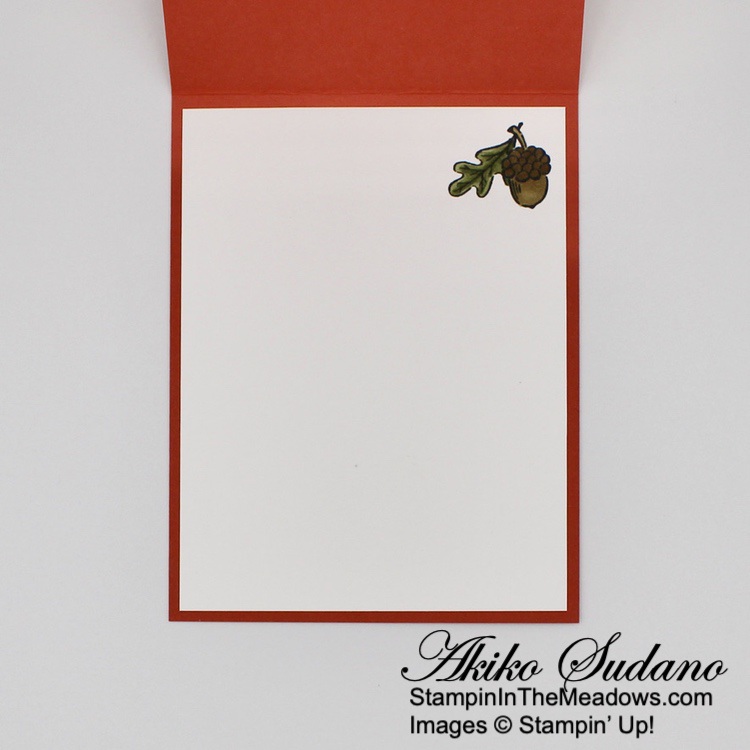
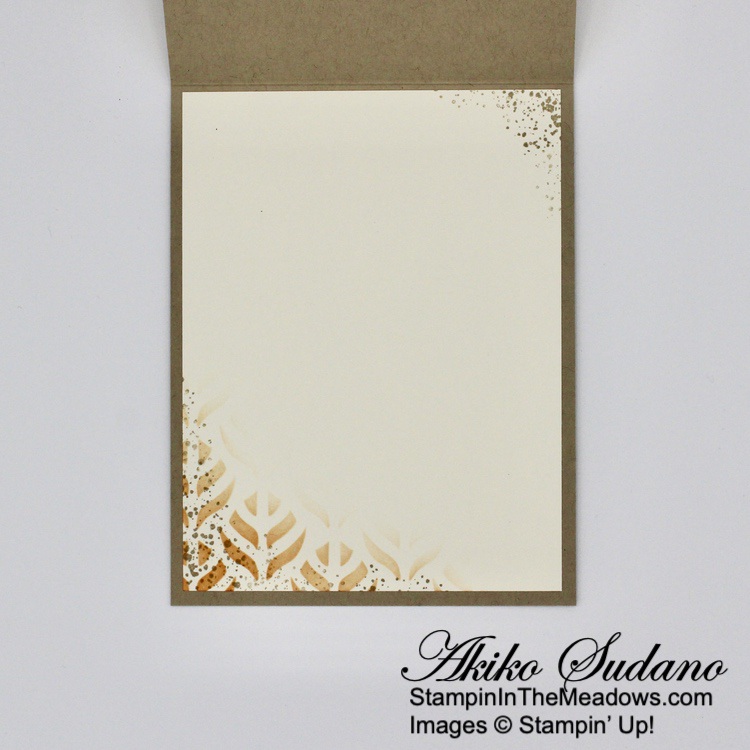
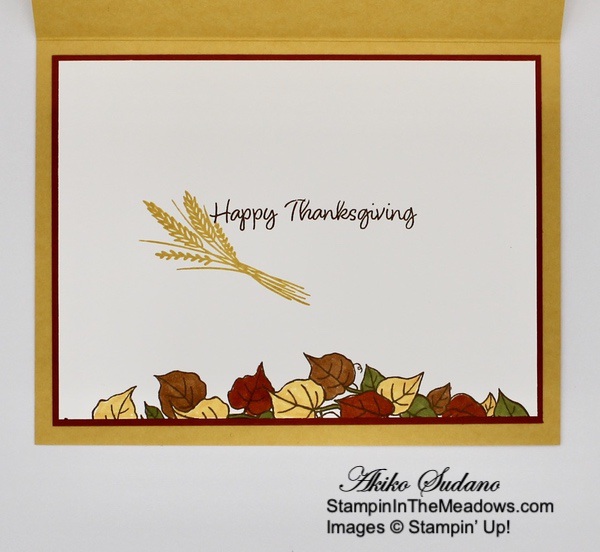
For the inside of the card, I stamped the berry end of the large floral bouquet stamp from the Stampin’ Up! Fond Of Autumn stamp set using Memento Tuxedo Black ink in the corners of a Basic White panel and colored them with Cajun Craze and So Saffron Stampin’ Blends. I adhered the panel to the inside of the card with Stampin’ Seal. I cut one of the picture corners from copper Brushed Metallic foil and adhered it to a lower corner with liquid glue.

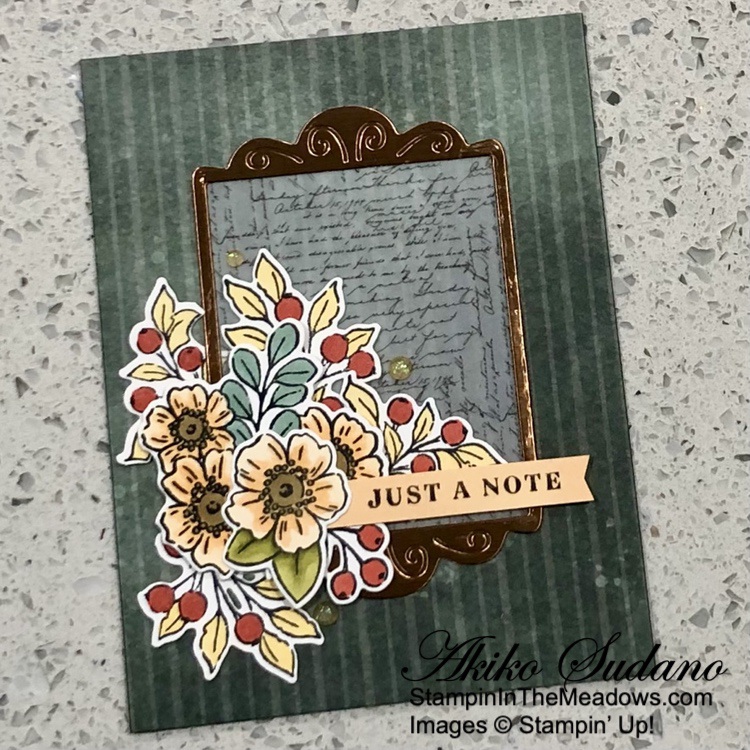
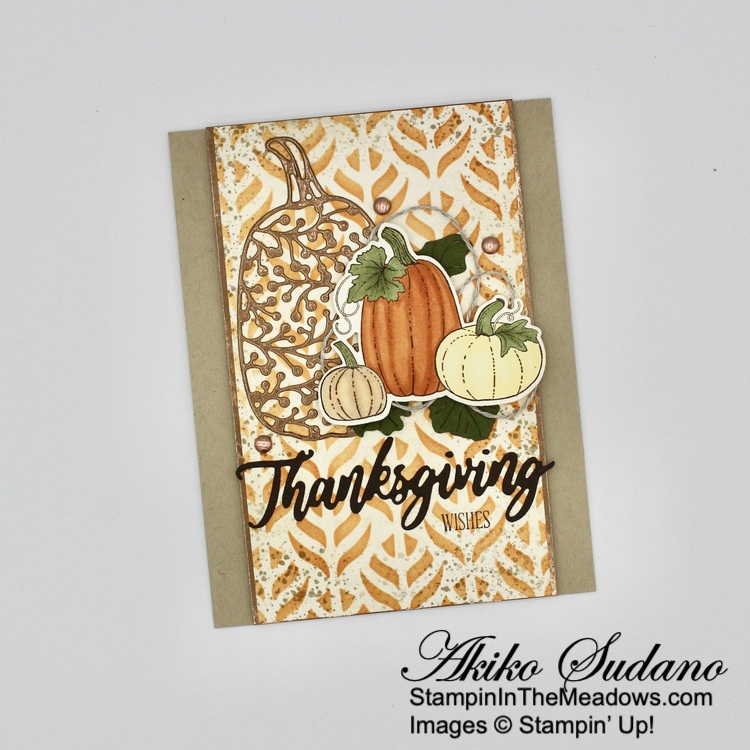
The Stampin’ Up! Fond Of Autumn stamp bundle is such a pretty bundle and the images are great for coloring.


Starter Kit + Joining Promotion Through October 31!

Stampin’ Up! has a new Joining promotion this month! New team members will get even MORE FREE products in their customizable Starter Kit. Between October 4–31 2022, those who sign up can get $125 $155 worth of products for only $99 + free business supplies + free shipping + all the fun being a part of Stampin’ Up!

What are the benefits of being a Stampin’ Up! Demonstrator?

  • You can choose any items you want for your Starter Kit – Choose $125 $155 worth of products for $99.
  • Demonstrators receive a minimum 20% discount on products.
  • Support from Stampin’ Up!
  • Support from me and the rest of the Inkin’ Krew Team
  • Early Access to new products

See my Join My Team page for all the benefits and to get started. Or contact me at apsudano@stampininthemeadows.com if you want to chat.


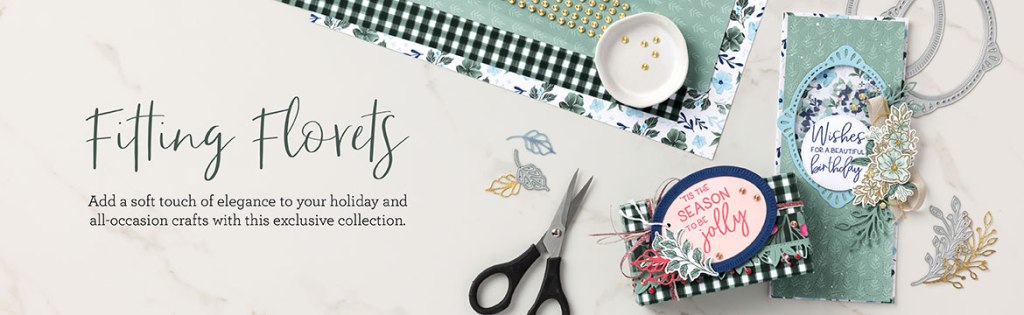
The Fitting Florets Collection is Coming November 1!

Add just the right touch of elegance to any occasion, including Christmas and seasonal celebrations, with the sweet Fitting Florets Collection. From color schemes to sentiments and embellishments to dies, these unique products blend together so that your cards and crafts fit whatever occasion you might need. Send birthday wishes, express your gratitude, or spread Christmas cheer—with so many options to mix and match you’ll be set no matter the celebration all year!

The beautiful Framed Florets bundle is an early release from the upcoming January-June 2023 Mini catalog. The Framed & Festive cling stamp set, Fitting Florets designer series paper and gold adhesive backed swirls are only available during this promotion. Click on the picture below to download a flyer with the details.

Watch this video that showcases the new and exclusive products from the Fitting Florets Collection:

The Fitting Florets collection is available now to Stampin’ Up! Demonstrators. And if you decide to join Stampin’ Up! this month, you can add items from this collection to your Starter Kit! Contact me if you have any questions.


Current Host Code: HHFMZPFH

Use this host code when you order $50 or more and receive a free gift from me!  The free gift is your choice of any item currently available valued up to $10.00 from the July-December 2022 Mini Catalog or the 2022-2023 Annual Catalog!

If your order is over $150, please do not use the host code since you’ll receive your own Host Dollars plus I’ll still send you the free gift!  This host code can be used by anyone, no club or commitment required. Let me know if you have any questions.


If you need any stamping supplies, I’d be very happy to be your Demonstrator.  Just click on the Shop Now button on the right side of the screen to go directly to my online store or contact me if you have any questions.  Happy Stamping!

Thanks for stopping by and have a great week!

Akiko

  • Visit my online store here
  • See the current Stampin’ Up! clearance rack specials here
  • Earn FREE Stampin’ Up! products through my Wildflower Frequent Shopper Program – my way of saying thank you to my online frequent shopper customers.
  • Have any questions? I’d be happy to help, click here to contact me.

Cardstock Cuts for this project:

  • Evening Evergreen – 4-1/4″ x 11″ card base scored at 5-1/2″
  • Brushed Metallic – 3″ x 4-1/8″ (frame)
  • Pale Papaya – 3/8″ x 3″ (label)
  • Layering Designs Vellum – 2-1/2″ x 3-1/8″ (frame filler)
  • Basic White – 3-3/4″ x 5″ (inside panel), 3-1/2″ x 4-3/4″ (large floral die cut), 2″ x 3-1/2″ (partial large floral die cut), 1-1/2″ x 2″ (single flower die cut)
  • Boughs of Holly DSP – 4-1/4″ x 5-1/2″ (front background)

Stampin’ Up! products used in this project:


Stampin’ Up! Soft Seedlings So Grateful Card

Good Morning! Here’s another fall card with the beautiful Stampin’ Up! Soft Seedlings cling stamp set. I used it with the pretty Leaf Fall 3D embossing folder for a leaf filled so grateful card. You can find the supplies I used at the bottom of my post along with the sizes of cardstock used.

I stamped the pretty maple leaf from the Stampin’ Up! Soft Seedlings stamp set multiple times around a Sahara Sand panel. I stamped it in Crushed Curry, Soft Succulent, Cajun Craze, Rich Razzleberry and Mango Melody, cleaning it off between stampings. I embossed the panel with the pretty Leaf Fall 3D embossing folder.

I adhered the embossed panel to a Mango Melody mat with liquid glue and adhered it to the front of a Rich Razzleberry card base. I stamped the sentiment from the Stampin’ Up! Soft Seedlings stamp set in Versamark Ink on Rich Razzleberry and sprinkled it with white embossing powder. I shook off the excess and heated it until it was bright and shiny. I cut it out with the large banner die from the Stylish Shapes dies so that the sentiment was on the right side of the banner. I trimmed left end straight and adhered it to the card front with liquid glue.

I made a four loop bow from Linen Thread and adhered it on the sentiment label with a glue dot. I finished the label with a large amber gem (I love these gems!!).

For the inside of the card, I stamped parts of the leaf from the Stampin’ Up! Soft Seedlings stamp set on a Sahara Sand panel using the same ink colors as the card front. I embossed the panel with the Leaf Fall 3D embossing folder and adhered it to the side of a Basic White panel with liquid glue before adhering it to the inside of the card with Stampin’ Seal.

The Stampin’ Up! Soft Seedlings stamp set is so pretty and the sentiments are great! It’s the perfect stamp set for this time of year!


Starter Kit + Joining Promotion Through October 31!

Stampin’ Up! has a new Joining promotion this month! New team members will get even MORE FREE products in their customizable Starter Kit. Between October 4–31 2022, those who sign up can get $125 $155 worth of products for only $99 + free business supplies + free shipping + all the fun being a part of Stampin’ Up!

What are the benefits of being a Stampin’ Up! Demonstrator?

  • You can choose any items you want for your Starter Kit – Choose $125 $155 worth of products for $99.
  • Demonstrators receive a minimum 20% discount on products.
  • Support from Stampin’ Up!
  • Support from me and the rest of the Inkin’ Krew Team
  • Early Access to new products

See my Join My Team page for all the benefits and to get started. Or contact me at apsudano@stampininthemeadows.com if you want to chat.


November Paper Pumpkin Kit is From The North Pole!

When autumn rolls around, do you start thinking about cozy Christmas crafting projects? This November, Paper Pumpkin delivers this and more with its one-of-a-kind, holiday-themed crafting experience. This festive kit includes 12 fun, sparkly gift tags and (as always!) an exclusive stamp set—plus everything you need for a successful holiday crafting experience. Make this Christmas the merriest ever with 12 easy-to-make tags to adorn your pretty packages. Combine them with last month’s coordinating Ho Ho Ho Paper Pumpkin Kit for even more creative fun! Need unique Christmas packaging to round out your gifting? We’ve got you covered with our exclusive North Pole Sacks add-on.

The November Kit Includes:

  • Supplies to create 12 tags—4 each of 3 designs.
    • Finished gift tag size: 2″ x 3″
  • Printed snowflake and banner die-cut paper pieces, Mint Macaron glitter specialty paper (a Paper Pumpkin exclusive), twine, adhesive, and more.
  • A Cherry Cobbler Classic Stampin’ Spot!
  • Create festive gift tags for all your packaging needs this holiday season with classic Christmas colors and designs.
  • Coordinates with October’s Ho Ho Ho Paper Pumpkin Kit and North Pole sacks add-on (item 162416)

Coordinating Colors: Basic Black, Cherry Cobbler, Crumb Cake, Mint Macaron, Shaded Spruce, Sweet Sorbet

If you’re interested in subscribing to Paper Pumpkin, you can either sign up for a subscription where you are billed monthly for your kit or you can purchase a prepaid subscription in my Online Store. To see more information and to sign up for the monthly subscription click here. To see the options for prepaid subscriptions in my Online Store, click here.

Sign up deadline for the November 2022 kit is November 10, 2022. Note: Supplies may be limited toward the end of the subscription period.


Current Host Code: HHFMZPFH

Use this host code when you order $50 or more and receive a free gift from me!  The free gift is your choice of any item currently available valued up to $10.00 from the July-December 2022 Mini Catalog or the 2022-2023 Annual Catalog!

If your order is over $150, please do not use the host code since you’ll receive your own Host Dollars plus I’ll still send you the free gift!  This host code can be used by anyone, no club or commitment required. Let me know if you have any questions.


If you need any stamping supplies, I’d be very happy to be your Demonstrator.  Just click on the Shop Now button on the right side of the screen to go directly to my online store or contact me if you have any questions.  Happy Stamping!

Thanks for stopping by and have a great week!

Akiko

  • Visit my online store here
  • See the current Stampin’ Up! clearance rack specials here
  • Earn FREE Stampin’ Up! products through my Wildflower Frequent Shopper Program – my way of saying thank you to my online frequent shopper customers.
  • Have any questions? I’d be happy to help, click here to contact me.

Cardstock Cuts for this project:

  • Rich Razzleberry – 5-1/2″ x 8-1/2″ card base scored at 4-1/4″, 1-1/2″ x 3″ (label)
  • Mango Melody – 4″ x 5-1/2″ (front mat)
  • Sahara Sand – 3-7/8″ x 5-1/8″ (front background), 1″ x 4″ (inside trim)
  • Basic White – 4” x 5-1/4” (inside panel)

Stampin’ Up! products used in this project:


Stampin’ Up! Fond Of Autumn for the Happy Inkin’ Thursday Blog Hop

Good morning and welcome to the Happy Inkin’ Thursday Blog Hop! I have Fall card made with the pretty Stampin’ Up! Fond Of Autumn bundle and the Timber 3D embossing folder. This is a great bundle for coloring and I colored today’s card with Stampin’ Blends. You can find the supplies I used along with card stock cuts at the bottom of my post.

We have a theme challenge this week that is perfect for the season:

I embossed a panel of Calypso Coral card stock with the Timber 3D embossing folder and adhered it to the front of a Calypso Coral card base. I stamped two of the large floral images from the Stampin’ Up! Fond Of Autumn photopolymer stamp set in Memento Tuxedo Black ink on Basic White and cut them out with the coordinating detailed die. This is the die that cuts the large image into four different pieces, so save your extra die cuts for your next card!

I colored the acorns with Soft Suede Stampin Blends and the leaves in Mossy Meadow and Old Olive Stampin Blends. I stamped four additional small oak leaves and two acorns in Memento Tuxedo Black on Basic White and cut them out with the coordinating dies. I colored them with Mossy Meadow and Soft Suede Stampin’ Blends. I stamped the sentiment from the Stampin’ Up! Fond Of Autumn stamp set in Memento Tuxedo Black ink on Pale Papaya and cut it out with the circle die from the All That dies.

I arranged my die cuts on the card front to determine where to place them and started by adhering the label with glue dots. I adhered the little leaves and acorns in the lower left corner with glue dots, tucking them under the label. I adhered the two large acorn and leaf clusters together with glue dots and adhered them to the card front with dimensionals. I adhered the last acorn to the leaves with a glue dot and tucked the last two little leaves under the larger die cuts, adhering them with glue dots. I finished off the card front with a bow and gold metallic dot.

For the inside of the card, I stamped the acorn from the Stampin’ Up! Fond Of Autumn stamp set in Memento Tuxedo Black ink on a Basic White panel. I covered it with a mask and stamped the leaf on top. I colored the leaf and acorn with Mossy Meadow and Soft Suede Stampin’ Blends and adhered the panel to the inside of the card.

This card reminds me of my old house where we had huge oak trees in the front. We had so many acorns and so many leaves to rake, well into the winter! The squirrels loved it! So I love the Stampin’ Up! Fond of Autumn bundle. And I especially love how the large image can either be die cut as a single image or cut into 4 different pieces – it’s really nice!

On with the Hop! Click on the Next Blog button to move forward to see the beautiful project Karen Ksenzakovic has created.

If you get lost along the way, here are the participants for the hop:


Current Host Code: HHFMZPFH

Use this host code when you order $50 or more and receive a free gift from me!  The free gift is your choice of any available item valued up to $10.00 in the 2022-2023 Annual Catalog or the July-December 2022 Mini Catalog!

If your order is over $150, please do not use the host code since you’ll receive your own Host Dollars plus I’ll still send you the free gift!  This host code can be used by anyone, no club or commitment required. Let me know if you have any questions.


If you need any stamping supplies, I’d be very happy to be your Demonstrator.  Just click on the Shop Now button on the right side of the screen to go directly to my online store or contact me if you have any questions. 

Thanks for stopping by and Happy Stamping!

Akiko

  • Visit my online store here
  • See the current Stampin’ Up! clearance rack specials here
  • Earn FREE Stampin’ Up! products through my Wildflower Frequent Shopper Program – my way of saying thank you to my online frequent shopper customers.
  • Have any questions? I’d be happy to help, click here to contact me.

Cardstock Cuts for this project:

  • Calypso Coral – 4-1/4″ x 11″ card base scored at 5-1/2″, 4-1/8″ x 5-3/8″ (embossed background)
  • Pale Papaya – 2-1/2″ x 2-1/2″ (label)
  • Basic White – 4″ x 5-1/4″ (inside panel), two 3-1/2″ x 4-3/4″ panels (large die cut leaves, 1-3/4″ x 6″ (small die cut leaves and acorns)

Stampin’ Up! products used in this project:


Stampin’ Up! Cottage Wreaths Grateful Card for the Happy Inkin’ Thursday Blog Hop

Good morning and welcome to the Happy Inkin’ Thursday Blog Hop! I have another Fall card made with the pretty Stampin’ Up! Cottage Wreaths bundle and the Leaf Fall 3D embossing folder. Today I paired them with the pretty Fall Celebrate Everything designer series paper. You can find the supplies I used along with card stock cuts at the bottom of my post.

We have a pretty sketch challenge this week:

I embossed a panel of Pear Pizzazz card stock with the Leaf Fall 3D embossing folder and adhered it to the front of a Pear Pizzazz card base. I used a blending brush to apply Crumb Cake ink to the front of a panel of Celebrate Everything designer series paper.

I cut the panel with the fourth largest deckled rectangle die and embossed it with the Leaf Fall 3D embossing folder. I adhered it to a Basic Black mat and adhered it to the card front with liquid glue. I cut Shaded Spruce panel with the die from the Stampin’ Up! Cottage Wreaths bundle and adhered it to the card front with liquid glue. I colored a Textural Elements sprig with the dark Crumb Cake Stampin’ blend and adhered it to the card front with glue dots.

I stamped the sentiment from the Stampin’ Up! Cottage Wreaths photopolymer stamp set with in Memento Tuxedo Black on Pear Pizzazz. I cut it out with the Deckled Rectangles die by cutting one corner, moving the die and cutting the next corner and adhered the label to a Basic Black mat. I made a loopy linen thread bow and adhered it to the card with a glue dot before adhering the label with dimensionals. I finished the label with a Crushed Curry die cut leaf sprig and a red rhinestone jewel.

I used a blending Brush to apply Crumb Cake ink to a strip of Celebrate Everything DSP and adhered it to the bottom of a Basic White panel I adhered the panel to the inside of the card with Stampin’ Seal.

The Stampin’ Up! Cottage Wreaths is a great bundle for making wreath cards! There are so many stamping and die cutting options, you’re sure to find a style for any occasion!

Click on the Next Blog button to move forward to see the beautiful project Karen Ksenzakovic has created.

If you get lost along the way, here are the participants for the hop:


Current Host Code: HHFMZPFH

Use this host code when you order $50 or more and receive a free gift from me!  The free gift is your choice of any available item valued up to $10.00 in the 2022-2023 Annual Catalog or the July-December 2022 Mini Catalog!

If your order is over $150, please do not use the host code since you’ll receive your own Host Dollars plus I’ll still send you the free gift!  This host code can be used by anyone, no club or commitment required. Let me know if you have any questions.


If you need any stamping supplies, I’d be very happy to be your Demonstrator.  Just click on the Shop Now button on the right side of the screen to go directly to my online store or contact me if you have any questions. 

Thanks for stopping by and Happy Stamping!

Akiko

  • Visit my online store here
  • See the current Stampin’ Up! clearance rack specials here
  • Earn FREE Stampin’ Up! products through my Wildflower Frequent Shopper Program – my way of saying thank you to my online frequent shopper customers.
  • Have any questions? I’d be happy to help, click here to contact me.

Cardstock Cuts for this project:

  • Pear Pizzazz – 4-1/4″ x 11″ card base scored at 5-1/2″, 4-1/4″ x 5-1/2″ (embossed background), 1-1/4″ x 2-1/4″ (label)
  • Basic Black – 2-3/4″ x 4-1/8″ (front mat), 7/8″ x 1-7/8″ (label mat)
  • Shaded Spruce – 3″ x 3″ (die cut wreath)
  • Crushed Curry – 1″ x 1-1/4″ (leaf sprig)
  • Basic White – 4″ x 5-1/4″ (inside panel)
  • Celebrate Everything DSP – 3″ x 4-1/4″ (front background), 1/2″ x 4″ (inside trim)

Stampin’ Up! products used in this project:


Stampin’ Up! Cottage Wreaths Card with Video Tutorial

Good Morning! Here is the Stampin’ Up! Cottage Wreaths grateful card that I made during my Facebook Live yesterday afternoon. I’m going to be sending these to my family at Thanksgiving, so I’m considering them Thanksgiving cards. Plus it’s a fun fold, so they should enjoy receiving them! You can find the supplies I used at the bottom of my post along with the sizes of cardstock used.

You can watch my Facebook live from yesterday afternoon HERE. I have also posted it to my YouTube Channel and you can view it HERE.

Adhere the left side of the Sahara Sand card base shut with liquid glue to form the book hinge. Adhere the Happy Forest Friends designer series paper panels to the Mossy Meadow mats with liquid glue and adhere them to the front panels of the card base with liquid glue, the skinny strip on the book hinge. Wrap a length of Old Olive ribbon around the book hinge and make a bow, securing it with a glue dot.

Emboss a Sahara Sand panel with the pretty Leaf Fall 3D embossing folder and adhere it to a Mossy Meadow mat with liquid glue. Adhere the layered panel to the card front with dimensionals. Stamp the leafy wreath from the Stampin’ Up! Cottage Wreaths photopolymer stamp set using Mango Melody ink on Basic White. Stamp the twiggy leaf over the leafy wreath using Soft Suede ink and cut out the wreath with the leafy wreath die. Adhere the wreath to the card front with liquid glue.

Cut two leaf clusters from Cajun Craze and two Oak leaves from Mossy Meadow using the dies from the Country Wreaths dies. Adhere the leaves to the top of the wreath with liquid glue. Make a bow from a length of Linen Thread and adhere it to the top of the wreath with a glue dot. Stamp the sentiment from the Stampin’ Up! Cottage Wreaths stamp set in Cajun Craze on a So Saffron panel. Adhere it to a Mossy Meadow mat and to the wreath with liquid glue. Finish the wreath with amber gems.

For the inside of the card, stamp the little oak leaves and acorns from the Stampin’ Up! Cottage Wreaths stamp set in the corner of a Basic White panel. Stamped the leaves in Old Olive, Cajun Craze & Mango Melody and the acorns in Soft Suede. If your stamp pads are a little dry, use a blender pen to blend the colors a little and soften the tiny dots. Trim the bottom of the panel with Happy Forest Friends DSP and adhere the panel to the inside of the card.

With Fall in the air, I’m ready to plant mums and decorate a Fall wreath for my front door. The Stampin’ Up! Cottage Wreaths bundle is perfect for wreath cards for any time of year, so be sure to check it out!


Perfect Partners – Exclusive Dies Available This Month!

Stampin’ Up! created six new die sets that coordinate with stamp sets in the 2022–2023 Annual Catalog and the July–December 2022 Mini Catalog. These coordinating dies will only be available during this promotion and will not be offered in any catalog.  Click on the picture below to open a flyer with all the details on the dies.

These stamp sets and dies are available separately or as a bundle. By buying the bundle, you will save 10% off the retail price.

Sales Period: September 1, 2022 – September 30, 2022 (while supplies last)


Save The Date – World Card Making Day is October 1!!

Stampin’ Up! and The Inkin’ Krew have fun events planned to celebrate!

Inkin’ Krew World Card Making Day Event – 9 AM ET Until 9 PM ET, Saturday, October 1!

We’re doing it again!!  Our team will be hosting a fun all-day event featuring card making presentations live on the event Facebook page as well as some fun giveaways! All are welcome to join us!  We’ll be setting up a Facebook page to host the event and we’ll be sharing the link to the page in late September. Can’t wait to stamp with you all then!!

Stampin’ Up! Free Virtual Craft Along Event

Stampin’ Up! is also hosting a free, virtual card making event on October 1 from 2:00–5:00 pm (MT)!  In just under three hours, Stampin’ Up will make three unique cards with the Cottage Rose Bundle, Cottage Wreath Bundle and the Warm Welcome Bundle (an early release from the Jan-Jun 2023 Mini Catalog).  Everyone is invited and welcome, and registration is not required, but it is encouraged to stay up to date.

Click HERE to register for the Stampin’ Up! 3 Hour Event.

Click HERE to download the Card Stock cuts for the cards.

As an added bonus, when you order any of the three bundles used for the event, you’ll get a FREE gift of Iridescent Pearl Basic Jewels! (Note that even if you order all three bundles, you’ll only receive one Iridescent Pearls gift) Click HERE to download a brochure with ordering details and check out the early release of the Warming Welcome bundle for this event:

Let me know if you have any questions.


September Weekly Deals Ending Soon!

We’re in the last round of the weekly specials. The last Day is Wednesday, September 28, 2022.

Check my Online Store to see the this week’s deals!


Current Host Code: JSUNSU6D

Use this host code when you order $50 or more and receive a free gift from me!  The free gift is your choice of any item currently available valued up to $10.00 from the July-December 2022 Mini Catalog or the 2022-2023 Annual Catalog!

If your order is over $150, please do not use the host code since you’ll receive your own Host Dollars plus I’ll still send you the free gift!  This host code can be used by anyone, no club or commitment required. Let me know if you have any questions.


If you need any stamping supplies, I’d be very happy to be your Demonstrator.  Just click on the Shop Now button on the right side of the screen to go directly to my online store or contact me if you have any questions.  Happy Stamping!

Thanks for stopping by and have a great week!

Akiko

  • Visit my online store here
  • See the current Stampin’ Up! clearance rack specials here
  • Earn FREE Stampin’ Up! products through my Wildflower Frequent Shopper Program – my way of saying thank you to my online frequent shopper customers.
  • Have any questions? I’d be happy to help, click here to contact me.

Cardstock Cuts for this project:

  • Sahara Sand – 4-1/4″ x 11″ card base scored at 5-1/2″ and 6-3/4″, 2-7/8″ x 2-7/8″ (embossed panel)
  • Mossy Meadow – 4″ x 4″ (front mat), 1″ x 4″ (front mat), 3″ x 3″ (embossed panel mat), 1/2″ x 1-5/16″ (label mat), 1-1/4″ x 1-1/2″ (die cut leaves)
  • So Saffron – 7/16″ x 1-1/4″ (label)
  • Cajun Craze – 1-1/4″ x 1-3/4″ (die cut leaves)
  • Basic White – 4” x 4” (inside panel), 3″ x 3″ (die cut wreath)
  • Happy Forest Friends DSP – 3-7/8″ x 3-7/8″ (front background), 7/8″ x 3-7/8″ (front background), 1/2″ x 4″ (inside trim)

Stampin’ Up! products used in this project:


Stampin’ Up! Peaceful Pumpkins for the Happy Inkin’ Thursday Blog Hop

Good morning and welcome to the Happy Inkin’ Thursday Blog Hop! I used the Stampin’ Up! Pretty Pumpkins bundle for today’s card, and I wanted to do something different. So I pulled out a mask and my blending brushes to create a background on Very Vanilla card stock. You can find the supplies I used at the bottom of my post along with the sizes of cardstock used.

We have a sketch challenge this week and here is the pretty sketch we are using:

I secured a panel of Very Vanilla under the leaf mask in the Basic Masks and applied Pumpkin Pie ink on it with a Blending Brush. I stamped the spatter from the Gorgeous Leaves stamp set around the edge in Crumb Cake ink using first and second generation stamping. I stamped the “Wishes” sentiment from the A Wish For Everything cling stamp set in Early Espresso ink at the bottom. I embossed the panel with the Timeworn Type 3D embossing folder and lightly brushed the top and edges with more Crumb Cake ink. I adhered the panel to a brushed copper metallic sheet with liquid glue.

I stamped the pumpkin trio from the Stampin’ Up! Pretty Pumpkins cling stamp set in Early Espresso ink on Very Vanilla. I colored the pumpkins with Stampin’ Blends – Pumpkin Pie, So Saffron, Ivory, Light Crumb Cake and light Mossy Meadow. I cut them out with the coordinating die. I also cut the large fancy pumpkin from Brushed copper metallic sheet and the leaves from Mossy Meadow. I cut the “Thanksgiving” word using the Word Wishes dies from Early Espresso – don’t forget to save the dots for the little i‘s.

I adhered the “Thanksgiving” word across the layered embossed panel with dots of liquid glue, just above the stamped “Wishes” sentiment. I adhered the brushed copper detailed pumpkin above the sentiment with dots of liquid glue. I ran some Stampin’ Seal next to the pumpkin and wound some Linen Thread around it, securing it to the seal and popped the colored pumpkins on top with dimensionals, tucking the leaves behind, securing them with glue dots. I adhered the panel to the front of a Crumb Cake card base with dimensionals and finished the card with brushed copper metallic dots.

For the inside of the card, used the leaf mask, Pumpkin Pie ink and blending brush to add pattern to the lower corner of a Very Vanilla Panel. I stamped some spatter in Crumb Cake around the design and added a little to the top corner. I adhered the panel to the inside of the card.

The pumpkins in the Stampin’ Up! Pretty Pumpkins bundle are so pretty and I love mixing the stamped pumpkins with the different die cut pumpkins. And I love using the masks with the blending brushes – the results are so bold!

On with the Hop! Click on the Next Blog button to move forward to see the beautiful project Karen Ksenzakovic has created.

If you get lost along the way, here are the participants for the hop:


Current Host Code: 29VEKU9M

Use this host code when you order $50 or more and receive a free gift from me!  The free gift is your choice of any item valued up to $10.00 in the 2021 – 2022 Annual Catalog or the July – December 2021 Mini Catalog including some of the host stamp sets!

If your order is over $150, please do not use the host code since you’ll receive your own Host Dollars plus I’ll still send you the free gift!  This host code can be used by anyone, no club or commitment required. Let me know if you have any questions.


If you need any stamping supplies, I’d be very happy to be your Demonstrator.  Just click on the Shop Now button on the right side of the screen to go directly to my online store or contact me if you have any questions. 

Thanks for stopping by and Happy Stamping!

Akiko

  • Visit my online store here
  • See the current Stampin’ Up! clearance rack specials here
  • Earn FREE Stampin’ Up! products through my Wildflower Frequent Shopper Program – my way of saying thank you to my online frequent shopper customers.
  • Have any questions? I’d be happy to help, click here to contact me.

Cardstock Cuts for this project:

  • Crumb Cake – 4-1/4″ x 11″ card base scored at 5-1/2″
  • Mossy Meadow – 1″ x 3″ (die cut leaves)
  • Early Espresso – 1-1/4″ x 4″ (die cut ‘Thanksgiving‘)
  • Brushed Copper Foil – 2″ x 3-1/2″ (die cut pumpkin), 3-3/8″ x 5-1/2″ (center panel mat)
  • Very Vanilla – 4″ x 5-1/4″ (inside panel), 3-1/4″ x 5-1/2″ (front center panel), 2-1/4″ x 3-1/4″ (die cut pumpkins)

Stampin’ Up! products used in this project:


Stampin’ Up! Christmas Season for Thanksgiving Video Tutorial

Good Morning! Have you seen the Stampin’ Up! Christmas Season photopolymer stamp set used for Fall cards? Last week I made a #simplestamping Christmas card with this set and I wanted to keep playing with this set and make a Thanksgiving card. I have seen a few and I was also inspired by a thank you card that I saw in the store, so I decided to give it a try. Here is the result. You can find the supplies I used at the bottom of my post along with the sizes of cardstock used.

I couldn’t post my Facebook Live video, but I posted a copy of the video in my YouTube channel and here it is:

I stamped the leaves from the Stampin’ Up! Christmas Season stamp set in Soft Succulent, Bumblebee and Cinnamon Cider on a Very Vanilla panel. For each image, I did a second generation (aka stamp off once) stamping over the first leaf, but slightly offset. This made the ‘bouquet’ look fuller. Then I stamped the berries in Merry Merlot.

I embossed the panel using the Timber 3D embossing folder to give it more texture and I adhered it to a Merry Merlot mat with liquid glue. I wrapped the panel with Very Vanilla Baker’s twine twice and made a bow on the side.

I stamped the sentiment from the Sparkle of the Season stamp set in Merry Merlot on a Cinnamon Cider panel and cut it out with the die from the Seasonal Labels bundle using the two step method. In the video, I made the first cut all the way, and it worked beautifully with this label die. But you have to be careful if using a stitched label die, because you will get stitching all the way to the end. I should have mentioned this in the video, but I didn’t think about it until afterwards.

I adhered the label over the vanilla twine with dimensionals and added three clear Genial Gems around the label. I popped the panel on the front of a Cinnamon Cider card base with dimensionals and trimmed the bow ends.

For the inside of the card, I stamped the images from the Stampin’ Up! Christmas Season stamp set in the corners of a Very Vanilla panel. I adhered the panel to the inside of the card with Stampin’ Seal.

The Stampin’ Up! Christmas Season images are beautiful in fall colors! The shadow stamping technique works very well with these beautiful images as well. Give it a try!


Current Host Code: 29VEKU9M

Use this host code when you order $50 or more and receive a free gift from me!  The free gift is your choice of any item valued up to $10.00 in the 2021-2022 Annual Catalog or the July – December 2021 Mini Catalog!

If your order is over $150, please do not use the host code since you’ll receive your own Host Dollars plus I’ll still send you the free gift!  This host code can be used by anyone, no club or commitment required. Let me know if you have any questions.


If you need any stamping supplies, I’d be very happy to be your Demonstrator.  Just click on the Shop Now button on the right side of the screen to go directly to my online store or contact me if you have any questions.  Happy Stamping!

Thanks for stopping by and have a great week!

Akiko

  • Visit my online store here
  • See the current Stampin’ Up! clearance rack specials here
  • Earn FREE Stampin’ Up! products through my Wildflower Frequent Shopper Program – my way of saying thank you to my online frequent shopper customers.
  • Have any questions? I’d be happy to help, click here to contact me.

Cardstock Cuts for this project:

  • Cinnamon Cider – 4-1/4″ x 11″ card base scored at 5-1/2″, 1-1/4″x 2-1/2″ (label)
  • Merry Merlot – 3-5/8″ x 4-7/8″ (front mat)
  • Very Vanilla – 3-1/2″ x 4-3/4″ (front panel), 3-3/4″ x 5″ (inside panel)

Stampin’ Up! products used in this project:


Stampin’ Up! Gorgeous Leaves for the Inkin’ Krew Blog Hop

Good morning! Welcome to the Inkin’ Krew Monthly Blog Hop! The theme for this month’s hop is “Giving Thanks” and I’m using the Stampin’ Up! Gorgeous Leaves bundle to make a Thanksgiving card. You can find the supplies I used at the bottom of my post along with the sizes of cardstock used.

I embossed a panel of Very Vanilla with the Timber 3D embossing folder and adhered it to a Merry Merlot mat with liquid glue. I adhered the embossed pane to the front of a Merry Merlot card base with dimensionals. I stamped the sentiment from the Sparkle of the Season photopolymer stamp set in Early Espresso on Very Vanilla and cut it out with the label die from the Tasteful Labels dies. I cut the larger label from Merry Merlot and adhered them together with liquid glue.

I stamped the leaves from the Stampin’ Up! Gorgeous Leaves cling stamp set in Daffodil Delight, Cajun Craze and Cinnamon cider and cut them out with the coordinating dies. I used the Intricate Leaves dies from the bundle to cut out the remaining detailed leaves from Crumb Cake, Soft Succulent and Pear Pizzazz card stock and arranged them cascading down the side of the card.

I adhered the leaves to the card front with liquid glue, and adhered the layered label over the leaves with dimensionals. I made a triple bow with linen thread and adhered it under the label with a glue dot. I finished the card front with three brushed copper metallic dots.

For the inside of the card, I stamped the leaves from the Stampin’ Up! Gorgeous Leaves stamp set around the bottom and top of a Very Vanilla panel in Daffodil Delight, Cajun Craze and Cinnamon Cider. I stamped the sentiment from the Sparkle of the Season stamp set in Early Espresso next to the leaves and adhered the panel to the inside of the card.

Every card I see made with the Stampin’ Up! Gorgeous Leaves bundle is beautiful, and the bundle is really easy to play with! There are no sentiments, but the combination of the artistic stamps and detailed dies is perfect for creating all kinds of fall masterpieces!

On With The Hop! Click on the Next Blog button to move forward to Mary Deatherage’s project or click the Previous Blog button to move back to see the project that Karen Finkle created.

If you get lost along the way, here are the participants for the hop:

  1. Jaimie Babarczy 
  2. Tara Carpenter
  3. Jillian Good 
  4. Karen Ksenzakovic 
  5. Karen Finkle 
  6. Akiko Sudano 
  7. Mary Deatherage 
  8. Donna Leonard 
  9. Terry Lynn Bright
  10. Amy Koenders

Current Host Code: 29VEKU9M

Use this host code when you order $50 or more and receive a free gift from me!  The free gift is your choice of any item valued up to $10.00 in the 2021 – 2022 Annual Catalog or the July – December 2021 Mini Catalog!

If your order is over $150, please do not use the host code since you’ll receive your own Host Dollars plus I’ll still send you the free gift!  This host code can be used by anyone, no club or commitment required. Let me know if you have any questions


If you need any stamping supplies, I’d be very happy to be your Demonstrator.  Just click on the Shop Now button on the right side of the screen to go directly to my online store or contact me if you have any questions. 

Thanks for stopping by and Happy Stamping!

Akiko

  • Visit my online store here
  • See the current Stampin’ Up! clearance rack specials here
  • Earn FREE Stampin’ Up! products through my Wildflower Frequent Shopper Program – my way of saying thank you to my online frequent shopper customers.
  • Have any questions? I’d be happy to help, click here to contact me.

Cardstock Cuts for this project:

  • Merry Merlot – 5-1/2″ x 8-1/2″ card base scored at 4-1/4″, 3-3/4 x 5″ (front mat), 2″ x 4″ (large label)
  • Very Vanilla – 4″ x 5-1/4″ (inside panel), 3-5/8″ x 4-7/8″ (embossed background), 1-1/2″ x 3-1/4″ (label), 2″ x 6″ (die cut stamped leaves)
  • Pear Pizzazz – 1-1/2″ x 3″ (die cut detailed leaf)
  • Soft Succulent – 1-1/2″ x 2″ (die cut detailed leaves)
  • Crumb Cake – 1″ x 2-1/4″ (die cut detailed leaves)

Stampin’ Up! products used in this project:

Gorgeous Leaves Bundle
$44.00
Gorgeous Leaves Cling Stamp Set
$21.00
Intricate Leaves Dies
$28.00
Sparkle Of The Season Photopolymer Stamp Set (English)
$17.00
Tasteful Labels Dies
$31.00
Timber 3 D Embossing Folder
$10.00
Merry Merlot 8-1/2" X 11" Cardstock
$8.75
Very Vanilla 8-1/2" X 11" Cardstock
$9.75
Pear Pizzazz 8-1/2" X 11" Cardstock
$8.75
Soft Succulent 8 1/2" X 11" Cardstock
$8.75
Crumb Cake 8-1/2" X 11" Cardstock
$8.75
Early Espresso Classic Stampin' Pad
$7.50
Cajun Craze Classic Stampin' Pad
$7.50
Daffodil Delight Classic Stampin' Pad
$7.50
Cinnamon Cider Classic Stampin' Pad
$7.50
Brushed Metallic Adhesive Backed Dots
$9.00
Linen Thread
$5.00
Multipurpose Liquid Glue
$4.00
Mini Glue Dots
$5.25
Stampin' Dimensionals
$4.00
Stampin' Seal
$8.00
Stampin' Cut & Emboss Machine
$120.00

Stampin’ Up! Pretty Pumpkins for the Happy Inkin’ Thursday Blog Hop

Good morning and welcome to the Happy Inkin’ Thursday Blog Hop! I used the Stampin’ Up! Pretty Pumpkins bundle to make a Thanksgiving card for today. I paired it with the pretty Harvest Meadow designer series paper and an embossed Very Vanilla background for a light fall look. You can find the supplies I used at the bottom of my post along with the sizes of cardstock used.

We have a sketch challenge this week and here is the pretty sketch we are using:

And since I’m doing pumpkins, I am playing with the Fall and Pumpkins Inspiration at TGIF Challenges – #TGIFC335 Inspiration Challenge:

I embossed a panel of Very Vanilla with thee Timeworn Type 3D embossing folder and adhered it to the front of a Thick Very Vanilla Card Base. I cut a Bumblebee panel with the Scalloped Contours die and adhered a panel of Harvest Meadow designer series paper to the front with liquid glue. I popped it on the card front with dimensionals.

I cut a Pumpkin Pie panel with the pumpkin from the Detailed Pumpkins dies and a Mossy Meadow panel with the large leaf. I adhered them together with glue dots. I stamped the leafy pumpkin from the Stampin’ Up! Pretty Pumpkins cling stamp set in Versamark ink on a Very Vanilla panel. I sprinkled it with copper embossing powder and shook off the excess. I heated it with my heat tool until shiny and cut it out with the coordinating die.

I cut the sprigs from the Sunflower dies from brushed copper foil and adhered it to the card front with glue dots. I adhered the leafy pumpkin on top of the sprigs with dimensionals and adhered the Pumpkin Pie pumpkin on top with dimensionals and glue dots. I stamped the sentiment from the Stampin’ Up! Pretty Pumpkins stamp set in Early Espresso on Soft Succulent and fussy cut it with my paper snips. I made a loopy bow with Linen Thread and adhered it to the card with glue dots and topped it with the fussy cut sentiment. I finished the card front with three Genial Gems.

For the inside of the card, I stamped the pumpkin vines from the Stampin’ Up! Pretty Pumpkins stamp set in Early Espresso on a Very Vanilla panel and trimmed the bottom with a strip of Harvest Meadow DSP. I adhered the panel to the inside of the card.

The pumpkins in the Stampin’ Up! Pretty Pumpkins bundle are so artistic and pretty and you can make so many different styles of Fall and Thanksgiving cards. The sentiments are really beautiful as well. I think I’m ready for Fall, are you?

On with the Hop! Click on the Next Blog button to move forward to Karen Ksenzakovic’s project.

If you get lost along the way, here are the participants for the hop:


Current Host Code: U6K4RBB4

Use this host code when you order $50 or more and receive a free gift from me!  The free gift is your choice of any item valued up to $10.00 in the 2021 – 2022 Annual Catalog or the July – December 2021 Mini Catalog including some of the host stamp sets!

If your order is over $150, please do not use the host code since you’ll receive your own Host Dollars plus I’ll still send you the free gift!  This host code can be used by anyone, no club or commitment required. Let me know if you have any questions.


If you need any stamping supplies, I’d be very happy to be your Demonstrator.  Just click on the Shop Now button on the right side of the screen to go directly to my online store or contact me if you have any questions. 

Thanks for stopping by and Happy Stamping!

Akiko

  • Visit my online store here
  • See the current Stampin’ Up! clearance rack specials here
  • Earn FREE Stampin’ Up! products through my Wildflower Frequent Shopper Program – my way of saying thank you to my online frequent shopper customers.
  • Have any questions? I’d be happy to help, click here to contact me.

Cardstock Cuts for this project:

  • Thick Very Vanilla – 5-1/2″ x 8-1/2″ card base scored at 4-1/4″
  • Pumpkin Pie – 2″ x 2-1/2″ (die cut pumpkin)
  • Mossy Meadow – 1″ x 1″ (die cut leaf)
  • Bumblebee – 3-1/4″ x 4-1/4″ (scalloped rectangle)
  • Soft Succulent – 1″ x 3″ (label)
  • Very Vanilla – 4-1/4″ x 5-1/2″ (embossed front background), 3-3/4″ x 5″ (inside panel), 2-1/2″ x 2-1/2″ (embossed pumpkin)
  • Brushed Copper Foil – 1-1/2″ x 3″ (die cut sprigs)
  • Harvest Meadow DSP – 2-1/2″ x 3-11/16″ (front background), 1/2″ x 3-3/4″ (inside trim)

Stampin’ Up! products used in this project:


Stampin’ Up! Gather Together Thanksgiving Card Video Tutorial

Good Morning! Today I’m sharing my final Thanksgiving card for this year – I’ll be sending them out to my family this week and moving on to finishing up Christmas cards. Kind of sad because I really love the fall season. This is the card I made during my Facebook Live video tutorial yesterday afternoon and it is full of pumpkins from the Stampin’ Up! Gather Together stamp set and Gathered Leaves dies. And I filled it out with an Autumn version of the new Quite Curvy leaves! You can find the supplies used to create this card at the bottom of my post along with the sizes of cardstock used.

Here is the Facebook Live video showing how I made the card:

I posted a copy of the video in my YouTube channel here so you can view it there if you prefer. Later this week I hope to get a quickie version posted to my channel too.

I started by stamping the pumpkins from the Stampin’ Up! Gather Together photopolymer stamp set in Cajun Craze ink on Whisper White. I stamped three large pumpkins and two of the smaller sets of pumpkins and colored them with Pumpkin Pie and Mossy Meadow Stampin’ Blends. I fussy cut them out. I cut two large leaves from the Gathered Leaves Dies from Old Olive card stock.

I stamped the large leafy vine from the Quite Curvy photopolymer stamp set in Soft Suede ink on Whisper White and cut it out with the coordinating die. I colored the leaves with Cajun Craze, Mango Melody, Cinnamon Cider and Old Olive Stampin’ Blends. I adhered a panel of Cinnamon Cider 2020-2022 In Color 6″ x 6″ designer series paper to a Cajun Craze mat and adhered it to the front of a Bumblebee card base. I adhered the die cut leaves to the panel with liquid glue and adhered the pumpkins across the bottom. I used liquid glue on all except the center pumpkin, which I popped on with a dimensional.

I adhered the Quite Curvy leafy vine with dimensionals on the bottom of the arrangement. I stamped the sentiment from the Stampin’ Up! Gathered Together stamp set in Soft Suede ink on a Bumblebee panel. I cut it out with the small label die from the Beautiful Boughs dies and stamped the wheat sheafs in Bumblebee ink. I adhered the label to the front of the card with dimensionals and finished of the card front with three Bumblebee enamel gems.

I stamped the sentiment from the Banner Year photopolymer stamp set in Cajun Craze ink on a Whisper White panel. I stamped the wheat sheaf from the Stampin’ Up! Gather Together stamp set in Bumblebee ink next to the sentiment and stamped the leafy vine in Soft Suede ink on the bottom. I colored the leaves with dimensionals like the card front and adhered the panel to a Cajun Craze mat before adhering it to the inside of the card.

I love the Stampin’ Up! Gather Together Bundle and was so happy to see it return in the Aug-Dec 2020 Mini Catalog. And I love the fall version of the Quite Curvy leafy vine!! Thanks for stopping by and Have a great week!


Stampin’ Up! Curvy Celebrations Going On now!

The Stampin’ Up! Curvy Celebrations runs through January 4, 2021. This will include the Quite Curvy bundle, which is an early release of the upcoming January – June 2021 Mini Catalog along with the Curvy Christmas stamp set and Classic Christmas 6″ x 6″ designer series paper. Click on the picture above to view PDF Flyer with all the details. And if you purchase either the Quite Curvy Variety Bundle (item 158396) or the Quite Curvy Bundle (item 156228) from me between now and January 4, you will receive our special Online Tutorial Class with videos. This is an exclusive set of written and video tutorials created by Inkin’ Krew team members who purchase these products during the Curvy Celebrations!


January – June 2021 Mini Catalog and Sale A Bration is Coming Soon!

Last weekend at Stampin’ Up! OnStage, we got to see many of the new products that will be coming in the new January-June 2021 Mini Catalog – and they are so amazing! Another benefit of attending OnStage is that we got the opportunity to order a few of the new products and received copies of the new Mini Catalog and Sale A Bration Brochure! So I’m busy looking through the catalogs, planning my pre-order next month – including new catalogs for my customers! If you’ve placed orders with me of at least $50 during the past year, you are automatically on my list to get a catalog when my shipment arrives! If you have not placed an order with me but want to be on my mailing list for the new catalogs too, simply place an order through my Online Store and I’ll add you to my list so you can get your catalogs too!


November 15-30 Host Code: N7E9DGB9

Use this host code when you order $50 or more and receive a free gift from me!  The free gift is your choice of any item valued up to $10.00 in the 2019 – 2020 Annual Catalog or in the Aug-Dec 2020 Mini Catalog!  That includes some of the Host Exclusive stamp sets!

If your order is over $150, please do not use the host code since you’ll receive your own Host Dollars plus I’ll still send you the free gift!  This host code can be used by anyone, no club or commitment required.  Let me know if you have any questions.


If you need any stamping supplies, I’d be very happy to be your Demonstrator.  Just click on the Shop Now button on the right side of the screen to go directly to my online store or contact me if you have any questions.  Happy Stamping!

Thanks for stopping by and have a great week!

Akiko

  • Visit my online store here
  • See the current Stampin’ Up! clearance rack specials here
  • Earn FREE Stampin’ Up! products through my Wildflower Frequent Shopper Program – my way of saying thank you to my online frequent shopper customers.
  • Sign up for my weekly newsletter here
  • Have any questions? I’d be happy to help, click here to contact me.

Cardstock Cuts for this project:

  • Bumblebee – 5-1/2″ x 8-1/2″ card base scored at 4-1/4″, 1-3/4″ x 3″ (label)
  • Cajun Craze – 3-1/8″ x 4-5/8″ (DSP mat), 3-7/8″ x 5-1/8″ (inside mat)
  • Old Olive – 2-1/2″ x 5″ (die cut leaves)
  • Whisper White – 3-3/4″ x 5″ panel (inside panel), 1-3/4″ x 5-1/2″ (leafy vine die cut), 2-1/2″ x 4-1/2″ (die cut pumpkins)
  • 2020-2022 In Color 6″ x 6″ DSP – 3″ x 4-1/2″ (front background)

Stampin’ Up! products used in this project: