Happy Friday! I pulled out the beautiful Stampin’ Up! Art Gallery bundle for a soft, feminine congratulations card to share today. I also added some touches of gold, including the Golden Garden acetate for some fun bling! You can find the supplies used to create this card at the bottom of this post along with the sizes of card stock used.

I embossed a Basic White panel with the Painted Texture 3D embossing folder and brushed Pool Party ink on it with my blending brush, making a delicate soft blue background. I adhered the panel to the front of a Pool Party card base and adhered a panel of Golden Garden Acetate across the embossed panel. I used Stampin’ Seal in the middle where it Ould be hidden by the main art panel – don’t forget to peel off the acetate protective backing! I adhered a square vellum doily to the top with glue dots.
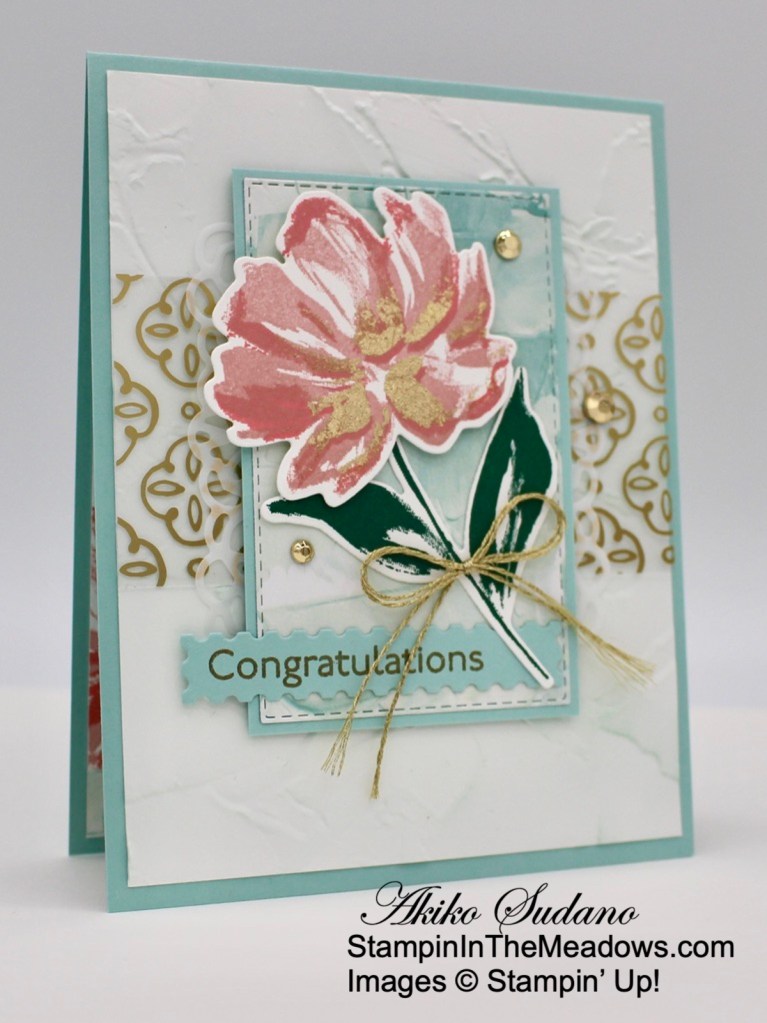
I stamped the large flower from the Stampin’ Up! Art Gallery photopolymer stamp set with Blushing Bride ink on Basic White. I stamped the coordinating detailed stamp in Flirty Flamingo on top. I inked up the center of the detailed stamp with Versamark ink and stamped a third time. I tamped the Versamark with a sponge dauber to soften any sharp edges and sprinkled the flower with heat and stick powder and heated it. I sprinkled it with a few gilding flakes and rubbed it in till smooth, giving me a light touch of gold in the flower center. I cut out the flower with the coordinating die and stamped the large stem in Shaded Spruce ink on basic White. I cut the stem out as well.
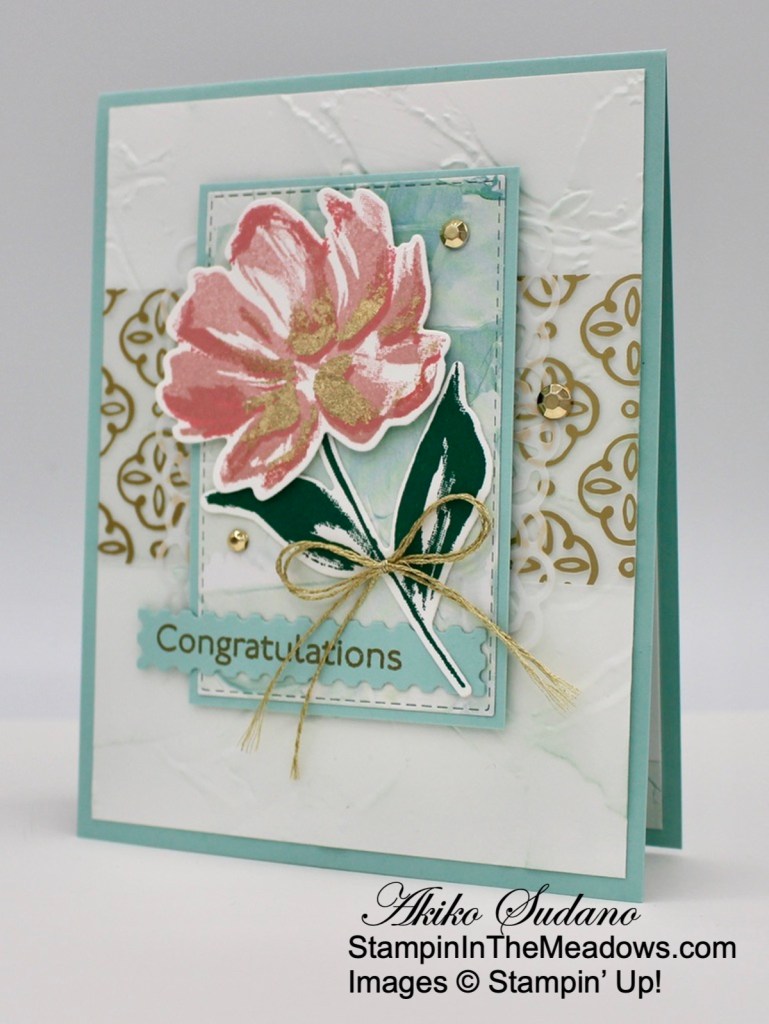
I stamped the sentiment from the Stampin’ Up! Art Gallery stamp set in Versamark ink on a strip of Pool Party and sprinkled it with Gold embossing powder. I heat set the powder until it was shiny and cut it out with the long label die. I cut a panel of the Fine Art Floral designer series paper with the Stitched Rectangles die and adhered it to a Pool Party mat. I adhered the label to the bottom of the panel with glue dots and adhered the leaves and stem on top. I popped the flower on with dimensionals and finished with a gold trim double bow on the stem. I adhered the panel to the card front with dimensional and finished it off with three gilded gems for a final touch of gold bling!
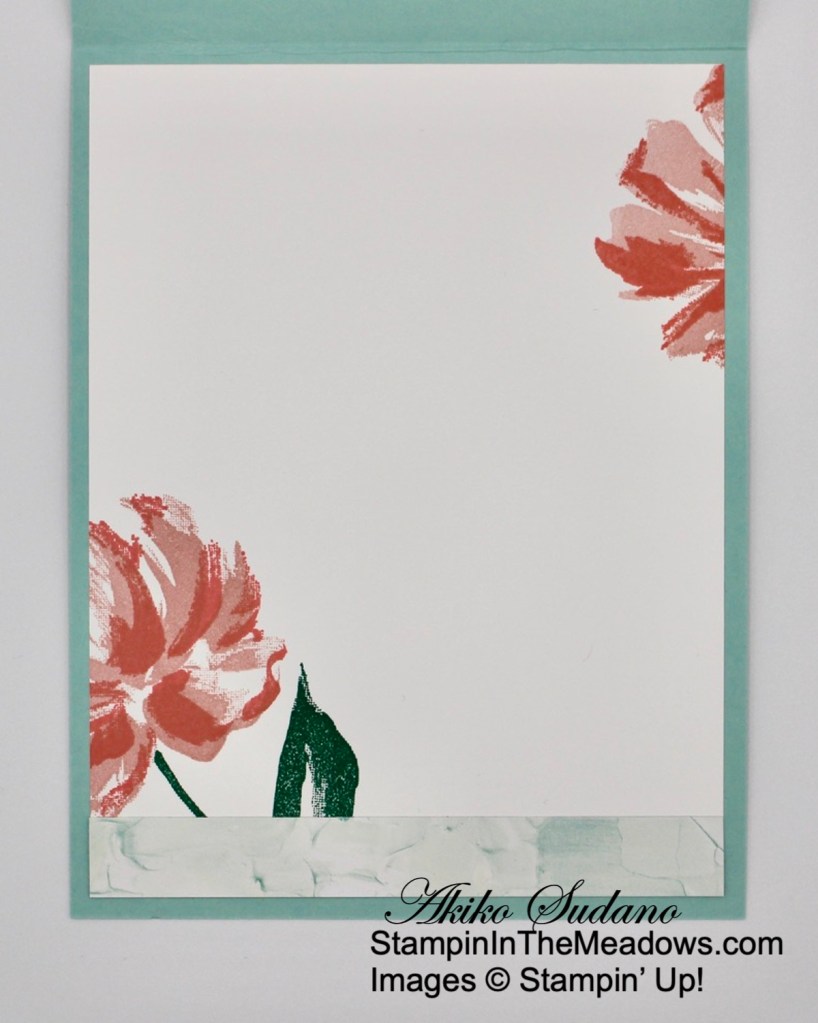
For the inside of the card, I the stamped the large flower and stem from the Stampin’ Up! Art Gallery stamp set in Blushing Bride, Flirty Flamingo and Shaded Spruce in the corners of a Basic White panel. I adhered a strip of Fine Art Floral DSP to the bottom of the panel and adhered it to the inside of the card.

The Stampin’ Up! Art Gallery bundle is just beautiful! The two step stamps are fairly easy to use for stamping pretty modern flowers that turn out beautiful even when they aren’t perfectly lined up! The simple font in the sentiments are a perfect contrast with the ornate flowers. This was the first time I used the gilding flakes, but it definitely won’t be the last – they add a beautiful touch!

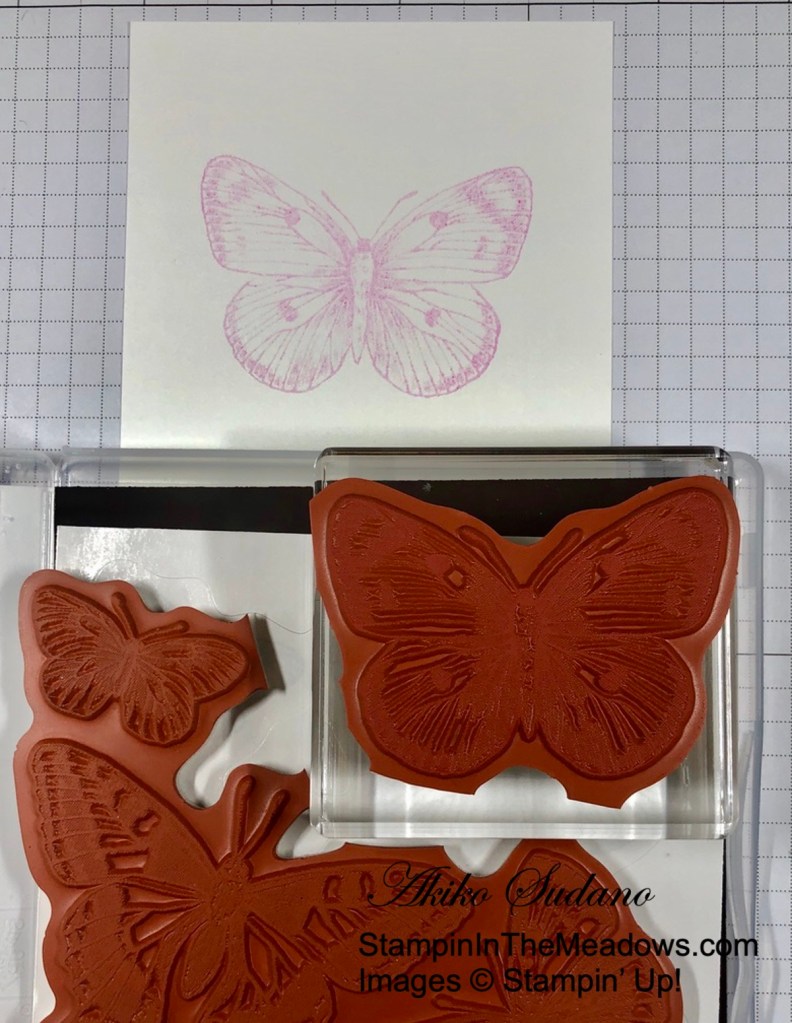
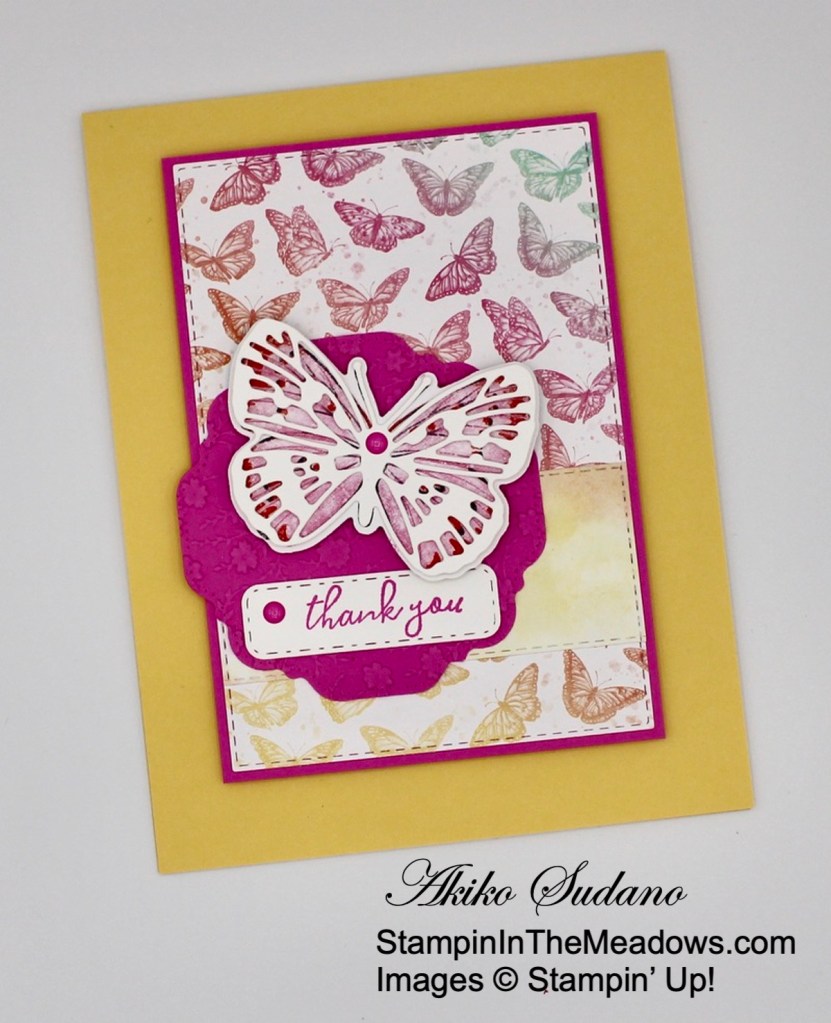
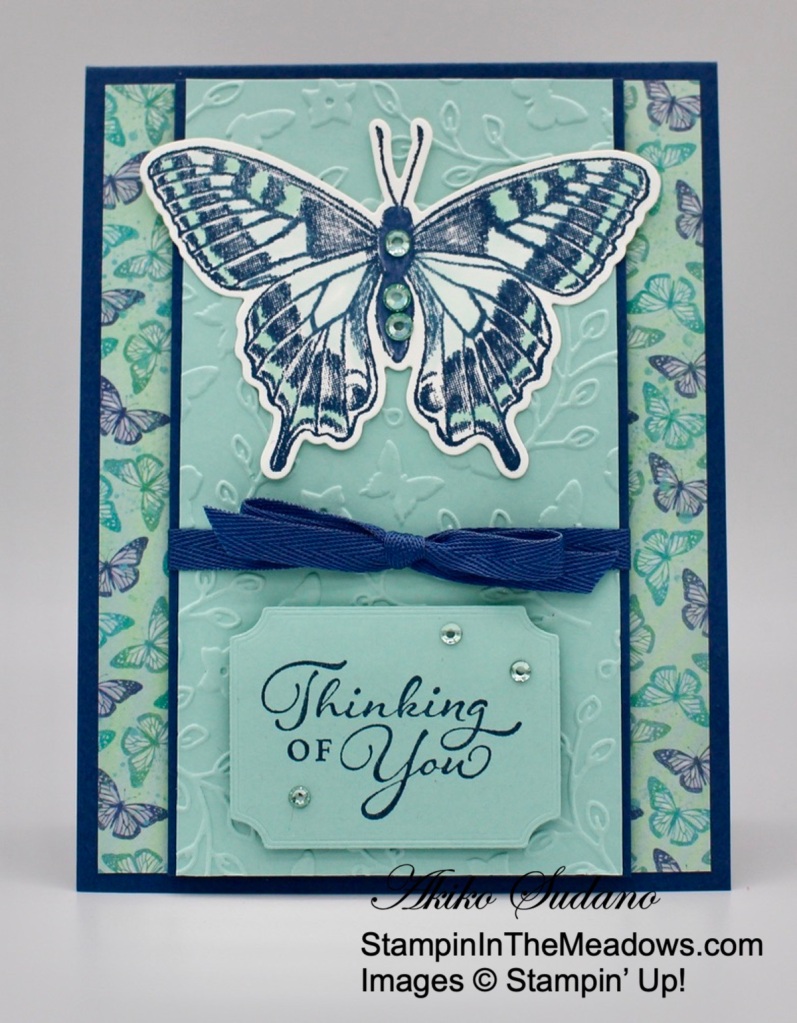
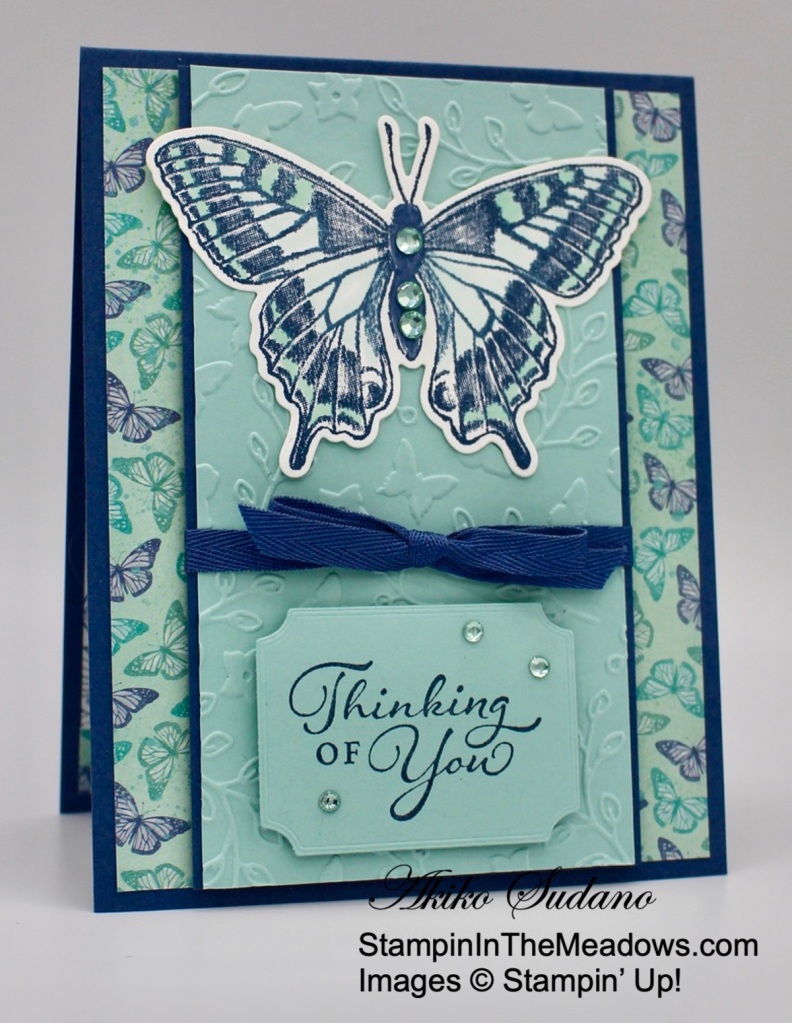
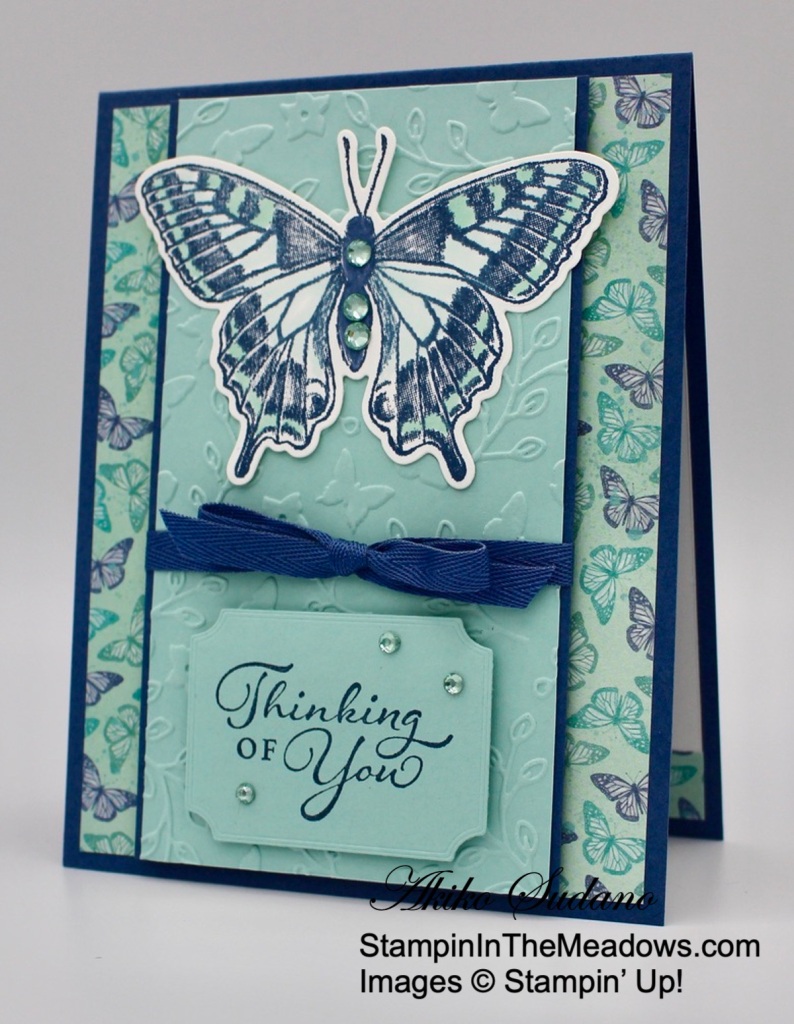
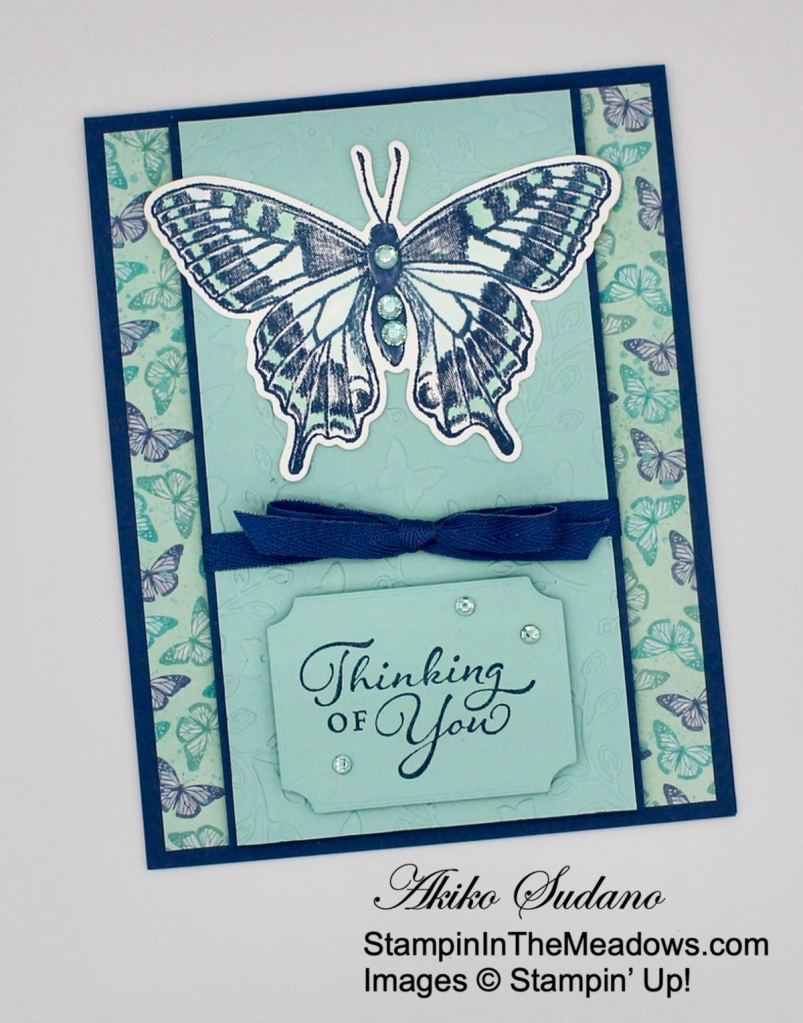
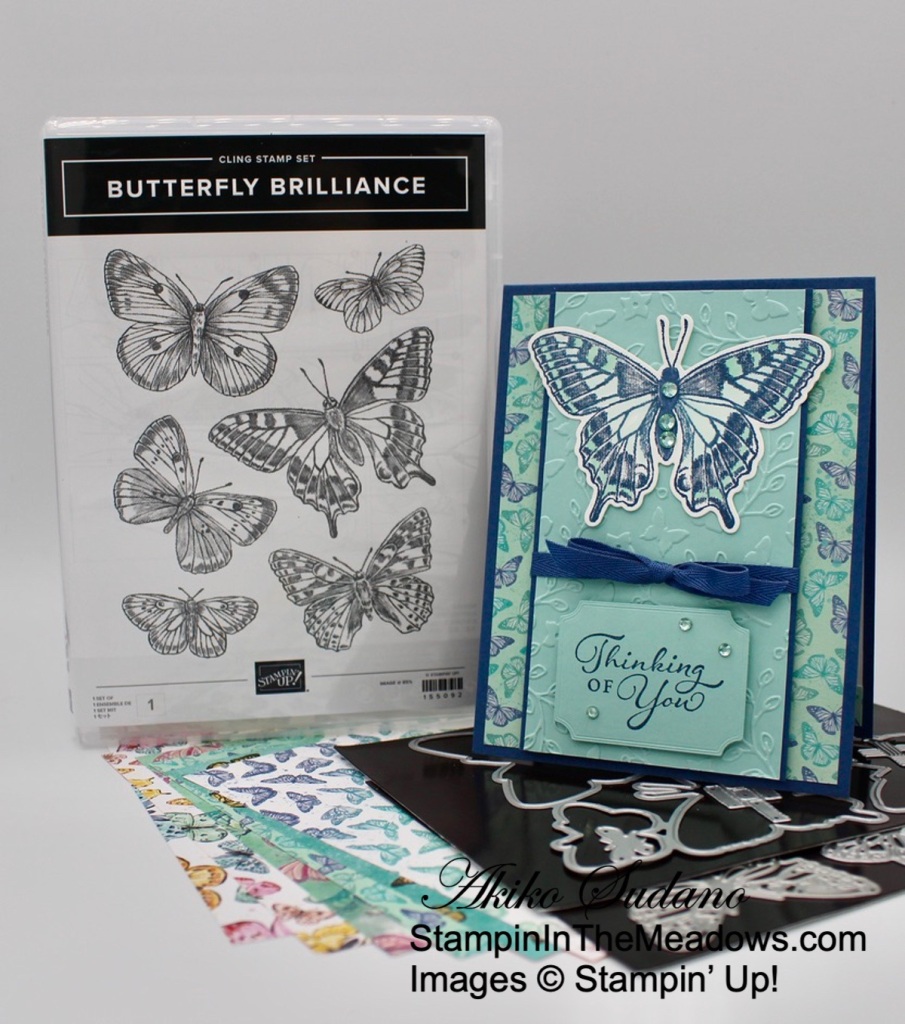
Bring in the beauty of nature with the artistic designs of the Butterfly Brilliance Bundle and coordinating designer series paper, along with textured specialty paper that will put a pop of brilliance on every project. The Butterfly Brilliance Collection is available now!! Click on the image below to download a PDF with all the details.
Note that the Butterfly Brilliance bundle is an early release from the 2021-2022 Annual Catalog that will be available in May! Unfortunately the beautiful Butterfly Bijou and Natural Touch specialty paper are only available while supplies last during the Butterfly Bouquet promotion period March 2, 2021 – May 3, 2021. So get them while supplies last!

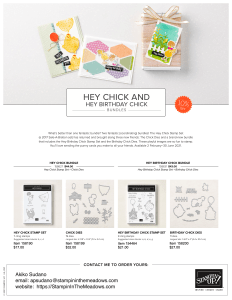
Stampin’ Up! Hey Chick and Hey Birthday Chick Bundles are Available Now!
What’s better than one fantastic bundle? Two fantastic (coordinating) bundles! The Hey Chick Stamp Set (a 2017 Sale-A-Bration set) has returned and brought along three new friends: The Chick Dies and a brand-new bundle that includes the Hey Birthday Chick Stamp Set and the Birthday Chick Dies. These playful images are so fun to stamp. You’ll love sending the punny cards you make to all your friends. Click on the image below to download a PDF with all the details on these fun bundles!
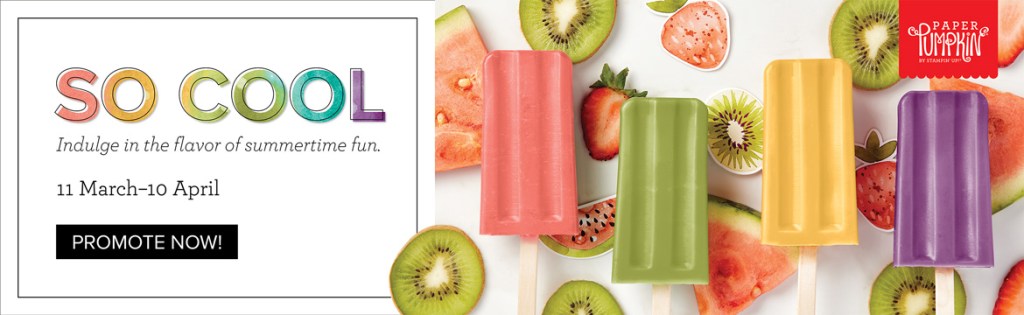
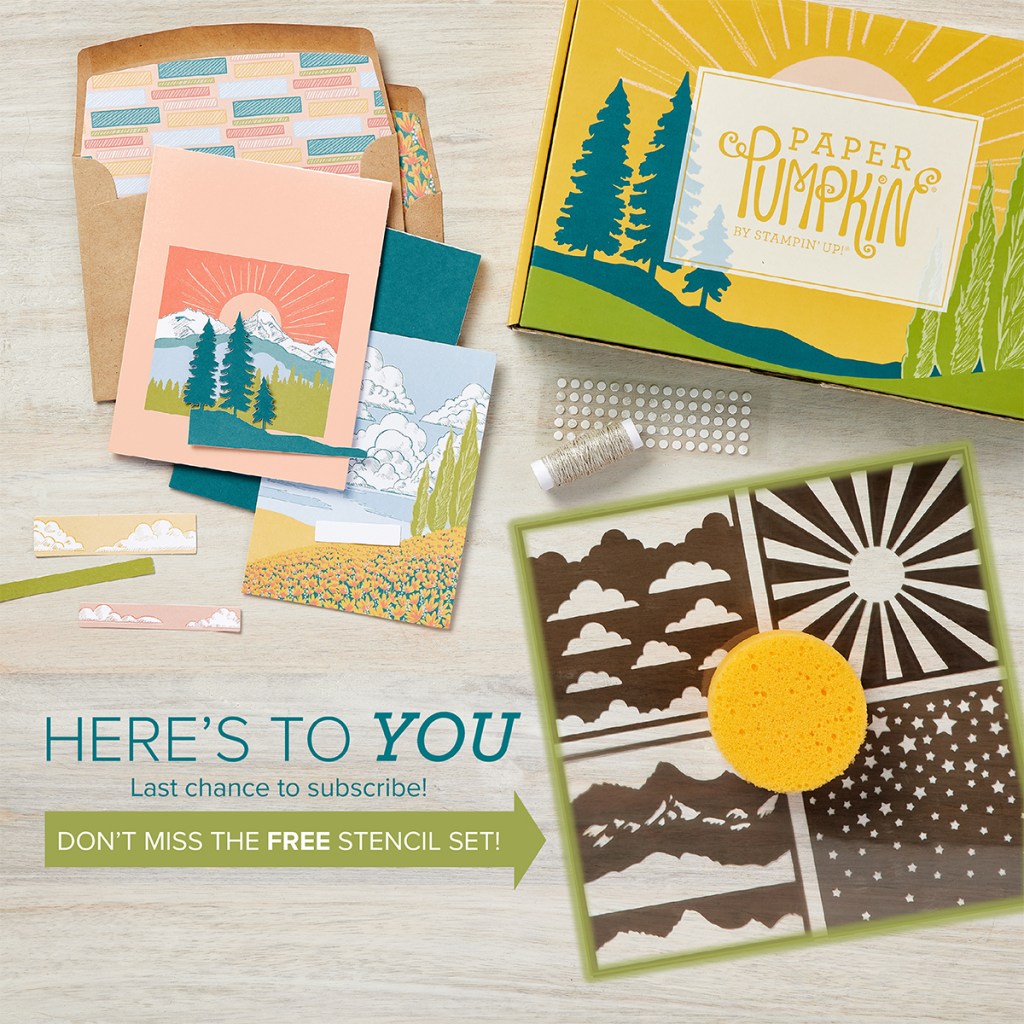
The April Paper Pumpkin Kit is So Cool!
The So Cool Paper Pumpkin Kit is a little taste of summer fun, with enough supplies to make 12 colorful, shaped cards with coordinating envelopes. Six card bases are popsicle shaped, the other six are semicircles: three watermelons and three rainbows. All of the cards are splashed with cheerful, vivid watercolor images. The kit also includes two full-size, matching sticker sheets, die-cut accents, fun embellishments, and more. But, even more cool: it’s the first Paper Pumpkin kit designed with kids in mind!
Here are the Details:
- Kit includes enough supplies to make 12 fresh, fun-shaped cards—6 popsicles and 6 blank semicircles to color—and coordinating envelopes.
- Kit includes card bases, 2 full sticker sheets, decorative die-cut pieces, embellishments, and more.
- Envelope size: 4-1/2″ x 5-3/4″
- Coordinates with the Ice Cream Corner Designer Series Paper (154567)
Coordinating Colors: Blackberry Bliss, Bermuda Bay, Bumblebee, Cinnamon Cider, Old Olive, Terracotta Tile
If you’re interested in subscribing to Paper Pumpkin, you can either sign up for a subscription where you are billed monthly for your kit or you can purchase a prepaid subscription in my online store. To see more information and to sign up for the monthly subscription click here. To see the options for prepaid subscriptions in my online store, click here.
Sign up deadline for the April 2021 kit is April 10, 2021. Supplies may be limited toward the end of the subscription period.
March Host Code: 9WJYHP76
Use this host code when you order $50 or more and receive a free gift from me! The gift is your choice of any item valued up to $10.00 in the 2020-21 Annual Catalog or the Jan-Jun 2021 Mini Catalog.
If your order is over $150, please do not use the host code since you’ll receive your own Host Dollars plus I’ll still send you the free gift! This host code can be used by anyone, no commitment required. Let me know if you have any questions.
If you need any stamping supplies, I’d be very happy to be your Demonstrator. Just click on the Shop Now Button on the right side of the screen to go directly to my Online store or contact me if you have any questions. Happy Stamping!
Thanks for stopping by and have a great day!
Akiko
- Visit my Online store here
- See the current Stampin’ Up! clearance rack specials here
- Earn FREE Stampin’ Up! products through my Wildflower Frequent Shopper Program – my way of saying thank you to my frequent shopper online customers.
- Sign up for my monthly newsletter here
- Have any questions? I’d be happy to help, click here to contact me.
Cardstock Cuts for this project:
- Pool Party – 4-1/4″ x 11″ card base scored at 5-1/2″, 2-3/8″ x 3-11/16″ (front mat), 1″ x 3-1/2″ (label)
- Basic White – two 4″ x 5-1/4″ panels (front embossed panel and inside panel), 2-1/2″ x 5″ (die cut flower and stem)
- Golden Garden Specialty Acetate – 2″ x 4″ (front accent panel)
- Fine Art Floral DSP – 2-1/2″ x 3-3/4″ (front inset panel), 1/2″ x 4″ (inside trim)
Stampin’ Up! products used in this project:


 Designer Series Paper")


")


 Designer Series Paper")


 2020–2022 In Color Ribbon")
 Braided Linen Trim")


")
")


 Designer Series Paper")
 Designer Series Paper")


")


 Designer Series Paper")


")


 Designer Series Paper")


 2020–2022 In Color Ribbon")


