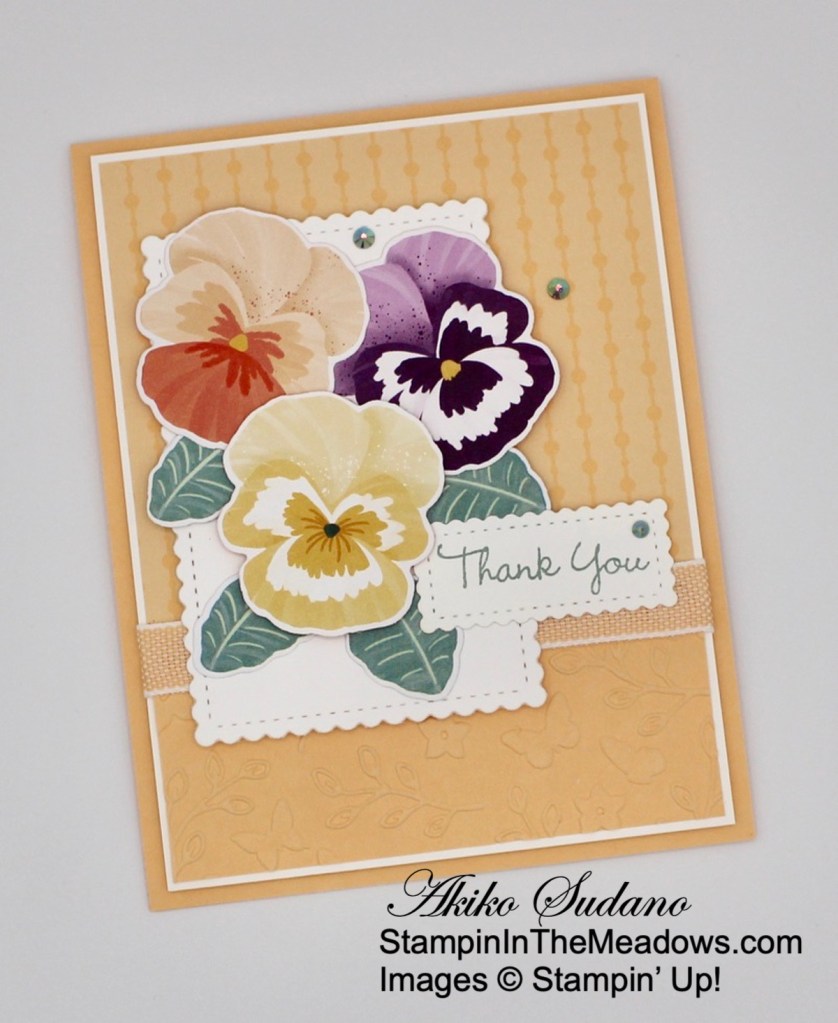
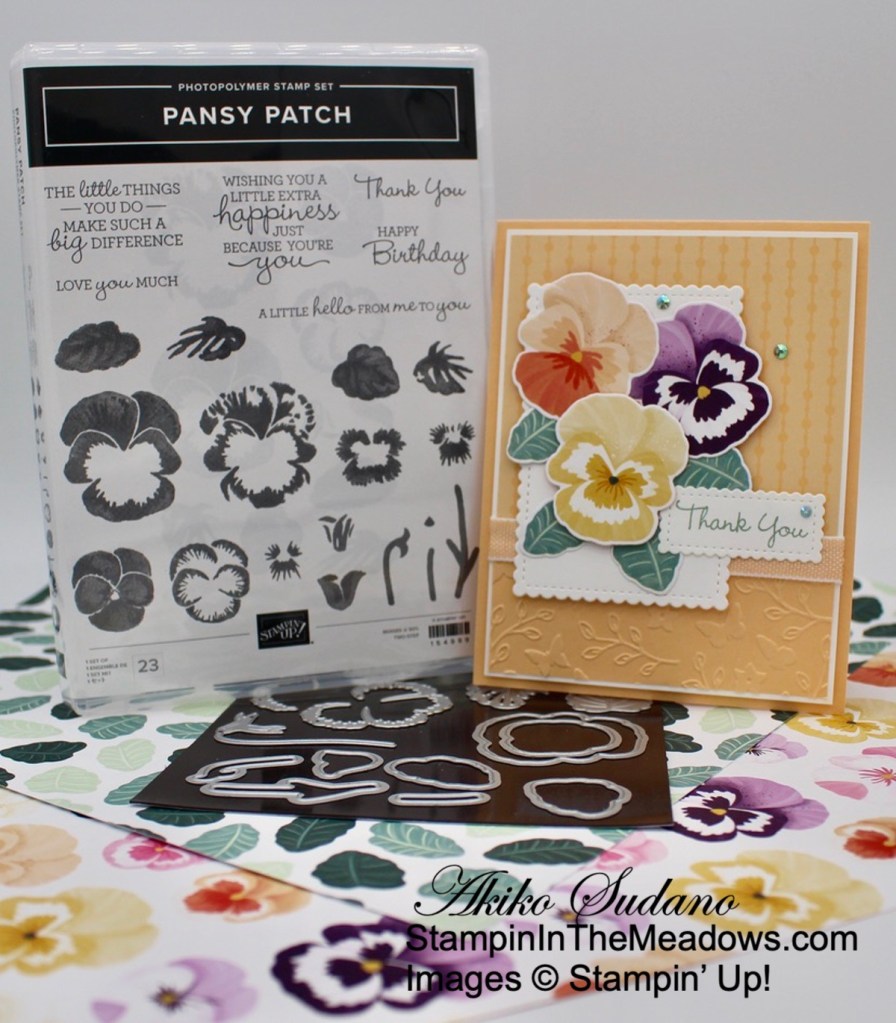
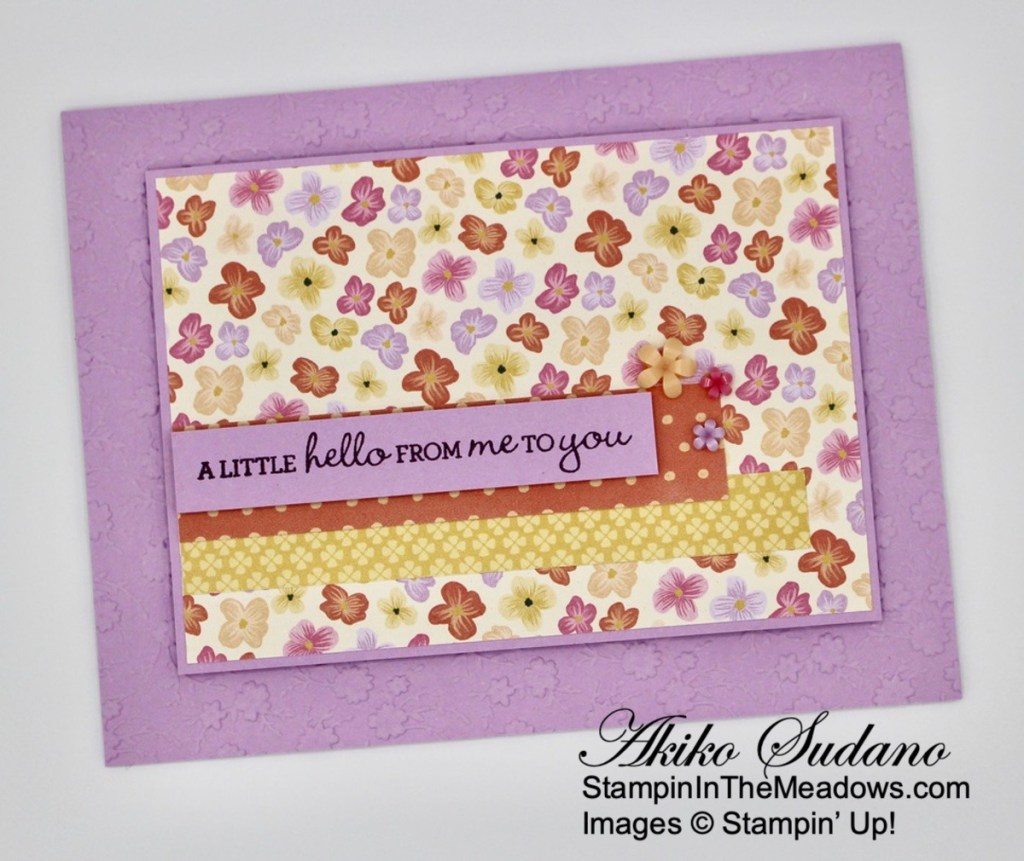
Good morning! The Stampin’ Up! Pansy Patch stamp set along with the Pansy Dies are one of the prettiest Spring flower stamp and die sets ever. The set has pretty sentiments, along with stamped and die cut pansies that are both wonderful. You can find the products I used at the bottom of my post along with the card stock sizes.

I adhered a panel of Poetic Expressions designer series paper to the front of a Pool Party card base. I stamped the Countryside Corners stamp on a Pool Party Panel and cut it out with the second largest octagon die. I cut another Pool Party Panel with the third largest die and embossed it with the Countryside Blossoms embossing folder and adhered it to the stamped octagon. I popped the panel on the card with dimensionals.

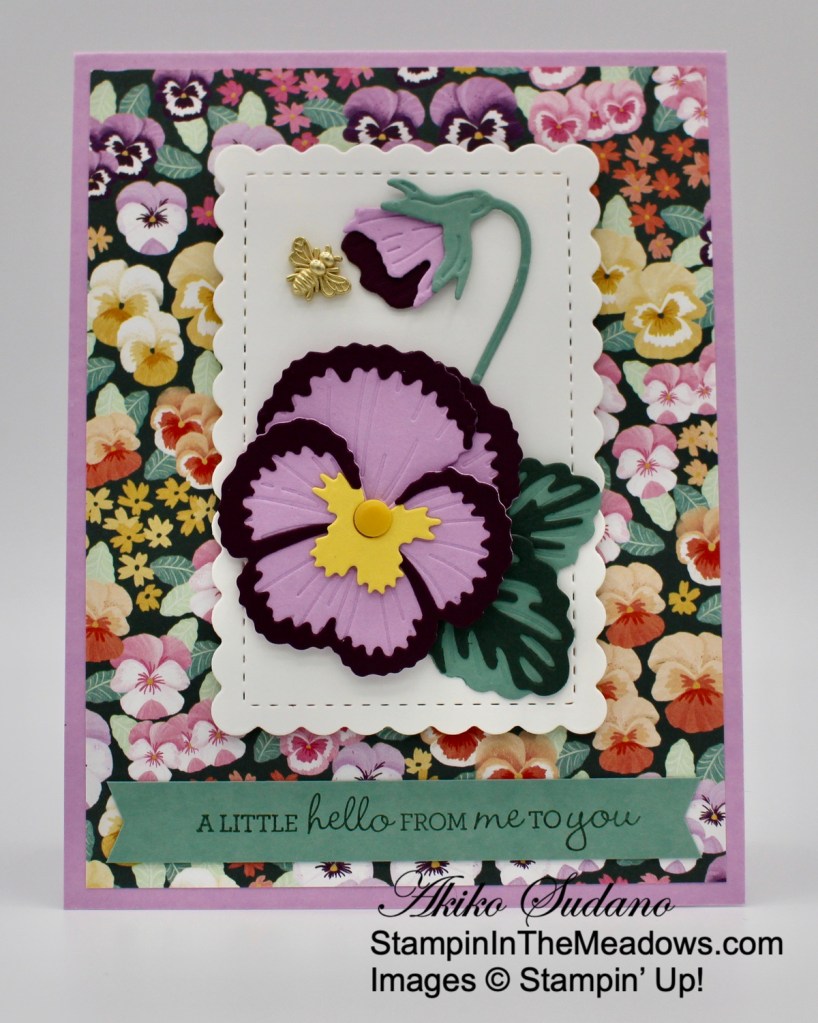
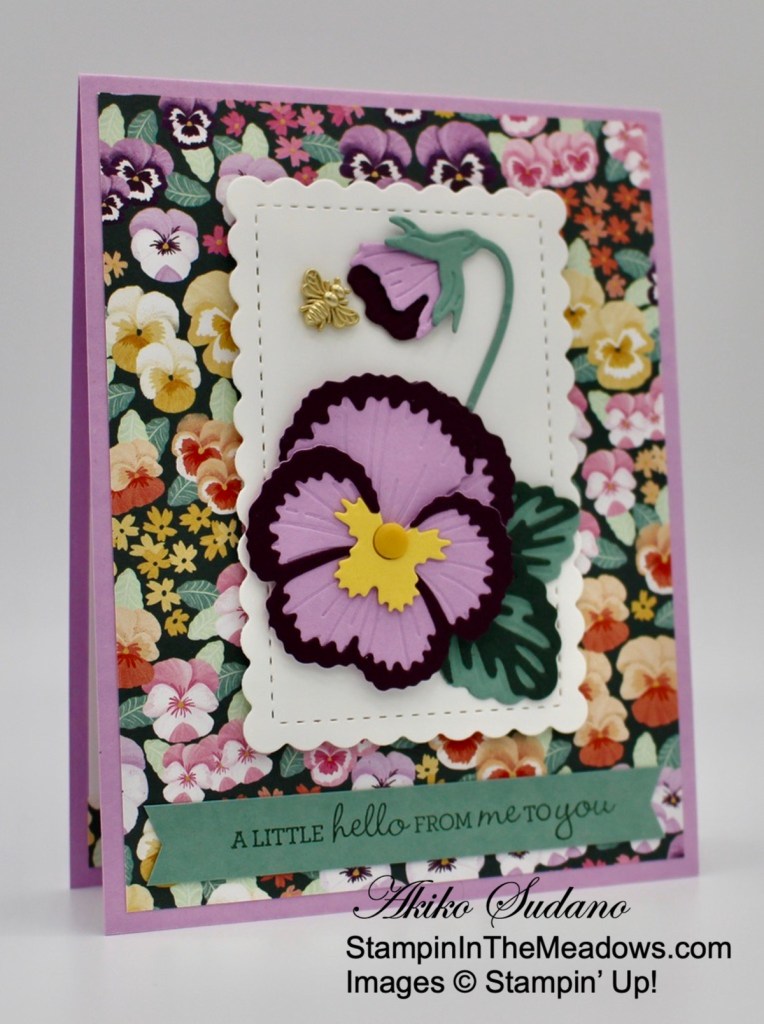
I made a die cut pansy using the Pansy dies from Blackberry Bliss, Daffodil Delight and Basic White. I cut the large center die from Daffodil Delight and two of the side petals from Basic White. I cut the borders in Blackberry Bliss and adhered the borders to the petals with liquid glue. I adhered the large petals to the center petal and cut the flower center pieces from Blackberry Bliss and Basic White. I made the bud with Basic White and Daffodil Delight and the stems and leaves from Garden Green.
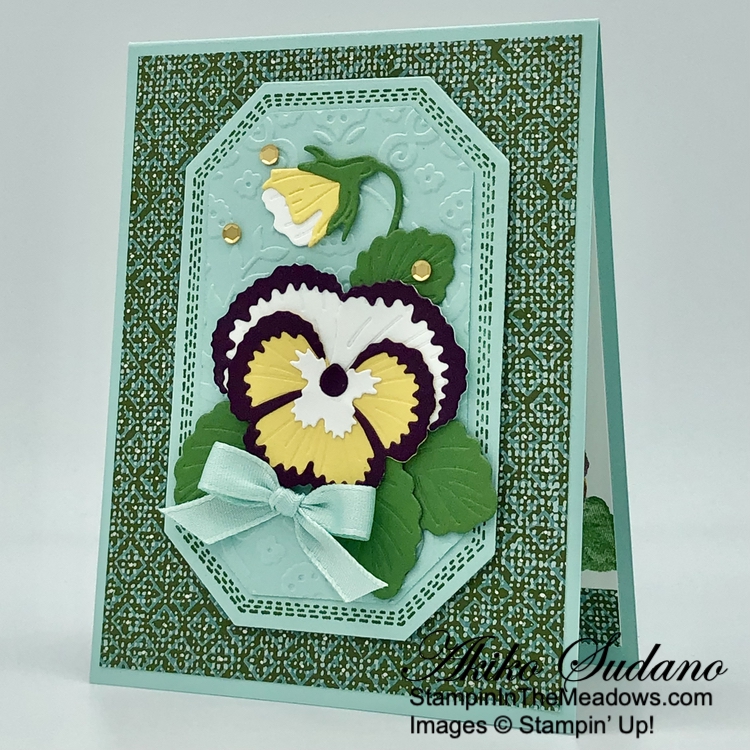
I adhered the assembled bud to the card with glue dots and popped the large pansy flower on the card with dimensionals. I tucked three large leaves and one small leaf under the flower, adhering them with glue dots. I made a Pool Party bow and adhered it with a glue dot. I finished the card front with three small gold sequins.

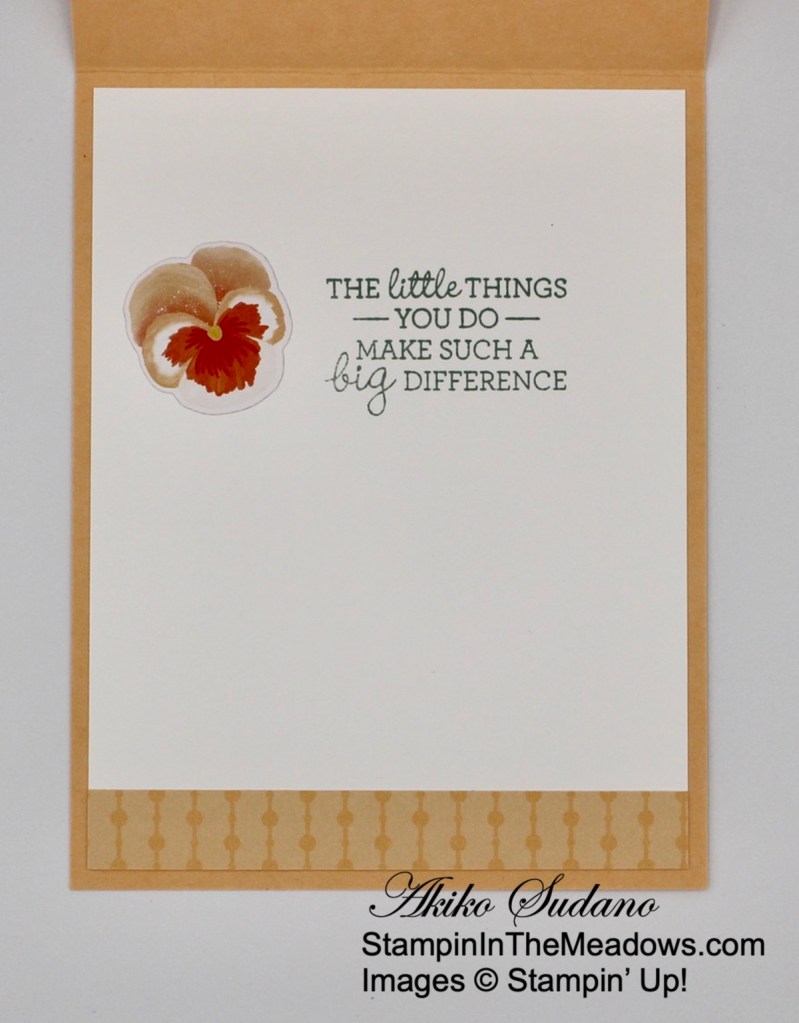
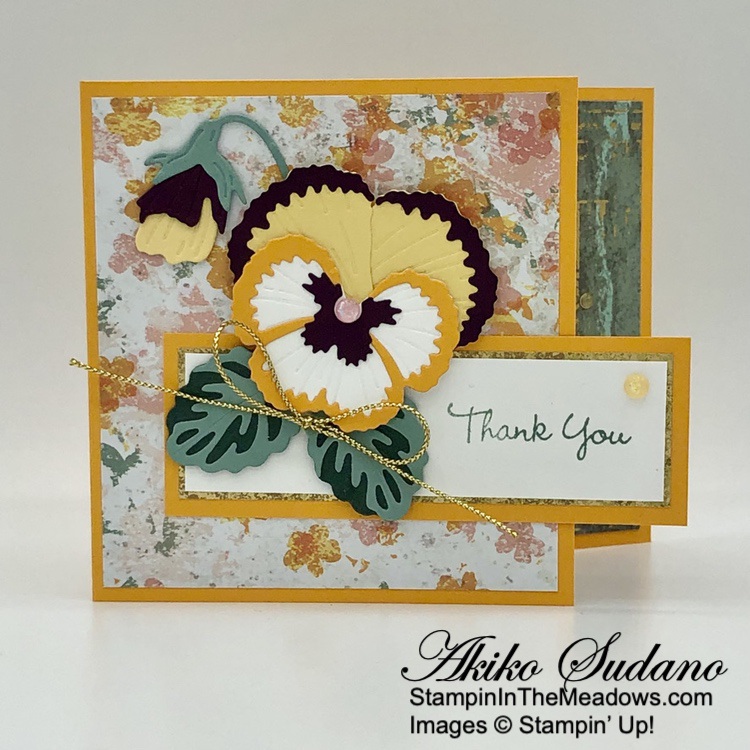
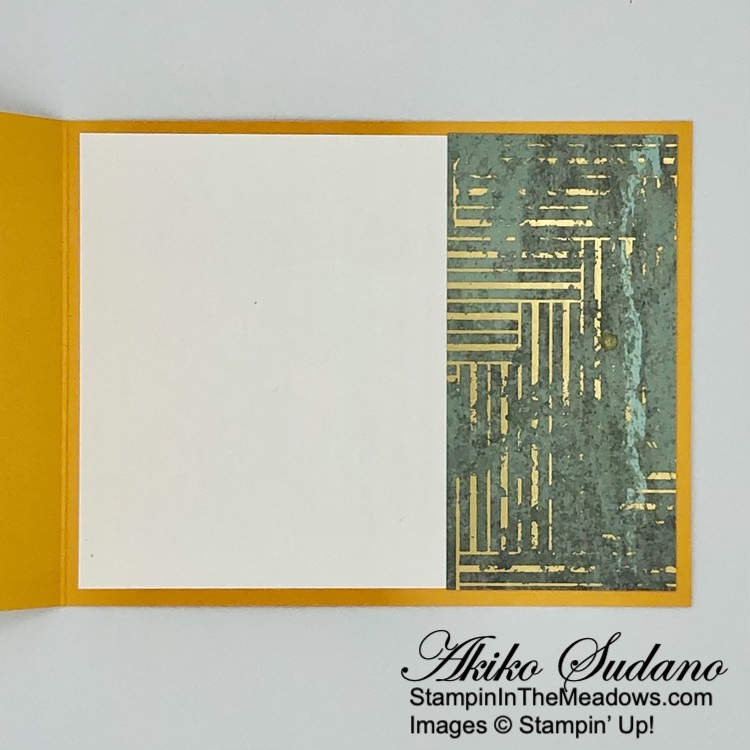
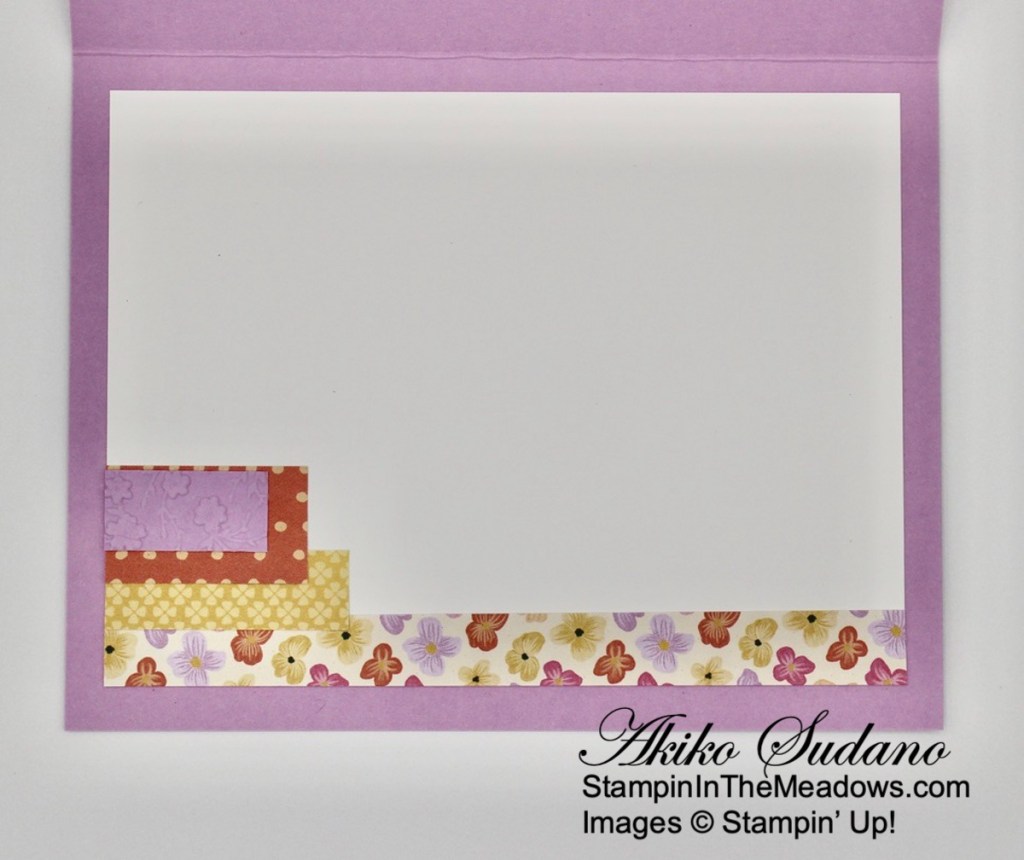
For the inside of the card, I decided to stamp a pansy using the Stampin’ Up! Pansy Patch stamp set on a Basic White panel. I stamped the small flower detailed stamp in stamped off Blackberry Bliss and the center in Daffodil Delight. With the darker outline, it was easy to line up the Daffodil Delight center. I covered the flower with a mask and stamped the leaves in Garden Green. I finished by stamping the center in Blackberry Bliss and trimming the bottom of the panel with DSP. I adhered the panel to the inside of the card with Stampin’ Seal.

I am always anxious to plant flowers in the spring when it’s too early, so pansies are my go to since they can stand up to the cold nights. And This week I managed to get some in the ground by my mailbox, so I had to make a card using the pretty Stampin’ Up! Pansy Patch stamp and dies to celebrate. Sadly, these pretty items are on the retiring list, and beginning April 9, the dies will be on sale!

Current Catalogs Retiring Lists Announced!
There is a retiring list for the 2023-2024 Annual Catalog and the January-April 2024 Mini Catalog and annual catalog. These lists detail the products that will no longer be available once the catalogs are gone on April 30. Items are only available while supplies last. Note – The Sale Prices don’t start until April 9th.
Click HERE to download a PDF of the retiring items from the Annual Catalog.
Click HERE to download an excel spreadsheet of the Annual Catalog retiring items.
Click HERE to download a PDF of the retiring items from the Mini Catalog.
Click HERE to download an excel spreadsheet of the Mini Catalog retiring items.
Click HERE to go to my online store to shop now.
Stampin’ Up! 2023-2024 Annual Catalog coming May 1, 2024!

It’s sad to see items retiring, but the new Stampin’ Up! 2024-2025 Annual Catalog will be here soon! April 30 is the last day to order from the current 2023-2024 Annual Catalog and May 1 is when ordering from the new Annual Catalog begins!
Current Host Code: 9WAA9JP9
Use this host code when you order $50 or more and receive a Thank You gift from me! The free gift is your choice of any item currently available valued up to $10.00.
If your order is over $150, please do not use the host code since you’ll receive your own Host Dollars plus I’ll still send you the Thank You gift! This host code can be used by anyone, no club or commitment required. Let me know if you have any questions.
If you need any stamping supplies, I’d be very happy to be your Demonstrator. Just click on the Shop Now Button on the right side of the screen to go directly to my Online store or contact me if you have any questions. Happy Stamping!
Thanks for stopping by and have a great day!
Akiko
- Visit my online store here
- See the current Stampin’ Up! clearance rack specials here
- Earn FREE Stampin’ Up! products through my Wildflower Frequent Shopper Program – my way of saying thank you to my online frequent shopper customers.
- Have any questions? I’d be happy to help, click here to contact me.
Cardstock Cuts for this project:
- Pool Party – 4-1/4″ x 11″ card base, scored at 5-1/2″, 3-1/2″ x 5″ (stamped octagon), 2-1/2″ x 4-1/4″ (embossed octagon)
- Garden Green – 3″ x 3-1/2″ (die cut leaves & stem)
- Daffodil Delight – 2″ x 2-1/2″ (die cut flower petals)
- Blackberry Bliss – 1″ x 3″ (die cut flower petals)
- Basic White – 4″ x 5-1/4″ (inside panel) , 2″ x 3″ (die cut flower petals)
- Poetic Expressions DSP – 4″ x 5-1/4″ (front background), 1/2″ x 4″ (inside trim)
Stampin’ Up! products used in this project:
")


 Designer Series Paper")


 Grosgrain Ribbon")


")
 Specialty Designer Series Paper")

 Specialty Paper")


 Designer Series Paper")


 Open Weave Ribbon")


 Open Weave Ribbon")