Stampin’ Up! Pansy Patch Birthday Card for the Happy Inkin’ Thursday Blog Hop

Good morning and welcome to the Happy Inkin’ Thursday Blog Hop! Today I used the pretty Stampin’ Up! Pansy Patch bundle to make a sweet birthday card. With the warmer weather, I planted some pansies by my mailbox this weekend, so I had to pull out this set for today’s card. With all the excitement about the new products, I forgot how beautiful this suite is, so it’s time to re-discover it! You can find the supplies I used along with card stock cuts at the bottom of my post.

We have a Theme Challenge this week with the wonderful theme of Flowers – so perfect!

This card is kind of a fun fold card, where the card front is cut in half and turned sideways, so part of the inside of the card is showing – perfect for showing off pretty DSP. So I adhered panels of the pansy filled Pansy Petals designer series paper to the inside and to the front of a my Calypso Coral card base. I adhered a Calypso Coral dotted panel of the Pansy Petals DSP to the cut off front panel, and adhered it to the card front with Tear & Tape, centering the panel on the card.

I cut my flower and bud from Basic White, Pale Papaya, Calypso Coral, Daffodil Delight and Evening Evergreen using the Pansy Dies from the Stampin’ Up! Pansy Patch bundle. I adhered the Pale Papaya large petal edge to the Basic White base and topped it with the Calypso Coral center detail and a Daffodil Delight flower center. I adhered the two Calypso Coral edges to the two Pale Papaya small petals and adhered them both to the back of the Basic White large flower. I adhered the Pale Papaya bud petal to the Basic White bud base and adhered them to the Evening Evergreen stem. I adhered the bud with glue dots and the large flower with dimensionals.

I cut some Evening Evergreen leaves from the Pansy Patch DSP and tucked them under the large pansy. I stamped the sentiment from the Stampin’ Up! Pansy Patch stamp set in Evening Evergreen ink on Pale Papaya and cut it out with the Ornate Frames die. I adhered it to the card front. I finished off the card with a Pale Papaya bow and some iridescent gems, adding a large one to the pansy center!

For the inside, I stamped the sentiment from the Stampin’ Up! Pansy Patch stamp set in Evening Evergreen on a Basic White panel. I cut out a small pansy from the Pansy Patch DSP and adhered it to the corner and adhered the panel to a Calypso Coral mat. I adhered the panel to the inside of the card with liquid glue, lining it up so that it would be covered by the front panel.

The Stampin’ Up! Pansy Patch bundle is really sweet and makes gorgeous dimensional pansies. The sentiments are also great and the Pansy Patch DSP is perfect for all your Spring cards.

On with the Hop! Click on the Next Blog button to move forward to see the beautiful project Karen Ksenzakovic has created.

If you get lost along the way, here are the participants for the hop:


Savings Are In Bloom During March!

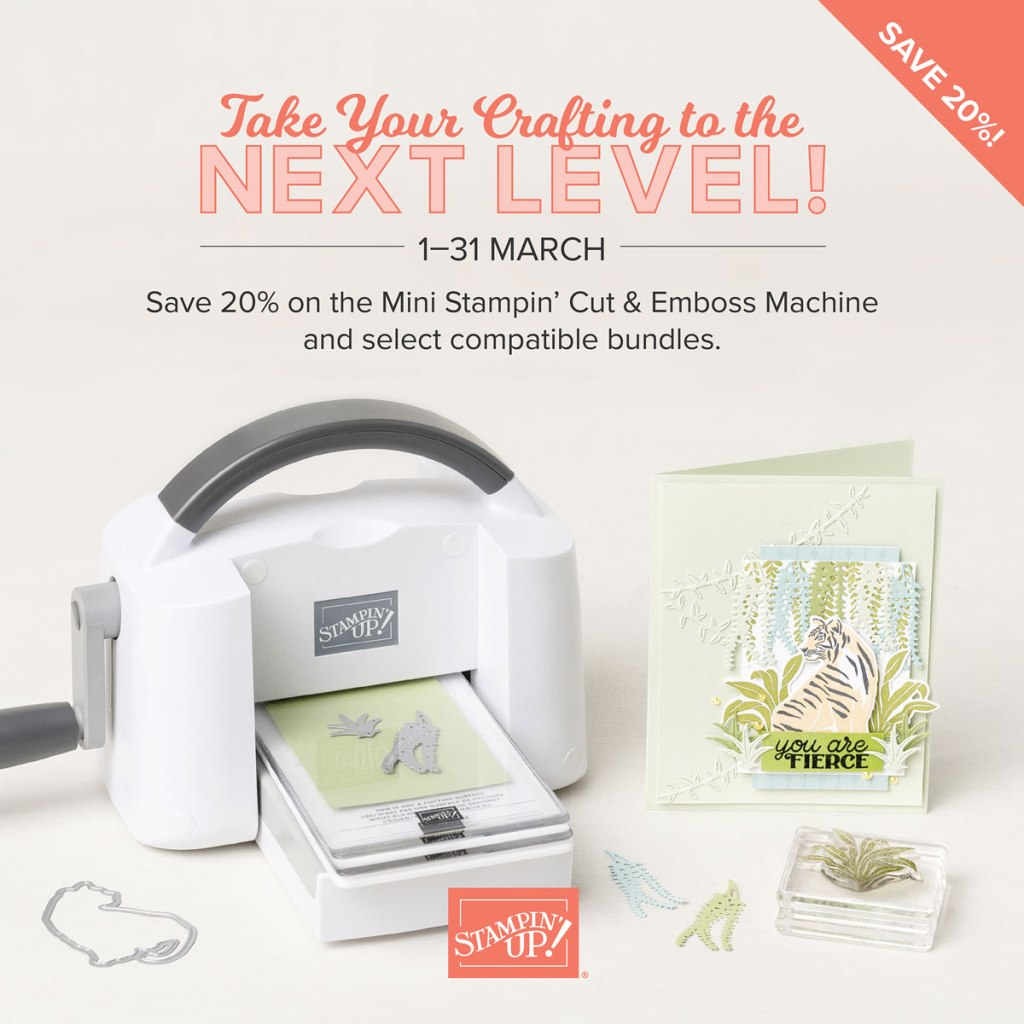
During the month of March, you can snag the Mini Stampin’ Cut & Emboss Machine at a 20% discount! This miniature machine is compatible with a large selection of Stampin’ Up! embossing folders and dies. Build your craft collection and combine the Mini Stampin’ Cut & Emboss Machine with any (or all!) of the select stamp-and-die bundles that are also available for 20% off during the month of March!

Click on the image below to download a PDF with all the details, including all the stamp bundles that will be on sale and the discounted prices! Click HERE to shop for these discounted items in my Online Store.


Current Host Code: MPMDW6BG

Use this host code when you order $50 or more and receive a free gift from me!  The free gift is your choice of any item valued up to $10.00 in the 2021 – 2022 Annual Catalog or the January – June 2022 Mini Catalog!

If your order is over $150, please do not use the host code since you’ll receive your own Host Dollars plus I’ll still send you the free gift!  This host code can be used by anyone, no club or commitment required. Let me know if you have any questions.


If you need any stamping supplies, I’d be very happy to be your Demonstrator.  Just click on the Shop Now button on the right side of the screen to go directly to my online store or contact me if you have any questions. 

Thanks for stopping by and Happy Stamping!

Akiko

  • Visit my online store here
  • See the current Stampin’ Up! clearance rack specials here
  • Earn FREE Stampin’ Up! products through my Wildflower Frequent Shopper Program – my way of saying thank you to my online frequent shopper customers.
  • Have any questions? I’d be happy to help, click here to contact me.

Cardstock Cuts for this project:

  • Calypso Coral – 4-1/4″ x 8-1/4″ card base scored at 2-3/4″, two 2-3/4″ x 4-1/4″ panels (front panel and inside mat), 1″ x 3″ (pansy die cuts)
  • Pale Papaya – 2″ x 4-1/2″ (pansy die cuts), 1-1/4″ x 2-1/2″ (label)
  • Daffodil Delight – 1″ x 1″ x 4″ (pansy center)
  • Evening Evergreen – 1-1/4″ x 3″ (bud stem)
  • Basic White – 2-1/2″ x 4″ (inside panel), 2″ x 3″ (pansy die cuts)
  • Pansy Petals DSP – 4″ x 5-1/4″ (inside panel), two 2-1/2″ x 4″ panels (front panels), small die cut pansy, two evening evergreen die cut leaves
Stampin’ Up! products used in this project:


Stampin’ Up! Friendly Hello Birthday Card

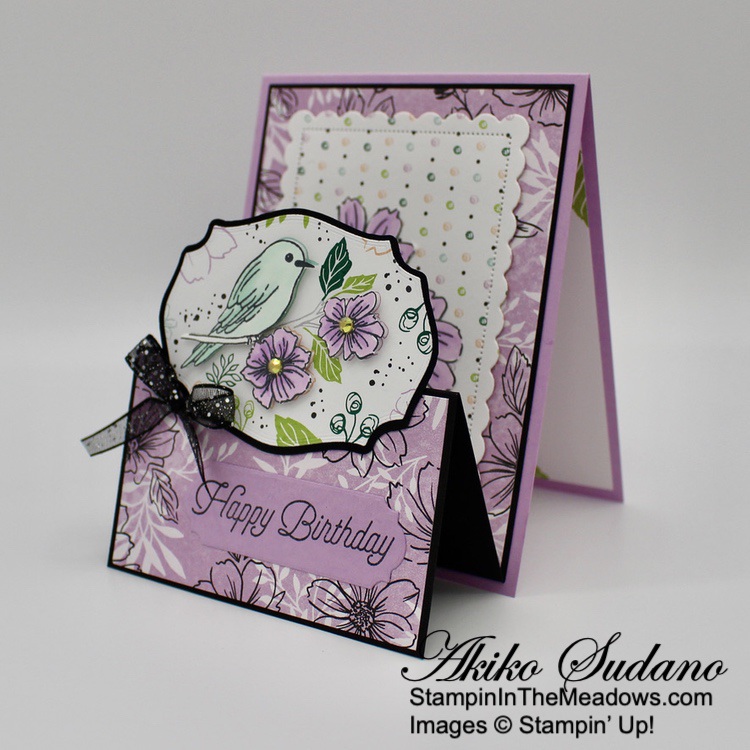
Good Morning! Today I’m bringing you a Double Easel fun fold card made with the Sale-A-Bration Stampin’ Up! Friendly Hello bundle This is a beautiful set of coordinating stamps and designer series paper that you can get for FREE with a $100 purchase during Sale-A-Bration! You can find the supplies I used at the bottom of my post along with the sizes of cardstock used.

I adhered the Stampin’ Up! Friendly Hello designer series paper panels to each scored section of the Basic Black panel, burnished the score lines, and adhered the folded Basic Black panel to the front of the Fresh Freesia card base. I cut a panel of the DSP with the second largest Scalloped Contours die and adhered it to the card front.

I traced the outline of the die from one of the Tasteful Labels dies on a Basic Black panel and fussy cut it out with my paper snips. I used the die to cut a panel of the Stampin’ Up! Friendly Hello DSP with the bird and flowers, and adhered it to the fussy cut Basic Black mat. I stamped the bird image from the Stampin’ Up! Friendly Hello stamp set in Memento Tuxedo Black and colored it with Pool Party, Fresh Freesia and Pale Papaya Stampin’ Blends. I fussy cut the bird and flowers and adhered them to the die cut with dimensionals. I adhered the die cut to the card front with Tear & Tape and finished the flowers with Pale Papaya rhinestones.

I stamped the double flower from the Stampin’ Up! Friendly Hello stamp set in Memento Tuxedo Black ink on Basic White. I colored the flowers with Fresh Freesia and Pale Papaya Stampin’ Blends. I stamped the leaves in Granny Apple Green and fussy cut the leaves and flowers. I adhered the flowers and leaves to the scalloped rectangle die cut panel with liquid glue.

I stamped the sentiment from the Sale-A-Bration Special Moments photopolymer stamp set in Basic Black on Fresh Freesia and cut it out with the Ornate Labels die. I adhered it to the card front and finished the card with a glittered Black Organdy bow.

I stamped the sentiment from the Special Moments stamp set in Memento Tuxedo Black on a Basic White panel. I stamped the large flowers from the Stampin’ Up! Friendly Hello stamp set in the corners in Basic Black and the leaves in Granny Apple Green. I colored the flowers with Fresh Freesia and Pale Papaya Stampin Blends and adhered the panel to the inside of the card. I also stamped a Basic White envelope with the flowers and leaves and colored it with Stampin’ Blends to match the inside panel.

The Stampin’ Up! Friendly Hello bundle is a wonderful Sale-A-Bration item that you can get for free with a $100 order. The designer series paper is so beautiful and the stamp set has pretty images and sentiments that can be used with it or on their own. But hurry, because Sale-A-Bration ends on February 28, 2022!


Earn Free Products During Sale-A-Bration: Jan 4 – Feb 28 2022!

Sale-A-Bration is one of Stampin’ Up!’s biggest promotions of the year with fun for everyone!  There are fantastic Sale-A-Bration specials for Shopping, Hosting and Joining! See my Promotions Page for more details or contact me and I’ll be happy to tell you more! But hurry because these specials are only available through February 28, 2022 or while supplies last!

All Together Collection Available Through May 2, 2022

Loving hands and heartfelt words are the best way to show you care. With hand designs that illustrate coming together in friendship and solidarity, the All Together Collection will help you create cardmaking and paper crafting projects that reflect the people you know and love. Click on the picture below to download a brochure with all the details or click HERE to start shopping the All Together Collection now in My Online Store.


Current Host Code: 3QYMGKQY

Use this host code when you order $50 or more and receive a free gift from me!  The free gift is your choice of any item valued up to $10.00 in the 2021-2022 Annual Catalog or the January – June 2022 Mini Catalog!

If your order is over $150, please do not use the host code since you’ll receive your own Host Dollars plus I’ll still send you the free gift!  This host code can be used by anyone, no club or commitment required. Let me know if you have any questions.


If you need any stamping supplies, I’d be very happy to be your Demonstrator.  Just click on the Shop Now button on the right side of the screen to go directly to my online store or contact me if you have any questions.  Happy Stamping!

Thanks for stopping by and have a great week!

Akiko

  • Visit my online store here
  • See the current Stampin’ Up! clearance rack specials here
  • Earn FREE Stampin’ Up! products through my Wildflower Frequent Shopper Program – my way of saying thank you to my online frequent shopper customers.
  • Have any questions? I’d be happy to help, click here to contact me.

Cardstock Cuts for this project:

  • Fresh Freesia – 4-1/4″ x 11″ card base scored at 5-1/2″, 1-1/4″ x 3-1/2 (label)
  • Basic Black – 4″ x 10-1/4″ scored at 2-1/2″ and 5″ (double easel), 3″ x 4″ (die cut mat)
  • Basic White – 4″ x 5-1/4″ (inside panel), 2-3/4″ x 3-3/3″ (bird and flowers), 1-3/4″ x 3″ (double flowers), 1-1/2″ x 1-1/2″ (leaves)
  • Friendly Hello DSP – 3-7/8″ x 5-1/8″ (large background panel), two 2-3/8″ x 3-7/8″ panels (small background panels), 2-3/4″ x 3-3/4″ (die cut bird), 3-1/2″ x 4-3/4″ (die cut scalloped rectangle)

Stampin’ Up! products used in this project:


Stampin’ Up! Happiest of Birthdays for the Inkin’ Krew Blog Hop

Good morning! Welcome to the Inkin’ Krew Monthly Blog Hop! The theme for this month’s hop is “Birthday” and I made a Z-fold card with the Stampin’ Up! Happiest of Birthdays stamp set and the beautiful Hydrangea Hill designer series paper. This is such a cheerful sentiment and is so versatile! Instead of the floral feminine birthday card, you can pair it with a masculine DSP for a Birthday card for the men in your family or add balloons and confetti for a lighthearted, youthful look. You can find the supplies I used at the bottom of my post along with the sizes of cardstock used.

I stamped sentiment from the Stampin’ Up! Happiest of Birthdays cling stamp set with my Stamparatus in an Ombre fashion. First I inked the top part of the stamp in Gorgeous Grape, sponged the bottom edge of the ink with a sponge dauber to soften the ink edge and stamped the Basic White panel. I wiped the ink with a moist chamois and inked the stamp with Highland Heather covering the middle and top. Then I wiped the stamp again and inked the bottom of the stamp with Misty Moonlight, again using the sponge dauber to soften the ink line. The Stamparatus was perfect, allowing me to stamp precisely over the same spot without making a mess!

I die cut the second largest Scalloped Contour rectangle from Gorgeous Grape and adhered the stamped panel to the center. I finished the panel with three floral embellishments and a Gorgeous Grape bow.

I adhered the floral Hydrangea Hill designer series paper to the right and left sections of the scored card base. I adhered the striped paper to the center and burnished the folds with my bone folder in a mountain and valley fashion.

I cut the Basic White panel with the second largest Scalloped Contours die and stamped the corners with the hydrangea flowers from the Hydrangea Haven photopolymer stamp set. I masked the corners before stamping so that only the paper inside the stitching would be stamped. I adhered the panel to the center of the large floral panel with liquid glue. Then I adhered strips of Tear & Tape to the left side of the front scalloped panel, pulled off the covers and adhered the panel to the card front, being careful to align it with the Basic White inside panel.

Isn’t the Stampin’ Up! Happiest of Birthdays wish cheerful and uplifting? And since it’s a large sentiment, it is really easy to do in an ombre or multi color look that makes it even more special!

On With The Hop! Click on the Next Blog button to move forward to Amy Koender’s project or click the Previous Blog button to move back to see the project that Mary Deatherage created.

If you get lost along the way, here are the participants for the hop:

  1. Jaimie Babarczy
  2. Tara Carpenter
  3. Leslie Larkin
  4. Karen Finkle
  5. Jillian Good
  6. Karen Ksenzakovic
  7. Donna Leonard
  8. Sue Prather
  9. Mary Deatherage
  10. Akiko Sudano <– You Are Here
  11. Amy Koenders

Current Host Code: VZMG92YZ

Use this host code when you order $50 or more and receive a free gift from me!  The free gift is your choice of any item valued up to $10.00 in the 2021 – 2022 Annual Catalog or in the Jan-Jun 2021 Mini Catalog!

If your order is over $150, please do not use the host code since you’ll receive your own Host Dollars plus I’ll still send you the free gift!  This host code can be used by anyone, no club or commitment required.  Let me know if you have any questions.


If you need any stamping supplies, I’d be very happy to be your Demonstrator.  Just click on the Shop Now button on the right side of the screen to go directly to my online store or contact me if you have any questions. 

Thanks for stopping by and Happy Stamping!

Akiko

  • Visit my online store here
  • See the current Stampin’ Up! clearance rack specials here
  • Earn FREE Stampin’ Up! products through my Wildflower Frequent Shopper Program – my way of saying thank you to my online frequent shopper customers.
  • Have any questions? I’d be happy to help, click here to contact me.

Cardstock Cuts for this project:

  • Highland Heather – 5-1/2″ x 8-1/2″ card base scored at 2-1/8″ (mountain) and 4-1/4″, (valley)
  • Gorgeous Grape – 3-3/8″ x 4-5/8″ (scalloped mat)
  • Basic White – 3-3/8″ x 4-5/8″ (inside panel), 2-5/8″ x 3-15/16″ (front label),
  • Hydrangea Hill DSP – 4″ x 5-1/4″ (back floral panel), two 1-7/8″ x 5-1/4″ panel (front floral panel and inside striped panel)

Stampin’ Up! products used in this project:


Stampin’ Up! All Things Fabulous for the Happy Inkin’ Thursday Blog Hop

Good Morning and welcome to the Happy Inkin’ Thursday Blog Hop! For today’s card I used the beautiful Stampin’ Up! All Things Fabulous bundle to make a pretty floral birthday card. This photopolymer stamp set has two and three step stamps that make gorgeous multi-toned flowers! You can find the supplies used to create this card at the bottom of my post along with the sizes of cardstock used.

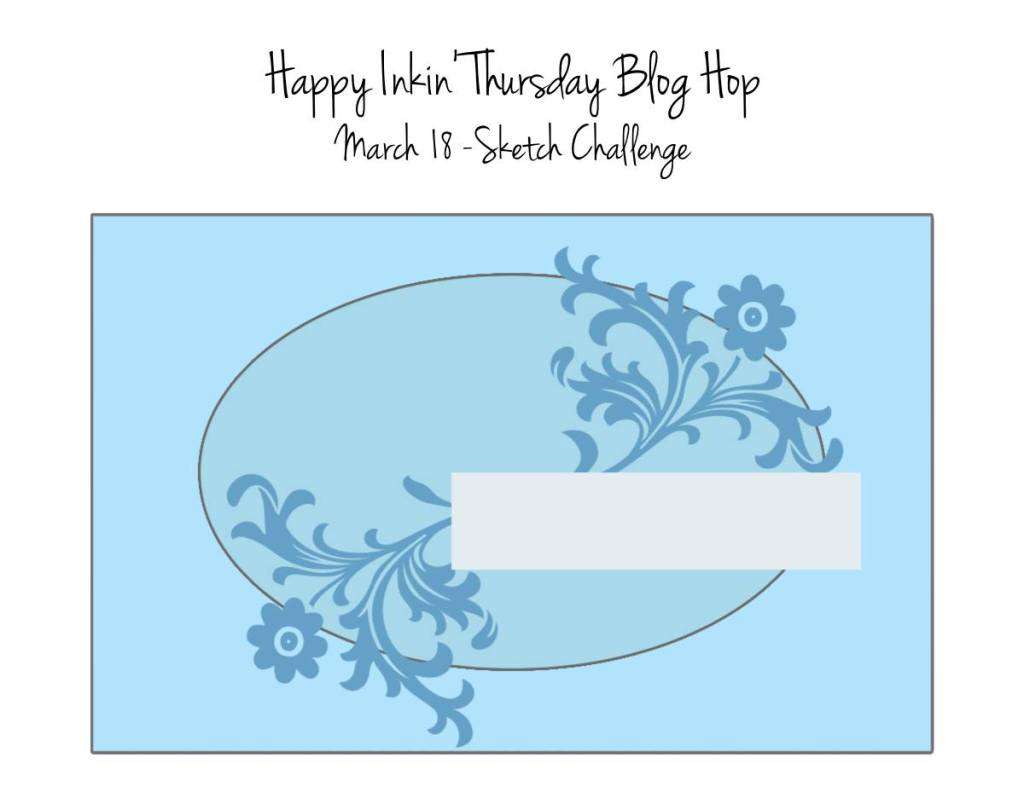
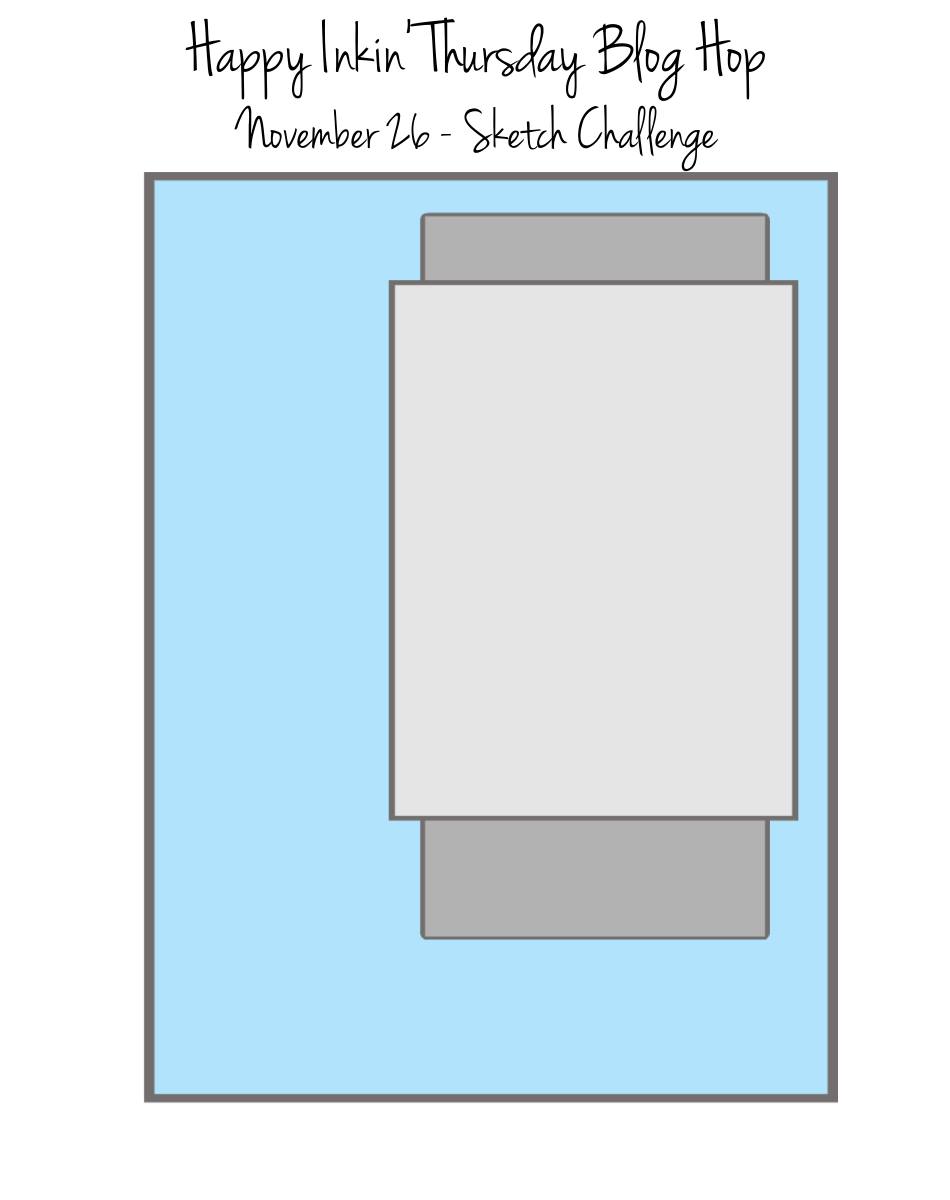
We have a sketch challenge this week and here is the pretty sketch we are using:

I embossed a panel of Soft Sea Foam Subtles 6″ x 6″ designer series paper with the Tasteful Textile embossing folder and adhering it to the front of a Soft Sea Foam card base. I cut the lattice from the Fabulous Florals Dies from Basic White card stock and cut the second largest oval from the Stitched Shapes dies from the Fine Art Floral designer series paper. I adhered the oval to the lattice with glue dots.

I stamped the large flower from the Stampin’ Up! All Things Fabulous photopolymer stamp set in Flirty Flamingo. I mounted the three stamps for this 3 step flower on blocks and stamped the center with full strength and then stamped the larger detailed stamp on top full strength. Then I stamped the larger background in stamped off Flirty Flamingo. Doing the stamping in this order made it fairly easy to line up. Then I stamped the small yellow flowers with the center in Mango Melody and the outer two in So Saffron. I cut out the flowers with the coordinating dies. I stamped two of each set of leaves in Pear Pizzazz and cut them out with the coordinating dies.

I arranged the leaves and flowers on the oval and used glue dots to adhere the So Saffron Flowers and leaves. I popped the Flirty Flamingo flower on the top with dimensionals. I stamped the sentiment from the Stampin’ Up! All Things Fabulous stamp set in Pear Pizzazz ink on a Basic White strip. I cut the end of the strip with the Banners Pick-A-Punch and adhered it to the oval. I adhered the oval to the card front with dimensionals and finished the card front with a White bow and three pearls.

For the inside of the card, I stamped the sentiment from the Peaceful Moments stamp set in Flirty Flamingo on a Basic White panel and trimmed the side in the Soft Seafoam Subtles 6″ x 6″ DSP. Stamped another flower from the Stampin’ Up! All Things Fabulous stamp set in Flirty Flamingo and cut it out with the coordinating die. I adhered the flower and remaining leaves to the panel and adhered the panel to the inside of the card.

The Stampin’ Up! All Things Fabulous bundle has beautiful floral images using the two and three step stamping techniques. These flowers definitely look better when carefully stamped to preserve the white highlights. So practice with different color combinations and use different techniques to help line up your stamps – it’s relaxing and fun!!

On with the Hop! Click the Next button below to visit Karen Ksenzakovic’s blog.

And just in case you get lost along the way, here’s a list of the team members participating in the hop today:


Current Host Code: 9WJYHP76

Use this host code when you order $50 or more and receive a free gift from me!  The gift is your choice of any item valued up to $10.00 in the 2019-20 Annual Catalog or in the 2021 January-June Mini Catalog!

If your order is over $150, please do not use the host code since you’ll receive your own Host Dollars plus I’ll still send you the free gift!  This host code can be used by anyone, no commitment required.  Let me know if you have any questions.


If you need any stamping supplies, I’d be very happy to be your Demonstrator.  Just click on the Shop Now Button on the right side of the screen to go directly to my online store or contact me if you have any questions.  Happy Stamping!

Thanks for visiting!

Akiko

  • Visit my online store here
  • See the current Stampin’ Up! clearance rack specials here
  • Earn FREE Stampin’ Up! products through my Wildflower Frequent Shopper Program – my way of saying thank you to my frequent shopper online customers.
  • Sign up for my weekly newsletter here
  • Have any questions? I’d be happy to help, click here to contact me.

Cardstock Cuts for this project:

  • Soft Sea Foam – 5-1/2″ x 8-1/2″ card base scored at 4-1/4″
  • Basic White – 4-1/2″ x 6″ (die cut flowers, leaves and lattice), 1/2″ x 3″ (label), 4″ x 5-1/4″ (inside panel)
  • Subtles 6″ x 6″ DSP – 1″ x 5-1/4″ (front background), 3/4″ x 4″ (inside trim)
  • Fine Art Floral DSP – 2-1/4″ x 3-1/2″ (die cut oval)

Stampin’ Up! products used in this project:


Stampin’ Up! Hey Birthday Chick Card

Good morning! Here’s a simple birthday card made with the cute Stampin’ Up! Hey Birthday Chick bundle. And today is the day when the matching dies are available as well as the return of the Hey Chick stamp set and it’s coordinating dies! Let me show you how cute these sets are with today’s card. You can find the supplies used to create this card at the bottom of my post along with the sizes of cardstock used.

My card is also entered in the Paper Players Challenge PP526 – it’s a Tic Tac Toe challenge and I chose the middle column – animal, embossing and markers. Be sure to check out the inspiration and other challenge entries in this fun challenge.

On with my card! I stamped the cute little chicken from the Stampin’ Up! Hey Birthday Chick cling stamp set with Memento Tuxedo Black ink on Thick Basic White card stock and colored her with the Ivory, Real Red and Mango Melody Stampin Blends. I colored the balloon Real Red, because red balloons are the best, and added a highlight with the Color Lifter! I cut her out with the coordinating die from the Birthday Chick dies that are available today (YAY!!)!

I cut out the cornstalk and corn husks with the new Hey Chick dies from Garden Green and the corn cobs from So Saffron. These dies are so tiny and so cute so be careful not to lose them. I cut out two grain sacks from the Hey Birthday Chick dies from Crumb Cake. I stamped the sentiment from the Stampin’ Up! Hey Birthday Chick stamp set in Memento Tuxedo Black ink on the bottom of a Basic White panel.

I used the new blending brushes to brush some So Saffron and Balmy blue ink on the panel as a background for the little chicken and embossed the panel with the Tasteful Textile 3D embossing folder. I adhered the panel to the front of a Real Red card base and adhered the cornstalk, ears of corn and grain sacks to the panel with liquid glue. I finished the front by popping the chicken and balloon on with dimensionals.

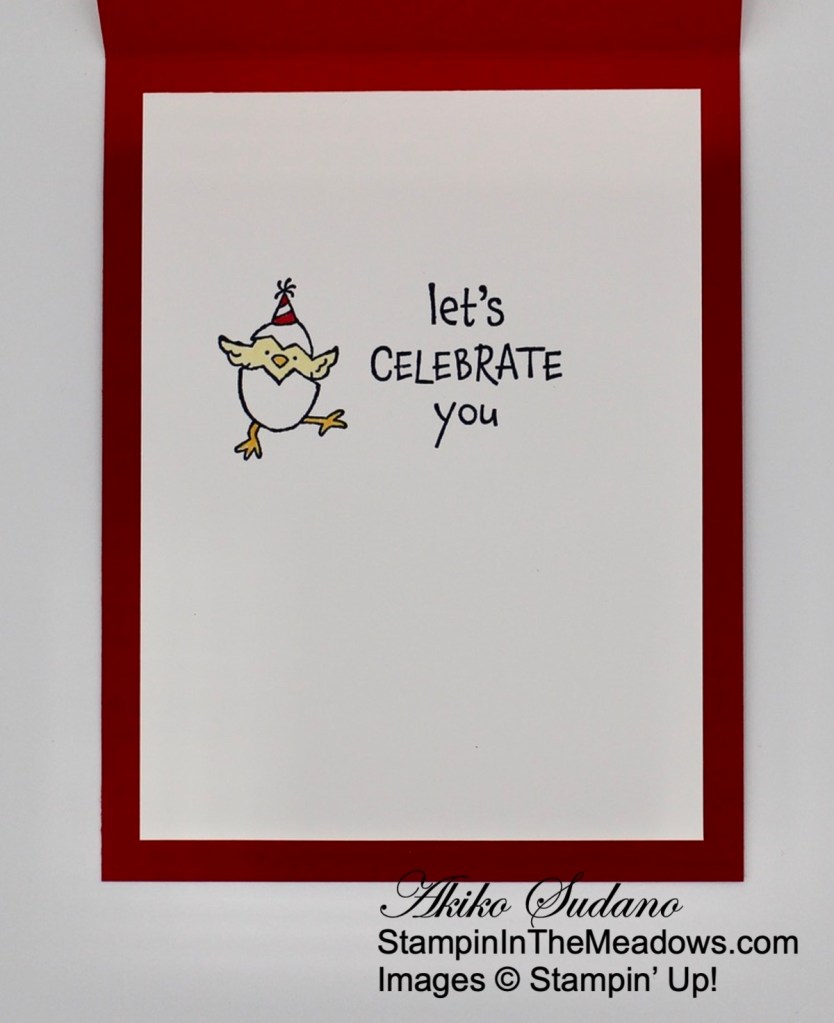
For the inside of the card, I stamped the sentiment and little chick from the Stampin’ Up! Hey Birthday Chick stamp set in Memento Tuxedo Black ink on a Basic White panel. I colored the little chick with So Saffron, Real Red and Mango Melody Stampin’ Blend markers and adhered the panel to the inside of the card.

This is a simple fun birthday card with the new Stampin’ Up! Hey Birthday Chick and Hey Chick bundles. Check them out because they’re so cute and the bundles will be available through June 30!


Stampin’ Up! Sale A Bration is going on Now!

Sale A Bration is Stampin’ Up!’s biggest event of the year with three ways to earn FREE products – SHOP – HOST – JOIN!

SHOP

During Sale-A-Bration, for every $50 or $100 you spend, you can choose between two purchasing levels of free products! Depending on the amount you spend, you’ll be able to mix ‘n’ match the Sale-A-Bration items you earn and you can choose from stunning stamp sets and designer series papers. There are 8 free products available to pick from at the $50 level and 2 free products to pick from at the $100 level. Click on the Sale A Bration brochure to the right to see these products.

HOST

Stampin’ Up! is offering an exclusive host stamp set called Punch Party and you can get it for FREE with an order of $300 or greater placed during Sale-a-bration or by hosting a workshop with orders totaling $300 or greater during Sale-a-bration!  And this is on top of the normal Stampin’ Rewards you get when you host a workshop!

JOIN

There’s no better time to Join Stampin’ Up! than during Sale A Bration! And joining is easy! You purchase your Starter kit for $99 by choosing $125 in Stampin’ Up! products (and shipping is FREE). If you join during Sale A Bration, you get an additional five FREE full size packs of 6″ x 6″ Designer Series Paper from the upcoming 2021-2022 Annual Catalog with your Starter Kit (the current 6″ x 6″ designer series paper goes for $11.50 per pack!). 

See my Join My Team page for all the benefits starting with a minimum 20% discount!  Contact me if you have any questions.  Click here to purchase your Starter Kit.

Contact me if you need a copy of the new Jan-Jun Mini Catalog and Sale A Bration brochure, and I’ll be happy to send you one!


FREE SHIPPING

This week is my 2 year anniversary with Stampin’ Up! and to celebrate I am offering FREE standard shipping on all orders over $50 through February 9th.

To get free shipping, you will need to:

  • Place an order at my Online Store between now and Monday February 9th using my current Host Code JNWPB7A4.
  • Send me an email at apsudano@stampininthemeadows.com of how you would like your shipping charges refunded to you, PayPal or check.
  • Once your order is processed and shipped, I will refund your standard shipping charges.

Your order will also qualify you for my thank you gift and for Wildflower Points! Orders over $150 will also qualify you for Stampin’ Rewards, so if your order is $150 or more, don’t use my host code so that you don’t miss out on your own Stampin’ Rewards from Stampin’ Up! Have fun shopping!


February Host Code: JNWPB7A4

Use this host code when you order $50 or more and receive a free gift from me!  The gift is your choice of any item valued up to $10.00 in the 2020-21 Annual Catalog or the Jan-Jun 2021 Mini Catalog.

If your order is over $150, please do not use the host code since you’ll receive your own Host Dollars plus I’ll still send you the free gift!  This host code can be used by anyone, no commitment required.  Let me know if you have any questions.


If you need any stamping supplies, I’d be very happy to be your Demonstrator.  Just click on the Shop Now Button on the right side of the screen to go directly to my Online store or contact me if you have any questions.  Happy Stamping!

Thanks for stopping by and have a great day!

Akiko

  • Visit my Online store here
  • See the current Stampin’ Up! clearance rack specials here
  • Earn FREE Stampin’ Up! products through my Wildflower Frequent Shopper Program – my way of saying thank you to my frequent shopper online customers.
  • Sign up for my monthly newsletter here
  • Have any questions? I’d be happy to help, click here to contact me.

Cardstock Cuts for this project:

  • Real Red – 4-1/4″ x 11″ card base scored at 5-1/2″
  • Basic White – two 3″ x 4-3/4″ panels (front and inside panels)
  • Basic White Thick – 2-1/2″ x 4-1/2″ (chick)
  • Crumb Cake – 1-1/2″ x 2-3/4″ (grain sacks)
  • So Saffron – 1/2″ x 3-1/2″ (corn)
  • Garden Green – 2″ x 3″ (cornstalk and husks)

Stampin’ Up! products used in this project:


Stampin’ Up! Mountain Air Birthday Card Video Tutorial

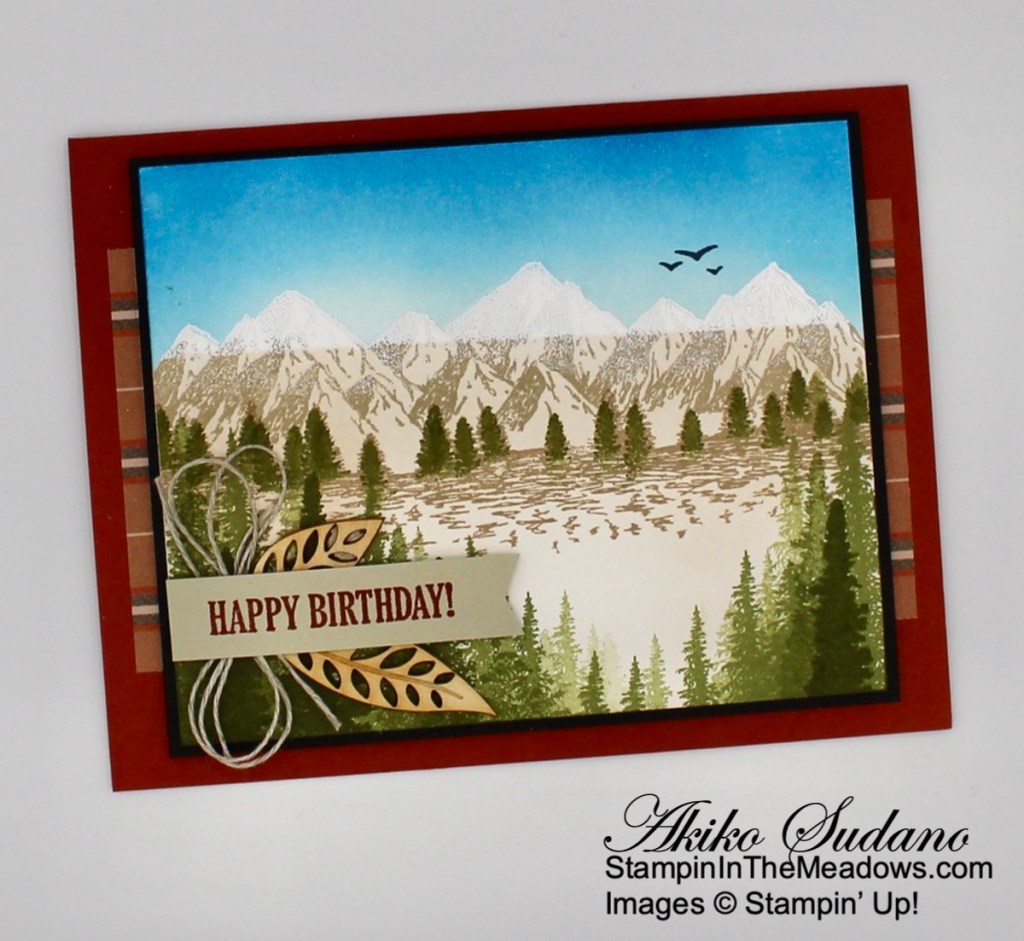
Good Morning! Today’s card uses the Stampin’ Up! Mountain Air photopolymer stamp set to make snow capped mountains for a western landscape birthday card. This is the card I made during my Facebook Live video tutorial yesterday afternoon and you can find the supplies I used to create this card at the bottom of my post along with the sizes of cardstock used.

Here is the Facebook Live video showing how I made the card:

I posted a copy of the video in my YouTube channel here so you can view it there if you prefer.

I was also inspired by the sketch from Freshly Made Sketches #466:


I set up the mountain range stamp from the Stampin’ Up! Mountain Air stamp set in my Stamparatus and secured Whisper White card stock with both magnets so it wouldn’t move. I stamped the mountains in Sahara Sand ink and then wiped the stamp and inked the top of the mountains with Versamark ink and stamped again. I sprinkled white embossing powder on the Versamark and heat set the embossing powder until it was shiny. I masked the mountains and used the new blending brushes that will be coming in the new Jan-Jun Mini Catalog to color the sky with Balmy Blue and Pacific Point inks. I love how brilliant the Pacific Point makes the sky and contrasts with the snow caps!

I masked off the sky and the embossed mountain tops and used a blending brush again to apply Crumb Cake ink on the rest of the card stock. I stamped the tree line from the Stampin’ Up! Mountain Air stamp set in Crumb Cake ink along the bottom of the mountains. I stamped the double tree stamp in Old Olive and the single tree stamp in Mossy Meadow to create the forest in the foreground, stamping off to create depth. I cleaned the tree stamp and then I stamped over the small trees at the bottom of the mountains in Mossy Meadow ink by inking up just the tip of the single tree stamp. Finally, I stamped the little birds in Memento Tuxedo Black ink and adhered the panel to a Basic Black mat.

I trimmed the end of a Sahara Sand strip with the Banners Pick A Punch and stamped the sentiment from the Pallet Thoughts stamp set in Cajun Craze ink. I adhered two leaves from the In Good Taste elements and a double bow made with linen thread with glue dots to the corner of the panel. I adhered the label over the embellishments with glue dots. I adhered a panel of Plaid Tidings 6″ x 6″ designer series paper to the front of a Cajun Craze card base and popped the mountain panel on top with dimensionals.

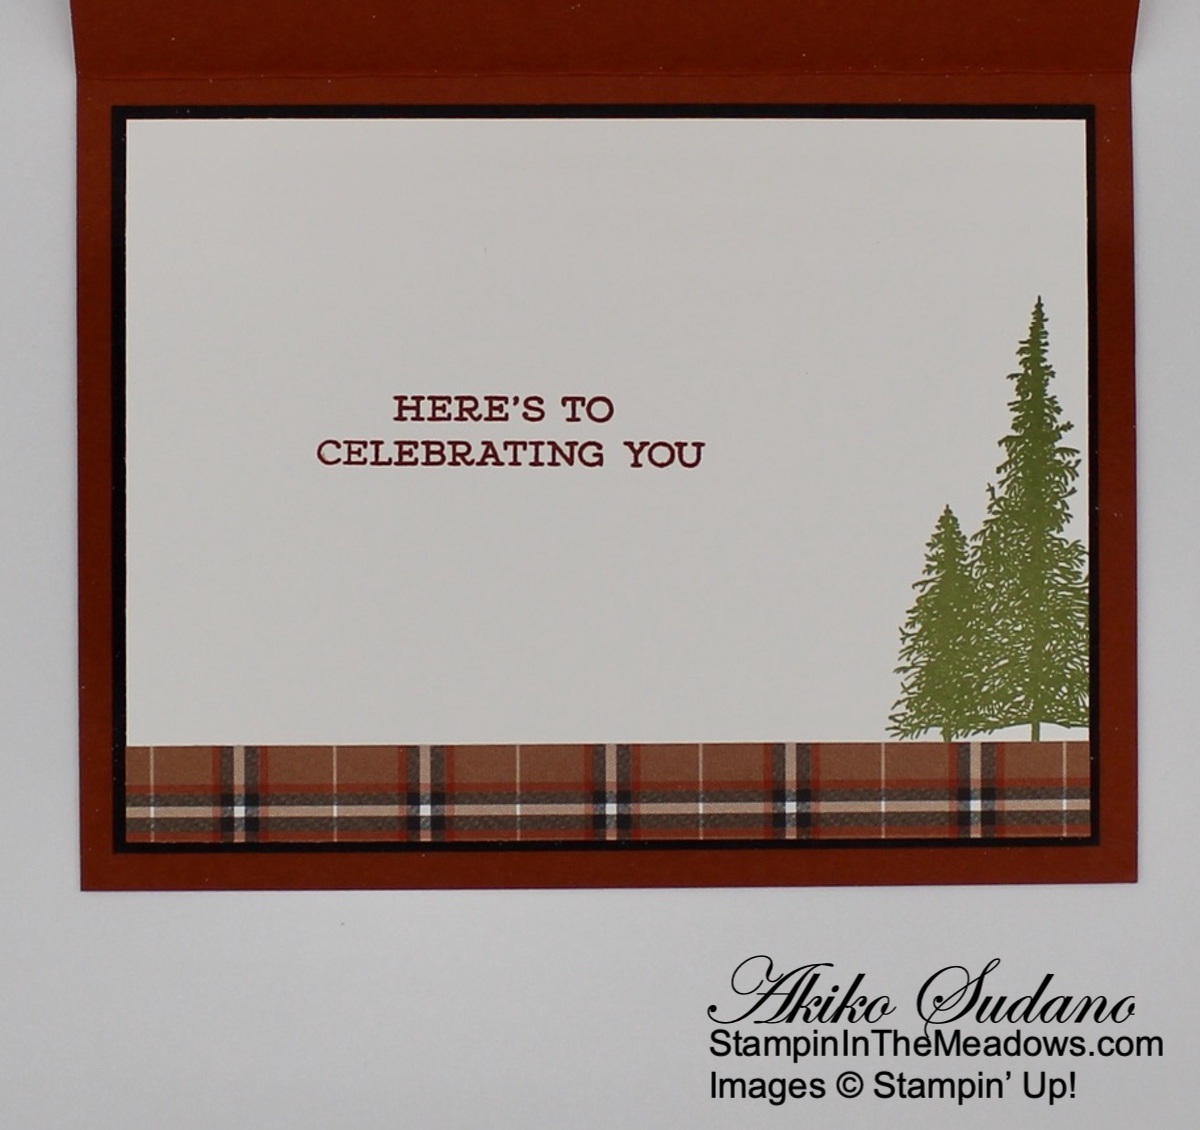
I stamped the sentiment from the Friend Like You photopolymer stamp set in Cajun Craze in on a Whisper White panel. I stamped thee double tree from the Stampin’ Up! Mountain Air stamp set in Old Olive ink on the side of the panel and trimmed the bottom with a strip of the Plaid Tidings 6″ x 6″ DSP. I adhered the panel to a Basic Black mat and then to the inside of the card with Stampin’ Seal.

The white embossed mountain tops are so dramatic against the blue sky and in life the shine from the embossed lines is pretty. I think that next time I should try this with a crooked line at the bottom of the snow rather than a straight line, what do you think?


Stampin’ In The Meadows January – June 2021 Mini Catalog New Product Shares Now Open

Do you want all of the great new products in the new January – June 2021 Mini Catalog but can’t afford everything?  Let’s do a share!  I’m placing an order early on January 5 for all the papers, ribbons and embellishments and I’m going to use the expedited shipping option so I get them fast. When I receive the order, I will cut and bundle the products and have the shares on their way to you by January 15. Go to my New Catalog Product Shares page to get the full details and to join. Please note, I can only ship to addresses within the US. Deadline to sign up for a share is January 3, 2021.


Stampin’ In The Meadows Online Host Club Openings Starting January 1

The Stampin’ In The Meadows Online Host Club is a good way to build up your Stampin’ Up supplies a little at a time without breaking the bank. You make a commitment to join the club for 6 months and place a minimum $25 order each month. A random host is chosen for each month and when you are the host, you get the Stampin’ Rewards Host Dollars for additional products. You can also give your Host Code to your Stampin’ Friends to increase your host rewards! For complete details, see my Online Host Club Page. You can also contact me at (484) 356-5031 or drop me an email at apsudano@stampininthemeadows.com.  

Sign up Deadline is Monday December 28, 2020.


Stampin’ Up!’s Giant Year-End Closeout Is Going On Now!

If you love Great Deals like I do, then the Giant Year-End Closeout event is the perfect time to shop. You’ll get deep discounts on your favorite products (up to 50% off some items) from the August–December 2020 Mini Catalog. Head over to my Online Store to check out the sale.  The retiring items are only available while supplies last! And many popular items have already been sold out!


December 16 – 31 Host Code: E7SDCMYW

Use this host code when you order $50 or more and receive a free gift from me!  The free gift is your choice of any item valued up to $10.00 in the 2019 – 2020 Annual Catalog or in the Aug-Dec 2020 Mini Catalog!  That includes some of the Host Exclusive stamp sets!

If your order is over $150, please do not use the host code since you’ll receive your own Host Dollars plus I’ll still send you the free gift!  This host code can be used by anyone, no club or commitment required.  Let me know if you have any questions.


If you need any stamping supplies, I’d be very happy to be your Demonstrator.  Just click on the Shop Now button on the right side of the screen to go directly to my online store or contact me if you have any questions.  Happy Stamping!

Thanks for stopping by and have a great week!

Akiko

  • Visit my online store here
  • See the current Stampin’ Up! clearance rack specials here
  • Earn FREE Stampin’ Up! products through my Wildflower Frequent Shopper Program – my way of saying thank you to my online frequent shopper customers.
  • Sign up for my weekly newsletter here
  • Have any questions? I’d be happy to help, click here to contact me.

Cardstock Cuts for this project:

  • Cajun Craze – 5-1/2″ x 8-1/2″ card base scored at4-1/4″
  • Basic Black – 7/8″ x 4-3/4″ (front mat), 3-7/8″ x 5-1/8″ (inside mat)
  • Sahara Sand – 1/2″ x 3″ (label)
  • Whisper White – 3-3/4″ x 5″ (inside panel), 3-3/4″ x 4-5/8″ (front panel)
  • Plaid Tidings 6″ x 6″ DSP – 2-3/4″ x 5-1/8″” (front background strip), 1/2″ x 5″ (inside trim)

Stampin’ Up! products used in this project:


Stampin’ Up! Peaceful Moments Birthday Card for the Happy Inkin’ Thursday Blog Hop

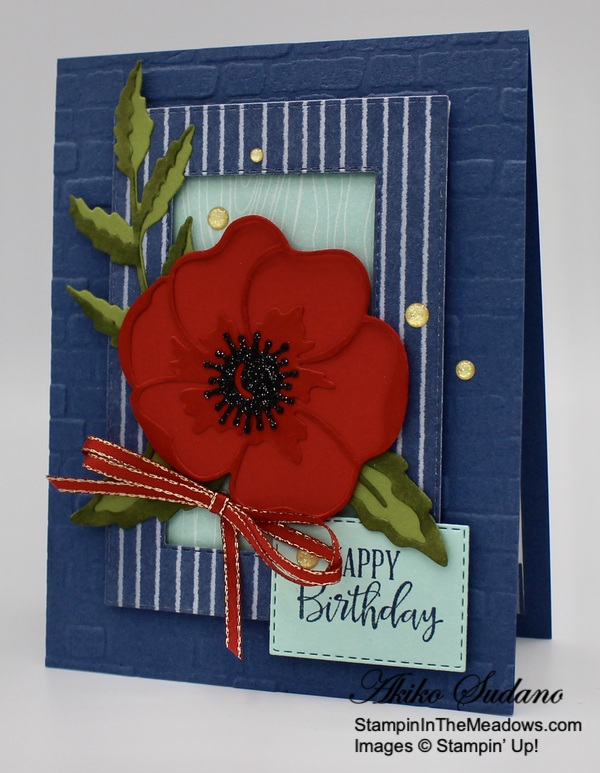
Good Morning and welcome to the Happy Inkin’ Thursday Blog Hop! I brought out the Stampin’ Up! Peaceful Moments bundle and the pretty Poppy Moments dies to make a Birthday card for today’s hop. You can find the currently available supplies used to create this card at the bottom of my post along with the sizes of cardstock used.

We have a color challenge this week, and here is the color palette we are using for our projects:

I embossed a panel of Misty Moonlight with the Bricks and Mortar embossing folder and adhered it to the front of a Misty Moonlight card base. I cut a panel of the Misty Moonlight striped paper from the Trimming the Town designer series paper (which just sold out, sadly) with the Stitched Rectangles Die and cut a panel of Misty Moonlight with thee same die. I adhered them together and cut out the middle with a Stitched Rectangle die two sizes smaller. I adhered the frame to a Pool Party panel from the Subtles 6″ x 6″ designer series paper with dimensionals. I adhered the whole thing to the middle of the card front.

I used the Poppy Moments Dies from the Stampin’ Up! Peaceful Moments bundle to cut out the flower and leaves from Poppy Parade, Old Olive and Black Glitter paper. I colored the accent leaves with the Old Olive Stampin Blends and the accent flower with the Poppy Parade Stampin’ Blends and clear Wink of Stella. I put the flowers and leaves together with liquid glue and adhered them to the card front with dimensionals and liquid glue.

I stamped the sentiment from the Stampin’ Up! Poppy Moments stamp set in Misty Moonlight ink on a Pool Party panel and cut it out with the small rectangle from the Stitched Rectangles Dies. I adhered it to the striped frame and finished the card front with a Poppy Parade and gold trimmed bow and gold glitter enamel dots.

I stamped the sentiment from the Stampin’ Up! Peaceful Moments stamp set in Poppy Parade ink on a Whisper White Panel and trimmed the bottom with the striped DSP. I adhered the panel to the inside of the card.

The die cut poppies from the Stampin’ Up! Peaceful Moments bundle are so beautiful that I think you can to use them at any time of the year!

On with the Hop! Click the Next button below to visit Karen Ksenzakovic’s blog.

And just in case you get lost along the way, here’s a list of the team members participating in the hop today:


December 16 – 31 Host Code: E7SDCMYW

Use this host code when you order $50 or more and receive a free gift from me!  The gift is your choice of any item valued up to $10.00 in the 2019-20 Annual Catalog or in the 2020 January-June Mini Catalog!  That includes some of the Host Exclusive stamp sets!

If your order is over $150, please do not use the host code since you’ll receive your own Host Dollars plus I’ll still send you the free gift!  This host code can be used by anyone, no commitment required.  Let me know if you have any questions.


If you need any stamping supplies, I’d be very happy to be your Demonstrator.  Just click on the Shop Now Button on the right side of the screen to go directly to my online store or contact me if you have any questions.  Happy Stamping!

Thanks for visiting!

Akiko

  • Visit my online store here
  • See the current Stampin’ Up! clearance rack specials here
  • Earn FREE Stampin’ Up! products through my Wildflower Frequent Shopper Program – my way of saying thank you to my frequent shopper online customers.
  • Sign up for my weekly newsletter here
  • Have any questions? I’d be happy to help, click here to contact me.

Cardstock Cuts for this project:

  • Misty Moonlight – 4-1/2″ x 11″ card base scored at 5-1/2″, 4-1/4″ x 5-1/2″ (embossed background), 3-1/4″ x 4-1/4″ (frame backing)
  • Pool Party – 1-1/2″ x 2″ (label)
  • Old Olive – 2″ x 8-1/2″ (die cut leaves)
  • Poppy Parade – 3″ x 5-1/2″ (die cut poppy)
  • Black Glitter – 1″ x 1″ (flower center)
  • Whisper White – 3-3/4″ x 5″ (inside panel)
  • Subtles 6″ x 6″ DSP – 2-3/4″ x 4-1/8″ (frame background)
  • Trimming The Town DSP – 3-1/4″ x 4-1/4″ panel (stitched rectangle frame), 1/2″ x 3-3/4″ (inside trim)

Stampin’ Up! products used in this project:


Stampin’ Up! Prized Peony for the Happy Inkin’ Thursday Blog Hop

Happy Thanksgiving!! My turkey should be in the oven by now so it’s time for the Happy Inkin’ Thursday Blog Hop! For today’s hop, I used the beautiful Stampin’ Up! Prized Peony bundle with the Heartwarming Hugs designer series paper to make a holiday season birthday card. I love this peony and I wanted to use it for a special December baby birthday card. You can find the supplies used to create this card at the bottom of my post along with the sizes of cardstock used.

We have a sketch challenge this week, and here is the pretty sketch we are using for our projects:

Emboss a Real Red Panel with the Parisian Flourish embossing folder and adhere it to the front of a Real Red Card Base. Adhere the striped Heartwarming Hugs Designer Series paper to the back of the red dotted designer series paper and then adhere it to the card front. Stamp the sentiment from the Peaceful Moments cling stamp set in Real Red ink on a Whisper White panel and cut it out with the Painted Labels Die. Adhere the label to the card front.

Cut the poppy petals from a Whisper White panel using the Peony Dies from the Stampin’ Up! Prized Peony bundle. Lightly sponge the petals with Real Red ink. Cut the flower center from Bumblebee. Assemble the flower and add a couple of half dimensionals at the top of the flower between the last two layers. Brush clear Wink of Stella on the flower to give it some sparkle. Cut the leaves from Mossy Meadow and Pear Pizzazz and adhere the pieces together.

Adhere the peony to the card front with glue dots. Adhere the leaves under the flower with glue dots. Make a bow with Real Red sheer ribbon and adhere a short length of Polka dot tulle ribbon behind it. Adhere it to the card and finish with three rhinestone gems.

Stamp the sentiment from the Peaceful Moments stamp set in Real Red ink on a Whisper White panel. Adhere a strip of the Heartwarming Hugs DSP to the bottom and adhere the panel to the inside of the card.

The Stampin’ Up! Prized Peony bundle is a beautiful set with gorgeous peony images as well as this innovative 3D die cut flower. It’s a must have if you love to make floral cards!

On with the Hop! Click the Next button below to visit Karen Ksenzakovic’s blog.

And just in case you get lost along the way, here’s a list of the team members participating in the hop today:


November 15-30 Host Code: N7E9DGB9

Use this host code when you order $50 or more and receive a free gift from me!  The gift is your choice of any item valued up to $10.00 in the 2019-20 Annual Catalog or in the 2020 January-June Mini Catalog!  That includes some of the Host Exclusive stamp sets!

If your order is over $150, please do not use the host code since you’ll receive your own Host Dollars plus I’ll still send you the free gift!  This host code can be used by anyone, no commitment required.  Let me know if you have any questions.


If you need any stamping supplies, I’d be very happy to be your Demonstrator.  Just click on the Shop Now Button on the right side of the screen to go directly to my online store or contact me if you have any questions.  Happy Stamping!

Thanks for visiting!

Akiko

  • Visit my online store here
  • See the current Stampin’ Up! clearance rack specials here
  • Earn FREE Stampin’ Up! products through my Wildflower Frequent Shopper Program – my way of saying thank you to my frequent shopper online customers.
  • Sign up for my weekly newsletter here
  • Have any questions? I’d be happy to help, click here to contact me.

Cardstock Cuts for this project:

  • Real Red – 5-1/2″ x 8-1/2″ card base scored at 4-1/4″, 4″ x 5-1/4″ (embossed panel)
  • Bumblebee – 1″ x 1-1/2″ (flower center)
  • Mossy Meadow – 2″ x 3″ (peony leaves)
  • Pear Pizzazz – 2-1/2″ x 3-1/2″ (peony leaves)
  • Whisper White – 4″ x 5-1/4″ (inside panel), 4″ x 4-3/4″ (peony flower), 1-3/4″ x 3″ (label)
  • Heartwarming Hugs DSP – 2-3/4″ x 4″ (red dotted panel), 2″ x 4-1/2″ (striped panel), 1/2″ x 5″ (inside trim)

Stampin’ Up! products used in this project:


Stampin’ Up! Ornate Style for the Happy Inkin’ Thursday Blog Hop

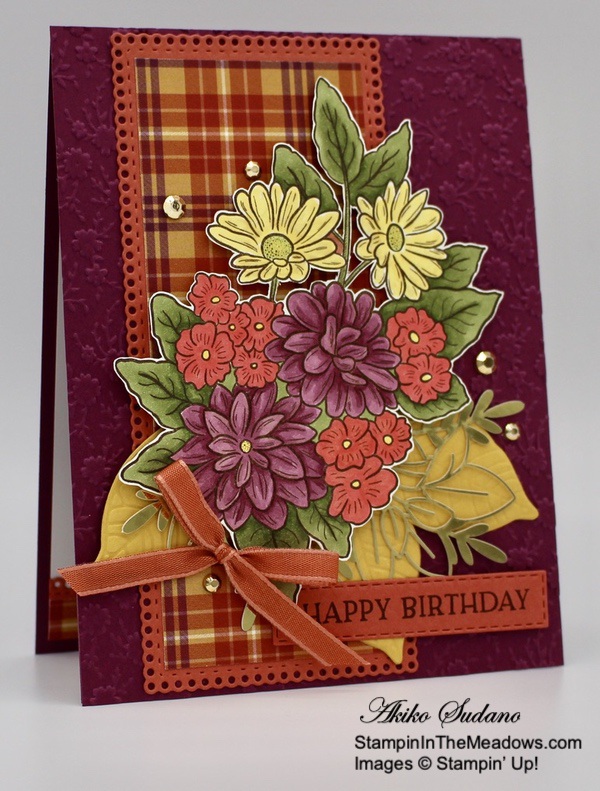
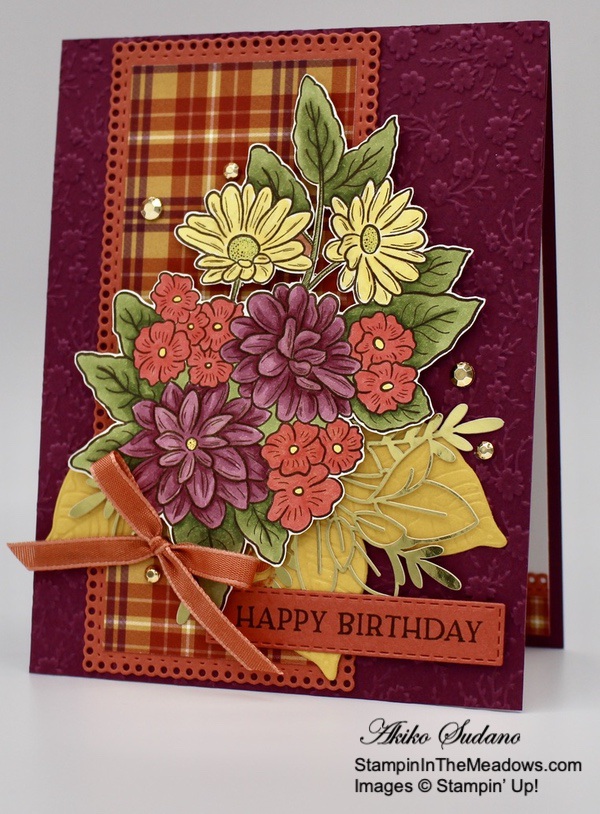
Good Morning! Welcome to another Happy Inkin’ Thursday Blog Hop! I just put out some purple mums by my front door and I wanted to pull out the Stampin’ Up! Ornate Style bundle so I could color it to match my mums. Then I saw that the our theme for this week is ‘Plaid’ and I thought that the plaid and flowers would be perfect together! This is what I came up with.

We have a theme challenge this week, and here is the theme we are using for our projects:

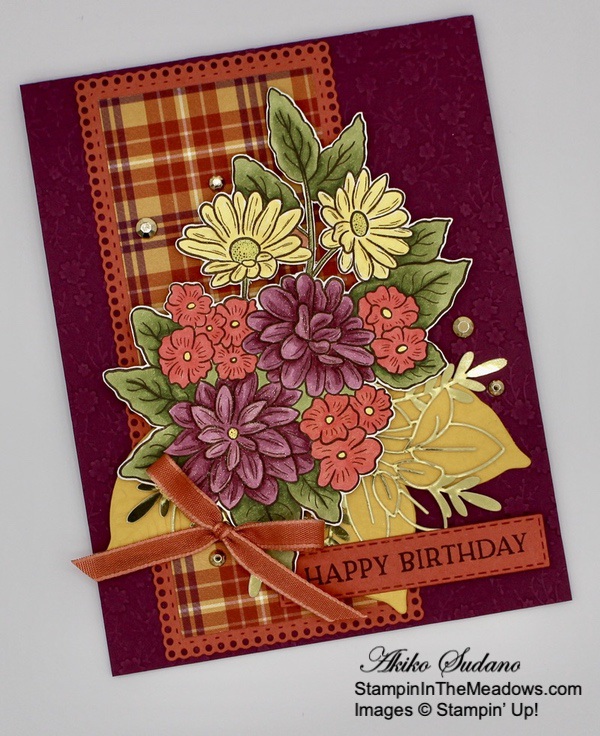
Emboss a Rich Razzleberry panel with the Ornate Floral 3D embossing folder and adhere it to the front of a Rich Razzleberry card base. Cut a Terracotta Tile panel with the Ornate Layers Die and adhere a panel of Plaid Tidings designer series paper to the front. Adhere the layered die cut to the front of the card. Cut and embossed three leaves from the Nature’s Roots dies in Bumblebee and adhere them to the bottom of the panel. Cut some branches from the Forever Gold Laser Cut specialty paper and adhere them to the top of the leaves.

Stamp the bouquet from the Stampin’ Up! Ornate Style cling stamp set in Early Espresso ink on a Whisper White panel. Color it with Rich Razzleberry, Mossy Meadow, Mango Melody, Granny Apple Green, Calypso Coral and Poppy Parade Stampin’ Blends. Fussy cut the image and brush clear Wink of Stella on the flowers.

Adhere the flowers to the card front with dimensionals. Stamp the Happy Birthday sentiment from the Blossoms in Bloom stamp set in Early Espresso ink on a strip of Terracotta Tile and cut it out with the long small die from the Stitched Rectangles Dies. Adhere it to the bottom of the card with liquid glue and dimensionals. Accent the card front with Gilded Gems and a Terracotta Tile bow.

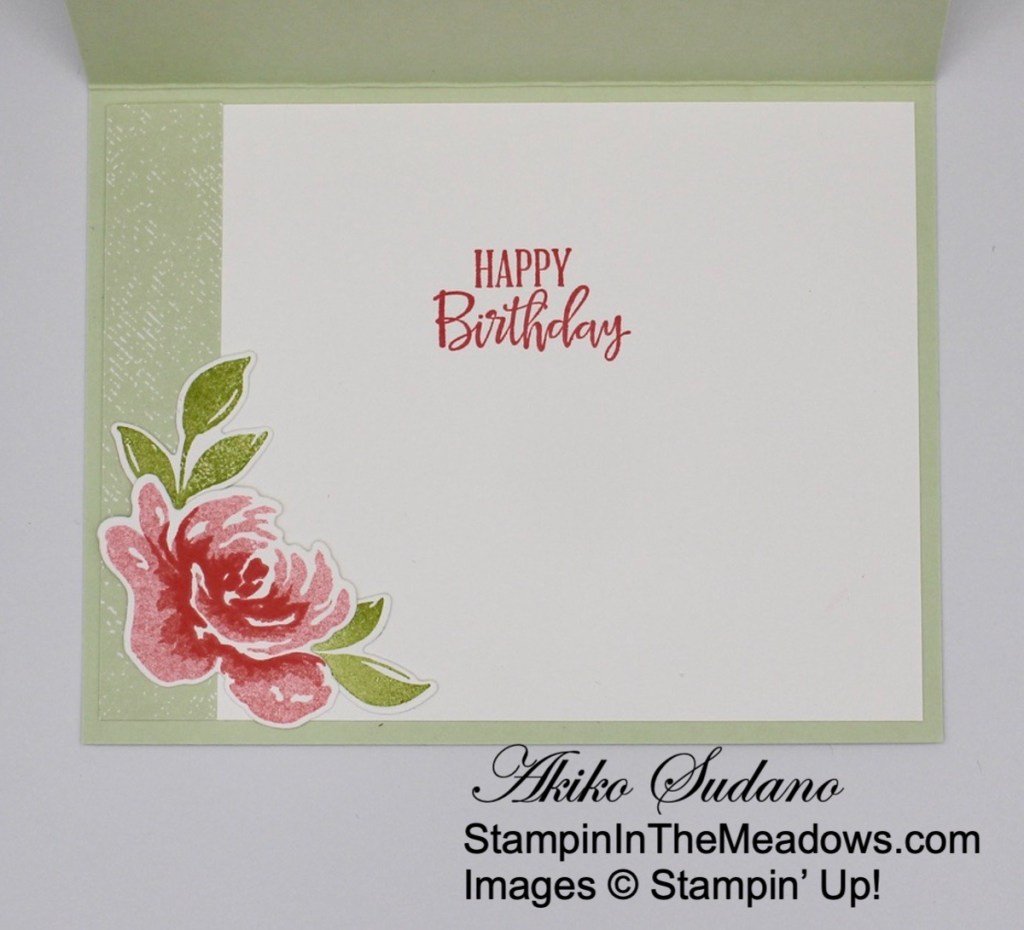
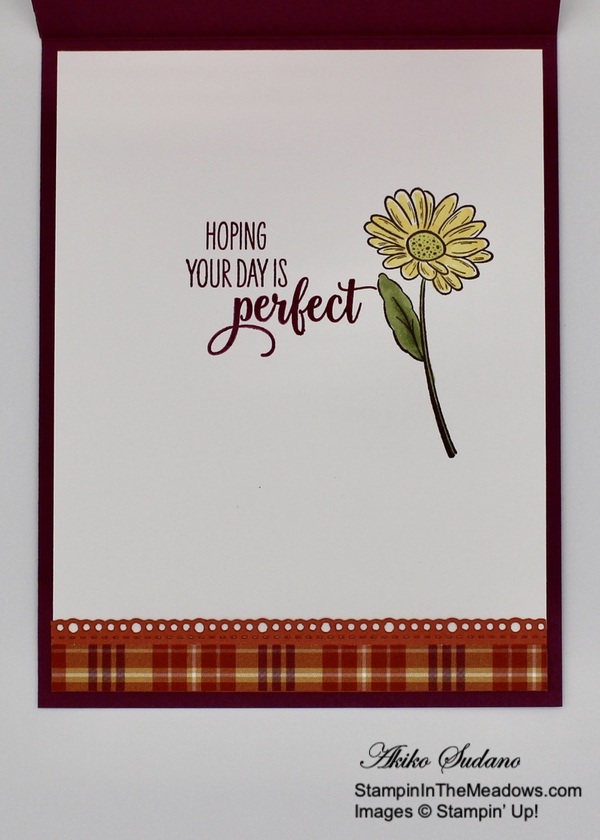
Stamp the sentiment from the Sending Sunshine stamp set in Rich Razzleberry ink on a Whisper White panel. Stamp the flower from the Stampin’ Up! Ornate Style Stamp set in Early Espresso ink next to the sentiment and color it with Mango Melody, Granny Apple Green and Mossy Meadow Stampin’ Blends. Cut a strip of Terracotta Tile with the Ornate Borders die and adhere a strip of Plaid Tidings DSP to the bottom. Adhere it to the bottom of the Whisper White panel and adhere the panel to the inside of the card.

The rich fall colors and the plaid give a different look to the beautiful flowers from the Stampin’ Up! Ornate Style stamp set, that is perfect for this time of year. So if you’ve got this bundle, pull it out and have fun creating a fall card! Oh, and the pretty Plaid Tidings designer series paper is on sale for 15% off!

On with the Hop! Click the Next button below to visit Karen Ksenzakovic’s blog.

And just in case you get lost along the way, here’s a list of the team members participating in the hop today:


Stampin’ Up! Designer Series Paper Sale Going on Now!

Stampin’ Up! has beautiful Designer Series Paper and during the Month of October they’re putting a select list of those on sale with a 15% discount! This is a fantastic opportunity for you to stock up and save on paper. And the sale includes some of the designs from the August-December 2020 Mini Catalog too! Get the full details on my Promotion Page or click on the image above to download a printable PDF with all the selections.  Click Here to shop the Designer Series Paper Sale in My Online Store now!


October 1-15 Host Code: F4UK7V36

Use this host code when you order $50 or more and receive a free gift from me!  The gift is your choice of any item valued up to $10.00 in the 2019-20 Annual Catalog or in the 2020 January-June Mini Catalog!  That includes some of the Host Exclusive stamp sets!

If your order is over $150, please do not use the host code since you’ll receive your own Host Dollars plus I’ll still send you the free gift!  This host code can be used by anyone, no commitment required.  Let me know if you have any questions.


If you need any stamping supplies, I’d be very happy to be your Demonstrator.  Just click on the Shop Now Button on the right side of the screen to go directly to my online store or contact me if you have any questions.  Happy Stamping!

Thanks for visiting!

Akiko

  • Visit my online store here
  • See the current Stampin’ Up! clearance rack specials here
  • Earn FREE Stampin’ Up! products through my Wildflower Frequent Shopper Program – my way of saying thank you to my frequent shopper online customers.
  • Sign up for my weekly newsletter here
  • Have any questions? I’d be happy to help, click here to contact me.

Cardstock Cuts for this project:

  • Rich Razzleberry – 4-1/4″ x 11″ card base scored at 5-1/2″, 4-1/4″ x 5-1/2″ (embossed panel)
  • Terracotta Tile – 2-3/4″ x 5-3/4″ (DSP mat), 5/8″ x 4″ (inside trim), 1-1/4″ x 3-1/4″ (label)
  • Whisper White – 4″ x 5-1/4″ (inside panel), 3-1/2″ x 4-3/4″ (flower bouquet)
  • Bumblebee – 3″ x 4″ (die cut leaves)
  • Plaid Tidings DSP – 2″ x 5″ (front panel), 3/8″ x 4″ (inside trim)
  • Forever Gold – trim leaves from the hexagon label

Stampin’ Up! products used in this project:


Stampin’ Up! Outdoor Barbecue Birthday Card for the Happy Inkin’ Thursday Blog Hop

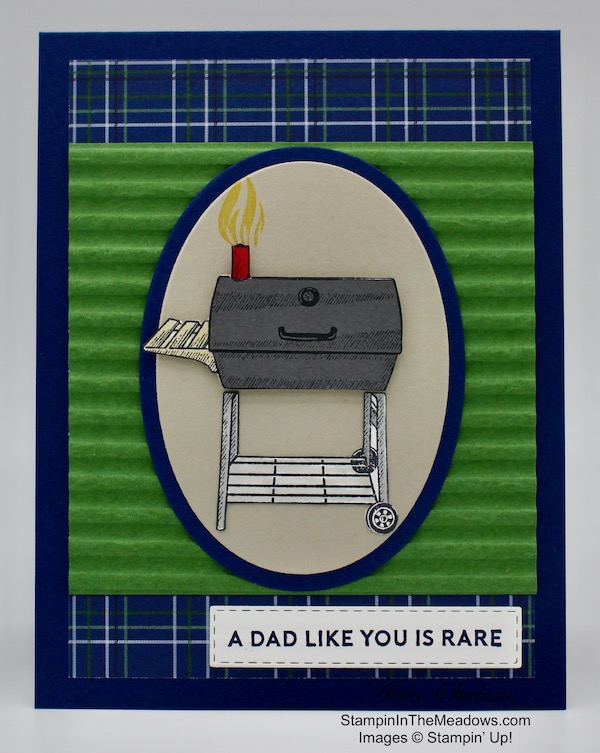
Good Morning! Welcome to the Happy Inkin’ Thursday Blog Hop! When I saw the Stampin’ Up! Outdoor Barbecue cling stamp set, I knew I had to have it. The men in my family love to cook and the barbecue grill is their main tool. So today’s card is dedicated to them! You can find the supplies I used to create this card at the bottom of my post along with the sizes of cardstock used.

We have a color challenge for the hop this week, and here is the color palette we are using:

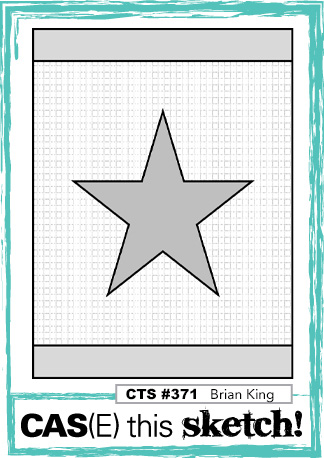
My layout was inspired by CAS(E) this Sketch #371:

I adhered a panel of the Night of Navy Plaid Country Club designer series paper to a Night of Navy card base with multipurpose liquid glue. I embossed a Garden Green square with the Corrugated 3D embossing folder and adhered it to the panel with multipurpose liquid glue. I used the Layering Ovals Dies to cut Sahara Sand and Night of Navy Ovals for the background.

I stamped the grill from the Stampin’ Up! Outdoor Barbecue stamp set in Memento Tuxedo Black on a Whisper White panel. I also stamped the top of the grill in Memento Tuxedo Black on a Basic Gray panel and fussy cut it out. I fussy cut the Whisper White grill, making two pieces – the top and bottom. I colored the bottom with Smoky Slate Stampin Blends and the Whisper White top with Ivory (shelf) and Real Red (chimney) Stampin Blends and adhered the Basic Gray hood on top. I positioned the grill parts on the Sahara Sand panel and stamped the flame from the Stampin’ Up! Outdoor Barbecue stamp set in Daffodil Delight.

I adhered the Sahara Sand oval to the Night of Navy oval with multipurpose liquid glue. I attached the bottom of the grill with multipurpose liquid glue and the top with dimensionals. I adhered the oval to the card base with multipurpose liquid glue. I stamped the sentiment from the Stampin’ Up! Outdoor Barbecue stamp set in Night of Navy ink on a strip of Whisper White. I cut it out with the long small Stitched Rectangle Die and adhered it to the card front with multipurpose liquid glue.

For the inside of the card, I stamped the sentiment from the Band Together stamp set in Night of Navy ink on a panel of Whisper White. I stamped the burger in the bottom corner and colored it with Granny Apple Green, Poppy Parade, Pumpkin Pie and Ivory Stampin Blends. I adhered a strip of the Night of Navy plaid DSP to the bottom and adhered it to a Garden Green mat with multipurpose liquid glue. I adhered the layered panel to the inside of the card.

Sadly, the Stampin’ Up! Outdoor Barbecue stamp set is on the retiring list and won’t be around for much longer, but I am so ready for a summer cook out! The menu can be burgers & hot dogs, or steaks, or ribs or even grilled veggies. What’s your favorite summer cook out dish?

On with the Hop! Click the Next button below to visit Karen Ksenzakovic’s blog.

And just in case you get lost along the way, here’s a list of the team members participating in the hop today:


Stampin’ Up! Last Chance Products are Going Fast!

Stampin’ Up has posted the retirement lists for the 2019-2020 Annual Catalog and January-June 2020 Mini Catalog in preparation for the release of the new 2020-2021 Annual Catalog. The items on the lists are only available while supplies last from now through June 2!  And some of the items are available at a discount!!

Click on the picture below to head over to my Online Store to shop the retiring products:

Have fun shopping and let me know if you have any questions!


The June Paper Pumpkin Kit is a Box of Sunshine!

What is a Box of Sunshine? It is a box filled with yellow, happy fun things to cheer the recipient! The June Paper Pumpkin kit is an exclusive Sara-inspired to help you #sharesunshine. It includes supplies for eight handmade cards and is specially designed to help you create a box full of cheer. Once you’ve made all the cards, use any leftover pieces to decorate the box. Fill it with yellow goodies, add the included adhesive label, address it to someone special, and brighten their life with a little sunshine! See my Promotions page for all the details.

If you’re interested in subscribing to Paper Pumpkin, you can either sign up for a subscription where you are billed monthly for your kit or you can purchase a prepaid subscription in my online store. To see more information and to sign up for the monthly subscription click here. To see the options for prepaid subscriptions in my online store, click here.


May 1 – 15 Host Code: T323M33B

May 16 – 31 Host Code: Z6VYEYYK

Use this host code when you order $50 or more and receive a free gift from me!  The gift is your choice of any item valued up to $10.00 in the 2019-20 Annual Catalog or in the 2020 January-June Mini Catalog!  That includes some of the Host Exclusive stamp sets!

If your order is over $150, please do not use the host code since you’ll receive your own Host Dollars plus I’ll still send you the free gift!  This host code can be used by anyone, no commitment required.  Let me know if you have any questions.


If you need any stamping supplies, I’d be very happy to be your Demonstrator.  Just click on the Shop Now Button on the right side of the screen to go directly to my online store or contact me if you have any questions.  Happy Stamping!

Thanks for visiting!

Akiko

  • Visit my online store here
  • See the current Stampin’ Up! clearance rack specials here
  • Earn FREE Stampin’ Up! products through my Wildflower Frequent Shopper Program – my way of saying thank you to my frequent shopper online customers.
  • Sign up for my weekly newsletter here
  • Have any questions? I’d be happy to help, click here to contact me.

Cardstock Cuts for this project:

  • Night of Navy – 4-1/4″ x 11″ card base scored at 5-1/2″, 3″ x 4″ (oval die cut)
  • Garden Green – 3-3/4″ x 3-3/4″ (embossed panel), 4″ x 5-1/4″ (inside mat)
  • Sahara Sand – 2-1/2″ x 3-1/2″ (oval die cut)
  • Basic Gray – 1-1/2″ x 2″ (grill hood)
  • Whisper White – 3-3/4″ x 5″ (inside panel), 2-1/2″ x 3″ (grill), 1″ x 3″ (label)

Stampin’ Up! products used in this project: