Stampin’ Up! Garden Grandeur Thank You Card

Good Morning! One of the nice things about hosting a Stampin’ Up! workshop is that you can earn free exclusive products when your workshop orders total $150 or more (before shipping and taxes).  These products can only be purchased with Host Dollars earned through a workshop.  Also, if you have a long shopping list and you place an order of $150 or more, you will receive Host Dollars that you can use to purchase of these items!  I chose two of the Host items for my card today – the Stampin’ Up! Garden Grandeur stamp set and the Design a Daydream designer series paper. You can find the supplies I used at the bottom of my post along with the sizes of cardstock used.

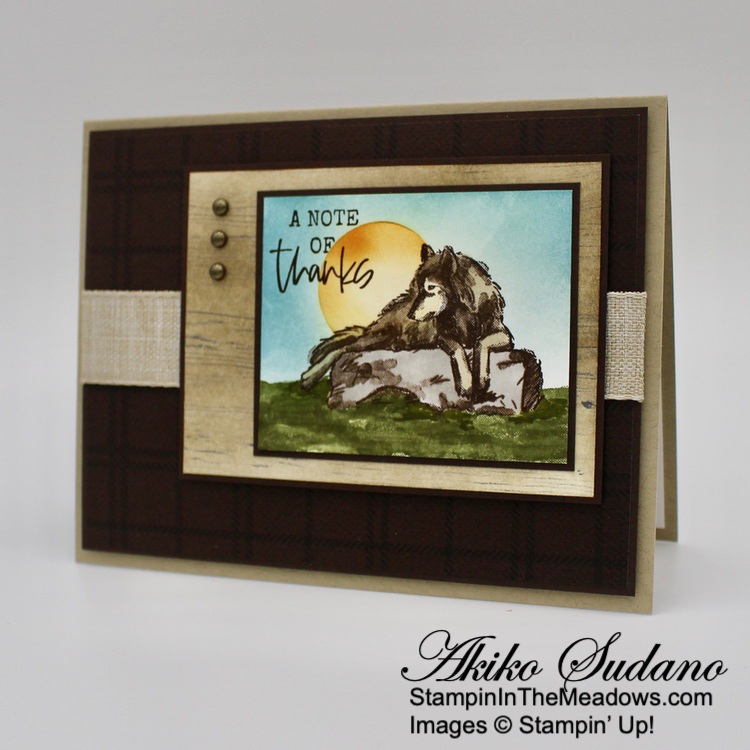
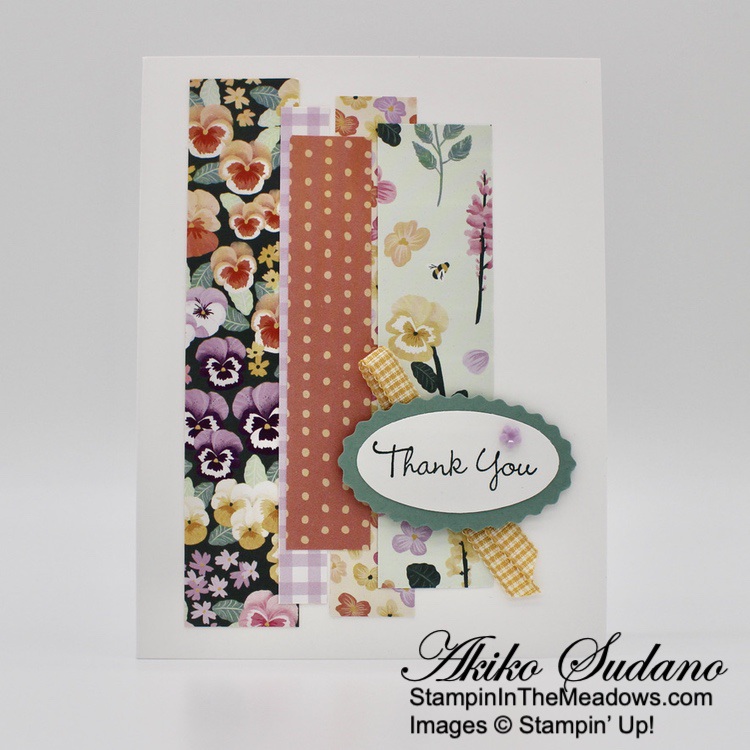
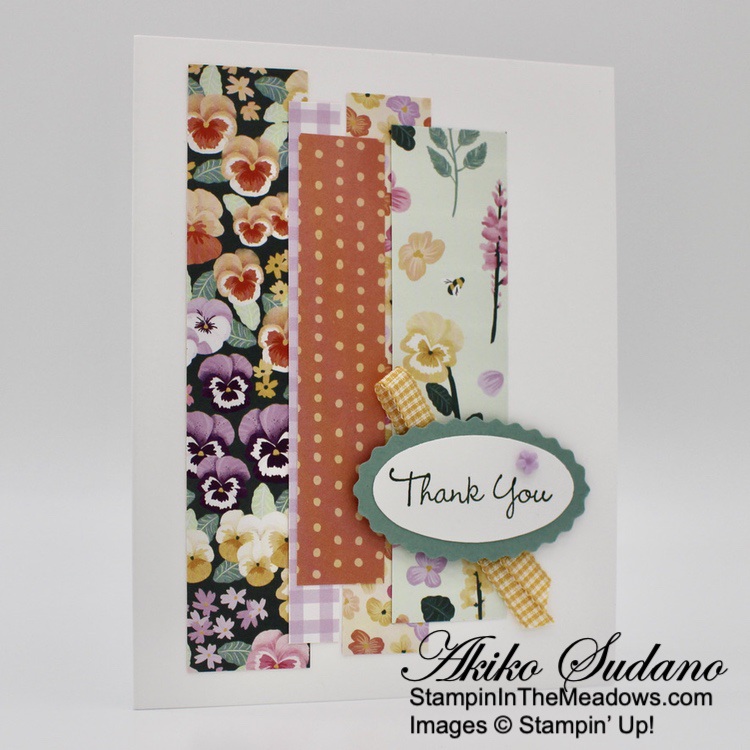
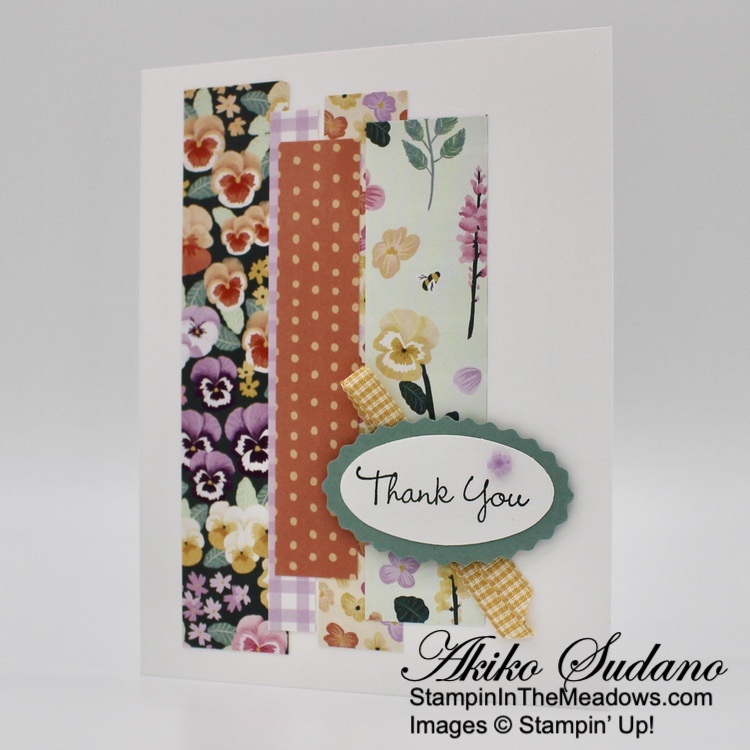
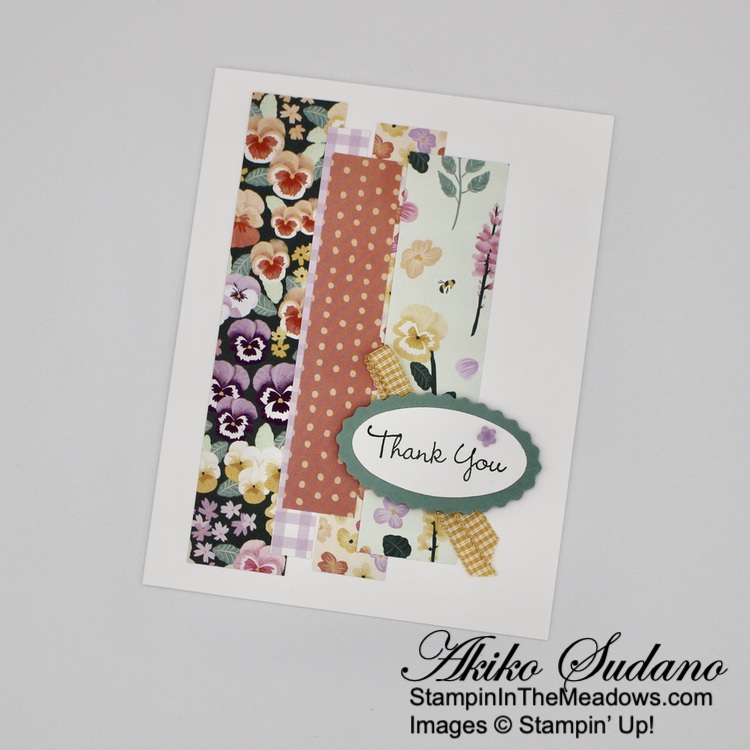
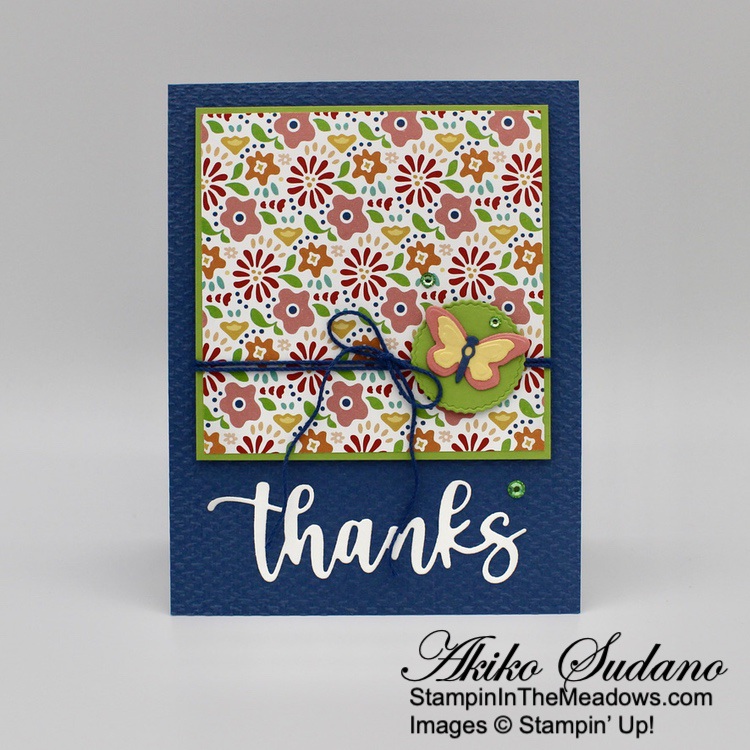
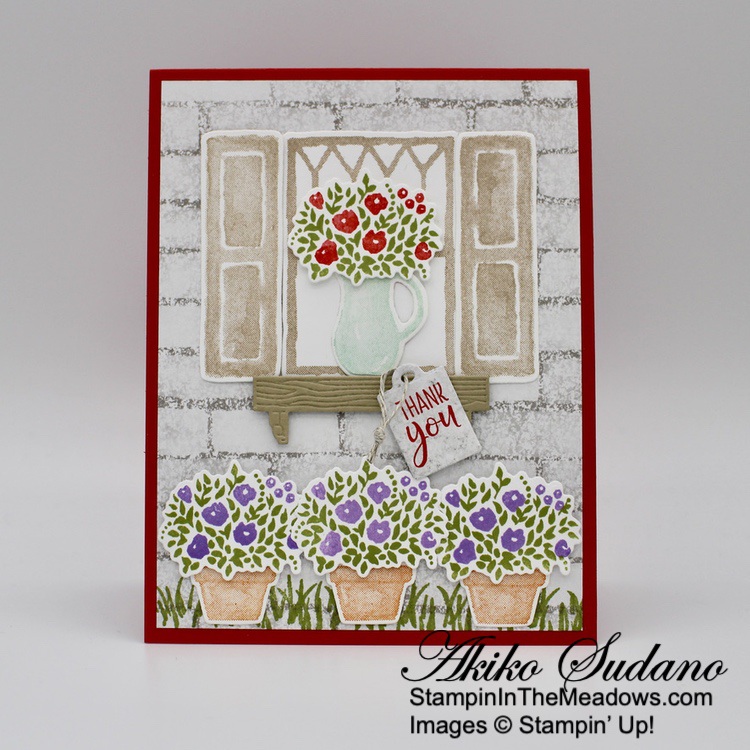
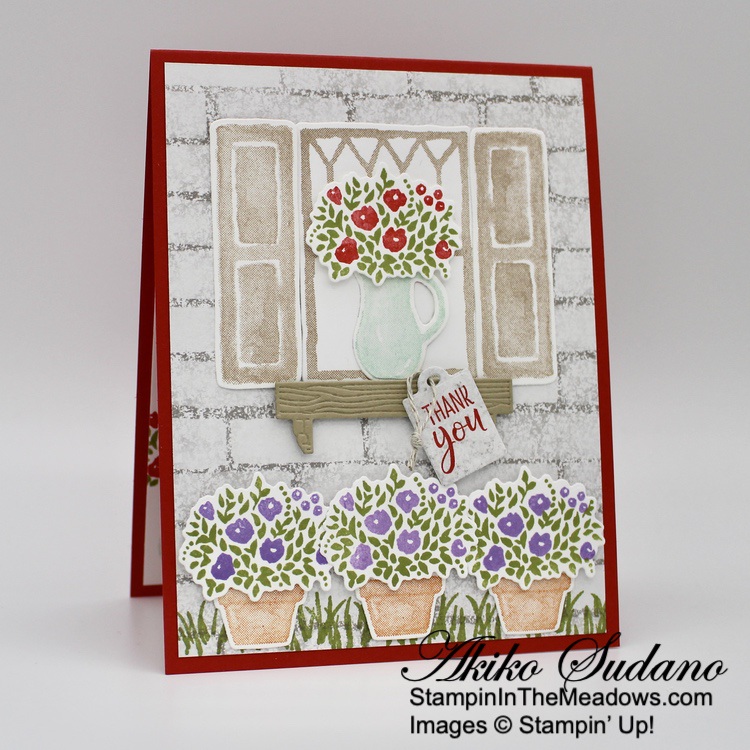
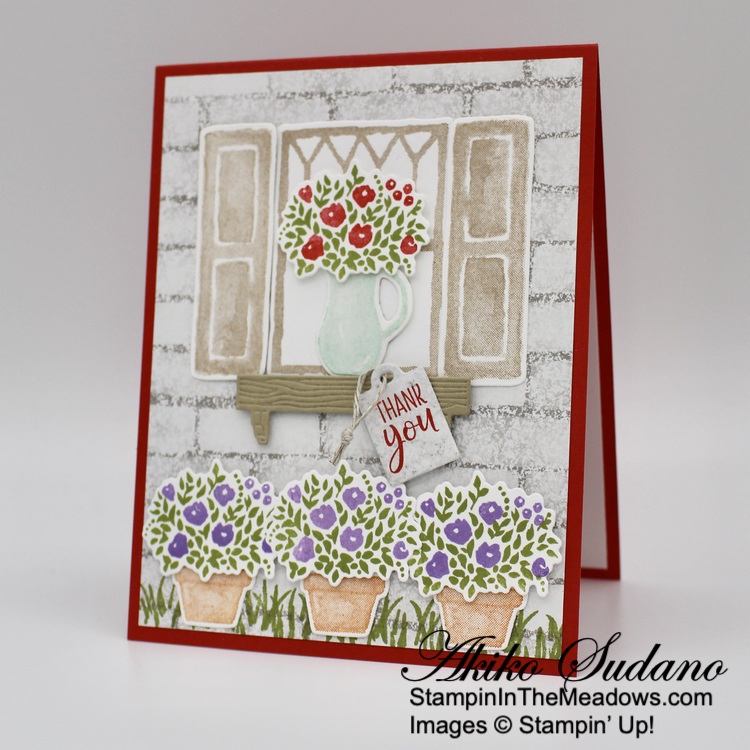
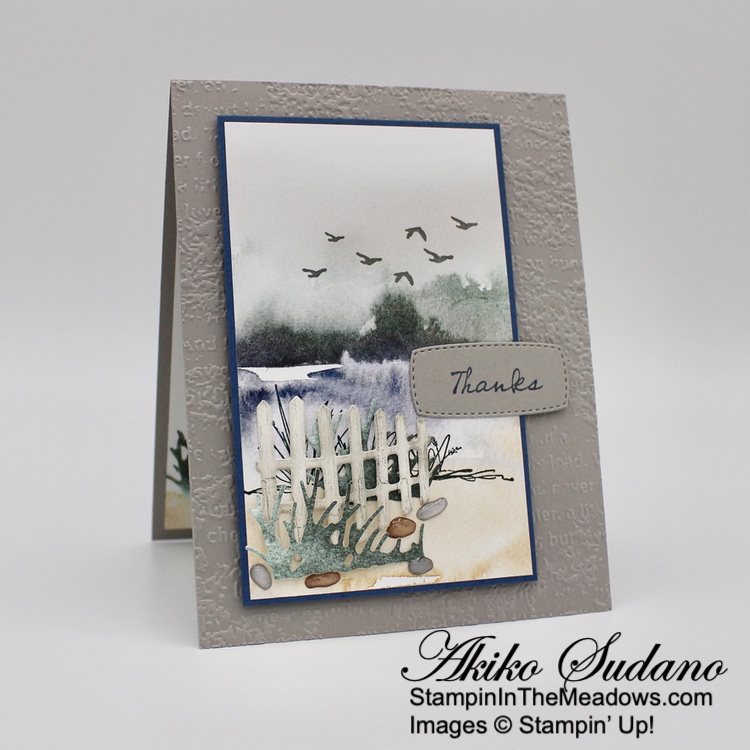
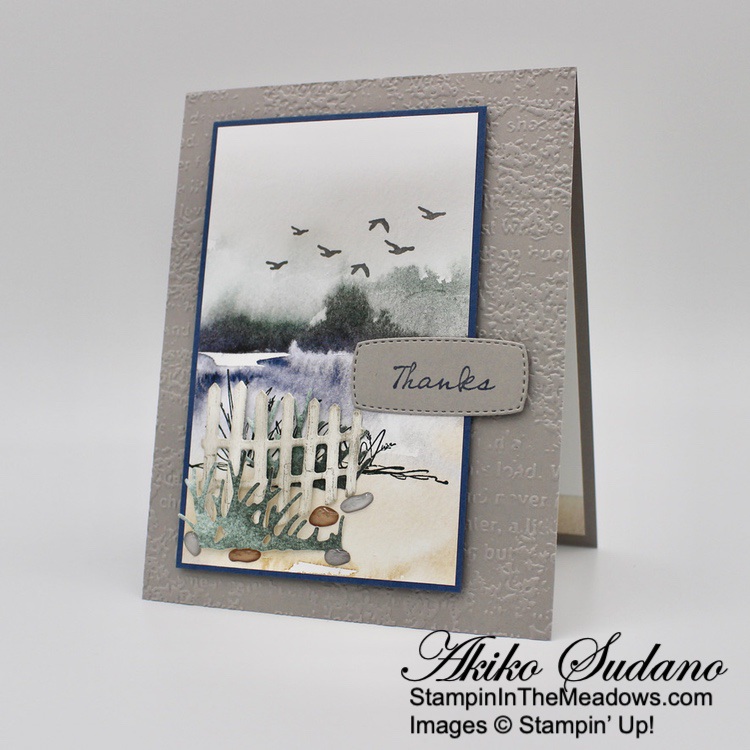
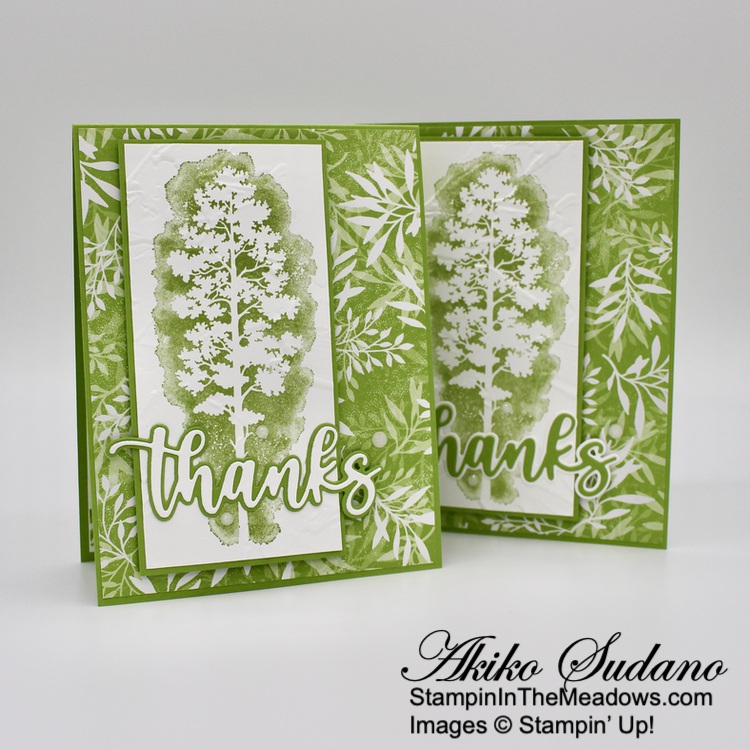
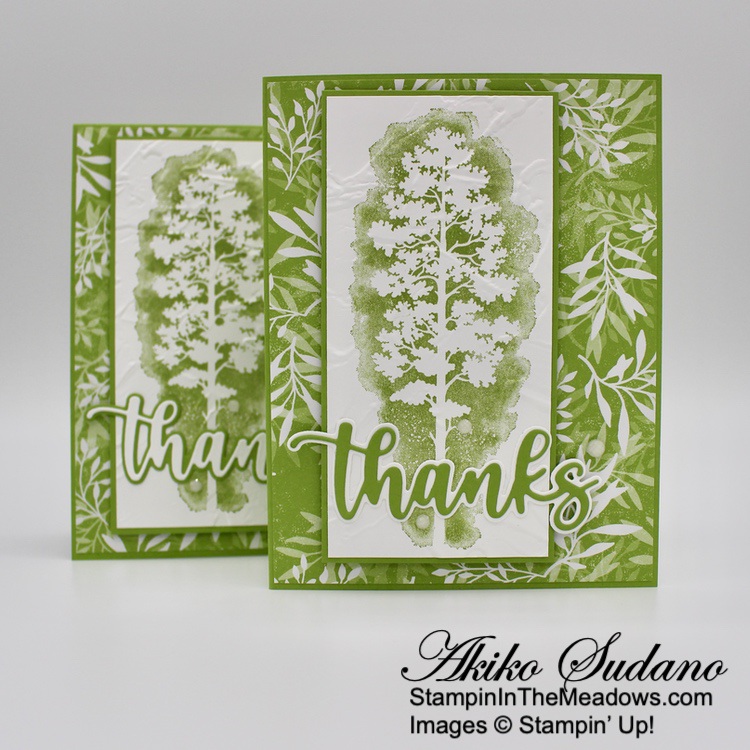
I cut a panel of the Design A Daydream Host designer series paper with the largest Deckled rectangles die and adhered it to the front of a Fresh Freesia card base.  I embossed a panel of Basic White with the Pretty Flowers embossing folder and then cut it out with the third smallest Deckled Rectangles Die and I was pleased that embossing was still visible, just a bit subtler.  I adhered the embossed die cut to the card front with liquid glue.

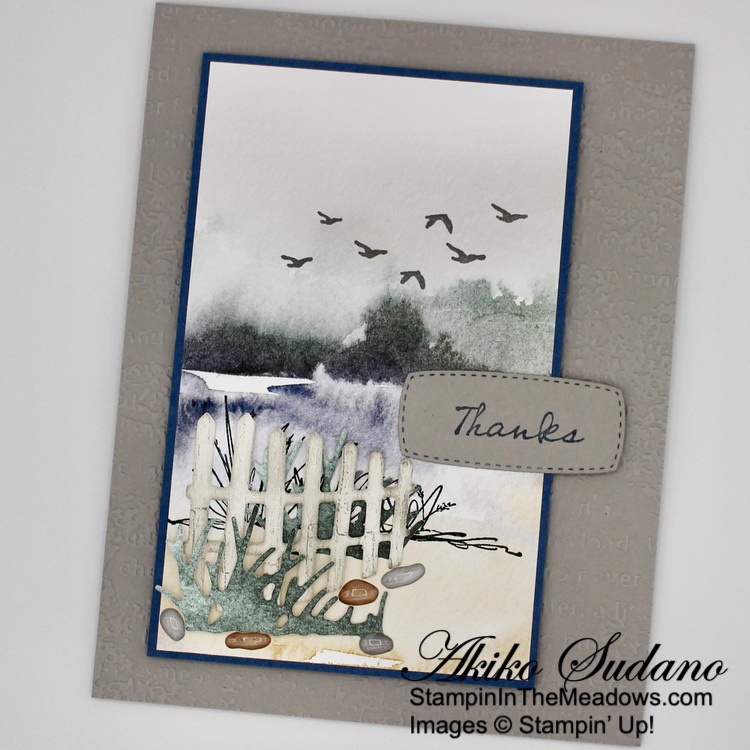
I stamped two of the flowers from the Stampin’ Up! Garden Grandeur Host stamp set in Blackberry Bliss ink on Fresh Freesia card stock and fussy cut them out.  I stamped two sets of leaves in Old Olive ink on Old Olive card stock and fussy cut them out.  I adhered the leaves to the card front with liquid glue and popped the flowers on with dimensionals.

I stamped the sentiment from the Beauty of Friendship stamp set in Blackberry Bliss on Basic White.  I wanted to frame the sentiment with the deckled rectangle but there wasn’t one that was the right size.  I selected a die that approximated the length of label I wanted and placed it on the stamped sentiment to cut three sides.  Then I moved it and cut the fourth side.  I love the random edge of these dies, and it makes it easy to use a two-step die cutting technique to get a custom size for a sentiment label.  I adhered the label over the flowers with glue dots and finished with a fresh Freesia bow and Fresh Freesia In Color Opal rounds for the flower centers.

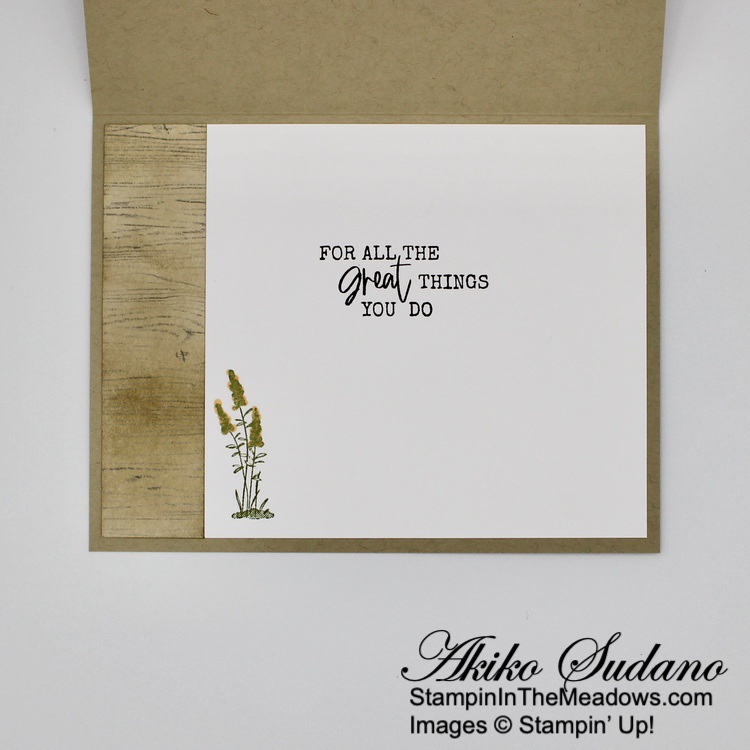
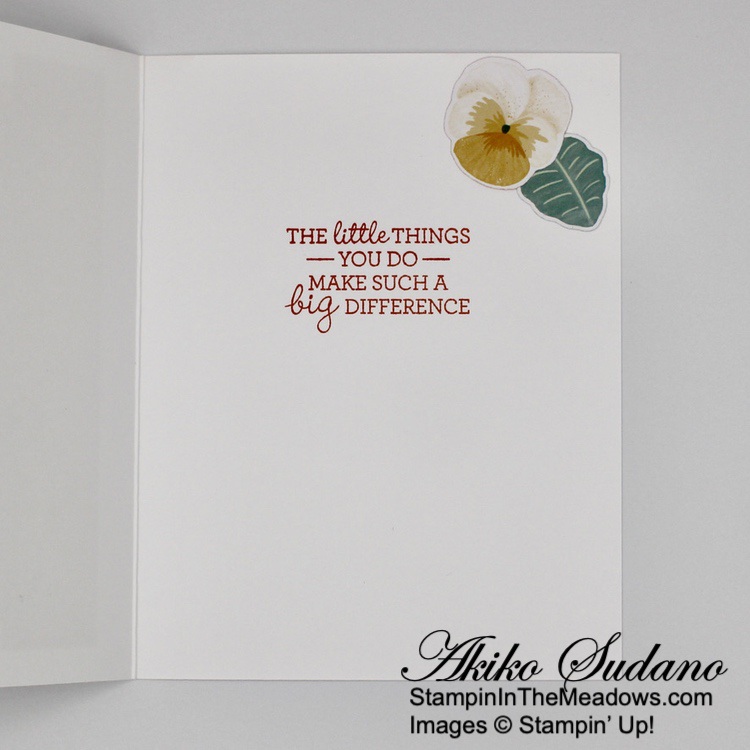
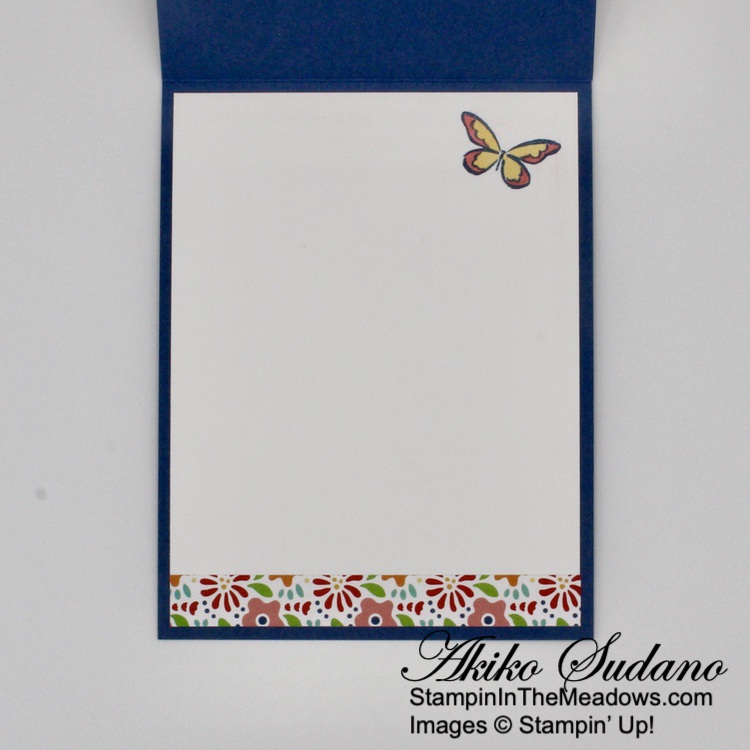
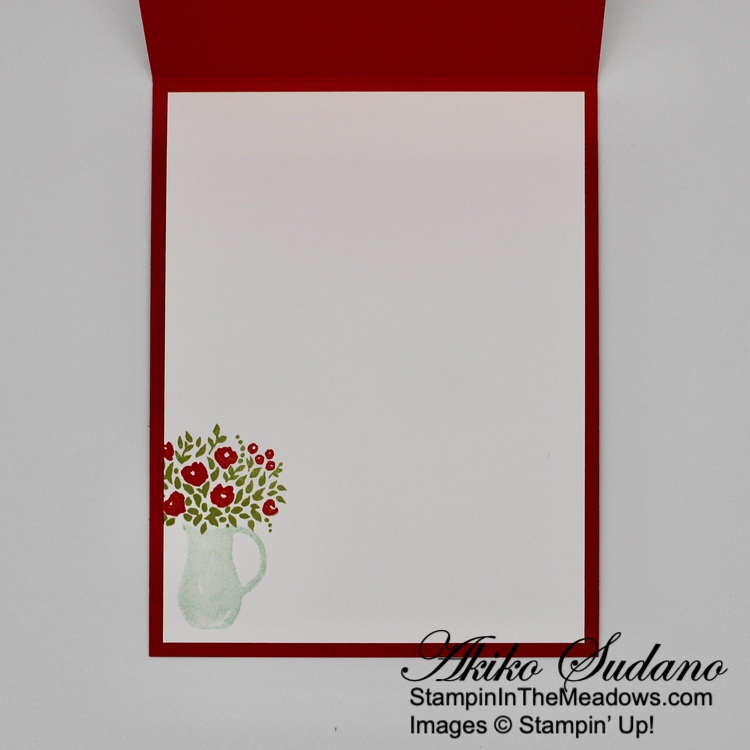
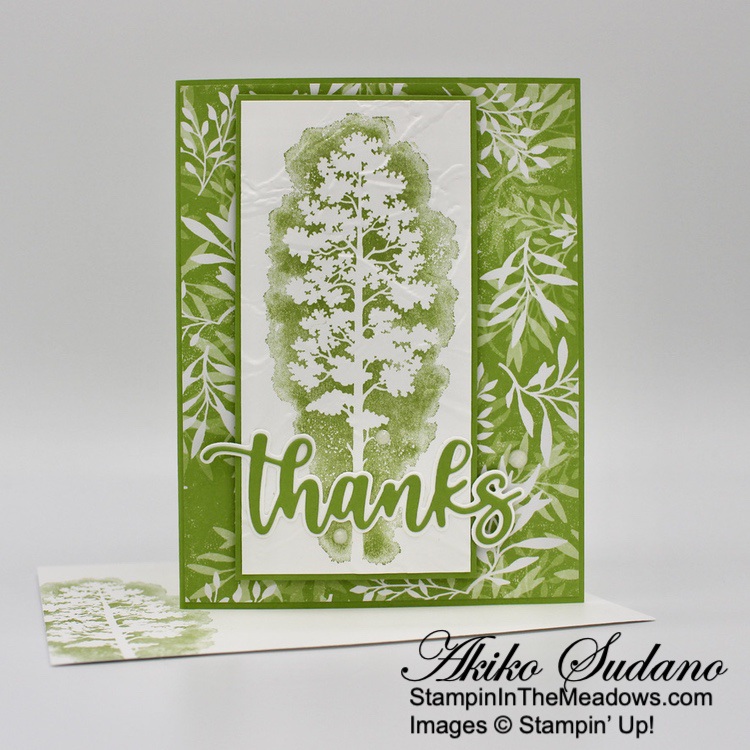
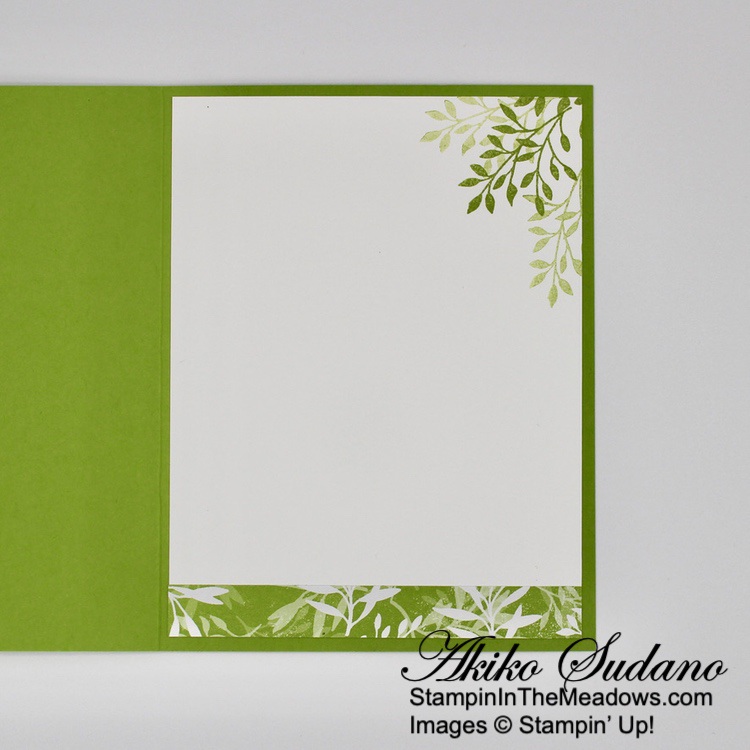
For the inside of the card, I stamped the flowers from the Stampin’ Up! Garden Grandeur stamp set in Blackberry Bliss on the borders of a Basic White panel.  I stamped some leaves in Old Olive and cut the panel with the largest Deckled Rectangles die. I adhered the die cut panel to the inside of the card.

The Stampin’ Up! Garden Grandeur stamp set has pretty free flowing line art flowers and leaves with filler stamps to create pretty two-step stamping images and is only one of the items that can only be purchased with Host Dollars. To see all the Host items currently available, click HERE.


Sale-A-Bration is Going on Now!

With Sale-A-Bration going on through August 31, and the new Mini Catalog, now is a great time to stock up on supplies for Holiday card making and gifts. For every $50 or $100 in orders (before shipping and taxes) you get to choose a free item from nine available stamp sets, dies and papers. And there are extra bonuses for Hosting and Joining Too. Click HERE to download the Sale-A-Bration brochure to learn more. Please note that Sale-A-Bration items are only available while supplies last, so shop early to get the bonus item you really want!


Current Host Code: QNGMH7CB

Use this host code when you order $50 or more and receive a free gift from me!  The free gift is your choice of any item currently available valued up to $10.00 from the July-December 2022 Mini Catalog or the 2022-2023 Annual Catalog!

If your order is over $150, please do not use the host code since you’ll receive your own Host Dollars plus I’ll still send you the free gift!  This host code can be used by anyone, no club or commitment required. Let me know if you have any questions.


If you need any stamping supplies, I’d be very happy to be your Demonstrator.  Just click on the Shop Now button on the right side of the screen to go directly to my online store or contact me if you have any questions.  Happy Stamping!

Thanks for stopping by and have a great week!

Akiko

  • Visit my online store here
  • See the current Stampin’ Up! clearance rack specials here
  • Earn FREE Stampin’ Up! products through my Wildflower Frequent Shopper Program – my way of saying thank you to my online frequent shopper customers.
  • Have any questions? I’d be happy to help, click here to contact me.

Cardstock Cuts for this project:

  • Fresh Freesia – 4-1/4″ x 11″ card base scored at 5-1/2″, 2-1/2″ x 4″ (fussy cut flowers)
  • Pear Pizzazz – 1-1/2″ x 2-1/4″ (fussy cut leaves)
  • Basic White – 4-1/4″ x 5-1/2″ (inside panel), 1″ x 2-1/2″ (label), 2-1/2″ x 4″ (embossed panel)
  • Design a Daydream Host DSP – 4-1/4″ x 5-1/2″ (front background)

Stampin’ Up! products used in this project:


Stampin’ Up! Wildlife Wonder for the Happy Inkin’ Thursday Blog Hop

Good morning and welcome to the Happy Inkin’ Thursday Blog Hop! I made a masculine thank you card with the wonderful Stampin’ Up! Wildlife Wonder cling stamp set. You can find the supplies I used along with card stock cuts at the bottom of my post.

We have a theme challenge this week and we are making cards with critters! How fun!

And I’m entering my card in the challenge at the Card Concept #177. The theme for this Challenge is ‘Make it Masculine’ and I was inspired by the plaids and outdoor themes in the inspiration picture to make a clean and layered card. Here is the inspiration picture:

I adhered a panel of plaid He’s the Man designer series paper to an Early Espresso mat and wrapped a length of natural ribbon around it, securing it in the back with tape. I adhered it to a Crumb Cake card base with dimensionals. I used a blending brush to blend Soft Suede ink on a wood grained panel of Heart and Home DSP and I love how it came out! I adhered that panel to an Early Espresso mat and then popped it on the card front with dimensionals.

I stamped the wolf from the Stampin’ Up! Wildlife Wonder stamp set in Early Espresso on Basic White and colored the wolf with Crumb Cake Stampin’ Blends and the rock in Gray Granite. I stamped the image again on masking paper and fussy cut it out. I covered the wolf with the mask and stamped the ground in Old Olive multiple times with the ground stamp.

I cut a circle in another sheet of masking paper and used it to make a Mango Melody sun behind the wolf with a blending brush. I covered the sun with the circle mask and blended the sky background in Balmy Blue ink with a blending brush. I removed all the masks and stamped the sentiment from the Stampin’ Up! Wildlife Wonder Stamp set in Early Espresso ink. I adhered the wolf panel to an Early Espresso mat and adhered it to the card front with liquid glue. I finished the card with three rustic metallic dots.

For the inside, I stamped the sentiment from the Stampin’ Up! Wildlife Wonder stamp set in Early Espresso on a Basic White panel. I stamped the plant in Old Olive and colored the tops with light Pumpkin Pie Stampin’ Blend. I blended Soft Suede on another woodgrain panel of Heart and Home DSP and adhered it to the side of the panel with liquid glue. I adhered the panel to the inside of the card with Stampin’ Seal.

The Stampin’ Up! Wildlife Wonder stamp set is another in a long line of gorgeous Stampin’ Up! natural wildlife stamp sets, and it’s another winner! These are perfect for masculine cards for any occasion and I have always enjoyed making natural backgrounds using different coloring techniques.

On with the Hop! Click on the Next Blog button to move forward to see the beautiful project Karen Ksenzakovic has created.

If you get lost along the way, here are the participants for the hop:


Current Host Code: MHHQUNTF

Use this host code when you order $50 or more and receive a free gift from me!  The free gift is your choice of any available item valued up to $10.00 in the 2022 – 2023 Annual Catalog or the January – June 2022 Mini Catalog!

If your order is over $150, please do not use the host code since you’ll receive your own Host Dollars plus I’ll still send you the free gift!  This host code can be used by anyone, no club or commitment required. Let me know if you have any questions.


If you need any stamping supplies, I’d be very happy to be your Demonstrator.  Just click on the Shop Now button on the right side of the screen to go directly to my online store or contact me if you have any questions. 

Thanks for stopping by and Happy Stamping!

Akiko

  • Visit my online store here
  • See the current Stampin’ Up! clearance rack specials here
  • Earn FREE Stampin’ Up! products through my Wildflower Frequent Shopper Program – my way of saying thank you to my online frequent shopper customers.
  • Have any questions? I’d be happy to help, click here to contact me.

Cardstock Cuts for this project:

  • Crumb Cake – 5-1/2″ x 8-1/2″ card base scored at 4-1/4″
  • Early Espresso – 4″ x 5-1/4″ (front mat), 2-7/8″ x 3-7/8″ (DSP mat), 2-3/8″ x 2-7/8″ (wolf mat)
  • Basic White – 4″ x 5-1/4″ (inside panel), 2-1/4″ x 2-3/4″ (art panel)
  • He’s The Man DSP – 3-7/8″ x 5-1/8″ (front background)
  • Heart & Home DSP – 2-3/4″ x 3-3/4″ (front wood grain panel), 1″ x 4″ (inside trim)

Stampin’ Up! products used in this project:


Stampin’ Up! Sweet Songbirds Card with Video Tutorial

Good Morning! The Stampin’ Up! Sweet Songbirds bundle is a happy and sweet little photopolymer stamp set that comes with the Songbird Builder Punch. I paired it with the Design a Daydream designer series paper for today’s card that I made yesterday afternoon for my Facebook Live. You can find the supplies I used in my video at the bottom of my post along with the sizes of cardstock used.

Here is the link to the Facebook Live video from yesterday. I also posted a copy of the video in my YouTube channel and you can view it here.

I folded and burnished the folds of both the large and smaller card base in mountain and valley fashion so that the large panel would be in the back for the large card base and the large panel would be in the front for the small card base. I adhered the three panels of the leaf pattern Design a Daydream designer series paper to the larger card base with liquid glue. I adhered the floral pattern DSP to the large section of the smaller card base and the striped pattern to the middle section.

I folded the small card base and applied Tear & Tape to the back of the small section. I removed the tape covers and adhered it to the center of the large panel of the large card base. I opened the small base and closed the large base so it overlapped the small card and applied Tear & Tape to the front inside edge of the large base and the back edge of the large section of the small base. I removed the tape covers and closed the small card and pressed the taped sections. This makes the double Z design from the top of the card.

I cut a circle from Basic White using the second largest circle from the Stylish Shapes dies and stamped the the circle with the Stampin’ Up! Sweet Songbirds branch in Soft Suede, leaves in Pear Pizzazz and music notes in Blackberry Bliss. I used the Songbird punch to punch the birdie and wing from Pool Party, the little beak from Daffodil Delight and the belly from Basic White.

I adhered the belly and beak to the bird with liquid glue and stamped the eyes in Blackberry Bliss. I adhered the wing to the bird with a dimensional. I stamped the sentiment from the Stampin’ Up! Sweet Songbirds stamp set in Blackberry Bliss on Daffodil Delight and cut it out with the small banner die from the Stylish Shapes dies. I adhered the sentiment to the card front with glue dots and popped the stamped circle on top with dimensionals. I popped the bird on the circle with dimensionals and finished the front with three shiny resin Daffodil Delight flowers. Note that I forgot to put them on in the video, so I put them on afterwards. LOL.

I stamped the branch from the Stampin’ Up! Sweet Songbirds stamp set in Soft Suede across the top of a Basic White panel. I stamped the leaves in Pear Pizzazz and part of the notes in Blackberry Bliss. I stamped some flowers in Daffodil Delight and adhered the panel to the inside of the small card.

This Double Z-Fold card will open flat, so you could replace the smaller card middle section with a Basic White decorated panel if you wanted more space to write a personal note. The Double Z-Fold is pretty easy to do, and makes your handmade card extra special. And the Stampin’ Up! Sweet Songbirds bundle is so cute that everyone will be smiling!


Current Host Code: ZFMCWFCA

Use this host code when you order $50 or more and receive a free gift from me!  The free gift is your choice of any item valued up to $10.00 from the January – June 2022 Mini Catalog or the 2022-2023 Annual Catalog!

If your order is over $150, please do not use the host code since you’ll receive your own Host Dollars plus I’ll still send you the free gift!  This host code can be used by anyone, no club or commitment required. Let me know if you have any questions.


If you need any stamping supplies, I’d be very happy to be your Demonstrator.  Just click on the Shop Now button on the right side of the screen to go directly to my online store or contact me if you have any questions.  Happy Stamping!

Thanks for stopping by and have a great week!

Akiko

  • Visit my online store here
  • See the current Stampin’ Up! clearance rack specials here
  • Earn FREE Stampin’ Up! products through my Wildflower Frequent Shopper Program – my way of saying thank you to my online frequent shopper customers.
  • Have any questions? I’d be happy to help, click here to contact me.

Cardstock Cuts for this project:

  • Pool Party – 4-1/4″ x 11″ card base scored at 2-3/4″ and 5-1/2″, 3-1/2″ x 9-3/4″ inner card scored at 2-3/4″ and 5-1/2″, 2-1/2″ x 2-1/2″ (bird)
  • Daffodil Delight – 1″ x 3″ (label and beak)
  • Basic White – 3-1/4″ x 2-1/2″ (inside panel), 3″ x 3″ (die cut circle), 1″ x 2″ (belly)
  • Design a Daydream DSP
    • Leaf pattern – 4″ x 5-1/4″, two 2-1/2″ x 4″ panels
    • Flower pattern – 3-3/4″ x 4″
    • Stripe pattern – 2-1/2″ x 3-1/2″

Stampin’ Up! products used in this project:


Stampin’ Up! Pansy Patch Thank You Card

Good Morning! The Stampin’ Up! Pansy Patch bundle is carrying over into the new 2022 – 2023 Annual catalog so YAY! With sweet sentiments, and wonderful dies, it’s definitely a favorite. But unfortunately the pretty Pansy Petals DSP is retiring, so I wanted to use it to make a simple card using scrappy strips of the pretty paper. You can find the supplies I used at the bottom of my post along with the sizes of cardstock used.

I selected 5 scrappy strips of the Pansy Petals designer series paper between 3″ – 5″ long and 1/2″ – 1″ wide. I cut a Thick Basic White card base and arranged the strips on the card base. Since some of the designs have a distinct up direction, I was careful to make sure the flowers weren’t upside down or sideways and the colors looked good next to each other. It’s relaxing to rearrange the strips to get the right combination.

Once I got the arrangement I liked, I took a picture with my phone and used it to recreate the design with adhesive, adhering each strip and for this design, I tried to keep them straight. I stamped the sentiment from the Stampin’ Up! Pansy Patch stamp set in Evening Evergreen on Basic White and cut it out with the Oval Double Punch. I cut a Soft Succulent panel with the scalloped Oval from the punch and adhered them together.

I folded a length of Bumble gingham ribbon and adhered it to the card front with glue dots and adhered the label on top with dimensionals. I finished the label with a small Fresh Freesia flower. There are so many different ways to add additional layers to this design and step it up for a fancier design. This DSP is so pretty that it can stand on it’s own and the design is simple enough for anyone to make!

For the inside of the card, I stamped the sentiment from the Stampin’ Up! Pansy Patch stamp set in Calypso Coral on the inside of the card. Since I used Thick Basic White for the card base, it doesn’t need an additional lining (of course if you make a boo boo, you can always cover it up with an additional layer – I was lucky today). I used the pansy dies to die cut a small pansy and leaf from the Pansy Petals DSP and adhered them to the top corner with liquid glue.

The Stampin’ Up! Pansy Patch bundle is so sweet and I’m so glad that it’s sticking around. And while the Pansy Petals DSP is retiring, the good news is that it is on sale, so get it before it’s gone!


2021 – 2022 Annual Catalog Last Chance Sale is Going on Now!

Many items have already sold out, so stock up on your favorite products before they’re gone for good! Save up to 50% on essential craft supplies. What are you waiting for? Start shopping! After all, this selection of Last Chance Products is only available while supplies last.

Here are the details:

  • Not all retiring items are on sale. Discounted items are noted in the Retiring List PDF or in Last Chance Products pages of my Online Store
  • All products are available while supplies last, and there are no purchase limits.
  • Discounted items can be added to a Starter Kit and redeemed as a 50% off item or with Stampin’ Rewards.
  • Only orders opened and closed during the promotion period apply. 
  • Stamp Sets are not guaranteed during this promotion.
  • The items are available while supplies last through May 2, 2022.

Order soon to make sure that you are able to get the items that you are wanting! Let me know if you have any questions.  Happy shopping!

Click HERE to download a PDF of the Retiring List items.

Head over to my Online Store to shop now.


Current Host Code: 6Y7ZDRM7

Use this host code when you order $50 or more and receive a free gift from me!  The free gift is your choice of any currently available item valued up to $10.00!

If your order is over $150, please do not use the host code since you’ll receive your own Host Dollars plus I’ll still send you the free gift!  This host code can be used by anyone, no club or commitment required. Let me know if you have any questions.


If you need any stamping supplies, I’d be very happy to be your Demonstrator.  Just click on the Shop Now button on the right side of the screen to go directly to my online store or contact me if you have any questions.  Happy Stamping!

Thanks for stopping by and have a great week!

Akiko

  • Visit my online store here
  • See the current Stampin’ Up! clearance rack specials here
  • Earn FREE Stampin’ Up! products through my Wildflower Frequent Shopper Program – my way of saying thank you to my online frequent shopper customers.
  • Have any questions? I’d be happy to help, click here to contact me.

Cardstock Cuts for this project:

  • Thick Basic White – 5-1/2″ x 8-1/2″ card base scored at 4-1/4″
  • Soft Succulent – 1-1/2″ x 4″ (scalloped oval)
  • Basic White – 1-1/4″ x 3″ (label)
  • Pansy Petals DSP – various scraps, die cut pansy and leaf

Stampin’ Up! products used in this project:


Stampin’ Up! Amazing Thanks with Pattern Party

Good Morning! Today I have a simple thank you card featuring the pretty Pattern Party Host designer series paper with the Stampin’ Up! Amazing Thanks dies. These are wonderful layered word dies, but as you can see, the die cut words are pretty without the background layers! You can find the supplies I used at the bottom of my post along with the sizes of cardstock used.

I embossed a panel of Misty Moonlight with the retiring Tasteful Textile 3D embossing folder and adhered it to the front of a Misty Moonlight card base. The subtle texture of this embossing folder really steps up a card front, and it’s on sale while supplies last – it’s a favorite so grab it while you can! I adhered a panel of the pretty floral Pattern Party DSP to a Granny Apple Green mat and wrapped it twice with Misty Moonlight twine, making a bow. I adhered the panel to the card front with dimensionals.

I used the Tasteful Labels small circle die to cut a pinked circle from Granny Apple Green. I used the butterfly dies from the Tulips dies to cut Flirty Flamingo, So Saffron and Misty Moonlight and adhered them together to make the pretty layered butterfly, and adhered it to the circle with a glue dot. I adhered the circle with dimensionals over the twine next to the bow.

I die cut the ‘thanks‘ word from the Stampin’ Up! Amazing Thanks dies from Basic White and adhered it to the bottom of the card front with dots of liquid glue and finished the card front with green Waves Rhinestones – these are pretty close to Granny Apple Green.

For the inside of the card, I stamped the butterfly from the Daffodil Daydream cling stamp set in Misty Moonlight on a Basic White panel. I trimmed the bottom with a strip of Pattern Party DSP before adhering it to the inside of the card.

The Pattern Party DSP is bright and colorful, and goes with so many other Stampin’ Up! products, especially for happy Spring cards!


Savings Are In Bloom During March!

There’s only a few more days left of the Savings are in Bloom promotion! The last day is March 31, and there are so many bundles that are on sale, so hurry and get the special bundle that you’ve been wanting while the sale is on!

Click on the image below to download a PDF with all the details, including all the stamp bundles that will be on sale and the discounted prices! Click HERE to shop for these discounted items in my Online Store.


2021 – 2022 Annual Catalog Last Chance Sale is Going on Now!

The 2021–2022 Annual Catalog will be retiring soon! It’s always bittersweet to see a classic Stampin’ Up! catalog take a trip to retirement. But, we’re looking forward to all the new products on their way—and we hope you are, too!

Stock up on your favorite products before they’re gone for good! Save up to 50% on essential craft supplies. What are you waiting for? Start shopping! After all, this selection of Last Chance Products is only available while supplies last.

Here are the details:

  • Not all retiring items are on sale. Discounted items are noted in the Retiring List PDF or in Last Chance Products pages of my Online Store
  • All products are available while supplies last, and there are no purchase limits.
  • Discounted items can be added to a Starter Kit and redeemed as a 50% off item or with Stampin’ Rewards.
  • Only orders opened and closed during the promotion period apply. 
  • Stamp Sets are not guaranteed during this promotion.
  • The items are available while supplies last through May 2, 2022.

Order soon to make sure that you are able to get the items that you are wanting! Let me know if you have any questions.  Happy shopping!

Click HERE to download a PDF of the Retiring List items.

Head over to my Online Store to shop now.


Current Host Code: MPMDW6BG

Use this host code when you order $50 or more and receive a free gift from me!  The free gift is your choice of any currently available item valued up to $10.00!

If your order is over $150, please do not use the host code since you’ll receive your own Host Dollars plus I’ll still send you the free gift!  This host code can be used by anyone, no club or commitment required. Let me know if you have any questions.


If you need any stamping supplies, I’d be very happy to be your Demonstrator.  Just click on the Shop Now button on the right side of the screen to go directly to my online store or contact me if you have any questions.  Happy Stamping!

Thanks for stopping by and have a great week!

Akiko

  • Visit my online store here
  • See the current Stampin’ Up! clearance rack specials here
  • Earn FREE Stampin’ Up! products through my Wildflower Frequent Shopper Program – my way of saying thank you to my online frequent shopper customers.
  • Have any questions? I’d be happy to help, click here to contact me.

Cardstock Cuts for this project:

  • Misty Moonlight – 4-1/4″ x 11″ card base scored at 5-1/2″, 4-1/4″ x 5-1/2″ (embossed background), 1″ x 1″ (butterfly body die cut)
  • Granny Apple Green – 3-5/8″ x 3-5/8″ (DSP mat), 1-1/2″ x 1-1/2″ (die cut circle)
  • Flirty Flamingo – 1″ x 1-1/4″ (die cut butterfly)
  • So Saffron – 1″ x 1″ (die cut butterfly)
  • Basic White – 4″ x 5-1/4″ (inside panel), 1-1/2″ x 4″ (die cut thanks),
  • Pattern Party DSP – 3-1/2″ x 3-1/2″ (front panel), 1/2″ x 4″ (inside trim)

Stampin’ Up! products used in this project:


Stampin’ Up! Welcoming Window for the Happy Inkin’ Thursday Blog Hop

Good morning and welcome to the Happy Inkin’ Thursday Blog Hop! I was happy to bring out the pretty Stampin’ Up! Welcoming Window bundle for our color challenge this week, and I was glad that I got so many of our colors in the card – the only one I missed was Petal Pink. You can find the supplies I used along with card stock cuts at the bottom of my post.

We have a Color Challenge this week and here’s the pretty color palette we are using:

I stamped the grass from the Paradise Palms cling stamp set across the bottom of a panel of brick Bloom Where You’re Planted designer series paper in Pear Pizzazz and adhered it to the front of a Poppy Parade card base. I stamped three of the wide pots from the Stampin’ Up! Welcoming Window photopolymer stamp set in Pumpkin Pie ink on Basic White and cut them out with the coordinating die.

I stamped four of the bushy plant greens from the Stampin’ Up! Welcoming Window stamp set in Pear Pizzazz on Basic White. I stamped three of the flower stamps that go with the bushy plant in Highland Heather and stamped the fourth in Poppy Parade and cut all four out with the coordinating die. I adhered the pots to the card in the grass with glue dots, and adhered the Highland Heather flowers on top with dimensionals. I stamped the window and two of the shutters in Crumb Cake ink on Basic White and cut them out with the coordinating dies. I adhered them to the card front with glue dots. I cut a panel of Crumb Cake with the shelf die and adhered it to the card front with dimensionals.

I stamped the pitcher in Pool Party, cut it out with the coordinating die and adhered it to the card with glue dots. I popped the Poppy Parade flowers on the vase with dimensionals. I stamped the sentiment from the Stampin’ Up! Welcoming Window stamp set in Poppy Parade on a panel of Bloom Where You’re Planted DSP and cut it out with the little tag die from the Hydrangea dies. I cut a piece of Basic White with the same die and adhered it to the back of the DSP die cut and looped a length of Linen Thread through the tag before adhering it to the card front.

For the inside, I stamped the pitcher from the Stampin’ Up! Welcoming Window stamp set in Pool Party ink on the bottom of a Basic White panel. I stamped the bushy plant greens in Pear Pizzazz and the coordinating flowers in Poppy Parade on top of the pitcher and adhered the panel to the inside of the card with Stampin’ Seal.

The Stampin’ Up! Welcoming Window bundle is so versatile with stamped and die cut windows and lots of accessories and great sentiments – especially for Spring! And it’s on sale with Savings are in Bloom going on this month!!

On with the Hop! Click on the Next Blog button to move forward to see the beautiful project Karen Ksenzakovic has created.

If you get lost along the way, here are the participants for the hop:


Savings Are In Bloom During March!

During the month of March, you can snag the Mini Stampin’ Cut & Emboss Machine at a 20% discount! This miniature machine is compatible with a large selection of Stampin’ Up! embossing folders and dies. Build your craft collection and combine the Mini Stampin’ Cut & Emboss Machine with any (or all!) of the select stamp-and-die bundles that are also available for 20% off during the month of March!

Click on the image below to download a PDF with all the details, including all the stamp bundles that will be on sale and the discounted prices! Click HERE to shop for these discounted items in my Online Store.


Last Day to Sign up for March Paper Pumpkin Kit – Beyond the Horizon!

The Beyond the Horizon Paper Pumpkin Kit includes watercolor prints and designs inspired by the beautiful nature around us to create nine cards and coordinating envelopes. And this month’s kit includes another FREE stamp set inside (yes—that’s two stamp sets in one kit!) as Paper Pumpkin’s way of saying THANK YOU!

Here are the Details:

  • This month’s kit contains enough elements to create 9 cards—3 each of 3 designs—and 9 coordinating envelopes.
    • Card size – 4-1/4″ x 5-1/2″
    • Envelope size – 4-1/2″ x 5-3/4″
  • This kit includes printed card bases, die-cut paper pieces, embellishments, adhesive, and more!
  • The Beyond the Horizon kit includes a Misty Moonlight Stampin’ Spot.
  • Elegant watercolor designs curated by our in-house artists to take your crafting to the next level
  • This kit’s stamp set is perfect for any occasion. With sentiments that say “thanks”, “hello”, “thinking of you,” and so many more, you’ll be able to use this stamp set year round.
  • And if you thought one stamp set was great just wait—this month’s kit comes with a BONUS stamp set for FREE! 
  • This kit perfectly coordinates with the New Horizon Suite in the Jan-June Mini catalog.

Coordinating Colors:  Bumblebee, Calypso Coral, Evening Evergreen, Misty Moonlight, Night of Navy, Old Olive, Pale Papaya

f you’re interested in subscribing to Paper Pumpkin, you can either sign up for a subscription where you are billed monthly for your kit or you can purchase a prepaid subscription in my Online Store. To see more information and to sign up for the monthly subscription click here. To see the options for prepaid subscriptions in my Online Store, click here.


Current Host Code: MPMDW6BG

Use this host code when you order $50 or more and receive a free gift from me!  The free gift is your choice of any item valued up to $10.00 in the 2021 – 2022 Annual Catalog or the January – June 2022 Mini Catalog!

If your order is over $150, please do not use the host code since you’ll receive your own Host Dollars plus I’ll still send you the free gift!  This host code can be used by anyone, no club or commitment required. Let me know if you have any questions.


If you need any stamping supplies, I’d be very happy to be your Demonstrator.  Just click on the Shop Now button on the right side of the screen to go directly to my online store or contact me if you have any questions. 

Thanks for stopping by and Happy Stamping!

Akiko

  • Visit my online store here
  • See the current Stampin’ Up! clearance rack specials here
  • Earn FREE Stampin’ Up! products through my Wildflower Frequent Shopper Program – my way of saying thank you to my online frequent shopper customers.
  • Have any questions? I’d be happy to help, click here to contact me.

Cardstock Cuts for this project:

  • Poppy Parade – 4-1/4″ x 11″ card base scored at 5-1/2″
  • Crumb Cake – 1″ x 3″ (die cut shelf)
  • Basic White – 4″ x 5-1/4″ (inside panel), 1-1/4″ x 1-1/4″ (tag), 1-1/2″ x 1-1/2″ (pitcher), 1-1/4″ x 3″ (die cut pots), 2″ x 6″ (die cut bushy flowers), 3″ x 4-1/2″ (die cut window and shutters)
  • Bloom Where You’re Planted DSP – 4″ x 5-1/4″ (front background), 1-1/4″ x 1-1/4″ (tag)

Stampin’ Up! products used in this project:


Stampin’ Up! Artfully Layered Thank You Card

Good Morning! Two weeks ago I made a card with the Stampin’ Up! Artfully Layered bundle in my Sunday Afternoon Facebook Live and I have another one today. Today’s card is a much cleaner design but still colorful and with texture! You can find the supplies I used at the bottom of my post along with the sizes of cardstock used.

I taped a panel of watercolor paper to my work mat with painters tape, securing it all around. I used my thick water painter to wet the paper and then add Pool Party ink to give it a watercolor wash. I’m not a watercolor painter, so I tried to start small by just doing a watercolor wash. After it dried I removed the tape and wanted more texture, so I embossed the panel with the Tasteful Textile 3D embossing folder and adhered it to a Just Jade mat with liquid glue and then to a Crumb Cake card base with dimensionals.

I cut a Pale Papaya panel of the pretty 2021-2022 In Color Shimmer vellum with the palm die cut from the Stampin’ Up! Artfully Layered bundle. I cut the detailed leaf die from Just Jade and adhered them to the card front with glue dots.

I stamped a panel of Crumb Cake with the sentiment from the Stampin’ Up! Artfully Layered cling stamp set in Versamark Ink. I sprinkled it with gold embossing powder and shook off the excess. I heat set the powder until shiny and cut the label out with the Messages die. I adhered a folded length of Just Jade metallic ribbon and some gold trim to the card front and adhered the label over it with dimensionals. I finished with three brushed gold dots.

For the inside of the card, I inked up the large leaf from the Stampin’ Up! Artfully Layered stamp set with Just Jade and stamped off twice before stamping in the corner of a Basic White panel. I inked up the script stamp and stamped off before stamping over the leaf – I did this a couple of times. I adhered the panel to the inside of the card.

It’s fun to try out different coloring techniques such as water coloring. I’m inspired by all the pretty designer series papers, and starting easy with a color wash is perfect, especially when there are bold die cuts that you can use. And touches of gold are always a perfect way to step up a card!

Join me for a Facebook Live this Afternoon!

I’m planning to go live on my Facebook Page at 1:00 ET this afternoon to make a card with the Seascape bundle. Look forward to seeing you then!


Savings Are In Bloom During March!

During the month of March, you can snag the Mini Stampin’ Cut & Emboss Machine at a 20% discount! This miniature machine is compatible with a large selection of Stampin’ Up! embossing folders and dies. Build your craft collection and combine the Mini Stampin’ Cut & Emboss Machine with any (or all!) of the select stamp-and-die bundles that are also available for 20% off during the month of March!

Click on the image below to download a PDF with all the details, including all the stamp bundles that will be on sale and the discounted prices! Click HERE to shop for these discounted items in my Online Store.


Current Host Code: MPMDW6BG

Use this host code when you order $50 or more and receive a free gift from me!  The free gift is your choice of any item valued up to $10.00 in the 2021-2022 Annual Catalog or the January – June 2022 Mini Catalog!

If your order is over $150, please do not use the host code since you’ll receive your own Host Dollars plus I’ll still send you the free gift!  This host code can be used by anyone, no club or commitment required. Let me know if you have any questions.


If you need any stamping supplies, I’d be very happy to be your Demonstrator.  Just click on the Shop Now button on the right side of the screen to go directly to my online store or contact me if you have any questions.  Happy Stamping!

Thanks for stopping by and have a great week!

Akiko

  • Visit my online store here
  • See the current Stampin’ Up! clearance rack specials here
  • Earn FREE Stampin’ Up! products through my Wildflower Frequent Shopper Program – my way of saying thank you to my online frequent shopper customers.
  • Have any questions? I’d be happy to help, click here to contact me.

Cardstock Cuts for this project:

  • Crumb Cake – 5-1/2″ x 8-1/2″ card base scored at 5-1/2″, 1-1/4″ x 2-1/2″ (label)
  • Just Jade – 4″ x 5-1/2″ (front mat), 2-1/4″ x 2-3/4″ (detailed leaf die cut)
  • 2021-2023 In Color Shimmer Vellum – 3″ x 4-1/4″ (palm die cut)
  • Watercolor paper – 3-3/4″ x 5″ (front background)
  • Basic White – 4″ x 5-1/4″ (inside panel)

Stampin’ Up! products used in this project:


Stampin’ Up! Flowing Flowers Thank You Card

Good Morning! The Stampin’ Up! Flowing Flowers cling stamp set is one of my favorites in the new January – June Mini Catalog. The stamps are Distinktive stamps, so you get various shades of ink color in one stamp. The medium flower has several elements – a flower, leaves and background spatter and I wanted to make each element a different color. So I used an old technique called ‘huffing’ to stamp the flower and I am happy with the result. You can find the supplies I used at the bottom of my post along with the sizes of cardstock used.

The huffing technique is where you use markers to ink the stamps and then breath heavily (or huff) on the stamp to re-moisten the ink before stamping. So I pulled out my 2021-2023 In Color Stampin’ Write markers and colored the stamp with the brush end of the markers. I colored the flower Polished Pink, the leaves Soft Succulent and the background spatter Pale Papaya. Then I huffed all over the stamp and stamped the flower on a Basic white panel. I also stamped the image on printer paper and fussy cut it out to make a mask and covered the stamped image with the mask before inking the stamp again and stamping the next flowers.

After stamping the medium flower from the Stampin’ Up! Flowing Flowers stamp set three times, I cleaned off the stamp and inked up the leaves with my Soft Succulent marker to add more leaves to the arrangement. I cleaned it up again and inked just the spatter with my Pale Papaya marker to fill in more spatter until I was happy with the arrangement.

I inked up the sentiment stamp from the Stampin’ Up! Flowing Flowers stamp set in Basic Gray and stamped it on the front panel. I embossed the panel with the Tasteful Textile 3D embossing folder to add texture and adhered the panel to a Polished Pink mat. I adhered the layered panel to the front of a Soft Succulent card base.

I cut a panel Soft Succulent Shimmer Vellum with the small detailed butterfly from the Brilliant Wings dies and adhered it to the card with a glue dot. I added a Soft Succulent In Color jewel to the butterfly and three Polished Pink jewels to each of the flowers.

I inked up the medium flower stamp from the Stampin’ Up! Flowing Flowers stamp set with my Polished Pink, Soft succulent and Pale Papaya Stampin’ Write markers again. I huffed on the stamp and stamped the image in the bottom corner of a Basic White panel. I cleaned off the stamp and used my Pale Papaya marker and mask to add more spatter to the edges and then adhered the panel to the inside of my card.

I love the Stampin’ Up! Flowing Flowers stamp set and have seen several techniques for getting a multicolor image such as inking the stamp with sponge daubers, blending brushes, or using the Stamparatus and they all have pros and cons. And then I remembered huffing and found this the easiest to do for this layout. What I really like is the creativity of trying different techniques and having so many options!


Sale-A-Bration is Ending on Monday!

Sale-A-Bration is one of Stampin’ Up!’s biggest promotions of the year with fun for everyone!  There are fantastic Sale-A-Bration specials for Shopping, Hosting and Joining! See my Promotions Page for more details or contact me and I’ll be happy to tell you more! But hurry because these specials are only available through February 28, 2022 or while supplies last!


All Together Collection Available Through May 2, 2022

Loving hands and heartfelt words are the best way to show you care. With hand designs that illustrate coming together in friendship and solidarity, the All Together Collection will help you create cardmaking and paper crafting projects that reflect the people you know and love. And the All Together Collection includes early-release products from the 2022–2023 Annual Catalog—an exciting new range of natural Stampin’ Blends! Click on the picture below to download a PDF with all the details or click HERE to shop the collection in my Online Store.


Current Host Code: MPMDW6BG

Use this host code when you order $50 or more and receive a free gift from me!  The free gift is your choice of any item valued up to $10.00 in the 2021-2022 Annual Catalog or the January – June 2022 Mini Catalog!

If your order is over $150, please do not use the host code since you’ll receive your own Host Dollars plus I’ll still send you the free gift!  This host code can be used by anyone, no club or commitment required. Let me know if you have any questions.


If you need any stamping supplies, I’d be very happy to be your Demonstrator.  Just click on the Shop Now button on the right side of the screen to go directly to my online store or contact me if you have any questions.  Happy Stamping!

Thanks for stopping by and have a great week!

Akiko

  • Visit my online store here
  • See the current Stampin’ Up! clearance rack specials here
  • Earn FREE Stampin’ Up! products through my Wildflower Frequent Shopper Program – my way of saying thank you to my online frequent shopper customers.
  • Have any questions? I’d be happy to help, click here to contact me.

Cardstock Cuts for this project:

  • Soft Succulent – 4-1/4″ x 11″ card base scored at 5-1/2″
  • Polished Pink – 4″ x 5-1/4″
  • 2021-2023 In Color Shimmer Vellum – 1-1/2″ x 2″ (die cut butterfly)
  • Basic White – 4″ x 5-1/4″ (inside panel)

Stampin’ Up! products used in this project:


Stampin’ Up! On the Horizon for the Happy Inkin’ Thursday Blog Hop

Good morning and welcome to the Happy Inkin’ Thursday Blog Hop! For today’s card, I used the wonderful Stampin’ Up! On The Horizon bundle with the beautiful New Horizons 6″ x 6″ designer series paper to make a masculine thank you card with an outdoors landscape. You can find the supplies I used at the bottom of my post along with the sizes of cardstock used.

We have a sketch challenge this week. Here is the pretty sketch we are using:

I embossed a panel of Gray Granite with the Timeworn Type embossing folder and adhered it to the front of a Gray Granite card base. I stamped the grass stamp from the Stampin’ Up! On The Horizon cling stamp set in Evening Evergreen on a panel of New Horizons 6″ x 6″ designer series paper. I stamped the birds in the sky with Basic Gray ink and adhered the image to a Misty Moonlight mat.

I stamped stamped a Basic White panel with the wood stamp from the Stampin’ Up! On The Horizon stamp set using stamped off Gray Granite ink and cut it out with the fence die from the Horizon Dies. I used a sponge dauber to add more Gray Granite ink to distress the fence, giving it a weathered look. I used the grass die to cut three clumps from an Evening Evergreen panel of the New Horizons 6″ x 6″ DSP. I trimmed the end off the first and adhered it to the DSP over the stamped grass. I gently curved the fence and applied liquid glue to the first and last slat and adhered it to the panel over the grasses. I trimmed the end off the second die cut grass and adhered it under the fence with dimensionals.

I inked up the thanks part of the sentiment from the Stampin’ Up! On The Horizon stamp set in Misty Moonlight ink and stamped it on a Gray Granite panel. I cut it out with the Messages die and adhered it to the panel with glue dots. I adhered the panel to the card front with dimensionals and adhered some Pebbles Enamel Shapes to the bottom around the fence and grasses.

For the inside, I stamped the grass stamp from the Stampin’ Up! On The Horizon stamp set in Evening Evergreen ink in the corner of a Basic White panel. I stamped the birds in the top corner using Basic Gray ink. I adhered a strip of New Horizons 6″ x 6″ DSP to the bottom and adhered the last grass die cut on top. I adhered the panel to the inside of the card.

The Stampin’ Up! On the Horizon bundle is a lot of fun with it’s unique dies and great sentiments. And with the beautiful New Horizons 6″ x 6″ DSP, it is so easy to make beautiful watercolor landscape or seascape cards and be creative!

On with the Hop! Click on the Next Blog button to move forward to see the beautiful project Karen Ksenzakovic has created.

If you get lost along the way, here are the participants for the hop:


Earn Free Products During Sale-A-Bration: Jan 4 – Feb 28 2022!

Sale-A-Bration is one of Stampin’ Up!’s biggest promotions of the year with fun for everyone!  There are fantastic Sale-A-Bration specials for ShoppingHosting and Joining! See my  Promotions Page for more details or contact me and I’ll be happy to tell you more! But hurry because these specials are only available through February 28, 2022 or while supplies last!


Current Host Code: 3QYMGKQY

Use this host code when you order $50 or more and receive a free gift from me!  The free gift is your choice of any item valued up to $10.00 in the 2021 – 2022 Annual Catalog or the January – June 2022 Mini Catalog!

If your order is over $150, please do not use the host code since you’ll receive your own Host Dollars plus I’ll still send you the free gift!  This host code can be used by anyone, no club or commitment required. Let me know if you have any questions.


If you need any stamping supplies, I’d be very happy to be your Demonstrator.  Just click on the Shop Now button on the right side of the screen to go directly to my online store or contact me if you have any questions. 

Thanks for stopping by and Happy Stamping!

Akiko

  • Visit my online store here
  • See the current Stampin’ Up! clearance rack specials here
  • Earn FREE Stampin’ Up! products through my Wildflower Frequent Shopper Program – my way of saying thank you to my online frequent shopper customers.
  • Have any questions? I’d be happy to help, click here to contact me.

Cardstock Cuts for this project:

  • Gray Granite – 4-1/4″ x 11″ card base scored at 5-1/2″, 4-1/4″ x 5-1/2″ (embossed background), 1″ x 2″ (label)
  • Misty Moonlight – 3″ x 4-3/4″ (front mat)
  • Basic White – 4″ x 5-1/4″ (inside panel), 2″ x 2″ (die cut fence)
  • New Horizons 6″ x 6″ DSP – 2-3/8″ x 4-5/8″ (art panel), 2-1/2″ x 3″ (die cut grasses), 1/2″ x 4″ (inside trim)

Stampin’ Up! products used in this project:


Stampin’ Up! Amazing Silhouettes Thank You Card Video Tutorial

Good Morning! It’s been a while since I’ve done a video tutorial, so this is a bit rough. But I used the pretty Stampin’ Up! Amazing Silhouettes bundle to make a simple thank you card in cheery Granny Apple Green. I love the layered word dies that come in the bundle and I paired it with the pretty Sale-A-Bration Friendly Hello designer series paper. You can find the supplies I used at the bottom of my post along with the sizes of cardstock used.

Here is the video of my Facebook Live from yesterday afternoon. I also posted a copy of the video in my YouTube channel and you can view it here if you prefer.

I adhered a panel of the pretty Granny Apple Green Friendly Hello designer series paper to the front of a Granny Apple Green card base. I stamped the tree from the Stampin’ Up! Amazing Silhouettes cling stamp set in Granny Apple Green on a Basic White panel. I embossed the panel with the Painted Texture 3D Embossing Folder and adhered it to a Granny Apple Green mat.

I used the thanks word dies from the Stampin’ Up! Amazing Silhouettes bundle to cut Granny Apple Green and Basic White panels. I adhered them together with liquid glue and adhered them to the stamped and embossed panel.

I used dimensionals to adhere the tree and die cut word to the card front and finished it with three Elegant Faceted gems to add sparkle.

For the inside of the card, I stamped the leaf cluster from the Sale-A-Bration Friendly Hello stamp set in Granny Apple Green in the corner of a Basic White panel. I adhered a strip of Friendly Hello DSP to the bottom and adhered the panel to the inside of the card. And then I finished the envelope by stamping the tree silhouette on the side of the envelope!

I love the Stampin’ Up! Amazing Silhouettes bundle! As you can see, it’s pretty easy to make simple yet impressive cards with it!


Earn Free Products During Sale-A-Bration: Jan 4 – Feb 28 2022!

Sale-A-Bration is one of Stampin’ Up!’s biggest promotions of the year with fun for everyone!  There are fantastic Sale-A-Bration specials for Shopping, Hosting and Joining! And it’s happening through February 28, 2022!

SHOP 

During Sale-A-Bration you get to choose a FREE Sale-A-Bration product with every $50 or $100 you spend (before Shipping and tax). There are 7 items that are available for free with every $50 you spend and 2 items that are available for free with every $100 you spend.

HOST

Host a party during Sale-A-Bration and both you and your guests can earn FREE Sale-A-Bration products! Plus, place any party or personal order of $300 or more and receive the exclusive Calming Camellia cling stamp set for FREE! And you can even host a virtual party! Drop me an email at apsudano@stampininthemeadows.com if you are interested in setting up a host code for yourself to see if you can collect $300 in orders from yourself and your stamping friends to get that FREE stamp set!  I’m happy to set up a code just for you!

JOIN

And there is an awesome joining special during Sale-A-Bration! When you join as a Stampin’ Up! Demonstrator, you pay $99 for your starter kit and you get to choose $125 in product from any current catalog plus your starter kit ships for free! And if you join during Sale-A-Bration you get to pick two additional stamp sets to add to your starter kit for free! Contact me if you have any questions about joining and I’ll be happy to tell you more!


Current Host Code: 3QYMGKQY

Use this host code when you order $50 or more and receive a free gift from me!  The free gift is your choice of any item valued up to $10.00 in the 2021-2022 Annual Catalog or the January – June 2022 Mini Catalog!

If your order is over $150, please do not use the host code since you’ll receive your own Host Dollars plus I’ll still send you the free gift!  This host code can be used by anyone, no club or commitment required. Let me know if you have any questions.


If you need any stamping supplies, I’d be very happy to be your Demonstrator.  Just click on the Shop Now button on the right side of the screen to go directly to my online store or contact me if you have any questions.  Happy Stamping!

Thanks for stopping by and have a great week!

Akiko

  • Visit my online store here
  • See the current Stampin’ Up! clearance rack specials here
  • Earn FREE Stampin’ Up! products through my Wildflower Frequent Shopper Program – my way of saying thank you to my online frequent shopper customers.
  • Have any questions? I’d be happy to help, click here to contact me.

Cardstock Cuts for this project:

  • Granny Apple Green – 5-1/2″ x 8-1/2″ card base scored at 4-1/4″, 2-1/2″ x 5″ (front mat), 1-1/4″ x 3-1/2″ (die cut thanks word)
  • Basic White – 4″ x 5-1/4″ (inside panel), 2-3/8″ x 4-7/8″ (tree panel), 1-1/4″ x 3-1/2″ (die cut thanks word)
  • Friendly Hello DSP – 4-1/8″ x 5-3/8″ (front background), 1/2″ x 4″ (inside trim)

Stampin’ Up! products used in this project: