Stampinโ€™ Up! Savings are in Bloom

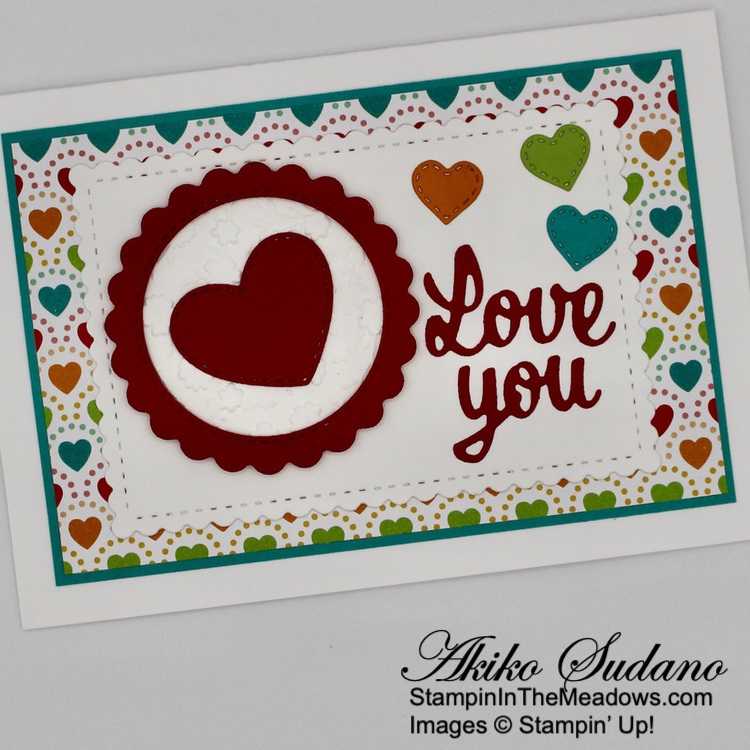
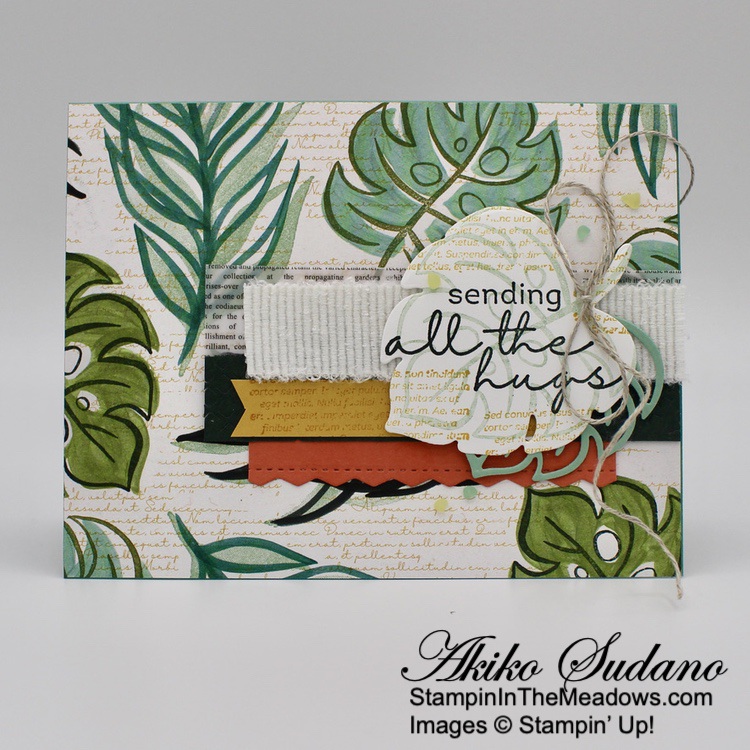
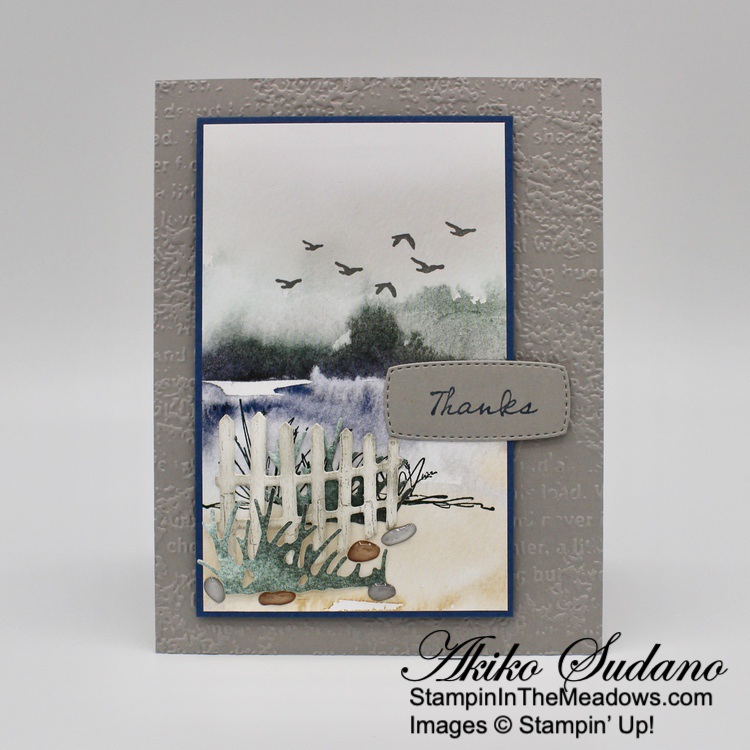
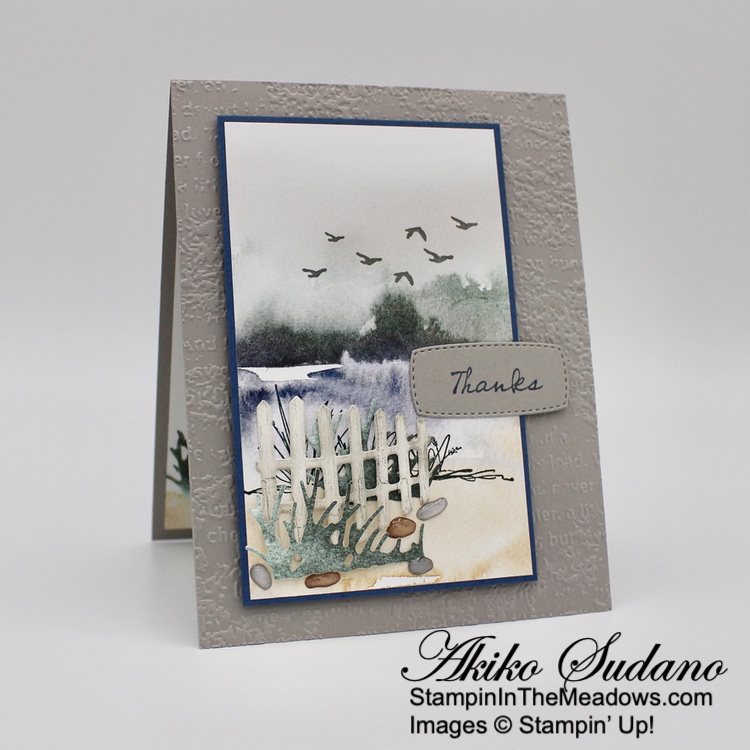
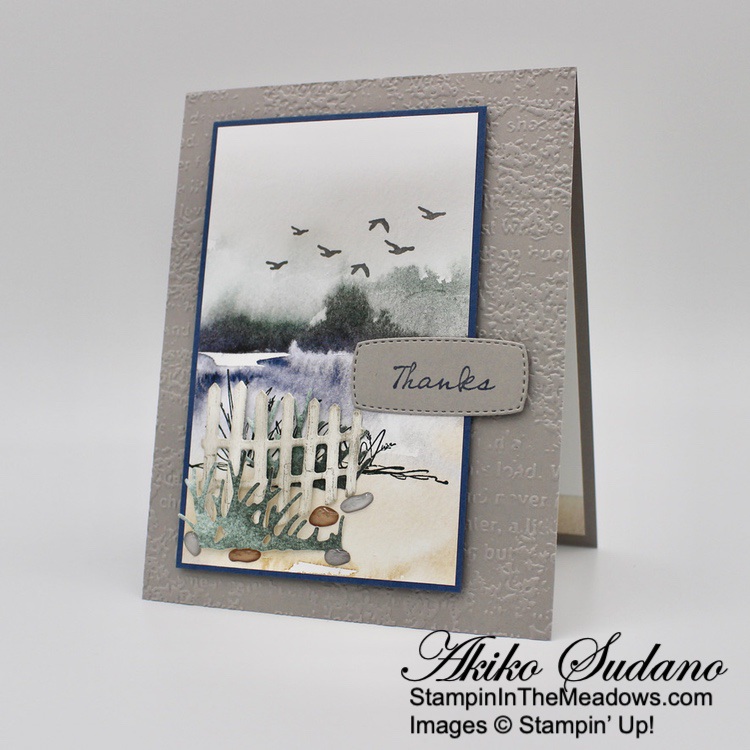
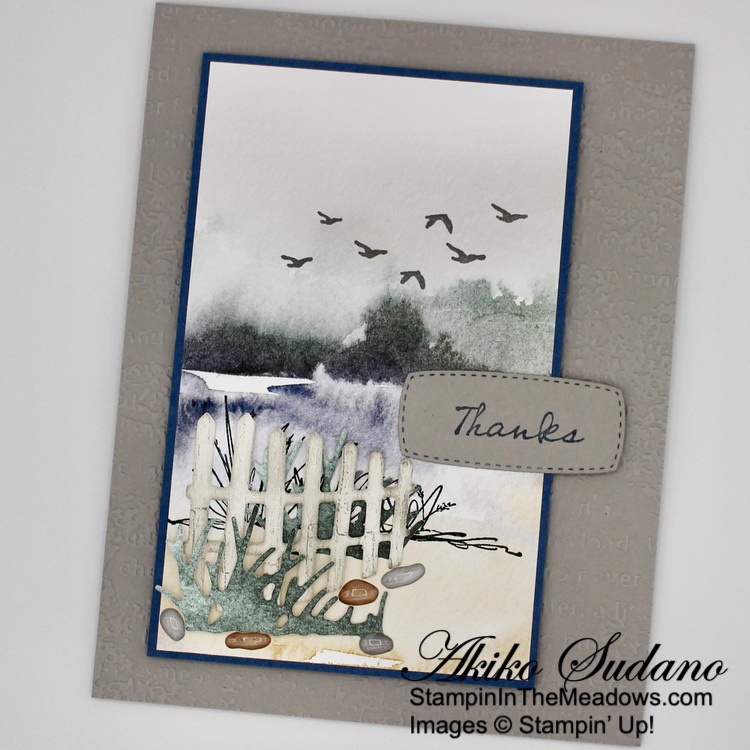
Happy Sunday! I don’t have a pretty card to share with you today, but I wanted to share some exciting news about the Stampin’ Up! Savings are in Bloom promotion that will start on Tuesday, March 1, 2022.
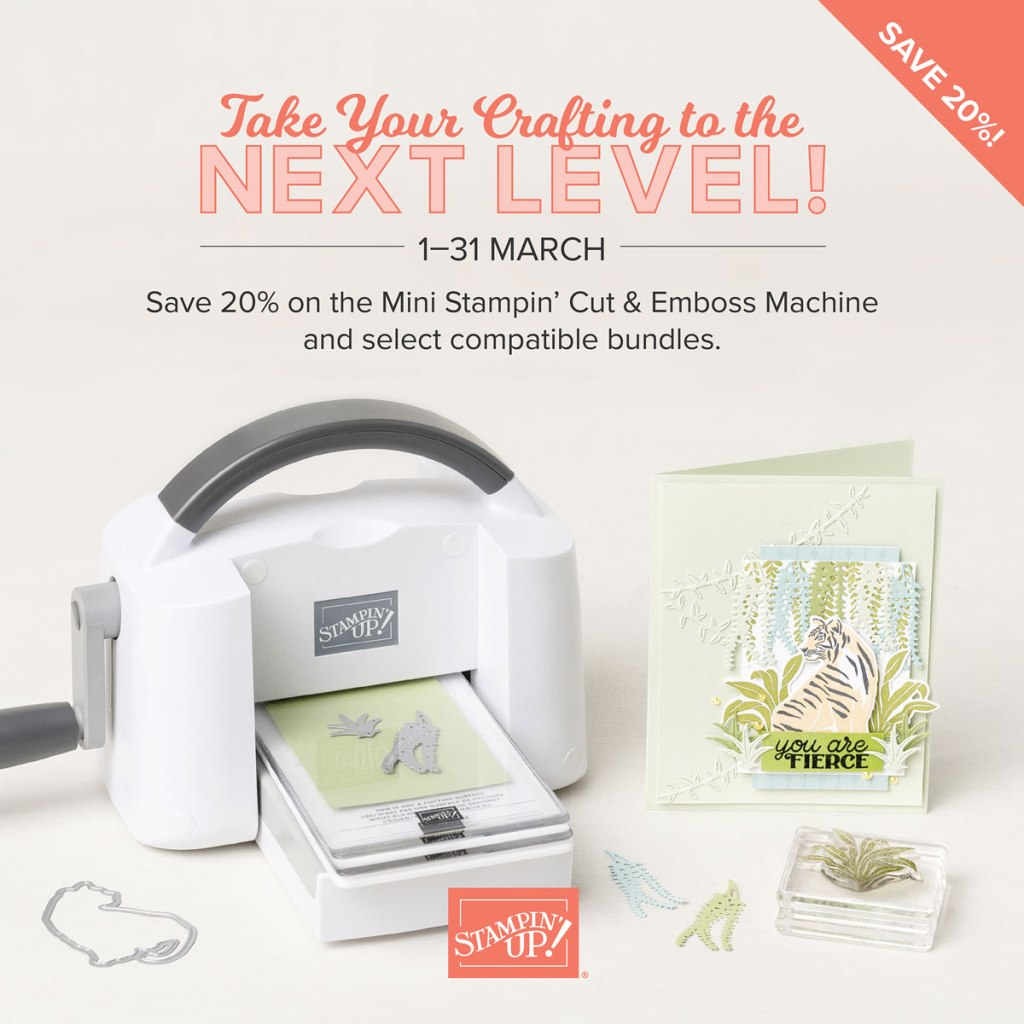
If you havenโ€™t already, itโ€™s time to meet your mini crafting companion: the Mini Stampinโ€™ Cut & Emboss Machine! If this is your first encounter, allow us to introduce you.
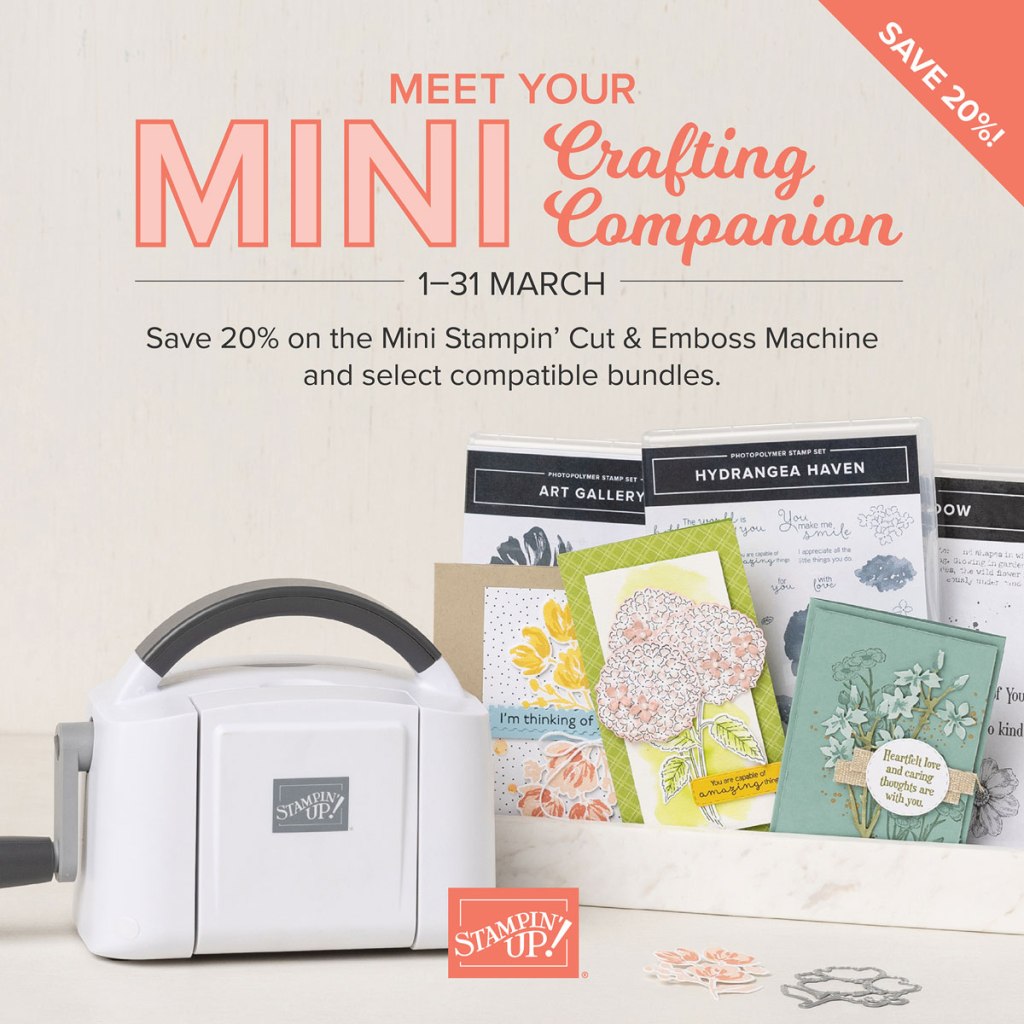
This miniโ€”but mightyโ€”machine is durable, portable, and easy to use. Itโ€™s the perfect pick for budding beginners who want to branch out, papercrafting pros who want to craft on the go, or those who are short on storage space! With this trusty tool, any crafter can make precise cuts and embossed designs for their projects with one pass.

During the month of March, you can snag the Mini Stampinโ€™ Cut & Emboss Machine at a 20% discount! This miniature machine is compatible with a large selection of Stampinโ€™ Up! embossing folders and dies. Build your craft collection and combine the Mini Stampinโ€™ Cut & Emboss Machine with any (or all!) of the select stamp-and-die bundles that are also available for 20% off during the month of March!

Here are the Details:

  • Promotion Period: March 1, 2022 – March 31, 2022
  • The Mini Stampinโ€™ Cut & Emboss Machine will be available for purchase at a 20% discount.
  • A number of select stamp-and-die bundles that are compatible with the Mini Stampinโ€™ Cut & Emboss Machine will also be available for purchase at a 20% discount.
  • For this promotion only, weโ€™ve brought back the previously popular Art Gallery, Celebrate Sunflowers, and Garden Wishes bundles. They will only be available in their bundle form during this promotion, so make sure to snag โ€˜em while you still can!
  • The Mini Stampinโ€™ Cut & Emboss Machine and select compatible bundles can be bought together or separately.
  • There is no limit on the number of Mini Stampinโ€™ Cut & Emboss Machines you can purchase
  • Products are available while supplies last – No backorders or substitutions will be allowed.
  • The stamp-and-die bundles that can be found in a current catalog will be replenished until they retire. When they do retire, the bundles will be added to the Retiring List.
  • Due to supply chain challenges, this promotion may be altered or ended early. We will post an update with further information if this is anticipated. 

Click on the image below to download a PDF with all the details, including all the stamp bundles that will be on sale and the discounted prices!

Join me for a Facebook Live this Afternoon!

Iโ€™m planning to go live on my Facebook Page at 1:00 ET this afternoon. Look forward to seeing you then!


Sale-A-Bration Ends Tomorrow!

Tomorrow is the Last Day for Sale-A-Bration, one of Stampinโ€™ Up!โ€™s biggest promotions of the year!  It’s been a great opportunity to earn free products. From the cute Awesome Otters and sweet Catching Butterflies stamp sets to the gorgeous Calming Camellia Host set, the specials are fantastic! And don’t forget about the happy Sunshine & Rainbows 6″ x 6″ DSP and sweet Friendly Hello bundle. And tomorrow, February 28, 2022, is the last day! So get yours before they’re gone!

SHOP 

During Sale-A-Bration you get to choose a FREE Sale-A-Bration product with every $50 or $100 you spend (before Shipping and tax). There are 7 items that are available for free with every $50 you spend and 2 items that are available for free with every $100 you spend.

HOST

Host a party during Sale-A-Bration and both you and your guests can earn FREE Sale-A-Bration products! Plus, place any party or personal order of $300 or more and receive the exclusive Calming Camellia cling stamp set for FREE!

JOIN

And there is an awesome joining special during Sale-A-Bration! When you join as a Stampinโ€™ Up! Demonstrator, you pay $99 for your starter kit and you get to choose $125 in product from any current catalog plus your starter kit ships for free! And if you join during Sale-A-Bration you get to pick two additional stamp sets to add to your starter kit for free! Contact me if you have any questions about joining and Iโ€™ll be happy to tell you more!


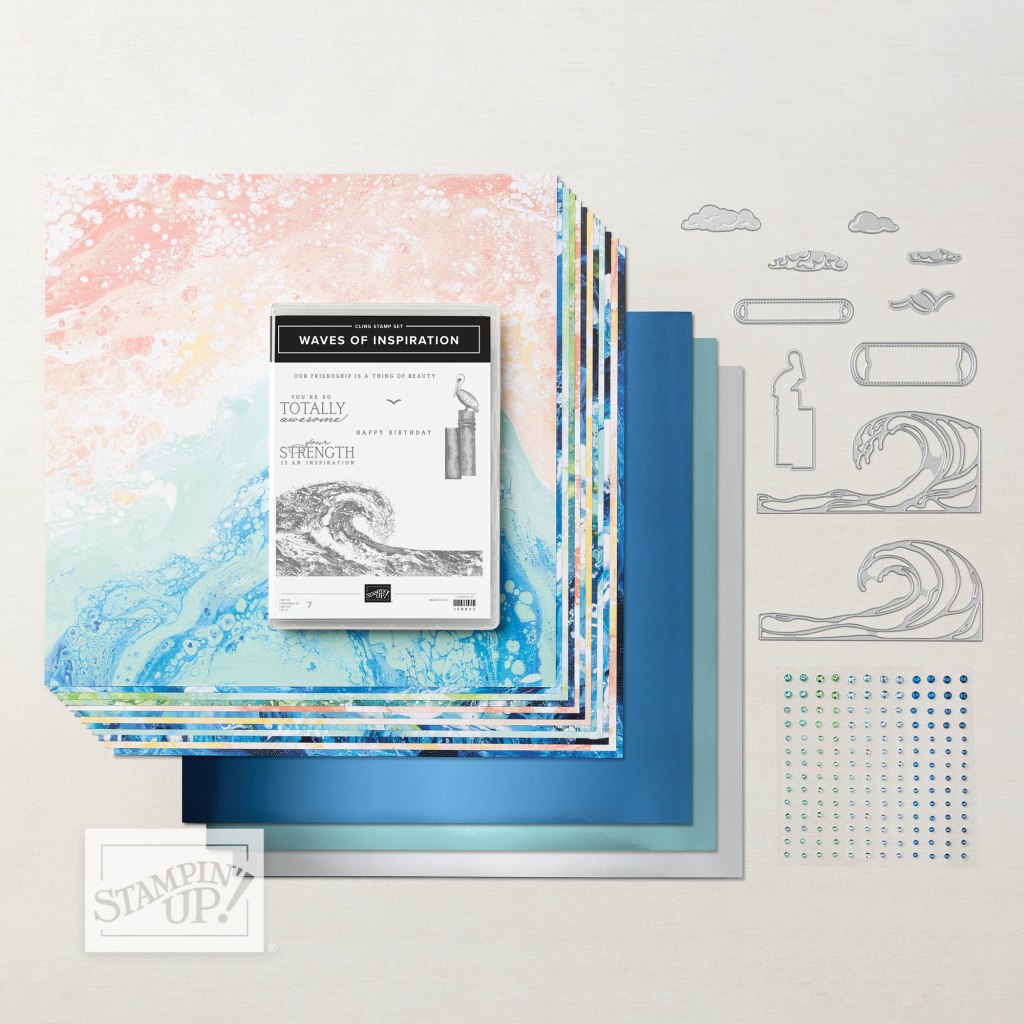
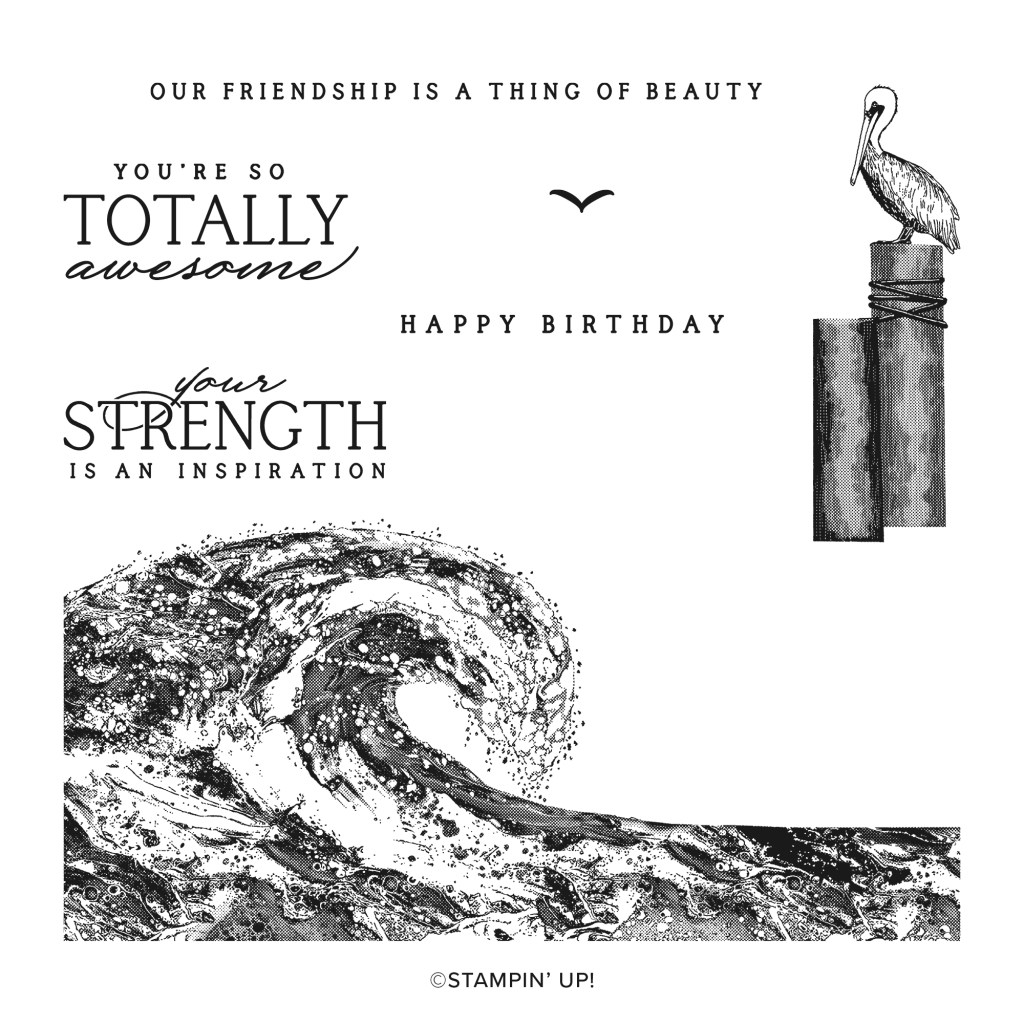
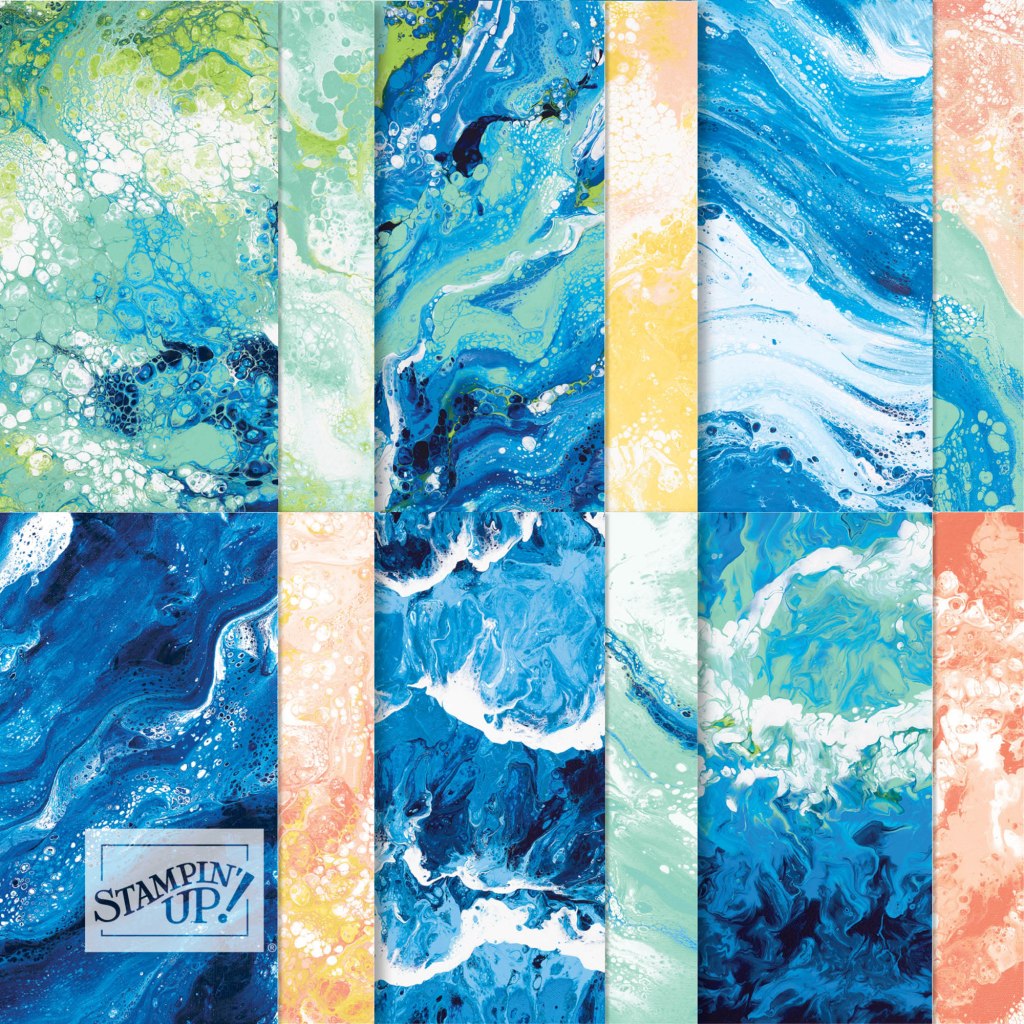
Waves of the Ocean Collection Available March 1, 2022

Discover the depths of the oceanโ€”and your artistic abilitiesโ€”with the Waves of the Ocean Collection! This coastal collection includes an inspiring set of stamps and detailed dies, both early-release products from the upcoming 2022โ€“2023 Annual Catalog. Plus, a pack of paper made from images of hand-poured paint, blue-hued foil sheets for a sea of shine, and radiant rhinestones for a splash of sparkleโ€”each an exclusive product you can only purchase during the promotion period!

Here are the Details:

  • Promotion Period: March 1, 2022 – May 2, 2022
  • The Waves of Inspiration Stamp Set and Waves Dies can be ordered separately.
  • The Waves of Inspiration Stamp Set is available in English, French, and German.
  • The following exclusive products are only available while supplies last:
    • Waves of the Ocean 12″ x 12″ Designer Series Paper
    • Blue Foils 12″ x 12″ Specialty Paper
    • Rhinestone Waves Basic Jewels

Click on the image below to download a PDF flyer with all the details including the item numbers and prices.


Current Host Code: MPMDW6BG

Use this host code when you order $50 or more and receive a free gift from me!  The free gift is your choice of any item valued up to $10.00 in the 2021 โ€“ 2022 Annual Catalog or the January โ€“ June 2022 Mini Catalog!

If your order is over $150, please do not use the host code since you’ll receive your own Host Dollars plus I’ll still send you the free gift!  This host code can be used by anyone, no commitment required.  Let me know if you have any questions.


If you need any stamping supplies, Iโ€™d be very happy to be your Demonstrator.  Just click on the Shop Now Button on the right side of the screen to go directly to my Online store or contact me if you have any questions.  Happy Stamping!

Thanks for stopping by and have a great day!

Akiko

  • Visit my Online store here
  • See the current Stampinโ€™ Up! clearance rack specials here
  • Earn FREE Stampinโ€™ Up! products through my Wildflower Frequent Shopper Program – my way of saying thank you to my frequent shopper online customers.
  • Have any questions? I’d be happy to help, click here to contact me.

Stampinโ€™ Up! Flowing Flowers Thank You Card

Good Morning! The Stampin’ Up! Flowing Flowers cling stamp set is one of my favorites in the new January – June Mini Catalog. The stamps are Distinktive stamps, so you get various shades of ink color in one stamp. The medium flower has several elements – a flower, leaves and background spatter and I wanted to make each element a different color. So I used an old technique called ‘huffing’ to stamp the flower and I am happy with the result. You can find the supplies I used at the bottom of my post along with the sizes of cardstock used.

The huffing technique is where you use markers to ink the stamps and then breath heavily (or huff) on the stamp to re-moisten the ink before stamping. So I pulled out my 2021-2023 In Color Stampin’ Write markers and colored the stamp with the brush end of the markers. I colored the flower Polished Pink, the leaves Soft Succulent and the background spatter Pale Papaya. Then I huffed all over the stamp and stamped the flower on a Basic white panel. I also stamped the image on printer paper and fussy cut it out to make a mask and covered the stamped image with the mask before inking the stamp again and stamping the next flowers.

After stamping the medium flower from the Stampin’ Up! Flowing Flowers stamp set three times, I cleaned off the stamp and inked up the leaves with my Soft Succulent marker to add more leaves to the arrangement. I cleaned it up again and inked just the spatter with my Pale Papaya marker to fill in more spatter until I was happy with the arrangement.

I inked up the sentiment stamp from the Stampin’ Up! Flowing Flowers stamp set in Basic Gray and stamped it on the front panel. I embossed the panel with the Tasteful Textile 3D embossing folder to add texture and adhered the panel to a Polished Pink mat. I adhered the layered panel to the front of a Soft Succulent card base.

I cut a panel Soft Succulent Shimmer Vellum with the small detailed butterfly from the Brilliant Wings dies and adhered it to the card with a glue dot. I added a Soft Succulent In Color jewel to the butterfly and three Polished Pink jewels to each of the flowers.

I inked up the medium flower stamp from the Stampin’ Up! Flowing Flowers stamp set with my Polished Pink, Soft succulent and Pale Papaya Stampin’ Write markers again. I huffed on the stamp and stamped the image in the bottom corner of a Basic White panel. I cleaned off the stamp and used my Pale Papaya marker and mask to add more spatter to the edges and then adhered the panel to the inside of my card.

I love the Stampin’ Up! Flowing Flowers stamp set and have seen several techniques for getting a multicolor image such as inking the stamp with sponge daubers, blending brushes, or using the Stamparatus and they all have pros and cons. And then I remembered huffing and found this the easiest to do for this layout. What I really like is the creativity of trying different techniques and having so many options!


Sale-A-Bration is Ending on Monday!

Sale-A-Bration is one of Stampinโ€™ Up!โ€™s biggest promotions of the year with fun for everyone!  There are fantastic Sale-A-Bration specials for Shopping, Hosting and Joining! See my Promotions Page for more details or contact me and Iโ€™ll be happy to tell you more! But hurry because these specials are only available through February 28, 2022 or while supplies last!


All Together Collection Available Through May 2, 2022

Loving hands and heartfelt words are the best way to show you care. With hand designs that illustrate coming together in friendship and solidarity, the All Together Collection will help you create cardmaking and paper crafting projects that reflect the people you know and love.ย And the All Together Collection includes early-release products from the 2022โ€“2023 Annual Catalogโ€”an exciting new range of natural Stampinโ€™ Blends! Click on the picture below to download a PDF with all the details or click HERE to shop the collection in my Online Store.


Current Host Code: MPMDW6BG

Use this host code when you order $50 or more and receive a free gift from me!  The free gift is your choice of any item valued up to $10.00 in the 2021-2022 Annual Catalog or the January โ€“ June 2022 Mini Catalog!

If your order is over $150, please do not use the host code since you’ll receive your own Host Dollars plus I’ll still send you the free gift!  This host code can be used by anyone, no club or commitment required. Let me know if you have any questions.


If you need any stamping supplies, Iโ€™d be very happy to be your Demonstrator.  Just click on the Shop Now button on the right side of the screen to go directly to my online store or contact me if you have any questions.  Happy Stamping!

Thanks for stopping by and have a great week!

Akiko

  • Visit my online store here
  • See the current Stampinโ€™ Up! clearance rack specials here
  • Earn FREE Stampinโ€™ Up! products through my Wildflower Frequent Shopper Program – my way of saying thank you to my online frequent shopper customers.
  • Have any questions? I’d be happy to help, click here to contact me.

Cardstock Cuts for this project:

  • Soft Succulent – 4-1/4″ x 11″ card base scored at 5-1/2″
  • Polished Pink – 4″ x 5-1/4″
  • 2021-2023 In Color Shimmer Vellum – 1-1/2″ x 2″ (die cut butterfly)
  • Basic White – 4″ x 5-1/4″ (inside panel)

Stampinโ€™ Up! products used in this project:


Stampinโ€™ Up! Daffodil Daydream for the Happy Inkinโ€™ Thursday Blog Hop

Good morning and welcome to the Happy Inkin’ Thursday Blog Hop! I am sharing a Hello card today made with the beautiful Stampin’ Up! Daffodil Daydream bundle and the Sale-A-Bration Special Moments stamp set. You can find the supplies I used at the bottom of my post along with the sizes of cardstock used.

We have a Theme Challenge this week. We’re sharing Spring projects and for me daffodils are one of the first signs of spring!

I adhered a panel of the Sale-A-Bration Daffodil Afternoon designer series paper to a Very Vanilla mat and wrapped a length of Pale Papaya ribbon around it and tied a knot. I popped it on the front of a Pale Papaya card base with dimensionals. I cut a panel of Very Vanilla with the second largest circle from the Layering circle die and a panel of Pale Papaya with the second largest scalloped circle die. I embossed the Very Vanilla circle with the Meadow Moments embossing folder and adhered it to the scalloped circle. I adhered the layered circles to the card front with dimensionals over the ribbon.

I stamped stamped a Very Vanilla panel with the single daffodil from the Stampin’ Up! Daffodil Daydream cling stamp set in Memento Tuxedo Black ink. I colored it with Pale Papaya and Old Olive Stampin’ Blends and I used a blender pen to apply craft white ink on the bottom petals. I cut it out with the coordinating die and adhered it to the embossed circle with glue dots.

I stamped the sentiment from the Sale-A-Bration Special Moments stamp set in Old Olive on a Very Vanilla panel. I cut it out with the small pinked circle from the Tasteful Labels dies and adhered it to the card front with glue dots. I finished the card front with the pretty little brushed brass butterflies.

For the inside, I inked up the small daffodil stamp from the Stampin’ Up! Daffodil Daydream stamp set in Pale Papaya ink and stamped it off twice before stamping in the center of a Very Vanilla panel. I trimmed the bottom with a strip of the Daffodil Afternoon DSP and adhered the panel to the inside of the card.

The Stampin’ Up! Daffodil Daydream bundle is really versatile with pretty stamped daffodils and awesome die cut daffodils, so be sure to check it out. And don’t forget that Sale-A-Bration is ending on Monday! There are only 5 days left to pick up Sale-A-Bration items, such as the Special Moments stamp set or the Daffodil Afternoon DSP, for Free with your qualifying orders, so don’t delay.

On with the Hop! Click on the Next Blog button to move forward to see the beautiful project Karen Ksenzakovic has created.

If you get lost along the way, here are the participants for the hop:


Sale-A-Bration Ends Monday!

Sale-A-Bration is one of Stampinโ€™ Up!โ€™s biggest promotions of the year with fun for everyone!  There are fantastic Sale-A-Bration specials for ShoppingHosting and Joining! See my  Promotions Page for more details or contact me and Iโ€™ll be happy to tell you more! But hurry because these specials are only available through February 28, 2022 or while supplies last!


Current Host Code: 3QYMGKQY

Use this host code when you order $50 or more and receive a free gift from me!  The free gift is your choice of any item valued up to $10.00 in the 2021 – 2022 Annual Catalog or the January – June 2022 Mini Catalog!

If your order is over $150, please do not use the host code since you’ll receive your own Host Dollars plus I’ll still send you the free gift!  This host code can be used by anyone, no club or commitment required. Let me know if you have any questions.


If you need any stamping supplies, Iโ€™d be very happy to be your Demonstrator.  Just click on the Shop Now button on the right side of the screen to go directly to my online store or contact me if you have any questions. 

Thanks for stopping by and Happy Stamping!

Akiko

  • Visit my online store here
  • See the current Stampinโ€™ Up! clearance rack specials here
  • Earn FREE Stampinโ€™ Up! products through my Wildflower Frequent Shopper Program – my way of saying thank you to my online frequent shopper customers.
  • Have any questions? I’d be happy to help, click here to contact me.

Cardstock Cuts for this project:

  • Pale Papaya โ€“ 4-1/4″ x 11″ card base scored at 5-1/2″, 3-1/4″ x 3-1/4″ (scalloped circle)
  • Very Vanilla – two 4″ x 5-1/4″ panels (inside panel and front mat), 2-1/2″ x 3-1/2″ (daffodil), 3″ x 3″ (embossed circle), 1-1/2″ x 1-1/2″ (label)
  • Daffodil Afternoon DSP – 3-7/8″ x 5-1/8″ (front background), 1/2″ x 4″ (inside trim)

Stampinโ€™ Up! products used in this project:


Stampinโ€™ Up! On The Horizon Thinking of You Card

Good Morning! Last week I finally pulled out my Stampin’ Up! On the Horizon bundle for this card and I had a little of the New Horizons DSP left over. So I decided to use it for an example of the simplest and most elegant designs I’ve seen with this suite – a simple 3″ x 3″ panel mounted on a Basic White background. You can find the supplies I used at the bottom of my post along with the sizes of cardstock used.

I stamped the sentiment from the Stampin’ Up! On the Horizon stamp set about 1″ from the bottom of a Basic White panel and adhered the panel to the front of an Evening Evergreen card base.

I stamped the trees from the Stampin’ Up! On the Horizon cling stamp set in Basic Gray twice on the New Horizons designer series paper panel. I stamped the little birds from the Mountain Air stamp set in the sky using Basic Gray. These little birds are perfectly proportioned for the small panel. I adhered the DSP panel to an Evening Evergreen mat with liquid glue.

I cut a panel of Evening Evergreen with the tree die from the Horizons die and adhered it to the DSP panel with dots of liquid glue. I adhered the panel to the card front with dimensionals and finished the front with a Brushed Metallic dot.

I stamped the trees from the Stampin’ Up! On the Horizon stamp set twice in Basic Gray on the bottom of a Basic White panel. I cut another set of trees from Evening Evergreen and adhered it to the panel so that I echo the design on the small DSP panel on the card front. I adhered the panel to the inside of the card.

The Stampin’ Up! On The Horizon bundle has so many stamps and dies that can be used to dress up a square panel of the New Horizon DSP for simple 3″ x 3″ scenes. The simple dark card stock framing makes the scene pop, and you can easily incorporate other nature stamp or die sets such as the Mountain Air stamp set. It can be kept simple or stepped up with additional embellishments or embossing and it’s a great option for masculine cards. And you can get real creative and make 4 cards from a single sheet of New Horizons DSP for a nice set of handmade cards!


The March Paper Pumpkin Kit is Beyond the Horizon!

If you like the New Horizons suite, consider the March Paper Pumpkin kit. The Beyond the Horizon Paper Pumpkin Kit includes watercolor prints and designs inspired by the beautiful nature around us to create nine cards and coordinating envelopes. And this monthโ€™s kit includes another FREE stamp set inside (yesโ€”thatโ€™s two stamp sets in one kit!) as Paper Pumpkinโ€™s way of saying THANK YOU!

Here are the Details:

  • This monthโ€™s kit contains enough elements to create 9 cardsโ€”3 each of 3 designsโ€”and 9 coordinating envelopes.
    • Card size โ€“ 4-1/4โ€ณ x 5-1/2โ€ณ
    • Envelope size โ€“ 4-1/2โ€ณ x 5-3/4โ€ณ
  • This kit includes printed card bases, die-cut paper pieces, embellishments, adhesive, and more!
  • The Beyond the Horizon kit includes a Misty Moonlight Stampinโ€™ Spot.
  • Elegant watercolor designs curated by our in-house artists to take your crafting to the next level
  • This kitโ€™s stamp set is perfect for any occasion. With sentiments that say โ€œthanksโ€, โ€œhelloโ€, โ€œthinking of you,โ€ and so many more, youโ€™ll be able to use this stamp set year round.
  • And if you thought one stamp set was great just waitโ€”this monthโ€™s kit comes with a BONUS stamp set for FREE! 
  • This kit perfectly coordinates with the New Horizon Suite in the Jan-June Mini catalog.

Coordinating Colors:  Bumblebee, Calypso Coral, Evening Evergreen, Misty Moonlight, Night of Navy, Old Olive, Pale Papaya

If youโ€™re interested in subscribing to Paper Pumpkin, you can either sign up for a subscription where you are billed monthly for your kit or you can purchase a prepaid subscription in my Online Store. To see more information and to sign up for the monthly subscription click here. To see the options for prepaid subscriptions in my Online Store, click here.

Sign up deadline for the March 2022 kit is March 10, 2022.  Note: Supplies may be limited toward the end of the subscription period.


Sale-A-Bration is ending soon – Feb 28 2022!

Sale-A-Bration is one of Stampinโ€™ Up!โ€™s biggest promotions of the year with fun for everyone!  There are fantastic Sale-A-Bration specials for Shopping, Hosting and Joining! See my Promotions Page for more details or contact me and Iโ€™ll be happy to tell you more! But hurry because these specials are only available through February 28, 2022 or while supplies last!


Current Host Code: 3QYMGKQY

Use this host code when you order $50 or more and receive a free gift from me!  The free gift is your choice of any item valued up to $10.00 in the 2021-2022 Annual Catalog or the January โ€“ June 2022 Mini Catalog!

If your order is over $150, please do not use the host code since you’ll receive your own Host Dollars plus I’ll still send you the free gift!  This host code can be used by anyone, no club or commitment required. Let me know if you have any questions.


If you need any stamping supplies, Iโ€™d be very happy to be your Demonstrator.  Just click on the Shop Now button on the right side of the screen to go directly to my online store or contact me if you have any questions.  Happy Stamping!

Thanks for stopping by and have a great week!

Akiko

  • Visit my online store here
  • See the current Stampinโ€™ Up! clearance rack specials here
  • Earn FREE Stampinโ€™ Up! products through my Wildflower Frequent Shopper Program – my way of saying thank you to my online frequent shopper customers.
  • Have any questions? I’d be happy to help, click here to contact me.

Cardstock Cuts for this project:

  • Evening Evergreen – 4-1/4″ x 11″ card base scored at 5-1/2″, 3-1/4″ x 3-1/4″ (DSP mat), 1-1/2″ x 4-1/4″ (tree line die cuts)
  • Basic White – two 4″ x 5-1/4″ panels (inside and front panels)
  • New Horizons DSP – 3″ x 3″ (scene)

Stampinโ€™ Up! products used in this project:


Stampinโ€™ Up! Artfully Layered Hugs Card Video Tutorial

Good Morning! I have been having a lot of fun with the Stampin’ Up! Artfully Layered bundle, exploring new designs and techniques. I CASEd this card from the January – June Mini Catalog during my Facebook Live yesterday afternoon and really enjoyed all the different techniques that it used. You can find the supplies I used at the bottom of my post along with the sizes of cardstock used.

Here is the video of my Facebook Live from yesterday afternoon. I also posted a copy of the video in my YouTube channel and you can view it here if you prefer.

I stamped a panel of Artfully Composed designer series paper with the leaf stamps of the Stampin’ Up! Artfully Layered cling stamp set. I stamped the outline leaves in Evening Evergreen over the Old Olive leaves and in Old Olive ink over the Just Jade leaves. I stamped the long leaves in Mint Macaron ink in the Just Jade and Evening Evergreen leaves and then adhered the panel to the front of a Just Jade card base with liquid glue.

I cut adhered a strip of Layering Designs vellum to the front and cut a strip of Calypso Coral cut with the stitched pinked die and adhered it below the vellum. I die cut a strip of Evening Evergreen with the texture die three times and ran the strip through the die cutting machine without the die to flatten the last cut before adhering it to the card front. I stamped a bumblebee strip with the printed script stamp from the Stampin’ Up! Artfully Layered stamp set in Bumblebee ink and adhered it on top of the Evening Evergreen strip. Finally, I adhered a length of white frayed ribbon on top of the layered strips with glue dots.

I stamped the sentiment from the Stampin’ Up! Artfully Layered stamp set in Evening Evergreen ink on a Basic White panel. I stamped the outline leaf in twice stamped off Mint Macaron ink over the sentiment and stamped the script in Bumblebee. I cut it out with the outline leaf die. I cut a Mint Macaron panel with the detailed leaf die and adhered it to the back of the leaf label before adhering the layered label to the card front with dimensionals. I finished the card with a linen thread bow and Faux Sea Glass shapes.

For the inside of the card, I stamped the script stamp from the Stampin’ Up! Artfully Layered stamp set in Bumblebee and adhered another detailed leaf die cut over it. I stamped another strip of the Artfully Composed DSP to match the card front background and adhered it to the bottom. I adhered the panel to the inside of the card.

The Stampin’ Up! Artfully Layered bundle is perfect for exploring different stamping techniques and artistic designs and styles. And I loved CASEing this card from the catalog. There is so much inspiration in the catalog and so many examples of the different things you can do with this bundle especially. So feel free to step out of your comfort zone and try something new. Enjoy!


Earn Free Products During Sale-A-Bration: Jan 4 โ€“ Feb 28 2022!

Sale-A-Bration is one of Stampinโ€™ Up!โ€™s biggest promotions of the year with fun for everyone!  There are fantastic Sale-A-Bration specials for Shopping, Hosting and Joining! See my Promotions Page for more details or contact me and Iโ€™ll be happy to tell you more! But hurry because these specials are only available through February 28, 2022 or while supplies last!


Current Host Code: 3QYMGKQY

Use this host code when you order $50 or more and receive a free gift from me!  The free gift is your choice of any item valued up to $10.00 in the 2021-2022 Annual Catalog or the January โ€“ June 2022 Mini Catalog!

If your order is over $150, please do not use the host code since you’ll receive your own Host Dollars plus I’ll still send you the free gift!  This host code can be used by anyone, no club or commitment required. Let me know if you have any questions.


If you need any stamping supplies, Iโ€™d be very happy to be your Demonstrator.  Just click on the Shop Now button on the right side of the screen to go directly to my online store or contact me if you have any questions.  Happy Stamping!

Thanks for stopping by and have a great week!

Akiko

  • Visit my online store here
  • See the current Stampinโ€™ Up! clearance rack specials here
  • Earn FREE Stampinโ€™ Up! products through my Wildflower Frequent Shopper Program – my way of saying thank you to my online frequent shopper customers.
  • Have any questions? I’d be happy to help, click here to contact me.

Cardstock Cuts for this project:

  • Just Jade โ€“ 5-1/2″ x 8-1/2″ card base scored at 4-1/4โ€ณ
  • Mint Macaron – 2-1/4″ x 4-1/2″ (two leaf die cuts)
  • Bumblebee – 1/2″ x 3″ (stamped strip)
  • Evening Evergreen – 3/4″ x 4-1/4″ (die cut design strip)
  • Calypso Coral – 1″ x 3-1/4″ (die cut border strip)
  • Layering Designs Vellum – 1″ x 4-1/4″
  • Basic White – 4″ x 5-1/4″ (inside panel), 2-3/4″ x 2-3/4″ (label)
  • Artfully Composed DSP – 4-1/4″ x 5-1/2″ (front background), 1/2″ x 5-1/4″ (inside trim)

Stampinโ€™ Up! products used in this project:


Stampinโ€™ Up! Artfully Layered Hello Card

Good Morning! It’s another cold winter day so I made a card with the Stampin’ Up! Artfully Layered bundle to remind me of the warm tropics. I paired the fun sentiments and lush tropical foliage stamps with the die cut pineapple from the In The Tropics dies for a Hello card. You can find the supplies I used at the bottom of my post along with the sizes of cardstock used.

I adhered a panel of the Artfully Composed designer series paper to an Evening evergreen mat and popped it all on an Old Olive card base. I used snail in the middle of a panel of the beautiful Layering Designs vellum to adhere it to the card front (it will be covered by the pineapple). I die cut a panel of Just Jade with the leaf sprig die from the Tropical Layers dies in the Stampin’ Up! Artfully Layered bundle and adhered it to the card front with glue dots. The vellum gives me just enough contrast to prevent the die cut from fading into the DSP, and the die cut helps to tie the pineapple to the DSP (plus I love how leaving a few of the center leaves in makes the die cut casual).

I die cut the pineapple from the In The Tropics dies from Bumblebee and sponged Cinnamon Cider ink around the edges and points. I fussy cut a Bumblebee backing using the die cut and adhered the die cut to the front. I cut a panel of Old Olive with the pineapple top and sponged the edges with Evening Evergreen and curled the leaves with my fingers. I adhered the pineapple top to the card front with glue dots and popped the pineapple on top with dimensionals.

I stamped the sentiment from the Stampin’ Up! Artfully Layered cling stamp set in Versamark ink on an Evening Evergreen panel and sprinkled it with white embossing powder. I shook off the excess and heated the powder with my heat tool until it was shiny. I cut the sentiment out with the Messages die and adhered it to the card front with glue dots (where it overlapped the pineapple) and dimensionals. I finished it with an Evening Evergreen iridescent jewel.

For the inside of the card, I stamped the leaf sprig from the Stampin’ Up! Artfully Layered stamp set in twice stamped off Evening Evergreen ink in the corners of a Basic White panel and trimmed the bottom with a strip of Artfully Composed DSP. I adhered the panel to the inside of the card.

A big pineapple against tropical foliage – this little hello is sure to warm you on the coldest winter day!

Join me for a Facebook Live this Afternoon!

Iโ€™m planning to go live on my Facebook Page at 1:00 ET this afternoon to make another touch of tropics card with the Stampin’ Up! Artfully Layered bundle. Look forward to seeing you then!


Sale-A-Bration is Ending Soon: Feb 28 2022!

Sale-A-Bration is one of Stampinโ€™ Up!โ€™s biggest promotions of the year with fun for everyone!  There are fantastic Sale-A-Bration specials for Shopping, Hosting and Joining! See my Promotions Page for more details or contact me and Iโ€™ll be happy to tell you more! But hurry because these specials are only available through February 28, 2022 or while supplies last!


Current Host Code: 3QYMGKQY

Use this host code when you order $50 or more and receive a free gift from me!  The free gift is your choice of any item valued up to $10.00 in the 2021-2022 Annual Catalog or the January โ€“ June 2022 Mini Catalog!

If your order is over $150, please do not use the host code since you’ll receive your own Host Dollars plus I’ll still send you the free gift!  This host code can be used by anyone, no club or commitment required. Let me know if you have any questions.


If you need any stamping supplies, Iโ€™d be very happy to be your Demonstrator.  Just click on the Shop Now button on the right side of the screen to go directly to my online store or contact me if you have any questions.  Happy Stamping!

Thanks for stopping by and have a great week!

Akiko

  • Visit my online store here
  • See the current Stampinโ€™ Up! clearance rack specials here
  • Earn FREE Stampinโ€™ Up! products through my Wildflower Frequent Shopper Program – my way of saying thank you to my online frequent shopper customers.
  • Have any questions? I’d be happy to help, click here to contact me.

Cardstock Cuts for this project:

  • Old Olive – 4-1/4″ x 11″ card base scored at 5-1/2″, 2-1/2″ x 2-3/4″ (pineapple top)
  • Just Jade – 2-1/2″ x 3-1/4″ (leaf sprig)
  • Bumblebee – 2-1/2″ x 4-1/2″ (pineapple)
  • Evening Evergreen – 4″ x 5-1/4″ (front mat), 1/2″ x 4″ (inside trim)
  • Basic White – 4″ x 5-1/4″ (inside panel)
  • Layering Designs Vellum – 3″ x 4-1/2″ (background panel)
  • Artfully Composed DSP – 2-5/8″ x 4″ (front background), 1/2″ x 4″ (inside trim)

Stampinโ€™ Up! products used in this project:


Stampinโ€™ Up! Hello Ladybug Smile Card

Happy Friday! Last weekend I used the Stampin’ Up! Hello Ladybug bundle to make a fun fold card for my Facebook Live and I’m using it again for a friendship and encouragement card for today. The ladybug is so cute and the other stamps in the photopolymer stamp set give you lots of options for your card designs. You can find the supplies I used at the bottom of my post along with the sizes of cardstock used.

I started cutting out a panel of Basic White with the second largest Scalloped Contours die and adhering a panel of the pretty Sale-A-Bration Sunshine and Rainbows designer series paper to it with liquid glue. I adhered the panel to the front of a Pool Party card base. I stamped the large leaf from the Stampin’ Up! Hello Ladybug stamp set in Granny Apple Green on a Basic White panel and fussy cut it out with my paper snips. I adhered it to the card front.

I stamped 3 large flowers from the Stampin’ Up! Hello Ladybug stamp set in Daffodil Delight on Basic White and punched them out with the Medium Daisy Punch. I adhered them together with liquid glue and added an iridescent gemstone to the center before adhering them to the card front with a dimensional. I punched the ladybug body from Pattern Party DSP and Basic Black card stock and adhered them together. I stamped the wings in Real Red, punched them out with the Butterfly Builder punch and adhered them to the butterfly body. I added black matte dots to the wings and adhered the ladybug to the card front with dimensionals.

I stamped the sentiment from the Daisy Lane stamp set in Real Red on Basic White and cut it out with the Tasteful Labels die. I adhered the label to the card front with liquid glue, tucking it under the leaf. I finished the card with a black and white twine bow.

I stamped the small bunch of flowers from the Stampin’ Up! Hello Ladybug stamp set in Daffodil Delight ink in the corners of a Basic White panel and the sweet sentiment from the Daisy Lane stamp set in Real Red. I trimmed the bottom with a strip of Sunshine and Rainbows DSP and adhered the panel to the inside of the card.

The Stampin’ Up! Hello Ladybug bundle is so cute and versatile. It’s perfect for many occasions, so be sure to check it out! Thanks for stopping by and have a great weekend!


Sale-A-Bration is ending soon – Feb 28 2022!

Sale-A-Bration is one of Stampinโ€™ Up!โ€™s biggest promotions of the year with fun for everyone!  There are fantastic Sale-A-Bration specials for Shopping, Hosting and Joining! See my Promotions Page for more details or contact me and Iโ€™ll be happy to tell you more! But hurry because these specials are only available through February 28, 2022 or while supplies last!


Current Host Code: 3QYMGKQY

Use this host code when you order $50 or more and receive a free gift from me!  The free gift is your choice of any item valued up to $10.00 in the 2021-2022 Annual Catalog or the January โ€“ June 2022 Mini Catalog!

If your order is over $150, please do not use the host code since you’ll receive your own Host Dollars plus I’ll still send you the free gift!  This host code can be used by anyone, no club or commitment required. Let me know if you have any questions.


If you need any stamping supplies, Iโ€™d be very happy to be your Demonstrator.  Just click on the Shop Now button on the right side of the screen to go directly to my online store or contact me if you have any questions.  Happy Stamping!

Thanks for stopping by and have a great week!

Akiko

  • Visit my online store here
  • See the current Stampinโ€™ Up! clearance rack specials here
  • Earn FREE Stampinโ€™ Up! products through my Wildflower Frequent Shopper Program – my way of saying thank you to my online frequent shopper customers.
  • Have any questions? I’d be happy to help, click here to contact me.

Cardstock Cuts for this project:

  • Pool Party – 4-1/4″ x 11″ card base scored at 5-1/2″
  • Basic Black – 2″ x 2″ (ladybug)
  • Basic White – 4″ x 5-1/4″ (inside panel), 3-1/2″ x 4-3/4″ (scalloped rectangle), 2″ x 2-1/2″ (label), 2″ x 6″ (flower), 2-1/2″ x 2-1/2″ (leaf), 2″ x 2″ (ladybug wings)
  • Sunshine & Rainbows DSP – 2-5/8″ x 4″ (scalloped panel background), 1/2″ x 4″ (inside trim)
  • Pattern Party DSP – 2″ x 2″ (ladybug)

Stampinโ€™ Up! products used in this project:


Stampinโ€™ Up! On the Horizon for the Happy Inkinโ€™ Thursday Blog Hop

Good morning and welcome to the Happy Inkin’ Thursday Blog Hop! For today’s card, I used the wonderful Stampin’ Up! On The Horizon bundle with the beautiful New Horizons 6″ x 6″ designer series paper to make a masculine thank you card with an outdoors landscape. You can find the supplies I used at the bottom of my post along with the sizes of cardstock used.

We have a sketch challenge this week. Here is the pretty sketch we are using:

I embossed a panel of Gray Granite with the Timeworn Type embossing folder and adhered it to the front of a Gray Granite card base. I stamped the grass stamp from the Stampin’ Up! On The Horizon cling stamp set in Evening Evergreen on a panel of New Horizons 6″ x 6″ designer series paper. I stamped the birds in the sky with Basic Gray ink and adhered the image to a Misty Moonlight mat.

I stamped stamped a Basic White panel with the wood stamp from the Stampin’ Up! On The Horizon stamp set using stamped off Gray Granite ink and cut it out with the fence die from the Horizon Dies. I used a sponge dauber to add more Gray Granite ink to distress the fence, giving it a weathered look. I used the grass die to cut three clumps from an Evening Evergreen panel of the New Horizons 6″ x 6″ DSP. I trimmed the end off the first and adhered it to the DSP over the stamped grass. I gently curved the fence and applied liquid glue to the first and last slat and adhered it to the panel over the grasses. I trimmed the end off the second die cut grass and adhered it under the fence with dimensionals.

I inked up the thanks part of the sentiment from the Stampin’ Up! On The Horizon stamp set in Misty Moonlight ink and stamped it on a Gray Granite panel. I cut it out with the Messages die and adhered it to the panel with glue dots. I adhered the panel to the card front with dimensionals and adhered some Pebbles Enamel Shapes to the bottom around the fence and grasses.

For the inside, I stamped the grass stamp from the Stampin’ Up! On The Horizon stamp set in Evening Evergreen ink in the corner of a Basic White panel. I stamped the birds in the top corner using Basic Gray ink. I adhered a strip of New Horizons 6″ x 6″ DSP to the bottom and adhered the last grass die cut on top. I adhered the panel to the inside of the card.

The Stampin’ Up! On the Horizon bundle is a lot of fun with it’s unique dies and great sentiments. And with the beautiful New Horizons 6″ x 6″ DSP, it is so easy to make beautiful watercolor landscape or seascape cards and be creative!

On with the Hop! Click on the Next Blog button to move forward to see the beautiful project Karen Ksenzakovic has created.

If you get lost along the way, here are the participants for the hop:


Earn Free Products During Sale-A-Bration: Jan 4 โ€“ Feb 28 2022!

Sale-A-Bration is one of Stampinโ€™ Up!โ€™s biggest promotions of the year with fun for everyone!ย  There are fantastic Sale-A-Bration specials forย Shopping,ย Hostingย andย Joining! See myย  Promotions Pageย for more details orย contact meย and Iโ€™ll be happy to tell you more! But hurry because these specials are only available throughย February 28, 2022ย or while supplies last!


Current Host Code: 3QYMGKQY

Use this host code when you order $50 or more and receive a free gift from me!  The free gift is your choice of any item valued up to $10.00 in the 2021 – 2022 Annual Catalog or the January – June 2022 Mini Catalog!

If your order is over $150, please do not use the host code since you’ll receive your own Host Dollars plus I’ll still send you the free gift!  This host code can be used by anyone, no club or commitment required. Let me know if you have any questions.


If you need any stamping supplies, Iโ€™d be very happy to be your Demonstrator.  Just click on the Shop Now button on the right side of the screen to go directly to my online store or contact me if you have any questions. 

Thanks for stopping by and Happy Stamping!

Akiko

  • Visit my online store here
  • See the current Stampinโ€™ Up! clearance rack specials here
  • Earn FREE Stampinโ€™ Up! products through my Wildflower Frequent Shopper Program – my way of saying thank you to my online frequent shopper customers.
  • Have any questions? I’d be happy to help, click here to contact me.

Cardstock Cuts for this project:

  • Gray Granite โ€“ 4-1/4″ x 11″ card base scored at 5-1/2″, 4-1/4″ x 5-1/2″ (embossed background), 1″ x 2″ (label)
  • Misty Moonlight – 3″ x 4-3/4″ (front mat)
  • Basic White – 4″ x 5-1/4″ (inside panel), 2″ x 2″ (die cut fence)
  • New Horizons 6″ x 6″ DSP – 2-3/8″ x 4-5/8″ (art panel), 2-1/2″ x 3″ (die cut grasses), 1/2″ x 4″ (inside trim)

Stampinโ€™ Up! products used in this project:


Stampinโ€™ Up! Hello Ladybug Video Tutorial

Good Morning! The Stampin’ Up! Hello Ladybug bundle is so adorable. With the bold, graphic ladybug stamps and coordinating Ladybug Builder Punch, it is so easy to make a bunch of cute little bugs to decorate cards and tags. I made this cute little fun fold card during my Facebook Live yesterday afternoon. You can find the supplies I used at the bottom of my post along with the sizes of cardstock used.

Here is the video of my Facebook Live from yesterday afternoon. I also posted a copy of the video in my YouTube channel and you can view it here if you prefer.

I a panel of pretty multicolor Flowering Fields designer series paper to a So Saffron panel. I adhered another Mango Melody Flowering Fields Panel to the front of my mini card. I adhered my mini card to the DSP panel with Tear & Tape adhesive. I stamped the leaf from the Stampin’ Up! Hello Ladybug photopolymer stamp set in Pear Pizzazz on Basic White and fussy cut it with a small white border. I adhered the leaf to the mini card front with liquid glue.

I stamped the large flower from the Stampin’ Up! Hello Ladybug stamp set three times in Highland Heather ink and cut them out with the Medium Daisy Punch. I curved the petals and adhered the clusters together with liquid glue and adhered it to the card front with dimensionals, finishing the center with an iridescent rhinestone. I stamped two ladybug wings with Poppy Parade ink on Basic White and punched them out with the Ladybug Builder Punch. I punched out two ladybug bodies from Pattern Party DSP and Basic Black card stock. I inked the edges of the Pattern Party bodies with my black Stamp & Write marker and adhered them to the Basic Black cardstock bodies. I adhered the wings with liquid glue and adhered Black Matte Dots to the wing spots.

I adhered the ladybugs to the card front with dimensionals, letting them hang over the sides of the mini card. I stamped the hello sentiment from the Stampin’ Up! Hello Ladybug stamp set in Poppy Parade on Basic White and trimmed it with my paper snips. I adhered the label to the card front on top of the leaf.

For the inside of the card, I stamped the sentiment from the Stampin’ Up! Hello Ladybug stamp set in Poppy Parade on a basic White panel. I trimmed the bottom with a strip of the Flowering Fields DSP and adhered the panel to the inside of the card.

The Stampin’ Up! Hello Ladybug bundle is the cutest! You can punch out the ladybug from colored card stock, stamped card stock and designer series paper for a wide range of styles. The bold stamps compliment the punched bugs and the sentiments are perfect for expressions of friendship, support and good wishes.


Earn Free Products During Sale-A-Bration: Jan 4 โ€“ Feb 28 2022!

Sale-A-Bration is one of Stampinโ€™ Up!โ€™s biggest promotions of the year with fun for everyone!  There are fantastic Sale-A-Bration specials for Shopping, Hosting and Joining! See my Promotions Page for more details or contact me and Iโ€™ll be happy to tell you more! But hurry because these specials are only available through February 28, 2022 or while supplies last!


Current Host Code: 3QYMGKQY

Use this host code when you order $50 or more and receive a free gift from me!  The free gift is your choice of any item valued up to $10.00 in the 2021-2022 Annual Catalog or the January โ€“ June 2022 Mini Catalog!

If your order is over $150, please do not use the host code since you’ll receive your own Host Dollars plus I’ll still send you the free gift!  This host code can be used by anyone, no club or commitment required. Let me know if you have any questions.


If you need any stamping supplies, Iโ€™d be very happy to be your Demonstrator.  Just click on the Shop Now button on the right side of the screen to go directly to my online store or contact me if you have any questions.  Happy Stamping!

Thanks for stopping by and have a great week!

Akiko

  • Visit my online store here
  • See the current Stampinโ€™ Up! clearance rack specials here
  • Earn FREE Stampinโ€™ Up! products through my Wildflower Frequent Shopper Program – my way of saying thank you to my online frequent shopper customers.
  • Have any questions? I’d be happy to help, click here to contact me.

Cardstock Cuts for this project:

  • So Saffron โ€“ 3-1/4″ x 8-1/2″ mini card base scored at 4-1/4โ€ณ, 4-1/4″ x 5-1/2″ card base panel
  • Basic Black – 2″ x 5″ (ladybugs)
  • Basic White – 3″ x 4″ (inside panel), 2″ x 4″ (ladybug wings), 2″ x 6″ (flower), 2-1/2″ x 2-1/2″ (leaf), 3/8″ x 1″ (label)
  • Flowering Fields DSP – 4″ x 5-1/4″ (floral background panel), 3″ x 4″ (front panel), 1/2″ x 3″ (floral inside trim)
  • Pattern Party DSP – 2″ x 5″ (ladybugs)

Stampinโ€™ Up! products used in this project:


Stampinโ€™ Up! Gumball Greetings Valentine

Good Morning! Monday is Valentine’s Day – Do you have all your Valentines ready? I pulled out the Stampin’ Up! Gumball Greetings stamp set and a bunch of die sets to pull together this pretty Valentine for my sweetie. You can find the supplies I used at the bottom of my post along with the sizes of cardstock used.

I adhered a panel of the heart design Pattern Party Host designer series paper to a Bermuda Bay mat and adhered them to a Basic White note card with liquid glue. I cut a Basic White panel with the second largest scalloped rectangle from the Stitched So Sweetly dies and layered my die cuts on top.

I cut the scalloped circle and stitched heart from Real Red using the Give It a Whirl dies. This die set has some wonderful stitched shapes in addition to the spinning wheel – clouds, stars and hearts, so be sure to check it out. I also cut Pumpkin Pie, Bermuda Bay and Granny Apple Green panels with the smallest stitched heart die for accents. I cut a Basic White panel with the third smallest Layering Circles die and embossed it with the Ornate Floral embossing folder. And I cut the Love You from the Love You More Than dies from Real Red card stock.

I adhered the words on the scalloped rectangle die cut with small dots of liquid glue along with the embossed circle. I adhered the scalloped circle over the embossed circle with dimensionals and centered the large stitched heart in the center. I adhered the small stitched hearts over the sentiment and adhered the scalloped rectangle to the card front with liquid glue.

I was going to stamp the sentiment from the Stampin’ Up! Gumball Greetings stamp set on the inside of the note card, but I dropped the inked stamp, messing up the inside. So I stamped the sentiment on a Basic White panel in Real Red and adhered it to a Bermuda Bay mat and adhered that to the inside of the note card, covering my mess. I have to do this way to often, and I find that using a mat under your Basic White panel really helps to cover stray ink marks – plus it gives a nice frame for your writing area!

The note cards are the perfect size for Valentines, and there are so many stamp and die sets that you can pull elements from for making a card for your sweeties if you don’t have a dedicated Valentine’s Day set. The Stampin’ Up! Gumball Greetings stamp set has the perfect sentiment (in addition to the fabulous gumball machine) and it even has some small sentiments that go with the holiday. So get creative and finish up your Valentines because everyone can use a little love note!


Earn Free Products During Sale-A-Bration: Jan 4 โ€“ Feb 28 2022!

Sale-A-Bration is one of Stampinโ€™ Up!โ€™s biggest promotions of the year with fun for everyone!  There are fantastic Sale-A-Bration specials for Shopping, Hosting and Joining! And itโ€™s happening through February 28, 2022!

SHOP 

During Sale-A-Bration you get to choose a FREE Sale-A-Bration product with every $50 or $100 you spend (before Shipping and tax). There are 7 items that are available for free with every $50 you spend and 2 items that are available for free with every $100 you spend.

HOST

Host a party during Sale-A-Bration and both you and your guests can earn FREE Sale-A-Bration products! Plus, place any party or personal order of $300 or more and receive the exclusive Calming Camellia cling stamp set for FREE! And you can even host a virtual party! Drop me an email at apsudano@stampininthemeadows.com if you are interested in setting up a host code for yourself to see if you can collect $300 in orders from yourself and your stamping friends to get that FREE stamp set!  Iโ€™m happy to set up a code just for you!

JOIN

And there is an awesome joining special during Sale-A-Bration! When you join as a Stampinโ€™ Up! Demonstrator, you pay $99 for your starter kit and you get to choose $125 in product from any current catalog plus your starter kit ships for free! And if you join during Sale-A-Bration you get to pick two additional stamp sets to add to your starter kit for free! Contact me if you have any questions about joining and Iโ€™ll be happy to tell you more!


From the hands and hearts of the Stampinโ€™ Up! in-house artisans to you comes this monthโ€™s breathtaking kit. The Beyond the Horizon Paper Pumpkin Kit includes watercolor prints and designs inspired by the beautiful nature around us to create nine cards and coordinating envelopes. And paper pieces that perfectly coordinate with the New Horizons Suite Collection in the Januaryโ€“June 2022 Mini Catalog. And this monthโ€™s kit includes another FREE stamp set inside (yesโ€”thatโ€™s two stamp sets in one kit!) as Paper Pumpkinโ€™s way of saying THANK YOU!

Here are the Details:

  • This monthโ€™s kit contains enough elements to create 9 cardsโ€”3 each of 3 designsโ€”and 9 coordinating envelopes.
    • Card size โ€“ 4-1/4โ€ณ x 5-1/2โ€ณ
    • Envelope size โ€“ 4-1/2โ€ณ x 5-3/4โ€ณ
  • This kit includes printed card bases, die-cut paper pieces, embellishments, adhesive, and more!
  • The Beyond the Horizon kit includes a Misty Moonlight Stampinโ€™ Spot.
  • Elegant watercolor designs curated by our in-house artists to take your crafting to the next level
  • This kitโ€™s stamp set is perfect for any occasion. With sentiments that say โ€œthanksโ€, โ€œhelloโ€, โ€œthinking of you,โ€ and so many more, youโ€™ll be able to use this stamp set year round.
  • And if you thought one stamp set was great just waitโ€”this monthโ€™s kit comes with a BONUS stamp set for FREE! 
  • This kit perfectly coordinates with the New Horizon Suite in the Jan-June Mini catalog.

Coordinating Colors:  Bumblebee, Calypso Coral, Evening Evergreen, Misty Moonlight, Night of Navy, Old Olive, Pale Papaya

If youโ€™re interested in subscribing to Paper Pumpkin, you can either sign up for a subscription where you are billed monthly for your kit or you can purchase a prepaid subscription in my Online Store. To see more information and to sign up for the monthly subscription click here. To see the options for prepaid subscriptions in my Online Store, click here.

Sign up deadline for the March 2022 kit is March 10, 2022.  Note: Supplies may be limited toward the end of the subscription period.


Current Host Code: 3QYMGKQY

Use this host code when you order $50 or more and receive a free gift from me!  The free gift is your choice of any item valued up to $10.00 in the 2021-2022 Annual Catalog or the July โ€“ December 2021 Mini Catalog!

If your order is over $150, please do not use the host code since you’ll receive your own Host Dollars plus I’ll still send you the free gift!  This host code can be used by anyone, no club or commitment required. Let me know if you have any questions.


If you need any stamping supplies, Iโ€™d be very happy to be your Demonstrator.  Just click on the Shop Now button on the right side of the screen to go directly to my online store or contact me if you have any questions.  Happy Stamping!

Thanks for stopping by and have a great week!

Akiko

  • Visit my online store here
  • See the current Stampinโ€™ Up! clearance rack specials here
  • Earn FREE Stampinโ€™ Up! products through my Wildflower Frequent Shopper Program – my way of saying thank you to my online frequent shopper customers.
  • Have any questions? I’d be happy to help, click here to contact me.

Cardstock Cuts for this project:

  • Bermuda Bay – two 3″ x 4-1/2″ panels (front and inside mats), 1″ x 1″ (die cut small hearts)
  • Real Red – 2-1/2″ x 5″ (die cut large heart, scalloped circle frame and words)
  • Granny Apple Green – 1″ x 1″ (die cut small hearts)
  • Pumpkin Pie – 1″ x 1″ (die cut small hearts)
  • Basic White – 2-1/4″ x 3-1/2″ (scalloped rectangle), 1-1/2″ x 1-1/2″ (embossed circle), 2-7/8″ x 4-3/8″ (inside panel)
  • Pattern Party DSP – 2-7/8″ x 4-3/8″ (front background)

Stampinโ€™ Up! products used in this project: