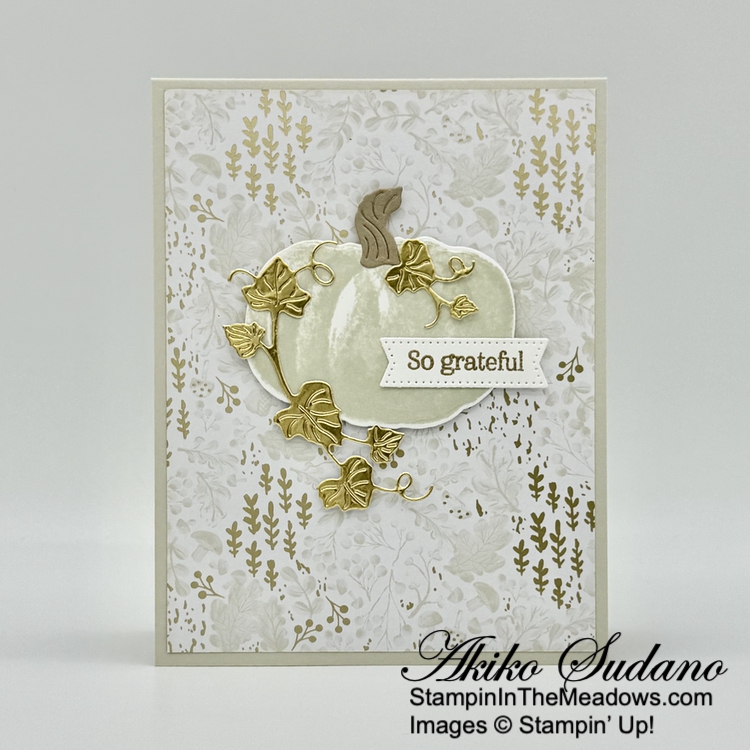
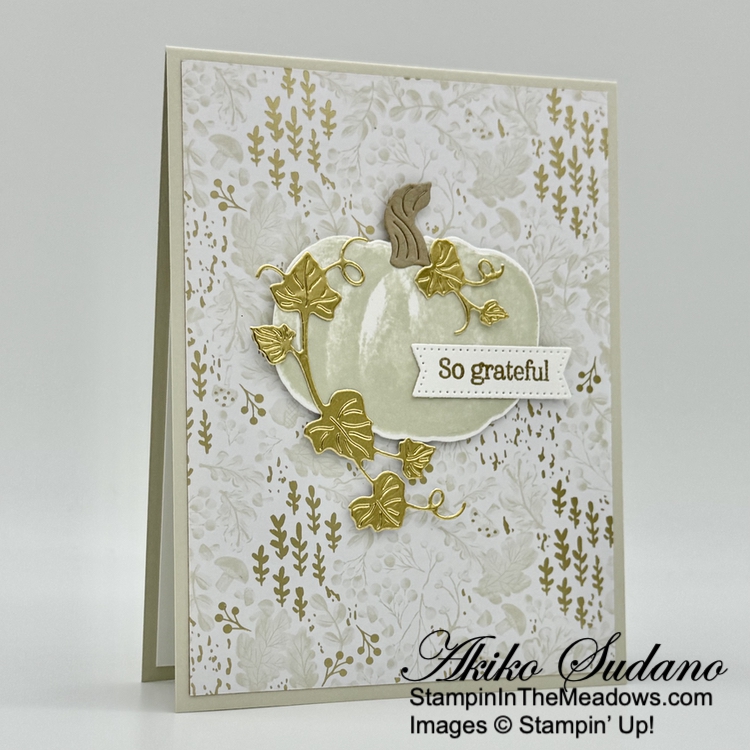
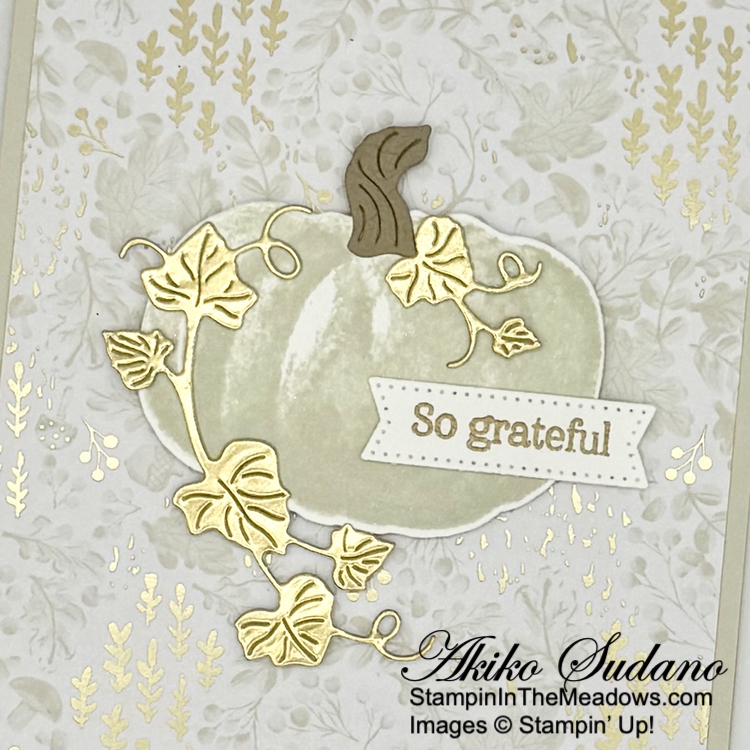
Good Morning and welcome to the Happy Inkin’ Thursday Blog Hop! Here is a simple Thanksgiving card made with the Stampin’ Up! Beautiful Pumpkins bundle and the Gather Together specialty designer series paper. You can find the supplies I used along with card stock cuts at the bottom of my post.
We have a theme challenge this week:
Adhere a panel of Gather Together specialty designer series paper to the front of a Basic Beige card base with liquid glue.
Stamp the detailed large pumpkin from the Stampin’ Up! Beautiful Pumpkins stamp set using Basic Beige ink. Stamp the background image using stamped off ink on top of the detailed image. Cut out the pumpkin with the coordinating die. Cut a stem from Crumb Cake card stock using the large stem die and adhere it to the pumpkin. Adhere the pumpkin to the card with dimensionals.
Use the two vine and leaves dies from the Stampin’ Up! Beautiful Pumpkins dies to cut gold foil and adhere them to the card with glue dots and dimensionals. Stamp the first part of the sentiment using Versamark ink on Basic White. Sprinkle it with gold embossing powder and heat set. Cut out the label with the small banner from the Stylish Shapes dies. Adhere the label to the card with glue dots and dimensionals.
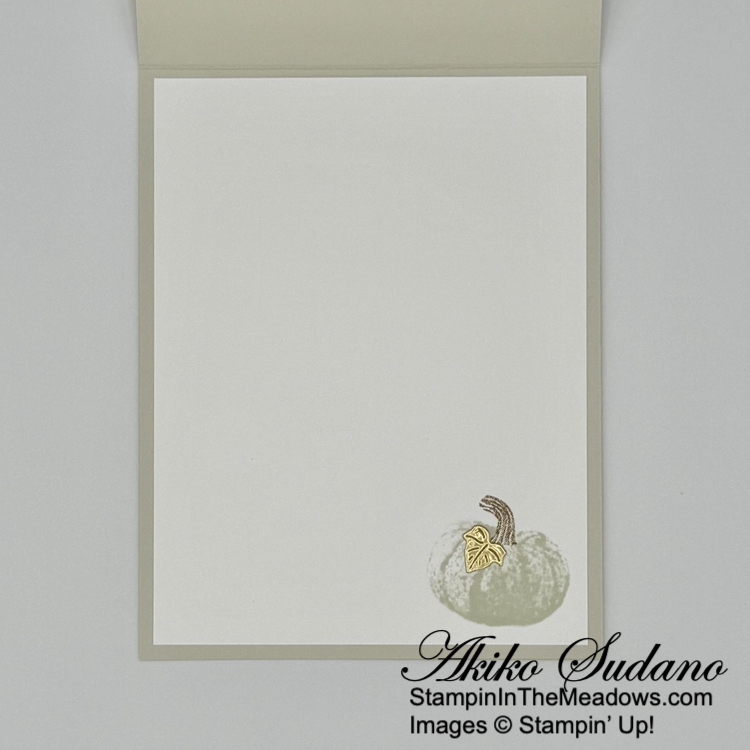
For the inside, stamp the small detailed pumpkin from the Stampin’ Up! Beautiful Pumpkins stamp set using Basic Beige ink in the corner of a Basic White panel. Stamp the background stamp using stamped off Basic Beige ink and the stem using Crumb Cake ink. Cut out a small leaf from gold foil and adhere it to the pumpkin and adhere the panel to the inside of the card with Stampin’ Seal.
The Stampin’ Up!Beautiful Pumpkins bundle is a simple Fall set with pretty two-step stamping pumpkins, sentiments and great dies. In keeping with the CAS theme challenge, I didn’t use any embellishments or ribbon, and it really lets the gold foil shine!
On with the Hop! Click on the Next Blog button to move forward to see the beautiful project Tara Carpenterhas created.
If you get lost along the way, here are the participants for the hop:
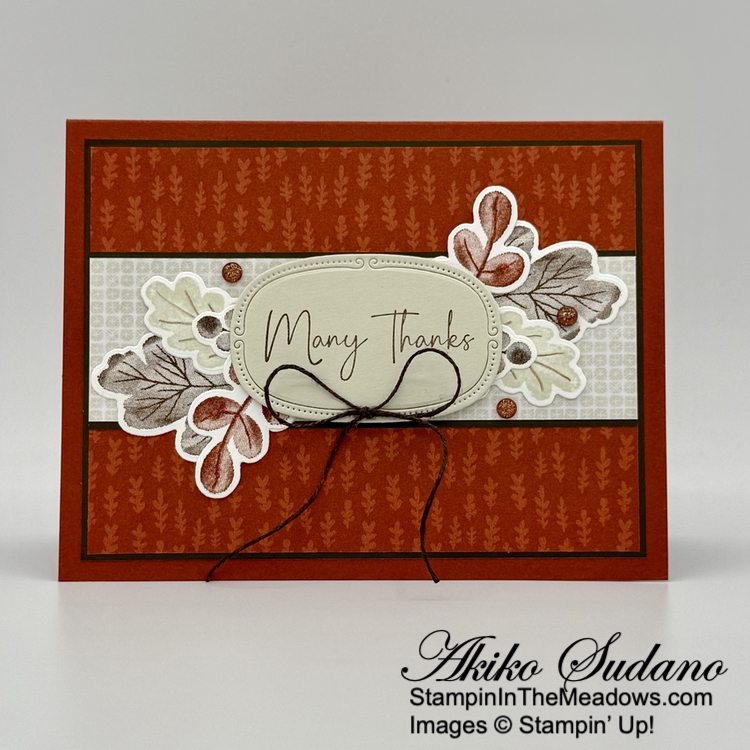
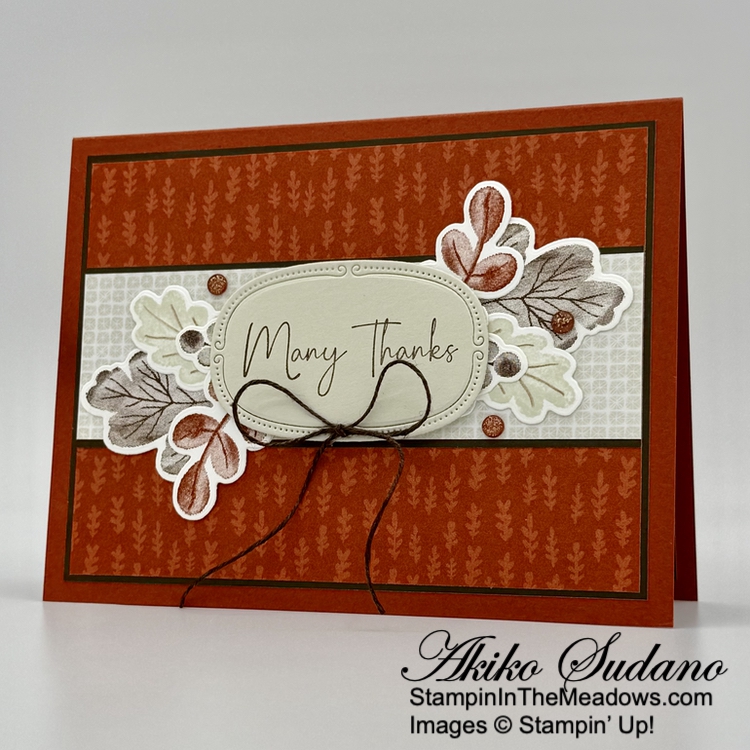
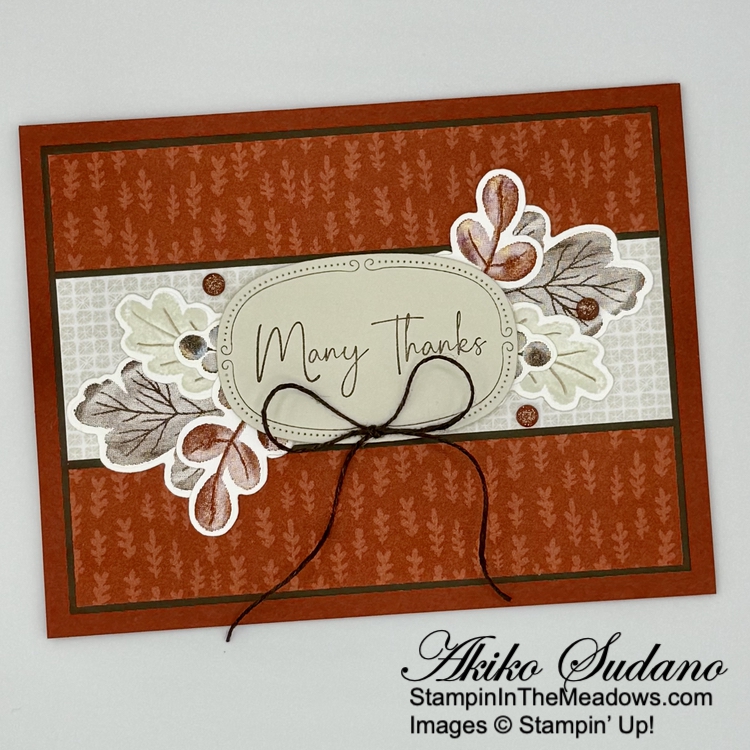
Good Morning and welcome to the Happy Inkin’ Thursday Blog Hop! Fall is here and I used the beautiful Stampin’ Up! Gathering Moments bundle along with the Gather Together specialty designer series paper to make a Thanksgiving card. You can find the supplies I used along with card stock cuts at the bottom of my post.
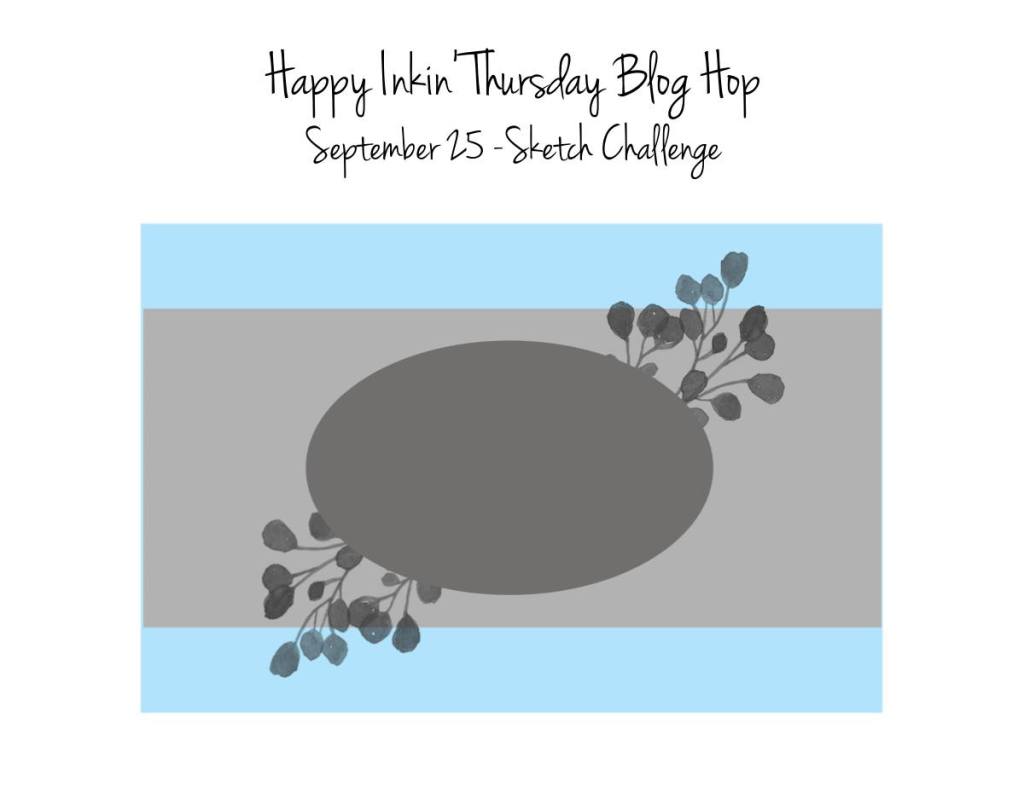
We have a pretty sketch challenge this week:
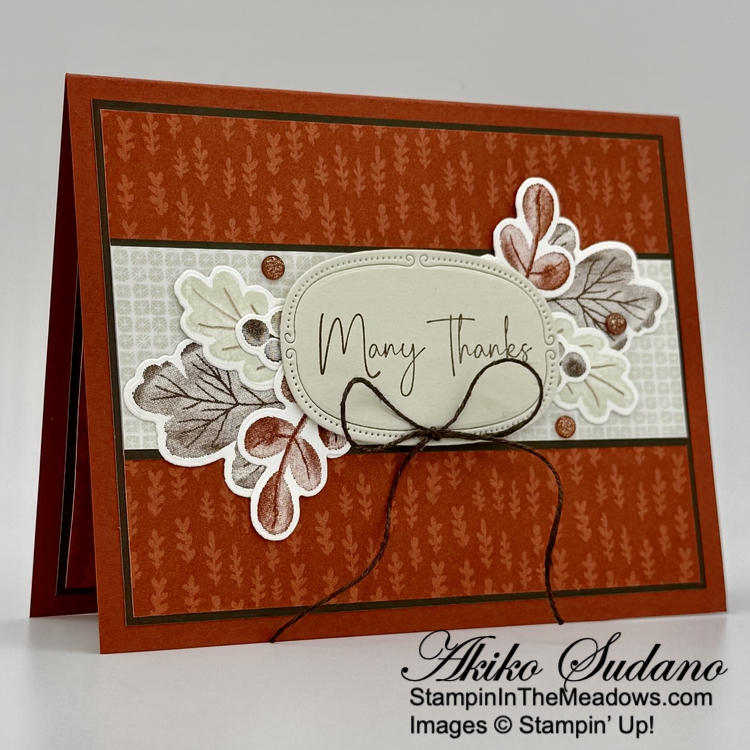
Adhere a strip of Basic Beige Gather Together specialty designer series paper to the dark side of a two-tone Early Espresso mat and adhere it to a Cajun Craze panel of the DSP. Adhere it to another dark Early Espresso mat before adhering it to the front of a Cajun Craze card base. The two-tone card stock is a little thinner than regular card stock so you get the pretty effects of the layered card front without extra bulk, making it great for mailing.
Stamp the leaf and berry clusters from the Stampin’ Up! Gathering Moments stamp set using Early Espresso, Cajun Craze and Basic Beige inks and cut them out with the coordinating dies. I stamped and cut two of each. I also used the Early Espresso watercolor pencil to draw the veins on the Basic Beige leaves to get more contrast. Adhere the leaves and berries together with liquid glue making little clusters and use glue dots to adhere the clusters to the card.
Stamp the sentiment from the Stampin’ Up! Gathering Moments stamp set on Basic Beige using Early Espresso ink and cut it out with the pretty Traditional Labels die. Adhere the label to the card with dimensionals and finish with a loopy Early Espresso linen thread bow and Cajun Craze dots.
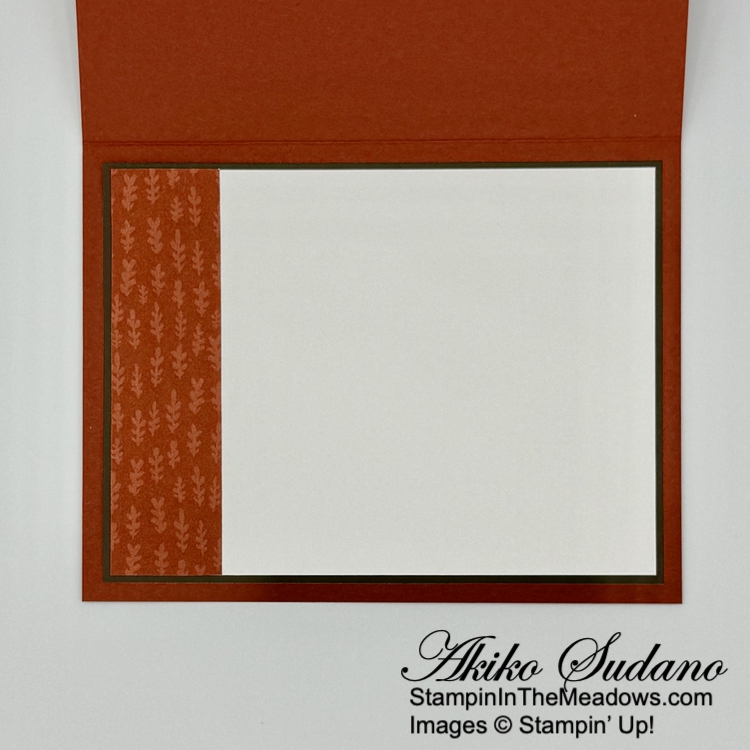
For the inside, I kept it simple by adhering a strip of DSP to the side of a Basic White panel and adhered it to an Early Espresso two-tone mat before adhering it to the inside of the card.
The Stampin’ Up! Gathering Moments bundle is a wonderful leaf set that is great for making Fall cards. And of course I love the Gather Together specialty DSP!
On with the Hop! Click on the Next Blog button to move forward to see the beautiful project Tara Carpenterhas created.
If you get lost along the way, here are the participants for the hop:
Good Morning! Today I’m sharing my final Thanksgiving card for this year – I’ll be sending them out to my family this week and moving on to finishing up Christmas cards. Kind of sad because I really love the fall season. This is the card I made during my Facebook Live video tutorial yesterday afternoon and it is full of pumpkins from the Stampin’ Up! Gather Together stamp set and Gathered Leaves dies. And I filled it out with an Autumn version of the new Quite Curvy leaves! You can find the supplies used to create this card at the bottom of my post along with the sizes of cardstock used.
Here is the Facebook Live video showing how I made the card:
I posted a copy of the video in my YouTube channel here so you can view it there if you prefer. Later this week I hope to get a quickie version posted to my channel too.
I started by stamping the pumpkins from the Stampin’ Up! Gather Together photopolymer stamp set in Cajun Craze ink on Whisper White. I stamped three large pumpkins and two of the smaller sets of pumpkins and colored them with Pumpkin Pie and Mossy Meadow Stampin’ Blends. I fussy cut them out. I cut two large leaves from the Gathered Leaves Dies from Old Olive card stock.
I stamped the large leafy vine from the Quite Curvy photopolymer stamp set in Soft Suede ink on Whisper White and cut it out with the coordinating die. I colored the leaves with Cajun Craze, Mango Melody, Cinnamon Cider and Old Olive Stampin’ Blends. I adhered a panel of Cinnamon Cider 2020-2022 In Color 6″ x 6″ designer series paper to a Cajun Craze mat and adhered it to the front of a Bumblebee card base. I adhered the die cut leaves to the panel with liquid glue and adhered the pumpkins across the bottom. I used liquid glue on all except the center pumpkin, which I popped on with a dimensional.
I adhered the Quite Curvy leafy vine with dimensionals on the bottom of the arrangement. I stamped the sentiment from the Stampin’ Up! Gathered Together stamp set in Soft Suede ink on a Bumblebee panel. I cut it out with the small label die from the Beautiful Boughs dies and stamped the wheat sheafs in Bumblebee ink. I adhered the label to the front of the card with dimensionals and finished of the card front with three Bumblebee enamel gems.
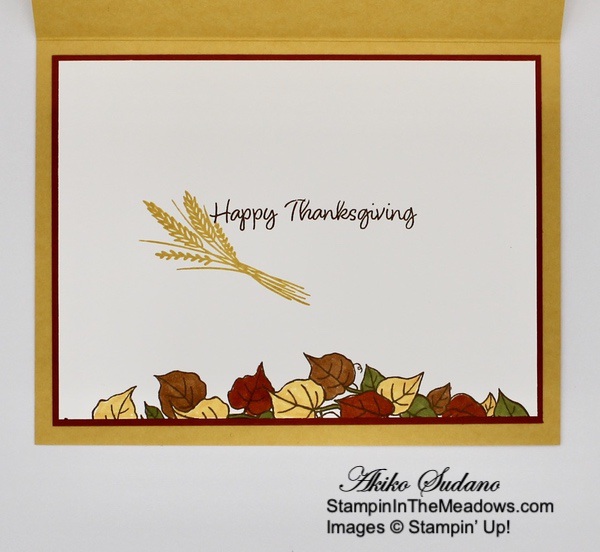
I stamped the sentiment from the Banner Year photopolymer stamp set in Cajun Craze ink on a Whisper White panel. I stamped the wheat sheaf from the Stampin’ Up! Gather Together stamp set in Bumblebee ink next to the sentiment and stamped the leafy vine in Soft Suede ink on the bottom. I colored the leaves with dimensionals like the card front and adhered the panel to a Cajun Craze mat before adhering it to the inside of the card.
I love the Stampin’ Up! Gather Together Bundle and was so happy to see it return in the Aug-Dec 2020 Mini Catalog. And I love the fall version of the Quite Curvy leafy vine!! Thanks for stopping by and Have a great week!
Stampin’ Up! Curvy Celebrations Going On now!
The Stampin’ Up! Curvy Celebrations runs through January 4, 2021. This will include the Quite Curvy bundle, which is an early release of the upcoming January – June 2021 Mini Catalog along with the Curvy Christmas stamp set and Classic Christmas 6″ x 6″ designer series paper. Click on the picture above to view PDF Flyer with all the details. And if you purchase either the Quite Curvy Variety Bundle (item 158396) or the Quite Curvy Bundle (item 156228) from me between now and January 4, you will receive our special Online Tutorial Class with videos. This is an exclusive set of written and video tutorials created by Inkin’ Krew team members who purchase these products during the Curvy Celebrations!
January – June 2021 Mini Catalog and Sale A Bration is Coming Soon!
Last weekend at Stampin’ Up! OnStage, we got to see many of the new products that will be coming in the new January-June 2021 Mini Catalog – and they are so amazing! Another benefit of attending OnStage is that we got the opportunity to order a few of the new products and received copies of the new Mini Catalog and Sale A Bration Brochure! So I’m busy looking through the catalogs, planning my pre-order next month – including new catalogs for my customers! If you’ve placed orders with me of at least $50 during the past year, you are automatically on my list to get a catalog when my shipment arrives! If you have not placed an order with me but want to be on my mailing list for the new catalogs too, simply place an order through my Online Store and I’ll add you to my list so you can get your catalogs too!
November 15-30 Host Code: N7E9DGB9
Use this host code when you order $50 or more and receive a free gift from me! The free gift is your choice of any item valued up to $10.00 in the 2019 – 2020 Annual Catalog or in the Aug-Dec 2020 Mini Catalog! That includes some of the Host Exclusive stamp sets!
If your order is over $150, please do not use the host code since you’ll receive your own Host Dollars plus I’ll still send you the free gift! This host code can be used by anyone, no club or commitment required. Let me know if you have any questions.
If you need any stamping supplies, I’d be very happy to be your Demonstrator. Just click on the Shop Now button on the right side of the screen to go directly to my online store or contact me if you have any questions. Happy Stamping!
Good Morning! For today I made a Fall card with the sweet tree from the Stampin’ Up! Life is Beautiful photopolymer stamp set. I paired it with pumpkins from the Stampin’ Up! Gather Together photopolymer stamp set and the coordinating Gathered Leaves Dies. You can find the supplies used to create this card at the bottom of my post along with the sizes of cardstock used.
I cut the top and bottom edge of a panel of Bumblebee card stock with the small bubble edge die from the Ornate Borders Dies and adhered an panel of Plaid Tidings 6″x6″ designer series paper to the front. I cut a panel of Shimmery White card stock with a die from the Stitched Rectangles Dies and used old Olive and Pool Party inks with my water painters to do a color wash background. After it dried, I pressed the panel and stamped the tree from the Stampin’ Up! Life is Beautiful stamp set in Early Espresso ink on the side. I stamped the leaves in Bumblebee, Pumpkin Pie and Cajun Craze inks and adhered the panel to a Soft Suede mat.
I stamped the pumpkins from the Stampin’ Up! Gather Together stamp set in Cajun Craze ink on Whisper White and cut them out with the coordinating dies from the Gathered Leaves Dies. I colored them with Mossy Meadow and Pumpkin Pie Stampin’ Blends. I stamped the sentiment from the Stampin’ Up! Gather Together stamp set in Soft Suede ink on Whisper White, cut it out with the small label die from the Stitched Rectangles Dies and adhered it to a Soft Suede mat.
I adhered the tree panel to the card front with dimensionals. I tied a length of Bumblebee Gingham ribbon with linen thread and adhered it to the panel with glue dots. I adhered the label with dimensionals and popped the pair of pumpkins on the panel with dimensionals. I brushed some clear Wink of Stella glitter on the pumpkins so they would shimmer like the background.
I stamped the leaves from the Stampin’ Up! Life is Beautiful stamp set in Bumblebee, Pumpkin Pie and Cajun Craze inks in the top corner of a Whisper White panel. I adhered a strip of Plaid Tidings DSP to the bottom and the large pumpkin in the corner. I adhered the panel to the inside of the card.
The Stampin’ Up! Life is Beautiful stamp set has the pretty tree that can be used for all seasons. It has beautiful sentiments, and coordinates well with many other stamp sets.
September 1-15 Host Code: 9UZFD3BH
Use this host code when you order $50 or more and receive a free gift from me! The gift is your choice of any item valued up to $10.00 in the 2020-21 Annual Catalog or the Aug – Dec 2020 Mini Catalog. This includes some of the host exclusive sets!
If your order is over $150, please do not use the host code since you’ll receive your own Host Dollars plus I’ll still send you the free gift! This host code can be used by anyone, no commitment required. Let me know if you have any questions.
If you need any stamping supplies, I’d be very happy to be your Demonstrator. Just click on the Shop Now Button on the right side of the screen to go directly to my Online store or contact me if you have any questions. Happy Stamping!
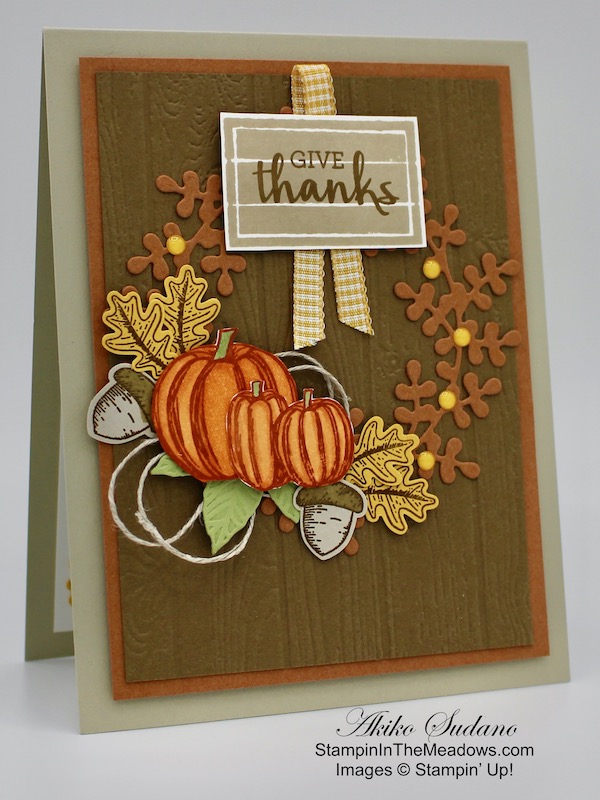
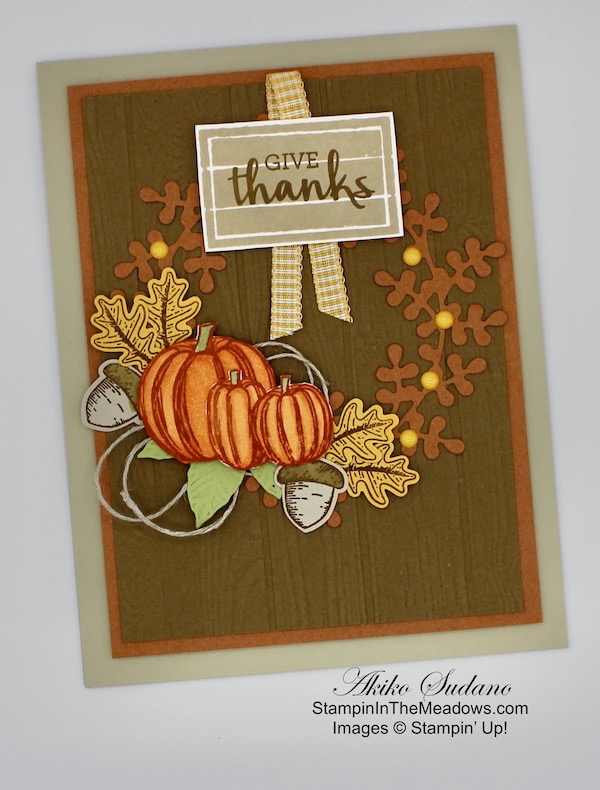
Good Morning! Today I’m sharing a Fall card made with the Stampin’ Up! Arrange a Wreath bundle that I made during my Facebook Live video tutorial yesterday afternoon. Actually, I used three different stamp sets for this card. I pulled in the pumpkins from the Gather Together stamp set and the oak leaves and acorns from the Beautiful Autumn bundle. You can find the supplies used to create this card at the bottom of my post along with the sizes of cardstock used.
Here is the Facebook Live video showing how I made the card:
I will also edit and post a concise tutorial on my YouTube Channel, so look for that soon. You can now find my edited YouTube video here.
I started by stamping the sign using the boards and sentiment stamps from the Stampin’ Up! Arrange a Wreath photopolymer stamp set in Sahara Sand and Soft Suede inks on Whisper White. I cut out the sign with a thin white outline. I stamped the pumpkins from the Stampin’ Up! Gather Together photopolymer stamp set in Cajun Craze ink on Whisper White and colored it with Mossy Meadow and Pumpkin Pie Stampin Blends. I fussy cut the pumpkins with my paper snips. I also used the Gathered Leaves Dies to cut a small embossed maple leaf from Pear Pizzazz card stock.
I stamped six oak leaves from the Beautiful Autumn photopolymer stamp set in Soft Suede ink on Bumblebee card stock and punched them out with the coordinating punch from the Autumn Punch Pack. I stamped three acorns from the same set in Soft Suede ink on Sahara Sand card stock and punched them out. I die cut the wreath from Cinnamon Cider Card stock using the Wreath Builder Dies. I embossed a panel of Soft Suede card stock with the Pinewood Planks 3D embossing folder and adhered it to a Cinnamon Cider mat. I adhered the wreath to the embossed panel using liquid glue and adhered linen thread using Stampin’ Seal.
I adhered the die cut leaf with glue dots so that it covered the Stampin’ Seal. I adhered the pumpkins together with liquid glue and popped them on the wreath with dimensionals. I adhered the oak leaves and acorns with glue dots, tucking the ends behind the pumpkins. I adhered the Bumblebee gingham ribbon to the sign with glue dots and adhered the sign to the top of the wreath with dimensionals. I finished off the wreath with Bumblebee enamel dots and adhered the piece to the front of a Sahara Sand card base.
I adhered the last oak leaves and acorn to a Whisper White pane and adhered the panel to the inside of the card.
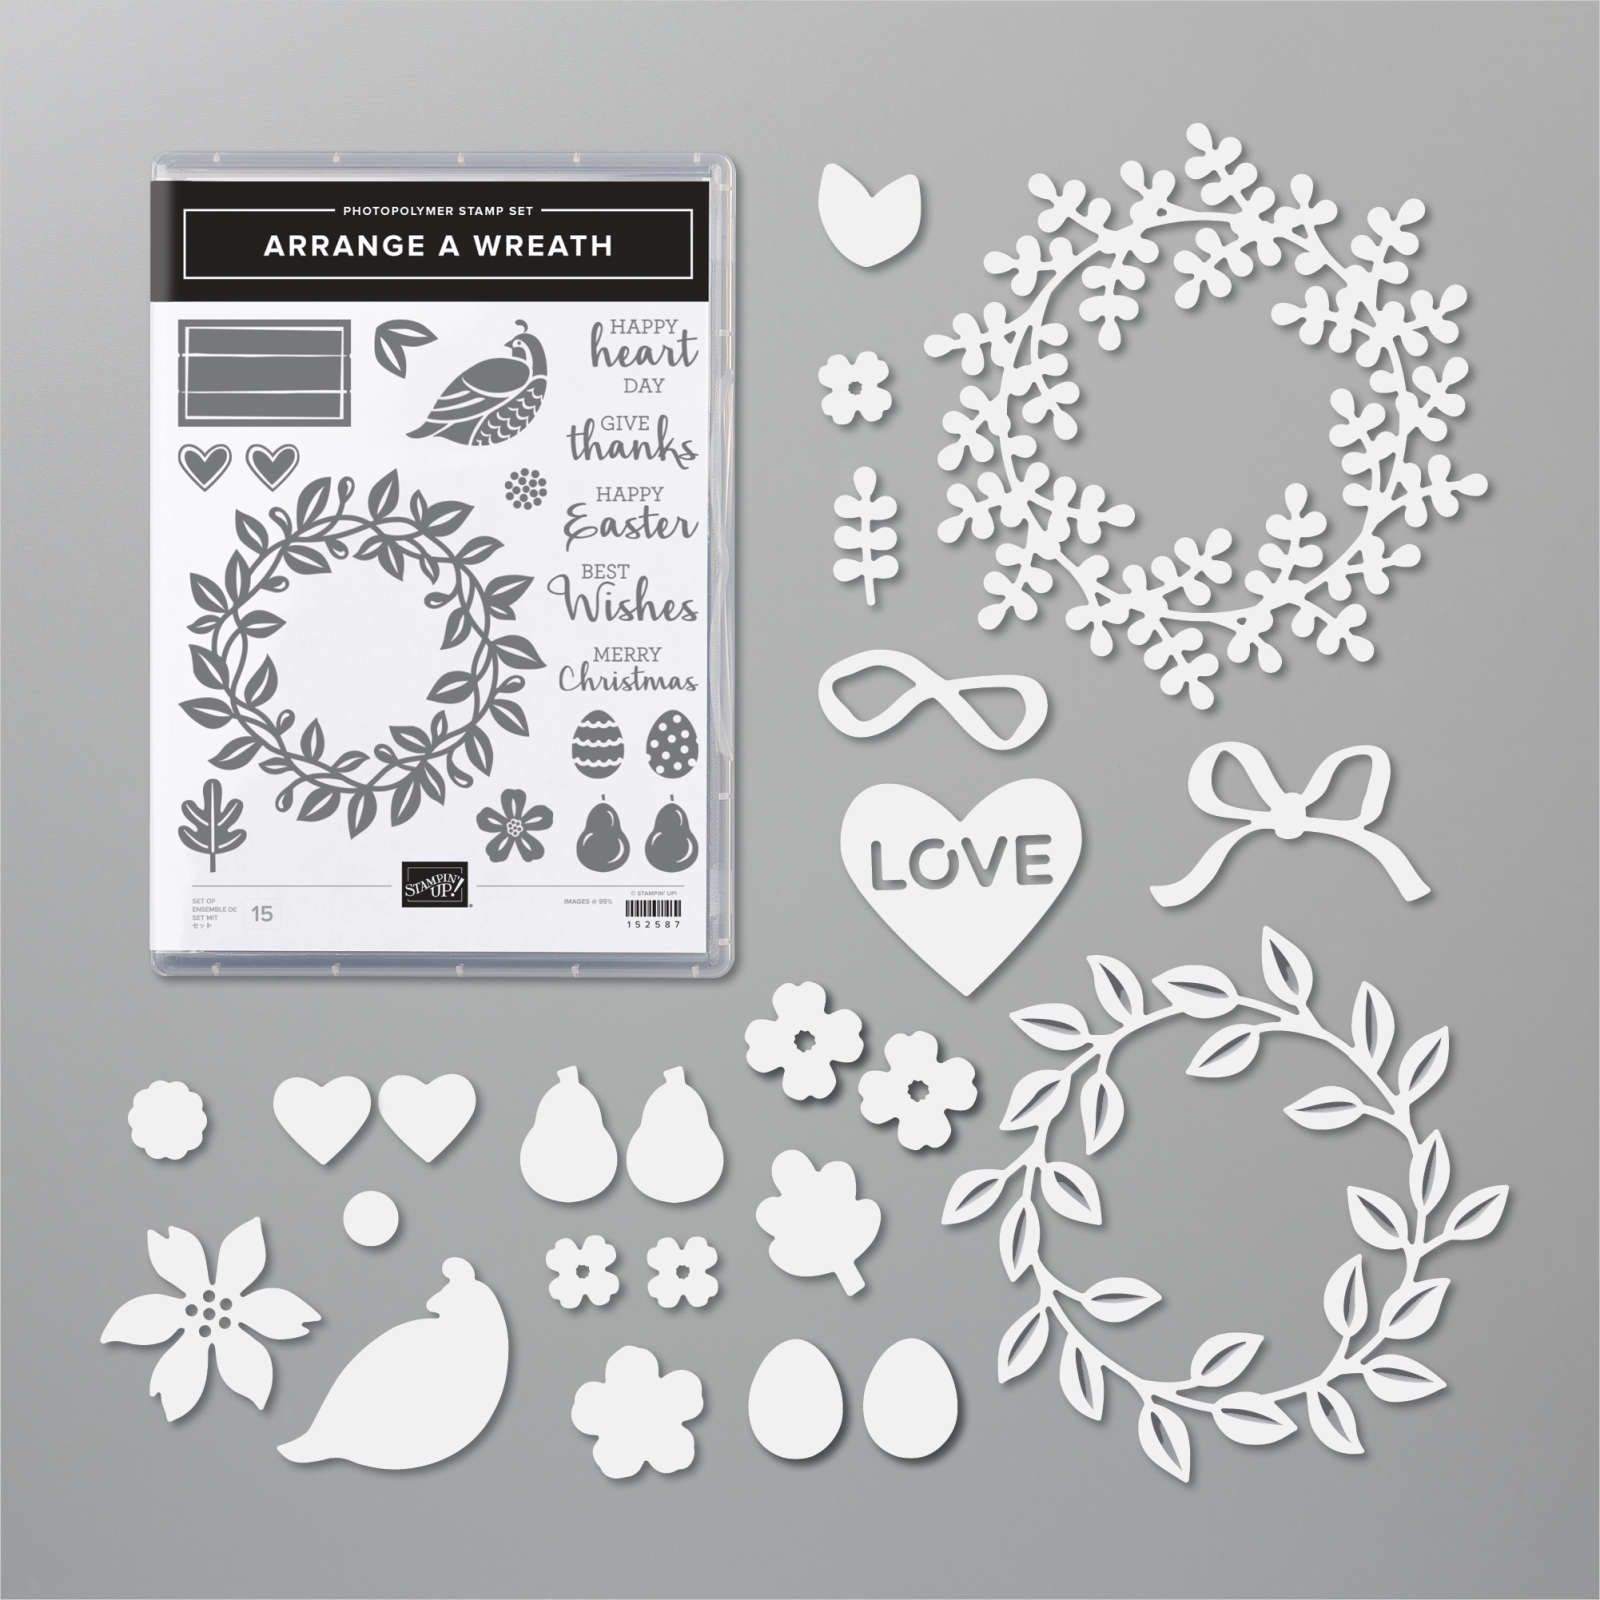
The Stampin’ Up! Arrange a Wreath bundle is so versatile!! The stamped images and sentiments support wreaths for many occasions and it can be combined with lots of other stamp sets to create any themed wreath for any occasion. And who doesn’t love a wreath? Click the image below to get the full details of this bundle and shop in my Online Store.
Today is the Last Day to redeem your Bonus Days coupon codes!!
If you still have coupon codes, you can use them to get a discount on the Stampin’ Up! Arrange a Wreath bundle – Don’t let them expire!
August 15 – 31 Host Code: TV9N9BHQ
September 1 – 15 Host Code: 9UZFD3BH
Use this host code when you order $50 or more and receive a free gift from me! The free gift is your choice of any item valued up to $10.00 in the 2019 – 2020 Annual Catalog or in the 2020 Mini Catalog! That includes some of the Host Exclusive stamp sets!
If your order is over $150, please do not use the host code since you’ll receive your own Host Dollars plus I’ll still send you the free gift! This host code can be used by anyone, no club or commitment required. Let me know if you have any questions.
If you need any stamping supplies, I’d be very happy to be your Demonstrator. Just click on the Shop Now button on the right side of the screen to go directly to my online store or contact me if you have any questions. Happy Stamping!
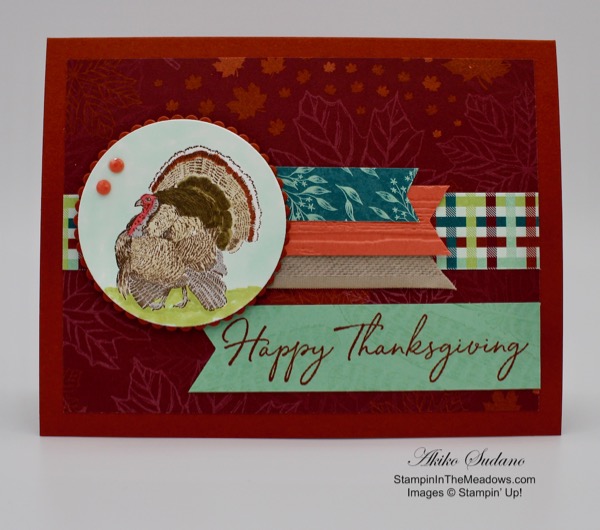
Good Morning! Today I am sharing a Thanksgiving Card made with the Stampin’ Up! Day of Thanks stamp set. This turkey looks just like the one on the Thanksgiving turkey platter that I have been using for 40 years, so I just had to get the set because it is a real traditional Thanksgiving turkey! You can find the supplies used to create this card at the bottom of my post along with the sizes of cardstock used.
I also used the wonderful Gather Together designer series paper for the card, so I started by cutting a panel of the Merry Merlot paper with the maple leaves I took a strip of the checked paper and adhered it across the Merry Merlot panel. I cut a strip of the Gather Together Crumb cake ribbon and attached it to the panel as shown. I cut a banner of Calypso coral and ran it through the pinewood planks embossing folder to give it some texture and attached it to the panel. I topped it off with a banner of the leafy Pretty Peacock paper.
I took a strip of Mint Macaron and stamped the feather from the Stampin’ Up! Day of Thanks stamp set in Mint Macaron on it several times, each time stamping it off twice first. I stamped the sentiment on the strip in Cajun Craze. I attached it to the Merry Merlot panel, then I attached the decorated panel to a Cajun Craze card base.
I stamped the turkey image from the Stampin’ Up! Day of Thanks stamp set in Early Espresso on a panel of Whisper White. I colored the turkey with Soft Suede, Smoky Slate, Cajun Craze and Poppy Parade Stampin’ Blends. I colored the Sky with the Light Pool Party Stampin’ Blend and the ground with the Light Old Olive. I cut it out with one of the Layering Circle dies and cut a Cajun Craze mat with the scalloped circle that matched it. I adhered them together and popped it on the card front with dimensionals. I added two Terra Cotta Tile faceted dots to finish it off.
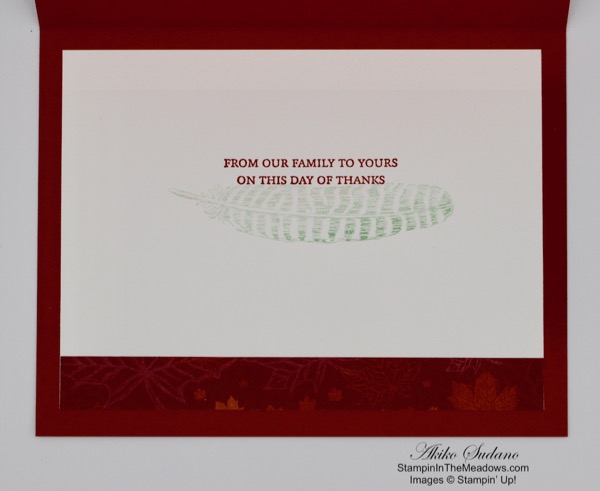
On the inside of the card, I added a strip of the Merry Merlot paper to the bottom of a Whisper White panel and stamped the sentiment in Cajun Craze. I also stamped another feather in Mint Macaron, after stamping off twice.
Next week when I get back from On Stage local, it will be time to send out all my Thanksgiving cards … and plan my Thanksgiving day menu.
November 1 – 15 Host Code: WR4KJJM4
November 16 – 30 Host Code: 462PVWKY
Use this host code when you order $50 or more and receive a free gift from me! The gift is your choice of any item valued up to $10.00 in the 2019-20 Annual Catalog or in the 2019 Holiday Catalog! That includes some of the Host Exclusive stamp sets!
If your order is over $150, please do not use the host code since you’ll receive your own Host Dollars plus I’ll send you the free gift! This host code can be used by anyone, no commitment required. Let me know if you have any questions.
If you need any stamping supplies, I’d be very happy to be your Demonstrator. Just click on the Shop Now button on the right side of the screen to go directly to my online store or contact me if you have any questions. Happy Stamping!
Thanks for stopping by and have a great weekend! I am spending Saturday at Stampin’ Up! On Stage Local in Hartford, CT and I am so excited!!
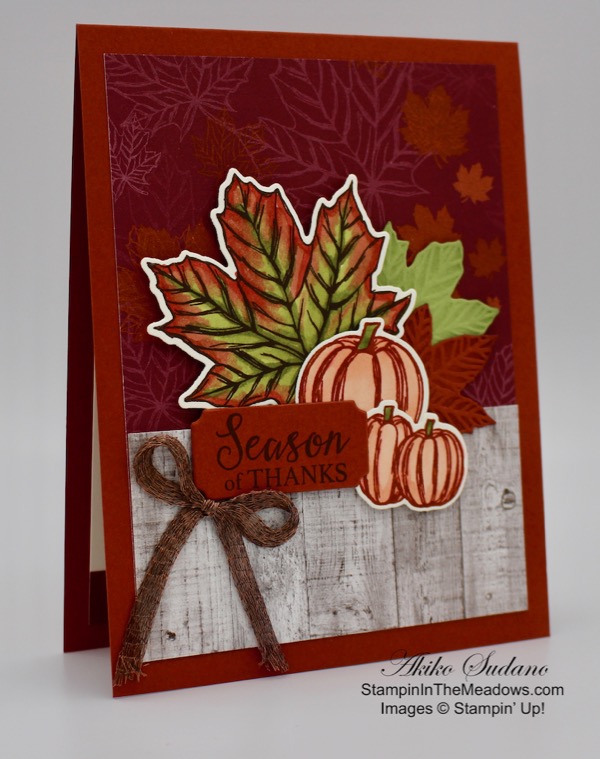
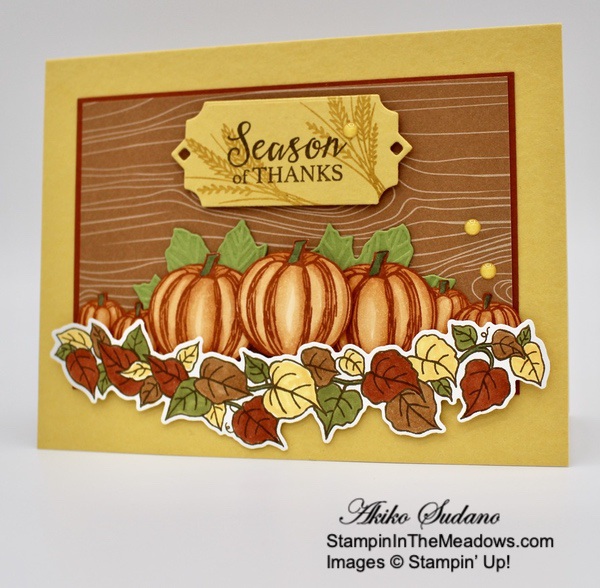
Good Morning! Today I’m sharing another card made with the wonderful Stampin’ Up! Gather Together photopolymer stamp set. This set has been my go to for fall cards and with the Come to Gather Designer Series paper, beautiful fall cards are so easy to put together. You can find the supplies used to create this card at the bottom of my post along with the sizes of cardstock used.
I cut a panel of the Merry Merlot maple leaf paper from the Come To Gather DSP pack and adhered it to a Cajun Craze card base. Then I took a panel of the wood panelling paper and adhered it to the bottom. I stamped the large maple leaf from the Stampin’ Up! Gather Together stamp set in Early Espresso ink on Very Vanilla and die cut it with the coordinating die. I colored it with Old Olive, Cajun Craze and Calypso Coral Stampin’ Blends.
I stamped the pumpkins in Cajun Craze ink on Very Vanilla cardstock and cut the out with the coordinating dies. I colored the stems with Old Olive Stampin’ Blends and the pumpkins themselves with Calypso Coral Stampin’ Blends. I then die cut the other two leaves from Old Olive and Cajun Craze cardstock. I adhered the smaller leaves to the card front with liquid glue and the large leaf and pumpkins with dimensionals.
I stamped the Season of Thanks sentiment from the Stampin’ Up! Gather Together stamp set in Early Espresso ink on a strip of Cajun Craze card stock. I used the large label from the Merry Christmas dies to cut it out. I arranged the die on the left side and cut it out, leaving a large space on the right. I moved the die to make the left side the same size as the right and ran it through the die cutting machine again to get a shorter label that matched the greeting. I adhered the label to the card front with dimensionals. I made a bow with the bride copper trim and attached it to the card front with glue dots.
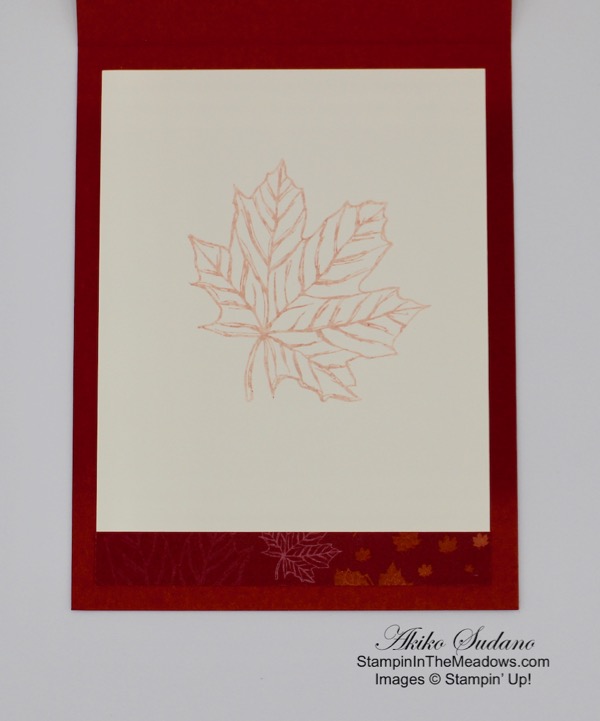
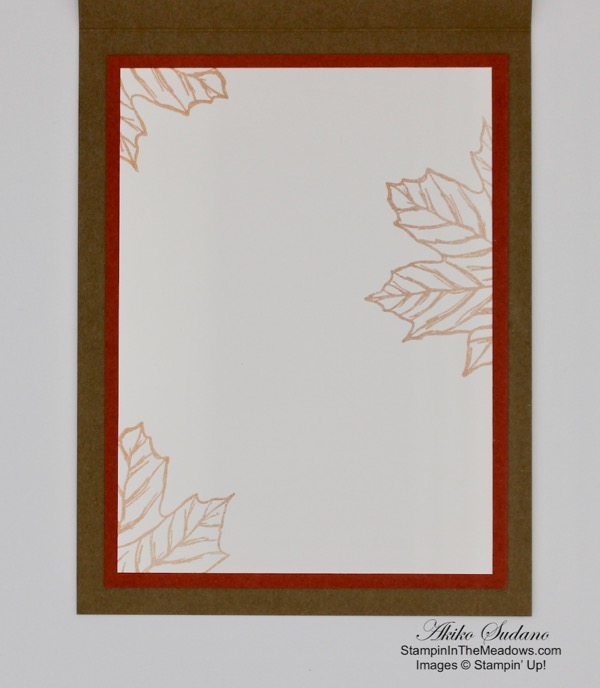
I stamped the maple leaf in Cajun Craze ink on a panel of Very Vanilla card stock after stamping it off 4 times. I added a strip of the same maple leaf DSP to the bottom of the panel and attached it to the inside of the card.
Thanks for visiting!
Akiko
October 1 – 15 Host Code: 44YKETNJ
October 15 – 31 Host Code: 3KQUKV9U
Use this host code when you order and receive a free gift from me! If your order is over $150, please do not use this code, but you’ll still get the free gift. The free gift is your choice of any item valued up to $10.00 in the 2018-19 Annual Catalog or in the 2019 Occasions Catalog! That includes some of the Host Exclusive stamp sets!
If you need any stamping supplies, I’d be very happy to be your Demonstrator. Just click on the Shop Now button on the right side of the screen to go directly to my online store or contact me if you have any questions. Happy Stamping!
Good Morning! Welcome to The October Inkin’ Krew Monthly Blog Hop!
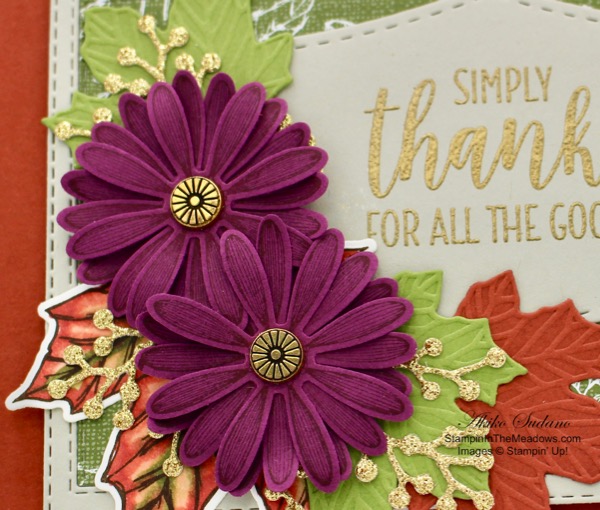
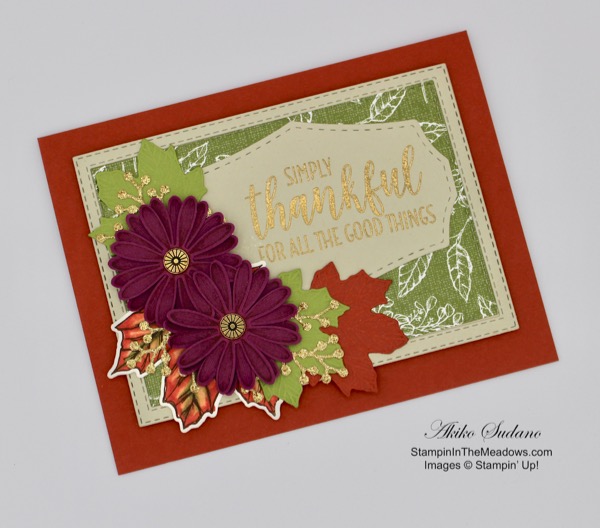
Our theme for this month is Giving Thanks and I’ve made a card using the Stampin’ Up! Daisy Lane stamp set and the wonderful sentiment from the Stampin’ Up! Country Home stamp set. These daisies remind me of the purple mums that are all over the place at this time of year and make me feel like Fall. You can find the supplies used to create this card at the bottom of my post along with the sizes of cardstock used.
I started by die cutting two pieces of Sahara Sand card stock using the second largest of the Stitched Rectangles dies. On one of them, I took the third largest of the Stitched Rectangle dies and cut out the middle to make a frame. Then I cut a panel of green leafy paper from the Magnolia Lane designer series paper using the same die. Then I adhered the frame to the second Sahara Sand die cut and adhered the green leaf DST to the inside.
Then I used the middle of the Sahara Sand frame to cut the label die from the Wild Rose dies. I stamped the sentiment from the Country Home stamp set in Versamark ink and sprinkled it with gold embossing powder. I heat set it and then adhered it to the background panel with liquid glue.
I stamped the large maple leaf from the Gather Together stamp set in Early Espresso ink on a panel of Very Vanilla. I then colored it with the Old Olive and Calypso Coral Stampin’ Blends and cut it out with the coordinating die. I also cut two maple leaves from Old Olive cardstock and one maple leaf from Cajun Craze cardstock using the smaller maple leaf die from the Gathered Leaves dies. Then I cut three berry branches in Gold Glimmer paper using the berry die from the Frosted Bouquet dies.
I stamped six small daisies from the Stampin’ Up! Daisy Lane stamp set in Rich Razzleberry ink on Rich Razzleberry card stock. Using a bone folder, I gently rounded the ends of the petals and glued three petal clusters together for each flower. I accented the centers with the gold Designer Elements. I arranged the leaves and berries on the panel and adhered them with liquid glue. I adhered the flowers with glue dots. I then used dimensionals to attach the decorated panel to a Cajun Craze card base.
I decided that I had to give the inside of the card the same frame treatment as the card front. So I cut another frame in Sahara Sand just like the front and attached it to the inside of the card with liquid glue. I then adhered a strip of the Magnolia Lane DSP to the bottom of a Very Vanilla panel and cut it out with the third largest die from the Stitched Rectangles dies. I adhered this to the inside of the card with liquid glue.
There you have it – a pretty fall card with flowers from the Stampin’ Up! Daisy Lane stamp set, turning maple leaves and touches of gold to express the thankful sentiments that abound at this time of year. Thanks for visiting! Click on the Next Blog button to move forward to Sue Prather’s project or click the Previous Blog button to move back to see the project that ShirleyGentry created.
If you get lost along the way, here are the participants for the hop:
I hope you enjoy all the projects that the team has created today. Have a great week!
Akiko
October 1 – 15 Host Code: 44YKETNJ
Use this host code when you order and receive a free gift from me! If your order is over $150, please do not use this code, but you’ll still get the free gift. The free gift is your choice of any item valued up to $10.00 in the 2018-19 Annual Catalog or in the 2019 Occasions Catalog! That includes some of the Host Exclusive stamp sets!
If you need any stamping supplies, I’d be very happy to be your Demonstrator. Just click on the Shop Now button on the right side of the screen to go directly to my online store or contact me if you have any questions. Happy Stamping!
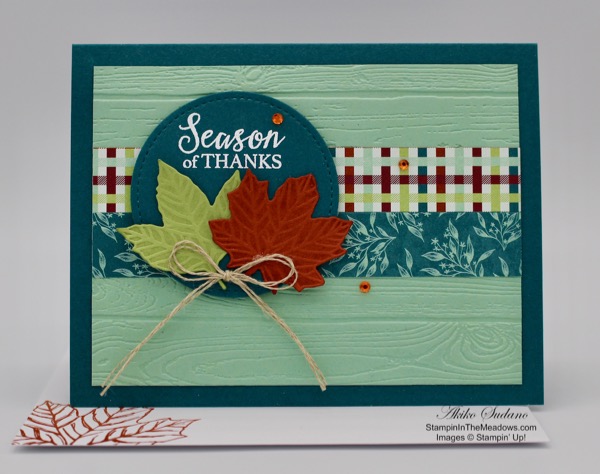
Good Morning! Today I’m sharing another Facebook Live video that I made with a card that I CASEd ( copy and share everything) from a fellow Inkin’ Krew team member Leslie Larkin. I loved this card that Leslie made and shared on our Facebook Team page. You can see her original on her blog here. You can find the supplies used to create my card at the bottom of my post along with the sizes of cardstock used.
When I first made the sample I made a boo boo because I embossed the panel before stamping the sentiment. So I had to modify it, and then when I made the video I changed it up a little more. Here’s the video. I hope you enjoy it.
This is the first time I’ve used my phone camera for recording for FB Live and I figured out how to fix some technical difficulties, but some still exist, so thank you for bearing with me. I’m planning to start a You Tube Channel by the week’s end, and I’ll update this post with the link when its ready.
Thanks for stopping by and have a great week!
Akiko
Evening Update: I posted the video to YouTube and you can view it here. I also managed to clean up phone orientation issues in the first two minutes (Yay!) before posting. Thanks for being patient with me. 🙂
LAST DAY!!! Buy 3 Get 1 Free Designer Series Paper Sale Ends Today
Today is the last day for the Stampin’ Up! Designer Series Paper Sale! where you can buy three packages of select Designer Series Paper, and get one FREE! See the full details on my Stampin’ Up! Promotions Page. Don’t miss out!
September 16 – 30 Host Code: EDRVYB3Z
October 1 – 15 Host Code: 44YKETNJ
Use this host code when you order and receive a free gift from me! If your order is over $150, please do not use this code, but you’ll still get the free gift. The free gift is your choice of any item valued up to $10.00 in the 2018-19 Annual Catalog or in the 2019 Occasions Catalog! That includes some of the Host Exclusive stamp sets!
If you need any stamping supplies, I’d be very happy to be your Demonstrator. Just click on the Shop Now button on the right side of the screen to go directly to my online store or contact me if you have any questions. Happy Stamping!
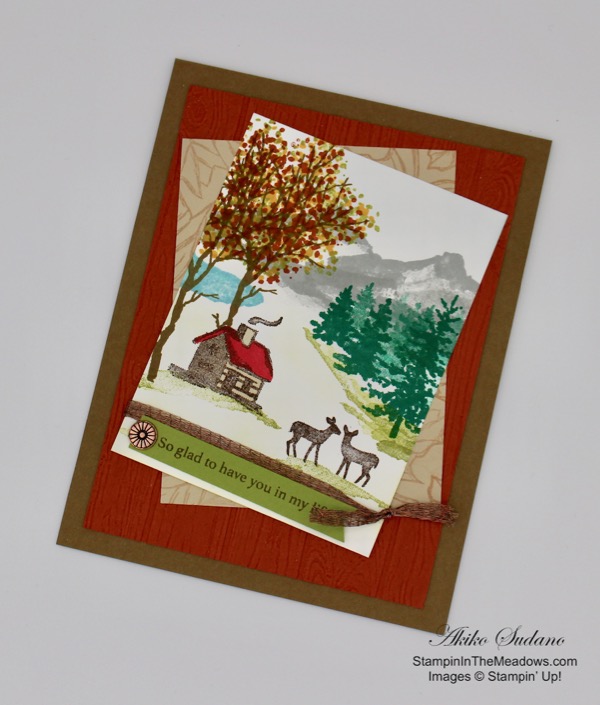
Good Morning! Yesterday was officially the first day of Fall, but with temperatures n the high 80’s here in Pennsylvania, it really doesn’t feel like it yet. So here’s a card to get us in the mood. It’s made with the new Stampin’ Up! Snow Front photopolymer stamp set. You can find the supplies used to create this card at the bottom of my post along with the sizes of cardstock used.
I started by running a Cajun Craze panel through the Pinewood Planks embossing folder and mounting it on a Soft Suede card base with liquid glue. I randomly stamped the large maple leaf from the Gather Together stamp set in Delicata Celestial Copper ink on a panel of Crumb Cake cardstock.
I stamped the images from the Stampin’ Up Snow Front stamp set on a panel of Whisper white as follows:
Mountains – Smoky Slate
Pine Trees – Shaded Spruce
Cabin and Deer – Early Espresso
Tree Trunks – Soft Suede
Leaves – Old Olive, Crushed Curry, Cajun Crazw
Lake – Balmy Blue
Grass – Old Olive
I then lightly sponged the grass in Old Olive and the sky in Seaside Spray. I gave the cabin a red tin roof using the Dark Real Red Stampin’ Blend and colored the cabin with the Light Crumb Cake Stampin’ Blend. I added a touch of Wink of Stella to the lake to make the water sparkle and wrapped a piece of copper trim around the bottom.
I stamped the sentiment from the Stampin’ Up! Gathered Together set on a strip of Old Olive cardstock using Early Espresso ink and added a copper Designer element before adhering it to the bottom of the image. I layered the Crumb Cake panel and the image and adhered them to the card with liquid glue.
I decorated the inside of the card by stamping a few maple leaves from the Gather Together stamp set in Celestial Copper ink on a panel of Whisper White. I adhered it to a Cajun Craze mat and then to the inside of the card.
The Stampin’ Up Snow Front stamp set is similar to the Waterfront stamp set for creating artistic landscape scenes. This puts me in the mood to visit the mountains and woods to see some great fall foliage. Thanks for visiting and have a great Fall day!
Akiko
Buy 3 Get 1 Free Designer Series Paper Sale
By popular demand, Stampin’ Up! is bringing back the Designer Series Paper Sale! During September 4–30, you can buy three packages of select Designer Series Paper, and get one FREE! See the full details on my Stampin’ Up! Promotions Page.
September 16 – 30 Host Code: EDRVYB3Z
Use this host code when you order and receive a free gift from me! If your order is over $150, please do not use this code, but you’ll still get the free gift. The free gift is your choice of any item valued up to $10.00 in the 2018-19 Annual Catalog or in the 2019 Occasions Catalog! That includes some of the Host Exclusive stamp sets!
If you need any stamping supplies, I’d be very happy to be your Demonstrator. Just click on the Shop Now button on the right side of the screen to go directly to my online store or contact me if you have any questions. Happy Stamping!


![Beautiful Pumpkins Bundle (English) [ 166012 ]](https://assets1.tamsnetwork.com/images/EC042017NF/166012s.jpg "Beautiful Pumpkins Bundle (English) [ 166012 ]")
![Stylish Shapes Dies [ 159183 ]](https://assets1.tamsnetwork.com/images/EC042017NF/159183s.jpg "Stylish Shapes Dies [ 159183 ]")
![Gathering Together 12" X 12" (30.5 X 30.5 Cm) Specialty Designer Series Paper [ 165969 ]](https://assets1.tamsnetwork.com/images/EC042017NF/165969s.jpg "Gathering Together 12\" X 12\" (30.5 X 30.5 Cm) Specialty Designer Series Paper [ 165969 ]")
![Basic Beige 8 1/2" X 11" Cardstock [ 164511 ]](https://assets1.tamsnetwork.com/images/EC042017NF/164511s.jpg "Basic Beige 8 1/2\" X 11\" Cardstock [ 164511 ]")
![Crumb Cake 8-1/2" X 11" Cardstock [ 120953 ]](https://assets1.tamsnetwork.com/images/EC042017NF/120953s.jpg "Crumb Cake 8-1/2\" X 11\" Cardstock [ 120953 ]")
![Gold Foil Sheets [ 132622 ]](https://assets1.tamsnetwork.com/images/EC042017NF/132622s.jpg "Gold Foil Sheets [ 132622 ]")
![Basic White 8 1/2" X 11" Cardstock [ 166780 ]](https://assets1.tamsnetwork.com/images/EC042017NF/166780s.jpg "Basic White 8 1/2\" X 11\" Cardstock [ 166780 ]")
![Basic Beige Classic Stampin Pad [ 163806 ]](https://assets1.tamsnetwork.com/images/EC042017NF/163806s.jpg "Basic Beige Classic Stampin Pad [ 163806 ]")
![Crumb Cake Classic Stampin' Pad [ 147116 ]](https://assets1.tamsnetwork.com/images/EC042017NF/147116s.jpg "Crumb Cake Classic Stampin' Pad [ 147116 ]")
![Versamark Pad [ 102283 ]](https://assets1.tamsnetwork.com/images/EC042017NF/102283s.jpg "Versamark Pad [ 102283 ]")
![Metallics Wow! Embossing Powder [ 165678 ]](https://assets1.tamsnetwork.com/images/EC042017NF/165678s.jpg "Metallics Wow! Embossing Powder [ 165678 ]")
![Multipurpose Liquid Glue [ 110755 ]](https://assets1.tamsnetwork.com/images/EC042017NF/110755s.jpg "Multipurpose Liquid Glue [ 110755 ]")
![Stampin' Dimensionals [ 104430 ]](https://assets1.tamsnetwork.com/images/EC042017NF/104430s.jpg "Stampin' Dimensionals [ 104430 ]")
![Mini Glue Dots [ 103683 ]](https://assets1.tamsnetwork.com/images/EC042017NF/103683s.jpg "Mini Glue Dots [ 103683 ]")
![Stampin' Seal [ 152813 ]](https://assets1.tamsnetwork.com/images/EC042017NF/152813s.jpg "Stampin' Seal [ 152813 ]")
![Stampin' Cut & Emboss Machine [ 149653 ]](https://assets1.tamsnetwork.com/images/EC042017NF/149653s.jpg "Stampin' Cut & Emboss Machine [ 149653 ]")

![Gathering Moments Bundle (English) [ 165980 ]](https://assets1.tamsnetwork.com/images/EC042017NF/165980s.jpg "Gathering Moments Bundle (English) [ 165980 ]")
![Traditional Labels Dies [ 165864 ]](https://assets1.tamsnetwork.com/images/EC042017NF/165864s.jpg "Traditional Labels Dies [ 165864 ]")
![Cajun Craze 8-1/2" X 11" Cardstock [ 119684 ]](https://assets1.tamsnetwork.com/images/EC042017NF/119684s.jpg "Cajun Craze 8-1/2\" X 11\" Cardstock [ 119684 ]")
![Early Espresso 12" X 12" (30.5 X 30.5 Cm) Two Tone Cardstock [ 166668 ]](https://assets1.tamsnetwork.com/images/EC042017NF/166668s.jpg "Early Espresso 12\" X 12\" (30.5 X 30.5 Cm) Two Tone Cardstock [ 166668 ]")
![Early Espresso Classic Stampin' Pad [ 147114 ]](https://assets1.tamsnetwork.com/images/EC042017NF/147114s.jpg "Early Espresso Classic Stampin' Pad [ 147114 ]")
![Cajun Craze Classic Stampin' Pad [ 147085 ]](https://assets1.tamsnetwork.com/images/EC042017NF/147085s.jpg "Cajun Craze Classic Stampin' Pad [ 147085 ]")
![Cajun Craze & Gold Dots [ 165984 ]](https://assets1.tamsnetwork.com/images/EC042017NF/165984s.jpg "Cajun Craze & Gold Dots [ 165984 ]")
![Early Espresso & Old Olive Linen Thread Pack [ 165986 ]](https://assets1.tamsnetwork.com/images/EC042017NF/165986s.jpg "Early Espresso & Old Olive Linen Thread Pack [ 165986 ]")


")
")

 Designer Series Paper")


 Designer Series Paper")


")
")

")