Stampin’ Up! Meant To Bee Celebrate Card

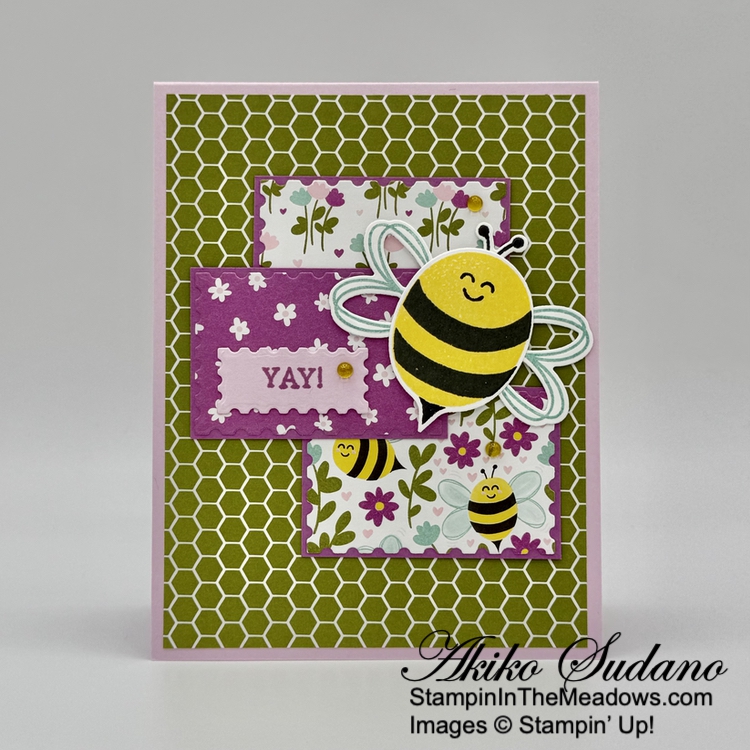
Good Morning! The Stampin’ Up! Meant To Bee bundle is part of the January Scrapbooking Brochure release and has cute bees, flowers and octagon dies. I used the large bee with the Cute As Can Bee designer series paper and Perennial Postage dies for an any occasion Celebrate card. You can find the products I used at the bottom of my post along with the card stock sizes.

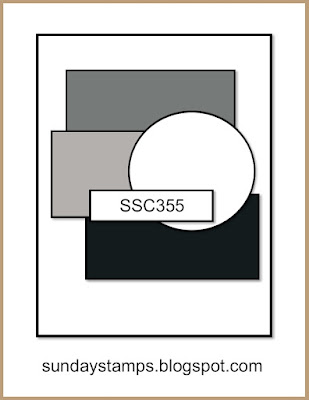
My card was inspired by the cute sketch in the current Sunday Stamps Challenge – SSC 355 Layered Up:

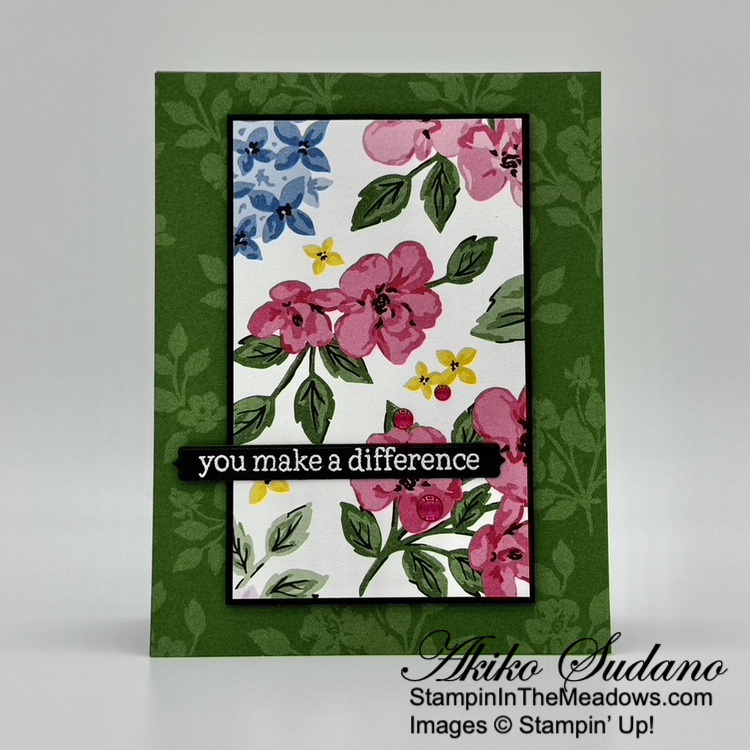
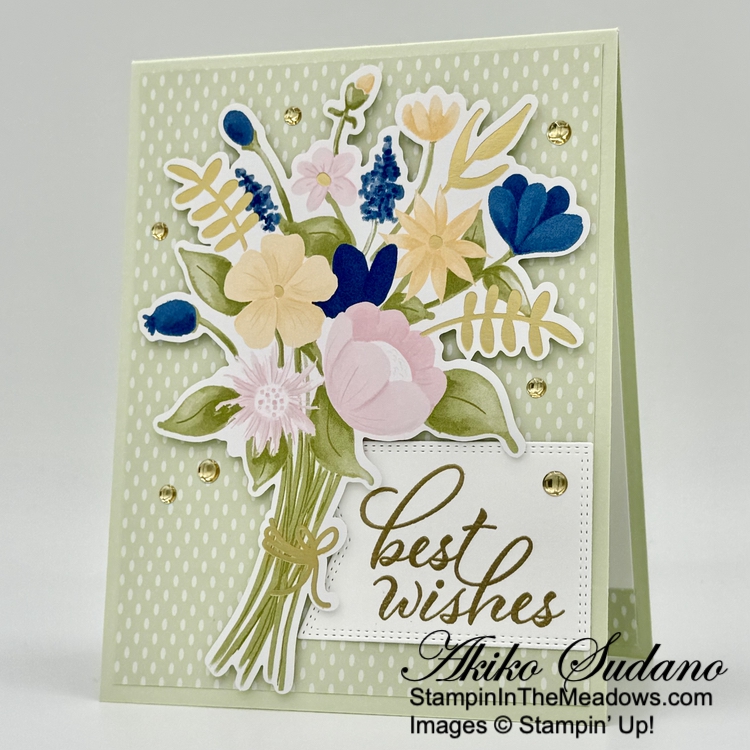
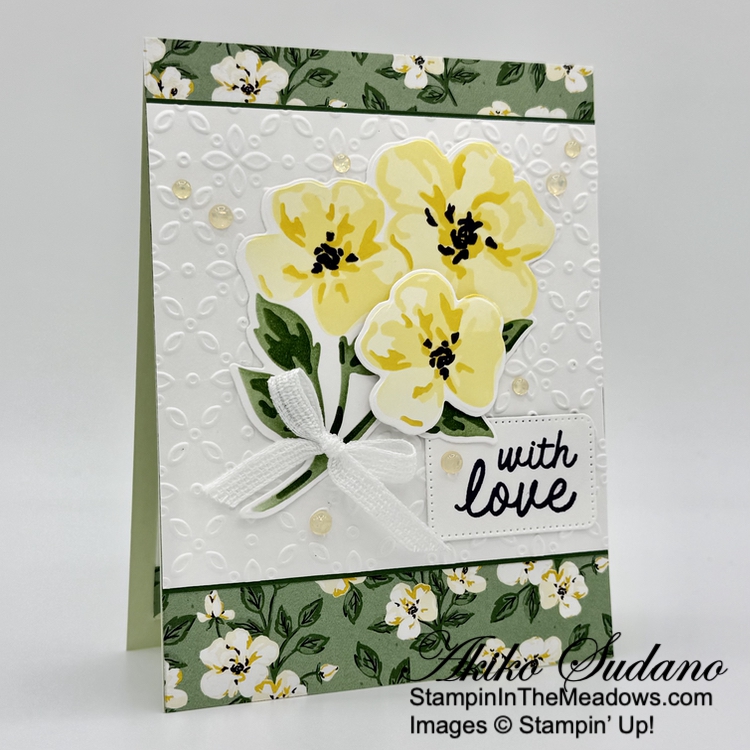
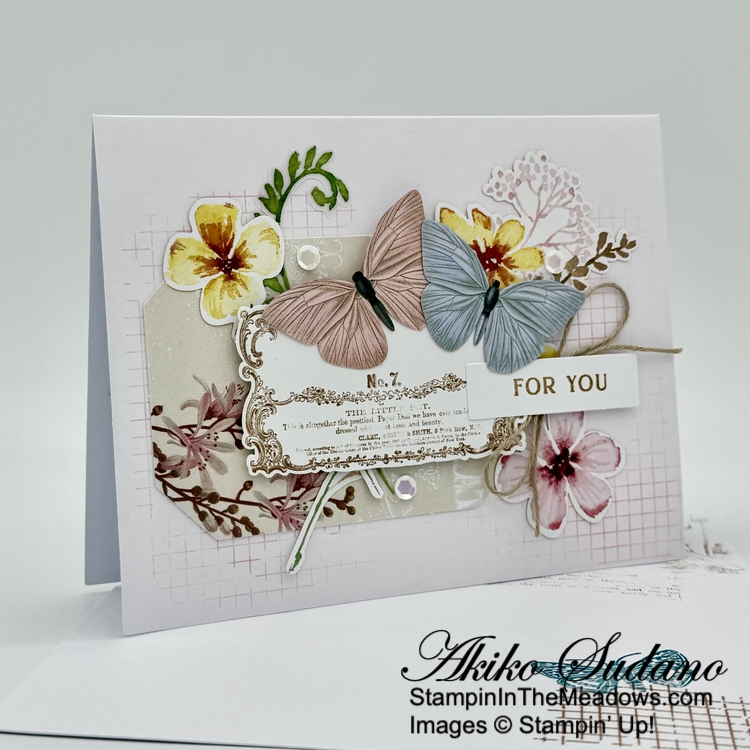
I adhered a panel of Cute As Can Bee designer series paper to the front of a Bubble Bath card base. I cut three floral panels of the DSP with a rectangular Perennial Postage die and adhered them to Petunia Pop mats before adhering them to the card front.

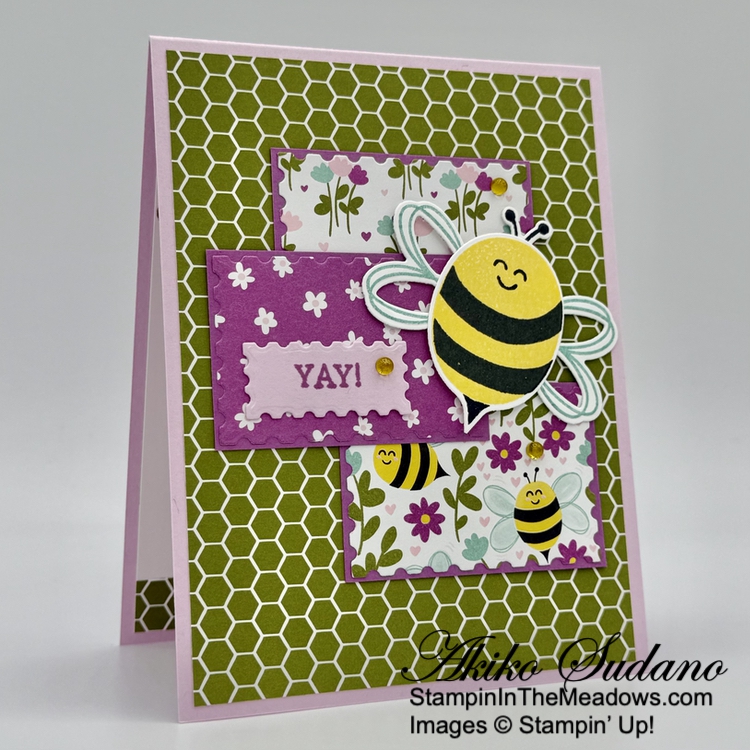
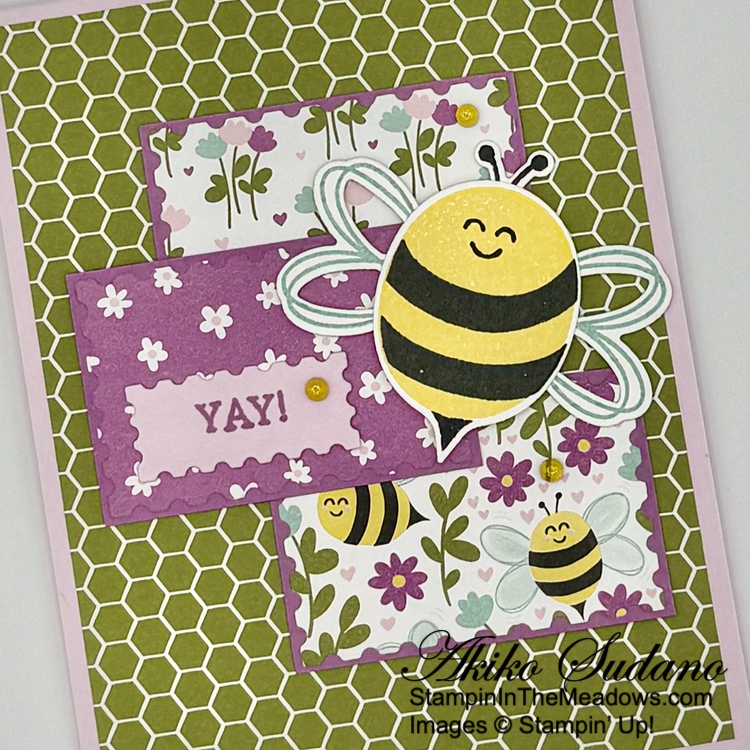
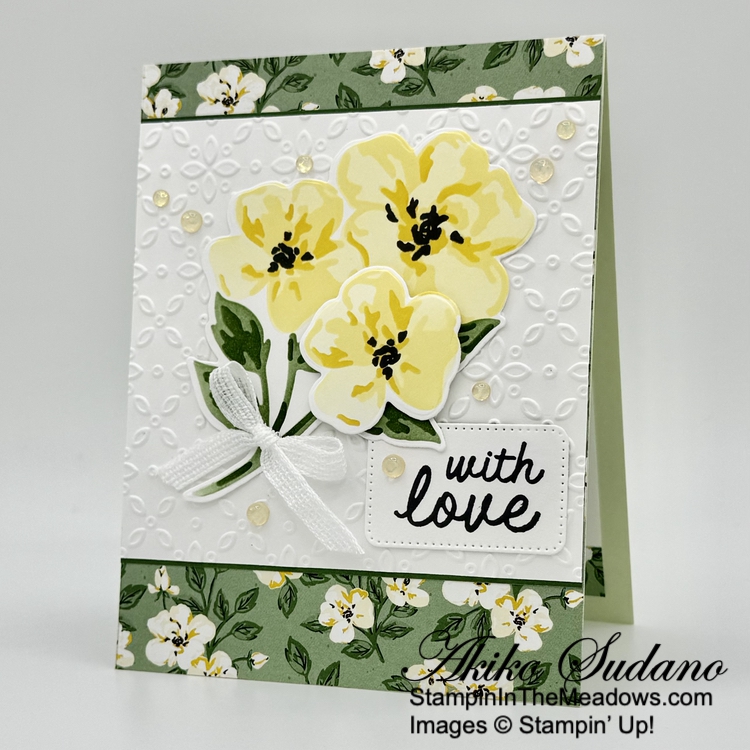
I stamped the large bee from the Stampin’ Up! Meant To Bee stamp set using Daffodil Delight and Memento Tuxedo Black inks on Basic White. I stamped the Wings using Pool Party ink and cut them all out (including the antenna) with the coordinating dies. I ahdered the wings and antenna to the back of the bee and popped it on the card with dimensionals.

I stamped the sentiment from the Simply Said stamp set using Petunia Pop ink on Bubble Bath card stock and cut it out with the small Perennial Postage die. I adhered it to the card with glue dots and finished the card with yellow gems.

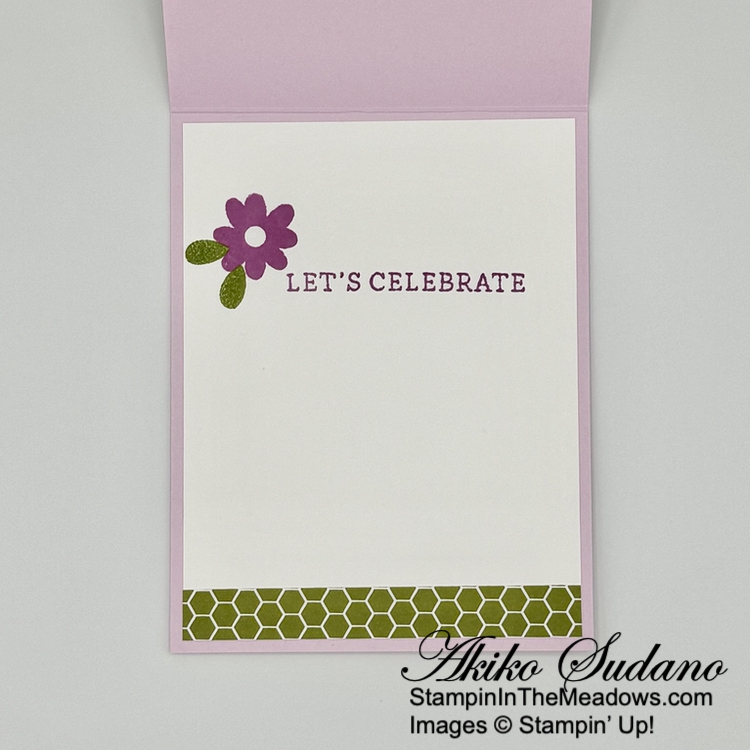
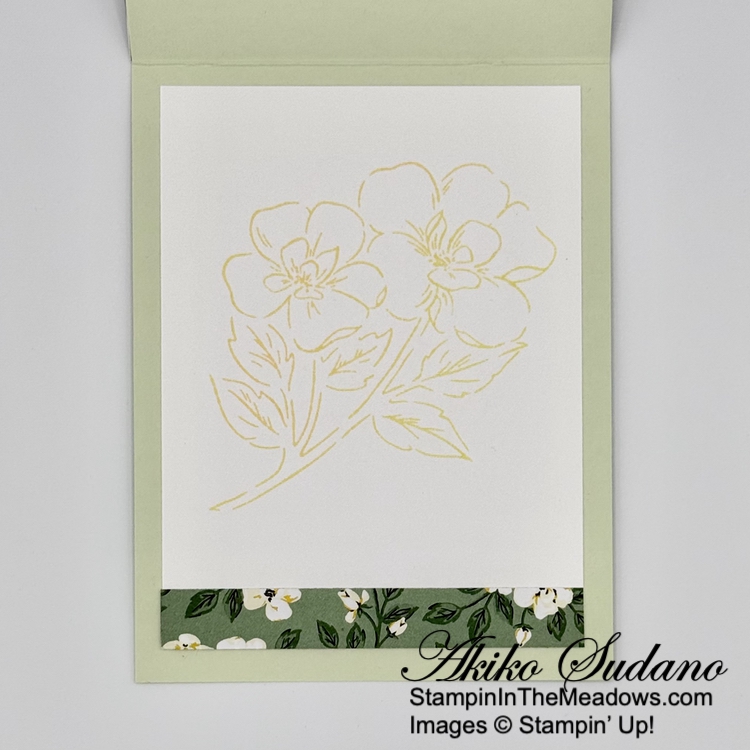
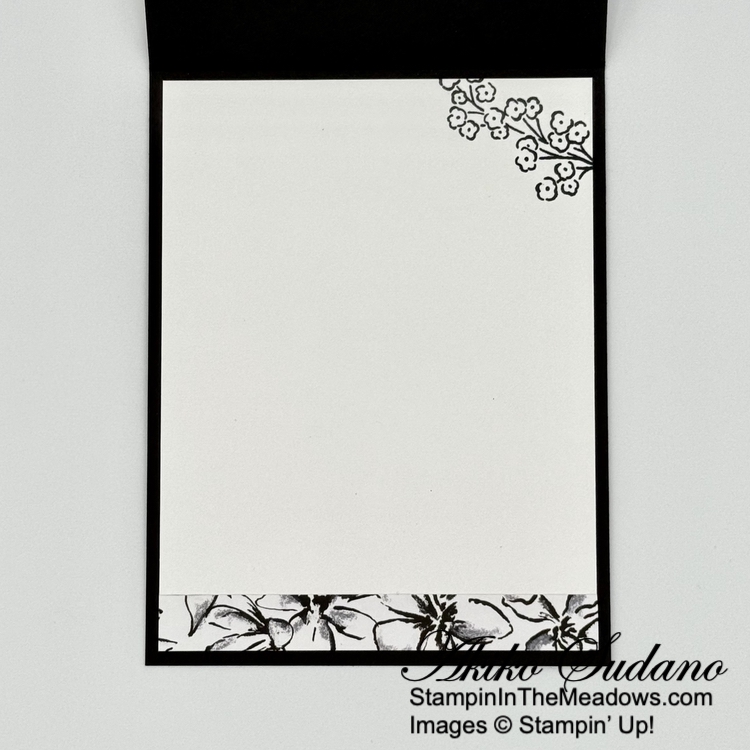
For the inside panel, I stamped the sentiment from the Simply Said stamp set using Petunia Pop ink on Basic White. I stamped the flower from the Stampin’ Up! Meant To Bee stamp set using Petunia Pop ink and leaves using Old Olive. I trimmed the bottom with DSP and adhered the panel to the inside of the card with Stampin’ Seal.

The Stampin’ Up! Meant To Bee bundle is a wonderful and happy set and goes well with the Cute As Can Bee DSP. With it’s bright, cheerful colors, these are perfect for Spring cards.


If you need any stamping supplies, I’d be very happy to be your Demonstrator.  Just click on the Shop Now Button on the right side of the screen to go directly to my Online store or contact me if you have any questions.  Happy Stamping!

Thanks for stopping by and have a great day!

Akiko

  • Visit my online store here
  • See the current Stampin’ Up! Last Chance items here
  • Have any questions? I’d be happy to help, click here to contact me.

Cardstock Cuts for this project:

  • Bubble Bath – 4-1/4″ x 11″ card base scored at 5-1/2″, 1″ x 2″ (label)
  • Petunia Pop – three 1-5/8″ x 2-7/16″ (DSP mats)
  • Basic White – 4″ x 5-1/4″ (inside panel), 2″ x 4-1/2″ (bee die cuts)
  • Cute As Can Bee DSP – 4″ x 5-1/4″ (front background), three 1-3/4″ x 2-1/2″ panels (postage stamp die cuts), 1/2″ x 4″ (inside trim)

Stampin’ Up! products used in this project:


Stampin’ Up! Wildflower Birthday for the Happy Inkin’ Thursday Blog Hop

Good Morning and welcome to the Happy Inkin’ Thursday Blog Hop! The Stampin’ Up! Wildflower Birthday specialty designer series paper is a beautiful patterned paper pack with gold foil accents and pretty birthday floral die cuts. I used a floral bouquet die cut and background paper with the pretty sentiment from the Layering Leaves stamp set for a best wishes card. You can find the supplies I used along with card stock cuts at the bottom of my post.

We have a pretty color challenge this week and most of the colors appear in the designer series paper:

I adhered a panel of Stampin’ Up! Wildflower Birthday specialty designer series paper to the front of a Soft Sea Foam card base with liquid glue.

I stamped the sentiment from the Layering Leaves stamp set using Versamark ink on Basic White and sprinkled it with gold embossing powder. I shook off the excess and heated the powder with my heat tool until it was bright and shiny. I cut out the sentiment with banner die from the Nested Essentials dies and adhered it to the card with glue dots.

I punched out the beautiful floral bouquet from the Stampin’ Up! Wildflower Birthday specialty DSP and popped it on the card with dimensionals. I finished the card with gold dots.

For the inside, I adhered a flower, gold sprig and leaf from the Stampin’ Up! Wildflower Birthday specialty DSP to the corner of a Basic White panel with liquid glue. . I trimmed the bottom with DSP and adhered the panel to the inside of the card with Stampin’ Seal.

So simple and pretty! The designs from the Stampin’ Up! Wildflower Birthday specialty DSP are so pretty and the die cuts make cardmaking so easy! There are designs for flowers, cakes, streamers and balloons – everything you need to celebrate a birthday or any special occasion.

On with the Hop! Click on the Next Blog button to move forward to see the beautiful project Karen Ksenzakovic has created.

If you get lost along the way, here are the participants for the hop:


If you need any stamping supplies, I’d be very happy to be your Demonstrator.  Just click on the Shop Now button on the right side of the screen to go directly to my online store or contact me if you have any questions. 

Thanks for stopping by and Happy Stamping!

Akiko

  • Visit my online store here
  • See the current Stampin’ Up! Last Chance items here
  • Have any questions? I’d be happy to help, click here to contact me.

Cardstock Cuts for this project:

  • Soft Sea Foam – 4-1/4″ x 11″ card base, scored at 5-1/2″
  • Basic White – 4″ x 5-1/4″ (inside panel), 2-1/2″ x 3″ (label)
  • Wildflower Birthday specialty DSP – 4-1/4″ x 5-1/2″ (front background), 1/2″ x 4″ (inside trim), large bouquet, small flower, leaf, gold sprig

Stampin’ Up! products used in this project:

Stampin’ Up! Thankful Garden Love Card

Good Morning! There’s a new release of Online Exclusives today and one of the new bundles is the pretty Stampin’ Up! Thankful Garden bundle. This is a stamp, die and mask bundle with big, bold flowers and pretty sentiments. I used the masks to make my flowers today and I’ve paired it with the coordinating Lovely Garden designer series paper. You can find the products I used at the bottom of my post along with the card stock sizes.

I adhered a panel of Lovely Garden designer series paper to the front of a Soft Sea Foam card base with liquid glue. I was going to use Garden Green, but I wanted a softer color – I think it works. I embossed a Basic White panel with the Eyelet 3D embossing folder and adhered strips of dark Garden Green two-tone card stock to the top and bottom edges. The two Tone card stock is thinner than regular card stock and I didn’t want the extra bulk and since I was adhering the embossed panel with liquid glue, I think it’s a great option! It gives me just a little stronger definition between the embossed panel and DSP.

The masks for the Stampin’ Up! Thankful Garden bundle are numbered 1 – 5 and have little notches to help line them up. I applied Lemon Lolly with Blending Brushes to 1 and 2. I applied the ink a little darker on the second mask. I used Daffodil Delight on the third mask to get the darkest highlights. The last two masks are for the leaves and I used Garden Green ink, making the ink darker on the last one. I used Memento Tuxedo Black ink to stamp the flower centers and cut the flowers out with the large coordinating die. I had to do this twice because the die didn’t line up correctly the first time. So on the second attempt, I snugged the stems up tighter against the flower and checked my die after I laid down enough Garden Green ink. For the third flower, I just used ink on the smaller flower in the masks (no need to do the stems). and cut it out with the small flower die. I adhered the flower and stems to the card with glue dots and popped the small flower on top with dimensionals.

I stamped sentiment from the Stampin’ Up! Thankful Garden stamp set using Memento Tuxedo Black ink on Basic White and cut it out with the small rectangle die from the Nested Essentials dies. I adhered the label to the card with glue dots. I made a bow with the new white ribbon and adhered it with a glue dot and finished with daffodil Delight opal rounds.

For the inside panel, I stamped the the flowers from the Stampin’ Up! Thankful Garden stamp set using Lemon Lolly ink on a Basic White panel. I trimmed the bottom with DSP and adhered it to the inside of the card with Stampin’ Seal.

The flowers from the Stampin’ Up! Thankful Garden bundle are so versatile and can be colored in so many ways. I think it would have been a little easier to align the coordinating die if I had stamped the whole flower first, but I wanted the look without the stamped image. And I love the black stamped center accents!

Next, I’ll have to try coloring the stamped outline image. This pretty bundle can be used in so many ways. Check it out along with the other new Online Exclusives here.


If you need any stamping supplies, I’d be very happy to be your Demonstrator.  Just click on the Shop Now Button on the right side of the screen to go directly to my Online store or contact me if you have any questions.  Happy Stamping!

Thanks for stopping by and have a great day!

Akiko

  • Visit my online store here
  • See the current Stampin’ Up! Last Chance items here
  • Have any questions? I’d be happy to help, click here to contact me.

Cardstock Cuts for this project:

  • Soft Sea Foam – 4-1/4″ x 11″ card base scored at 5-1/2″
  • Garden Green Two-Tone – two 1″ x 4-1/4″ strips (embossed panel mat)
  • Basic White – 4″ x 4-1/4″ (embossed front background), 3-3/4″ x 5″ (inside panel), 3-1/2″ x 3-1/2″ (die cut flowers), 2-1/2″ x 2-1/2″ (die cut flower), 1-1/2″ x 2″ (label)
  • Lovely Garden DSP – 4-1/4″ x 5-1/2″ (front background), 1/2″ x 3-3/4″ (inside trim)

Stampin’ Up! products used in this project:


Stampin’ Up! Mixed Florals Card

Good Morning! I used the pretty daisy image from the Stampin’ Up! Mixed Florals stamp set with the pretty sentiment from the Labeled with Love stamp set o make an monochromatic black and white card for today. You can find the products I used at the bottom of my post along with the card stock sizes.

I embossed a Basic White panel with the Plaster Painting 3D embossing folder and adhered it to the front of a Basic Black card base with liquid glue. I adhered a black and white floral panel of Mixed Media Florals designer series paper to a Basic Black mat and adhered it to the card.

I stamped the daisy image from the Stampin’ Up! Mixed Florals stamp set using Versamark ink on a Basic Black panel. I sprinkled it with white embossing powder and shook off the excess. I heated the powder with my heat tool until it was bright and shiny and popped it on the card with dimensionals.

I stamped sentiment from the Labeled with Love stamp set using Memento Tuxedo Black ink ink on Basic White and adhered it to a basic Black mat. I adhered it to the card with glue dots and finished the card with clear sparkle dots.

For the inside panel, I stamped the the floral sprig from the Stampin’ Up! Mixed Florals stamp set using Memento Tuxedo Black ink on a Basic White panel. I trimmed the bottom with DSP and adhered it to the inside of the card with Stampin’ Seal.

I love the Mixed Media Florals designer series paper and the floral images go well with the stamped daisy from the Stampin’ Up! Mixed Florals stamp set. And I love that sentiment from the Labeled with Love stamp set – the curvy script goes perfect with the flowers. And the sentiment is the perfect start to the week – Enjoy!!


If you need any stamping supplies, I’d be very happy to be your Demonstrator.  Just click on the Shop Now Button on the right side of the screen to go directly to my Online store or contact me if you have any questions.  Happy Stamping!

Thanks for stopping by and have a great day!

Akiko

  • Visit my online store here
  • See the current Stampin’ Up! Last Chance items here
  • Have any questions? I’d be happy to help, click here to contact me.

Cardstock Cuts for this project:

  • Basic Black – 4-1/4″ x 11″ card base scored at 5-1/2″, 2-1/8″ x 4-5/8″ (DSP mat), 1-3/8″ x 1-5/8″ (label mat), 2-1/2″ x 3-1/2″ (floral panel)
  • Basic White – two 4″ x 5-1/4″ (embossed front background and inside panel), 1-1/4″ x 1-1/2 (label)
  • Mixed Media Florals DSP – 2″ x 4-1/2″ (floral strip), 1/2″ x 4″ (inside trim)

Stampin’ Up! products used in this project:


Stampin’ Up! Heirloom Arrangements Kit

Good Morning and Happy March! Hopefully Spring arrives soon. I used the beautiful Stampin’ Up! Heirloom Arrangements kit for today’s cards and it was so much fun and creative relaxation to arrange the die cuts and make the cards!

The kit comes with detailed instructions for two cards and shows examples that are pretty easy to re-create for the rest. There are several die cuts left over, and I just added them to the existing designs so they were all used. I did add baker’s twine and sequins from my stash to each of the cards and used Pretty Peacock ink to stamp the butterfly with the Pecan Pie grid. Here’s a closer look at each of my cards.

Aren’t the vintage die cuts from the Stampin’ Up! Heirloom Arrangements kit so pretty? There are other sentiments in the stamp set, but I decided to only use the ‘for you‘ sentiment on the cards. I love how you can make each card unique and that there are 8 cards. This kit was just added to the Stampin’ Up! Kits Collection last month and is only available in the Online Store. New kits are added each month in a variety of styles to meet different crafting tastes and needs. Be sure to check them out.


Last Month To Earn Wildflower Rewards Points

There are exciting changes coming to the Stampin’ Rewards program in April, so sadly, this means my Wildflower Points Frequent Shopper Program is coming to an end.  March 2025 is the last month to earn Wildflower Points and all Wildflower Rewards earned must be redeemed before December 31, 2025.  If you have any questions about your current Wildflower Points status, please contact me.

Stay tuned for the exciting new Stampin’ Rewards program that will begin April 15, 2025!


Current Host Code: CCXFTCJQ

Use this host code when you order $50 or more and receive a Thank You gift from me – a pack of pretty Tinsel Gems Three-Pack (item 161624).

161624 – Tinsel Gems Three-Pack

When I am notified of your order, I will pack your embellishments and send them to your shipping address along with a handmade thank you card!


If you need any stamping supplies, I’d be very happy to be your Demonstrator.  Just click on the Shop Now Button on the right side of the screen to go directly to my Online store or contact me if you have any questions.  Happy Stamping!

Thanks for stopping by and have a great day!

Akiko

  • Visit my online store here
  • See the current Stampin’ Up! Last Chance items here
  • Have any questions? I’d be happy to help, click here to contact me.

Stampin’ Up! products used in this project:


Stampin’ Up! Thankful Garden Sneak Peek for the Happy Inkin’ Thursday Blog Hop

Good Morning and welcome to the Happy Inkin’ Thursday Blog Hop! The Stampin’ Up! Thankful Garden is part of the new Online Exclusives release that will be available on March 4. It includes a pretty floral stamp set with coordinating dies and there is also a set of designer series paper that goes with it – the Lovely Garden designer series paper. I used both of these for a simple encouragement card. You can find the currently available supplies I used along with card stock cuts at the bottom of my post and I also included a picture of the bundle and the beautiful DSP as well.

We have a pretty sketch challenge this week:

I adhered a panel of Lovely Garden designer series paper to the front of a Garden Green card base with liquid glue. I adhered a colorful panel of the DSP to a Basic Black mat and adhered it to the card with dimensionals.

I stamped the sentiment from the Stampin’ Up! Thankful Garden stamp set using Versamark ink on Basic Black and sprinkled it with white embossing powder. I shook off the excess and heated the powder with my heat tool until it was bright and shiny. I cut out the sentiment with the long label die from the Delightful Wishes dies.

I adhered the label to the card with glue dots and dimensionals and finished with three Melon Mambo glossy dots.

For the inside, I stamped the flower from the Stampin’ Up! Thankful Garden stamp set using twice stamped off Melon Mambo ink on Basic White. I trimmed the bottom with DSP and adhered the panel to the inside of the card with Stampin’ Seal. Isn’t that big flower impressive!

The Stampin’ Up! Thankful Garden bundle is so bold and the beautiful Lovely Garden DSP is so colorful and bright. Here is a picture of the stamp set and dies that are included in the bundle. There is also a set of masks for coloring the flowers, but I forgot to include it in the picture. I need to use the masks to color one of these flowers soon!

And here is the pretty DSP. It will be great for all sorts of Spring card making.

These products are part of the Lovely Garden Suite Collection and will be available next week on March 4, 2025!

On with the Hop! Click on the Next Blog button to move forward to see the beautiful project Karen Ksenzakovic has created.

If you get lost along the way, here are the participants for the hop:


Current Host Code: CCXFTCJQ

Use this host code when you order $50 or more and receive a free gift from me!  The free gift is your choice of any item currently available valued up to $10.00!

If your order is over $150, please do not use the host code since you’ll receive your own Host Dollars plus I’ll still send you the free gift!  This host code can be used by anyone, no club or commitment required. Let me know if you have any questions.


If you need any stamping supplies, I’d be very happy to be your Demonstrator.  Just click on the Shop Now button on the right side of the screen to go directly to my online store or contact me if you have any questions. 

Thanks for stopping by and Happy Stamping!

Akiko

  • Visit my online store here
  • See the current Stampin’ Up! Last Chance items here
  • Earn FREE Stampin’ Up! products through my Wildflower Frequent Shopper Program – my way of saying thank you to my online frequent shopper customers.
  • Have any questions? I’d be happy to help, click here to contact me.

Cardstock Cuts for this project:

  • Garden Green – 4-1/4″ x 11″ card base, scored at 5-1/2″
  • Basic Black – 2-7/8″ x 4-5/8″ (DSP mat), 3/4″ x 4″ (label)
  • Basic White – 4″ x 5-1/4″ (inside panel), 2-1/4″ x 3-3/4″ (small die cut hexagon)
  • Lovely Garden DSP – 4-1/4″ x 5-1/2″ (front background), 2-3/4″ x 4-1/2″ (DSP panel), 1/2″ x 4″ (inside trim)

Stampin’ Up! products used in this project:

Stampin’ Up! Bright Borders Congratulations Card

Good Morning! The Stampin’ Up! Bright Borders stamp set is a pretty all occasion stamp stamp set that coordinates with the new To The Point label punch. I used it with the Serene Love designer series paper to make a simple blue and white congratulations card. You can find the products I used at the bottom of my post along with the card stock sizes.

I adhered a panel of Serene Love designer series paper to the front of a Night of Navy card base with liquid glue.

I cut three strips of the Serene Love DSP and adhered them to a Night of Navy panel, a floral strip in the middle and graphic strips on the ends. I wrapped the panel with white ribbon (available March 4 with the new Online Exclusives) and tied a knot. I adhered the panel to the card front with dimensionals.

I stamped the frame from the Stampin’ Up! Bright Borders stamp set using Night of Navy ink on Basic White. I stamped the sentiment in the middle in Night of Navy and punched the label out with the To The Point label punch. I adhered the label to the card with dimensionals and finished it with Night of Navy dots.

For the inside panel, I stamped the sentiment from the Stampin’ Up! Bright Borders stamp set using Night of Navy ink on a Basic White panel. I trimmed the bottom with DSP and adhered it to the inside of the card with Stampin’ Seal.

I love that the Stampin’ Up! Bright Borders coordinates with the To The Point label punch. I think a stamped border is a great, easy way to dress up a punched label and the sentiments are so versatile. This simple design really shows off the different designs of the pretty Serene Love designer series paper which is a wonderful deal on the Last Chance Products list, so be sure to check it out.


Final Days For Sale-A-Bration!!

Sale-A-Bration is the biggest Stampin’ Up! promotion of the year and it’s coming to an end. The best part of Sale-A-Bration is that you earn FREE items for every $60 worth of products you purchase. There are items that you get for $60 and there are items you can get for $120. All the details are in the Sale-A-Bration Brochure. Click on the picture of the brochure below to download a copy to view the items and details.

Another benefit of Sale-A-Bration is when you host a workshop with sales over $300 or have an individual order over $300, you get to choose an additional $30 worth of products from the Stampin’ Up! catalog or Online Store for FREE!

And Sale-A-Bration is the best time to join Stampin’ Up! as a new Demonstrator. During Sale-A-Bration, new Demonstrators who purchase a starter kit by choosing $125 worth of products for only $99 (includes shipping) have two FREE bonus options to add to your starter kit.

  • Option 1: Your choice of TWO marker sets from our Stampin’ Write Marker Assortments (Brights, Neutrals, Regals, Subtles), PLUS the Handmade Designs stamp set, a beautiful stamp set exclusively designed to work with them.
  • Option 2: Your Choice of an additional $30 in FREE products

Sale-A-Bration runs through February 28, 2025. Visit my Online Store to start shopping now.


Current Host Code: CCXFTCJQ

Use this host code when you order $50 or more and receive a Thank You gift from me!  The free gift is your choice of any item currently available valued up to $10.00.

If your order is over $150, please do not use the host code since you’ll receive your own Host Dollars plus I’ll still send you the Thank You gift!  This host code can be used by anyone, no club or commitment required. Let me know if you have any questions.


If you need any stamping supplies, I’d be very happy to be your Demonstrator.  Just click on the Shop Now Button on the right side of the screen to go directly to my Online store or contact me if you have any questions.  Happy Stamping!

Thanks for stopping by and have a great day!

Akiko

  • Visit my online store here
  • See the current Stampin’ Up! Last Chance items here
  • Earn FREE Stampin’ Up! products through my Wildflower Frequent Shopper Program – my way of saying thank you to my online frequent shopper customers.
  • Have any questions? I’d be happy to help, click here to contact me.

Cardstock Cuts for this project:

  • Night of Navy – 4-1/4″ x 11″ card base scored at 5-1/2″, 3-1/2″ x 4-3/4″ (center panel)
  • Basic White – 4″ x 5-1/4″ (inside panel), 2-1/2″ x 2-3/4 (label)
  • Serene Love DSP – 4-1/4″ x 5-1/2″ (front background), 1/2″ x 4″ (inside trim), two 3/4″ x 4-1/4″ strips (side strips), 1″ x 4-1/4″ (center strip)

Stampin’ Up! products used in this project:


Stampin’ Up! Textured Notes Sneak Peek

Good Morning! Next week a new set of Online Exclusives will be released on March 4 and one of the new bundles is the Stampin’ Up! Textured Notes bundle. This is stamp and die bundle featuring a stamp set with wonderful texture elements and sentiments along with a fabulous set of rectangle dies with fancy textured edges. I used the bundle with the Nature’s Sweetness specialty designer series paper for today’s card. You can find the currently available products I used at the bottom of my post along with the card stock sizes. And you can find a link further down to download a PDF with all the details of the Botanical Textures suite that includes this awesome new bundle.

I stamped a panel of Nature’s Sweetness specialty designer series paper with the large leaf sprig from the pretty Stampin’ Up! Textured Notes stamp set using Pecan Pie ink. I stamped the image twice so that the image flowed on a diagonal across the panel. I cut it out with one of the awesome rectangle dies and adhered it to the front of a Pecan Pie card base.

I stamped the basket from the Stampin’ Up! Textured Notes stamp set using Pecan Pie ink on Basic White. I fussy cut it out with my paper snips and adhered it to the card with liquid glue. I tore the end of a strip of Pebbled Path card stock and embossed it with the new Mini Corrugated 3D embossing folder. I adhered it to the card with liquid glue. I adhered two strips of Nature’s Sweetness specialty DSP to the card with glue dots.

I stamped the woven image from the Stampin’ Up! Textured Notes stamp set using stamped off Pebbled Path ink on Basic White. I stamped the sentiment in full strength Pebbled Path and cut it out with a rectangle die – isn’t the edge just gorgeous!

For the inside panel, I stamped the leaf from the Stampin’ Up! Textured Notes stamp set using stamped off Pecan Pie ink in the corners of a Basic White panel and adhered it to the inside of the card with Stampin’ Seal.

The pretty Stampin’ Up! Textured Notes bundle will be available on March 4 with the new release of Online Exclusives. Click on the picture below to download a flyer with details of this bundle and other items in the Botanical Textures Suite Collection.


Last Week For Sale-A-Bration!!

Sale-A-Bration is the biggest Stampin’ Up! promotion of the year. The best part of Sale-A-Bration is that you earn FREE items for every $60 worth of products you purchase. There are items that you get for $60 and there are items you can get for $120. All the details are in the Sale-A-Bration Brochure. Click on the picture of the brochure below to download a copy to view the items and details.

Another benefit of Sale-A-Bration is when you host a workshop with sales over $300 or have an individual order over $300, you get to choose an additional $30 worth of products from the Stampin’ Up! catalog or Online Store for FREE!

And Sale-A-Bration is the best time to join Stampin’ Up! as a new Demonstrator. During Sale-A-Bration, new Demonstrators who purchase a starter kit by choosing $125 worth of products for only $99 (includes shipping) have two FREE bonus options to add to your starter kit.

  • Option 1: Your choice of TWO marker sets from our Stampin’ Write Marker Assortments (Brights, Neutrals, Regals, Subtles), PLUS the Handmade Designs stamp set, a beautiful stamp set exclusively designed to work with them.
  • Option 2: Your Choice of an additional $30 in FREE products

Sale-A-Bration runs through February 28, 2025. Visit my Online Store to start shopping now.


Current Host Code: FYMGA4AN

Use this host code when you order $50 or more and receive a Thank You gift from me!  The free gift is your choice of any item currently available valued up to $10.00.

If your order is over $150, please do not use the host code since you’ll receive your own Host Dollars plus I’ll still send you the Thank You gift!  This host code can be used by anyone, no club or commitment required. Let me know if you have any questions.


If you need any stamping supplies, I’d be very happy to be your Demonstrator.  Just click on the Shop Now Button on the right side of the screen to go directly to my Online store or contact me if you have any questions.  Happy Stamping!

Thanks for stopping by and have a great day!

Akiko

  • Visit my online store here
  • See the current Stampin’ Up! Last Chance items here
  • Earn FREE Stampin’ Up! products through my Wildflower Frequent Shopper Program – my way of saying thank you to my online frequent shopper customers.
  • Have any questions? I’d be happy to help, click here to contact me.

Cardstock Cuts for this project:

  • Pecan Pie – 4-1/4″ x 11″ card base scored at 5-1/2″
  • Pebbled Path – 3/4″ x 5″ (embossed strip)
  • Basic White – 3-3/4″ x 5″ (inside panel), 1-1/2″ x 3 (label), 2″ x 2″ (fussy cut basket)
  • Nature’s Sweetness specialty DSP – 3-1/2″ x 5″ (die cut background), 1/2″ x 3-3/4″ (pebbled path strip), 3/8″ x 3″ (gold foil strip

Stampin’ Up! products used in this project:


Stampin’ Up! Terrific Toadstools Fun Fold Card

Good Morning! The Stampin’ Up! Terrific Toadstools bundle is from the new Mini Catalog is a whimsical and fun mushroom themed stamp set that coordinates with the Sale-A-Bration Toadstool Gardens designer series paper. Sale-A-Bration is ending soon, so I decided to make this fun-fold hello card with these products. You can find the products I used at the bottom of my post along with the card stock sizes.

I adhered panels of Toadstool Gardens designer series paper to Pebbled Path mats before adhering them to the front and end sections of a Melon Mambo card base. I adhered striped patterns of the DSP to the middle sections (see picture below). I used the second largest circle from the Stylish Shapes dies to cut a Gray Granite panel of the DSP and adhered it to the center panel with liquid glue.

I used the leaf sprigs from the Delicate Forest dies to cut a granny Apple Green panel and adhered them to the card with liquid glue. I stamped the mushroom caps from the Stampin’ Up! Terrific Toadstools bundle using Melon Mambo and Pumpkin Pie inks on Basic White and punched them out with the Terrific Toadstools punch. I stamped the mushroom stems using Gray Granite ink on Basic White and fussy cut them with my paper snips. I adhered the stems to the caps with liquid glue and popped them on the card with dimensionals.

I stamped the sentiment from the Stampin’ Up! Terrific Toadstools stamp set using Versamark ink on Pebbled Path card stock. I sprinkled it with white embossing powder, shook off the excess and heated it with my heat tool. I cut it out with the short label die from the Delicate Forest dies. I folded a length of Peach Pie ribbon and adhered it to the back of the label with glue dots and popped the label on the card with dimensionals. I finished the card with Melon Mambo glossy dots.

The inside panel is on the back of the front center panel and I stamped the mushroom, stems and leaf sprig from the Stampin’ Up! Terrific Toadstools stamp set in Melon Mambo, Gray Granite and Granny Apple Green inks on Basic White. I adhered the panel to the card and adhered panels of the striped Toadstool Gardens DSP to each of the back panels.

The Stampin’ Up! Terrific Toadstools bundle has different style mushroom tops and stems for you to mix and match to create your own mushrooms. And there are cute little ladybugs that you can stamp too! The punch punches out the mushrooms without the white border, so it’s pretty easy to use. This is the last week to get the Toadstool Gardens 6″ x 6″ designer series paper for FREE as a Sale-A-Bration item. It is a bright and colorful set of papers that are perfect for Spring. This is part of the reason I like this fun fold card so much, it shows off the pretty DSP!


Last Week for Sale-A-Bration !!

Sale-A-Bration is the biggest Stampin’ Up! promotion of the year. The best part of Sale-A-Bration is that you earn FREE items for every $60 worth of products you purchase. There are items that you get for $60 and there are items you can get for $120. You can select your FREE Sale-A-Bration items when you checkout.

Another benefit of Sale-A-Bration is when you host a workshop with sales over $300 or have an individual order over $300, you get to choose an additional $30 worth of products from the Stampin’ Up! catalog or Online Store for FREE!

And Sale-A-Bration is the best time to join Stampin’ Up! as a new Demonstrator. During Sale-A-Bration, new Demonstrators who purchase a starter kit by choosing $125 worth of products for only $99 (includes shipping) have two FREE bonus options to add to your starter kit.

  • Option 1: Your choice of TWO marker sets from our Stampin’ Write Marker Assortments (Brights, Neutrals, Regals, Subtles), PLUS the Handmade Designs stamp set, a beautiful stamp set exclusively designed to work with them.
  • Option 2: Your Choice of an additional $30 in FREE products

Sale-A-Bration runs through February 28, 2025. Visit my Online Store to start shopping now.


Current Host Code: FYMGA4AN

Use this host code when you order $50 or more and receive a Thank You gift from me!  The free gift is your choice of any item currently available valued up to $10.00.

If your order is over $150, please do not use the host code since you’ll receive your own Host Dollars plus I’ll still send you the Thank You gift!  This host code can be used by anyone, no club or commitment required. Let me know if you have any questions.


If you need any stamping supplies, I’d be very happy to be your Demonstrator.  Just click on the Shop Now Button on the right side of the screen to go directly to my Online store or contact me if you have any questions.  Happy Stamping!

Thanks for stopping by and have a great day!

Akiko

  • Visit my online store here
  • See the current Stampin’ Up! Last Chance items here
  • Earn FREE Stampin’ Up! products through my Wildflower Frequent Shopper Program – my way of saying thank you to my online frequent shopper customers.
  • Have any questions? I’d be happy to help, click here to contact me.

Cardstock Cuts for this project:

  • Melon Mambo – 4-1/4″ x 11″ card base scored at 2-1/4″, 3-5/8″, 7-3/8″ and 8-3/4″
  • Pebbled Path – 3-1/2″ x 4″ (front center panel mat), two 2″ x 4″ panels (side DSP mats), 1-1/4″ x 3-1/4″ (label)
  • Granny Apple Green – 2″ x 2-3/4″ (die cut leaf sprigs)
  • Basic White – 3-1/2″ x 4″ (back center panel), 1-1/4″ x 4-1/2″ (punched mushroom caps), 1″ x 3-1/2″ (fussy cut mushroom stems)
  • Toadstool Gardens 6″ x 6″ DSP – 3-3/8″ x 3-7/8″ (center panel background), two 1-7/8″ x 3-7/8″ (side panels), two 2″ x 4″ panels (back side panels), four 1-1/4″ x 4″ (front and back middle panels), 2-3/4″ x 2-3/4″ (die cut circle)

Stampin’ Up! products used in this project:


Stampin’ Up! So Sincere for the Happy Inkin’ Thursday Blog Hop

Good Morning and welcome to the Happy Inkin’ Thursday Blog Hop! The Stampin’ Up! So Sincere stamp set from the current Annual Catalog is filled with wonderful sentiments. I picked an inspirational one and paired it with the beautiful new Mixed Media Florals designer series paper and the paper butterfly cutouts for today’s card. You can find the supplies I used along with card stock cuts at the bottom of my post.

We have a fun theme challenge this week:

I adhered a panel of Mixed Media Florals designer series paper to a Basic Black mat and popped it on the front of a Poppy Parade card base with dimensionals.

I stamped the sentiment from the Stampin’ Up! So Sincere stamp set using Poppy Parade ink on Basic White and cut it out with the Countryside Corners die. I cut a Garden Green panel of the DSP with the next largest size Countryside Corners die and adhered the stamped die cut on top. I adhered the layered die cuts to the card with liquid glue.

I colored two of the paper butterfly cutouts Basic Black. In order to get an intense color, I used the dark Stampin’ Blend and then use the Stampin’ Write marker over it. I found that it wasn’t intense enough with just one. Also I colored the back sides of the butterflies. I adhered them to the card with glue dots applied to the butterfly bodies and finished the butterflies with black sparkle gems.

For the inside, I stamped the small butterflies from the Sketched butterflies stamp set using Garden Green ink on Basic White I trimmed the bottom with DSP and adhered the panel to the inside of the card with Stampin’ Seal.

The Mixed Media Florals designer series paper is full of bold, pretty colors that make wonderful cards. The sentiments from the Stampin’ Up! So Sincere stamp set are perfect for many occasions and go well with this pretty DSP. And I just love these versatile paper butterflies!

On with the Hop! Click on the Next Blog button to move forward to see the beautiful project Karen Ksenzakovic has created.

If you get lost along the way, here are the participants for the hop:


Current Host Code: FYMGA4AN

Use this host code when you order $50 or more and receive a free gift from me!  The free gift is your choice of any item currently available valued up to $10.00!

If your order is over $150, please do not use the host code since you’ll receive your own Host Dollars plus I’ll still send you the free gift!  This host code can be used by anyone, no club or commitment required. Let me know if you have any questions.


If you need any stamping supplies, I’d be very happy to be your Demonstrator.  Just click on the Shop Now button on the right side of the screen to go directly to my online store or contact me if you have any questions. 

Thanks for stopping by and Happy Stamping!

Akiko

  • Visit my online store here
  • See the current Stampin’ Up! Last Chance items here
  • Earn FREE Stampin’ Up! products through my Wildflower Frequent Shopper Program – my way of saying thank you to my online frequent shopper customers.
  • Have any questions? I’d be happy to help, click here to contact me.

Cardstock Cuts for this project:

  • Poppy Parade – 4-1/4″ x 11″ card base, scored at 5-1/2″
  • Basic Black – 3-7/8″ x 5-1/8″ (DSP mat)
  • Basic White – 3-3/4″ x 5″ (inside panel), 2-1/4″ x 3-3/4″ (small die cut hexagon)
  • Mixed Media Florals DSP – 3-3/4″ x 5″ (front background), 2-3/4″ x 4-1/4″ (large die cut hexagon), 1/2″ x 3-3/4″ (inside trim)
  • Two paper butterfly accents

Stampin’ Up! products used in this project: