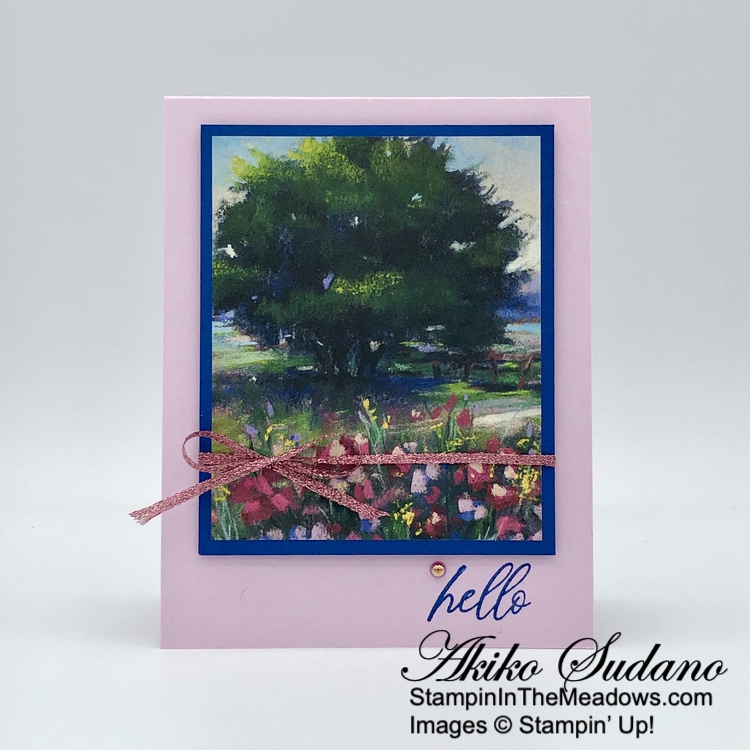
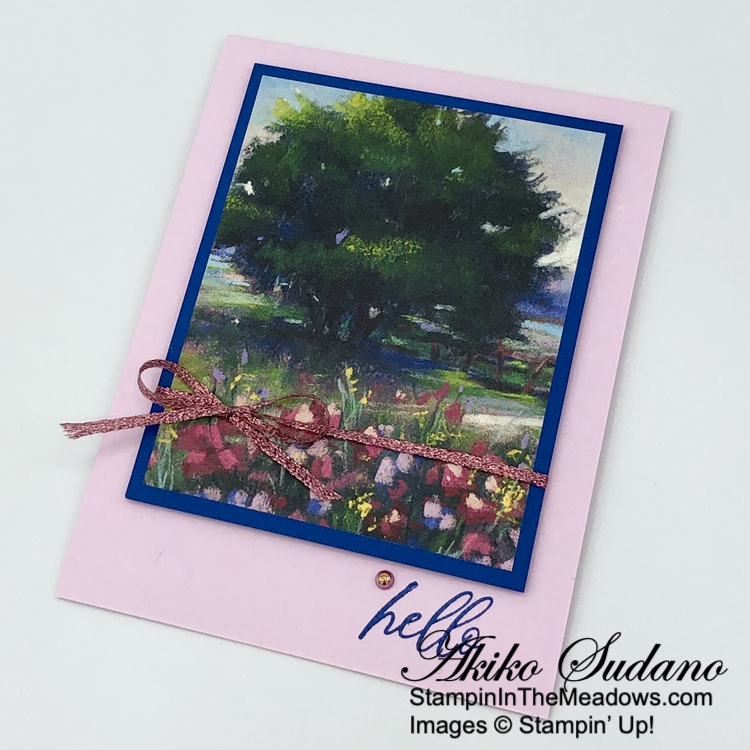
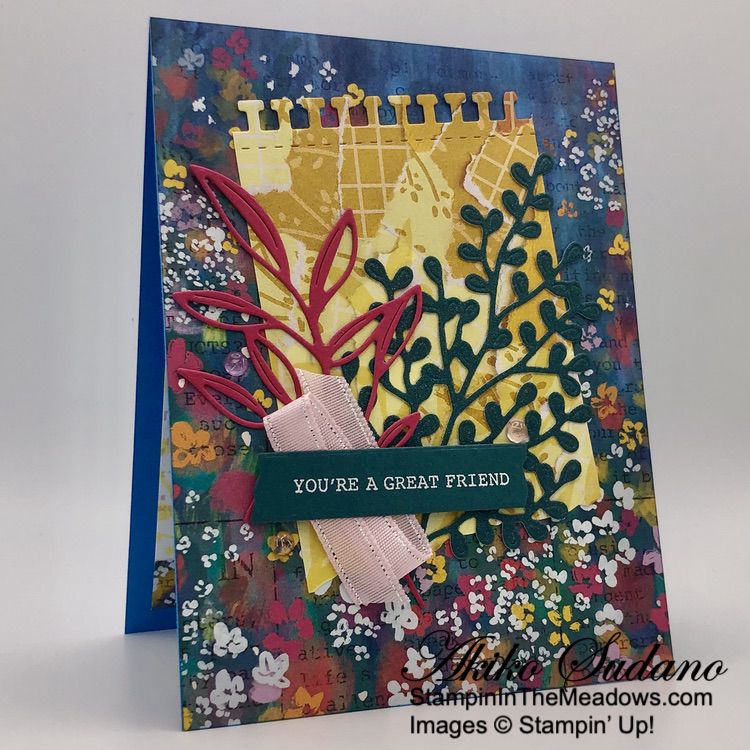
Good Morning! The Stampin’ Up! Blueberry Bunches stamp set is one of the pretty cling stamp sets that is not retiring – Yay! It is not in the new catalog, but it will still be available in the Online Store, and I think it will coordinate great with some of the new designer series papers. Today’s card is CASE’d from a sample in the retiring January-April Mini Catalog and is watercolored with ink! It also uses the pretty Meandering Meadows designer series paper. You can find the products I used at the bottom of my post along with the card stock sizes.

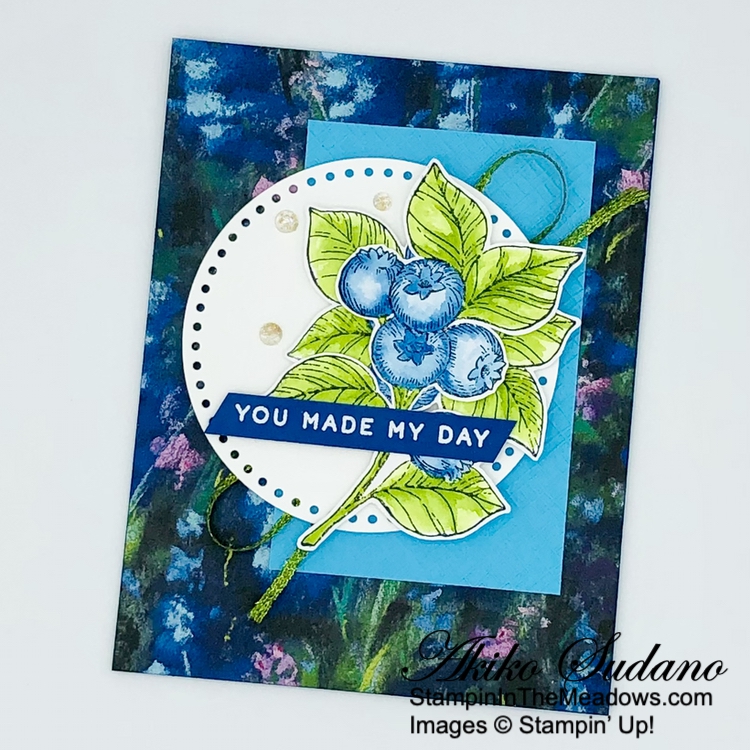
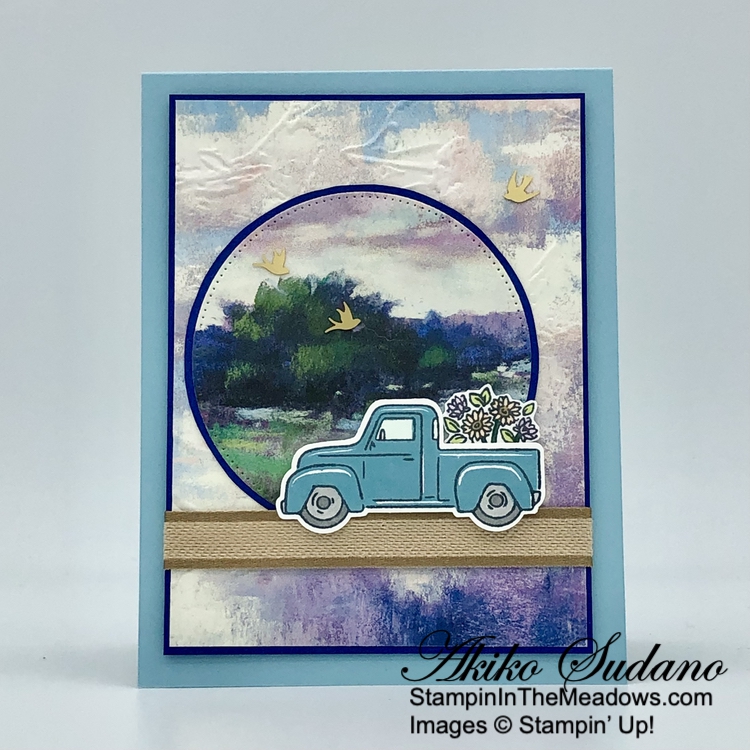
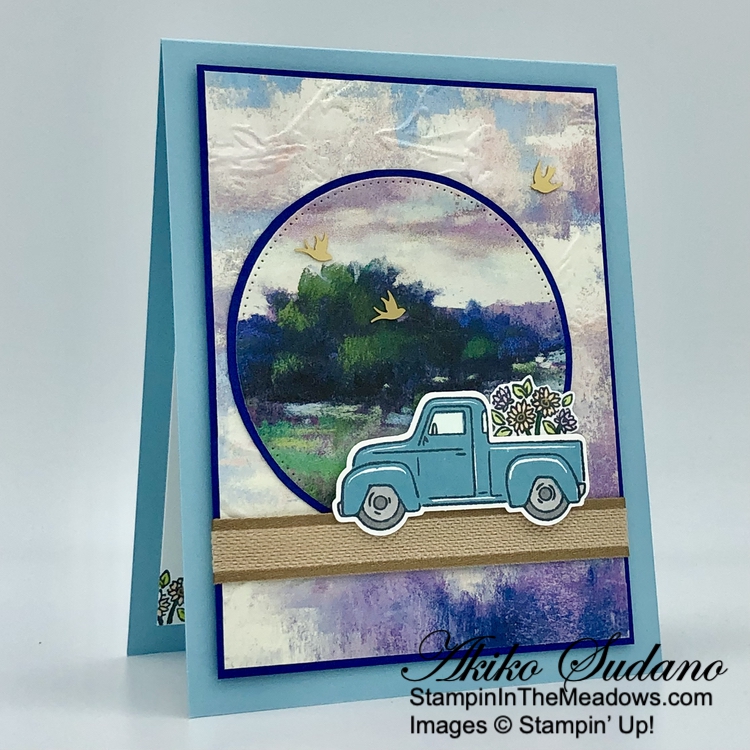
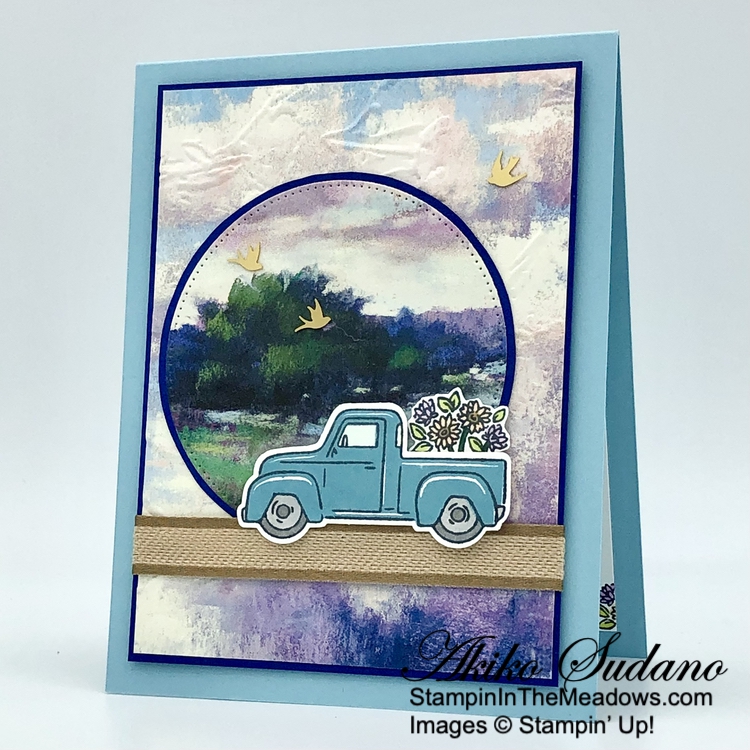
I adhered a panel of Meandering Meadows 6″ x 6″ designer series paper to the front of a Blueberry Bushel card base with liquid glue. I embossed a panel of retiring Tahitian Tide card stock with the Cross Hatch embossing folder and adhered it to the card front. I made a big loopy bow with retiring Parakeet Party metallic ribbon and adhered it with a glue dot. I cut a Basic White panel with the pretty Everyday Details circle die and adhered it to the card with dimensionals.
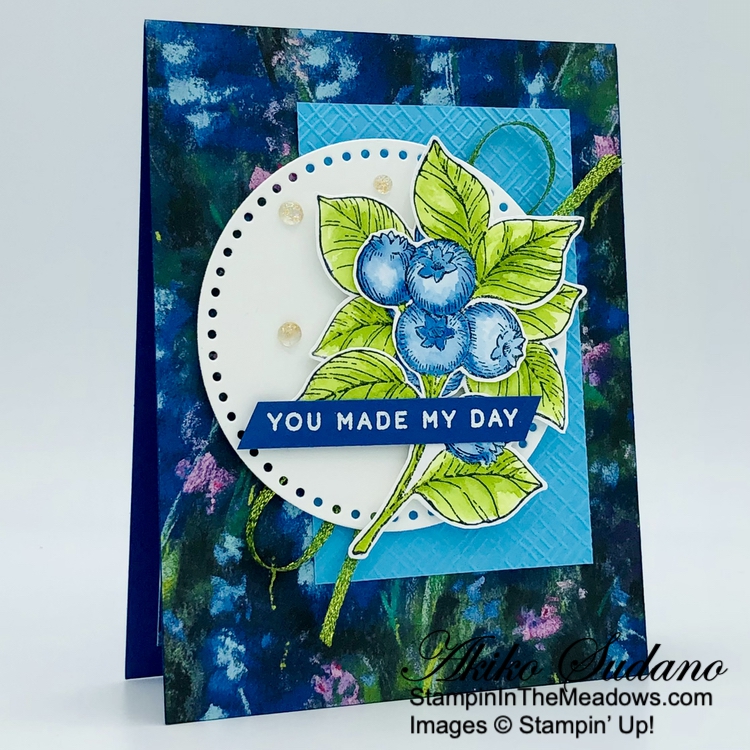
I stamped both of the blueberry stamps from the Stampin’ Up! Blueberry Bunches stamp set in black Stazon Ink on a panel of watercolor paper. I used my water painters to color the images with ink. I used Blueberry Bushel for the berries and Granny Apple Green for the leaves. After they dried, I fussy cut the images with my paper snips and adhered the smaller one to the back of the one with the stem with glue dots. I popped the berries onto the card with dimensionals.
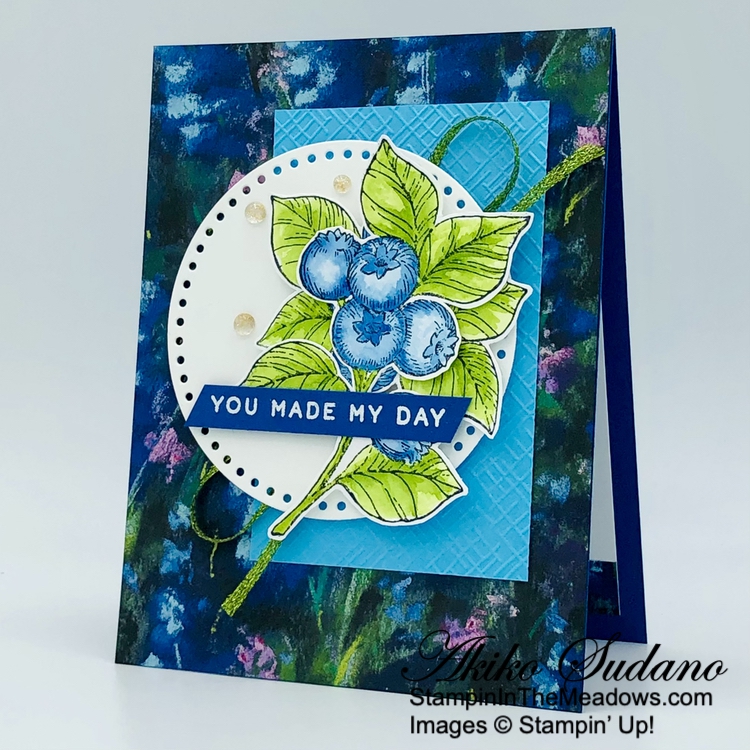
I stamped the sentiment from the Cheerful Daisies stamp set in Versamark ink on a strip of Blueberry Bushel card stock. I sprinkled it with white embossing powder and shook off the excess. I heated the powder with my heat tool until it was bright and shiny. I trimmed the ends at an angle with my paper snips and adhered it to the card with dimensionals and glue dots. I finished the card with iridescent foil gems.
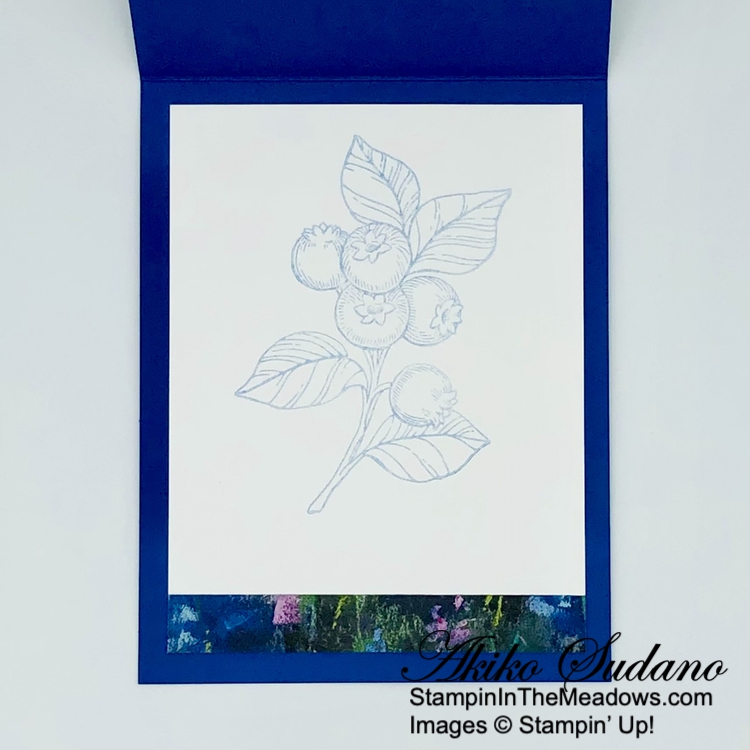
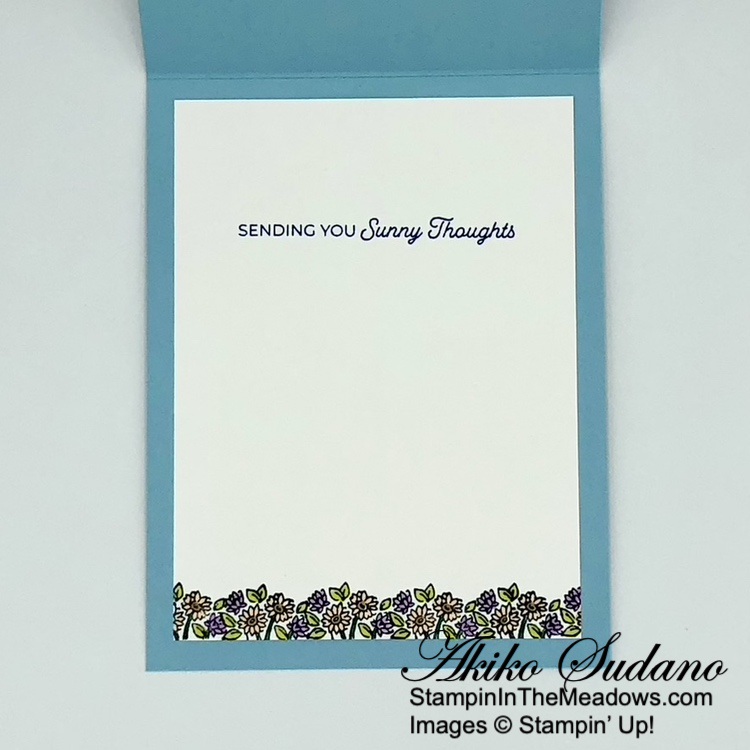
For the inside of the card I inked up the large blueberry stamp from the Stampin’ Up! Blueberry Bunches stamp set in Blueberry Bushel ink and stamped it off twice. Then I stamped it on the middle of a Basic White panel. I trimmed the bottom of the panel with DSP and adhered it to the inside of the card with Stampin’ Seal.
Watercoloring with ink is fun and it’s really easy when you have stamped line images like the ones in the Stampin’ Up! Blueberry Bunches stamp set. Go ahead and give it a try.

Last Chance Products on Sale Now!
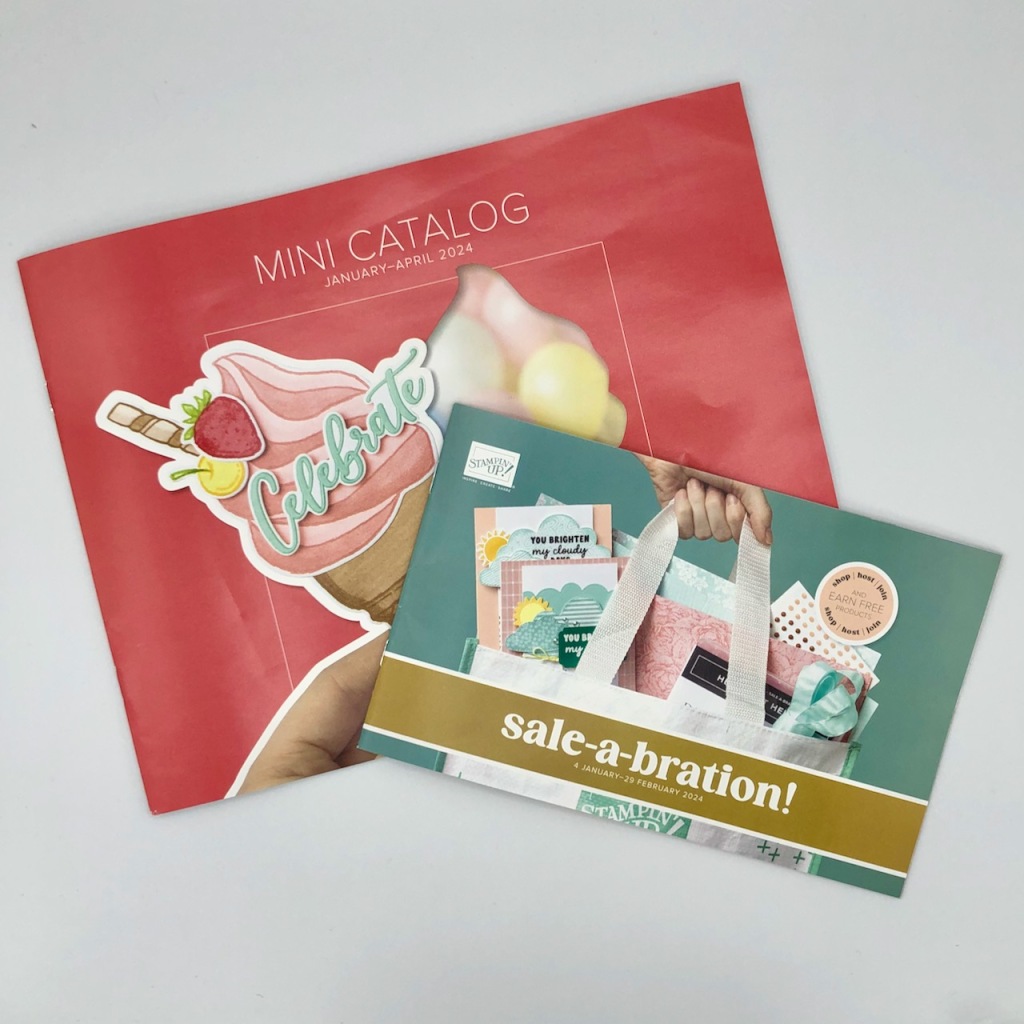
The retiring lists for the 2023-2024 Annual Catalog and the January-April 2024 Mini Catalog have been announced and some products are on sale with discounts up to 60%. These lists detail the products that will no longer be available once the catalogs retire on April 30. Items are only available while supplies last and some items are already sold out. So check it out to see if there is anything you want while it’s still available. And don’t forget the retiring 2022-2024 In Colors!
Click HERE to go to my online store to shop now.
Click HERE to download a PDF of the retiring items from the Annual Catalog.
Click HERE to download an excel spreadsheet of the Annual Catalog retiring items.
Click HERE to download a PDF of the retiring items from the Mini Catalog.
Click HERE to download an excel spreadsheet of the Mini Catalog retiring items.
New Stampin’ Up! 2023-2024 Annual Catalog coming May 1, 2024!

It’s sad to see items retiring, but the new Stampin’ Up! 2024-2025 Annual Catalog will be here soon! April 30 is the last day to order from the current 2023-2024 Annual Catalog and May 1 is when ordering from the new Annual Catalog begins!
And with the new Annual Catalog are the new 2024-2026 In Colors! Introducing Peach Pie, Petunia Pop, Pretty In Pink, Shy Shamrock and Summer Splash:


The May Paper Pumpkin Kit is The Best There Is!
Make cards for Father’s Day and more to express your gratitude and admiration!
- Makes 9 cards: 3 each of 3 designs with 9 coordinating envelopes
- Precut paper, accent pieces & labels
- Woodgrain textures and masculine earthy tones
- Misty Moonlight Classic Stampin’ Spot
Coordinating Colors: Wild Wheat, Pool Party, Misty Moonlight, Early Espresso, Crumb Cake, Basic Beige
And the coordinating add-on is the Thanks and Beyond dies. These dies coordinate with the Best There Is kit and will also coordinate with the June kit.

If you’re interested in subscribing to Paper Pumpkin, you can either sign up for a subscription where you are billed monthly for your kit or you can purchase a prepaid subscription in my Online Store. To see more information and to sign up for the monthly subscription click here. To see the options for prepaid subscriptions in my Online Store, click here.
Sign up deadline for the May 2024 kit is May 10, 2024. Note: Supplies may be limited toward the end of the subscription period.
Current Host Code: YEPTJAZ9
Use this host code when you order $50 or more and receive a Thank You gift from me! The free gift is your choice of any item currently available valued up to $10.00.
If your order is over $150, please do not use the host code since you’ll receive your own Host Dollars plus I’ll still send you the Thank You gift! This host code can be used by anyone, no club or commitment required. Let me know if you have any questions.
If you need any stamping supplies, I’d be very happy to be your Demonstrator. Just click on the Shop Now Button on the right side of the screen to go directly to my Online store or contact me if you have any questions. Happy Stamping!
Thanks for stopping by and have a great day!
Akiko
- Visit my online store here
- See the current Stampin’ Up! clearance rack specials here
- Earn FREE Stampin’ Up! products through my Wildflower Frequent Shopper Program – my way of saying thank you to my online frequent shopper customers.
- Have any questions? I’d be happy to help, click here to contact me.
Cardstock Cuts for this project:
- Blueberry Bushel – 4-1/4″ x 11″ card base, scored at 5-1/2″, 3/8″ x 3-1/2″ (label)
- Tahitian Tide – 2-1/2″ x 4″ (accent panel)
- Basic White – 3-3/4″ x 5″ (inside panel), 3-1/2″ x 3-1/2″ (die cut circle)
- Watercolor Paper – 5″ x 7″ (blueberies)
- Meandering Meadows 6″ x 6″ DSP – 4-1/4″ x 5-1/2″ (front background), 1/2″ x 3-3/4″ (inside trim)
Stampin’ Up! products used in this project:
")


 Designer Series Paper")


 Metallic Woven Ribbon")

")


")


 Metallic Woven Ribbon")


")

 Designer Series Paper")


 Specialty Paper")


")


 Bordered Ribbon")


")
 Designer Series Paper")


 Designer Series Paper")


")
")

 Designer Series Paper")


 Textured Ribbon")


")
 Designer Series Paper")


 Specialty Paper")


 Sheer Ribbon Combo Pack")


")


 Designer Series Paper")


