Stampin’ Up! Regal Reindeer for the Inkin’ Krew Blog Hop

Good Morning! Welcome to the November Inkin’ Krew Team Blog Hop! The theme for this month’s hop is “Merry Christmas or Happy Holidays” and I used the Stampin’ Up! Regal Reindeer stamp set and coordinating Reindeer dies to make a Christmas card. I paired it with the pretty One Horse Open Sleigh designer series paper for a rustic woodland look. You can find the supplies I used along with card stock cuts at the bottom of my post.

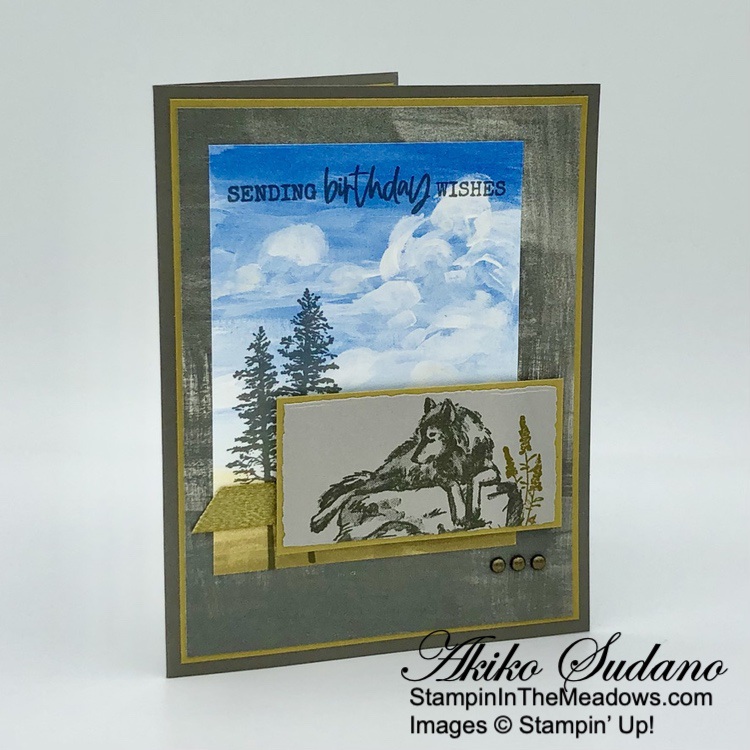
I adhered a panel of woodgrain One Horse Open Sleigh 6″ x 6″ designer series paper to the bottom of a woodland scene with liquid glue and adhered the layered DSP panel to a Lost Lagoon mat. I wrapped a length of gold ribbon around the seam and tied a bow. I popped the panel to the front of a Pool Party card base with dimensionals.

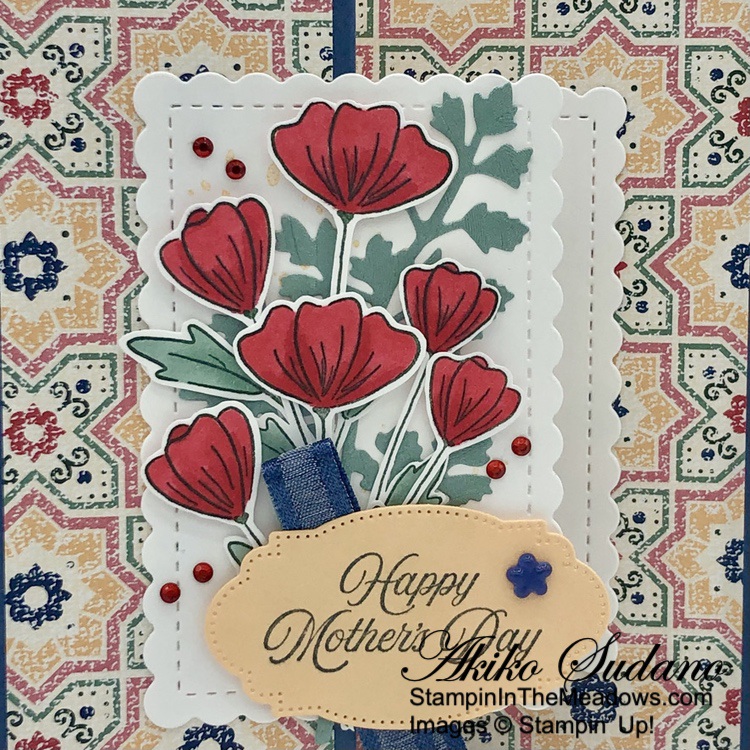
I stamped the pretty Merry Christmas sentiment from the Stampin’ Up! Regal Reindeer cling stamp set in Versamark ink on a Crumb Cake panel. I sprinkled it with gold embossing powder and shook off the excess. I heated the powder with my heat tool until it was bright and shiny. I cut the sentiment out with the label die from the Autumn Leaves dies and adhered it to the card with dimensionals.

I cut the reindeer from Pebbled Path card stock using the die from the Reindeer dies that coordinate with the Stampin’ Up! Regal Reindeer stamp set. I popped the reindeer on the card with dimensionals, cutting them small to fit behind the hooves and antlers.

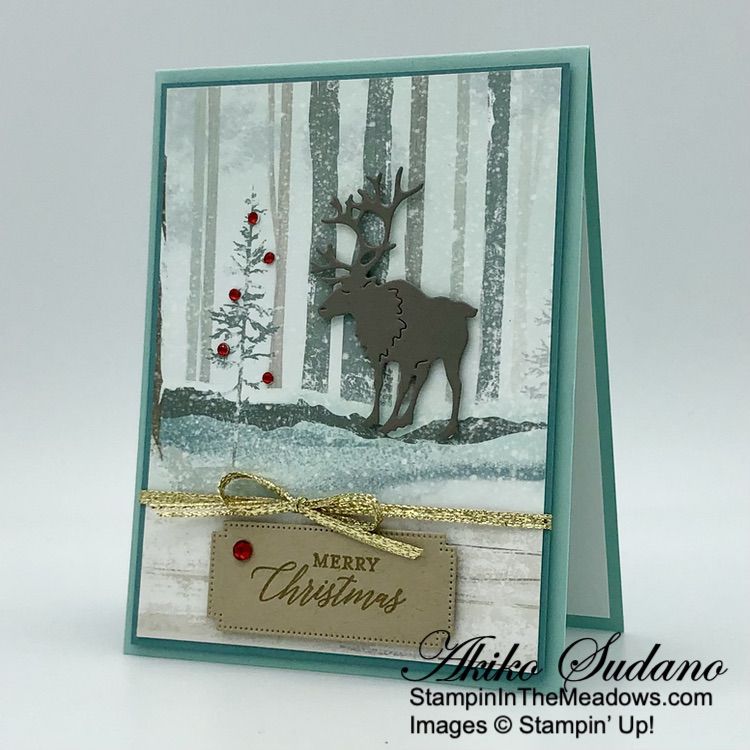
I adhered a large red rhinestones to the label and adhered some small ones to the pine tree in the DSP with bits of glue dots.

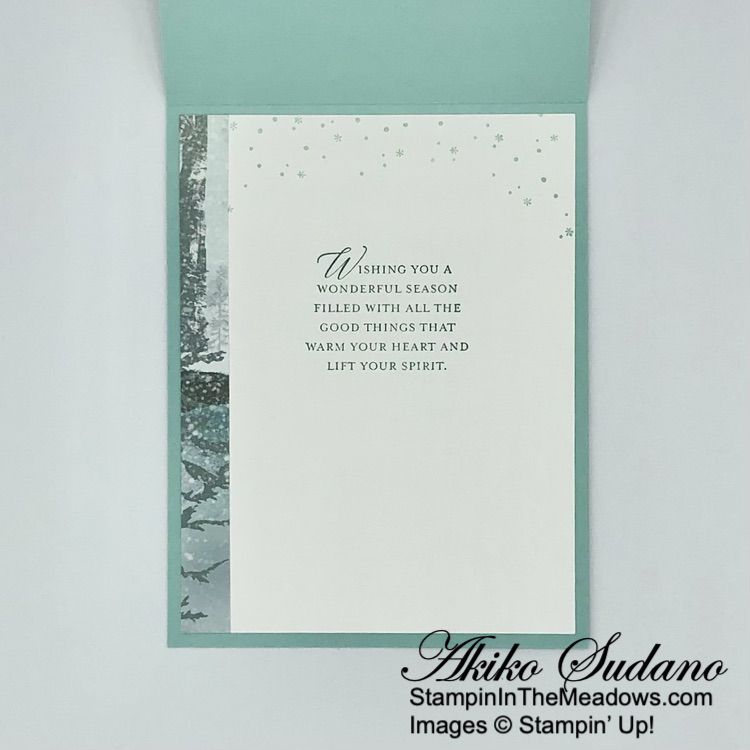
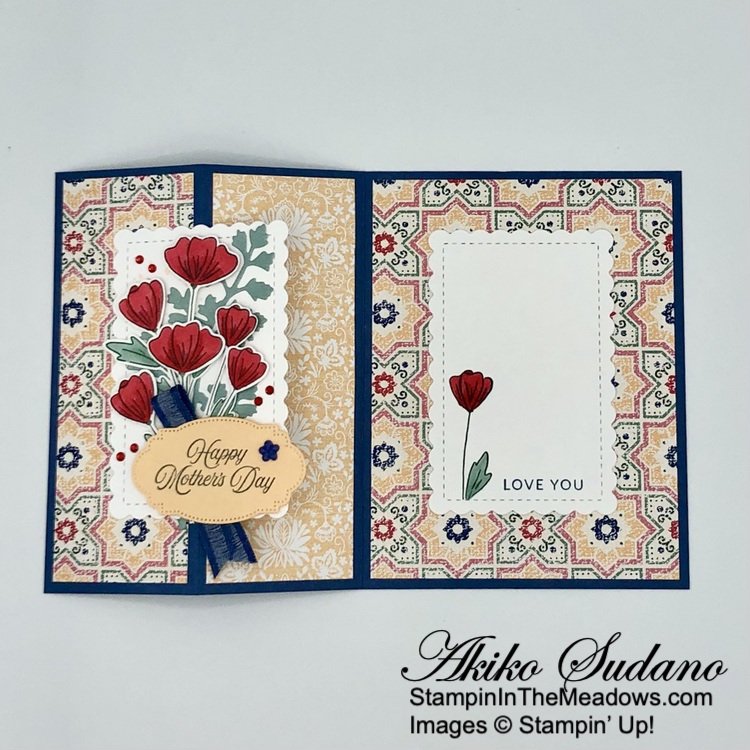
For the inside of the card, I stamped the sentiment from the Stampin’ Up! Regal Reindeer stamp set in Lost Lagoon on a Basic White panel. I stamped snow around the top in Pool Party ink and adhered a strip of DSP to the side before adhering the Basic White panel to the inside of the card with Stampin’ Seal.

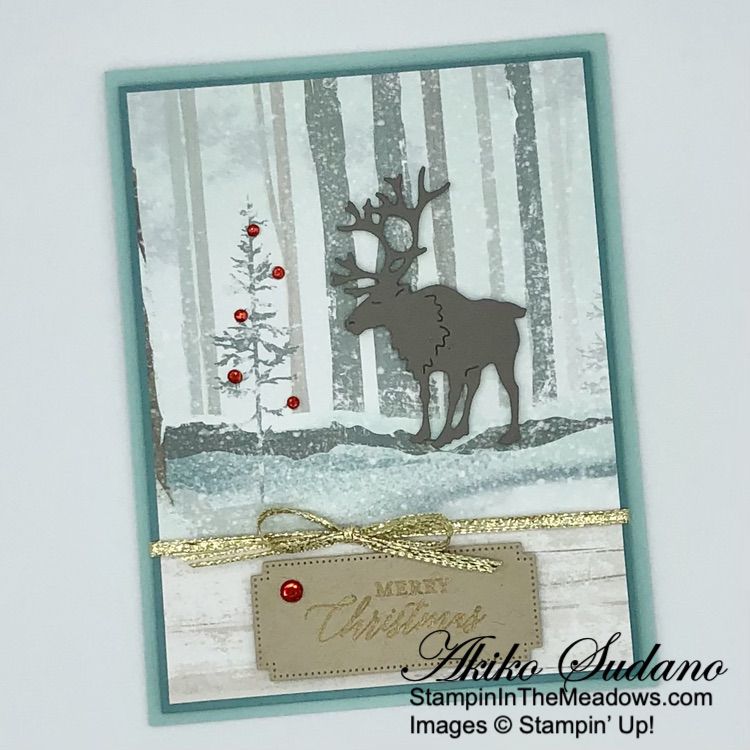
The One Horse Open Sleigh 6″ x 6″ designer series paper is one of my favorites for Christmas this year and the Stampin’ Up! Regal Reindeer sentiments are so pretty with it – and I love the Reindeer die cut!

On With The Hop! Click on the Next Blog button to move forward to Karen Finkle’s project or click the Previous Blog button to move back to see the project that Karen Ksenzakovic created.

If you get lost along the way, here are the participants for the hop:


Seasonal Sale Starts Today!

Create more by spending less during the Seasonal Sale! Between Nov 14 – Nov 16, you can get select products from the 2023–2024 Annual Catalog up to 20% off. Here’s what you’ll save when you shop during the sale:

  • 10% off ribbons and trims.
  • 15% off inks, including pads, refills, markers, and Blends. Bundles are not included.
  • 20% off papers, including cardstock, specialty paper, and Designer Series Paper.

Stock up on supplies for all your upcoming handmade projects or embrace the season of giving and buy something for your fellow crafting enthusiasts. Make sure to act quickly on this limited time only deal.


Current Host Code: J39F9RSA

Use this host code when you order $50 or more and receive a Thank You gift from me!  The free gift is your choice of any currently available item valued up to $10.00.

If your order is over $150, please do not use the host code since you’ll receive your own Host Dollars plus I’ll still send you the Thank You gift!  This host code can be used by anyone, no club or commitment required. Let me know if you have any questions.


If you need any stamping supplies, I’d be very happy to be your Demonstrator.  Just click on the Shop Now button on the right side of the screen to go directly to my online store or contact me if you have any questions.  Happy Stamping!

Thanks for stopping by and have a great week!

Akiko

  • Visit my online store here
  • See the current Stampin’ Up! clearance rack specials here
  • Earn FREE Stampin’ Up! products through my Wildflower Frequent Shopper Program – my way of saying thank you to my online frequent shopper customers.
  • Have any questions? I’d be happy to help, click here to contact me.

Cardstock Cuts for this project:

  • Pool Party – 4-1/4″ x 11″ card base scored at 5-1/2″
  • Lost Lagoon – 4″ x 5-1/4″ (front mat)
  • Crumb Cake – 1-1/2″ x 3″ (label)
  • Pebbled Path – 2″ x 2-1/2″ (die cut reindeer)
  • Basic White – 4″ x 5-1/4″ (inside panel)
  • One Horse Open Sleigh 6″ x 6″ DSP – 3-7/8″ x 5-1/8″ (front background), 1-1/4″ x 3-7/8″ (front woodgrain panel), 1/2″ x 5-1/4″ (inside trim)

Stampin’ Up! products used in this project:

Stampin’ Up! Pick Of The Patch for the Inkin’ Krew Blog Hop

Good Morning! Welcome to the September Inkin’ Krew Team Blog Hop! The theme for this month’s hop is “Giving Thanks” and I used the Stampin’ Up! Pick of The Patch bundle to make today’s card. You can find the supplies I used at the bottom of my post and I included the card stock cuts in the description of each card

I embossed a Crumb Cake panel with the Exposed Brick 3D embossing folder and adhered it to the front of a Pecan Pie card base. I adhered a Pecan Pie plaid panel of the Lets Go Fishing designer series paper to the embossed panel with liquid glue.

I stamped a little fall pumpkin scene on Very Vanilla with the Stampin’ Up! Pick Of The Patch stamp set. I stamped the tree in Pecan Pie and the leaves in Daffodil Delight. I stamped the smaller pumpkins in stamped off Wild Wheat, Calypso Coral and Petal Pink. I cut masks and used them to stamp the stems in Pecan Pie. I stamped more leaves in Daffodil Delight on the ground and cut the scene out with the largest circle from the Stylish Shapes dies.

I adhered the circle to the card with liquid glue. I stamped the larger pumpkins from the Stampin’ Up! Pick Of The Patch stamp set in Calypso Coral, stamped off Lost Lagoon and stamped off Crumb Cake on Very Vanilla and punched them out. I stamped speckles on the pumpkins using the same colors. I punched out stems from Pecan Pie card stock and adhered them to the back of the pumpkins. I adhered the two smaller pumpkins to the card with glue dots and the larger pumpkin with dimensionals.

I stamped the sentiment from the Stampin’ Up! Pick Of The Patch stamp set in Pecan Pie ink on Very Vanilla and cut it out with the long skinny die from the Stylish Shapes dies using the two step method. I adhered it to the card with dimensionals and glue dots and adhered a loopy Linen Thread bow underneath. I finished the card with Very Vanilla dots.

For the inside of the card, I stamped the sentiment from the Stampin’ Up! Pick Of The Patch stamp set in Pecan Pie on a Very Vanilla Panel. I stamped the pumpkin in Calypso Coral ink and covered it with a mask before stamping the stem in Pecan Pie. I stamped speckles on the pumpkin and adhered a strip of DSP to the bottom before adhering the Very Vanilla panel to the inside of the card with Stampin’ Seal.

I just love the Stampin’ Up! Pick Of The Patch bundle – it has so many pretty pumpkin stamps! And I love the coordinating stamps and great sentiments too!

On With The Hop! Click on the Next Blog button to move forward to Carol Buckalew’s project or click the Previous Blog button to move back to see the project that Tara Carpenter created.

If you get lost along the way, here are the participants for the hop:


Free Shipping from Stampin’ Up! Oct 9 – 11, 2023!

Stampin’ Up! is offering free shipping on all orders of $75+ placed between October 9-11!  So get your lists ready and save on shipping fees today and tomorrow!

Details:

  • Free shipping offer begins:  October 9 at 12:01 AM MT
  • Ordering Deadline:  October 11 at 11:59 PM MT
  • Free shipping applies after the qualifying amount has been met.
  • The minimum qualifying amount to receive free shipping is $75 or more (before tax).
  • Free shipping only applies during the three-day period the promotion is live; this means that the order must be opened and closed between October 9-11.
  • With the exception of a one-time monthly Paper Pumpkin subscription, all Stampin’ Up! products qualify for the promotion. Subscriptions billed and shipped this month will be charged for the normal amount ($24.50 shipping included) + tax.
  • Prepaid 3, 6, or 12 month Paper Pumpkin subscriptions are eligible for FREE shipping under the same rules as all other Stampin’ Up! items during the promotion.
  • The free shipping promotion does not cover the additional cost for expedited shipping.
  • Please keep in mind, that with any product launch, the distribution center may fall behind our typical shipping timeframes.

Let me know if you have any questions. You can find my online store here.


Current Host Code: CD4VVKRG

Use this host code when you order $50 or more and receive a Thank You gift from me!  The free gift is your choice of any currently available item valued up to $10.00.

If your order is over $150, please do not use the host code since you’ll receive your own Host Dollars plus I’ll still send you the Thank You gift!  This host code can be used by anyone, no club or commitment required. Let me know if you have any questions.


If you need any stamping supplies, I’d be very happy to be your Demonstrator.  Just click on the Shop Now button on the right side of the screen to go directly to my online store or contact me if you have any questions.  Happy Stamping!

Thanks for stopping by and have a great week!

Akiko

  • Visit my online store here
  • See the current Stampin’ Up! clearance rack specials here
  • Earn FREE Stampin’ Up! products through my Wildflower Frequent Shopper Program – my way of saying thank you to my online frequent shopper customers.
  • Have any questions? I’d be happy to help, click here to contact me.

Cardstock Cuts for this project:

  • Pecan Pie – 4-1/4″ x 11″ card base scored at 5-1/2″, 1/2″ x 2-1/2″ (punched stems)
  • Crumb Cake – 4″ x 5-1/4″ (embossed background)
  • Very Vanilla – 4″ x 5-1/4″ (inside panel), 3-1/4″ x 3-1/4″ (die cut circle), 1-1/2″ x 5″ (punched pumpkins), 1″ x 3-1/4″ (label)
  • Let’s Go Fishing DSP – 2-1/2″ x 4″ (front stripe), 1/2″ x 4″ (inside trim)

Stampin’ Up! products used in this project:

Stampin’ Up! Bag of Bones Halloween Note Cards for the Inkin’ Krew Blog Hop

Good Morning! Welcome to the September Inkin’ Krew Team Blog Hop! The theme for this month’s hop is “Halloween Fun” and the Stampin’ Up! Bag of Bones bundle fits the bill perfectly with all the skeletons and costumes! And I used the bundle with the fun Them Bones designer series paper and Basic White Note Cards and Envelopes to make a simple set of note cards. You can find the supplies I used at the bottom of my post and I included the card stock cuts in the description of each card

One of the designs in the Them Bones DSP pack is a multi panel sheet with cute backgrounds that I cut up and adhered to the front of a Basic White note card. I then decorated it with the wonderful glow in the dark embellishments and designer series paper die cuts – yes the Stampin’ Up! Bag of Bones dies can be used to cut out the DSP! Here are the note cards that I made.

Here is the multiple panel sheet of Them Bones designer series paper. I started by cutting each panel out with my paper trimmer. One of the coolest things about this DSP is that the houndstooth like plaid pattern is actually little bats and they match one of the little bat stamps!

For the first card, I trimmed the ‘Boo‘ panel to 2-3/4″ x 4″ and adhered it to a Starry Sky striped 3″ x 4-1/4″ panel before adhering it to the front of the note card. I decorated it with some glow in the dark bat embellishments and stamped the sentiment from the Stampin’ Up! Bag of Bones stamp set in Starry Sky ink on the inside.

For this card, I cut the fence panel in half and used the right side with the moon, trimming it to 3″ x 4-3/4″ before adhering it to the note card. I die cut a skeleton dog and cat from another panel of the DSP and adhered to the card. I stamped the sentiment from the Stampin’ Up! Bag of Bones stamp set in Memento Tuxedo Black ink on a 1-1/2″ x 1-1/2″ Pumpkin Pie panel and cut it out with the second largest banner from the Nested Essentials dies. I adhered it to the card and finished it with glow in the dark bats and ghosts. I stamped bats in Memento Tuxedo Black the top corner of the inside.

I trimmed the spotlight panel to 3″ x 4-1/2″ and adhered it to the front of a note card. I used the Stampin’ Up! Bag of Bones skeleton die to cut a DSP skeleton and adhered it to the panel. I stamped the sentiment in Memento Tuxedo Black on Pumpkin Pie and cut it out with the second smallest circle from the Stylish Shapes dies. I ahdered it to the card and finished with glow in the dark ghosts. I stamped bats in the top corner of the inside and found half a skeleton at the bottom of the DSP and cut it out to adhere to the bottom corner.

I fussy cut some gravestones from a pannel of Them Bones DSP and adhered it to the left side of the fence panel that I split. I should have picked up some glow in the dark paper (it’s expected to be back in stock at the beginning of October), but I didn’t. So I used the moon and stars die from the Stampin’ Up! Bag of Bones dies to cut a 1-1/2″ x 1-1/2″ panel of white Textured Shimmer paper (I remembered to put adhesive sheets behind it first). I adhered the decorated panel to a note card and finished it with glow in the dark ghosts. I stamped the sentiment in Memento Tuxedo Black on the inside and adhered another fussy cut gravestone to the bottom.

This was the easiest – I trimmed the ‘Trick or Treat‘ panel to 3″ x 4-1/2″, adhered it to the front of a note card and adhered some glow in the dark bats. I stamped some bats on the inside and decided to use the Mini Pocket Envelope dies to make a gift card pocked with a 4-3/4″ x 5-3/4″ DSP panel. This make quick fun gift card holder – definitely a treat!

No, this was the easiest. I trimmed the cat and gravestone panel to 3″ x 4-1/2″ and adhered it to the front of a note card. I adhered glow in the dark bats and a ghost to the front and stamped the sentiment in Pumpkin Pie on the inside. My stamp pad needs re-inking, so the color is uneven, but it goes with the ghostly Halloween theme!

See how great those glow in the dark embellishments work?

These note cards were such a fun project and would be great for quick greetings or gifts for co-workers, friends and family. This would also be a fun project to make with children!

On With The Hop! Click on the Next Blog button to move forward to Mary Deatherage’s project or click the Previous Blog button to move back to see the project that Karen Ksenzakovic created.

If you get lost along the way, here are the participants for the hop:


Current Host Code: ATSGGVYD

Use this host code when you order $50 or more and receive a Thank You gift from me!  The free gift is your choice of any currently available item valued up to $10.00.

If your order is over $150, please do not use the host code since you’ll receive your own Host Dollars plus I’ll still send you the Thank You gift!  This host code can be used by anyone, no club or commitment required. Let me know if you have any questions.


If you need any stamping supplies, I’d be very happy to be your Demonstrator.  Just click on the Shop Now button on the right side of the screen to go directly to my online store or contact me if you have any questions.  Happy Stamping!

Thanks for stopping by and have a great week!

Akiko

  • Visit my online store here
  • See the current Stampin’ Up! clearance rack specials here
  • Earn FREE Stampin’ Up! products through my Wildflower Frequent Shopper Program – my way of saying thank you to my online frequent shopper customers.
  • Have any questions? I’d be happy to help, click here to contact me.

Stampin’ Up! products used in this project:


Stampin’ Up! Apple Harvest for the Inkin’ Krew Blog Hop

Good Morning! Welcome to the August Inkin’ Krew Team Blog Hop! The theme for this month’s hop is “Fall Frenzy” and I used the Stampin’ Up! Apple Harvest cling stamp set to make a friendship card for our hop today. You can find the supplies I used at the bottom of my post along with the card stock cuts.

I adhered a panel of Inked Botanicals designer series paper to a Garden Green mat and adhered it to the front of a Crushed Curry card base. I stamped the large apple branch from the Stampin’ Up! Apple Harvest cling stamp set in Early Espresso ink on a Very Vanilla panel.

I used watercolor pencils to color the image. I used Daffodil Delight, Real Red and Cherry Cobbler on the apples, Pecan Pie and Early Espresso on the branches and Granny Apple Green, Old Olive and Garden Green on the leaves. I took my time and colored each section, going over it several times to blend the colors and get the color intensity I wanted.

I used the 4th largest Deckled Rectangles die to cut the bottom and sides of the image, leaving a straight edge on the top. I popped the apples on the card front with dimensionals. I stamped a second image and colored the small apple and the leaves over the apples and fussy cut them with my paper snips. I used my Early Espresso Stampin’ Write marker to color the edges and popped the small apple on the card with dimensionals. I curved the leaves with my bone folder and adhered the stems and base to the card with liquid glue. This gives it a lot of dimension!

I stamped the sentiment from the Stampin’ Up! Apple Harvest stamp set in Garden Green ink on Very Vanilla. I cut it out with the coordinating label die from the Apple Blossom dies. These dies are currently available on the Clearance Rack at a huge discount, so now is a great time to pick them up! I adhered the label to the card with glue dots and dimensionals and finished the card with Rustic Metallic dots and a Linen Thread bow

For the inside of the card, I stamped the large apple from the Stampin’ Up! Apple Harvest stamp set in Early Espresso ink on a Very Vanilla panel and colored it with watercolor pencils like the apples on the card front. I trimmed the bottom with a strip of Inked Botanicals DSP and adhered the panel to the inside of the card with Stampin’ Seal.

I love going apple picking in the fall (fresh picked apples are the best!) and I’m lucky to have wonderful orchards nearby. My apple pies are usually terrible – too runny with mushy crusts – so I make apple crisp and applesauce. I think it will be time to go apple picking soon and I can’t wait!

On With The Hop! Click on the Next Blog button to move forward to Terry Lynn Bright’s project or click the Previous Blog button to move back to see the project that Carol Buckalew created.

If you get lost along the way, here are the participants for the hop:


Current Host Code: MK3GJ47F

Use this host code when you order $50 or more and receive a Thank You gift from me!  The free gift is your choice of any currently available item valued up to $10.00.

If your order is over $150, please do not use the host code since you’ll receive your own Host Dollars plus I’ll still send you the Thank You gift!  This host code can be used by anyone, no club or commitment required. Let me know if you have any questions.


If you need any stamping supplies, I’d be very happy to be your Demonstrator.  Just click on the Shop Now button on the right side of the screen to go directly to my online store or contact me if you have any questions.  Happy Stamping!

Thanks for stopping by and have a great week!

Akiko

  • Visit my online store here
  • See the current Stampin’ Up! clearance rack specials here
  • Earn FREE Stampin’ Up! products through my Wildflower Frequent Shopper Program – my way of saying thank you to my online frequent shopper customers.
  • Have any questions? I’d be happy to help, click here to contact me.

Cardstock Cuts for this project:

  • Crushed Curry – 4-1/4″ x 11″ card base
  • Garden Green – 4″ x 4-1/4″ (front mat)
  • Very Vanilla – 4″ x 5-1/4″ (inside panel), two 3″ x 4″ panels (apple branch), 1″ x 4-1/4 (label)
  • Inked Botanicals DSP – 3-7/8″ x 4-1/4″ (background), 1/2″ x 4″ (inside trim)

Stampin’ Up! products used in this project:


Stampin’ Up! Inked and Tiled for the Inkin’ Krew Blog Hop

Good Morning! Welcome to the July Inkin’ Krew Team Blog Hop! The theme for this month’s hop is “Fun Fold” and I used the Stampin’ Up! Inked and Tiled cling stamp set to make a simple accordion tri-fold friendship card for our hop!

I adhered a Calypso Coral panel of Inked Botanicals 6″ x 6″ designer series paper to a Calypso Coral card base. I scored a Crushed Curry mini card base in a mountain/valley manner to create the tri-fold accordion and adhered it to the center of card base with liquid glue. I adhered the smaller panels of Inked Botanicals DSP to the left and middle panels of the mini card.

I used the dies from the Timeless Arrangements die set to cut foliage for the mini card front. I applied liquid adhesive to the bars connecting the sprigs to build the layers. I cut two long leaf sprig sets and two leaf clusters from Old Olive. I adhered the leaf clusters to the right side of the sprig sets with liquid glue.

I cut two floral sets from Calypso Coral and adhered them on top of the Old Olive leaf sets with liquid glue. I cut two berry sprig sets from Petal Pink and adhered them to the layered die cuts with liquid glue. I love how easy it is to build up the floral bouquets with the solid bars – the spacing is perfect!

I adhered the two sets of layered die cuts to the mini card, centering them and spacing the bars 1/2″ apart. I cut 4 floral sprigs (with holes) from Daffodil Delight and adhered them to the layered die cuts with liquid glue.

I stamped the sentiment from the Stampin’ Up! Inked and Tiled cling stamp set in Calypso Coral ink on Basic White and cut it out with the large label die from the Timeless Arrangements dies. I cut a leaf sprig from Old Olive and a floral sprig from Daffodil Delight and adhered them to the side of the sentiment with liquid glue and adhered the label to the mini card with dimensionals and glue dots. I finished the card with Lemon Lime Twist tinsel gems.

For the inside of the card, I inked up the flower from the Stampin’ Up! Inked and Tiled stamp set in Daffodil Delight ink. i used a Sponge Dauber to apply Calypso Coral ink to the center and stamped the flower on a Basic White panel. I stamped the sentiment in Old Olive ink next to the flower and used stamped off Petal Pink to stamp a light wood grain design under the sentiment.

The Timeless Arrangements dies make such sweet arrangements and they go so well with the Stampin’ Up! Inked and Tiled stamp set and Inked Botanicals designer series paper.

On With The Hop! Click on the Next Blog button to move forward to Mary Deatherage’s project or click the Previous Blog button to move back to see the project that Karen Ksenzakovic created.

If you get lost along the way, here are the participants for the hop:


Current Host Code: P7SWY6DS

Use this host code when you order $50 or more and receive a Thank You gift from me!  The free gift is your choice of any currently available item valued up to $10.00.

If your order is over $150, please do not use the host code since you’ll receive your own Host Dollars plus I’ll still send you the Thank You gift!  This host code can be used by anyone, no club or commitment required. Let me know if you have any questions.


If you need any stamping supplies, I’d be very happy to be your Demonstrator.  Just click on the Shop Now button on the right side of the screen to go directly to my online store or contact me if you have any questions.  Happy Stamping!

Thanks for stopping by and have a great week!

Akiko

  • Visit my online store here
  • See the current Stampin’ Up! clearance rack specials here
  • Earn FREE Stampin’ Up! products through my Wildflower Frequent Shopper Program – my way of saying thank you to my online frequent shopper customers.
  • Have any questions? I’d be happy to help, click here to contact me.

Cardstock Cuts for this project:

  • Calypso Coral – 4-1/4″ x 5-1/2″ card base, 3″ x 3″ (die cut flowers)
  • Crushed Curry – 4″ x 9″ mini card base scored at 3″ and 6″
  • Old Olive – 3″ x 5″ (die cut leaves)
  • Petal Pink -3″ x 3″ (die cut berry sprigs)
  • Daffodil Delight – 1-1/4″ x 4″ (die cut flowers)
  • Basic White – 2-3/4″ x 3-3/4″ (inside panel), 2″ x 2-3/4″ (label)
  • Inked Botanicals DSP – 4″ x 5-1/4″ (background), two 2-3/4″ x 3-3/4″ panels (mini card panels)

Stampin’ Up! products used in this project:


Stampin’ Up! Wildlife Wonder for the Inkin’ Krew Blog Hop

Good Morning! Welcome to the May Inkin’ Krew Team Blog Hop! The theme for this month’s hop is “For the Men/Boys” and I used the Stampin’ Up! Wildlife Wonder cling stamp set to make a masculine birthday card for our hop!

The Stampin’ Up! Wildlife Wonder cling stamp set is one of the returning favorite stamp sets in the new catalog. I combined it with the pretty Fresh As A Daisy designer series paper and some of the new 2023-2025 In Colors for a rugged outdoors look. You can find the supplies I used at the bottom of my post along with the sizes of cardstock used.

I adhered a panel of Fresh As A Daisy designer series paper to a Wild Wheat mat and adhered the layered panel to the front of a Pebbled Path card base with dimensionals.

I stamped the sentiment from the Stampin’ Up! Wildlife Wonder stamp set in Pebbled Path ink on the top of another Fresh As A Daisy DSP panel. I stamped the trees from the Grassy Grove stamp set in Pebbled Path ink on the side of the panel and adhered the panel to the card front with liquid glue.

I stamped the wolf from the Stampin’ Up! Wildlife Wonder stamp set in Pebbled Path ink on a Gray Granite panel and stamped the plant in Wild Wheat. I cut the image out with the second smallest Deckled Rectangles die and adhered it to a Wild Wheat mat with liquid glue. I adhered a short length of Wild Wheat ribbon to the card with Stampin’ Seal and adhered the wolf panel over it using dimensionals. I finished the card with three rustic metallic dots.

For the inside of the card, I stamped the sentiment from the Stampin’ Up! Wildlife Wonder stamp set in Pebbled Path ink ink on a Basic White panel. I stamped the plant next to the sentiment in Wild Wheat and adhered the panel to a Wild Wheat mat. I adhered the layered panel to the inside of the card with Stampin’ Seal.

If you look closely at the Fresh As A Daisy designer series paper, you will see that on the back of the pretty florals is a gentle brush stroke texture pattern that is great for subtle backgrounds and masculine cards.

On With The Hop! Click on the Next Blog button to move forward to Karen Finkle’s project or click the Previous Blog button to move back to see the project that Mary Deatherage created.

If you get lost along the way, here are the participants for the hop:


Current Host Code: TUMGKET9

Use this host code when you order $50 or more and receive a Thank You gift from me!  The free gift is your choice of any currently available item valued up to $10.00.

If your order is over $150, please do not use the host code since you’ll receive your own Host Dollars plus I’ll still send you the Thank You gift!  This host code can be used by anyone, no club or commitment required. Let me know if you have any questions.


If you need any stamping supplies, I’d be very happy to be your Demonstrator.  Just click on the Shop Now button on the right side of the screen to go directly to my online store or contact me if you have any questions.  Happy Stamping!

Thanks for stopping by and have a great week!

Akiko

  • Visit my online store here
  • See the current Stampin’ Up! clearance rack specials here
  • Earn FREE Stampin’ Up! products through my Wildflower Frequent Shopper Program – my way of saying thank you to my online frequent shopper customers.
  • Have any questions? I’d be happy to help, click here to contact me.

Cardstock Cuts for this project:

  • Pebbled Path – 5-1/2″ x 8-1/2″ card base scored at 4-1/4″
  • Wild Wheat – two 4″ x 5-1/4″ panels (front and inside mats)
  • Gray Granite – 2″ x 3-1/2″ (wolf panel)
  • Basic White – 3-7/8″ x 5-1/8″ (inside panel)
  • Fresh as a Daisy DSP – 3-7/8″ x 5-1/8″ (front background), 3″ x 4″ (outdoor panel)

Stampin’ Up! products used in this project:


Stampin’ Up! Flowers of Friendship for the Inkin’ Krew Blog Hop

Good morning! Welcome to the April Inkin’ Krew Team Blog Hop! The theme for this month’s hop is “For the Ladies/Girls” and I used the sweet Stampin’ Up! Flowers of Friendship stamp set to make a simple Z-Fold Mother’s Day card. You can find the supplies I used at the bottom of my post along with the sizes of cardstock used.

I adhered a panels of Lovely in Linen designer series paper to each section of a Misty Moonlight card base. Stampin’ Up! is bringing Misty Moonlight out of retirement and it will join the Neutrals color family in the new catalog next month! I cut two panels of Basic White with the third largest scalloped rectangle in the Scalloped Contours dies – one for the inside panel and one for the front. For the front rectangle, I stamped the spatter stamp from the Color and Contour photopolymer stamp set using Pale Papaya ink in two corners.

I cut a panel of Soft Succulent Brushstroke specialty paper with the fern from the Meadows Dies and adhered it to the panel with liquid glue. I stamped two sets of the flower bouquet from the retiring Stampin’ Up! Flowers of Friendship photopolymer stamp set in Evening Evergreen ink on Basic White. I colored them with Stampin’ Blends – the leaves in light Soft Succulent and the flowers in Sweet Sorbet. Then I fussy cut them with my paper snips and this was the most challenging fussy cutting task that I have performed – it was good practice in patience. Then I adhered the flowers on the scalloped rectangle with dimensionals under the flowers and glue dots under the leaves. I did trim some of the bottoms so that they wouldn’t extend too far below the scalloped rectangle.

I folded a short length of Night of Navy Bordered ribbon and adhered it to the bottom of the bouquet with a dimensional. I stamped the sentiment from the retiring Celebrating You cling stamp set in Misty Moonlight ink on Pale Papaya. I cut it out with the label die from the retiring Geraniums dies and adhered it to the bottom of the scalloped rectangle with dimensionals.

I adhered the decorated scalloped rectangle to the card front with liquid glue, being careful to apply the glue to only half of the panel. I stamped the sentiment from the Happy Labels stamp set in Misty Moonlight ink in the lower corner of the second scalloped rectangle. Note that I only inked up half the sentiment.

I covered the scallops on the other lower corner with post-it notes and inked up the lone flower from the bouquet from the Stampin’ Up! Flowers of Friendship stamp set with Evening Evergreen ink. I stamped it and removed the post-it notes and only the area inside the stitching is stamped! I colored the flower and leaf with Sweet Sorbet and Soft Succulent Stampin’ Blends. I adhered the panel to the inside of the card with liquid glue, being careful to line it up behind the top scalloped rectangle.

I finished the card with red rhinestones and adhered a Starry Sky adhesive flower to the label.

I used a mix of so many different stamps and dies on this project – I love how the items work so well together. Some of these are retiring and some are new – I also love how you can mix retired products from your stash with new items to make beautiful cards – especially for Mother’s Day!

On With The Hop! Click on the Next Blog button to move forward to Karen Finkle’s project or click the Previous Blog button to move back to see the project that Mary Deatherage created.

If you get lost along the way, here are the participants for the hop:


Current Host Code: 6EDCPU4T

Use this host code when you order $50 or more and receive a free gift from me!  The free gift is your choice of any item currently available valued up to $10.00.

If your order is over $150, please do not use the host code since you’ll receive your own Host Dollars plus I’ll still send you the free gift!  This host code can be used by anyone, no club or commitment required. Let me know if you have any questions


If you need any stamping supplies, I’d be very happy to be your Demonstrator.  Just click on the Shop Now button on the right side of the screen to go directly to my online store or contact me if you have any questions. 

Thanks for stopping by and Happy Stamping!

Akiko

  • Visit my online store here
  • See the current Stampin’ Up! clearance rack specials here
  • Earn FREE Stampin’ Up! products through my Wildflower Frequent Shopper Program – my way of saying thank you to my online frequent shopper customers.
  • Have any questions? I’d be happy to help, click here to contact me.

Cardstock Cuts for this project:

  • Misty Moonlight – 5-1/2″ x 8-1/2″ card base scored at 2-1/8″ and 4-1/4″
  • Pale Papaya – 1-3/4″ x 3″ (label)
  • Brushstrokes Specialty – 2-1/4″ x 4-1/2″ (die cut fern)
  • Basic White – two 2-3/4″ x 4″ panels (scalloped rectangles), 4″ x 5″ (fussy cut flowers)
  • Lovely in Linen DSP – 4″ x 5-1/4″ (inside panel), two 1-7/8″ x 5-1 4″ panels (front and middle panels)

Stampin’ Up! products used in this project:


Stampin’ Up! Best Butterflies for the Inkin’ Krew Blog Hop

Good morning! Welcome to the February Inkin’ Krew Team Blog Hop! The theme for this month’s hop is “Celebrate Spring” and I used the sweet Stampin’ Up! Best Butterflies bundle to make a simple fun fold Birthday card. You can find the supplies I used at the bottom of my post along with the sizes of cardstock used.

I adhered a panel of Starry Sky Butterfly Kisses 6″ x 6″ designer series paper to a panel of Crushed Curry card stock with liquid glue. I adhered a panels of floral butterfly Butterfly Kisses 6″ x 6″ designer series paper to the front and inside panels of the Crushed Curry mini card and adhered the mini card to the front of the main card base with liquid glue.

I cut two Basic White circles with the second largest Stylish Shapes circle die. On the first one, I stamped the dots from the Stampin’ Up! Best Butterflies photopolymer stamp set in Crushed Curry ink several times. I cut a Fresh Freesia scalloped circle using the second largest scalloped circle from the Layering Circles die and adhered it to the back of the stamped Basic White circle with liquid glue. I adhered it to the mini card front flap, being careful to apply the adhesive to only one side of the circle.

I cut two sets of wings using the Butterfly Builder dies in the Stampin’ Up! Best Butterflies bundle from different patterns of the Butterfly Kisses 6″ x 6″ DSP. I cut a large butterfly body from Starry Sky and adhered the wings to the body with glue dots to make the large butterfly on the front. I adhered the butterfly to the circle with dimensionals.

I stamped the sentiment from the Sweetest Cherries stamp set in Versamark ink on Starry Sky. I sprinkled it with white embossing powder and shook off the excess. I heated the powder with my heat tool until it was bright and shiny and cut it out with the skinny long banner from the Stylish Shapes dies. I adhered it to the mini card, being careful to apply the adhesive to the left side of the label.

I stamped the sentiment from the Stampin’ Up! Best Butterflies stamp set in Starry Sky ink on the second die cut circle. I adhered the circle to the inside of the mini card under the front flap circle. I cut the large butterfly from Starry Sky and the smaller butterfly from Calypso Coral and adhered them to the inside with liquid glue.

I finished the card with gold adhesive sequins around the mini card. I like how I can extend the mini card front design into the inside with the die cuts, DSP and sequins!

A happy, colorful butterfly birthday card to Celebrate Spring! This was a fun card to make and the Stampin’ Up Best Butterflies bundle is fun to play with – you can make all sorts of butterflies!

On With The Hop! Click on the Next Blog button to move forward to Mary Deatherage’ project or click the Previous Blog button to move back to see the project that Tara Carpenter created.

If you get lost along the way, here are the participants for the hop:


Current Host Code: FWMXBD76

Use this host code when you order $50 or more and receive a free gift from me!  The free gift is your choice of any item currently available valued up to $10.00 in the 2022-2023 Annual Catalog or the January-April 2023 Mini Catalog!

If your order is over $150, please do not use the host code since you’ll receive your own Host Dollars plus I’ll still send you the free gift!  This host code can be used by anyone, no club or commitment required. Let me know if you have any questions


If you need any stamping supplies, I’d be very happy to be your Demonstrator.  Just click on the Shop Now button on the right side of the screen to go directly to my online store or contact me if you have any questions. 

Thanks for stopping by and Happy Stamping!

Akiko

  • Visit my online store here
  • See the current Stampin’ Up! clearance rack specials here
  • Earn FREE Stampin’ Up! products through my Wildflower Frequent Shopper Program – my way of saying thank you to my online frequent shopper customers.
  • Have any questions? I’d be happy to help, click here to contact me.

Cardstock Cuts for this project:

  • Crushed Curry – 4-1/4″ x 5-1/2″ main card base, 4-1/4″ x 5-1/4″ mini card base scored at 1-3/4″
  • Starry Sky – 1″ x 3-1/4″ (label), 1-1/2″ x 2-1/2″ (butterfly body), 2-1/2″ x 2-1/2″ (large die cut butterfly)
  • Fresh Freesia – 3-1/4″ x 3-1/4″ (scalloped circle die cut)
  • Calypso Coral – 1-1/2″ x 2″ (small die cut butterfly)
  • Basic White – 3″ x 6″ (die cut circles)
  • Butterfly Kisses 6″ x 6″ DSP – 4″ x 5-1/4″ (main card base background), two 1-3/4″ x 4″ (mini card flaps), 3″ x 4″ (mini card inside background), 2″ x 2″ (butterfly wings), 1-1/2″ x 2″ (butterfly wings)

Stampin’ Up! products used in this project:


Stampin’ Up! Petal Park for the Inkin’ Krew Blog Hop

Good morning! Welcome to the February Inkin’ Krew Team Blog Hop! The theme for this month’s hop is “Birthday” and I used the sweet Stampin’ Up! Petal Park bundle to make a simple fun fold Birthday card! You can find the supplies I used at the bottom of my post along with the sizes of cardstock used.

I adhered a panel of Balmy Blue Country Gingham 6″ x 6″ designer series paper to a panel of Balmy Blue card stock with liquid glue. I adhered a panel of Regency Park 6″ x 6″ designer series paper to the front of a 3″ mini card and adhered the mini card to the DSP panel with liquid glue.

I stamped the large leaf spray line image from the Stampin’ Up! Petal Park photopolymer stamp set in Shaded Spruce ink on Basic White and used stamped off Shaded Spruce ink to stamp the filler image. I cut it with the largest circle die from the Stylish Shapes dies.

I stamped the three large outline flowers from the Stampin’ Up! Petal Park stamp set in Night of Navy ink on Basic White. I stamped the filler flower image in Balmy Blue and cut the flowers out with the coordinating punch. I adhered the flowers to the die cut circle with dimensionals and adhered Milky Dots to the centers. I adhered the decorated circle to the card with liquid glue.

I stamped the birthday sentiment from the Sentimental Park stamp set in Versamark ink on a strip of Night of Navy. I sprinkled it with white embossing powder and shook off the excess. I heated the powder with my heat tool until it was bright and shiny. I cut the sentiment out with the small label die from the Sending dies, using the two step die cutting method. I adhered the label to the card with glue dots. I made a bow with Starry Sky metallic ribbon and tucked it under one of the flowers, adhering it with a glue dot. I finished the card with a dragonfly trinket, adhered with a glue dot.

For the inside of the card, I stamped the the flowers from the Stampin’ Up! Petal Park stamp set in Night of Navy in the corner of a Basic White panel. I stamped the flower filler image in Balmy Blue and the leaves in Shaded Spruce – full strength for the outline and stamped off for the filler. I stamped the sentiments from the Sentimental Park stamp set in Night of Navy and trimmed the bottom with a strip of Regency Park 6″ x 6″ DSP before adhering it to the inside of the card.

A pretty floral birthday wish with the beautiful Stampin’ Up! Petal Park bundle and Regency Park 6″ x 6″ DSP!

On With The Hop! Click on the Next Blog button to move forward to Amy Koenders’ project or click the Previous Blog button to move back to see the project that Mary Deatherage created.

If you get lost along the way, here are the participants for the hop:


Current Host Code: ZYNDU2N9

Use this host code when you order $50 or more and receive a free gift from me!  The free gift is your choice of any item currently available valued up to $10.00 in the 2022-2023 Annual Catalog or the January-April 2023 Mini Catalog!

If your order is over $150, please do not use the host code since you’ll receive your own Host Dollars plus I’ll still send you the free gift!  This host code can be used by anyone, no club or commitment required. Let me know if you have any questions


If you need any stamping supplies, I’d be very happy to be your Demonstrator.  Just click on the Shop Now button on the right side of the screen to go directly to my online store or contact me if you have any questions. 

Thanks for stopping by and Happy Stamping!

Akiko

  • Visit my online store here
  • See the current Stampin’ Up! clearance rack specials here
  • Earn FREE Stampin’ Up! products through my Wildflower Frequent Shopper Program – my way of saying thank you to my online frequent shopper customers.
  • Have any questions? I’d be happy to help, click here to contact me.

Cardstock Cuts for this project:

  • Balmy Blue – 4-1/4″ x 5″ main card base, 3″ x 11″ mini card base scored at 5-1/2″
  • Night of Navy – 3/4″ x 3″ (label)
  • Basic White – 2-3/4″ x 5-1/4″ (inside panel), 3-1/4″ x 3-1/4″ (die cut circle), 2-1/2″ x 3″ (punched flowers)
  • Country Gingham 6″ x 6″ DSP – 4″ x 5-1/4″ (main card base background)
  • Regency Park 6″ x 6″ DSP – 2-3/4″ x 5-1/4″ (mini card base background), 3/4″ x 2-3/4″ (inside trim)

Stampin’ Up! products used in this project:


Stampin’ Up! Two-Tone Flora for the Inkin’ Krew Blog Hop

Good morning! Welcome to the January Inkin’ Krew Team Blog Hop! The theme for this month’s hop is “Love” and I used the cute Stampin’ Up! Two-Tone Flora bundle to make a CAS (Clean and Simple) Valentine! You can find the supplies I used at the bottom of my post along with the sizes of cardstock used.

I stamped the large rose from the Stampin’ Up! Two-Tone Flora photopolymer stamp set in Polished Pink ink on Basic White. I stamped the detailed stamp first in full strength ink and then stamped the background stamp in stamped off ink. I cut it out with the coordinating die.

I stamped the double leaf stamp from the Stampin’ Up! Two-Tone Flora stamp set twice in Soft Succulent ink in the lower corner of a Basic White panel. I laid the die cut rose on the panel and stamped the sentiment from the Country Bouquet stamp set in Evening Evergreen ink to the side.

I adhered the stamped panel to an Evening Evergreen mat with liquid glue and adhered the die cut rose to the layered panel with dimensionals.

I adhered the panel to the front of a Thick Basic White card base with dimensionals. I finished the card with a Soft Succulent bow and three In Color Opal gems.

For the inside of the card, I stamped the the sentiment from the Country Bouquet stamp set in Evening Evergreen ink on a Basic White panel. I stamped the open hearts next to the sentiment in Polished Pink ink and adhered the panel to an Evening Evergreen mat before adhering it to the inside of the card.

A simple pink rose from the pretty Stampin’ Up! Two-Tone Flora bundle to say I love you. Perfect for Valentine’s Day!

On With The Hop! Click on the Next Blog button to move forward to Terry Lynn Bright’s project or click the Previous Blog button to move back to see the project that Karen Ksenzakovic created.

If you get lost along the way, here are the participants for the hop:


Current Host Code: ZYNDU2N9

Use this host code when you order $50 or more and receive a free gift from me!  The free gift is your choice of any item currently available valued up to $10.00 in the 2022-2023 Annual Catalog or the January-April 2023 Mini Catalog!

If your order is over $150, please do not use the host code since you’ll receive your own Host Dollars plus I’ll still send you the free gift!  This host code can be used by anyone, no club or commitment required. Let me know if you have any questions


If you need any stamping supplies, I’d be very happy to be your Demonstrator.  Just click on the Shop Now button on the right side of the screen to go directly to my online store or contact me if you have any questions. 

Thanks for stopping by and Happy Stamping!

Akiko

  • Visit my online store here
  • See the current Stampin’ Up! clearance rack specials here
  • Earn FREE Stampin’ Up! products through my Wildflower Frequent Shopper Program – my way of saying thank you to my online frequent shopper customers.
  • Have any questions? I’d be happy to help, click here to contact me.

Cardstock Cuts for this project:

  • Thick Basic White – 4-1/4″ x 11″ card base scored at 5-1/2″
  • Evening Evergreen – 3-3/4″ x” x 5″ (front mat), 3-7/8″ x 5-1/8″ (inside mat)
  • Basic White – 3-3/8″ x 4-7/8″ (front panel), 3-3/4″ x 5″ (inside panel), 2-1/4″ x 2-1/4″ (die cut flower)

Stampin’ Up! products used in this project: