Stampin’ Up! Field of Flowers Thinking of You Card

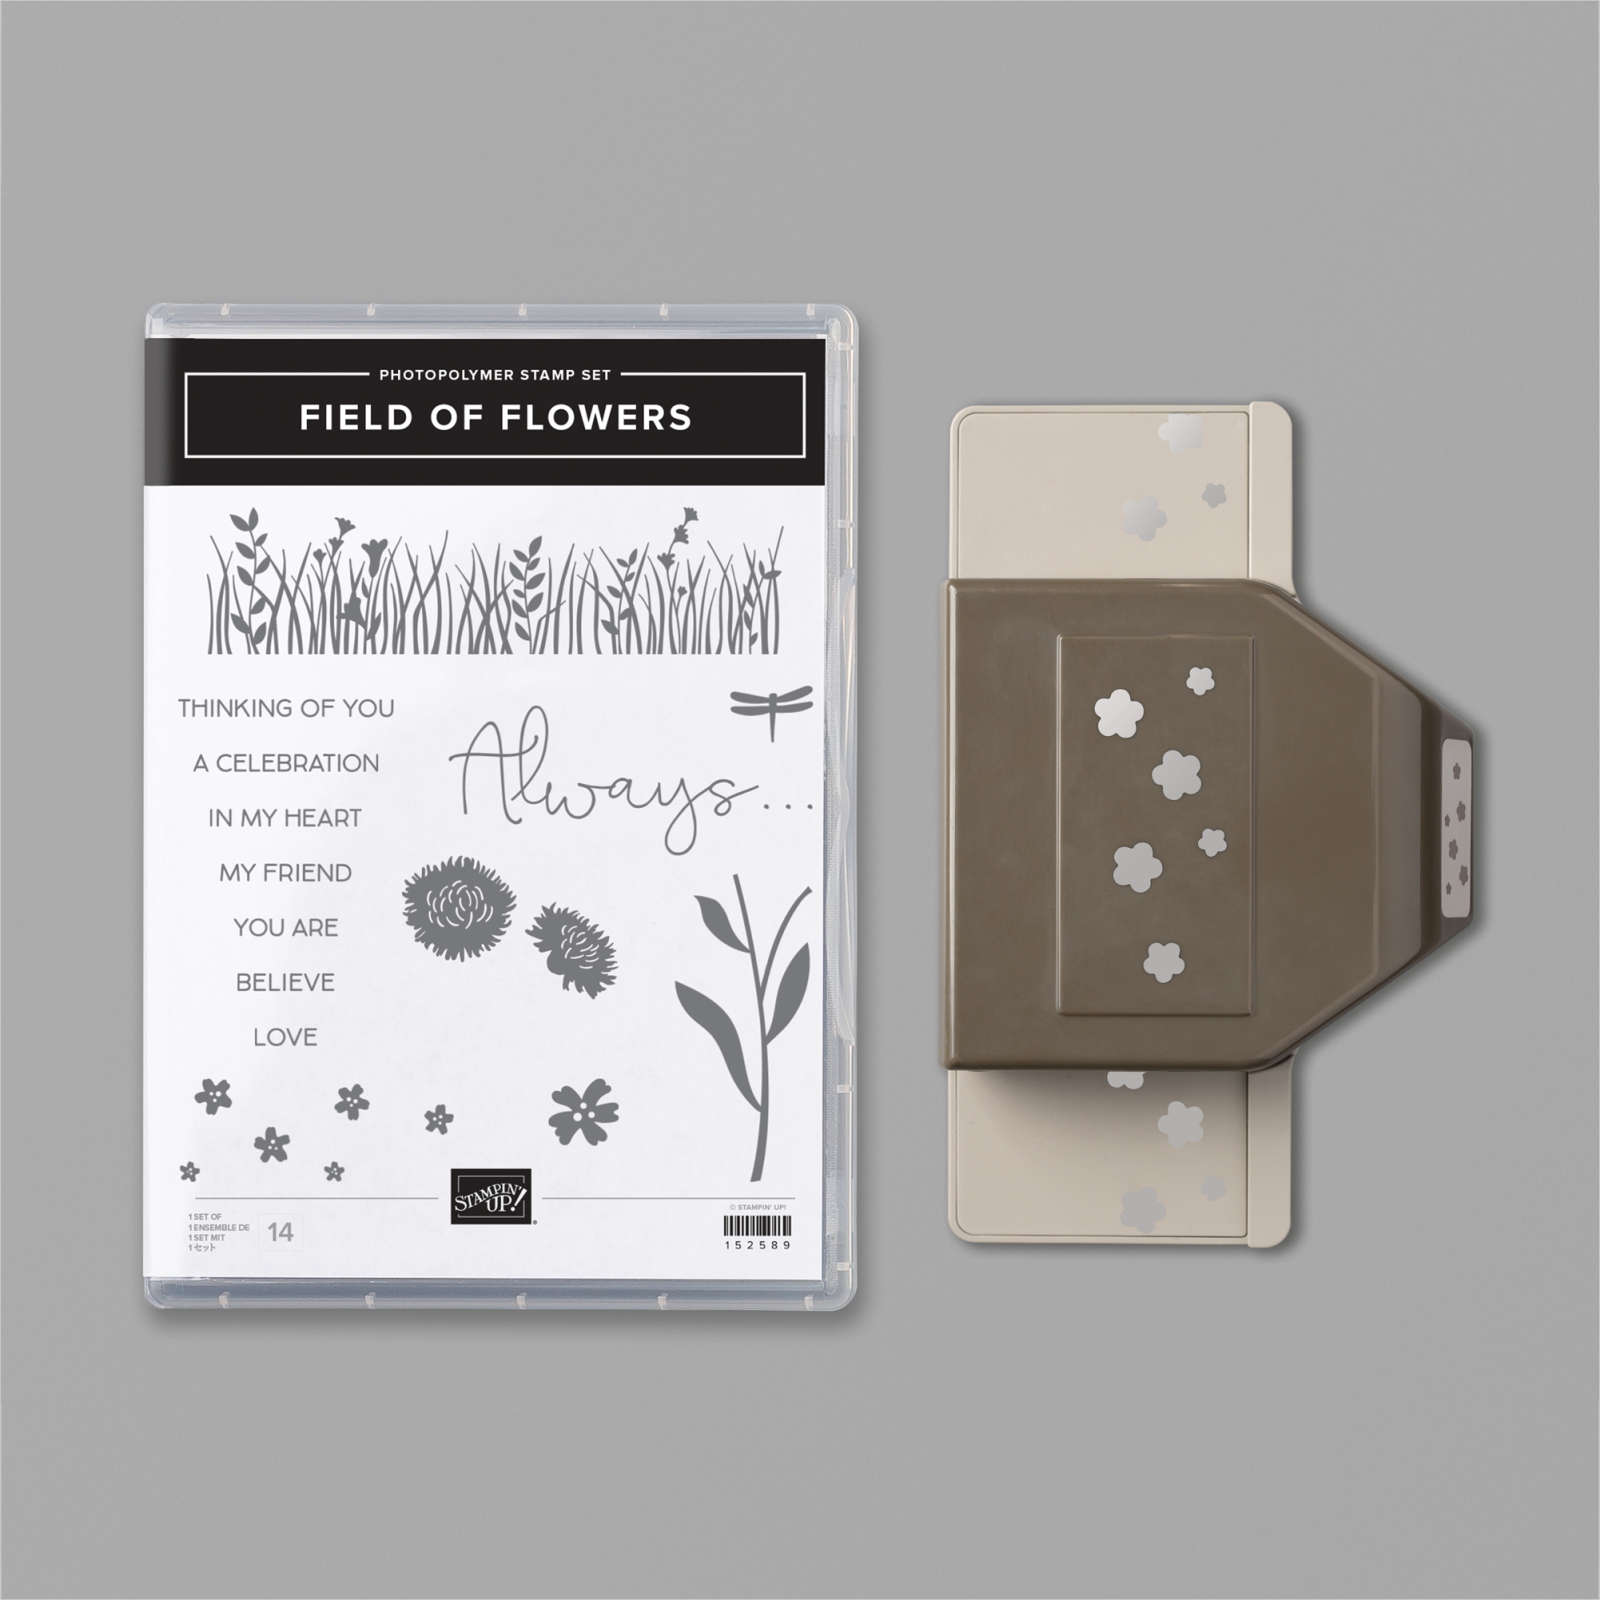
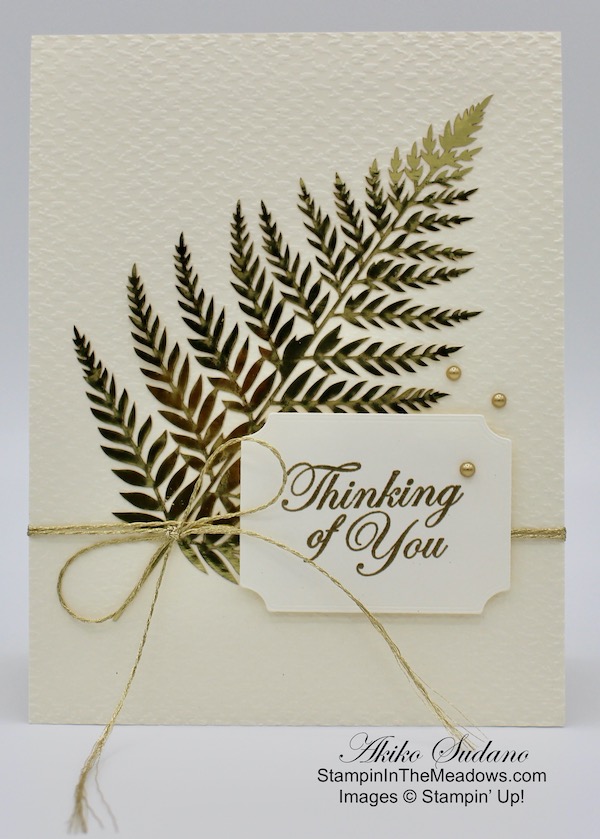
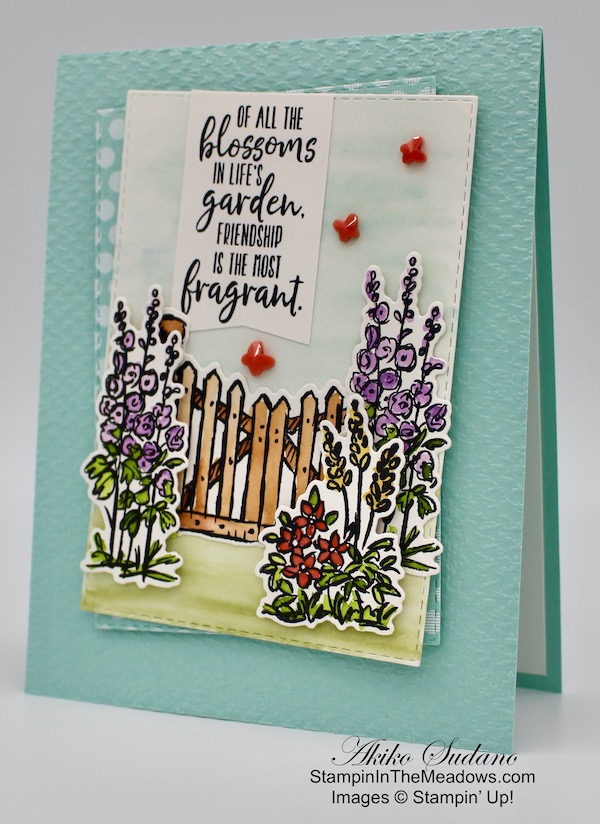
Good Morning! Today I have a Thinking of You Card note card made with the Stampin’ Up! Field of Flowers stamp bundle. This bundle consists of the sweet Field of Flowers photopolymer stamp set and the Confetti Flowers Border Punch. You can find the supplies used to create this card at the bottom of my post along with the sizes of cardstock used.

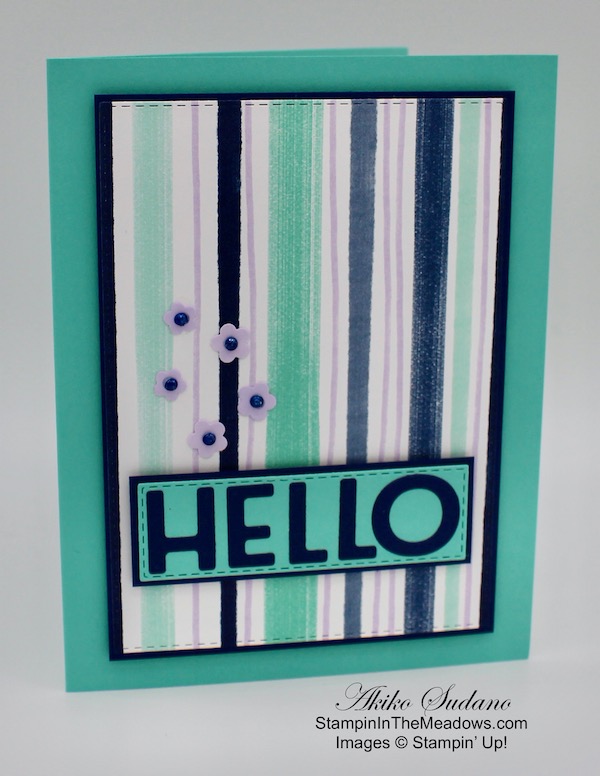
I used my sponge brayer to spread some Old Olive ink on the bottom of an Artistry Blooms designer series paper panel. I wanted to make the bottom look like grass – it was originally light blue and I thought the top looked like an evening sky, so I wanted it to fade to green. I stamped the sentiment from the Stampin’ Up! Field of Flowers photopolymer stamp set in Versamark ink on the top of the DSP panel and sprinkled it with white embossing powder. I heat set it until it was shiny and adhered the panel to a Sahara Sand mat.

I stamped the grasses from the Stampin’ Up! Field of Flowers stamp set in Old Olive ink on a strip of Pool Party. I used the sponge brayer to add some Old Olive ink to the bottom of the grasses. I stamped the dragonflies in Misty Moonlight. I stamped the flowers in Rich Razzleberry ink on Rick Razzleberry card stock and punched them out with the Confetti Flowers Punch. I adhered them to the stamped panel.

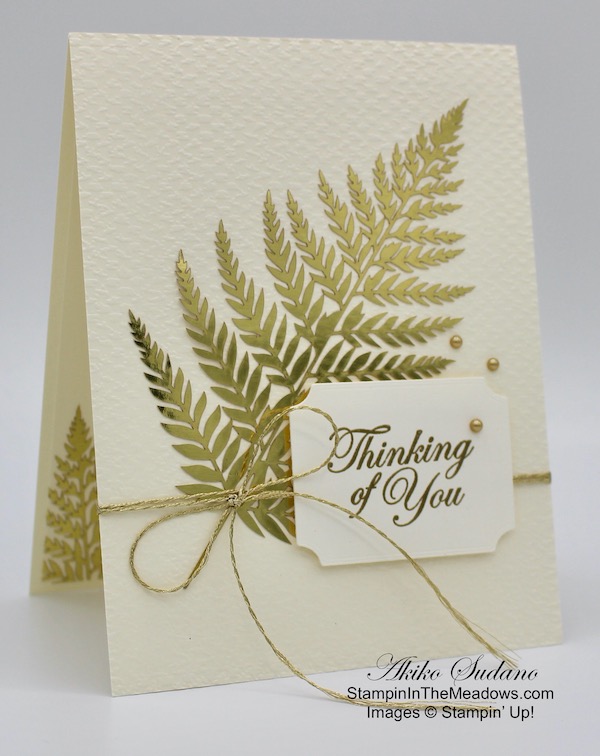
I cut a panel of Old Olive card stock with the leafy border die from the Birds & More Dies. I adhered the stamped panel to the top and adhered it to the DSP panel. I wrapped it twice with Linen Thread and tied a bow. I stamped the thinking of you sentiment in Old Olive ink on a strip of Whisper White. I trimmed it close with my paper snips and adhered it to the DSP panel. I adhered the DSP panel to the front of a Misty Moonlight card base with dimensionals.

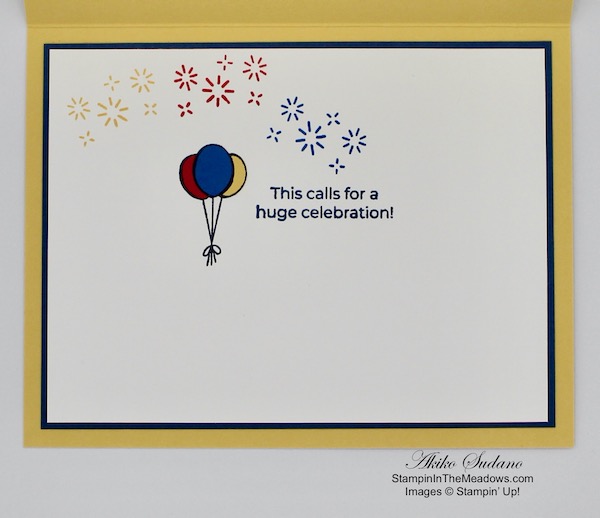
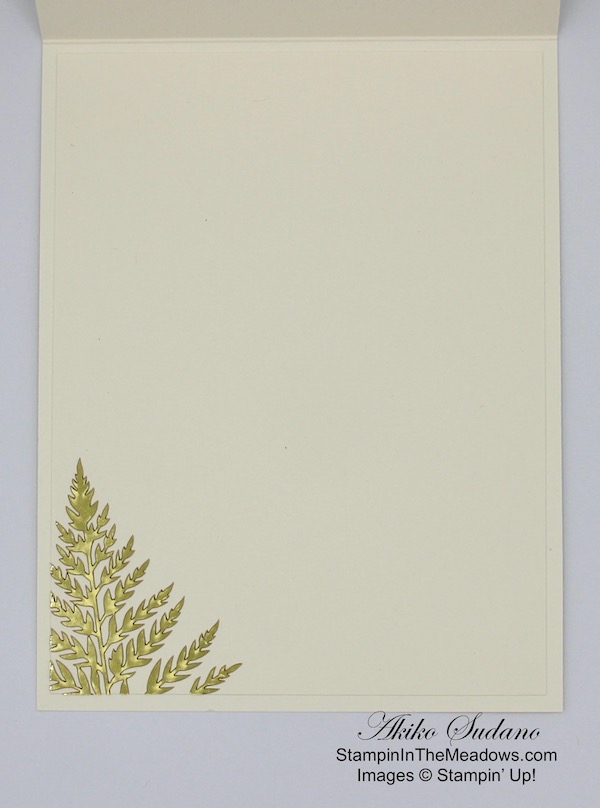
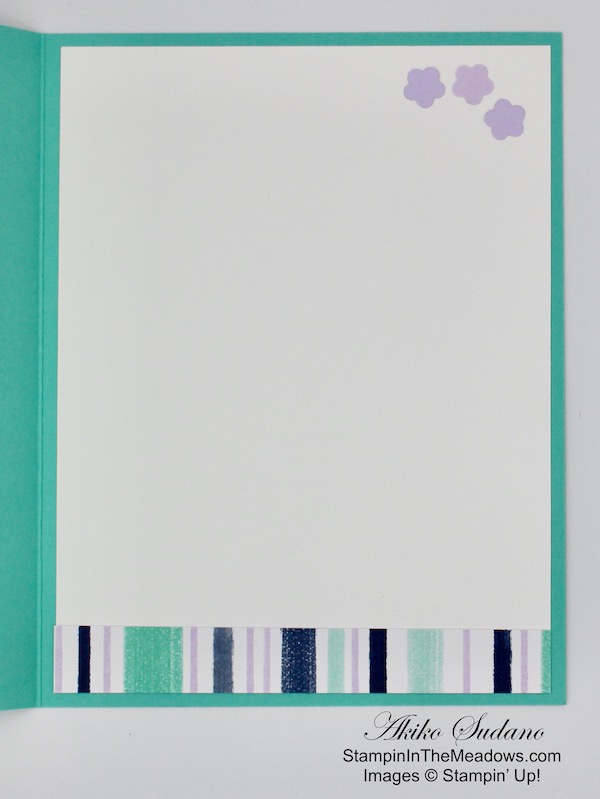
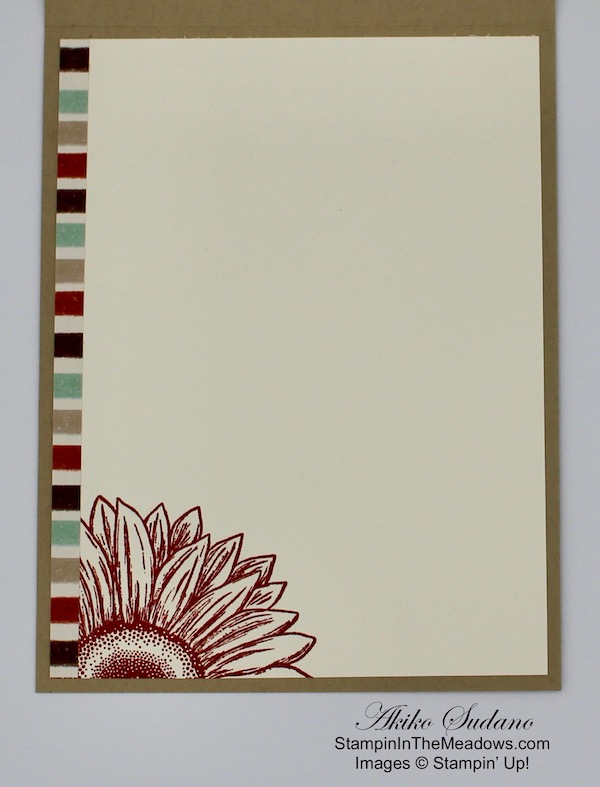
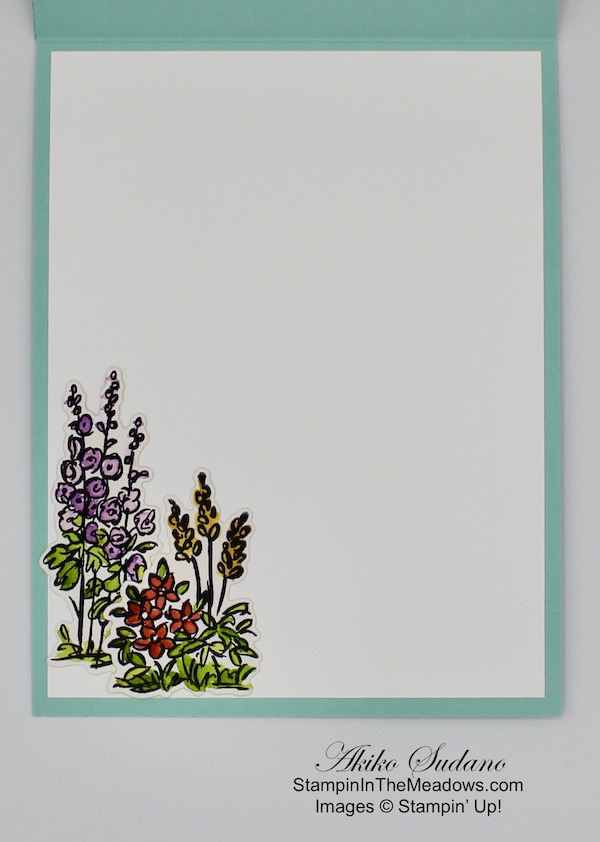
I stamped the grasses from the Stampin’ Up! Field of Flowers stamp set in Old Olive ink on the bottom of a Whisper White panel and bartered some Old Olive ink on the bottom. I stamped the dragonflies on the panel along with the my friend sentiment in Misty Moonlight ink. I adhered the panel to the inside of the card.

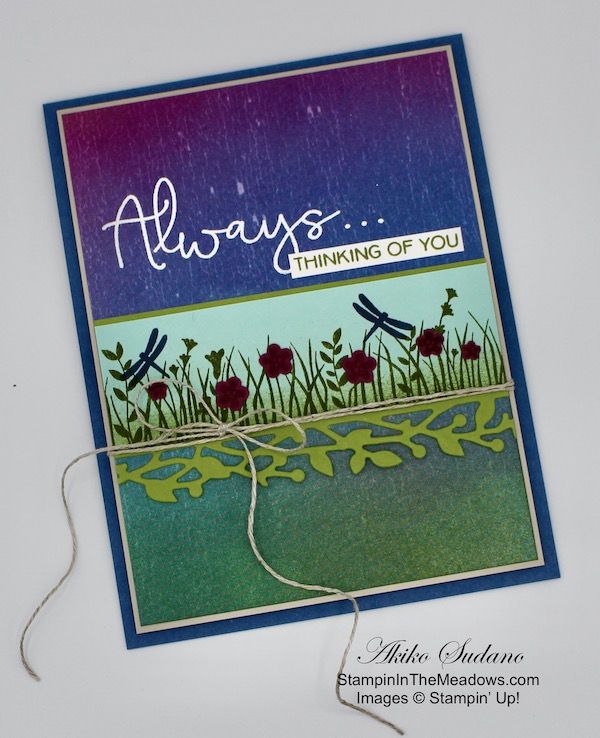
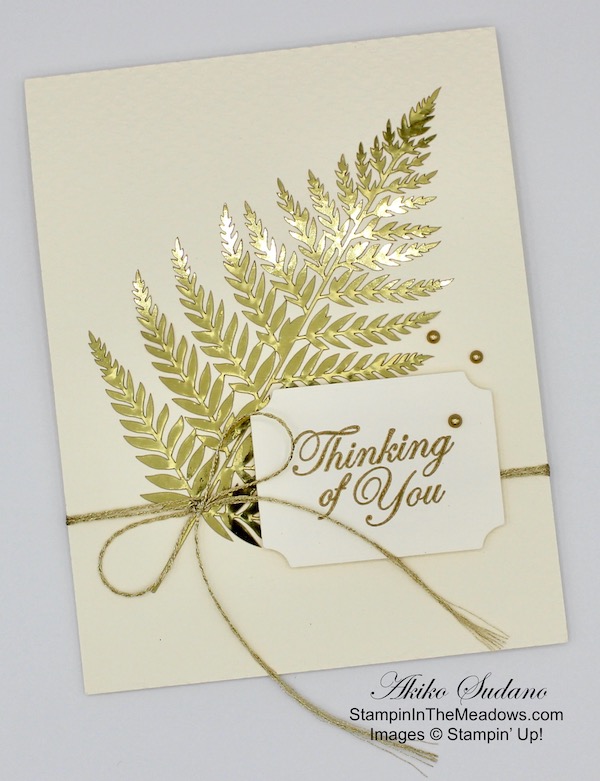
The Stampin’ Up! Field of Flowers bundle is really sweet with it’s grassy stamp and little flowers, and wonderful sentiments. And I really love how the sponge brayer gently filled in the spaces between the grasses giving the stamped image depth! Click on the picture below to get the details in my Online Store.


The Stampin’ Cut & Emboss Machine is Here!

If you need a new die cutting machine, check out the new Stampin’ Cut & Emboss machine! This is a well built, smooth running machine and I used it on today’s project along with the wonderful Magnetic Cutting Plate! Details are on my Promotions page – and I’ve even posted the Stampin’ Up! Videos that show the some of the sandwiches.


September 16-30 Host Code: V9FPKC9R

Use this host code when you order $50 or more and receive a free gift from me!  The gift is your choice of any item valued up to $10.00 in the 2020-21 Annual Catalog or the Aug – Dec 2020 Mini Catalog. This includes some of the host exclusive sets!

If your order is over $150, please do not use the host code since you’ll receive your own Host Dollars plus I’ll still send you the free gift!  This host code can be used by anyone, no commitment required.  Let me know if you have any questions.


If you need any stamping supplies, I’d be very happy to be your Demonstrator.  Just click on the Shop Now Button on the right side of the screen to go directly to my Online store or contact me if you have any questions.  Happy Stamping!

Thanks for stopping by and have a great day!

Akiko

  • Visit my Online store here
  • See the current Stampin’ Up! clearance rack specials here
  • Earn FREE Stampin’ Up! products through my Wildflower Frequent Shopper Program – my way of saying thank you to my frequent shopper online customers.
  • Sign up for my monthly newsletter here
  • Have any questions? I’d be happy to help, click here to contact me.

Cardstock Cuts for this project:

  • Misty Moonlight – 4-1/4″ x 11″ card base scored at 5-1/2″
  • Sahara Sand – 4″ x 5-1/4″ (front mat)
  • Old Olive – 2″ x 3-7/8″ (die cut bordered mat)
  • Pool Party – 1-1/4″ x 3-7/8″ (stamped panel)
  • Rich Razzleberry – 1-1/4″ x 2-3/4″ (punched flowers)
  • Whisper White – 4″ x 5-1/4″ (inside panel)
  • Artistry Blooms DSP – 3-7/8″ x 5-1/8″ (front background)

Stampin’ Up! products used in this project:


Stampin’ Up! Zoo Globe for the Happy Inkin’ Thursday Blog Hop

Good Morning! Welcome to another Happy Inkin’ Thursday Blog Hop! I made a fun birthday card with the cute Stampin’ Up! Zoo Globe photopolymer stamp set.

We have a theme challenge this week, and here is this week’s theme:

For today’s card, I did a lot of fussy cutting and some paper piecing. I stamped the Stampin’ Up! Zoo Globe animals and trees with Memento Tuxedo Black ink on colored card stock. I stamped the trees in on Just Jade card stock and fussy cut them out. I stamped the trees (trunk part) again on Early Espresso and fussy cut out the trunks and adhered them to the top of the Just Jade trees. I stamped the grass on Just Jade and fussy cut it out – I had to stamp several times across the panel and used my Basic Black Stampin’ Write marker to connect the sections of grass before fussy cutting. I embossed it with the Subtle 3D embossing folder to give it some texture.

I stamped the giraffe on Bumblebee card stock and fussy cut. I chose to color the spots with dark Cinnamon Cider Stampin’ Blend – I did not have the patience to fussy cut and paper piece each spot. I stamped and fussy cut the koala on Crumb Cake and adhered it to one of the trees. I stamped and fussy cut the elephant on Gray Granite card stock. I stamped and fussy cut the two birds on Poppy Parade and I stamped four sets of balloons – one on Whisper White, Poppy Parade, Pacific Point and So Saffron. I fussy cut the Whisper White balloon as one piece and cut the other colors individually and adhered them to the Whisper White balloon. I stamped the sentiment from the Stampin’ Up! Zoo Globe stamp set in Misty Moonlight ink on Whisper White and cut it out with the word bubble die from the Special Day Dies (yay for die cutting!). With all the parts cut out, I’m ready to start assembling!

I positioned the grass on a panel of Artistry Blooms designer series paper and marked where I would place the giraffe and elephant. I removed the grass and stamped the giraffe on the DSP and the balloons on the DSP by the elephant’s trunk. I then adhered the grass to the DSP. I adhered the giraffe and balloons on the stamped outlines. I adhered the elephant so it would look like it’s holding the balloons and the trees on the ends. I adhered the panel to a Misty Moonlight mat and wrapped it with linen thread and made a bow. I adhered the sentiment and adhered the birds. I popped the panel on the front of a So Saffron card base with dimensionals.

I stamped the balloons again in Memento Tuxedo Black in and paper pieced the balloons in the same card stock colors as the ones on the front. I stamped the sentiment from the Many Mates cling stamp set in Misty Moonlight ink next to the balloons and stamped the fireworks from the Pattern Play photopolymer stamp set in So Saffron, Poppy Parade and Pacific Point ink across the top. I adhered the Whisper White panel to a Misty Moonlight mat and then adhered it to the inside of the card.

The Stampin’ Up! Zoo Globe photopolymer stamp set has some really cute zoo animals and would make a great card for children of all age. It has several sweet sentiments and stamps for a snow globe and stand that coordinate with the Snow Globe Scene Dies to create a fun shaker card!

On with the Hop! Click the Next button below to visit Karen Ksenzakovic’s blog.

And just in case you get lost along the way, here’s a list of the team members participating in the hop today:


September 1-15 Host Code: 9UZFD3BH

Use this host code when you order $50 or more and receive a free gift from me!  The gift is your choice of any item valued up to $10.00 in the 2019-20 Annual Catalog or in the 2020 January-June Mini Catalog!  That includes some of the Host Exclusive stamp sets!

If your order is over $150, please do not use the host code since you’ll receive your own Host Dollars plus I’ll still send you the free gift!  This host code can be used by anyone, no commitment required.  Let me know if you have any questions.


If you need any stamping supplies, I’d be very happy to be your Demonstrator.  Just click on the Shop Now Button on the right side of the screen to go directly to my online store or contact me if you have any questions.  Happy Stamping!

Thanks for visiting!

Akiko

  • Visit my online store here
  • See the current Stampin’ Up! clearance rack specials here
  • Earn FREE Stampin’ Up! products through my Wildflower Frequent Shopper Program – my way of saying thank you to my frequent shopper online customers.
  • Sign up for my weekly newsletter here
  • Have any questions? I’d be happy to help, click here to contact me.

Cardstock Cuts for this project:

  • So Saffron – 5-1/2″ x 8-1/2″ card base scored at 4-1/4″, 3/4″ x 2″ (balloons)
  • Early Espresso – 1″ x 4-1/4″ (tree trunks)
  • Just Jade – 1-1/2″ x 5″ (trees), 1-1/4″ x 5″ (grass)
  • Poppy Parade – 3/4″ x 3″ (balloons and birds)
  • Crumb Cake – 1/2″ x 1″ (koala)
  • Bumblebee – 3/4″ x 2-1/4″ (giraffe)
  • Gray Granite – 1-1/2″ x 1-1/2″ (elephant)
  • Misty Moonlight – two 3-7/8″ x 5-1/8″ (mats)
  • Lovely Lipstick – 3-1/4″ x 4-1/2″ (flower panel mat)
  • Whisper White – 3-3/4″ x 5″ (inside panel), 3/4″ x 1″ (balloon), 1″ x 2-1/2″ (label)
  • Artistry Blooms DSP – 3-3/4″ x 5″ (front background)

Stampin’ Up! products used in this project:


Stampin’ Up! Forever Gold Thinking of You Card

Good Morning! Today I have a simple and elegant thinking of you card made with the Stampin’ Up! Forever Gold specialty laser cut paper. You can find the supplies used to create this card at the bottom of my post along with the sizes of cardstock used.

I embossed a panel of Very Vanilla cardstock with the Tasteful Textile 3D embossing folder and adhered it to the front of a Thick Very Vanilla card base. I adhered the beautiful large gold fern leaf from the Stampin’ Up! Forever Gold specialty laser cut paper to the front with small dots of liquid glue.

I stamped the sentiment from the Good Morning Magnolia cling stamp set in Versamark ink on a panel of Very Vanilla card stock. I sprinkled it with gold embossing powder and heat set until shiny. I cut it out with the die from the Tasteful Labels Dies.

I wrapped the card twice with gold floss and tied a bow. I popped the embossed label on the card front with dimensionals and finished it off with three metallic pearls.

I cut the top of another large gold fern from the Stampin’ Up! Forever Gold specialty laser cut paper and adhered it to the bottom corner of a Very Vanilla panel with dots of liquid glue. I adhered the panel to the inside of the card.

This card is so simple, but the gold foil leaves from the Stampin’ Up! Forever Gold specialty laser cut paper makes it so elegant and special. And while this card is a thinking of you card, you could replace the label with any sentiment and use it for many different occasions from a wedding card to a masculine birthday card. Here are all the pretty laser-cut gold foil elements that come in the set – you get three of each!!


Get & Go Starter Kit – Limited Time Joining Promotion

The Get & Go Starter Kit is a limited time promotion designed to give new Stampin’ Up! demonstrators additional products to help you get started right away. In addition to the already great valued Starter Kit, you will receive precut paper, stamps, and embellishments to use in your first event.

For full details, see my Promotions page or contact me.


The Stampin’ Cut & Emboss Machine is Here!

And if you need a new die cutting machine, check out the new Stampin’ Cut & Emboss machine! Details are on my Promotions page.


September 1-15 Host Code: 9UZFD3BH

Use this host code when you order $50 or more and receive a free gift from me!  The gift is your choice of any item valued up to $10.00 in the 2020-21 Annual Catalog or the Aug – Dec 2020 Mini Catalog. This includes some of the host exclusive sets!

If your order is over $150, please do not use the host code since you’ll receive your own Host Dollars plus I’ll still send you the free gift!  This host code can be used by anyone, no commitment required.  Let me know if you have any questions.


If you need any stamping supplies, I’d be very happy to be your Demonstrator.  Just click on the Shop Now Button on the right side of the screen to go directly to my Online store or contact me if you have any questions.  Happy Stamping!

Thanks for stopping by and have a great day!

Akiko

  • Visit my Online store here
  • See the current Stampin’ Up! clearance rack specials here
  • Earn FREE Stampin’ Up! products through my Wildflower Frequent Shopper Program – my way of saying thank you to my frequent shopper online customers.
  • Sign up for my monthly newsletter here
  • Have any questions? I’d be happy to help, click here to contact me.

Cardstock Cuts for this project:

  • Thick Very Vanilla – 4-1/4″ x 11″ card base scored at 5-1/2″
  • Very Vanilla – 4-1/4″ x 5-1/2″ (embossed front), 4″ x 5-1/4″ (inside panel), 2″ x 2-3/4″ (label)
  • Forever Gold Laser cut – two large fern leaves

Stampin’ Up! products used in this project:


Stampin’ Up! Playful Alphabet Hello Card

Good Morning! Today I have a fun Hello card made with the Stampin’ Up! Playful Alphabet Dies and the Playing with Patterns designer series paper. This was my first attempt as using these letter dies, so I wanted to keep it simple. You can find the supplies used to create this card at the bottom of my post along with the sizes of cardstock used.

I also used the new adhesive sheets for the words. I cut a strip of the adhesive sheets, and peeled off the backing and laid it on a strip of Night of Navy card stock that I used to cut the words. I cut the adhesive strip about 1/8″ all around shorter than the card stock so I wouldn’t need to worry about sticky glue on the front of the card stock. I placed the letter dies from the Stampin’ Up! Playful Alphabet Dies for HELLO on the other side of the card stock and ran it through my die cutting machine. It cut pretty cleanly and there was no sticky residue from the sheetss. I also die cut the Coastal Cabana label with a label from the Stitched Rectangles Dies. I carefully peeled the adhesive backing off each letter and placed it on the Coastal Cabana label. I adhered the label to a Night of Navy mat.

I cut the striped paper from the Playing with Patterns designer series paper with another Stitched Rectangle Die and adhered it to a Night of Navy mat. I adhered it to the front of a Coastal Cabana card base with dimensionals. I adhered the label to the card front with more dimensionals.

I used the new Confetti Flowers Border Punch to punch some flowers from Purple Posy card stock. I adhered five to the card front with liquid glue and colored some pearls with Night of Navy Stampin’ Blend for the flower centers.

I adhered three of the Purple Posy flowers to the top corner of a Whisper White panel and another strip of the Playing with Patterns DSP to the bottom. I adhered the panel to the inside of the card.

I was pretty impressed at how well the word fit in the Stitched Rectangle Die – I guess I really lucked out. I love the font of the letters in the Stampin’ Up! Playful Alphabet Dies! They are bold, clean, modern and easy to read. And there are numbers and double letters (I was able to cut both ‘L’s at the same time) and special symbols!

This was also the first time I used the adhesive sheets, and I was also impressed with how well they work. They leave a very fine adhesive film that sticks really well. I’ll definitely be using them more often.


September 1-15 Host Code: 9UZFD3BH

Use this host code when you order $50 or more and receive a free gift from me!  The gift is your choice of any item valued up to $10.00 in the 2020-21 Annual Catalog or the Aug – Dec 2020 Mini Catalog. This includes some of the host exclusive sets!

If your order is over $150, please do not use the host code since you’ll receive your own Host Dollars plus I’ll still send you the free gift!  This host code can be used by anyone, no commitment required.  Let me know if you have any questions.


If you need any stamping supplies, I’d be very happy to be your Demonstrator.  Just click on the Shop Now Button on the right side of the screen to go directly to my Online store or contact me if you have any questions.  Happy Stamping!

Thanks for stopping by and have a great day!

Akiko

  • Visit my Online store here
  • See the current Stampin’ Up! clearance rack specials here
  • Earn FREE Stampin’ Up! products through my Wildflower Frequent Shopper Program – my way of saying thank you to my frequent shopper online customers.
  • Sign up for my monthly newsletter here
  • Have any questions? I’d be happy to help, click here to contact me.

Cardstock Cuts for this project:

  • Coastal Cabana – 5-1/2″ x 8-1/2″ card base scored at 4-1/4″, 1-1/4″ x 3-1/4″ (die cut label)
  • Night of Navy – 1″ x 3″ (label mat), 3-1/2″ x 4-7/8″ (DSP mat), 1″ x 3-1/2″ (die cut letters)
  • Purple Posy – 1-1/2″ x 2-1/2″ (punched flowers)
  • Whisper White – 4″ x 5-1/4″ (inside panel)
  • Playing with Patterns DSP – 4″ x 5-1/4″ (front background), 1/2″ x 4″ (inside trim)

Stampin’ Up! products used in this project:


Welcome September, Welcome New Promotions

Hello! Stampin’ Up! has several exciting new things starting today!

The New Stampin’ Cut & Emboss Machine is Here!

The brand new standard size Stampin’ Cut & Emboss Machine and Magnetic Plate are now available to order! Yay!! The machine has been in development for a while now and is finally ready. Tis is a durable, strong machine that is easy to use and the fold up plates make it simple to store and portable.

The new Stampin’ Cut & Emboss Machine (item 149653) comes with all the plates you need to get started: 1 Base Plate (Plate 1), 1 Die Plate (Plate 2), 2 Cutting Plates (Plate 3), and 1 Specialty Plate (Plate 4).

The new Magnetic Plate (item 150673)is a thin, fully magnetic sheet with a self-healing cutting surface and holds dies securely in place, even nested dies. This slim, portable sheet replaces a Cutting Plate in your sandwich, making it even easier to take with you!

Here’s a video introducing the new Stampin’ Cut & Emboss machine:

Note that the new Mini Stampin’ Cut & Emboss machine will be available later in the year.


Get & Go Starter Kit Joining Promotion

The Get & Go Starter Kit is a limited time promotion meant to give new Stampin’ Up! demonstrators additional products to help your get started right away. In addition to the already great valued Starter Kit, you recruits will receive precut paper, stamps, and embellishments to use in your first event.

Here are the details:

  • Promotion Dates:  September 1, 2020 – September 30, 2020
  • New demonstrators who submit their Independent Demonstrator Agreement (IDA) before 1 September or after 30 September will not be eligible for this promotion.
  • In addition to the regular starter kit (choose $125 worth of products for $99) you will also receive enough cardstock pieces to make 16 cards, a pack of Rhinestone Basic Jewels, the So Much Love stamp set, and the Queen Anne’s Lace stamp set—all for your first event.
  • 8 packs of precut cardstock of the coastal cabana pack will be provided, and 8 packs of precut cardstock of the Granny Apple Green pack, for a total of 16 cards (packs include envelopes). They even provide pictures of sample cards with recipes that you can use for your event.  Click here to see the cards and recipes.
  • Important note: Ink, adhesive, cutting tool, and clear block for stamping must be purchased separately. However, these products may be included as part of your Starter Kit product selection.

Here are the additional products that you’ll receive:


And the Stampin’ Up! Clearance Rack was Updated with Exciting New Savings!

Be sure to check it out!!


The September Paper Pumpkin Kit Celebrates Fall!

As the autumn season approaches, prepare to celebrate with the September Paper Pumpkin Kit! There’s so much to love about fall—some love the haunts of Halloween, many love the time to give thanks, and others love the changing colors and cooler temperatures. Whatever you love most about fall, September’s kit has everything you need to celebrate the season your way! Between a multi-occasion stamp set and enough supplies to design 20 cracker box treat packages, you can create custom fall crafts to celebrate Halloween, Thanksgiving, pumpkins, and leaves. Whether you make them all the same or mix ‘n’ match your crafts, there’s something for everyone in this kit!

Here are the Details:

  • Kit contains enough supplies to create 20 cracker box treat packages.
  • Each cracker box treat package can be customized to celebrate Halloween, Thanksgiving, the autumn season, or all three!

Coordinating Colors: Bumblebee, Basic Black, Cajun Craze, Cinnamon Cider, Mossy Meadow, Old Olive, Pumpkin Pie, white

If you’re interested in subscribing to Paper Pumpkin, you can either sign up for a subscription where you are billed monthly for your kit or you can purchase a prepaid subscription in my online store. To see more information and to sign up for the monthly subscription click here. To see the options for prepaid subscriptions in my online store, click here.

Sign up deadline for the September 2020 kit is September 10, 2020. Supplies may be limited toward the end of the subscription period.


September 1 – 15 Host Code: 9UZFD3BH

Use this host code when you order $50 or more and receive a free gift from me!  The gift is your choice of any item valued up to $10.00 in the 2020-21 Annual Catalog or the Aug – Dec 2020 Mini Catalog. This includes some of the host exclusive sets!

If your order is over $150, please do not use the host code since you’ll receive your own Host Dollars plus I’ll still send you the free gift!  This host code can be used by anyone, no commitment required.  Let me know if you have any questions.


If you need any stamping supplies, I’d be very happy to be your Demonstrator.  Just click on the Shop Now Button on the right side of the screen to go directly to my Online store or contact me if you have any questions.  Happy Stamping!

Thanks for stopping by and have a great day!

Akiko

  • Visit my Online store here
  • See the current Stampin’ Up! clearance rack specials here
  • Earn FREE Stampin’ Up! products through my Wildflower Frequent Shopper Program – my way of saying thank you to my frequent shopper online customers.
  • Sign up for my monthly newsletter here
  • Have any questions? I’d be happy to help, click here to contact me.

Stampin’ Up! Arrange a Wreath Video Tutorial

Good Morning! Today I’m sharing a Fall card made with the Stampin’ Up! Arrange a Wreath bundle that I made during my Facebook Live video tutorial yesterday afternoon. Actually, I used three different stamp sets for this card. I pulled in the pumpkins from the Gather Together stamp set and the oak leaves and acorns from the Beautiful Autumn bundle. You can find the supplies used to create this card at the bottom of my post along with the sizes of cardstock used.

Here is the Facebook Live video showing how I made the card:

I will also edit and post a concise tutorial on my YouTube Channel, so look for that soon. You can now find my edited YouTube video here.

I started by stamping the sign using the boards and sentiment stamps from the Stampin’ Up! Arrange a Wreath photopolymer stamp set in Sahara Sand and Soft Suede inks on Whisper White. I cut out the sign with a thin white outline. I stamped the pumpkins from the Stampin’ Up! Gather Together photopolymer stamp set in Cajun Craze ink on Whisper White and colored it with Mossy Meadow and Pumpkin Pie Stampin Blends. I fussy cut the pumpkins with my paper snips. I also used the Gathered Leaves Dies to cut a small embossed maple leaf from Pear Pizzazz card stock.

I stamped six oak leaves from the Beautiful Autumn photopolymer stamp set in Soft Suede ink on Bumblebee card stock and punched them out with the coordinating punch from the Autumn Punch Pack. I stamped three acorns from the same set in Soft Suede ink on Sahara Sand card stock and punched them out. I die cut the wreath from Cinnamon Cider Card stock using the Wreath Builder Dies. I embossed a panel of Soft Suede card stock with the Pinewood Planks 3D embossing folder and adhered it to a Cinnamon Cider mat. I adhered the wreath to the embossed panel using liquid glue and adhered linen thread using Stampin’ Seal.

I adhered the die cut leaf with glue dots so that it covered the Stampin’ Seal. I adhered the pumpkins together with liquid glue and popped them on the wreath with dimensionals. I adhered the oak leaves and acorns with glue dots, tucking the ends behind the pumpkins. I adhered the Bumblebee gingham ribbon to the sign with glue dots and adhered the sign to the top of the wreath with dimensionals. I finished off the wreath with Bumblebee enamel dots and adhered the piece to the front of a Sahara Sand card base.

I adhered the last oak leaves and acorn to a Whisper White pane and adhered the panel to the inside of the card.

The Stampin’ Up! Arrange a Wreath bundle is so versatile!! The stamped images and sentiments support wreaths for many occasions and it can be combined with lots of other stamp sets to create any themed wreath for any occasion. And who doesn’t love a wreath? Click the image below to get the full details of this bundle and shop in my Online Store.


Today is the Last Day to redeem your Bonus Days coupon codes!!

If you still have coupon codes, you can use them to get a discount on the Stampin’ Up! Arrange a Wreath bundle – Don’t let them expire!


August 15 – 31 Host Code: TV9N9BHQ

September 1 – 15 Host Code: 9UZFD3BH

Use this host code when you order $50 or more and receive a free gift from me!  The free gift is your choice of any item valued up to $10.00 in the 2019 – 2020 Annual Catalog or in the 2020 Mini Catalog!  That includes some of the Host Exclusive stamp sets!

If your order is over $150, please do not use the host code since you’ll receive your own Host Dollars plus I’ll still send you the free gift!  This host code can be used by anyone, no club or commitment required.  Let me know if you have any questions.


If you need any stamping supplies, I’d be very happy to be your Demonstrator.  Just click on the Shop Now button on the right side of the screen to go directly to my online store or contact me if you have any questions.  Happy Stamping!

Thanks for stopping by and have a great week!

Akiko

  • Visit my online store here
  • See the current Stampin’ Up! clearance rack specials here
  • Earn FREE Stampin’ Up! products through my Wildflower Frequent Shopper Program – my way of saying thank you to my online frequent shopper customers.
  • Sign up for my weekly newsletter here
  • Have any questions? I’d be happy to help, click here to contact me.

Cardstock Cuts for this project:

  • Sahara Sand – 4-1/4″ x 11″ card base scored at 5-1/2″, 1-1/2″ x 2-1/2″ (punched acorns)
  • Cinnamon Cider – 3-3/4″ x 5″ (front mat), 4″ x 4″ (wreath die cut)
  • Soft Suede – 3-1/2″ x 4-3/4″ (embossed background)
  • Bumblebee – 1-1/4″ x 4″ (punched leaves)
  • Pear Pizzazz – 1-1/2″ x 1-1/2″ (die cut leaf)
  • Whisper White – 3-3/4″ x 5″ (inside panel), 2″ x 4-1/2″ (fussy cut images)

Stampin’ Up! products used in this project:

Product List

Stampin’ Up! Celebrate Sunflowers for the Happy Inkin’ Thursday Blog Hop

Good Morning! Welcome to the Happy Inkin’ Thursday Blog Hop! I wanted to use the Stampin’ Up! Celebrate Sunflowers bundle to make a fall card, and the color palette for today’s hop gave me the perfect excuse to pull it out! You can find the supplies used to create this card at the bottom of my post along with the sizes of cardstock used.

We have a color challenge this week, and here is the color palette we are using. I ended up using all of the colors:

I adhered a strip of the striped paper from the Gilded Autumn specialty designer series paper to a panel of the dark wood grained paper from the In Good Taste designer series paper and then to to a Cajun Craze mat. I popped the layered panel on the front of a Crumb Cake card base with dimensionals.

I stamped the large sunflower from the Stampin’ Up! Celebrate Sunflowers cling stamp set in Early Espresso ink on a Very Vanilla panel. I colored it with Calypso Coral, Cajun Craze and Soft Suede Stampin’ Blends and cut it out with the coordinating die from the Sunflower Dies. I cut the large lacy sunflower from brushed copper foil and three lacy leaves from Mossy Meadow card stock. I popped the copper die cut to the front of the sunflower and the layered sunflower to the card front with dimensionals. I adhered glue dots to the leaves and slipped them under the flower.

I stamped the sentiment from the Stampin’ Up! Celebrate Sunflowers stamp set in Cajun Craze ink on a Very Vanilla panel and cut it out with the stitched pinked circle from the Tasteful Labels Dies. I adhered it to the card front with Stampin’ Seal and added three champagne rhinestones for a touch of sparkle.

I stamped part of the large sunflower from the Stampin’ Up! Celebrate Sunflowers in the lower corner of a Very Vanilla panel and added a strip of the Gilded Autumn Specialty DSP to the side. I adhered it to the inside of the card with Stampin’ Seal.

I was surprised at how well this color palette goes together. And I love the touch of Cajun Craze with the natural elements – the realistic flower and dark wood.

On with the Hop! Click the Next button below to visit Karen Ksenzakovic’s blog.

And just in case you get lost along the way, here’s a list of the team members participating in the hop today:


August 16 – 31 Host Code: TV9N9BHQ

Use this host code when you order $50 or more and receive a free gift from me!  The gift is your choice of any item valued up to $10.00 in the 2019-20 Annual Catalog or in the 2020 January-June Mini Catalog!  That includes some of the Host Exclusive stamp sets!

If your order is over $150, please do not use the host code since you’ll receive your own Host Dollars plus I’ll still send you the free gift!  This host code can be used by anyone, no commitment required.  Let me know if you have any questions.


If you need any stamping supplies, I’d be very happy to be your Demonstrator.  Just click on the Shop Now Button on the right side of the screen to go directly to my online store or contact me if you have any questions.  Happy Stamping!

Thanks for visiting!

Akiko

  • Visit my online store here
  • See the current Stampin’ Up! clearance rack specials here
  • Earn FREE Stampin’ Up! products through my Wildflower Frequent Shopper Program – my way of saying thank you to my frequent shopper online customers.
  • Sign up for my weekly newsletter here
  • Have any questions? I’d be happy to help, click here to contact me.

Cardstock Cuts for this project:

  • Crumb Cake – 4-1/4″ x 11″ card base scored at 5-1/2″
  • Cajun Craze – 4″ x 5-1/4″ (front mat)
  • Mossy Meadow – 1-3/4″ x 3-3/4″ (die cut leaves)
  • Brushed Copper Foil – 3-1/2″ x 3-1/2″ (sunflower)
  • Very Vanilla – 4″ x 5-1/4″ (inside panel), 3-1/2″ x 3-1/2″ (sunflower), 2″ x 2″ (label)
  • In Good Taste DSP – 3-7/8″ x 5-1/8″ (front background)
  • Gilded Autumn DSP – 1-1/2″ x 5-1/8″ (front accent strip), 1/4″ x 5-1/4″ (inside trim)

Stampin’ Up! products used in this project:


Stampin’ Up! So Much Love Card

Good Morning! Today I have a pretty floral card made with the pretty Stampin’ Up! So Much Love cling stamp set. I had so much fun watercoloring the Grace’s Garden card last weekend that I wanted to bring out the water painters and use them again. Today’s technique is a little different though in that I embossed the image with gold embossing powder before watercoloring. What do you think? You can find the supplies used to create this card at the bottom of my post along with the sizes of cardstock used.

I stamped the flower from the Stampin’ Up! So Much Love stamp set in Versamark ink on a panel of watercolor paper. I sprinkled it with gold embossing powder and heat set until it was shiny. I colored the flower with Melon Mambo ink using the fine tipped water painter and used a bit of Daffodil Delight for the flower center. I colored the leaves in Pear Pizzazz. I fussy cut the flower with my paper snips after it was dry. Here’s a close-up of the flower so you can see the gold embossing.

I colored the flower one petal at a time, starting at the darkest part of each petal and pulling the color outward to cover the entire petal. The watercolor paper does not absorb the color very fast, so you have time to move it as you go over the petal and the color will bleed and blend wherever the paper is wet. The color also gets lighter as you go. The embossed lines help contain the water, so that it’s easier to ‘stay in the lines’.

I adhered a panel of Peony Garden designer series paper to a Whisper White mat and popped it on the front of a Pear Pizzazz card base. I cut a Whisper White panel with the Stitched So Sweetly Dies and ran it through the Dainty Diamonds 3D embossing folder. I stamped the sentiment from the Stampin’ Up! So Much Love stamp set in Gray Granite ink and cut it out with the smaller die from the Stitched So Sweetly Dies. I adhered the dies together and adhered them to the card front.

I adhered some gold foil leaves from the Forever Gold laser cut specialty paper with glue dots and popped the watercolored flower on top with dimensionals. I made bows with the polka dot tulle ribbon and gold thread and tied them together with more gold thread and adhered them to the card front. I finished it off with three gold enamel gems.

I stamped the flower again in Melon Mambo ink after stamping off three times on a Whisper White panel. I trimmed the bottom with a strip of the Peony Garden DSP and adhered the panel to the inside of the card.

I had the old Stampin’ Up! Birthday Blooms stamp set that I must have made a dozen birthday cards with using this watercolor technique! That flower had to be fussy cut too, and it is a bit intensive but the results are really pretty!!


Last Week to Redeem Bonus Days Coupon Codes!!

Don’t forget to redeem your Bonus Days Coupon Codes before the end of the month!!


August 16 – 31 Host Code: TV9N9BHQ

Use this host code when you order $50 or more and receive a free gift from me!  The gift is your choice of any item valued up to $10.00 in the 2020-21 Annual Catalog or the Aug – Dec 2020 Mini Catalog. This includes some of the host exclusive sets!

If your order is over $150, please do not use the host code since you’ll receive your own Host Dollars plus I’ll still send you the free gift!  This host code can be used by anyone, no commitment required.  Let me know if you have any questions.


If you need any stamping supplies, I’d be very happy to be your Demonstrator.  Just click on the Shop Now Button on the right side of the screen to go directly to my Online store or contact me if you have any questions.  Happy Stamping!

Thanks for stopping by and have a great day!

Akiko

  • Visit my Online store here
  • See the current Stampin’ Up! clearance rack specials here
  • Earn FREE Stampin’ Up! products through my Wildflower Frequent Shopper Program – my way of saying thank you to my frequent shopper online customers.
  • Sign up for my monthly newsletter here
  • Have any questions? I’d be happy to help, click here to contact me.

Cardstock Cuts for this project:

  • Pear Pizzazz – 4-1/4″ x 11″ card base scored at 5-1/2″, 1-3/4″ x 3″ (label)
  • Watercolor paper – 3″ x 4-1/2″ (flower)
  • Whisper White – (2) 4″ x 5-1/4″ (front mat and inside panel), 3″ x 4″ (label)
  • Peony Garden DSP – 3-7/8″ x 5-1/8″ (front background), 1/2″ x 4″ (inside trim)
  • Forever Gold Specialty – three sprigs

Stampin’ Up! products used in this project:


Stampin’ Up! Grace’s Garden Watercolor Friendship Card Video Tutorial

Good Morning! Today I’m sharing a friendship card using the Stampin’ Up! Grace’s Garden photopolymer stamp set and Garden Gateway Dies that I made during my Facebook Live video tutorial yesterday afternoon. I CASE’d a card from the annual catalog because it uses a watercolor with ink technique to color the images and I was excited to try out my new water painters! You can find the supplies used to create this project at the bottom of my post along with the sizes of cardstock used.

Here is the Facebook Live video showing how I made card:

I also posted the video to my YouTube Channel and you can view it here if you prefer.

I die cut a panel of Shimmery White with the third largest Stitched Rectangles Dies and used the large brush water painter to create a color wash with Pool Party on top and Old Olive on the bottom. I flattened the panel by placing it in a folded sheet of typing paper and ironing it, since the watercoloring caused it to warp.

I stamped the garden gate from the Stampin’ Up! Grace’s Garden photopolymer stamp set using Stazon Jet Black ink on Shimmery White card stock. I also stamped three of the tall flower clusters and two of the medium flower clusters. I cut out all the elements with the coordinating dies from the Garden Gateway Dies. Using the fine tip water painter, I colored the gate with Cinnamon Cider ink and the flowers with Highland Heather, Terracotta Tile, Bumblebee and Granny Apple Green inks.

I cut a panel of Pool Party from the Subtles 6″ x 6″ designer series paper pack with the third largest Stitched Rectangles Dies and adhered it offset to the back of the watercolored background with Stampin’ Seal. I adhered the gate and one of the tall flowers to the panel with Stampin’ Seal and popped another tall flower cluster and the shorter flowers on with dimensionals. I stamped the sentiment on a panel of Shimmery White card stock in Memento Tuxedo Black ink, trimmed the bottom and adhered it to the panel with Stampin’ Seal. I embossed a panel of Pool Party with the Tasteful Textile 3D embossing folder and adhered it to the front of a Pool Party card base. I popped the layered watercolor panel on with dimensionals and finished the card with three Terracotta Tile butterflies.

I saved two flower clusters for the inside of the card, so I adhered them to the bottom of a Whisper White panel and adhered the panel to the inside of the card.

The Stampin’ Up! Grace’s Garden bundle is such a sweet set and is beautiful when watercolored! I haven’t used the watercolor technique in a long time and while it was a bit messier, it was a lot of fun. And I really like the new Stampin’ Up! water painters! I’m already planning which flower stamps to watercolor in the coming weeks!


Don’t forget to redeem your Bonus Days Coupon Codes before the end of the month!!


August 16 – 31 Host Code: TV9N9BHQ

Use this host code when you order $50 or more and receive a free gift from me!  The free gift is your choice of any item valued up to $10.00 in the 2020 – 2021 Annual Catalog or the new Aug-Dec 2020 Mini Catalog.  This includes some of the host exclusive sets!

If your order is over $150, please do not use the host code since you’ll receive your own Host Dollars plus I’ll still send you the free gift!  This host code can be used by anyone, no club or commitment required.  Let me know if you have any questions.


If you need any stamping supplies, I’d be very happy to be your Demonstrator.  Just click on the Shop Now button on the right side of the screen to go directly to my online store or contact me if you have any questions.  Happy Stamping!

Thanks for stopping by and have a great week!

Akiko

  • Visit my online store here
  • See the current Stampin’ Up! clearance rack specials here
  • Earn FREE Stampin’ Up! products through my Wildflower Frequent Shopper Program – my way of saying thank you to my online frequent shopper customers.
  • Sign up for my weekly newsletter here
  • Have any questions? I’d be happy to help, click here to contact me.

Cardstock Cuts for this project:

  • Pool Party – 4-1/4″ x 11″ card base scored at 5-1/2″, 4-1/4″ x 5-1/2″ (embossed front background)
  • Shimmery White – 3-1/8″ x 4-1/2″ (die cut background), 3-1/4″ x 8″ (stamped die cuts), 1-1/4″ x 2″ (label)
  • Subtles 6″ x 6″ DSP – 3-1/8″ x 4-1/2″ (die cut mat)
  • Whisper White – 4″ x 5-1/4″ (inside panel)

Stampin’ Up! products used in this project:


Stampin’ Up! Cherish the Season Wreath Christmas Card

Good Morning! Today I used the wonderful Wreath Builder Dies to create a pretty Christmas Wreath to go with the sentiments from the Stampin’ Up! Cherish the Season cling stamps for a Christmas Card! You can find the supplies used to create this card at the bottom of my post along with the sizes of cardstock used.

I adhered a panel of the Shaded Spruce plaid paper from the Plaid Tidings 6″ x 6″ designer series paper pack to the front of a Real Red card base with Stampin’ Seal. I embossed a panel of Whisper White card stock with the Pinewood Planks 3D embossing folder and adhered it to a Real Red mat before popping it on the card front with dimensionals.

I cut the leaf wreath from the Wreath Builder Dies from Shaded Spruce card stock, two poinsettias from Real Red card stock and the two pieced bow from Bumblebee card stock. I adhered the wreath and poinsettias on embossed panel with liquid glue and popped the bow on with a piece of a dimensional. I accented the centers of the poinsettias with yellow rhinestones.

I stamped the Merry Christmas sentiment from the Stampin’ Up! Cherish the Season stamp set in Real Red ink on a strip of Whisper White and cut it out with the label die from the Ornate Frames Dies. I adhered it to the card front with liquid glue and decorated it with a red rhinestone.

I stamped the sentiment from the Stampin’ Up! Cherish the Season stamp set in Real Red ink on a Whisper White panel and trimmed the bottom with a strip of Plaid Tidings DSP. I added another poinsettia and small piece of the leaf wreath to the upper corner and adhered the panel to the inside of the card.

I love wreath Christmas cards and the Wreath Builder Dies make beautiful ones, whether simple or more elaborate. Plus, it’s fun – like decorating a holiday wreath for your front door!!


August 16 – 31 Host Code: TV9N9BHQ

Use this host code when you order $50 or more and receive a free gift from me!  The gift is your choice of any item valued up to $10.00 in the 2020-21 Annual Catalog or the Aug – Dec 2020 Mini Catalog. This includes some of the host exclusive sets!

If your order is over $150, please do not use the host code since you’ll receive your own Host Dollars plus I’ll still send you the free gift!  This host code can be used by anyone, no commitment required.  Let me know if you have any questions.


If you need any stamping supplies, I’d be very happy to be your Demonstrator.  Just click on the Shop Now Button on the right side of the screen to go directly to my Online store or contact me if you have any questions.  Happy Stamping!

Thanks for stopping by and have a great day!

Akiko

  • Visit my Online store here
  • See the current Stampin’ Up! clearance rack specials here
  • Earn FREE Stampin’ Up! products through my Wildflower Frequent Shopper Program – my way of saying thank you to my frequent shopper online customers.
  • Sign up for my monthly newsletter here
  • Have any questions? I’d be happy to help, click here to contact me.

Cardstock Cuts for this project:

  • Real Red – 4-1/4″ x 11″ card base scored at 5-1/2″, 3-3/8″ x 3-3/8″ (mat)
  • Bumblebee – 1-1/4″ x 3″ (bow die cuts)
  • Shaded Spruce – 3-3/4″ x 3-3/4″ (wreath die cuts)
  • Whisper White – 4″ x 5-1/4″ (inside panel), 1-1/2″ x 3-1/3″ (label), 3-1/4″ x 3-1/4″ (embossed panel)
  • Plaid Tidings DSP – 4″ x 5-1/4″ (front background), 1/2″ x 4″ (inside trim)

Stampin’ Up! products used in this project: