Stampin’ Up! Painted Poppies Card

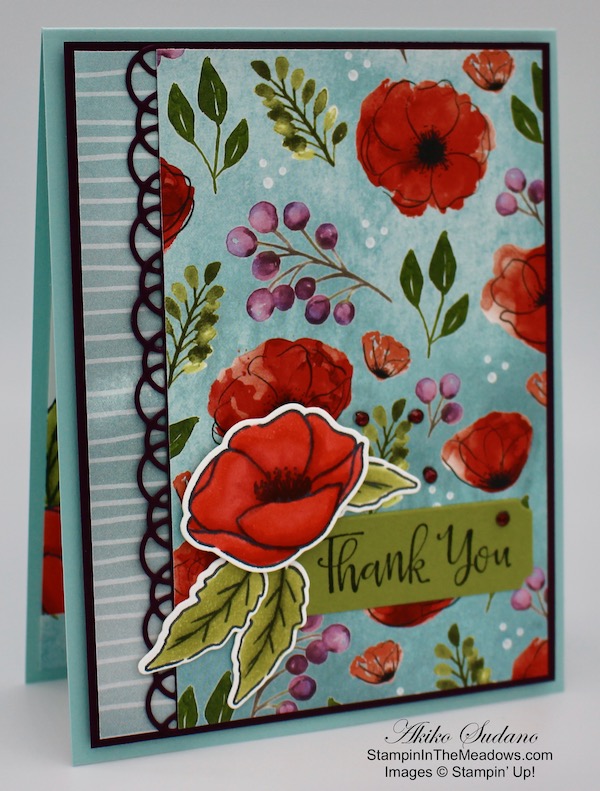
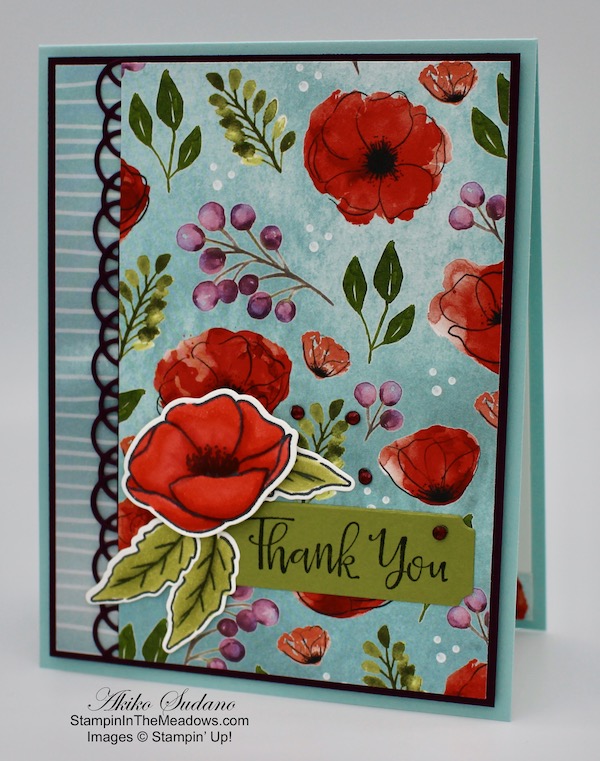
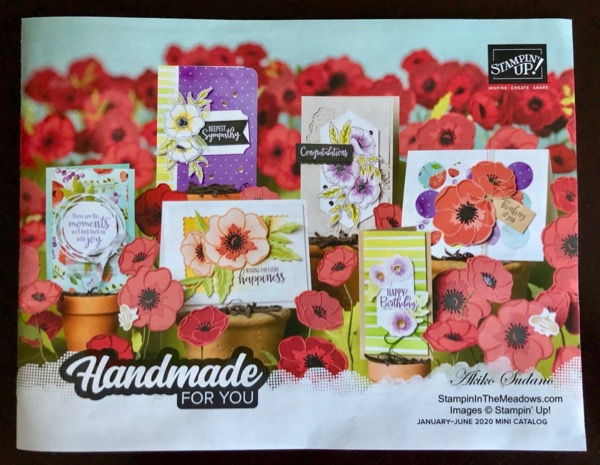
Good Morning! I was so glad when I saw the beautiful Stampin’ Up! Painted Poppies cling stamp set and the coordinating dies because they are such a striking flower, coming in so many colors these days. And I always think of Poppies on Memorial Day because of my childhood, growing up as an Air Force brat, frequently living on base. So I had to bring out these stamps for a Memorial Day card. You can find the supplies I used at the bottom of my post along with the sizes of cardstock used.

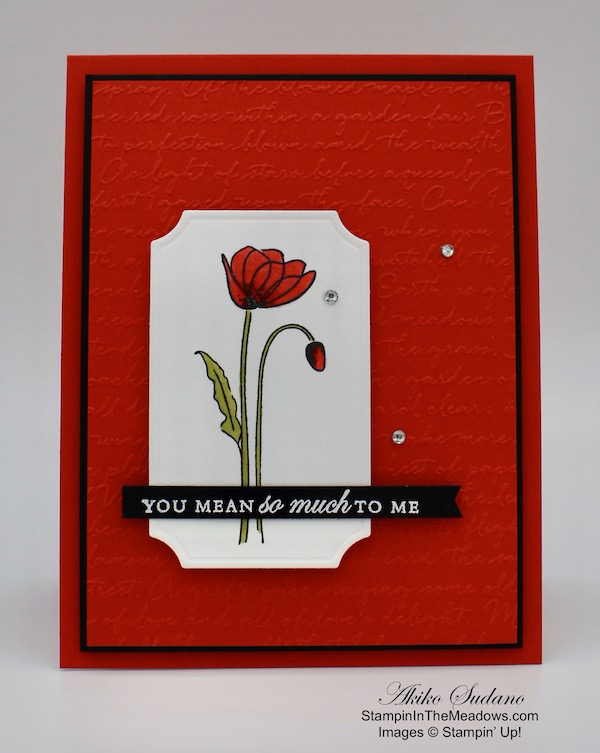
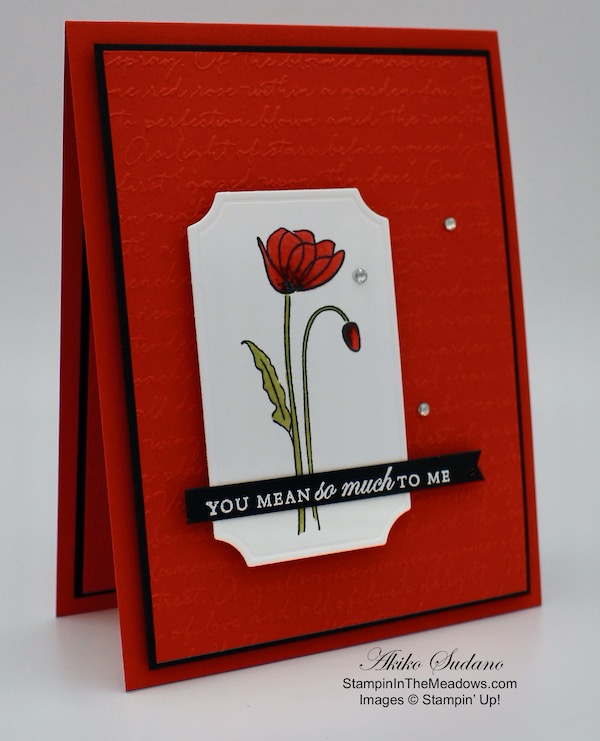
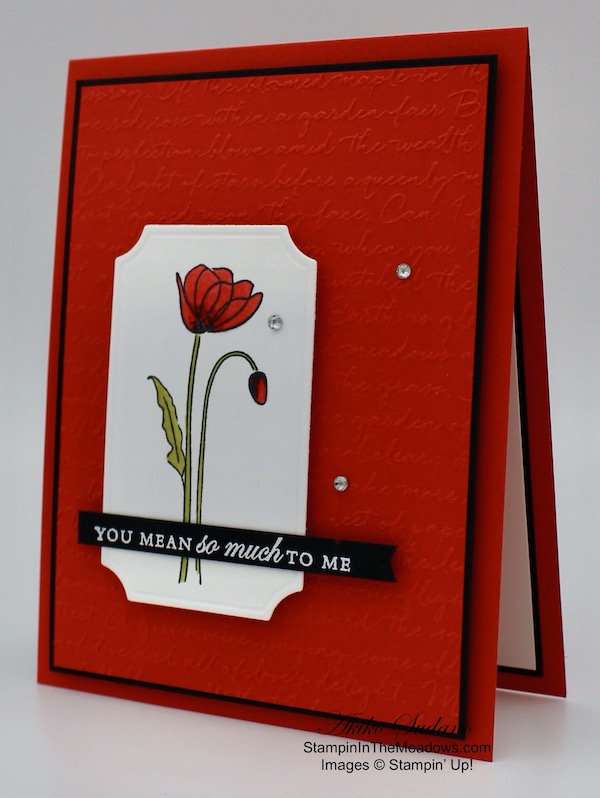
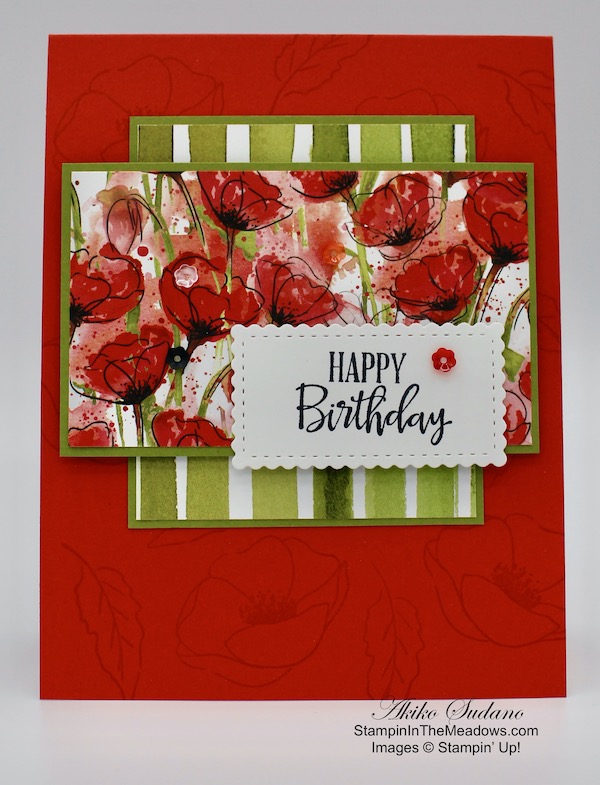
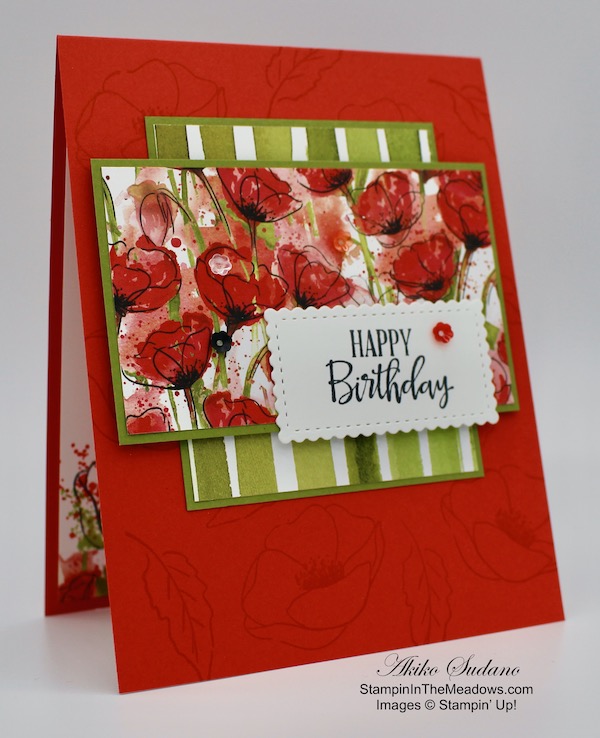
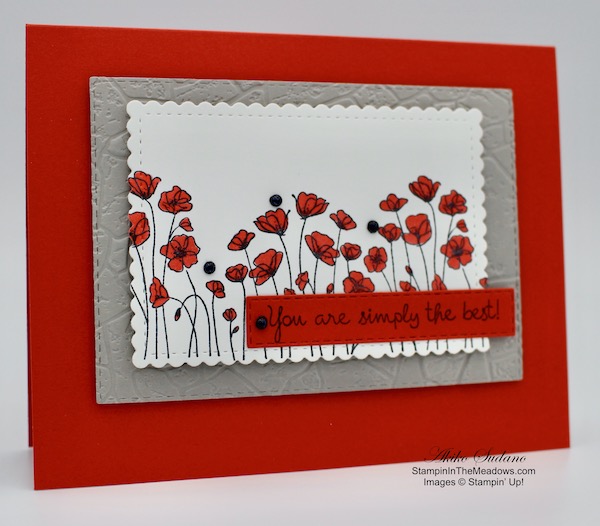
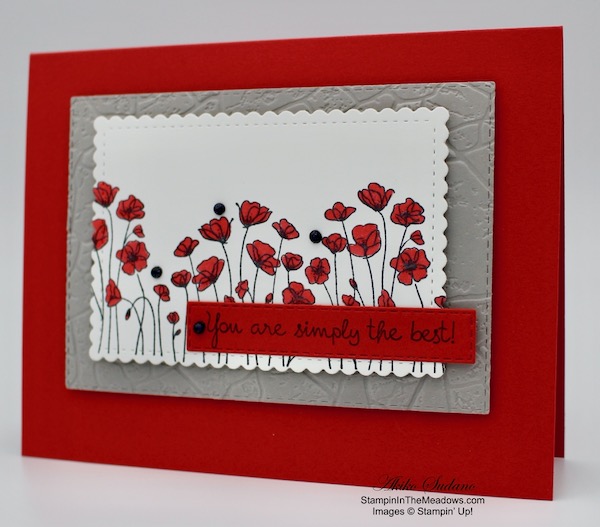
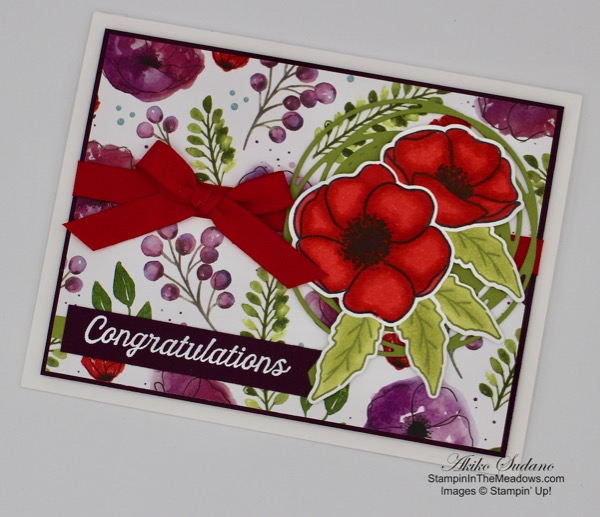
I adhered a panel of Flowering Fields designer series paper to a Basic Black mat with liquid glue. I stamped the poppies from the Stampin’ Up! Painted Poppies cling stamp set in Memento Tuxedo Black across a Basic White panel. I colored the flowers with the Poppy Parade Stampin’ Blend and adhered the panel to another panel of Flowering Fields DSP.

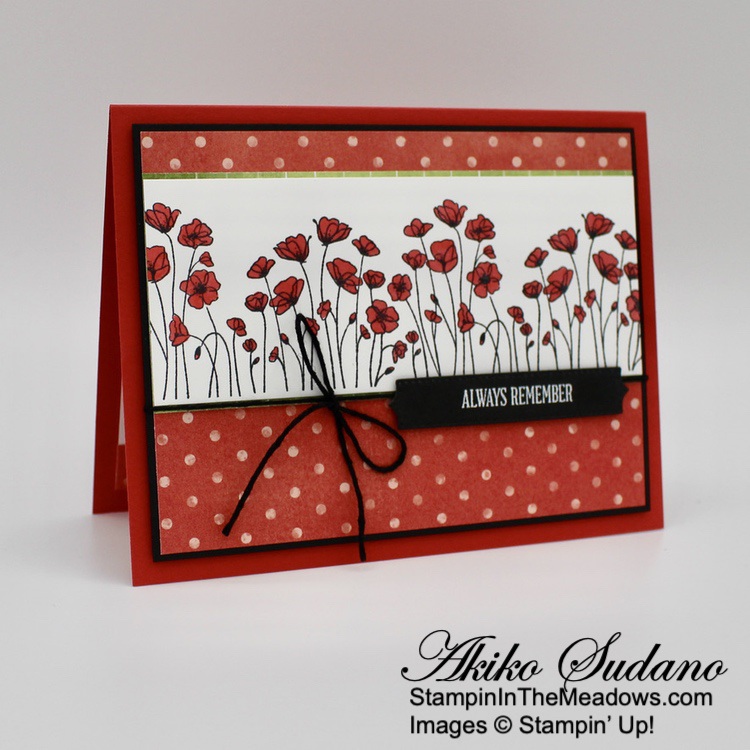
I adhered the layered panel to the larger DSP panel with liquid glue. I wrapped the panel with a length of black bakers’s twine and made a bow. I stamped the sentiment from the Peaceful Moments stamp set in Versamark ink on a strip of Basic Black and sprinkled it with white embossing powder. I shook off the excess and heated the powder with my heat tool until it was shiny.

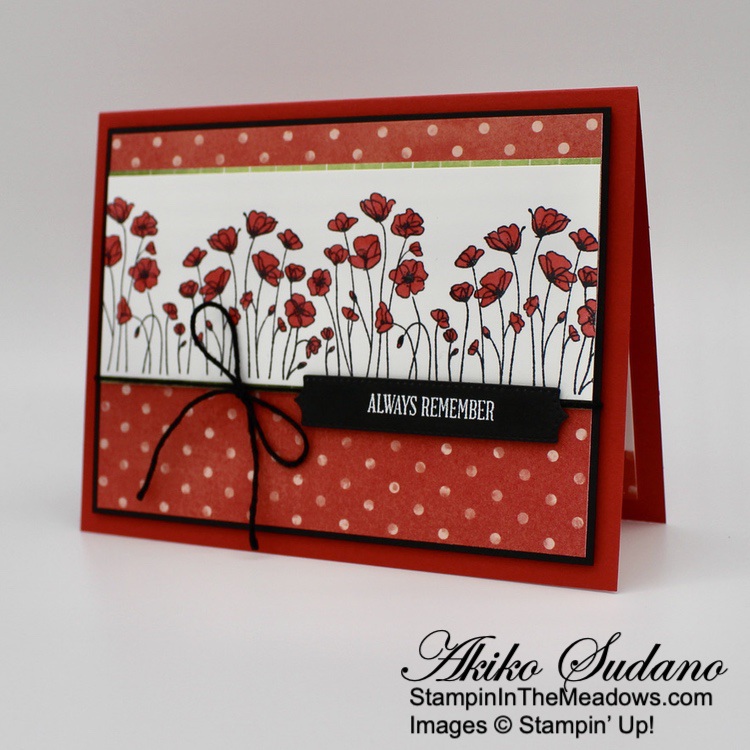
I cut out the sentiment with the long label die from the Potted Succulents dies and adhered it over the twine with dimensionals. I adhered the panel to the front of a Poppy Parade card base with dimensionals.

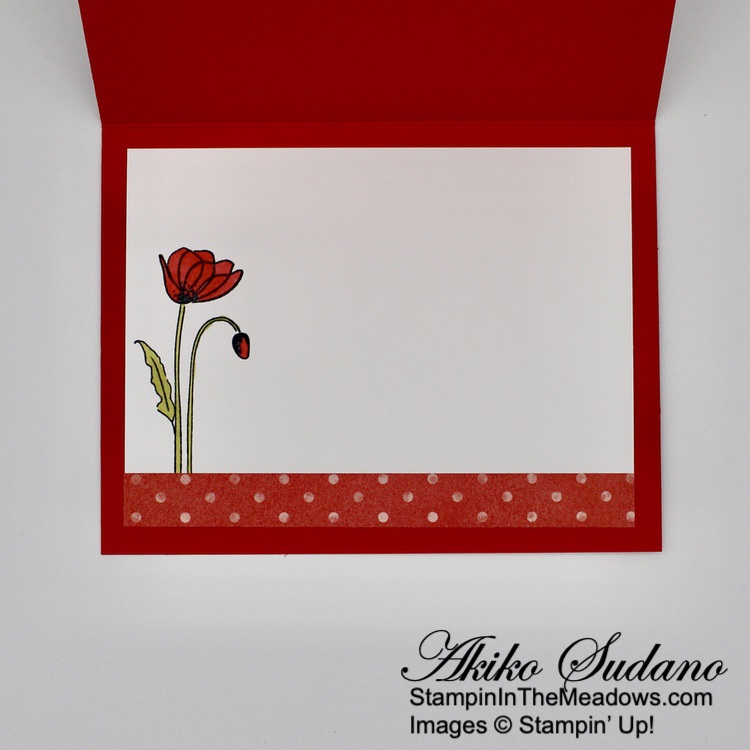
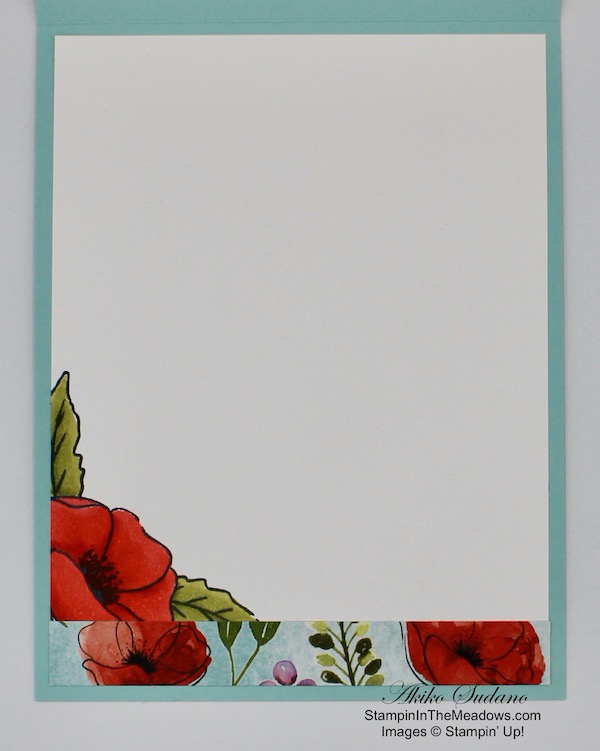
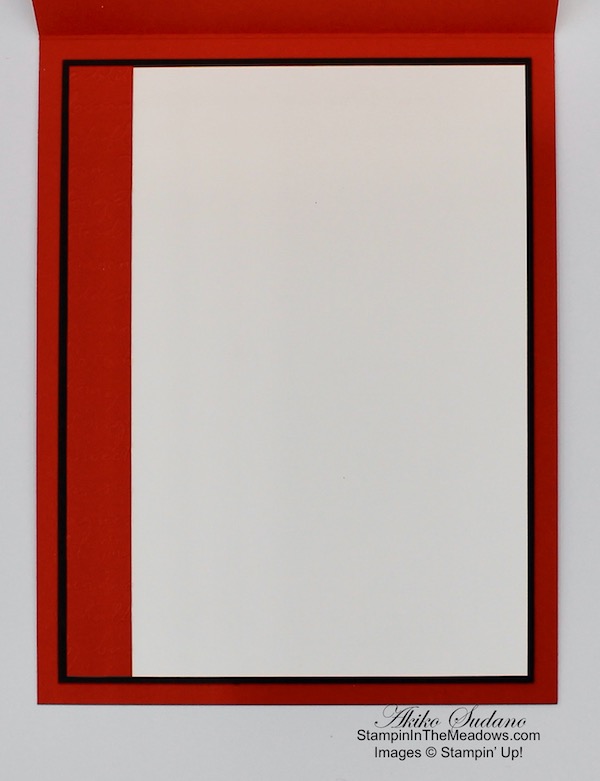
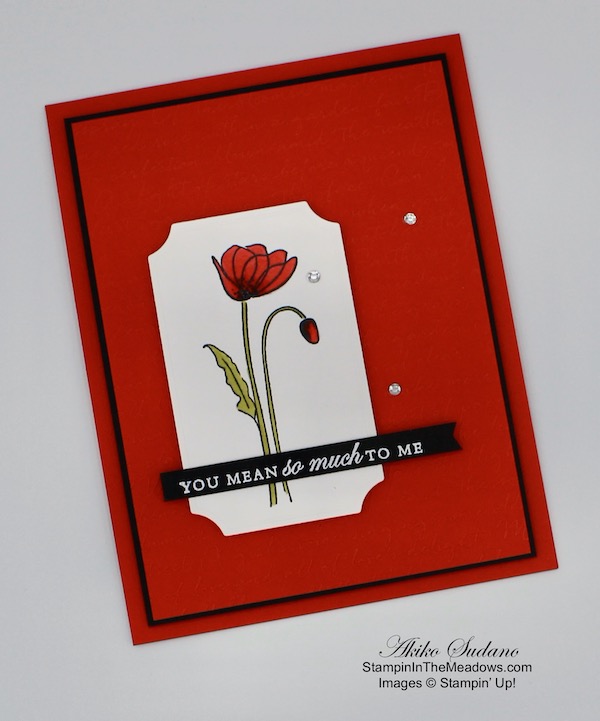
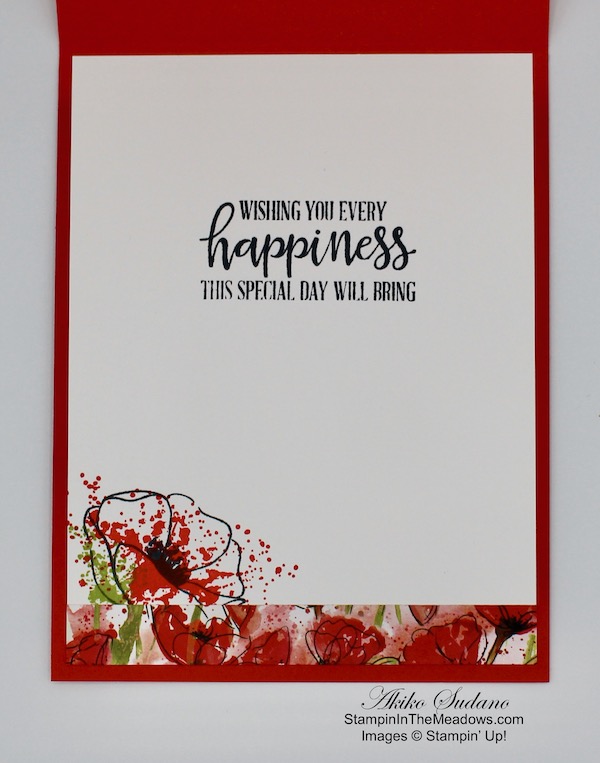
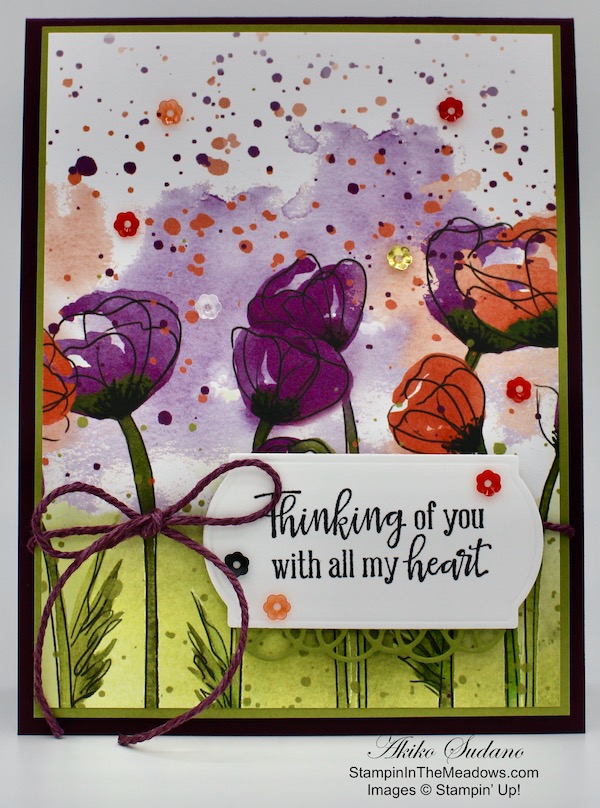
For the inside of the card, I stamped the the single poppy flower from the Stampin’ Up! Painted Poppies stamp set in Memento Tuxedo Black on a Basic White panel. I colored the flower with a Poppy Parade Stampin’ Blend and the stem and leaves with an Old Olive Stampin’ Blend. I trimmed the bottom with a strip of Flowering fields DSP and adhered the panel to the inside of the card.

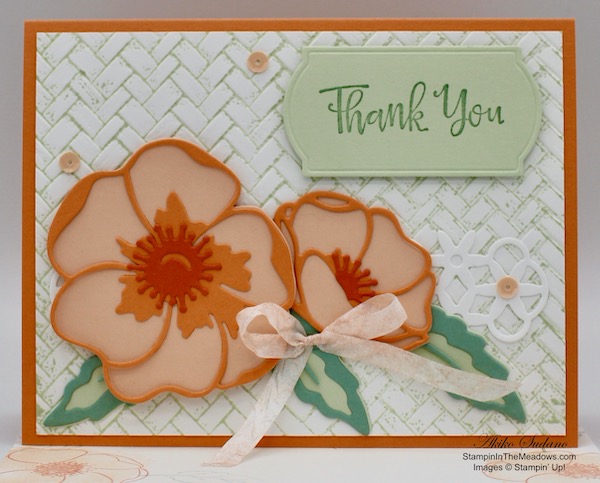
The Stampin’ Up Painted Poppies stamp set has simple, pretty poppy flowers and leaves and coordinates with the Painted Labels dies to make gorgeous die cut poppies. Have a safe Memorial day, and I hope you spend time with those you love.


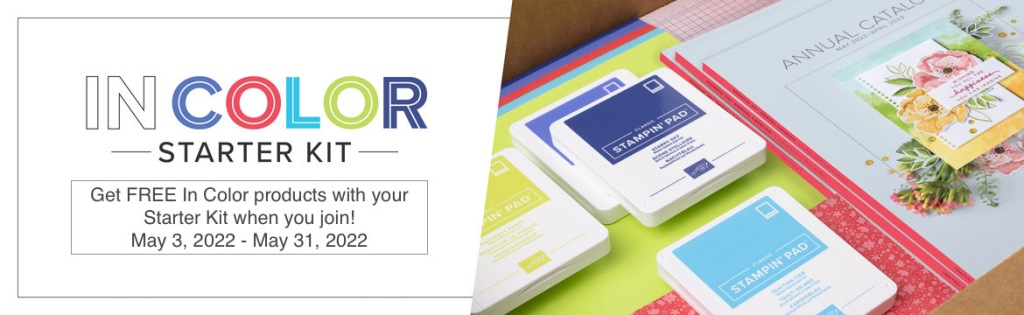
In Color Starter Kit Special Ending Soon!

Ready to start your Stampin’ Up! business in style? Then sign up between May 3 – 31, 2022 to be a demonstrator and get $66.50 in FREE 2022-2024 In Color® products!

The Starter Kit is only $99 + tax!!  And if you join between May 3-31, you’ll get:

  • $125 Stampin’ Up! merchandise of your choice
  • $66.50 in 2022-2024 In Color merchandise
    • 2022–2024 In Color Grid Paper – item 160009
    • 2022-2024 In Color 8-1/2″ x 11″ Card Stock – item 159204
    • 2022-2024 In Color Ink Pad Collection – item 161108
    • 2022-2024 In Color 6″ x 6″ Designer Series Paper – item 159253
  • Free business supplies and catalogs
  • Free random past Paper Pumpkin Kit
  • Free shipping!!

Read more about Stampin’ Up! Demonstrator benefits on my Join My Team page and click the button at the bottom to join. Contact me if you have any questions and I’ll be happy to tell you more! Last Day is Tuesday May 31!


Current Host Code: MHHQUNTF

Use this host code when you order $50 or more and receive a free gift from me!  The free gift is your choice of any item valued up to $10.00 from the January – June 2022 Mini Catalog or the 2022-2023 Annual Catalog!

If your order is over $150, please do not use the host code since you’ll receive your own Host Dollars plus I’ll still send you the free gift!  This host code can be used by anyone, no club or commitment required. Let me know if you have any questions.


If you need any stamping supplies, I’d be very happy to be your Demonstrator.  Just click on the Shop Now button on the right side of the screen to go directly to my online store or contact me if you have any questions.  Happy Stamping!

Thanks for stopping by and have a great week!

Akiko

  • Visit my online store here
  • See the current Stampin’ Up! clearance rack specials here
  • Earn FREE Stampin’ Up! products through my Wildflower Frequent Shopper Program – my way of saying thank you to my online frequent shopper customers.
  • Have any questions? I’d be happy to help, click here to contact me.

Cardstock Cuts for this project:

  • Poppy Parade – 5-1/2″ x 8-1/2″ card base scored at 4-1/4″
  • Basic Black – 3-7/8″ x 5-1/8″ (front mat), 1″ x 3-1/4″ (label)
  • Basic White – 3-3/4″ x 5″ (inside panel), 2″ x 5″ (poppy panel)
  • Flowering Fields DSP – 3-3/4″ x 5″ (front background), 2-1/8″ x 5″ (front mat), 1/2″ x 5″ (inside trim)

Stampin’ Up! products used in this project:


Stampin’ Up! Painted Poppies Thank You Card for the Happy Inkin’ Thursday Blog Hop

Good Morning! Welcome to another Happy Inkin’ Thursday Blog Hop! I made a pretty thank you card for today’s hop using the beautiful Stampin’ Up! Painted Poppies bundle along with the Peaceful Poppies designer series paper.

We have a color challenge this week, and here is the pretty color palette we are using:

My card layout was inspired by the pretty sketch in the TGIF Challenges blog, #TGIFC255 Sketch Challenge. Here is their sketch:

I cut a strip of the striped Peaceful Poppies designer series paper and adhered it to the side of a Blackberry Bliss panel with snail. I cut three of the bubble border dies from the Painted Labels dies in Blackberry Bliss card stock and adhered them together. I adhered them to the back of the floral panel of Peaceful Poppies DSP and then trimmed the ends. I adhered the panel to the Blackberry bliss panel so that it overlapped the striped paper.

I stamped the Thank You sentiment from the Peaceful Moments stamp set on a strip of Old Olive in Memento Tuxedo Black ink. I used the large label die from the Merry Christmas Dies to cut out the sentiment. I stamped the small poppy and three leaves from the Stampin’ Up! Painted Poppies stamp set on a Whisper White panel in Memento Tuxedo Black ink. I colored them with the Poppy Parade and Old Olive Stampin’ Blends and cut them out with the coordinating dies from the Painted Labels dies.

I adhered the label and leaves to the floral background with multipurpose liquid glue and adhered the poppy with dimensionals. I adhered the decorated panel to a Pool Party card base and finished of the front with rhinestones colored with the dark Blackberry Bliss Stampin’ Blend.

I stamped the small poppy and two leaves from the Stampin’ Up! Painted Poppies cling stamp set in Memento Tuxedo Black ink on a Whisper White panel. I used a mask to stamp the leaves after I stamped the flower. I colored the leaves with the Old Olive Stampin’ Blends and the flower with the Poppy Parade Stampin Blends. I trimmed the bottom with a strip of the floral Peaceful Poppies DSP and adhered it to the inside of the card.

On with the Hop! Click the Next button below to visit Karen Ksenzakovic’s blog.

And just in case you get lost along the way, here’s a list of the team members participating in the hop today:


March 16 – 31 Host Code: RSAF3R27

Use this host code when you order $50 or more and receive a free gift from me!  The gift is your choice of any item valued up to $10.00 in the 2019-20 Annual Catalog or in the 2020 January-June Mini Catalog!  That includes some of the Host Exclusive stamp sets!

If your order is over $150, please do not use the host code since you’ll receive your own Host Dollars plus I’ll send you the free gift!  This host code can be used by anyone, no commitment required.  Let me know if you have any questions.


If you need any stamping supplies, I’d be very happy to be your Demonstrator.  Just click on the Shop Now button on the right side of the screen to go directly to my online store or contact me if you have any questions.  Happy Stamping!

Thanks for visiting!

Akiko

  • Visit my online store here
  • See the current Stampin’ Up! clearance rack specials here
  • Earn FREE Stampin’ Up! products through my Wildflower Frequent Shopper Program – my way of saying thank you to my frequent shopper online customers.
  • Sign up for my weekly newsletter here
  • Have any questions? I’d be happy to help, click here to contact me.

Cardstock Cuts for this project:

  • Pool Party – 4-1/4″ x 11″ card base scored at 5-1/2″
  • Blackberry Bliss – 4″ x 5-1/4″ (front mat), (3) 1″ x 3-1/2″ (die cuts)
  • Old Olive – 1-1/2″ x 3-1/2″ (label)
  • Whisper White – 4″ x 5-1/4″ (inside panel) 2″ x 4-1/2″ (die cut flowers and leaves)
  • Peaceful Poppies DSP – 1″ x 5-1/8″ (stripe), 3-1/4″ x 5-1/8″ (floral panel), 1/2″ x 4″ (inside floral strip)

Stampin’ Up! products used in this project:


Stampin’ Up! Peaceful Moments Thank You Card Video Tutorial

Good Morning! Today I am sharing a video tutorial that I made yesterday during my Sunday Facebook Live session. I made a Thank You Card with the pretty Stampin’ Up! Peaceful Moments and Painted Poppies bundles. You can find the supplies used to create this card at the bottom of my post along with the sizes of cardstock used. Here is my card:

And here’s the Facebook Live video:

I also posted the video to YouTube and you can view it here if you prefer.

I started by inking up my Coastal Weave Embossing Folder with Soft Sea Foam ink using the ink pad directly to the embossing folder. I carefully positioned a Whisper White panel in the embossing folder, closed it and ran it through the die cutting machine. This gave me the embossed panel with touches of Soft Sea Foam ink in the creases. I adhered the embossed panel to a Grapefruit Grove card base. I cut a Whisper White panel with the flower trellis die from the Wild Roses dies and adhered it to the lower part of the embossed panel with multipurpose liquid glue.

I die cut the flowers and leaves from the Peaceful Poppies dies and assembled them with multipurpose liquid glue. I cut the solid flowers from Petal Pink, the outline flowers from Grapefruit Grove and the centers from Calypso Coral. I cut the solid Leaves from Soft Sea Foam and the accent parts from Mint Macaron. I arranged the flowers and leaves on the card on top of the trellis and adhered all but the large flower with multipurpose liquid glue. I adhered the large flower with dimensionals.

I stamped the sentiment from the Stampin’ Up! Peaceful Moments stamp set in Mint Macaron ink on a panel of Soft Sea Foam. I cut it out with the small label die from the Painted Labels dies and adhered it to the card with dimensionals. I used the small spatter stamp from the Painted Poppies stamp set to stamp Calypso Coral ink on a length of Whisper White Crinkle Seam Binding ribbon to give it some color. I made a bow and attached it under the flowers with glue dots. I finished the card with three Petal Pink sequins.

On the inside of the card I stamped three flowers from the Painted Poppies stamp set in Calypso Coral ink after stamping off on a panel of Whisper White. I used the splotch stamp from the set to color the poppies in Petal Pink ink. I stamped three leaves in Mint Macaron after stamping off and then adhered it to the inside of the card with snail. I stamped a Whisper White envelope the same way as the inside panel.


Tomorrow is the last day to sign up for the March 2020 Paper Pumpkin kit!

The theme is No Matter the weather and it celebrates a Paper Pumpkin milestone: our seventh year of delivering fun, easy, creative projects. To thank everyone who has helped us along the way, we’re including an additional FREE stamp set with every March kit. This means that every subscriber will receive two stamp sets! 

The March 2020 kit will arrive in an exclusive, specially-designed box that subscribers will love! Think daffodils, raindrops, and a fresh spring vibe.

Here are the Details:

  • Kit contains supplies for 12 cards and envelopes (4 cards of 3 designs)
  • Notecard size: 5″ x 3-1/2″ (12.7 x 8.9 cm)
  • Envelope size: 5-1/8″ x 3-5/8″ (13 x 9.2 cm)
  • The additional stamp set coordinates with the March kit design; however, you do not need it to complete the March cards.
  • The additional stamp set is a 4×6 footprint, which is larger than most Paper Pumpkin sets and is designed for use on a variety of crafting projects.

Coordinating Colors: Balmy Blue, Basic Gray, Calypso Coral, Grapefruit Grove, Gray Granite, Pear Pizzazz, Petal Pink, Shaded Spruce, and So Saffron

If you’re interested in subscribing to Paper Pumpkin, you can either sign up for a subscription where you are billed monthly for your kit or you can purchase a prepaid subscription in my online store. To see more information and to sign up for the monthly subscription click here. To see the options for prepaid subscriptions in my online store, click here.

As a bonus during Sale-A-Bration, purchasing a 3-month or longer prepaid subscription qualifies for FREE Sale-A-Bration products!

Sign up deadline for the March 2020 kit is tomorrow.


March 1 – 15 Host Code: BQCVV2RG

Use this host code when you order $50+ and receive a free gift from me!  If your order is over $150, please do not use this code, but you’ll still get the free gift.  The free gift is your choice of any item valued up to $10.00 in the 2019 – 2020 Annual Catalog or in the 2020 Mini Catalog!  That includes some of the Host Exclusive stamp sets!

If your order is over $150, please do not use the host code since you’ll receive your own Host Dollars plus I’ll send you the free gift!  This host code can be used by anyone, no club or commitment required.  Let me know if you have any questions.


If you need any stamping supplies, I’d be very happy to be your Demonstrator.  Just click on the Shop Now button on the right side of the screen to go directly to my online store or contact me if you have any questions.  Happy Stamping!

Thanks for stopping by and have a great week!

Akiko

  • Visit my online store here
  • See the current Stampin’ Up! clearance rack specials here
  • Earn FREE Stampin’ Up! products through my Wildflower Frequent Shopper Program – my way of saying thank you to my online frequent shopper customers.
  • Sign up for my weekly newsletter here
  • Have any questions? I’d be happy to help, click here to contact me.

Cardstock Cuts for this project:

  • Grapefruit Grove – 5-1/2″ x 8-1/2″ card base scored at 4-1/4″, 3″ x 4-1/2″ (flower die cuts)
  • Petal Pink – 3″ x 4-1/2″ (flower die cuts)
  • Calypso Coral – 1-1/2″ x 3″ (flower center die cuts)
  • Soft Sea Foam – 2-1/2″ x 3″ (leaf die cuts), 2-1/2″ x 3-1/2″ (label)
  • Mint Macaron – 2-1/2″ x 3″ (leaf die cuts)
  • Whisper White – (2) 4″ x 5-1/4″ (inside panel and embossed background), 1-1/2″ x 5 1/4″ (trellis die cut)

Stampin’ Up! products used in this project:


Stampin’ Up! Painted Poppies You Mean So Much Card

Good Morning and Happy Friday! I have another card today made with the beautiful Stampin’ Up! Painted Poppies stamp set. You can find the supplies used to create this card at the bottom of my post along with the sizes of cardstock used.

I embossed a panel of Poppy Parade card stock with the Scripty embossing folder. I adhered it to a Basic Black mat with snail and then to a Poppy Parade card base with dimensionals.

I stamped the Poppy and bud from the Stampin’ Up! Painted Poppies stamp set in Memento Tuxedo Black ink on a panel of Thick Whisper White. I colored it with the Poppy Parade and Old Olive Stampin Blends. I cut it out with the large label from the Painted Labels dies. The Painted Labels dies come bundled with the Stampin’ Up! Painted Poppies stamp set for a 10% discount. I adhered it to the card front with dimensionals.

I stamped the sentiment from the Forever Blossoms stamp set using Versamark Ink on a strip of Basic Black. I sprinkled it with White Embossing powder and heat set. I trimmed the end and adhered it to the panel with glue dots. I finished off the card front with three rhinestones.

I embossed a strip of Poppy Parade with the Scripty embossing folder and adhered it to the side of a Whisper White panel. I adhered the panel to a Basic Black mat and then to the inside of the card.

It’s funny because when I first envisioned this card, I wanted to do a White on White theme with the red poppy making a big contrast. As I pulled it together, first the card base turned red, then the mats turned black and finally the embossed background turned red. Oh Well – but I do like how it turned out. We’ll have to do White on White another day. Have a great weekend!!


February 16 – 29 Host Code: KFK3RZHV

Use this host code when you order $50 or more and receive a free gift from me!  The gift is your choice of any item valued up to $10.00 in the 2019-20 Annual Catalog or in the 2019 Holiday Catalog!  That includes some of the Host Exclusive stamp sets!

If your order is over $150, please do not use the host code since you’ll receive your own Host Dollars plus I’ll send you the free gift!  This host code can be used by anyone, no commitment required.  Let me know if you have any questions.


If you need any stamping supplies, I’d be very happy to be your Demonstrator.  Just click on the Shop Now button on the right side of the screen to go directly to my online store or contact me if you have any questions.  Happy Stamping!

Thanks for stopping by and have a great day!

Akiko

  • Visit my online store here
  • See the current Stampin’ Up! clearance rack specials here
  • Earn FREE Stampin’ Up! products through my Wildflower Frequent Shopper Program – my way of saying thank you to my frequent shopper online customers.
  • Sign up for my weekly newsletter here
  • Have any questions? I’d be happy to help, click here to contact me.

Cardstock Cuts for this project:

  • Poppy Parade – 4 1/4″ x 11″ scored at 5 1/2″ (card base), 3 3/4″ x 5″ (embossed background), 1/2″ x 5″ (embossed inside trim)
  • Basic Black – (2) 3 7/8″ x 5 1/8″ (mats), 1/4″ x 4″ (label)
  • Whisper White – 3 3/4″ x 5″ (inside panel)
  • Thick Whisper White – 3″ x 4″ (flower label)

Stampin’ Up! products used in this project:


Stampin’ Up! Peaceful Moments with Painted Poppies Birthday Card

Good Morning! Today I am sharing a video that I did yesterday during my Sunday Facebook Live session. I made a pretty birthday card using stamps and designer series paper from the Stampin’ Up! Peaceful Poppies suite. This includes the Stampin’ Up! Painted Poppies stamp set and the Stampin’ Up! Peaceful Moments stamp set.

Here’s the Facebook Live video showing how to make this pretty card:

I also posted the video to my YouTube channel and you can view it here.

I CASE’d today’s card from one that my upline, Amy Koenders made for one of our Blog Hops. Here’s Amy’s original card. I love this card sketch (that she also designed), because the top layer is wider than the bottom layer and it is unexpected, yet interesting and pleasing to the eye. And it’s also a great way to easily show off pretty designer series paper to make a simple card that doesn’t look too simple.

I adhered the two panels of the Stampin’ Up! Peaceful Poppies designer Series Paper to Old Olive mats with snail. Then I stamped the background of the Poppy Parade card base with the flower and leaf stamp from the Stampin’ Up! Painted Poppies stamp set using Poppy Parade ink, giving it a tone on tone look. I adhered the layered stripe panel to the card base with snail and the flower panel on top with dimensionals.

I stamped the Happy Birthday sentiment from the Stampin’ Up! Peaceful Moments stamp set in Memento Tuxedo Black ink on a Whisper White panel and cut it out with the second smallest scalloped rectangle die from the Stitched So Sweetly dies. I adhered it to the floral panel with glue dots and finished off the card front with Peaceful Poppy sequins.

I decorated the inside of the card by stamping the sentiment from the Stampin’ Up! Peaceful Moments stamp set in Memento Tuxedo Black ink on a panel of Whisper White. I stamped the poppy flower from the Stampin’ Up! Painted Poppies stamp set in the lower corner in black and used the large spatter stamp to ‘paint’ the flower in Poppy Parade. I used the small spatter stamp next to it in Granny Apple Green ink. I trimmed the bottom with a strip of the Peaceful Poppies DSP and adhered to the inside of the card.

All the components of the Peaceful Poppies suite are pretty, making it so easy to quickly make an attractive handmade card that will bring smiles all around.


February 16 – 29 Host Code: KFK3RZHV

Use this host code when you order $50+ and receive a free gift from me!  If your order is over $150, please do not use this code, but you’ll still get the free gift.  The free gift is your choice of any item valued up to $10.00 in the 2018-19 Annual Catalog or in the 2019 Occasions Catalog!  That includes some of the Host Exclusive stamp sets!

If your order is over $150, please do not use the host code since you’ll receive your own Host Dollars plus I’ll send you the free gift!  This host code can be used by anyone, no club or commitment required.  Let me know if you have any questions.


If you need any stamping supplies, I’d be very happy to be your Demonstrator.  Just click on the Shop Now button on the right side of the screen to go directly to my online store or contact me if you have any questions.  Happy Stamping!

Thanks for stopping by and have a great week!

Akiko

  • Visit my online store here
  • See the current Stampin’ Up! clearance rack specials here
  • Earn FREE Stampin’ Up! products through my Wildflower Frequent Shopper Program – my way of saying thank you to my frequent shopper online customers.
  • Have any questions? I’d be happy to help, click here to contact me.

Cardstock Cuts for this project:

  • Poppy Parade – 4 1/4″ x 11″ scored at 5 1/2″ (card base)
  • Old Olive – 2 7/8″ x 3 3/8″, 2 3/8″ x 3 7/8″ (mats)
  • Whisper White – 3 3/4″ x 5″ (inside panel), 2″ x 3″ (label)
  • Peaceful Poppies DSP – 2 3/4″ x 3 1/4″ (stripes panel), 2 1/4″ x 3 3/4″ (floral panel)

Stampin’ Up! products used in this project:


Stampin’ Up! Painted Poppies You are the Best Card

Good Morning and Happy Valentine’s Day! Today’s card is made with the beautiful and versatile Stampin’ Up! Painted Poppies stamp set. You can find the supplies used to create this card at the bottom of my post along with the sizes of cardstock used.

I stamped the small poppy field stamp from the Stampin’ Up! Painted Poppies stamp set in Memento Tuxedo Black ink on thick Whisper White card stock. I stamped twice so that the flowers would go across the panel. I cut out the panel with the largest scalloped rectangle from the Stitched So Sweetly dies. I colored the flowers with the light Poppy Parade Stampin’ Blend.

I cut a panel of Gray Granite card stock with the third largest Stitched Rectangle die and ran it through the Stone embossing folder. The Stone embossing folder is a Sale-A-Bration item that comes in the Power of Hope bundle that is FREE with a $100 purchase. I adhered the stamped thick Whisper White panel over the embossed panel with dimensionals. I adhered the embossed panel over a Poppy Parade card base with dimensionals.

I stamped the sentiment from the Varied Vases stamp set in Memento Tuxedo Black ink on a strip of Poppy Parade card stock. I cut out the label using the long thin Stitched Rectangle die using the two-step partial die cutting method so that it would be long enough for the entire sentiment. I adhered it to the poppy panel with glue dots. I colored some basic pearls with my dark Basic Black Stampin’ Blend and added them to the panel to finish it off.

I stamped the middle section of the small poppy field stamp from the Stampin’ Up! Painted Poppies stamp set across a strip of Whisper White. I colored the flowers with the Light Poppy Parade Stampin’ Blend and adhered it to the bottom of a Whisper White panel. I adhered the panel to a Gray Granite mat and then to the inside of the card.

The Stampin’ Up! Painted Poppies stamp set is so versatile because it has so many different poppy images that can be used to make pretty cards. I hope you try this simple design.


Stampin’ In The Meadows Online Host Club Opening in March

A quick reminder that there are openings in the Stampin’ In The Meadows Online Host club beginning March 1. See my Stampin’ In The Meadows Online Host Club page or email me at apsudano@stampininthemeadows.com for more details.


Double Wildflower Points Ordering Bonus

Tomorrow is the last day for my DOUBLE Wildflower Points Bonus. If you don’t know about my Wildflower Frequent Shopper program, are the highlights on how it works:

  • For each $50 that you order from my online store (before S & H) you will earn one Wildflower point.
  • You will earn one Wildflower point for each friend that you refer when they place their first order of $50+ from my online store.
  • When you have earned 8 Wildflower points you will get a FREE product order valued up to $40.00, your choice and mailed directly to you!

With DOUBLE points you get 2 points for each $50 order, 4 points for each $100 order, and so on, reaching your FREE order faster!!

This offer ends TOMORROW.

For complete details on my Wildflower Frequent Shopper Program, scroll to the bottom of my Customer Rewards page or contact me at apsudano@stampininthemeadows.com.


This image has an empty alt attribute; its file name is 01.01.20_sab_cmain_us.jpg

Stampin’ Up! Sale-A-Bration is going on now!

Stampin’ Up!’s spectacular Sale-A-Bration is entering its second month. There are three ways to enjoy Sale-A-Bration benefits: Shop – Host – Join.

Sale-A-Bration Shopping Benefits

This image has an empty alt attribute; its file name is 12-01-19_sab_demoshare_shop_us_th.jpg

You earn FREE products for every $50 you spend (before shipping and taxes) during Sale-A-Bration. The Sale-A-Bration brochure has the products that you can choose to add to your order. And the more you spend, the more FREE products you can earn. There are two qualifying levels with spending thresholds, giving you flexibility to choose what you want.

This image has an empty alt attribute; its file name is sale-a-bration-levels.jpeg

For example, if you spend $150, then you can then choose three level 1 items or one level 1 and one level 2.

Head over to my online store to shop now.

See the current Sale-A-Bration Joining and Hosting specials on my Promotions page. These are available through March 31, 2020.


February 1 – 15 Host Code: ZSQEMEKE

Use this host code when you order $50 or more and receive a free gift from me!  The gift is your choice of any item valued up to $10.00 in the 2019-20 Annual Catalog or in the 2020 January-June Mini Catalog!  That includes some of the Host Exclusive stamp sets!

If your order is over $150, please do not use the host code since you’ll receive your own Host Dollars plus I’ll send you the free gift!  This host code can be used by anyone, no commitment required.  Let me know if you have any questions.


If you need any stamping supplies, I’d be very happy to be your Demonstrator.  Just click on the Shop Now button on the right side of the screen to go directly to my online store or contact me if you have any questions.  Happy Stamping!

Thanks for stopping by and have a great day!

Akiko

  • Visit my online store here
  • See the current Stampin’ Up! clearance rack specials here
  • Earn FREE Stampin’ Up! products through my Wildflower Frequent Shopper Program – my way of saying thank you to my frequent shopper online customers.
  • Sign up for my weekly newsletter here
  • Have any questions? I’d be happy to help, click here to contact me.

Cardstock Cuts for this project:

  • Poppy Parade – 5 1/2″ x 8 1/2″ scored at 4 1/4 (card base), 1 1/2″ x 3″ (label)
  • Grey Granite – 3 1/4″ x 4 1/2″ (embossed front panel), 3 7/8″ x 5 1/8″ (inside mat)
  • Whisper White – 3 3/4″ x 5″ (inside panel), 1/2″ x 5″
  • Thick Whisper White – 3″ x 4″ (poppy panel)

Stampin’ Up! products used in this project:


Stampin’ Up! Peaceful Poppies Thinking of You Card

Good Morning! Today I am sharing a video that I did yesterday during my Sunday Facebook Live session. The Stampin’ Up! Peaceful Poppies designer series paper has a sheet that makes the most beautiful full page card front, and you can make the simplest beautiful card with it.

Here’s the Facebook Live video showing how to make this pretty card:

I also posted the video to my YouTube channel and you can view it here.

In the video, I made the card backwards, making the inside first and then the card front. I started by stamping the poppy and bud stamp from the Stampin’ Up! Painted Poppies stamp set in Memento Tuxedo Black ink on a Whisper White panel. I colored the flowers with the Poppy Parade Stampin Blends and the stems and leaves with the Old Olive Stampin Blends. I used the large spatter stamp from the Painted Poppies stamp set to decorate the bottom of the panel with Blackberry Bliss and Poppy Parade inks after stamping off. I adhered it to an Old Olive mat and then to the inside of the Blackberry Bliss card base.

I trimmed the pretty panel of Stampin’ Up Peaceful Poppies DSP with an Old Olive mat. I tied a length of Blackberry Bliss twine around the panel and made a bow. I pre-made a label using the sentiment from the Peaceful Moments stamp set and dies from the Painted Frames die set. I decorated the label with Peaceful Poppies sequins and an Old Olive die cut and popped it on the card front with dimensionals over the twine. I popped the panel on the card base with dimensionals and finished it off with more Peaceful Poppies sequins.

The Stampin’ Up! Peaceful Poppies designer series paper is beautiful and with the Peaceful Moments and Painted Poppies bundles, the possibilities are endless. And this paper in the DSP pack is so artistic and pretty that it makes a statement on its own so that you can create a stunning card quick and easy.


January 1 – 15 Host Code: FB6MBVE3

Use this host code when you order $50+ and receive a free gift from me!  If your order is over $150, please do not use this code, but you’ll still get the free gift.  The free gift is your choice of any item valued up to $10.00 in the 2018-19 Annual Catalog or in the 2019 Occasions Catalog!  That includes some of the Host Exclusive stamp sets!

If your order is over $150, please do not use the host code since you’ll receive your own Host Dollars plus I’ll send you the free gift!  This host code can be used by anyone, no club or commitment required.  Let me know if you have any questions.


If you need any stamping supplies, I’d be very happy to be your Demonstrator.  Just click on the Shop Now button on the right side of the screen to go directly to my online store or contact me if you have any questions.  Happy Stamping!

Thanks for stopping by and have a great week!

Akiko

  • Visit my online store here
  • See the current Stampin’ Up! clearance rack specials here
  • Earn FREE Stampin’ Up! products through my Wildflower Frequent Shopper Program – my way of saying thank you to my frequent shopper online customers.
  • Have any questions? I’d be happy to help, click here to contact me.

Cardstock Cuts for this project:

  • Blackberry Bliss – 4 1/4″ x 11″ scored at 5 1/2″ (card base)
  • Old Olive – (2) 4″ x 5 1/4″ (mats), 1/2″ x 3″ (label trim)
  • Whisper White – 3 7/8″ x 5 1/8″ (inside panel)
  • Thick Whisper White – 2″ x 3 1/4″ (label)
  • Peaceful Poppies DSP – 3 7/8″ x 5 1/8″

Stampin’ Up! products used in this project:


Stampin’ Up! Painted Poppies Congratulations Card Sneak Peek

Good Morning! Today I have a sneak peek of the new Stampin’ Up! Painted Poppies bundle that will be in the new January – June 2020 Mini Catalog. The bundle has the Painted Poppies cling stamp set which has pretty line images of poppy flowers and leaves with additional artistic stamps that can be used to color the flowers with artistic flair. The bundle also has the Painted Labels dies which has dies for some labels labels as well as for cutting out the larger poppies and leaves. You can find the supplies used to create this card at the bottom of my post along with the sizes of cardstock used.

The layout for this card was inspired by Hand Stamped Sentiments Sketch Challenge #329.

I started with mounting a panel of the pretty Peaceful Poppies Designer Series Paper on a Blackberry Bliss mat. I wrapped a length of Real Red ribbon around it and secured it in the back with snail and scotch tape. I cut out the large swirl from Old Olive card stock using the Painted Labels dies and adhered it to the panel with liquid glue.

I stamped the large poppy flower and small poppy flower from the Stampin’ Up! Painted Poppies stamp set on Whisper White card stock using Memento Tuxedo Black ink. I colored them with the Poppy Parade Stampin’ Blends and cut them out with the coordinating dies from the Painted Labels dies. I stamped 4 leaves in Old Olive ink on Whisper White and colored them with the Light Old Olive Stampin’ Blend. I cut them out with coordinating dies.

I arranged the flowers and leaves and adhered them together with liquid glue. I adhered them to the panel with dimensionals. I made a bow from the Real Red Ribbon and adhered it next to the flowers. I stamped the Congratulations sentiment from the Flourishing Phrases stamp set in VersaMark ink on a strip of Blackberry Bliss card stock. I sprinkled it with white embossing powder and heat set. I trimmed the end. I adhered the label to a thin strip of Old Olive card stock and then to the floral panel with multipurpose liquid glue. I adhered the floral panel to a Thick Whisper White card base with dimensionals.

I decorated the inside by stamping the poppy with stem and leaves from the Stampin’ Up! Painted Poppies stamp set in Memento Tuxedo Black on a Whisper White panel. I adhered a strip of the Peaceful Poppies DSP to the bottom of the panel with multipurpose liquid glue. I adhered the panel to a Blackberry Bliss mat and then to the inside of the card with multipurpose liquid glue.

The Stampin’ Up! Painted Poppies stamp bundle is part of the Peaceful Poppies suite which is prominently featured on the cover of the January – June 2020 Mini Catalog.


Stampin’ Up! January – June 2020 Mini Catalog and Sale-A-Bration Coming in January!

This image has an empty alt attribute; its file name is stampin-up-2020-jan-jun-mini-catalog-stampininthemeadows.com_.jpg
This image has an empty alt attribute; its file name is stampin-up-on-stage-stampininthemeadows.com-07.jpg

I ordered catalogs for my customers last week, and I messed up and did not get expedited shipping, but do I expect to get them tomorrow.  So if you placed an order with me, I will send you one via priority mail as soon as I get them packed up!

If you have not placed an order with me but want to be on my mailing list for the new catalogs too, simply place an order through my online store by next tomorrow and you’ll automatically be added to my mailing list to get your catalogs ASAP!

The new January – June 2020 Mini Catalog and Sale-A-Bration will be open for ordering on January 3, 2020.


December 1 – 15 Host Code: R497392Q

Use this host code when you order $50 or more and receive a free gift from me!  The gift is your choice of any item valued up to $10.00 in the 2019-20 Annual Catalog or in the 2019 Holiday Catalog!  That includes some of the Host Exclusive stamp sets!

If your order is over $150, please do not use the host code since you’ll receive your own Host Dollars plus I’ll send you the free gift!  This host code can be used by anyone, no commitment required.  Let me know if you have any questions.


If you need any stamping supplies, I’d be very happy to be your Demonstrator.  Just click on the Shop Now button on the right side of the screen to go directly to my online store or contact me if you have any questions.  Happy Stamping!

Thanks for stopping by and have a great week!

Akiko

  • Visit my online store here
  • See the current Stampin’ Up! clearance rack specials here
  • Earn FREE Stampin’ Up! products through my Wildflower Frequent Shopper Program – my way of saying thank you to my frequent shopper online customers.
  • Sign up for my weekly newsletter here
  • Have any questions? I’d be happy to help, click here to contact me.

Cardstock Cuts for this project:

  • Thick Whisper White – 5 1/2″ x 11″ scored at 4 1/4″ (card base)
  • Blackberry Bliss – (2) 3 7/8″ x 5 1/8″ (mats), 1/2″ x 3 1/4″ (label)
  • Whisper White – 3 3/4″ x 5″ (inside panel), 2 1/4″ x 4″ (flower die cuts), 2″ x 3″ (leaf die cuts)
  • Old Olive – 3 1/4″ x 3 1/4″ (die cut swirl), 1/4″ x 3 1/2″ (label)
  • Peaceful Poppies DSP – 3 3/4″ x 5″ (front panel), 1/2″ x 5″ (inside decoration)

Stampin’ Up! products used in this project: