Stampin’ Up! Dragonfly Garden Sneak Peek

Good morning! I enjoyed attending the Stampin’ Up! OnStage@Home event this past weekend. Even though it was virtual this year, it was fun to play with some new products and it was informative too! We got to see the new products from the upcoming January – June 2021 Mini Catalog and Sale-A-Bration that all starts on January 5, 2021. So today I am giving you a sneak peek by sharing the Stamp & Share projects I made during OnStage with the Stampin’ Up! Dragonfly Garden bundle and the beautiful Dandy Garden 6″ x 6″ designer series paper. You can find the currently available supplies used to create these cards at the bottom of my post along with the sizes of cardstock used.

This first card uses the Misty Moonlight shades of the beautiful Dandy Garden 6″ x 6″ designer series paper (available Jan 5, 2021). I stamped the small dragonflies from the Stampin’ Up! Dragonfly Garden cling stamp set (available Jan 5, 2021) on one side of a Whisper White panel using Bumblebee ink and then I randomly stamped the large dragonflies in Misty Moonlight ink. I stamped the wings in Bumblebee ink on the large dragonflies and adhered the striped Dandy Garden DSP (available Jan 5, 2021) strip across the panel. I adhered the panel to the front of a Misty Moonlight card base and adhered the two vertical strips of Dandy Garden DSP (available Jan 5, 2021). I stamped the sentiment in Misty Moonlight ink and the dragonfly wings in Bumblebee ink on a small Bumblebee panel. I wrapped it in Misty Moonlight/Silver/White twine and made a bow and popped it on the card front with dimensionals. I used the Dragonflies punch (available Jan 5, 2021) to punch a Misty Moonlight dragonfly from the Dandy Garden 6″ x 6″ DSP (available Jan 5, 2021). I love how the the two Misty Moonlight DSP strips look like a mat for the Bumblebee panel!

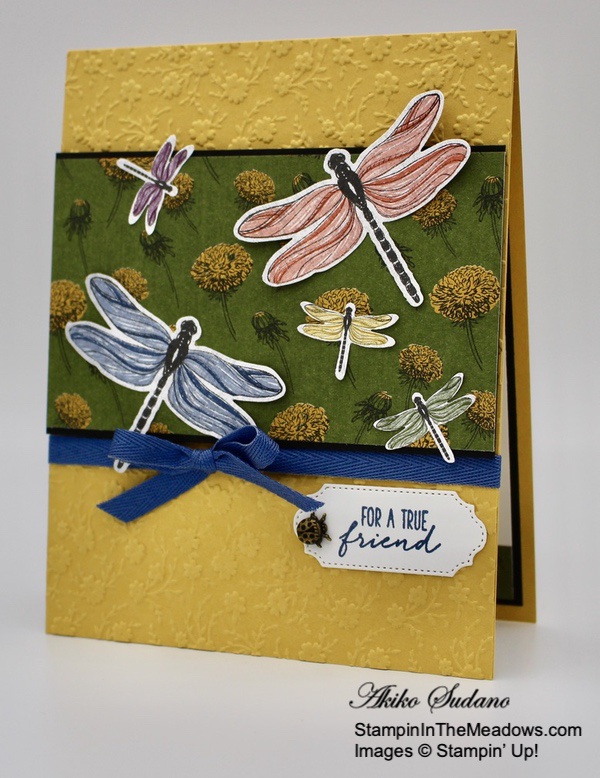
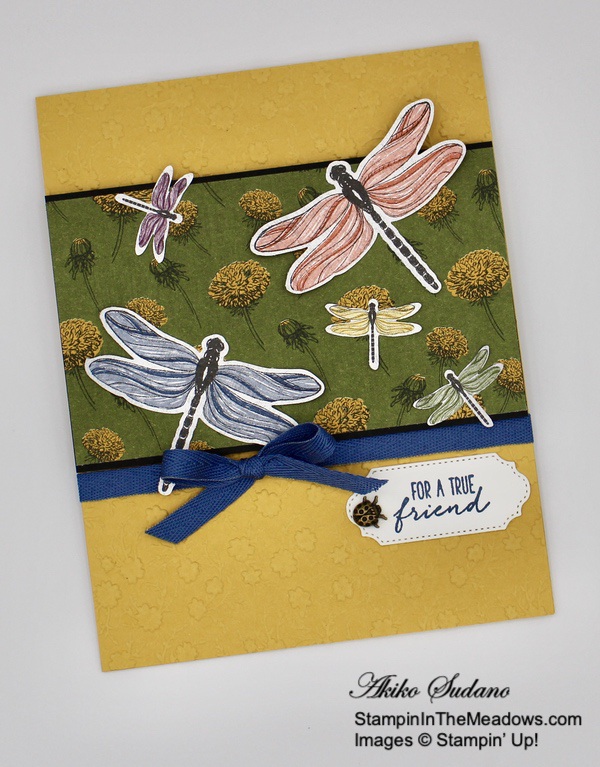
On the second card, I stamped the little dragonflies from the Stampin’ Up! Dragonfly Garden stamp set (available Jan 5, 2021) in Mossy Meadow ink in a diagonal on the front of the Mossy Meadow card base. I adhered a Bumblebee panel and adhered the Bumblebee and Mossy Meadow strips of Dandy Garden 6″ x 6″ DSP (available Jan 5, 2021) on top of the panel. I stamped the large dragonflies with Bumblebee ink and sentiment with Mossy Meadow ink on a Whisper White panel and popped it on the card front with dimensionals. I stamped another large dragonfly in Bumblebee ink on Whisper White and punched it out and popped it on the panel with dimensionals. I finished the card front with three of the cutest ladybug trinkets (available Jan 5, 2021).

On the final card I stamped the beautiful wildflowers and sentiment from the Stampin’ Up! Dragonfly Garden stamp set in Mossy Meadow ink on a Smoky Slate panel. I adhered three square panels of Dandy Garden 6″ x 6″ DSP (available Jan 5, 2021) to the side and wrapped the panel with Mossy Meadow braided linen trim (available Jan 5, 2021) and made a bow. I punched three small dragonflies from Whisper White, adhered them to the panel and popped the panel on the front of a Blackberry Bliss card base with dimensionals. I finished the card front with three rhinestone jewels.

I finished the inside of each card by stamping images from the Stampin’ Up! Dragonfly Garden stamp set to coordinate with the card fronts and trimming the bottom of the Whisper White panels with the Dandy Garden 6″ x 6″ DSP.

The card designs we made during OnStage were very different from my usual style, but I thought they were really pretty and I want to try out some of these sketches with current products for Christmas Cards! And isn’t the Stampin’ Up! Dragonfly Garden stamp bundle awesome! Be sure to look for these products out when the new January – June 2021 Mini Catalog launches on January 5, 2021.

Here are some more goodies that we got for OnStage – a great bag, cute notebooks, pen & stickers and another great sneak peek stamp set. I just love being a Stampin’ Up! Demonstrator! Contact me if you think you might be interested in joining up, and I’ll be happy to tell you more!


In celebration of the inspirational Stampin’ Up! OnStage@Home event last weekend, I am offering a Double Wildflower points ordering special through November 15.

If you don’t know about my Wildflower Points frequent shopper program, here’s how it works:

  • For each $50 that you order from my online store (before shipping) you will earn one Wildflower point.
  • You will earn one Wildflower point for each friend that you refer when they place their first order of $50+ from my online store.
  • When you have earned 8 Wildflower points you will get a FREE product order valued up to $40.00, your choice and mailed directly to you!

With DOUBLE Wildflower points you get 2 points for each $50 order, 4 points for each $100 order, and so on, reaching your FREE order faster!!

This offer ends on Sunday November 15, 2020.

For complete details on my Wildflower Rewards, scroll to the bottom of my Customer Rewards page or contact me. To start shopping now, head over to my Online Store!


FREE Bonus Curvy Celebrations Project Tutorials With Videos When You Purchase The Bundle From Me!!

You don’t have to wait for January 5 to get some of the new products from the upcoming catalog because the Quite Curvy Bundle is now available as an early release as part of Curvy Celebrations! A group of us worked together to create 5 awesome tutorials using the Curvy Celebrations special release products with videos!  You can get this set of exclusive tutorials when you purchase either the Quite Curvy Variety Bundle (item 158396) or the Quite Curvy Bundle (item 156228) from me between now and January 4!


November 1-15 Host Code: N7E9DGB9

Use this host code when you order $50 or more and receive a free gift from me!  The gift is your choice of any item valued up to $10.00 in the 2020-21 Annual Catalog or the Aug – Dec 2020 Mini Catalog. This includes some of the host exclusive sets!

If your order is over $150, please do not use the host code since you’ll receive your own Host Dollars plus I’ll still send you the free gift!  This host code can be used by anyone, no commitment required.  Let me know if you have any questions.


If you need any stamping supplies, I’d be very happy to be your Demonstrator.  Just click on the Shop Now Button on the right side of the screen to go directly to my Online store or contact me if you have any questions.  Happy Stamping!

Thanks for stopping by and have a great day!

Akiko

  • Visit my Online store here
  • See the current Stampin’ Up! clearance rack specials here
  • Earn FREE Stampin’ Up! products through my Wildflower Frequent Shopper Program – my way of saying thank you to my frequent shopper online customers.
  • Sign up for my monthly newsletter here
  • Have any questions? I’d be happy to help, click here to contact me.

Cardstock Cuts for this project:

  • Misty Moonlight Dragonfly Friendship Card
    • Misty Moonlight – 5-1/2″ x 8-1/2″ card base scored at 4-1/4″
    • Whisper White – 4″ x 5-1/4″ (front background panel), 3-3/4″ x 5″ (inside panel)
    • Bumblebee – 2″ x 2-3/4″ (art panel)
    • Dandy Garden 6″ x 6″ DSP – 1″ x 4″ (horizontal strip), two 1-1/4″ x 3-1/4″ (vertical strips), large dragonfly punch
  • Mossy Meadow Inspiration Card
    • Mossy Meadow – 5-1/2″ x 8-1/2″ card base scored at 4-1/4″
    • Whisper White – two 2-1/2″ x 3-1/2″ (punched dragonfly and art panel), 3-3/4″ x 5″ (inside panel)
    • Bumblebee – 2-3/4″ x 3-3/4″ (mat)
    • Dandy Garden 6″ x 6″ DSP – three 3/4″ x 3-3/4″ (horizontal strips – cut one from each pattern)
  • Blackberry Bliss Thank You Card
    • Blackberry Bliss – 5-1/2″ x 8-1/2″ card base scored at 4-1/4″
    • Smoky Slate – 4″ x 5-1/4″ (art panel)
    • Whisper White – 1″ x 5″ (punched dragonflies), 3-3/4″ x 5″ (inside panel)
    • Dandy Garden 6″ x 6″ DSP – three 2″ x 2″ (layered squares – cut one from each pattern)

Stampin’ Up! products used in this project:


Stampin’ Up! Dragonfly Garden Friendship Card

Good Morning! Today I want to share a sneak peek of a bundle from the upcoming January – June 2021 Mini Catalog. You see, in a week and a half, the Stampin’ Up! Annual Meeting is going to start – OnStage! But due to the pandemic, this year’s event will be virtual – OnStage@Home! Last year was the first time I went and it was so much fun, and I think that it will still be fun, even virtual. Since I signed up to attend, I was able to purchase the Stampin’ Up! Dragonfly Garden stamp set early and so I can give you can get a sneak peek of these pretty upcoming products. You can find the list of supplies supplies of currently available products I used to create this card at the bottom of my post along with the sizes of cardstock used. The Stampin’ Up! Dragonfly Garden stamp set and coordinating products will be available when the new Mini Catalog releases on January 4, 2021. Here’s my sneak peek:

I embossed a panel of Bumblebee card stock with the Ornate Floral 3D embossing folder and adhered it to the front of a Bumblebee card base. One of the new designer series paper packs in the upcoming catalog is called Dandy Garden (available Jan 4, 2021) and it’s filled with pretty dandelion florals like this one in Mossy Meadow and Bumblebee. So I adhered it to a Basic Black mat and popped it on the card front with dimensionals.

Another panel of the Dandy Garden 6″ x 6″ designer series paper pack (available Jan 4, 2021) has lots of dragonflies that fit the Dragonfly punch that is also coming in on January 4th. So I punched a bunch of dragonflies from the paper and adhered them to the card front with liquid glue. Since one of my dragonflies is blue, I wrapped a length of Misty Moonlight ribbon around the card front and made a bow.

I stamped one of the pretty sentiments from the Stampin’ Up! Dragonfly Garden stamp set (available Jan 4, 2021) in Misty Moonlight ink on a strip of Whisper White. I cut it out with one of the stitched dies from the Ornate Frames Dies and adhered it to the card front with liquid glue. I finished it with one of the cute ladybug embellishments (available Jan 4, 2021).

For the inside of the card, I stamped the dragonflies from the Stampin’ Up! Dragonfly Garden stamp set (available Jan 4, 2021) in Misty Moonlight ink in the corners of a Whisper White panel. I trimmed the bottom with a strip of the Dandy Garden DSP (available Jan 4, 2021) and adhered it to a Basic Black mat and then to the inside of the card.

Aren’t these new products cute? They will be available on January 4, 2021 when the new January-June 2021 Mini Catalog releases – a nice thing to look forward to after Christmas!


Stampin’ Up! Designer Series Paper Sale Ending October 31!

Stampin’ Up! has beautiful Designer Series Paper and during the Month of October they’re putting a select list of those on sale with a 15% discount! This is a fantastic opportunity for you to stock up and save on paper. And the sale includes some of the designs from the August-December 2020 Mini Catalog too! Get the details on my Promotions Page or click on the image above to download a printable PDF with all the selections. Click Here to shop the Designer Series Paper Sale in My Online Store now! But Hurry, this sale ends soon!


Stampin’ Up! Curvy Celebrations Coming November 3!

The Stampin’ Up! Curvy Celebrations starts on November 3, 2020 and runs through January 4, 2021. This will include the Quite Curvy bundle, which is an early release of the upcoming January – June 2021 Mini Catalog along with the Curvy Christmas stamp set and Classic Christmas 6″ x 6″ designer series paper. Click on the picture above to view PDF Flyer with all the details.


October 16-31 Host Code: 3VJWYCTP

Use this host code when you order $50 or more and receive a free gift from me!  The gift is your choice of any item valued up to $10.00 in the 2020-21 Annual Catalog or the Aug – Dec 2020 Mini Catalog. This includes some of the host exclusive sets!

If your order is over $150, please do not use the host code since you’ll receive your own Host Dollars plus I’ll still send you the free gift!  This host code can be used by anyone, no commitment required.  Let me know if you have any questions.


If you need any stamping supplies, I’d be very happy to be your Demonstrator.  Just click on the Shop Now Button on the right side of the screen to go directly to my Online store or contact me if you have any questions.  Happy Stamping!

Thanks for stopping by and have a great day!

Akiko

  • Visit my Online store here
  • See the current Stampin’ Up! clearance rack specials here
  • Earn FREE Stampin’ Up! products through my Wildflower Frequent Shopper Program – my way of saying thank you to my frequent shopper online customers.
  • Sign up for my monthly newsletter here
  • Have any questions? I’d be happy to help, click here to contact me.

Cardstock Cuts for this project:

  • Bumblebee – 4-1/4″ x 11″ card base scored at 5-1/2″, 4-1/4″ x 5-1/2″ (embossed card front)
  • Basic Black – 2-5/8″ x 4-1/4″ (front DSP mat), 4″ x 5-1/4″ (inside mat)
  • Whisper White – 3-7/8″ x 5-1/8″ (inside panel), 1″ x 2″ (label)
  • Dandy Garden DSP – 2-1/2″ x 4-1/4″ (front DSP strip), 1/2″ x 3-7/8″ (inside trim)

Stampin’ Up! products used in this project:


Stampin’ Up! Curvy Celebrations Sneak Peek

Have you seen the stamps from the Stampin’ Up! Curvy Celebrations? Here’s a sneak peek – I used the Quite Curvy bundle for my card today and paired it with the Classic Christmas designer series paper and some of the sentiments from the Curvy Christmas stamp set to make a festive floral Christmas bouquet! All of these items will be available on November 3 when the Stampin’ Up! Curvy Celebrations starts! You can find the currently available supplies I used to create this card at the bottom of my post along with the sizes of cardstock used.

Adhere a panel of the Shaded Spruce Classic Christmas designer series paper (available Nov 3) to the front of a Real Red card base. Emboss a panel of Whisper White with the Parisian Flourish 3D embossing folder and adhere it to the card front.

Stamp three floral branches from the Quite Curvy photopolymer stamp (available Nov 3) set in Memento Tuxedo Black ink on Whisper White. Cut them out with the coordinating die and color them with Real Red and Granny Apple Green Stampin’ Blends. Cut four sprigs from Shaded Spruce from the Curvy Dies (available Nov 3). Adhere the arrangement to the embossed panel with liquid glue.

Stamp the bow from the Curvy Christmas photopolymer stamp (available Nov 3) set in Memento Tuxedo Black ink on Whisper White and color it wit Real Red Stampin’ Blends. Fussy cut the bow with paper snips. Stamp the sentiment from the Curvy Christmas stamp set (available Nov 3) in Real Red ink on Whisper White and cut it out with the Ornate Frames tiny tag die. Tie a piece of gold trim through the hole and adhere the tag to the card with dimensionals. Adhere the bow over the tag with dimensionals and accent the card front with red rhinestones.

Stamp the sentiment from the Curvy Christmas stamp set (available Nov 3) in Real Red ink on a Whisper White panel. Stamp the branch under the sentiment in Shaded Spruce ink and adhere a thin strip of Shaded Spruce Classic Christmas DSP (available Nov 3) to the bottom. Adhere the panel to the inside of the card.

The Stampin’ Up! Curvy Celebrations products will be available November 3 so be sure to check it out. And watch for more sneak peeks of these cute products!


Stampin’ Up! Curvy Celebrations Coming November 3!

The Stampin’ Up! Curvy Celebrations starts on November 3, 2020 and runs through January 4, 2021. This will include the Quite Curvy bundle, which is an early release of the upcoming January – June 2021 Mini Catalog along with the Curvy Christmas stamp set and Classic Christmas 6″ x 6″ designer series paper. Click on the picture above to view PDF Flyer with all the details.


Stampin’ Up! Designer Series Paper Sale Going on Now!

Stampin’ Up! has beautiful Designer Series Paper and during the Month of October they’re putting a select list of those on sale with a 15% discount! This is a fantastic opportunity for you to stock up and save on paper. And the sale includes some of the designs from the August-December 2020 Mini Catalog too! Get the details on my Promotion Page or click on the image above to download a printable PDF with all the selections. Click Here to shop the Designer Series Paper Sale in My Online Store now!


October 16-31 Host Code: 3VJWYCTP

Use this host code when you order $50 or more and receive a free gift from me!  The gift is your choice of any item valued up to $10.00 in the 2020-21 Annual Catalog or the Aug – Dec 2020 Mini Catalog. This includes some of the host exclusive sets!

If your order is over $150, please do not use the host code since you’ll receive your own Host Dollars plus I’ll still send you the free gift!  This host code can be used by anyone, no commitment required.  Let me know if you have any questions.


If you need any stamping supplies, I’d be very happy to be your Demonstrator.  Just click on the Shop Now Button on the right side of the screen to go directly to my Online store or contact me if you have any questions.  Happy Stamping!

Thanks for stopping by and have a great day!

Akiko

  • Visit my Online store here
  • See the current Stampin’ Up! clearance rack specials here
  • Earn FREE Stampin’ Up! products through my Wildflower Frequent Shopper Program – my way of saying thank you to my frequent shopper online customers.
  • Sign up for my monthly newsletter here
  • Have any questions? I’d be happy to help, click here to contact me.

Cardstock Cuts for this project:

  • Real Red – 4-1/4″ x 11″ card base scored at 5-1/2″
  • Shaded Spruce – 1-1/4″ x 4-1/2″ (leaf sprigs)
  • Whisper White – 4″ x 5-1/4″ (inside panel), 3-1/4″ x 3-3/4″ (floral branches), 3-1/4″ x 4-1/2″ (embossed panel), 1″ x 2″ (label), 1″ x 2″ (bow)
  • Classic Christmas DSP – 3-3/4″ x 5″ (front mat), 1/4″ x 4″ (inside trim)

Stampin’ Up! products used in this project:

Product List

Stampin’ Up! Curvy Christmas Sneak Peek Video Tutorial

Good Morning! Today I’m sharing a sneak peek of the Stampin’ Up Curvy Christmas stamp set that will be available as part of the Curvy Celebrations promotion starting on November 3. This will include the Quite Curvy bundle, which is an early release of the upcoming January – June 2021 Mini Catalog along with the Stampin’ Up! Curvy Christmas stamp set and Classic Christmas 6″ x 6″ designer series paper. So here is my card:

Here is the Facebook Live video giving more details on these products and showing how I made the card:

I will post an edited version of how I made the card in my YouTube channel later this week so you can view a quickie version.

Cut a panel of Shaded Spruce Card stock with the fancy curved die from the Curvy Dies that will be available November 3 and emboss it with the Subtle 3D embossing folder. Adhere it to a panel of Classic Christmas 6″ x 6″ designer series paper (available November 3). Adhere the panel to a Whisper White mat and pop it on the front of a Shaded Spruce Card base with dimensionals.

Cut a Whisper White label with the Timeless Label Punch and stamp the Merry Christmas sentiment from the Stampin’ Up! Curvy Christmas photopolymer stamp set (available November 3) in the lower corner in Cherry Cobbler ink. Adhere the label to the card front. Cut out two Cherry Cobbler flowers from the Wreath Builder Dies and adhere them together. Cut out three sprigs from the Curvy Dies (available November 3) from Whisper White card stock and adhere them to the back of the flower. Adhere the flower to the card front.

Make a bow with Whisper White crinkle ribbon and adhere it to the corner with a glue dot. Trim the flower center with yellow Holiday Rhinestones and the border with Shaded Spruce Holiday Rhinestones.

Stamp the curvy sentiment from the Stampin’ Up! Curvy Christmas stamp set (available November 3) in Cherry Cobbler ink on a Whisper White panel. Stamp the pine branch under the sentiment in Shaded Spruce ink and adhere a strip of Classic Christmas designer series paper (available November 3) to the bottom. Adhere the panel to the inside of the card.

All the products from the Stampin’ Up! Curvy Celebrations promotion will be available to customers on November 3, 2020. Demonstrators can pre-order limited quantities of these products now. Click on the picture below for a PDF flyer with all the details on these products and be on the look out for more sneak peeks!!


October 1-15 Host Code: F4UK7V36

Use this host code when you order $50 or more and receive a free gift from me!  The free gift is your choice of any item valued up to $10.00 in the 2019 – 2020 Annual Catalog or in the Aug-Dec 2020 Mini Catalog!  That includes some of the Host Exclusive stamp sets!

If your order is over $150, please do not use the host code since you’ll receive your own Host Dollars plus I’ll still send you the free gift!  This host code can be used by anyone, no club or commitment required.  Let me know if you have any questions.


If you need any stamping supplies, I’d be very happy to be your Demonstrator.  Just click on the Shop Now button on the right side of the screen to go directly to my online store or contact me if you have any questions.  Happy Stamping!

Thanks for stopping by and have a great week!

Akiko

  • Visit my online store here
  • See the current Stampin’ Up! clearance rack specials here
  • Earn FREE Stampin’ Up! products through my Wildflower Frequent Shopper Program – my way of saying thank you to my online frequent shopper customers.
  • Sign up for my weekly newsletter here
  • Have any questions? I’d be happy to help, click here to contact me.

Cardstock Cuts for this project:

  • Shaded Spruce – 4-1/4″ x 11″ card base scored at 5-1/2″, 3-3/4″ x 3-3/4″ (die cut and embossed front panel)
  • Cherry Cobbler – 1-1/2″ x 3″ (die cut flowers),
  • Whisper White – 4″ x 5-1/4″ (inside panel), 3-7/8″ x 5-1/8″ (front mat), 3/4″ x 6″ (die cut sprigs), 1-1/2″ x 2-1/2″ (punched label)
  • Celebrate Christmas DSP – 3-3/4″ x 5″ ” (front background), 1/2″ x 4″ (inside trim)

Stampin’ Up! products used in this project: