Stampin’ Up! Poinsettia Petals Christmas Card Video Tutorial

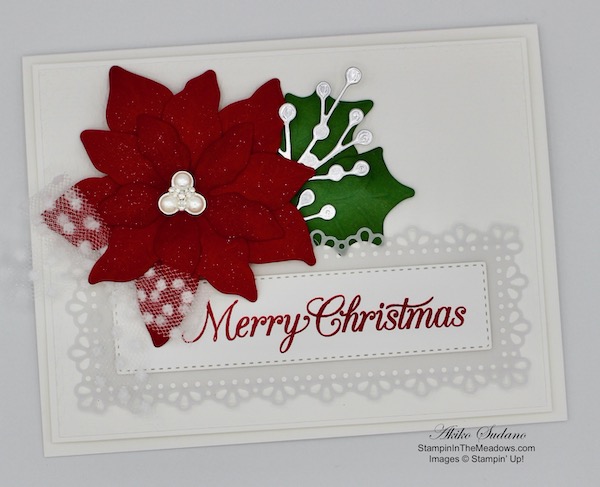
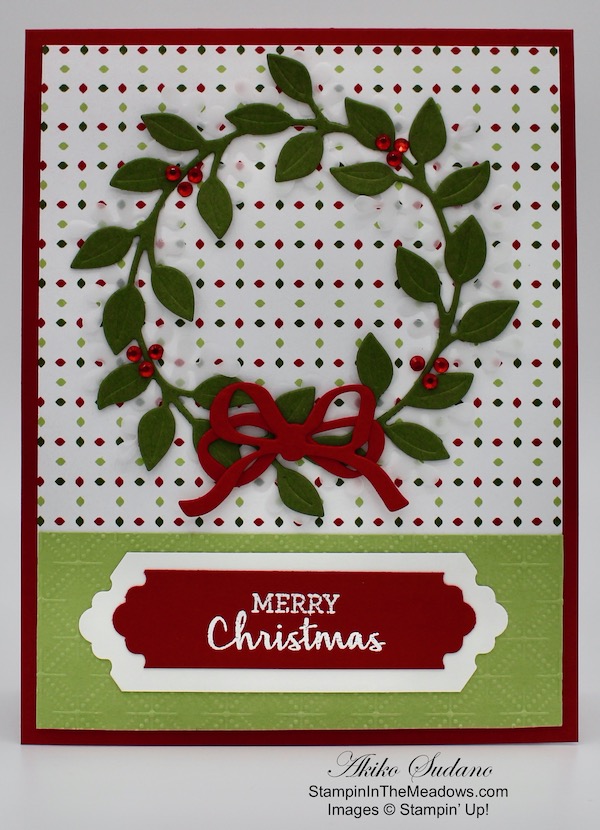
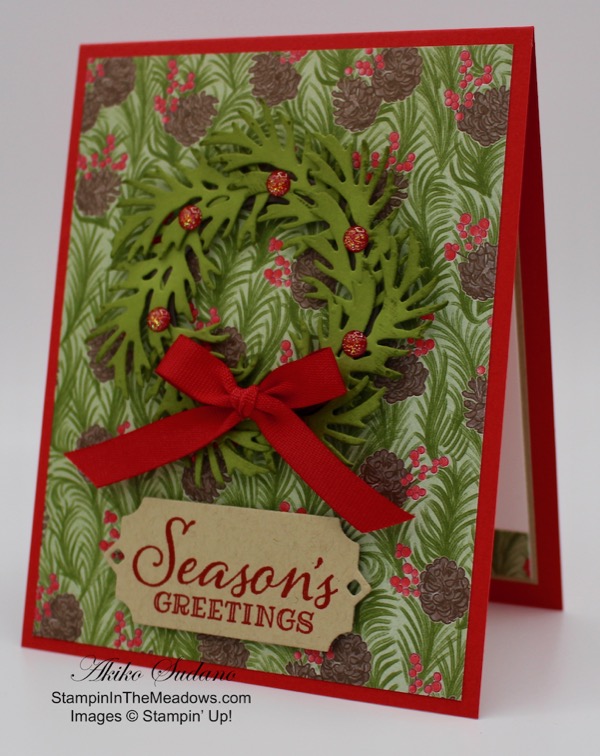
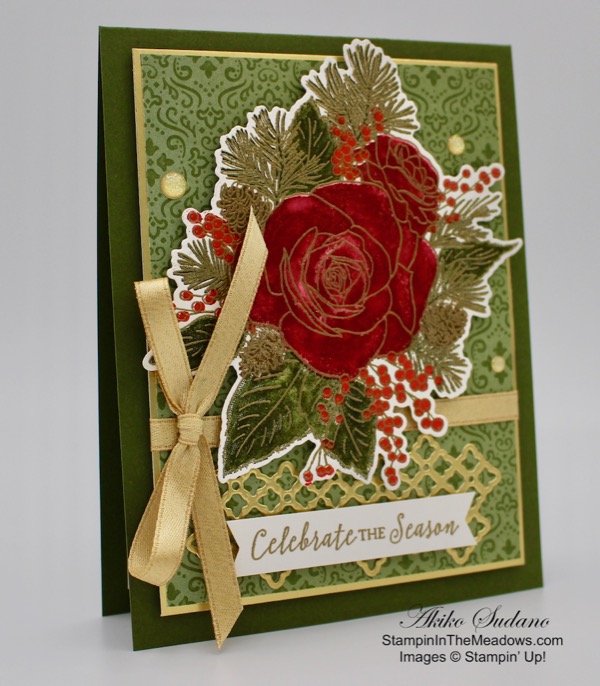
Good Morning! Today I’m sharing a Christmas card made with the Stampin’ Up! Poinsettia Petals bundle that I made during my Facebook Live video tutorial yesterday afternoon. This is hands down the best poinsettia bundle ever! You can find the supplies used to create this card at the bottom of my post along with the sizes of cardstock used.

Here is the Facebook Live video showing how I made the card:

I also posted the video to my YouTube Channel and you can view it here if you prefer.

I started by cutting three sets of petal clusters and the embossing inserts from Real Red card stock using the Poinsettia Dies that are part of the Stampin’ Up! Poinsettia Petals bundle. I also cut one each of the leaf dies with the embossing inserts from Garden Green card stock and a berry sprig from Silver Foil. I embossed a panel of Whisper White with the Tasteful Textile 3D embossing folder and adhered it to a Whisper White panel. I popped the panel on the front of a Thick Whisper White card base using dimensionals.

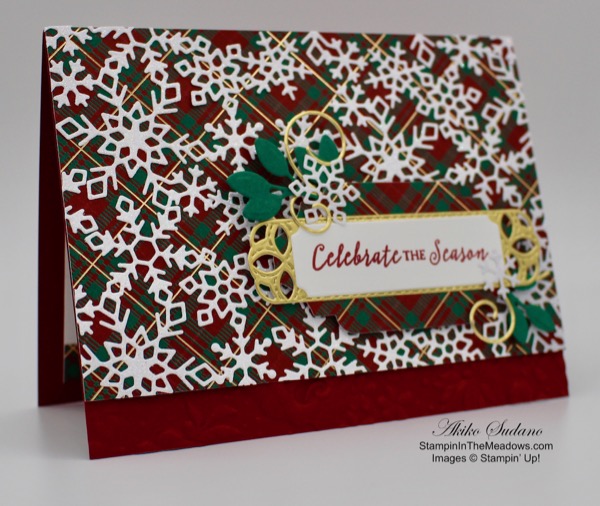
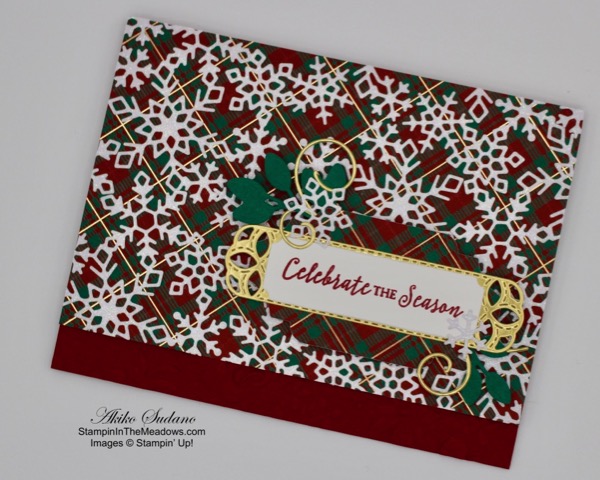
I cut out the fancy label frame from vellum using the Ornate Layers Dies. I stamped the sentiment from the Stampin’ Up! Poinsettia Petals photopolymer stamp set in Real Red ink on a strip of Whisper White and cut it out with the stitched label from the Ornate Layers Dies. I adhered the label to the vellum frame with Stampin’ Seal and then adhered it to the card front.

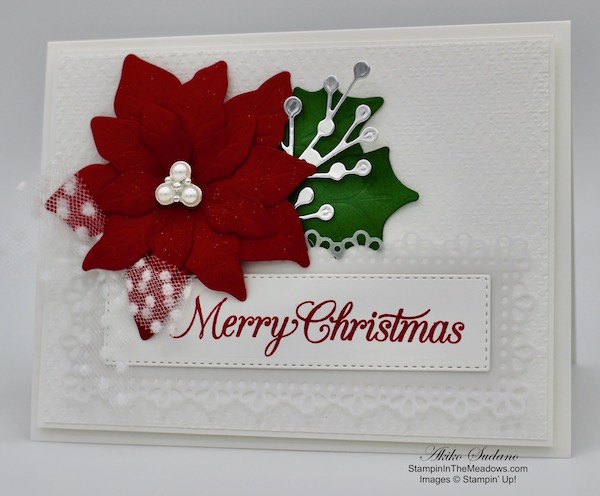
I sponged the center and edges of each of the flower petals with Real Red ink and I sponged the edges of the leaves with Garden green ink. I gently curled the flower petals under with my bone folder and adhered the layers together with glue dots. I brushed each petal with the Wink of Stella glitter brush and adhered one of the beautiful new beaded pearls to the center. I adhered the flower to the card front with glue dots. Then I adhered the leaves and silver sprigs and a polka dot tulle bow.

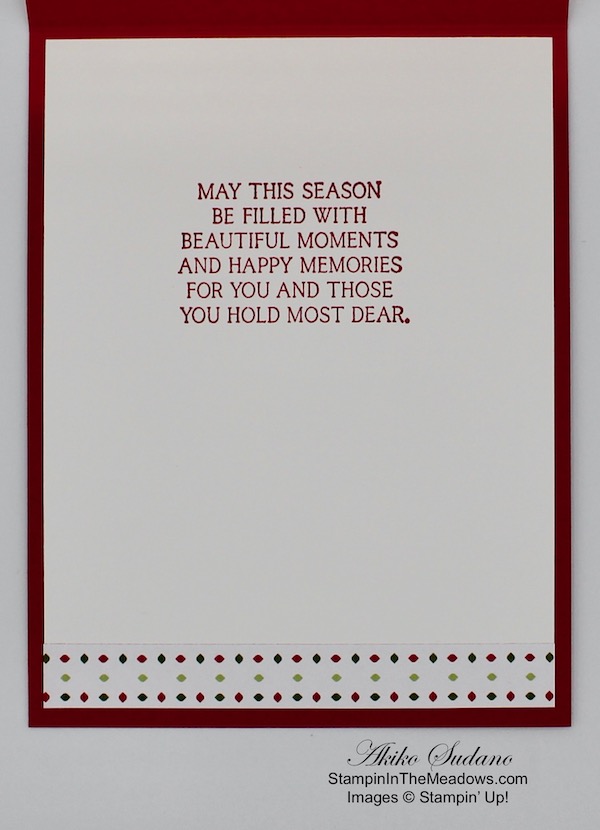
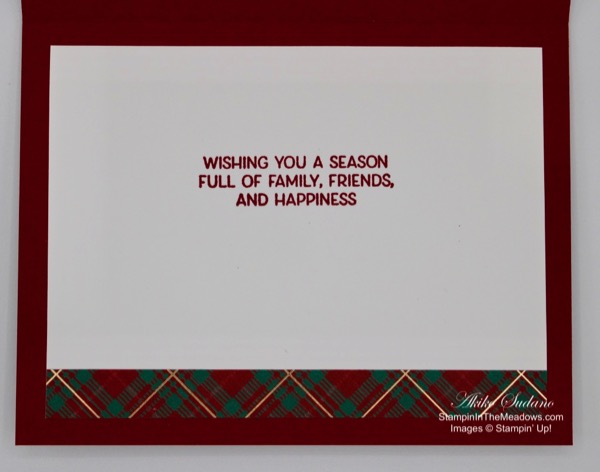
I stamped the sentiment from the Stampin’ Up! Poinsettia Petals stamp set in Real Red ink on a Whisper White panel. I stamped the poinsettia in the lower corner, also in Real Red ink and adhered the panel to the inside of the card.

Layered die cut poinsettias make the prettiest Christmas cards. But they can also be used for holiday tags, ornaments, garlands, package decorations and small bouquets. And since the petals come in clusters, they are easy for children to work with in holiday craft projects! So the Stampin’ Up! Poinsettia Petals bundle is a definite must have when the catalog opens on Tuesday, Aug 4!


Today is The Last Day to Earn Bonus Days Coupon Codes!!

It’s the last day to to earn Bonus Days coupon codes! We’ll be able to start redeeming the coupon codes tomorrow! For every $50 (before shipping and tax) you spend today, you earn a $5 USD Bonus Days coupon code that can be redeemed between August 4 and August 31. There’s no limit on how many coupon codes you can earn or redeem, but they must be redeemed by August 31. For full details, see my Promotions Page.


Tomorrow the August – December 2020 Mini Catalog is Live!!

The new Online Store will open at 7:00AM (MT) tomorrow morning with the new products from the new Aug – Dec 2020 Mini Catalog. You can review my blog post from Friday to get details on the new Online Store. If you don’t have your new catalog yet, but would like to be one of my customers, let me know and I’ll be happy to send you one. It has a boatload of great products for the holidays!


August 1 – 15 Host Code: B76NYDVU

Use this host code when you order $50 or more and receive a free gift from me!  The free gift is your choice of any item valued up to $10.00 in the 2020 – 2021 Annual Catalog or the new Aug-Dec 2020 Mini Catalog.  

If your order is over $150, please do not use the host code since you’ll receive your own Host Dollars plus I’ll still send you the free gift!  This host code can be used by anyone, no club or commitment required.  Let me know if you have any questions.


If you need any stamping supplies, I’d be very happy to be your Demonstrator.  Just click on the Shop Now button on the right side of the screen to go directly to my online store or contact me if you have any questions.  Happy Stamping!

Thanks for stopping by and have a great week!

Akiko

  • Visit my online store here
  • See the current Stampin’ Up! clearance rack specials here
  • Earn FREE Stampin’ Up! products through my Wildflower Frequent Shopper Program – my way of saying thank you to my online frequent shopper customers.
  • Sign up for my weekly newsletter here
  • Have any questions? I’d be happy to help, click here to contact me.

Cardstock Cuts for this project:

  • Thick Whisper White – 5-1/2″ x 8-1/2″ card base scored at 4-1/4″
  • Real Red – 3-1/2″ x 7″ (flower petal die cuts)
  • Garden Green – 2″ x 3-1/2″ (leaf die cuts)
  • Vellum – 2″ x 5″ (label frame)
  • Silver Foil – 1-1/2″ x 2-1/2″ (berry sprig)
  • Whisper White – (2) 4″ x 5-1/4″ (inside panel and embossed panel mat), 3-7/8″ x 5-1/8″ (embossed panel), 1-1/4″ x 4-1/2″ (label)

Stampin’ Up! products used in this project:


Stampin’ Up! Dove of Hope Christmas Card

Good Morning! Today I have another sneak peek of a beautiful new bundle from the new Aug-Dec 2020 Mini Catalog. It’s called the Stampin’ Up! Dove of Hope Bundle and it comes with the Dove of Hope cling stamp set and the Detailed Dove Dies. This bundle will be available next week on Aug 4 – YAY!!! You can find the supplies used to create this card at the bottom of my post along with the sizes of cardstock used.

I stamped the Peace on Earth sentiment from the Stampin’ Up! Dove of Hope stamp set in Pacific Point ink on a panel of the new Snowflake Splendor designer series paper and adhered the panel to the front of a Pacific Point card base.

I cut out the dove body and two wings from the Detailed Dove Dies from Thick Whisper White card stock and adhered the wings to the body with liquid glue. I cut the small branch from Shaded Spruce card stock and adhered it to the beak with a dot of liquid glue. I adhered the bird to the card front with dimensionals.

I finished off the card front with two small pearls on the branch.

I stamped the sentiment from the Stampin’ Up! Dove of Hope stamp set in Pacific Point ink on a Whisper White panel. I stamped dove in Pool Party ink after stamping off, and trimmed the bottom with a strip of the Snowflake Splendor DSP. I adhered the panel to the inside of the card with Stampin’ Seal.

This was another simple Christmas card, but the dove die cut is so elegant and beautiful that it doesn’t need much.


Stampin’ In The Meadows August-December 2020 Mini Catalog Product Shares

The Stampin’ In The Meadows product shares for the new Mini Catalog are still available, but they’re filling up fast! If you would like samples of all the new products from the new August-December 2020 Mini Catalog, check it out. I am offering 6×6 samples of all the new designer series papers for $25 + $7 Priority Shipping and samples of all the new embellishments for $26 + $7 Priority Shipping. And if you want both, you can get an I WANT IT ALL share for $51 + $7 Priority Shipping.

Visit my New Catalog Product Shares Page to get the full details of what is included. Fill out the order form or drop me an email if you have questions. Ordering deadline is August 2. Please note that I can only ship to addresses in the US.


Stampin Up! Bonus Days are back!

It’s the last week to earn coupon codes in the Bonus Days promotion. If you need a refresher on this promotion, here’s how it works: For every $50 (before shipping and tax) you spend between today and August 3, you earn a $5 USD Bonus Days coupon code that can be redeemed between August 4 and August 31. There’s no limit on how many coupon codes you can earn or redeem, but they must be redeemed by August 31. For full details, see my Promotions Page.


July 16 – 31 Host Code: FD627X9W

Use this host code when you order $50 or more and receive a free gift from me!  The gift is your choice of any item valued up to $10.00 in the 2020-21 Annual Catalog!

If your order is over $150, please do not use the host code since you’ll receive your own Host Dollars plus I’ll still send you the free gift!  This host code can be used by anyone, no commitment required.  Let me know if you have any questions.


If you need any stamping supplies, I’d be very happy to be your Demonstrator.  Just click on the Shop Now Button on the right side of the screen to go directly to my Online store or contact me if you have any questions.  Happy Stamping!

Thanks for stopping by and have a great day!

Akiko

  • Visit my Online store here
  • See the current Stampin’ Up! clearance rack specials here
  • Earn FREE Stampin’ Up! products through my Wildflower Frequent Shopper Program – my way of saying thank you to my frequent shopper online customers.
  • Sign up for my monthly newsletter here
  • Have any questions? I’d be happy to help, click here to contact me.

Cardstock Cuts for this project:

  • Pacific Point – 4-1/4″ x 11″ card base scored at 5-1/2″
  • Shaded Spruce – 1″ x 1-1/2″ (branch die cut)
  • Thick Whisper White – 3″ x 5-1/4″ (dove die cuts)
  • Whisper White – 4″ x 5-1/4″ (inside panel)
  • Snowflake Splendor DSP – 4″ x 5-1/4″ (front background), 1/2″ x 4″ (inside trim)

Stampin’ Up! products used in this project:


Stampin’ Up! Snowflake Wishes Shaker Card Video Tutorial

Good Morning! Today I’m sharing a shaker card that I made during my Facebook Live video tutorial yesterday afternoon using the new Stampin’ Up! Snowflake Wishes bundle. This bundle is the most versatile snowflake set and the best yet, consisting of the Snowflake Wishes photopolymer stamp set and So Many Snowflakes Dies. It has so many different snowflake stamps and beautiful dies that can be combined to make many different style snowflake cards. And it has a die for a snowflake frame that I turned into my shaker card. The Stampin’ Up! Snowflake Wishes bundle will be available when the new Aug-Dec Mini Catalog premieres on Aug 4. You can find the supplies used to create this card at the bottom of my post along with the sizes of cardstock used.

Here is the Facebook Live video showing how I made the card:

I also posted the video to my YouTube Channel and you can view it here if you prefer.

I started by cutting out the frame using the snowflake window die cut from the So Many Snowflakes Dies (available Aug 4) and a Thick Whisper White panel. I embossed the the die cut panel with the Winter Snow embossing folder (available Aug 4). I adhered the window sheet to cover the opening with Tear and Tape. I applied Adhesive Foam strips around the opening making sure the ends were tight so that no sequins would leak through. I applied additional foam strips around the outside of the frame so that it would not bend.

I adhered a panel of the Snowflake Splendor designer series paper to the front of a Pacific Point card base. I die cut six of the small snowflakes from the Christmas Layers Dies from Balmy Blue Glimmer paper (available Aug 4) and placed 5 of them in the center of the DSP panel. I added some snowflake sequins (available Aug 4) and some Whale of a Time sequins (making sure to remove all pink shells) to the center with the die cut snowflakes. I peeled the covering off the adhesive foam strips and adhered the panel to the card front, pressing to make sure the foam strips next to the window were secure.

I stamped the Christmas Cheer sentiment from the Itty Bitty Christmas stamp set in Pacific Point ink on a small scrap of Thick Whisper White card stock and cut it out with a stitched die from the Ornate Frames dies. I folded a short length of Iridescent Ribbon (available Aug 4) and adhered it to the card front with glue dots. I adhered the last Balmy Blue small snowflake die cut to the label with multipurpose liquid glue and adhered it to the card over the ribbon with more glue dots. I cut the small intricate snowflake from the So Many Snowflakes dies from Balmy Blue glimmer paper and the medium intricate snowflake from Pacific Point card stock. I adhered these together with multipurpose liquid glue and adhered the snowflake to the card front with glue dots.

Inside the card, I stamped the sentiment from the Stampin’ Up! Snowflake Wishes stamp set (available Aug 4) in Pacific Point ink on a Whisper White panel. I stamped the snowflake cluster in stamped off Pacific Point ink and trimmed the bottom of the panel with a strip of Snowflake Splendor DSP before adhering it to the inside of the card.

This was the first time I made a shaker card and it was easier than I thought and they are so fun!! The pretty snowflake window die is perfect, and using the pretty Snowflake Splendor DSP (available Aug 4) makes it so easy! This bundle is a definite must have from the new Aug-Dec Mini Catalog, available on Aug 4.


Stampin’ In The Meadows August-December 2020 Mini Catalog Product Shares

I am pleased to announce that the Stampin’ In The Meadows product shares for the new Mini Catalog is open for orders! If you would like samples of all the new products from the new August-December 2020 Mini Catalog, check it out. I am offering 6×6 samples of all the new designer series papers for $25 + $7 Priority Shipping and samples of all the new embellishments for $26 + $7 Priority Shipping. And if you want both, you can get an I WANT IT ALL share for $51 + $7 Priority Shipping.

Visit my New Catalog Product Shares Page to get the full details of what is included. Fill out the order form or drop me an email if you have questions. Please note that I can only ship to addresses in the US.


Stampin Up! Bonus Days are back!

Good news – Bonus Days are back! That means it’s time to start earning coupon codes to redeem in August! If you need a refresher on this promotion, here’s how it works: For every $50 (before shipping and tax) you spend between today and August 3, you earn a $5 USD Bonus Days coupon code that can be redeemed between August 4 and August 31. There’s no limit on how many coupon codes you can earn or redeem, but they must be redeemed by August 31. For full details, see my Promotions Page.


July 16 – 31 Host Code: FD627X9W

Use this host code when you order $50 or more and receive a free gift from me!  The free gift is your choice of any item valued up to $10.00 in the 2019 – 2020 Annual Catalog or in the 2020 Mini Catalog!  That includes some of the Host Exclusive stamp sets!

If your order is over $150, please do not use the host code since you’ll receive your own Host Dollars plus I’ll still send you the free gift!  This host code can be used by anyone, no club or commitment required.  Let me know if you have any questions.


If you need any stamping supplies, I’d be very happy to be your Demonstrator.  Just click on the Shop Now button on the right side of the screen to go directly to my online store or contact me if you have any questions.  Happy Stamping!

Thanks for stopping by and have a great week!

Akiko

  • Visit my online store here
  • See the current Stampin’ Up! clearance rack specials here
  • Earn FREE Stampin’ Up! products through my Wildflower Frequent Shopper Program – my way of saying thank you to my online frequent shopper customers.
  • Sign up for my weekly newsletter here
  • Have any questions? I’d be happy to help, click here to contact me.

Cardstock Cuts for this project:

  • Pacific Point – 4-1/4″ x 11″ card base scored at 5-1/2″, 2″ x 2″ (med snowflake die cut)
  • Thick Whisper White – 3-1/2″ x 4-3/4″ (embossed & die cut top panel), 1″ x 2-1/4″ (label)
  • Window Sheet – 2-1/2″ x 4-1/2″
  • Balmy Blue Glimmer – 1-1/4″ x 3-1/4″ (die cut snowflakes)
  • Whisper White – 4″ x 5-1/4″ (inside panel)
  • Snowflake Splendor DSP – 4″ x 5-1/4″ (card front background), 1/2″ x 4″ (inside trim)

Stampin’ Up! products used in this project:


Stampin’ Up! Four Season Floral Christmas Card

Good Morning! Today I continue with my Christmas in July theme with a simple little Christmas note card made with the Stampin’ Up! Four Season Floral Stamp set. This little photopolymer stamp set is in the Beginner Brochure and it has four floral stamps – one of them is a poinsettia! So I decided to use it for today’s Christmas card. You can find the supplies used to create this card at the bottom of my post along with the sizes of cardstock used.

I adhered a panel of the Flowers for Every Season 6″ x 6″ designer series paper to a Poppy Parade mat with Stampin’ Seal. I adhered another strip of Poppy Parade on the left side of the panel and wrapped it with Just Jade In Color ribbon, securing it in the back.

I stamped the Merry Christmas sentiment from the Arrange a Wreath photopolymer stamp set in Poppy Parade in the lower right corner of a 3″ x 5″ Whisper White note card. I stamped the poinsettia from the Stampin’ Up! Four Season Floral stamp set in Memento Tuxedo Black ink on a small Whisper White panel. I colored it with Poppy Parade, Just Jade and Mango Melody Stampin’ Blends and cut it out with a label die from the Tasteful Labels dies.

I added Wink of Stella on the poinsettia and berries and popped it on the DSP panel with dimensionals. I added a Just Jade bow just beneath the poinsettia. I adhered the panel to the card front with dimensionals.

I left the inside of the note card pretty simple – I adhered a panel of Whisper White to a panel of Poppy Parade and adhered it to the inside of the card.

The Stampin’ Up! Four Season Floral stamp set is the perfect stamp set for beginning stampers. When paired with the Flowers for Every Season designer series paper or the Flowers for Every Season Memories and More card pack you have perfectly coordinated products that makes it easy to create beautiful cards. And also consider the Flowers for Every Season Cards and more pack that gives you a third option for coordination.


Stampin’ In The Meadows August-December 2020 Mini Catalog Product Shares

I am pleased to announce that the Stampin’ In The Meadows product shares for the new Mini Catalog is open for orders! If you would like samples of all the new products from the new August-December 2020 Mini Catalog, check it out. I am offering 6×6 samples of all the new designer series papers for $25 + $7 Priority Shipping and samples of all the new embellishments for $26 + $7 Priority Shipping. And if you want both, you can get an I WANT IT ALL share for $51 + $7 Priority Shipping.

Visit my New Catalog Product Shares Page to get the full details of what is included. Fill out the order form or drop me an email if you have questions. Please note that I can only ship to addresses in the US.


Stampin Up! Bonus Days are back!

Good news – Bonus Days are back! That means it’s time to start earning coupon codes to redeem in August! If you need a refresher on this promotion, here’s how it works: For every $50 (before shipping and tax) you spend between today and August 3, you earn a $5 USD Bonus Days coupon code that can be redeemed between August 4 and August 31. There’s no limit on how many coupon codes you can earn or redeem, but they must be redeemed by August 31. For full details, see my Promotions Page.


July 16 – 31 Host Code: FD627X9W

Use this host code when you order $50 or more and receive a free gift from me!  The gift is your choice of any item valued up to $10.00 in the 2020-21 Annual Catalog!

If your order is over $150, please do not use the host code since you’ll receive your own Host Dollars plus I’ll still send you the free gift!  This host code can be used by anyone, no commitment required.  Let me know if you have any questions.


If you need any stamping supplies, I’d be very happy to be your Demonstrator.  Just click on the Shop Now Button on the right side of the screen to go directly to my Online store or contact me if you have any questions.  Happy Stamping!

Thanks for stopping by and have a great day!

Akiko

  • Visit my Online store here
  • See the current Stampin’ Up! clearance rack specials here
  • Earn FREE Stampin’ Up! products through my Wildflower Frequent Shopper Program – my way of saying thank you to my frequent shopper online customers.
  • Sign up for my monthly newsletter here
  • Have any questions? I’d be happy to help, click here to contact me.

Cardstock Cuts for this project:

  • Poppy Parade – 3-1/8″ x 4-1/8″ (front mat), 3-1/8″ x 4-5/8″ (inside mat)
  • Whisper White – 3″ x 4-1/2″ (inside panel), 2″ x 2-1/2″ (small stamped die cut)
  • Flowers for Every Season DSP – 3″ x 4″ (front background)
  • Stampin’ Up! Whisper White note cards (item # 131527) used for card base

Stampin’ Up! products used in this project:


Stampin’ Up! Perfectly Plaid for the Happy Inkin’ Thursday Blog Hop

Good Morning! Welcome to another Happy Inkin’ Thursday Blog Hop! I am continuing with the Christmas in July theme for today’s card pairing a sneak peek of the new Snowflake Splendor designer series paper from the new Aug-Dec 2020 Mini Catalog with a returning favorite, the Stampin’ Up! Perfectly Plaid Christmas tree and Pine Tree Punch from the current Annual Catalog.

We have a sketch challenge this week, and here is the sketch we are using:

I embossed a strip of Balmy Blue card stock with the new Winter Snow embossing folder (available Aug 4) and adhered it to the bottom of a panel of the beautiful Snowflake Splendor designer series paper (available Aug 4). I adhered the layered panel to a Thick Whisper White panel and wrapped it with a length of Whisper White crinkle ribbon and made a bow. I adhered the panel to the front of a Balmy Blue card base with dimensionals.

I stamped the tree from the Stampin’ Up! Perfectly Plaid photopolymer stamp set three times on a panel of Thick Whisper White card stock and punched them out with the Pine Tree Punch. I adhered them to the front of the card with dimensionals.

I added sparkle to the trees by adding the iridescent adhesive backed snowflakes to the trees and added Blue Adhesive backed gems add sparkle to the background. Both of these will be available on Aug 4.

I stamped another tree from the Stampin’ Up! Perfectly Plaid stamp set in Highland Heather ink to the bottom of a Whisper White panel. I stamped the sentiment from the stamp set in the middle of the panel in Highland Heather ink and added a strip of the Snowflake Splendor DSP to the bottom. I adhered the panel to the inside of the card.

Non-Traditional colored Christmas cards aren’t for everyone, but they can be fun and whimsical – another way to spread happiness and joy during the Christmas season!

On with the Hop! Click the Next button below to visit Karen Ksenzakovic’s blog.

And just in case you get lost along the way, here’s a list of the team members participating in the hop today:


July 16 – 31 Host Code: FD627X9W

Use this host code when you order $50 or more and receive a free gift from me!  The gift is your choice of any item valued up to $10.00 in the 2019-20 Annual Catalog or in the 2020 January-June Mini Catalog!  That includes some of the Host Exclusive stamp sets!

If your order is over $150, please do not use the host code since you’ll receive your own Host Dollars plus I’ll still send you the free gift!  This host code can be used by anyone, no commitment required.  Let me know if you have any questions.


If you need any stamping supplies, I’d be very happy to be your Demonstrator.  Just click on the Shop Now Button on the right side of the screen to go directly to my online store or contact me if you have any questions.  Happy Stamping!

Thanks for visiting!

Akiko

  • Visit my online store here
  • See the current Stampin’ Up! clearance rack specials here
  • Earn FREE Stampin’ Up! products through my Wildflower Frequent Shopper Program – my way of saying thank you to my frequent shopper online customers.
  • Sign up for my weekly newsletter here
  • Have any questions? I’d be happy to help, click here to contact me.

Cardstock Cuts for this project:

  • Balmy Blue – 5-1/2″ x 8-1/2″ card base scored at 4-1/4″, 1″ x 5-1/8″ (embossed strip)
  • Thick Whisper White – 4″ x 5-1/4″ (front mat), 2-1/2″ x 5-1/2″ (punched trees)
  • Whisper White – 4″ x 5-1/4″ (inside panel)
  • Snowflake Splendor DSP – 3-7/8″ x 5-1/8″ (front background), 1/2″ x 5-1/4″ (inside trim)

Stampin’ Up! products used in this project:


Stampin’ Up! Arrange a Wreath Christmas Card

Good Morning! Today I am celebrating Christmas in July with my first Christmas Card for the year made with the Stampin’ Up! Arrange A Wreath bundle. And I paired it with the new Heartwarming Hugs designer series paper from the Aug-Dec 2020 Mini Catalog that will be available on Aug 4. You can find the supplies used to create this card at the bottom of my post along with the sizes of cardstock used.

I embossed a panel of Pear Pizzazz card stock with the Dainty Diamonds 3D embossing folder and adhered it to the bottom of a panel of the new Heartwarming Hugs designer series paper with Stampin’ Seal. The Heartwarming Hugs DSP is one of my favorites from the new catalog because it combines Real Red, Mossy Meadow and Pear Pizzazz in cute traditional holiday prints! I used Stampin’ Seal to adhere the layered DSP panel to the front of a Real Red card base.

I cut a berry wreath from vellum card stock using the die from the Build a Wreath Dies that come in the Stampin’ Up! Arrange a Wreath bundle. I cut a leaf wreath using the leaf wreath die from the same bundle. I adhered the two wreaths together with glue dots and used glue dots to adhere the wreaths to the front of the card. I die cut the bow and extra bow loops from the Build a Wreath Dies from Real Red card stock and adhered it to the bottom of the wreath with glue dots.

I stamped the Merry Christmas sentiment from the Stampin’ Up! Arrange a Wreath photopolymer stamp set in Versamark ink on Real Red card stock. I sprinkled it with white embossing powder and heat set. I trimmed the ends of the label with the Lovely Labels Pick a Punch. I punched the ends of a Whisper White strip with the same punch and adhered it to the back of the label. I adhered the layered label to the bottom of the card with Stampin’ Seal. I trimmed the wreath with trios of Red Rhinestones to finish off the card front.

I love a Christmas wish on the inside of my Christmas cards, so I used the inside sentiment from the Toile Christmas (the one with the beautiful cardinal) cling stamp set that is carried over from last year and available in the Annual catalog now. I stamped the sentiment in Real Red ink on a Whisper White panel and trimmed the bottom with a strip of the Heartwarming Hugs DSP and adhered it to the inside of the card.

The first of many Christmas cards for this year to kick off Christmas in July! A very simple wreath with rhinestone berries on pretty Christmas paper!


Stampin’ In The Meadows August-December 2020 Mini Catalog Product Shares

I am pleased to announce that the Stampin’ In The Meadows product shares for the new Mini Catalog is open for orders! If you would like samples of all the new products from the new August-December 2020 Mini Catalog, check it out. I am offering 6×6 samples of all the new designer series papers for $25 + $7 Priority Shipping and samples of all the new embellishments for $26 + $7 Priority Shipping. And if you want both, you can get an I WANT IT ALL share for $51 + $7 Priority Shipping.

Visit my New Catalog Product Shares Page to get the full details of what is included. Fill out the order form or drop me an email if you have questions. Please note that I can only ship to addresses in the US.


Stampin Up! Bonus Days are back!

Good news – Bonus Days are back! That means it’s time to start earning coupon codes to redeem in August! If you need a refresher on this promotion, here’s how it works: For every $50 (before shipping and tax) you spend between today and August 3, you earn a $5 USD Bonus Days coupon code that can be redeemed between August 4 and August 31. There’s no limit on how many coupon codes you can earn or redeem, but they must be redeemed by August 31. For full details, see my Promotions Page.


July 16 – 31 Host Code: FD627X9W

Use this host code when you order $50 or more and receive a free gift from me!  The gift is your choice of any item valued up to $10.00 in the 2020-21 Annual Catalog!

If your order is over $150, please do not use the host code since you’ll receive your own Host Dollars plus I’ll still send you the free gift!  This host code can be used by anyone, no commitment required.  Let me know if you have any questions.


If you need any stamping supplies, I’d be very happy to be your Demonstrator.  Just click on the Shop Now Button on the right side of the screen to go directly to my Online store or contact me if you have any questions.  Happy Stamping!

Thanks for stopping by and have a great day!

Akiko

  • Visit my Online store here
  • See the current Stampin’ Up! clearance rack specials here
  • Earn FREE Stampin’ Up! products through my Wildflower Frequent Shopper Program – my way of saying thank you to my frequent shopper online customers.
  • Sign up for my monthly newsletter here
  • Have any questions? I’d be happy to help, click here to contact me.

Cardstock Cuts for this project:

  • Real Red – 4-1/4″ x 11″ card base scored at 5-1/2″, 2″ x 2-1/2″ (die cut bow), 3/4″ x 3 (label)
  • Mossy Meadow – 3-3/4″ x 3-3/4″ (leaf wreath)
  • Pear Pizzazz – 1/1/2″ x 4″ (embossed bottom panel)
  • Vellum – 3-3/4″ x 3-3/4″ (berry wreath)
  • Whisper White – 4″ x 5-1/4″ (inside panel), 1″ x 3-1/2″ (label mat)
  • Heartwarming Hugs DSP – 4″ x 5-1/4″ (front background), 1/2″ x 4″ (inside trim)

Stampin’ Up! products used in this project:


Stampin’ Up! Itty Bitty Christmas Snowflakes for the Happy Inkin’ Thursday Blog Hop

Good Morning! Welcome to another Happy Inkin’ Thursday Blog Hop! For today’s blog hop, I am sharing one of the last Christmas Cards for this season since I will need to send them out soon! I used the Stampin’ Up! Itty Bitty Christmas bundle with the Wrapped in Plaid specialty designer series paper to make a sparkly card. The bundle includes the Christmas Layers dies and it has some snowflake dies – one with a cluster of snowflakes and two individual snowflakes. I used these to create my card today.

We have a sketch challenge this week, and here is the sketch we are using:

I started by die cutting 5 snowflake clusters using the Christmas Layers dies from Sparkle Glimmer paper and arranging them to cover a panel of Wrapped in Plaid DSP. I adhered the snowflakes with multipurpose liquid glue and trimmed the ends, using some of the trimmings to fill in bare spots. I ran a strip of Cherry Cobbler card stock through the Country Floral embossing folder and adhered it to the bottom of a Cherry Cobbler card base with multipurpose liquid glue. I adhered the snowflake covered DSP panel to the card front with dimensionals.

I made a layered die cut sentiment label, starting out by stamping the Stampin’ Up! Itty Bitty Christmas sentiment in Cherry Cobbler ink on a strip of Whisper White. I cut it out with the large label die from the Merry Christmas dies. I cut the long label from the Stitched Labels dies out of Gold Foil using the two step die cutting technique so it would be longer than the Whisper White label and adhered it to the back with multipurpose liquid glue. I cut the large label from the Detailed Bands dies from the Wrapped in Plaid DSP and adhered it to the back of the layered label with multipurpose liquid glue.

I cut the two small leaf clusters from the Christmas Cardinal dies out of Shaded Spruce card stock. I cut the two swirl flourishes from the Christmas Cardinal dies out of Gold foil. I arranged the large flourish and leaf cluster and adhered it behind the top left of the layered label with a glue dot. I arranged the small flourish and leaf cluster and adhered it behind the bottom right of the layered label with a glue dot. I cut out the two small snowflakes using the Christmas Layers dies from Sparkle Glimmer paper and adhered them to the label with multipurpose liquid glue. I finished it off by adhering the label to the card front with dimensionals.

I decorated the inside of the card by stamping the greeting from the Frosted Foliage stamp set in Cherry Cobbler ink on a panel of Whisper White. I trimmed the bottom with a strip of Wrapped in Plaid DSP and adhered to the inside of the card.

I love the Wrapped in Plaid DSP with the touches of Gold Foil and I love it in combination with the elegant Country Floral embossing and Sparkle Glimmer snowflakes. And while the Stampin’ Up! Itty Bitty Christmas stamps and Christmas Layers dies will be carried over (Yay!!), they will no longer be available as a bundle with the 10% discount.

On with the Hop! Click the Next button below to visit Karen Ksenzakovic’s blog.

And just in case you get lost along the way, here’s a list of the team members participating in the hop today:


December 1 – 15 Host Code: R497392Q

Use this host code when you order $50 or more and receive a free gift from me!  The gift is your choice of any item valued up to $10.00 in the 2019-20 Annual Catalog or in the 2019 Holiday Catalog!  That includes some of the Host Exclusive stamp sets!

If your order is over $150, please do not use the host code since you’ll receive your own Host Dollars plus I’ll send you the free gift!  This host code can be used by anyone, no commitment required.  Let me know if you have any questions.


If you need any stamping supplies, I’d be very happy to be your Demonstrator.  Just click on the Shop Now button on the right side of the screen to go directly to my online store or contact me if you have any questions.  Happy Stamping!

Thanks for visiting and enjoy the Blog Hop!

Akiko

  • Visit my online store here
  • See the current Stampin’ Up! clearance rack specials here
  • Earn FREE Stampin’ Up! products through my Wildflower Frequent Shopper Program – my way of saying thank you to my frequent shopper online customers.
  • Sign up for my weekly newsletter here
  • Have any questions? I’d be happy to help, click here to contact me.

Cardstock Cuts for this project:

  • Cherry Cobbler – 5 1/2″ x 8 1/2″ scored at 4 1/4 (card base), 3/4″ x 5 1/2″ (embossed strip)
  • Whisper White – 3 3/4″ x 5″ (inside panel), 1 1/2″ x 3″ (label)
  • Sparkle DSP – 5″ x 8 1/2″ (snowflake die cuts)
  • Gold Foil – 3″ x 4″ (die cuts)
  • Shaded Spruce – 2″ x 3″ (die cuts)
  • Wrapped in Plaid DSP – 3 3/4″ x 5 1/2″ (card front), 1/2″ x 5″ (inside trim), 2″ x 3 1/2″ (label)

Stampin’ Up! products used in this project:


Stampin’ Up! Peaceful Boughs Wreath Seasons Greetings Card

Good Morning! I hope you had a great Thanksgiving. I have a Christmas card this morning made with the Stampin’ Up! Peaceful Boughs bundle and the Stampin’ Up! Christmastime Is Here specialty designer series paper. I love cards with dimensional wreaths and so I made one with the small bough from the Beautiful Boughs dies in the bundle. You can find the supplies used to create this card at the bottom of my post along with the sizes of cardstock used.

I cut out 7 small boughs from the Beautiful Boughs dies using Old Olive card stock. I sponged the outside of each bough with Old Olive ink so that it would have some texture. I cut out a circle with two medium circle dies from the Layering Circles dies using Early Espresso card stock. I adhered the boughs around the circle with liquid glue on the stem and lowest needle section. I tucked the last stem underneath the first branch’s upper needles, so that it looks like a continuous circle of pine branches.

I cut a panel of the pinecone paper from the Christmastime Is Here specialty designer series paper and adhered it to a Poppy Parade card base with liquid glue. I stamped the Seasons Greetings sentiment from the Stampin’ Up! Peaceful Boughs stamp set in Poppy Parade ink on Crumb Cake card stock and cut it out with the small label die from the Beautiful Boughs dies.

I adhered the wreath to the card front with mini dimensionals. I made a bow with Real Red ribbon and adhered it to the bottom of the wreath with glue dots. I finished the wreath off with red glitter enamel dots. I adhered the label to the card with mini dimensionals.

I stamped the greeting from the Stampin’ Up! Peaceful Boughs stamp set in Poppy Parade on a Whisper White panel for the inside of the card. I stamped the medium pine sprig stamp over the sentiment in Old Olive after stamping off twice. I added a strip of the pinecone DSP to the bottom and adhered it to a Crumb Cake mat before adhering it to the inside of the card.

I thought the Christmastime Is Here pinecone paper would coordinate nicely with the Stampin’ Up! Peaceful Boughs bundle. What do you think?

Join me on Sunday at 1 PM on my Facebook Page for my weekly Facebook Live session as I re-do one of the Make and Takes that I received from Stampin’ Up! On Stage a couple of weeks ago. It did not come out very well and I will show you how to make it better (I hope it comes out better). I will post it on my Monday blog so you can catch it there if you have a busy weekend planned. I think all weekends are going to be busy for the next month!


Stampin’ Up!’s Year-End Closeout is almost here!

Beginning December 3 and while supplies last, you can save big on a selection of retiring and surplus items including holiday catalog items, stamp sets, and Paper Pumpkin past kits. Shop early to avoid missing out! Supplies are limited and popular items will sell out quickly. This amazing sale ends on January 2. Additional details will be posted as soon as they are available.


This image has an empty alt attribute; its file name is 10.01.19_OMAIN_Q4_OOP_NAUK.jpg

We hope you’re ready to make this holiday season magical, because the Christmastime Is Here Suite is, well . . . here! This exclusive, limited-time collection of festive, floral coordinating products has everything you need to share love, joy, and creativity this holiday season.

Products from the Christmastime Is Here Suite will be available while supplies last only.

Click on the image below to see the details of the products in the suite and the pricing or click here to shop the products in my online store.

This image has an empty alt attribute; its file name is 10-01-19_th_flyer_q4_oop_na.jpg

November 16 – 30 Host Code: 462PVWKY

December 1 – 15 Host Code: R497392Q

Use this host code when you order $50 or more and receive a free gift from me!  The gift is your choice of any item valued up to $10.00 in the 2019-20 Annual Catalog or in the 2019 Holiday Catalog!  That includes some of the Host Exclusive stamp sets!

If your order is over $150, please do not use the host code since you’ll receive your own Host Dollars plus I’ll send you the free gift!  This host code can be used by anyone, no commitment required.  Let me know if you have any questions.


If you need any stamping supplies, I’d be very happy to be your Demonstrator.  Just click on the Shop Now button on the right side of the screen to go directly to my online store or contact me if you have any questions.  Happy Stamping!

Thanks for stopping by and have a great weekend!

Akiko

  • Visit my online store here
  • See the current Stampin’ Up! clearance rack specials here
  • Earn FREE Stampin’ Up! products through my Wildflower Frequent Shopper Program – my way of saying thank you to my frequent shopper online customers.
  • Sign up for my weekly newsletter here
  • Have any questions? I’d be happy to help, click here to contact me.

Cardstock Cuts for this project:

  • Poppy Parade – 4 1/4″ x 11″ scored at 5 1/2″ (card base)
  • Crumb Cake – 3 3/4″ x 5″ (inside mat), 1 3/4″ x 3 1/4″ (sentiment label)
  • Old Olive – 5″ x 6″ (7 pine sprig die cuts)
  • Early Espresso – 2 3/4″ x 2 3/4″ (wreath ring)
  • Whisper White – 3 5/8″ x 4 7/8″ (inside panel)
  • Christmastime Is Here DSP – 4″ x 5 1/4″(card front background), 1/2″ x 3 5/8″ (inside trim)

Stampin’ Up! products used in this project:


Stampin’ Up! Country Road with Beautiful Boughs for the Happy Inkin’ Thursday Blog Hop

Happy Thanksgiving! Welcome to another Happy Inkin’ Thursday Blog Hop! I used the Stampin’ Up! Country Road stamp set along with the Beautiful Boughs dies to create a country themed Christmas Card for this week’s challenge. Here is my card:

We have a color challenge this week, and here is color palette we are using:

I started by stamping the horse weather vane from the Stampin’ Up! Country Road stamp set in Versamark Ink on a panel of Very Vanilla. I sprinkled it with Copper embossing powder and heat set. I stamped the grain stamp along the left side and bottom in Crumb Cake ink. I blotted the weather vane with a paper towel to remove wet Crumb Cake ink so it wouldn’t smear. I stamped the wagon wheel in Soft Suede ink. I sponged the sky in Night of Navy, Balmy Blue, Calypso Coral and Mango Melody so that it would look like an evening sunset. I sponged Crumb Cake ink along the bottom. I adhered the image to a Night of Navy mat with liquid glue and then to a Crumb Cake card base with dimensionals.

I cut the berry branch using the Beautiful Bouquet dies from Real Red Glimmer paper. I cut the medium branch from the Stampin’ Up! Beautiful Boughs dies from Mossy Meadow. I snipped the berry branch in two and adhered the pieces behind the Mossy Meadow branch between the boughs with glue dots. I adhered the branch and berries to the card front with glue dots. I stamped the Blessed Christmas Wishes sentiment from the Stampin’ Up! Itty Bitty Christmas stamp set in Real Red ink on a strip of Very Vanilla. I trimmed the ends and adhered it to a Night of Navy mat and then to the bottom of the card front using liquid glue.

I made two pinecones with the small pine cone dies from the Beautiful Boughs dies. I used Crumb cake for the background and Soft Suede for the front. I adhered them to the bough with glue dots. I adhered a short length of copper trim with glue dots and made a bow with the Real Red ribbon and adhered it with a glue dot. I finished the label off with a Night of Navy rhinestone.

I decorated the inside of the card with a Very Vanilla panel stamped with the sentiment from the Toile Christmas stamp set in Night of Navy ink. I stamped the grain from the Stampin’ Up! Country Road stamp set in Crumb Cake ink and added a small Mossy Meadow bough from the Beautiful Boughs dies. I adhered the panel to a Night of Navy mat and then to the inside of the card with liquid glue.

I hope you like the card and that you have a wonderful time with family and friends!

On with the Hop! Click the Next button below to visit Karen Ksenzakovic’s blog.

And just in case you get lost along the way, here’s a list of the team members participating in the hop today:


November 16 – 30 Host Code: 462PVWKY

Use this host code when you order $50 or more and receive a free gift from me!  The gift is your choice of any item valued up to $10.00 in the 2019-20 Annual Catalog or in the 2019 Holiday Catalog!  That includes some of the Host Exclusive stamp sets!

If your order is over $150, please do not use the host code since you’ll receive your own Host Dollars plus I’ll send you the free gift!  This host code can be used by anyone, no commitment required.  Let me know if you have any questions.


If you need any stamping supplies, I’d be very happy to be your Demonstrator.  Just click on the Shop Now button on the right side of the screen to go directly to my online store or contact me if you have any questions.  Happy Stamping!

Thanks for taking the time to visit!

Akiko

  • Visit my online store here
  • See the current Stampin’ Up! clearance rack specials here
  • Earn FREE Stampin’ Up! products through my Wildflower Frequent Shopper Program – my way of saying thank you to my frequent shopper online customers.
  • Sign up for my weekly newsletter here
  • Have any questions? I’d be happy to help, click here to contact me.

Cardstock Cuts for this project:

  • Crumb Cake – 5 1/2″ x 8 1/2″, 1 1/2″ x 2″
  • Night of Navy – 3 7/8″ x 5 1/8″, 5/8″ x 3 1/2″
  • Mossy Meadow – 2 1/2″ x 3″
  • Very Vanilla – (2) 3 3/4″ x 5″, 1/2″ x 3″
  • Soft Suede – 1 1/2″ x 2″
  • Real Red Glimmer – 2″ x 2 1/2″

Stampin’ Up! products used in this project:


Stampin’ Up! Christmas Rose Celebrate the Season Card

Good Morning! Today I have another Christmas card made with the Stampin’ Up! Christmas Rose stamp set from the beautiful Christmastime is Here Suite. For today’s card, I used gold embossing for the outline and the photopolymer stamps to color each section in different colors. You can find the supplies used to create this card at the bottom of my post along with the sizes of cardstock used.

I stamped the outline image from the Christmas Rose stamp set in Versamark Ink on Shimmery White Paper. I sprinkled it with gold embossing powder and heat set. I then cut it out with the coordinating die. I was glad I used the shimmery white paper for two reasons. First after I stamped each section, I used my aqua painter to go over the sections and blend them (you can use the aqua painter on shimmery white card stock without pilling problems). This gave me a smoother look. The second reason is that the shimmer shows through the image nicely and makes it look special!

I stamped the flowers with Cherry Cobbler ink and then went over them with the aqua painter. Then I blotted it with a paper towel to clean the ink from the embossing. You need to blot it because the embossing resists the ink from being absorbed on the paper and so it has wet ink that can be smeared and spoil your project if you don’t blot it. I next stamped each leaf section with Mossy Meadow ink and repeated with the aqua painter on the broad leaves and paper towel after each. I then stamped the pinecones in Soft Suede and repeated with the aqua painter and paper towel. I finished it off by stamping the berries in Poppy Parade. I did not use the aqua painter on these, but I did blot the ink off the embossing with a paper towel. The Poppy Parade berries really brought the bouquet to life after they were stamped!

Next I cut a panel of the green paper from the Christmastime is Here specialty designer series paper and adhered it to a gold mat. I cut the lattice from gold foil with the large die and adhered it to the panel with liquid glue. I cut a strip of the shimmery gold ribbon and wrapped it around the panel, securing it in the back. I stamped the Celebrate the Season sentiment from the Itty Bitty Christmas stamp set in Versamark Ink on a strip of shimmery white card stock and sprinkled it with gold embossing powder and heat set. I then trimmed the ends and adhered it over the lattice with dimensionals. I adhered the floral bouquet on the panel with dimensionals and added a large bow made with the gold shimmer ribbon. I then popped the panel on a Mossy Meadow card base with dimensionals. I finished off the card front with three gold glitter enamel dots.

I stamped the sentiment from the Frosted Foliage stamp set in Mossy Meadow ink on a panel of Whisper White. I added a strip of the green paper from the Christmastime is Here DSO to the bottom and added a thin strip of gold foil. Then I adhered the panel to the inside of the card.

When I first got the stamp set I was surprised that it had both cling stamps and photopolymer stamps. But it makes sense that you have photopolymer for the solid images so you can see through the stamp to position it over the lined images. I was pleased at how easy this makes it to create the main focal image and how beautiful it came out with this technique. Stampin’ Up! did a great job of designing the pieces so you can use all the different colors on different sections of the bouquet. I definitely recommend trying it.


We hope you’re ready to make this holiday season magical, because the Christmastime Is Here Suite is, well . . . here! This exclusive, limited-time collection of festive, floral coordinating products has everything you need to share love, joy, and creativity this holiday season.

Products from the Christmastime Is Here Suite will be available while supplies last only.

Click on the image below to see the details of the products in the suite and the pricing or click here to shop the products in my online store.


November 16 – 30 Host Code: 462PVWKY

Use this host code when you order $50 or more and receive a free gift from me!  The gift is your choice of any item valued up to $10.00 in the 2019-20 Annual Catalog or in the 2019 Holiday Catalog!  That includes some of the Host Exclusive stamp sets!

If your order is over $150, please do not use the host code since you’ll receive your own Host Dollars plus I’ll send you the free gift!  This host code can be used by anyone, no commitment required.  Let me know if you have any questions.


If you need any stamping supplies, I’d be very happy to be your Demonstrator.  Just click on the Shop Now button on the right side of the screen to go directly to my online store or contact me if you have any questions.  Happy Stamping!

Thanks for stopping by and have a great week!

Akiko

  • Visit my online store here
  • See the current Stampin’ Up! clearance rack specials here
  • Earn FREE Stampin’ Up! products through my Wildflower Frequent Shopper Program – my way of saying thank you to my frequent shopper online customers.
  • Sign up for my weekly newsletter here
  • Have any questions? I’d be happy to help, click here to contact me.

Cardstock Cuts for this project:

  • Mossy Meadow – 4 1/4″ x 11″
  • Shimmery White – 4″ x 5″ (rose bouquet), 1/2″ x 3″ (label)
  • Gold foil – 3 3/4″ x 5″ (front mat), 1 1/2″ x 3″ (lattice), 1/8″ x 3 3/4″
  • Whisper White – 3 3/4″ x 5″
  • Christmastime Is Here DSP – 3 5/8″ x 4 7/8″, 1/2″ x 3 3/4″

Stampin’ Up! products used in this project: