Stampin’ Up! Wild Roses with Butterflies Card

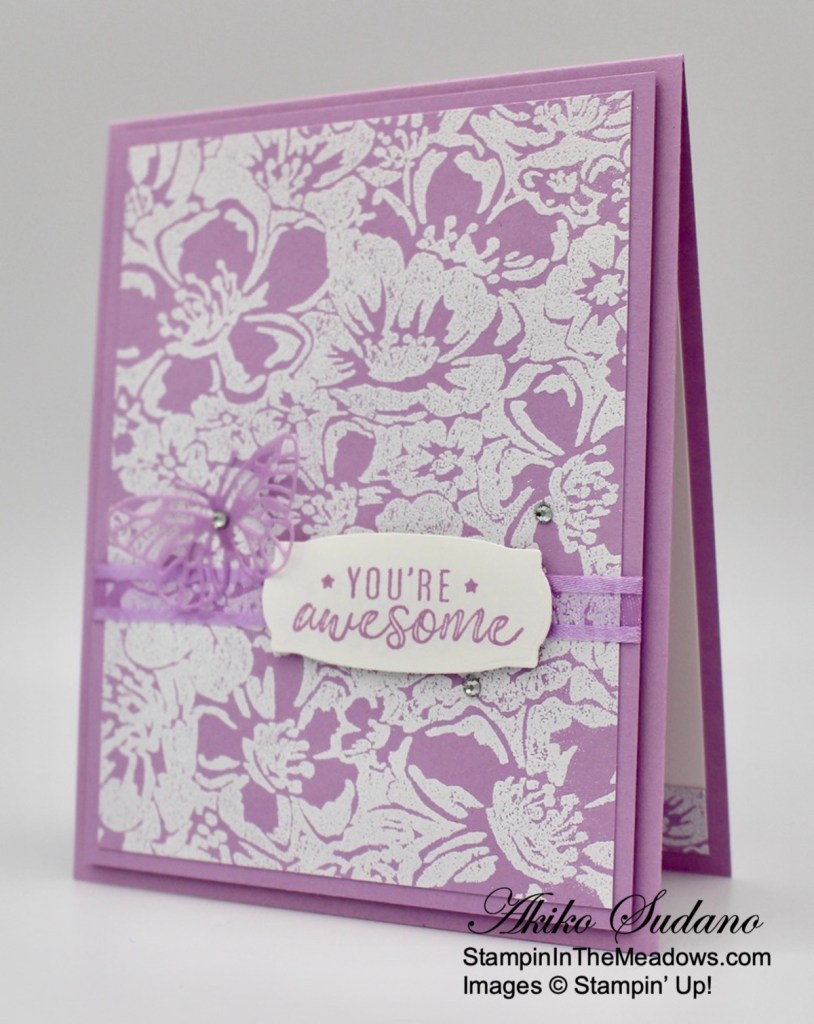
Happy Wednesday! Today I’m sharing a simple monochrome card made with the Stampin’ Up! Wild Roses cling stamp set in Fresh Freesia. I made a thank you card with this stamp last week, kind of in reverse and you can see it here. Today’s card is kind of the reverse because I used versamark ink with white embossing powder to create a card with lots of shine. You can find the supplies I used at the bottom of my post along with the sizes of cardstock used.

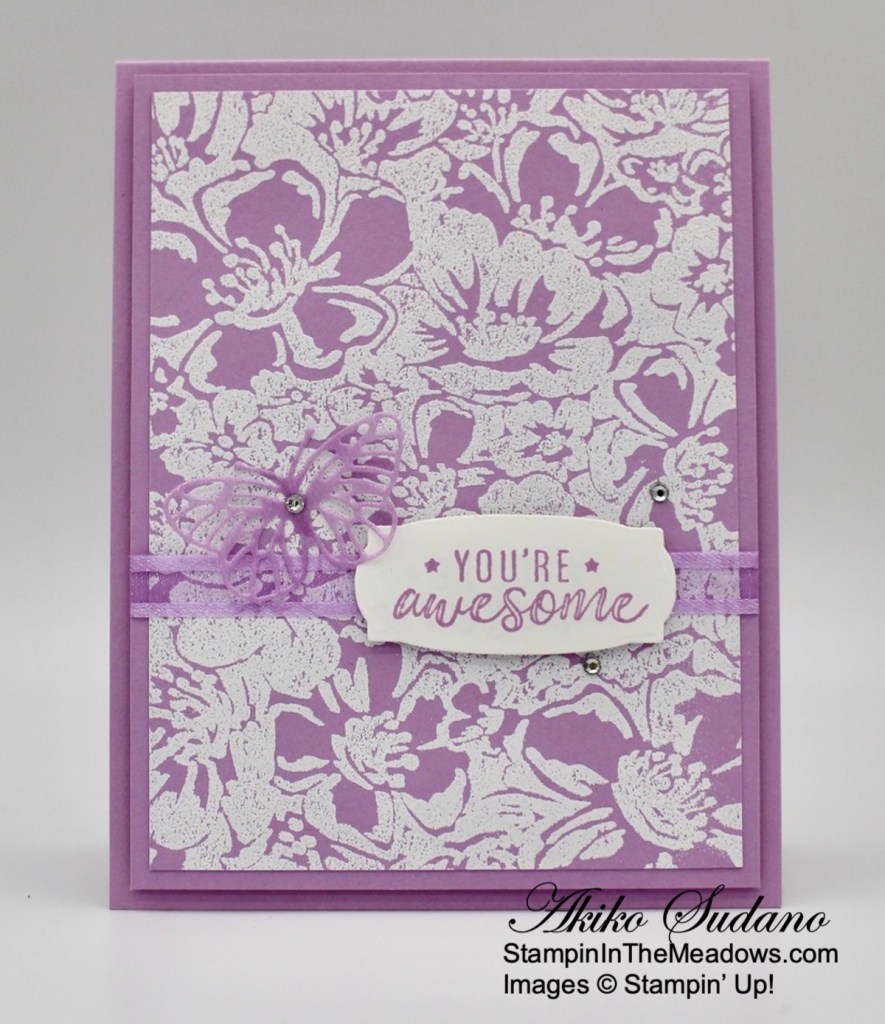
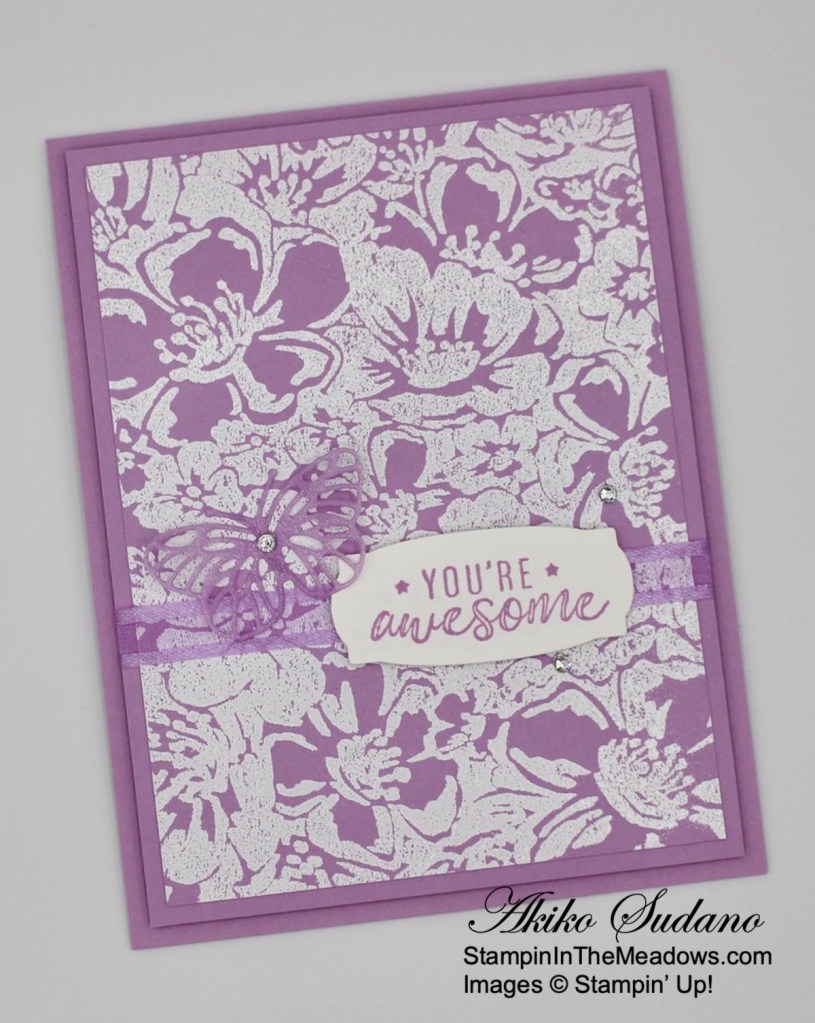
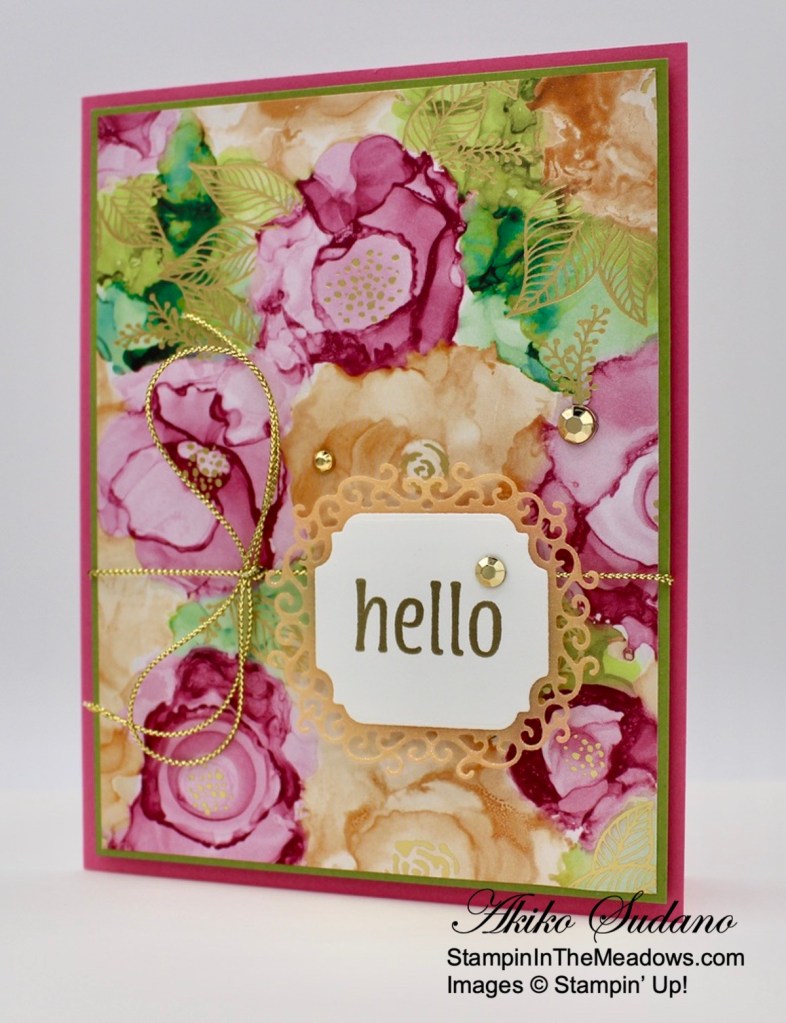
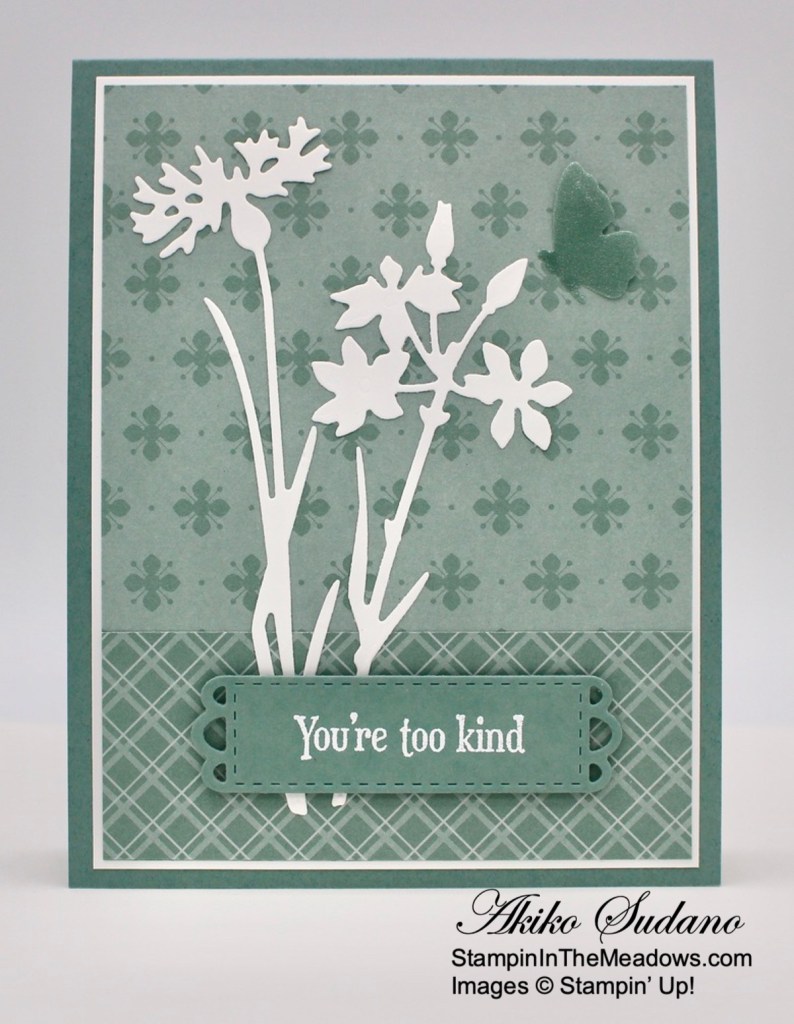
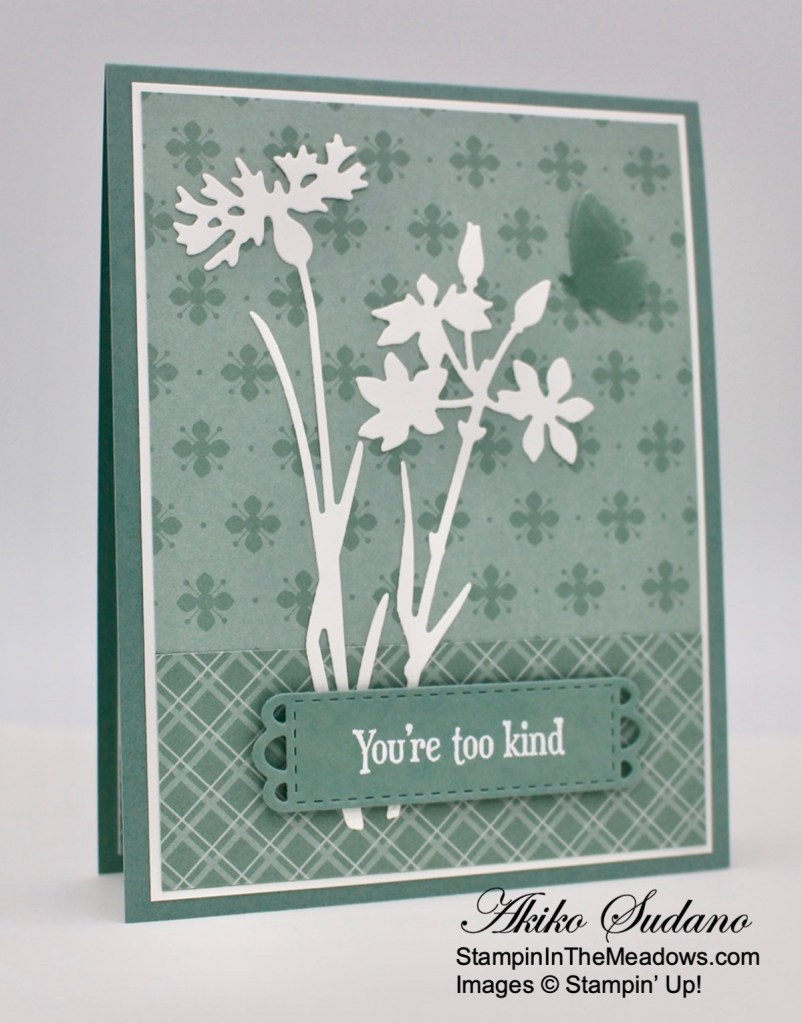
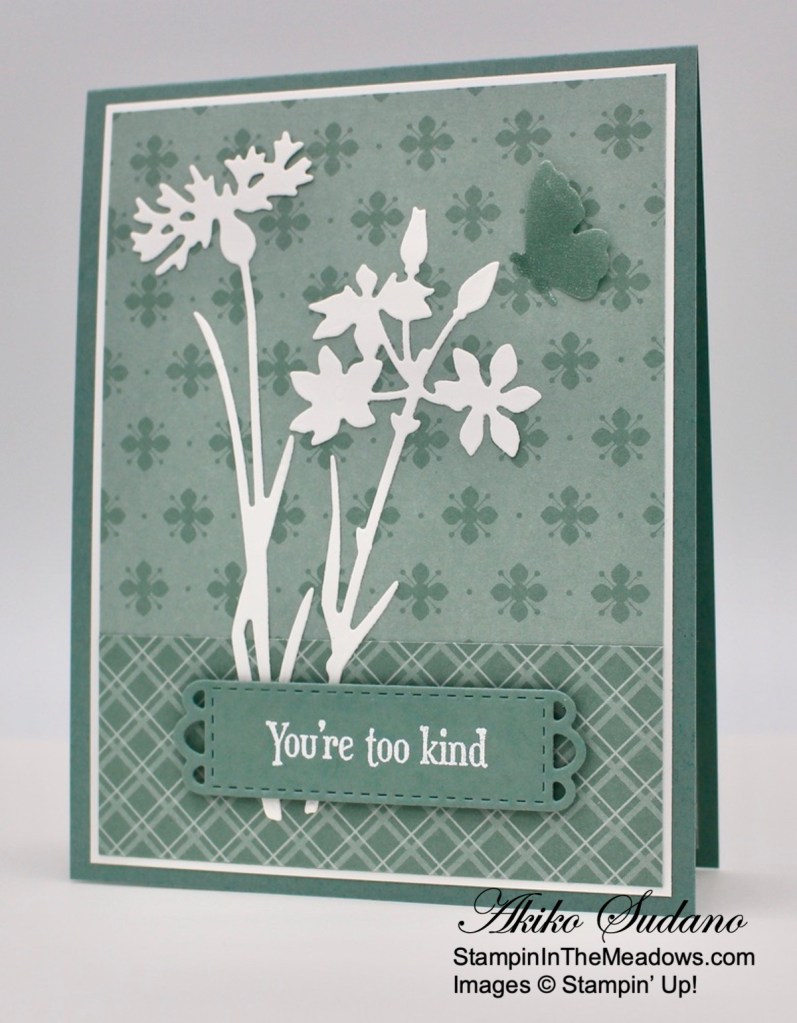
I used my stamparatus to stamp the Stampin’ Up! Wild Roses background stamp in Versamark ink on a Fresh Freesia Panel. I used the magnets to hold the card stock down and inked up the stamp and stamped it a couple of times to get good coverage, pressing all around the stamp each time. I covered the panel with white embossing powder and shook off the excess. I heated the embossing powder with my heat tool, being careful to make sure it was all shiny. I trimmed the panel down to 3-3/4″ x 5″ and adhered it to a Fresh Freesia mat. I popped the panel on the front of a Fresh Freesia card base with dimensionals.

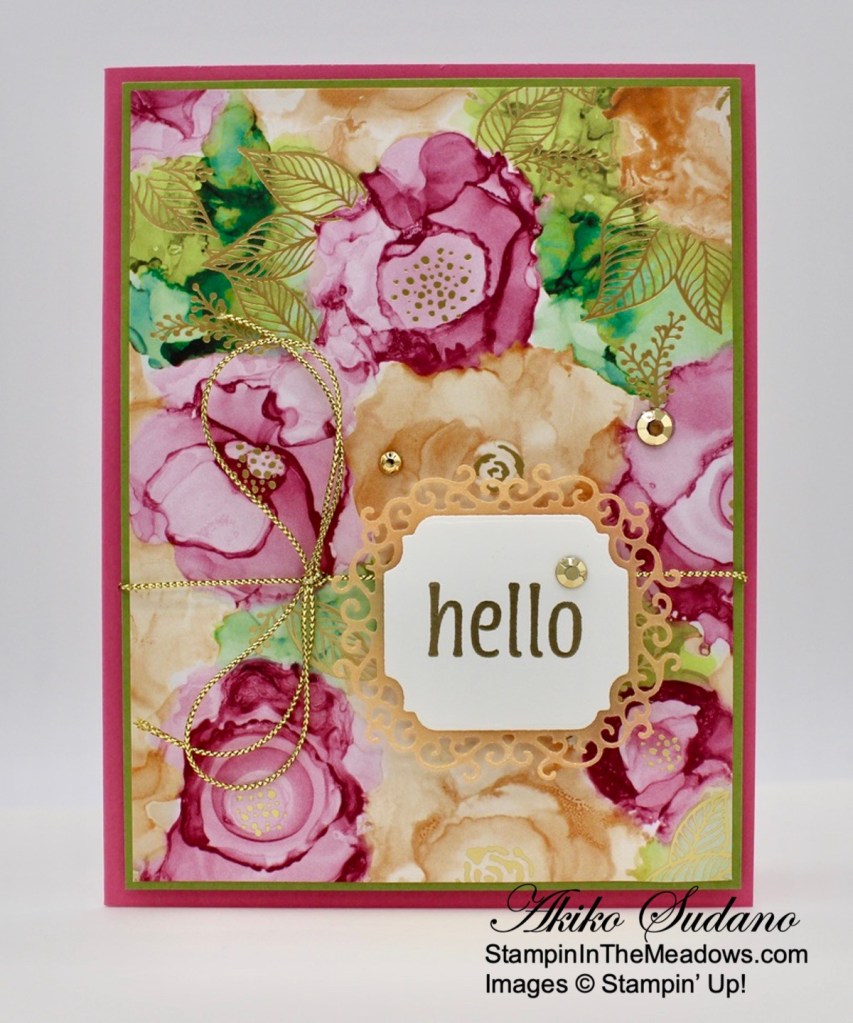
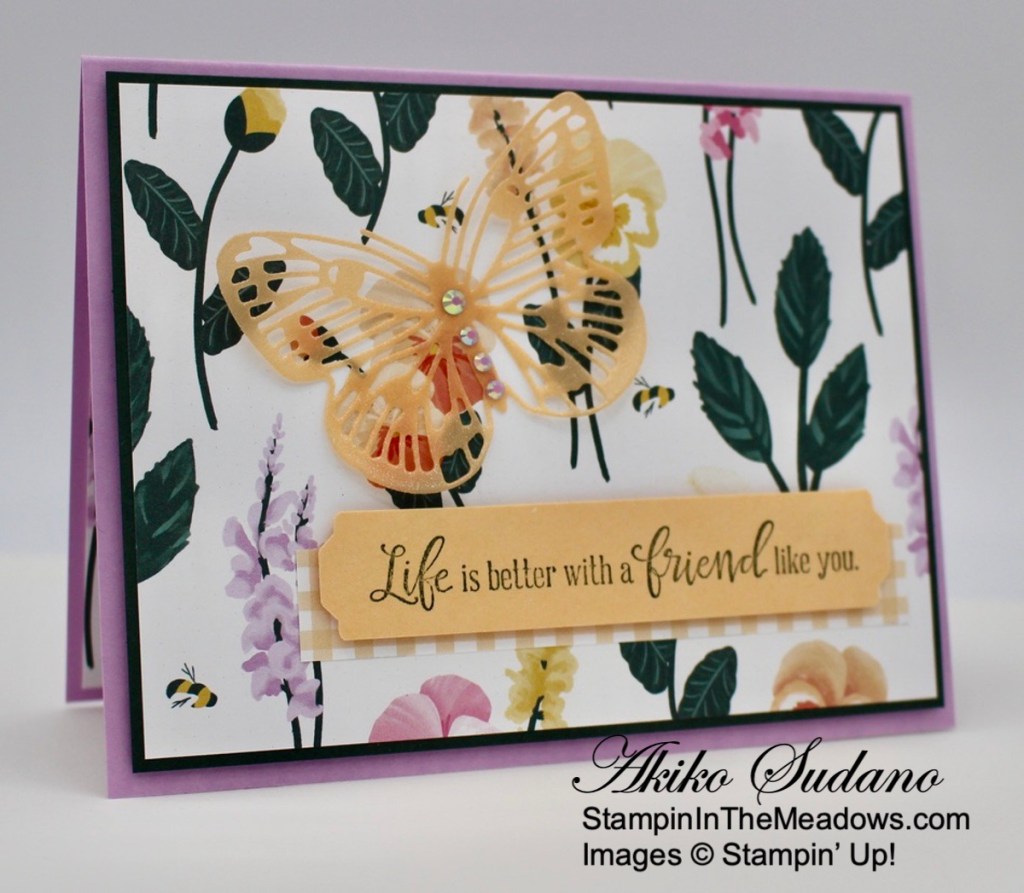
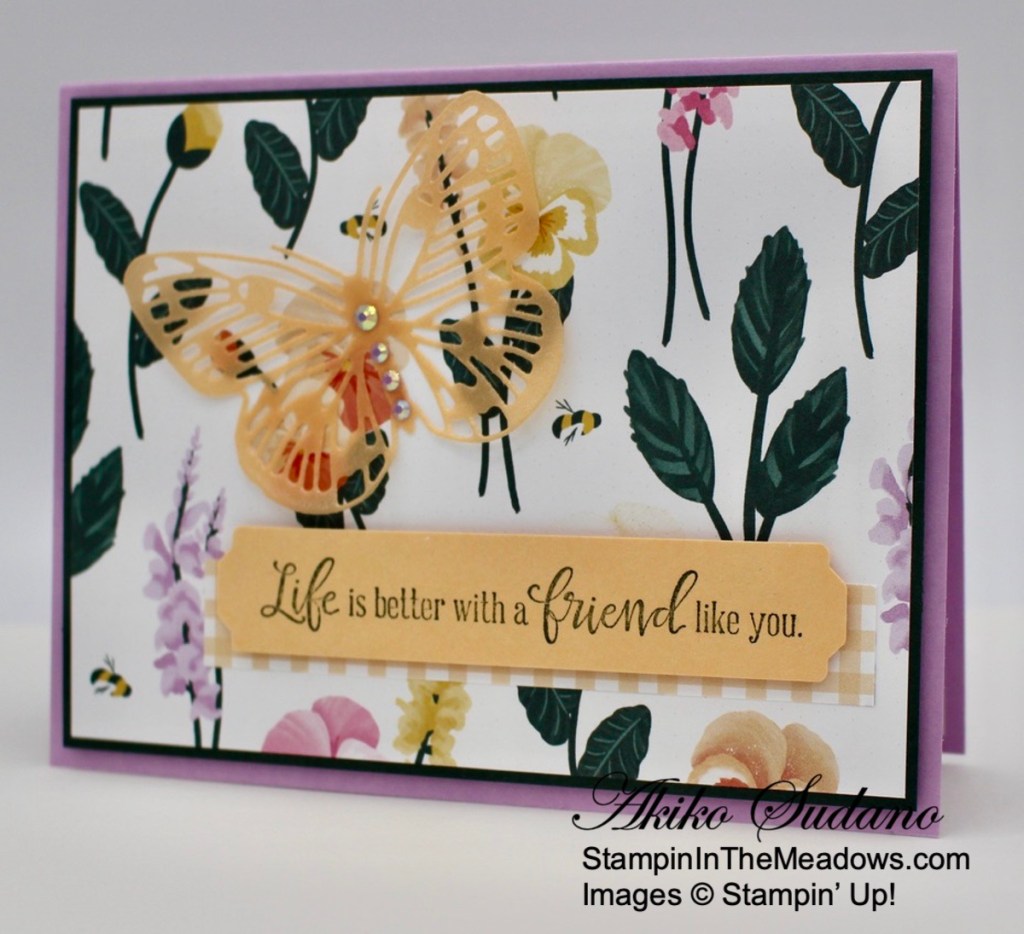
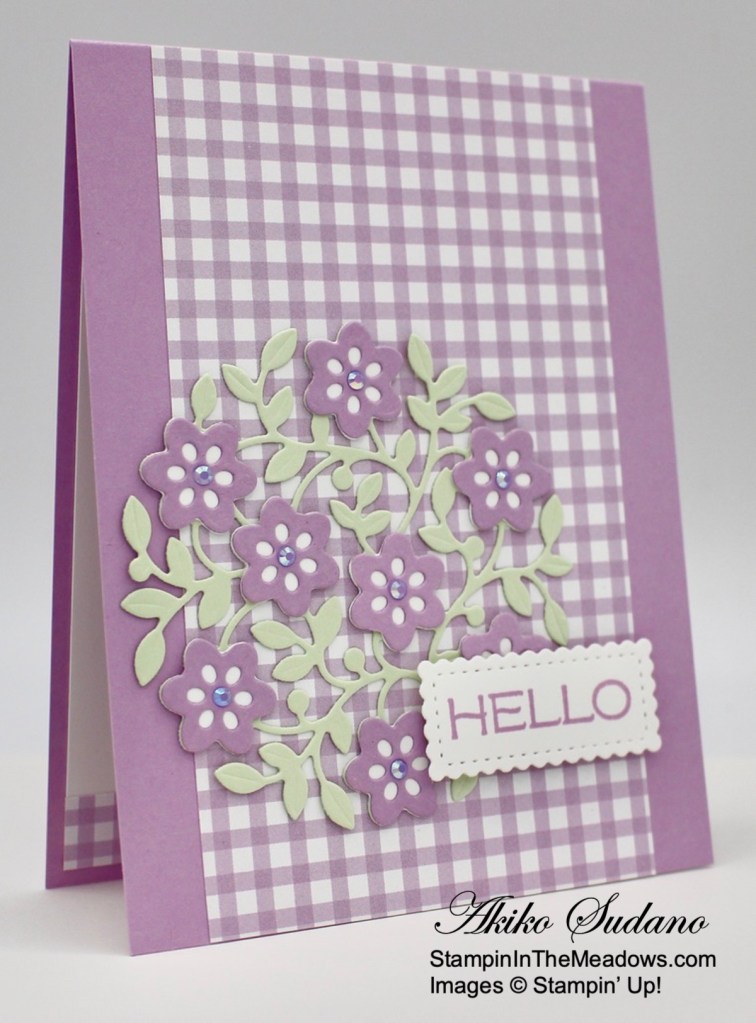
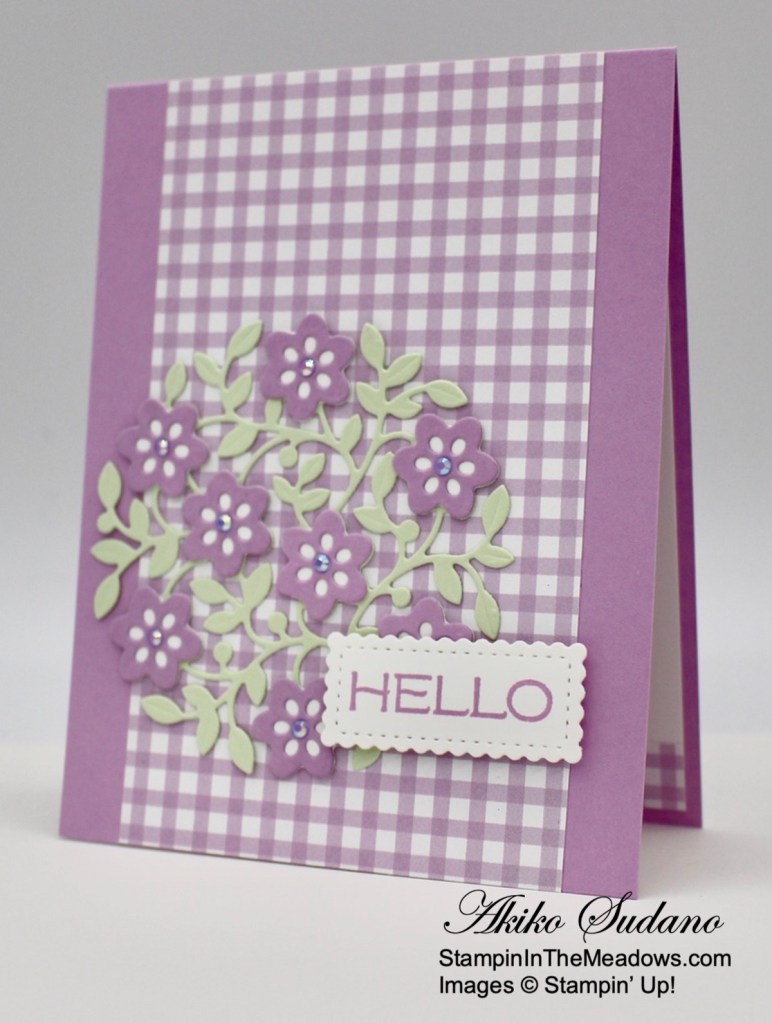
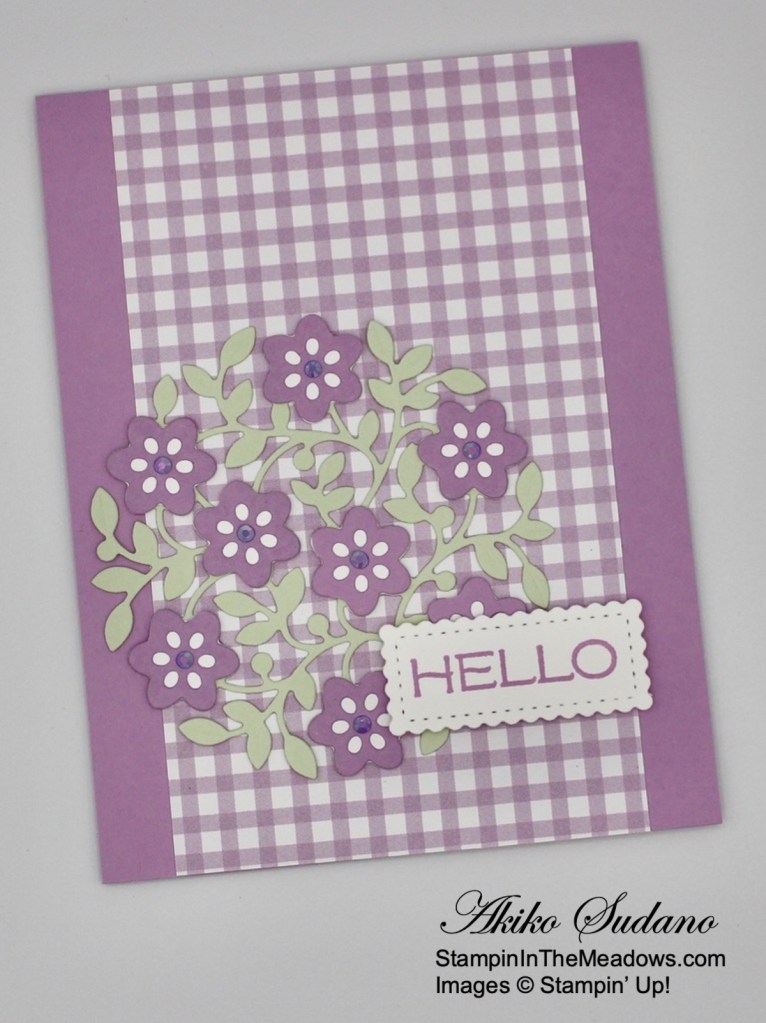
I wrapped the panel with a length of Fresh Freesia ribbon, securing it in the back. I stamped the sentiment from the Many Happenings stamp set in Fresh Freesia ink on a basic white panel and cut it out with the Messages die. I adhered it to the card front with dimensionals over the ribbon.

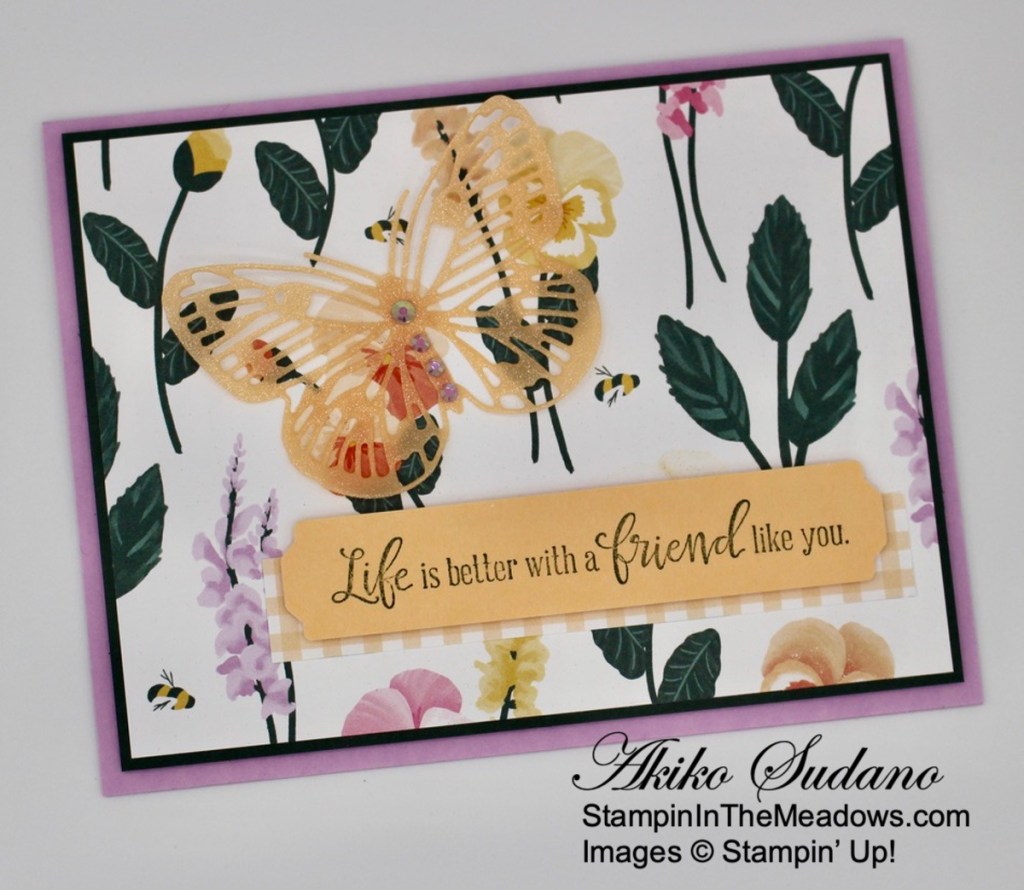
I cut the small detailed butterfly from the Brilliant Wings dies from Fresh Freesia shimmer vellum and adhered it to the card front next to the label with glue dots in the butterfly body, allowing the wings to flutter freely. I finished the butterfly with a rhinestone and added two more to finish the card front.


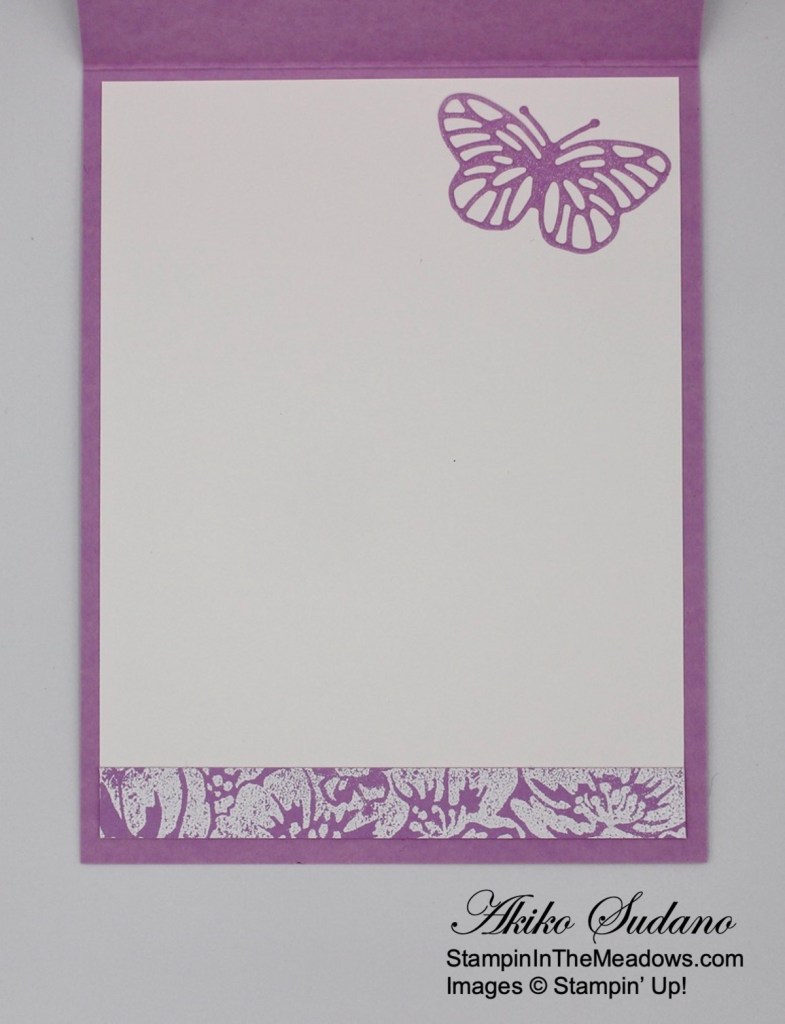
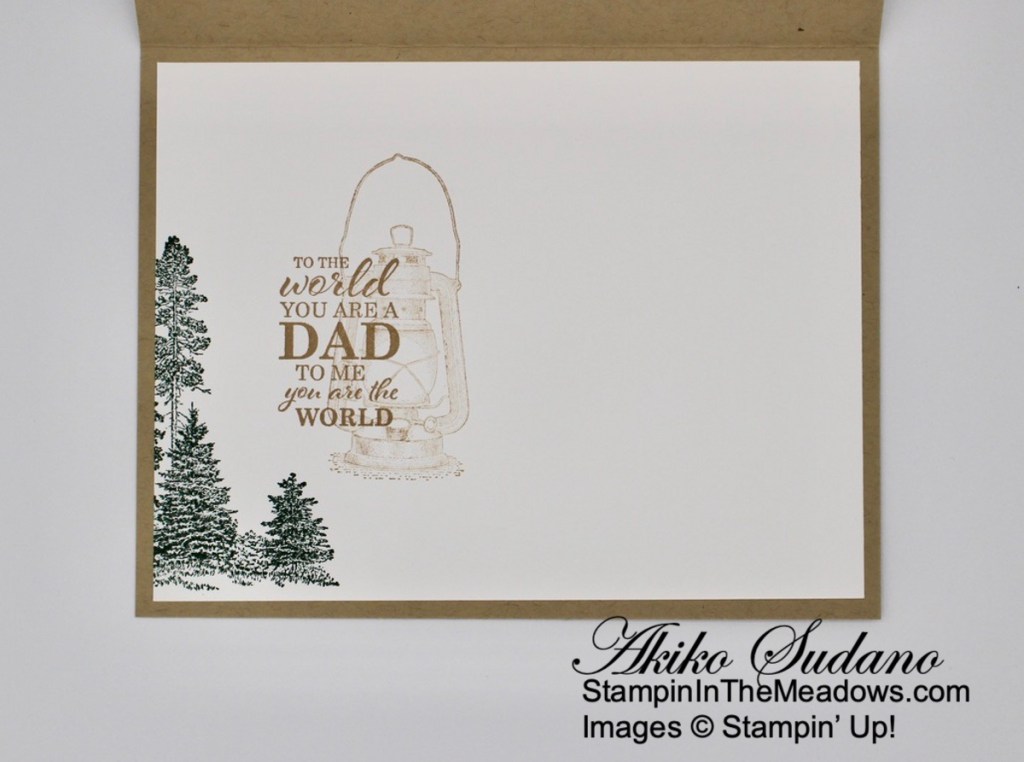
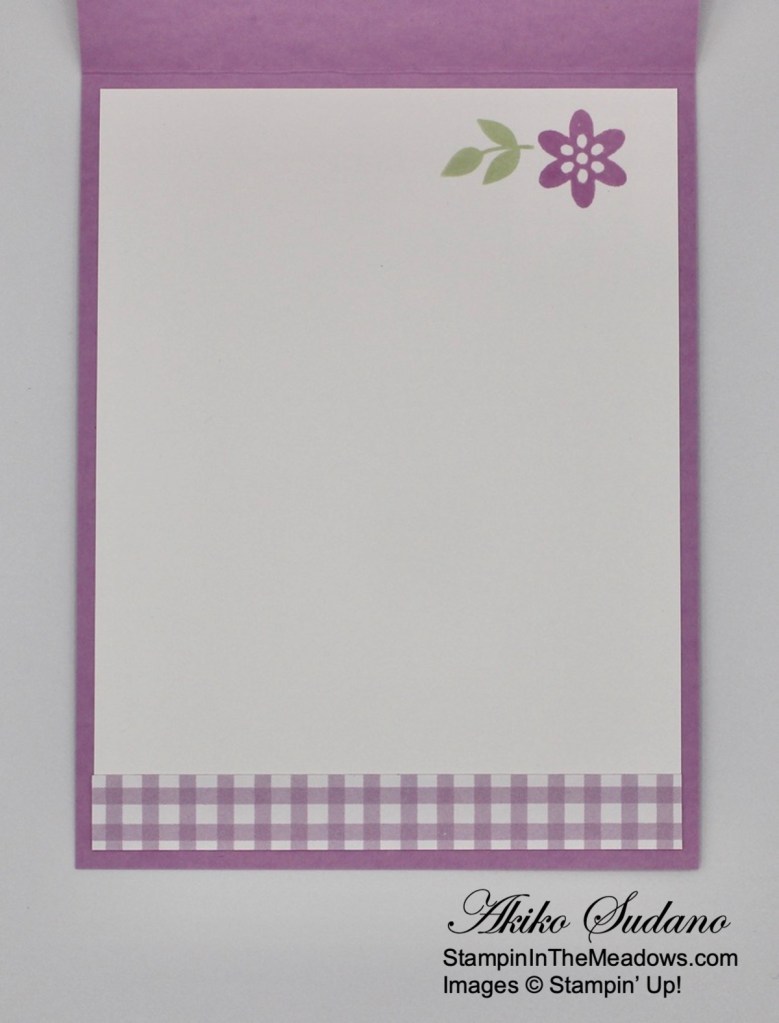
For the inside of the card, I used the Stampin’ Up! Wild Roses stamp again on a strip of Fresh Freesia card stock and embossed it with white embossing powder. I adhered it to the bottom of a Basic White panel. I adhered a panel of adhesive strip to the back of another panel of Fresh Freesia Vellum and cut out another small detailed butterfly from the Brilliant Wings dies. I peeled of the adhesive backing and adhered it to the top of the panel, pressing it with my bone folder to make sure it was secure. I adhered the panel to the inside of the card.

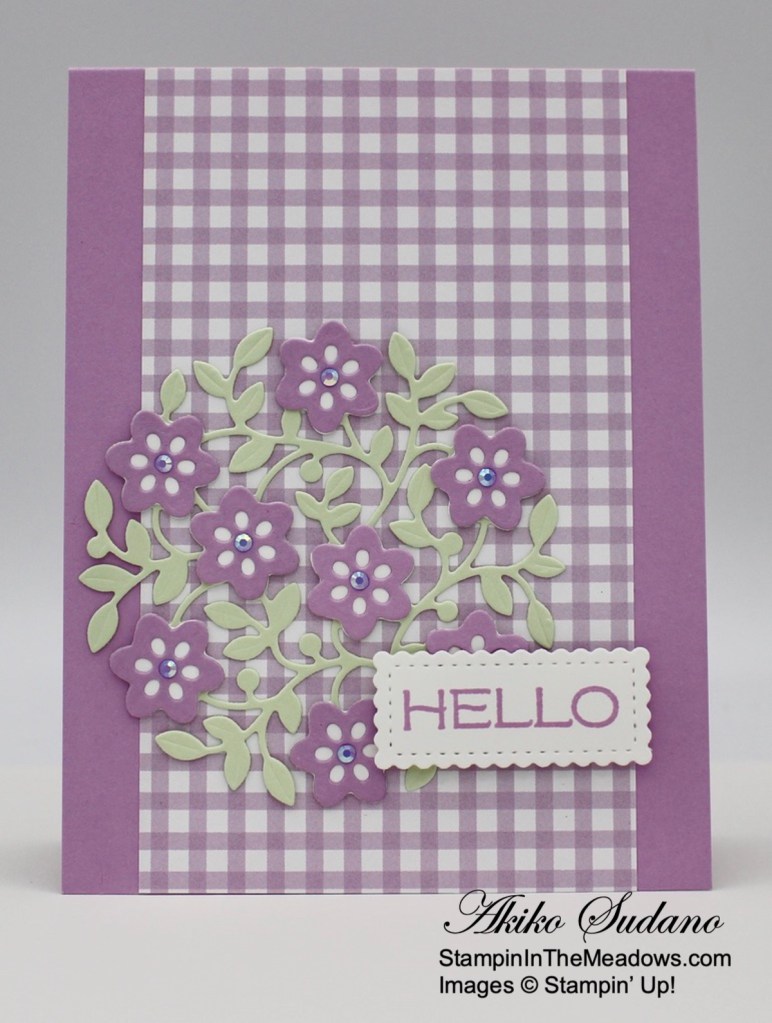
The Stampin’ Up! Wild Roses background stamp makes a pretty design for the background of a card and it’s pretty versatile as you can see from the two simple simple cards that I have made with it. I’m not sure which I like better – do you have a preference?


January – June 2021 Mini Catalog Last Chance Products Sale Going on Now!

Last chance products from the January–June 2021 Mini Catalog are available while supplies last so shop early for the best selection! Many items will sell out fast, so don’t delay – head over to my Online Store to start shopping now! 

Click Here to download a PDF of the LAST CHANCE retiring items from the Jan-Jun 2021 Mini Catalog.

Click Here to down load an Excel file with the LAST CHANCE retiring items from the Jan-Jun 2021 Mini Catalog


Current Host Code: VZMG92YZ

Use this host code when you order $50 or more and receive a free gift from me!  The free gift is your choice of any item valued up to $10.00 in the 2021 – 2022 Annual Catalog or in the Jan-Jun 2021 Mini Catalog!

If your order is over $150, please do not use the host code since you’ll receive your own Host Dollars plus I’ll still send you the free gift!  This host code can be used by anyone, no club or commitment required.  Let me know if you have any questions.


If you need any stamping supplies, I’d be very happy to be your Demonstrator.  Just click on the Shop Now button on the right side of the screen to go directly to my online store or contact me if you have any questions. 

Thanks for stopping by and Happy Stamping!

Akiko

  • Visit my online store here
  • See the current Stampin’ Up! clearance rack specials here
  • Earn FREE Stampin’ Up! products through my Wildflower Frequent Shopper Program – my way of saying thank you to my online frequent shopper customers.
  • Have any questions? I’d be happy to help, click here to contact me.

Cardstock Cuts for this project:

  • Fresh Freesia – 4-1/4″ x 11″ card base scored at 5-1/2″, 4″ x 5″ panel (front mat), 4-1/4″ x 6″ (embossed layer – I made this large enough so I had a little extra for my magnet and to hold while heat embossing), 1/2″ x 4″ (embossed inside trim)
  • 2021-2023 In Color Shimmer Vellum – two 1-1/4″ x 2-1/4″ panels (butterfly die cuts)
  • Basic White – 4″ x 5-1/4″ panel (inside panel), 1-3/4″ x 2-1/2″ (label)

Stampin’ Up! products used in this project:


Stampin’ Up! Artistically Inked Hello Card

Happy Wednesday! Today I’m sharing a simple monochrome thank you card made with the beautiful Expressions in Ink designer series paper and the Stampin’ Up! Artistically Inked bundle. This was my first opportunity to play with this beautiful suite, and so I had to show it off, so hopefully it will be back in stock soon. I am also impressed by the stamp and die bundle that is available and I paired it with the fancy Ornate Frames dies to make my label. You can find the supplies I used at the bottom of my post along with the sizes of cardstock used.

I adhered a panel of the Expressions in Ink designer series paper to an Old Olive panel and wrapped a length of gold twine around it and made a loopy bow. I adhered the panel to the front of a Polished Pink card base with dimensionals.

I stamped the sentiment from the Stampin’ Up! Artistically Inked cling stamp set in Versamark ink on a Basic White panel and sprinkled it with gold embossing powder. I heat set the embossing powder until it was shiny and cut the label out with the Ornate Frames die. I cut a Pale Papaya shimmer vellum panel with the filigree die from the Ornate Frames die and adhered it to the back of the label with glue dots.

I popped the label on the card front with dimensionals and finished it off with three gilded gems.


For the inside of the card, stamped three flowers from the Stampin’ Up! Artistically Inked stamp set in Melon Mambo ink on a Basic White panel. Aren’t those flowers just gorgeous? I made masks by stamping the flower on printer paper and cutting it out with my paper snips. Then I covered each flower with the mask and stamped the single leaf in stamped off Shaded Spruce ink. Then I stamped the spatter in Versamark twice in the center of each flower, sprinkled it with Gold Embossing Powder and heat set. This way I have gold sprinkles in the center of my flowers, just like the DSP! I adhered the panel to the inside of my card.

I thought I was going to make a simple card featuring beautiful DSP, but the wonderful Stampin’ Up! Artistically Inked stamps are just as beautiful as the DSP! Next up is some stamped floral card fronts with these gorgeous stamps and I can’t wait to play with them in different colors!


Last Day for Connect, Craft & Collect $25!

The Connect, Craft & Collect $25 promotion ends today! It’s the last day for qualifying Stampin’ Up! orders over $250 to receive an extra $25 in BONUS Stampin’ Rewards!

So Hurry – The Extra $25 Bonus ends soon!


January – June 2021 Mini Catalog Last Chance Products Sale Going on Now!

Last chance products from the January–June 2021 Mini Catalog are available while supplies last so shop early for the best selection! Many items will sell out fast, so don’t delay – head over to my Online Store to start shopping now! 

Click Here to download a PDF of the LAST CHANCE retiring items from the Jan-Jun 2021 Mini Catalog.

Click Here to down load an Excel file with the LAST CHANCE retiring items from the Jan-Jun 2021 Mini Catalog


Current Host Code: VZMG92YZ

Use this host code when you order $50 or more and receive a free gift from me!  The free gift is your choice of any item valued up to $10.00 in the 2021 – 2022 Annual Catalog or in the Jan-Jun 2021 Mini Catalog!

If your order is over $150, please do not use the host code since you’ll receive your own Host Dollars plus I’ll still send you the free gift!  This host code can be used by anyone, no club or commitment required.  Let me know if you have any questions.


If you need any stamping supplies, I’d be very happy to be your Demonstrator.  Just click on the Shop Now button on the right side of the screen to go directly to my online store or contact me if you have any questions. 

Thanks for stopping by and Happy Stamping!

Akiko

  • Visit my online store here
  • See the current Stampin’ Up! clearance rack specials here
  • Earn FREE Stampin’ Up! products through my Wildflower Frequent Shopper Program – my way of saying thank you to my online frequent shopper customers.
  • Have any questions? I’d be happy to help, click here to contact me.

Cardstock Cuts for this project:

  • Polished Pink – 5-1/2″ x 8-1/2″ card base scored at 4-1/4″
  • Old Olive – 4″ x 5-1/4″ (front mat)
  • 2021-2023 In Color Shimmer Vellum – 2-1/4″ x 2-1/2″ (filigree frame die cut)
  • Basic White – 4″ x 5-1/4″ panel (inside panel), 1-3/4″ x 2″ (label)
  • Expressions in Ink DSP – 3-7/8″ x 5-1/8″ (front background)

Stampin’ Up! products used in this project:


Stampin’ Up! Campology for the Happy Inkin’ Thursday Blog Hop

Good Morning and welcome to the Happy Inkin’ Thursday Blog Hop! Father’s Day is coming up and I made an outdoors Father’s Day card with the Stampin’ Up! Campology cling stamp set. I used my blending brushes and sponge daubers to make a sunset in the woods and the beautiful sentiments from the Best Year cling stamp set to make a Father’s Day card. You can find the supplies used to create this card at the bottom of my post along with the sizes of cardstock used.

We have a sketch challenge this week and here is the simple sketch we are using:

I started by using my blending brushes and a sponge dauber to create a sunset scene on a Basic White panel. I cut a circle from a half sheet of printer paper with the smallest layering circles dies and used it as a mask to color a sun with my blending brush and Daffodil Delight and Crushed Curry inks. Then I made a horizon with a straight edge of the printer paper covering most of the sun and the sky and colored the ground with blending brushes and Old Olive and Crushed Curry inks. I covered the sun with the cut out circle and the ground with the printer paper and colored the sky with Balmy Blue, Calypso Coral and Daffodil Delight inks. I removed the circle covering the sun and added some Calypso Coral streaks with a sponge dauber for more intense color. I finished the background by applying Misty Moonlight ink to the top of the sky with a blending brush.

I stamped the trees from the Stampin’ Up! Campology stamp set in Evening Evergreen ink several times across the sunset panel to make the woods. I stamped the tent in Evening Evergreen ink to the side. I applied Crushed Curry ink to a small Basic White panel with a blending brush and stamped the tent again and fussy cut it with my paper snips. I adhered the fussy cut tent to the panel with liquid glue, being careful to line up the tent lines.

I adhered the panel to an Evening Evergreen mat and wrapped it with Linen Thread. I stamped the sentiment from the Best Year stamp set in Evening Evergreen ink on a Crumb Cake panel and cut it out with the smallest Stitched Rectangles label die. I adhered the label to the panel with dimensionals and used dimensionals to adhere the panel to the front of a Crumb Cake card base.

For the inside, I stamped the trees from the Stampin’ Up! Campology stamp set in Evening Evergreen ink on a Basic White panel. I stamped the lantern in stamped off Crumb Cake ink and stamped the sweet sentiment from the Best Year stamp set in Crumb Cake ink on top. I adhered the panel to the inside of the card.

I’m not sure that this I colored the best sunset, but stamping the trees from the Stampin’ Up! Campology stamp set on top helps fill in some areas and makes it a pretty evening scene in spite of it. Coloring the tent separately, fussy cutting it and adhering it on the scene makes a cozy place in the dark woods. A nice little Father’s Day card for an outdoors loving Dad!

On with the Hop! Click the Next button below to visit Karen Ksenzakovic’s blog.

And just in case you get lost along the way, here’s a list of the team members participating in the hop today:


Current Host Code: VZMG92YZ

Use this host code when you order $50 or more and receive a free gift from me!  The gift is your choice of any item valued up to $10.00 in the 2021-2022 Annual Catalog or in the 2021 January-June Mini Catalog!

If your order is over $150, please do not use the host code since you’ll receive your own Host Dollars plus I’ll still send you the free gift!  This host code can be used by anyone, no commitment required.  Let me know if you have any questions.


If you need any stamping supplies, I’d be very happy to be your Demonstrator.  Just click on the Shop Now Button on the right side of the screen to go directly to my online store or contact me if you have any questions.  Happy Stamping!

Thanks for visiting!

Akiko

  • Visit my online store here
  • See the current Stampin’ Up! clearance rack specials here
  • Earn FREE Stampin’ Up! products through my Wildflower Frequent Shopper Program – my way of saying thank you to my frequent shopper online customers.
  • Have any questions? I’d be happy to help, click here to contact me.

Cardstock Cuts for this project:

  • Crumb Cake – 5-1/2″ x 8-1/2″ card base scored at 4-1/4″, 1-1/4″ x 3-1/2″ (label)
  • Evening Evergreen – 4″ x 5-1/4″ (front mat)
  • Basic White – 4″ x 5-1/4″ (inside panel), 3-7/7″ x 5-1/8″ (front panel), 1-1/2″ x 2″ (stamped tent)

Stampin’ Up! products used in this project:


Stampin’ Up! Happiest of Birthdays for the Inkin’ Krew Blog Hop

Good morning! Welcome to the Inkin’ Krew Monthly Blog Hop! The theme for this month’s hop is “Birthday” and I made a Z-fold card with the Stampin’ Up! Happiest of Birthdays stamp set and the beautiful Hydrangea Hill designer series paper. This is such a cheerful sentiment and is so versatile! Instead of the floral feminine birthday card, you can pair it with a masculine DSP for a Birthday card for the men in your family or add balloons and confetti for a lighthearted, youthful look. You can find the supplies I used at the bottom of my post along with the sizes of cardstock used.

I stamped sentiment from the Stampin’ Up! Happiest of Birthdays cling stamp set with my Stamparatus in an Ombre fashion. First I inked the top part of the stamp in Gorgeous Grape, sponged the bottom edge of the ink with a sponge dauber to soften the ink edge and stamped the Basic White panel. I wiped the ink with a moist chamois and inked the stamp with Highland Heather covering the middle and top. Then I wiped the stamp again and inked the bottom of the stamp with Misty Moonlight, again using the sponge dauber to soften the ink line. The Stamparatus was perfect, allowing me to stamp precisely over the same spot without making a mess!

I die cut the second largest Scalloped Contour rectangle from Gorgeous Grape and adhered the stamped panel to the center. I finished the panel with three floral embellishments and a Gorgeous Grape bow.

I adhered the floral Hydrangea Hill designer series paper to the right and left sections of the scored card base. I adhered the striped paper to the center and burnished the folds with my bone folder in a mountain and valley fashion.

I cut the Basic White panel with the second largest Scalloped Contours die and stamped the corners with the hydrangea flowers from the Hydrangea Haven photopolymer stamp set. I masked the corners before stamping so that only the paper inside the stitching would be stamped. I adhered the panel to the center of the large floral panel with liquid glue. Then I adhered strips of Tear & Tape to the left side of the front scalloped panel, pulled off the covers and adhered the panel to the card front, being careful to align it with the Basic White inside panel.

Isn’t the Stampin’ Up! Happiest of Birthdays wish cheerful and uplifting? And since it’s a large sentiment, it is really easy to do in an ombre or multi color look that makes it even more special!

On With The Hop! Click on the Next Blog button to move forward to Amy Koender’s project or click the Previous Blog button to move back to see the project that Mary Deatherage created.

If you get lost along the way, here are the participants for the hop:

  1. Jaimie Babarczy
  2. Tara Carpenter
  3. Leslie Larkin
  4. Karen Finkle
  5. Jillian Good
  6. Karen Ksenzakovic
  7. Donna Leonard
  8. Sue Prather
  9. Mary Deatherage
  10. Akiko Sudano <– You Are Here
  11. Amy Koenders

Current Host Code: VZMG92YZ

Use this host code when you order $50 or more and receive a free gift from me!  The free gift is your choice of any item valued up to $10.00 in the 2021 – 2022 Annual Catalog or in the Jan-Jun 2021 Mini Catalog!

If your order is over $150, please do not use the host code since you’ll receive your own Host Dollars plus I’ll still send you the free gift!  This host code can be used by anyone, no club or commitment required.  Let me know if you have any questions.


If you need any stamping supplies, I’d be very happy to be your Demonstrator.  Just click on the Shop Now button on the right side of the screen to go directly to my online store or contact me if you have any questions. 

Thanks for stopping by and Happy Stamping!

Akiko

  • Visit my online store here
  • See the current Stampin’ Up! clearance rack specials here
  • Earn FREE Stampin’ Up! products through my Wildflower Frequent Shopper Program – my way of saying thank you to my online frequent shopper customers.
  • Have any questions? I’d be happy to help, click here to contact me.

Cardstock Cuts for this project:

  • Highland Heather – 5-1/2″ x 8-1/2″ card base scored at 2-1/8″ (mountain) and 4-1/4″, (valley)
  • Gorgeous Grape – 3-3/8″ x 4-5/8″ (scalloped mat)
  • Basic White – 3-3/8″ x 4-5/8″ (inside panel), 2-5/8″ x 3-15/16″ (front label),
  • Hydrangea Hill DSP – 4″ x 5-1/4″ (back floral panel), two 1-7/8″ x 5-1/4″ panel (front floral panel and inside striped panel)

Stampin’ Up! products used in this project:


Stampin’ Up! Wild Cats Video Tutorial

Good Morning, I hope you had a great weekend. I’m so glad that I was able to get back to my Facebook Live videos yesterday afternoon, and I’m sharing this Hello Tiger card I made with the awesome Stampin’ Up! Wild Cats bundle. It’s a fun bundle to play with and I especially love the In the Wild designer series paper. You can find the supplies I used at the bottom of my post along with the sizes of cardstock used.

Here is the Facebook Live video showing how I made the card:

I posted a copy of the video in my YouTube channel here so you can view it there if you prefer.

I adhered the contrasting pattern stripe to the wild tiger paper from the In The Wild designer series paper pack. I adhered the layered panel to an Evening Evergreen mat. I cut a panel of Soft Succulent with the second largest Layering Circle die and embossed it with the Greenery embossing folder before adhering it to the layered DSP panel. I stamped two plants from the Stampin’ Up! Wild Cats photopolymer stamp set in Evening Evergreen ink on Basic White and cut them out with the coordinating die.

I stamped the sentiment from the Stampin’ Up! Wild Cats stamp set in Evening Evergreen on Cajun Craze and cut it out with the banner die from the Tasteful Labels dies. Then I went to work on my Tiger. I started by stamping the large stripes in Memento Tuxedo Black ink on Basic White. Then I stamped the body in Pumpkin Pie over the stripes. I finished by stamping the tiger’s face in Memento Tuxedo Black ink. I cut the tiger out with the coordinating die from the Big Cats dies.

I adhered the plants to the layered panel with glue dots and adhered the label with more glue dots. I wrapped the panel with black and Crumb Cake twine and tied a knot and then popped the tiger on top with dimensionals. I adhered the panel to the front of a Crushed Curry card base with dimensionals.

For the inside, I stamped the the plant from the Stampin’ Up! Wild Cats stamp set in Evening Evergreen in the lower corner and stamped some vines in the upper corner of a Basic White panel. I stamped the sentiment in Cajun Craze and adhered a strip of the tiger paper to the bottom. I adhered the panel to an Evening Evergreen mat and then adhered it to the inside of the card.

The Stampin’ Up! Wild Cats bundle is so much fun! The two step stamping tiger is awesome, but it does take practice to get the alignment the way you like it. Try pairing the In The Wild designer series paper and the plant dies with tropical themed stamp sets – I think the tiger will look great wandering through some palm trees!


January – June 2021 Mini Catalog Last Chance Products Sale Going on Now!

Last chance products from the January–June 2021 Mini Catalog are available while supplies last so shop early for the best selection! Many items will sell out fast, so don’t delay – head over to my Online Store to start shopping now! 

Click Here to download a PDF of the LAST CHANCE retiring items from the Jan-Jun 2021 Mini Catalog.

Click Here to down load an Excel file with the LAST CHANCE retiring items from the Jan-Jun 2021 Mini Catalog


Connect, Craft & Collect $25 Ending Soon!

The Connect, Craft & Collect $25 promotion runs through May 14, 2021. During this period, qualifying Stampin’ Up! orders and parties over $250 will receive an extra $25 in BONUS Stampin’ Rewards!

Here is the Host Dollars chart for the promotion:

Full details can be found on my Stampin’ Up! Promotions page. Let me know if you have any questions.  Head over to my Online Store to start shopping now before it’s too late! 


Current Host Code: VZMG92YZ

Use this host code when you order $50 or more and receive a free gift from me!  The free gift is your choice of any item valued up to $10.00 in the 2021-2022 Annual Catalog or in the Jan-Jun 2021 Mini Catalog!

If your order is over $150, please do not use the host code since you’ll receive your own Host Dollars plus I’ll still send you the free gift!  This host code can be used by anyone, no club or commitment required.  Let me know if you have any questions.


If you need any stamping supplies, I’d be very happy to be your Demonstrator.  Just click on the Shop Now button on the right side of the screen to go directly to my online store or contact me if you have any questions.  Happy Stamping!

Thanks for stopping by and have a great week!

Akiko

  • Visit my online store here
  • See the current Stampin’ Up! clearance rack specials here
  • Earn FREE Stampin’ Up! products through my Wildflower Frequent Shopper Program – my way of saying thank you to my online frequent shopper customers.
  • Have any questions? I’d be happy to help, click here to contact me.

Cardstock Cuts for this project:

  • Crushed Curry – 4-1/4″ x 11″ card base scored at 5-1/2″
  • Evening Evergreen – two 4″ x 5-1/4″ panels (front and inside mats)
  • Soft Succulent – 3″ x 3″ panel (die cut and embossed circle)
  • Cajun Craze – 3/4″ x 2-1/2″ (label)
  • Basic White – 3-7/8″ x 5-1/8″ (inside panel), 2″ x 4″ (die cut plants), 3″ x 3″ (die cut tiger)
  • In the Wild DSP – 3-7/8″ x 5-1/8″ (front background), 1/2″ x 3-7/8″ (inside trim), 1-1/2″ x 3-7/8″ (contrasting front stripe)

Stampin’ Up! products used in this project:


Stampin’ Up! Flowers of Friendship Thank You Card

Good morning! I am back home after a long visit and excited to bring a Thank You card made with the pretty Stampin’ Up! Flowers of Friendship bundle. I used some of the new In Colors and the new masks with blending brushes to create a different look. You can find the supplies I used at the bottom of my post along with the sizes of cardstock used.

I positioned the small flower mask over a Basic White panel and secured it to my work surface with post it notes. I used a blending brush to apply some Fresh Freesia ink over the masked panel, making it darker in the center and lighter on the edges. I embossed the panel with the Tasteful Textile embossing folder and adhered the embossed panel to the front of a Fresh Freesia card base.

I stamped the sentiment from the Stampin’ Up! Flowers of Friendship cling stamp set in Evening Evergreen ink on a Basic White panel. I cut it out with the smallest angled Tailor Made Tags dies. I also cut the little tab from Fresh Freesia card stock and adhered it to the front. I looped a short length of Fresh Freesia ribbon through the hole and tied a bow with white twine. I stamped three large flowers in Fresh Freesia ink on Fresh Freesia card stock and punched them out with the Flowers and Leaves punch. I stamped four large leaves in Soft Succulent ink on Soft Succulent card stock and punched them out.

I adhered the tag to the card front with glue dots. I gently curled the flower petals back with my bone folder and adhered the flowers to the card front around the tag with glue dots. I tucked the leaves under the flowers with more glue dots and added a resin dot to the center of each flower.


For the inside of the card, I used the floral mask again and inked up the bottom of a Basic White panel with my blending brush and Fresh Freesia ink. I stamped the small flower from the Stampin’ Up! Flowers of Friendship stamp set in Fresh Freesia ink on Fresh Freesia card stock and two small leaves in Soft Succulent ink on Soft Succulent card stock. I colored the flower center with Fresh Freesia Stampin’ Blend and punched the flower and leaves out. I adhered them to the bottom of the panel and adhered the panel to the inside of the card.

It felt good to be back in my stamp room, and it was really nice playing with new items! I was pleased with how pretty the masked background came out – and I was really happy with how easy it was to do with the blending brush. Give it a try, I’m sure you’ll be pleased with the results, too!

Join me for a Facebook Live this afternoon!

I’m planning to go live on my Facebook Page at 1:00 ET to make a card with the fun Wild Cats bundle! Look forward to seeing you then!


Last Week for Connect, Craft & Collect $25!

The Connect, Craft & Collect $25 promotion is underway! Through June 14, 2021, qualifying Stampin’ Up! orders and parties over $250 will receive an extra $25 in BONUS Stampin’ Rewards!

Here is the Host Dollars chart for the promotion:

Full details can be found on my Stampin’ Up! Promotions page. Let me know if you have any questions.

The Extra $25 Bonus ends on June 14!


January – June 2021 Mini Catalog Last Chance Products Sale Going on Now!

Last chance products from the January–June 2021 Mini Catalog are available while supplies last so shop early for the best selection! Many items will sell out fast, so don’t delay – head over to my Online Store to start shopping now! 

Click Here to download a PDF of the LAST CHANCE retiring items from the Jan-Jun 2021 Mini Catalog.

Click Here to down load an Excel file with the LAST CHANCE retiring items from the Jan-Jun 2021 Mini Catalog


The June Paper Pumpkin Kit is Expressions In Color!

Dream and discover In Color! With the Expressions In Color Paper Pumpkin Kit, you’ll be introduced to our intriguing collection of In Colors for 2021–2023—and, you’ll find a familiar shade from our 2020–2022 In Color selection. This month’s ink-credible kit contains enough elements to create nine cards—and coordinating envelopes—including ink-stained paper pieces, an exclusive stamp set, and not one, but two Classic Stampin’ Spots! And, it all comes in a cute, colorful, and collectible box.

Coordinating Colors: Bumblebee, Evening Evergreen, Fresh Freesia, Polished Pink

If you’re interested in subscribing to Paper Pumpkin, you can either sign up for a subscription where you are billed monthly for your kit or you can purchase a prepaid subscription in my Online Store. To see more information and to sign up for the monthly subscription click here. To see the options for prepaid subscriptions in my Online Store, click here.

Sign up deadline for the June 2021 kit is June 10, 2021.  Note: Supplies may be limited toward the end of the subscription period.


Current Host Code: VZMG92YZ

Use this host code when you order $50 or more and receive a free gift from me!  The free gift is your choice of any item valued up to $10.00 in the 2021 – 2022 Annual Catalog or in the Jan-Jun 2021 Mini Catalog!

If your order is over $150, please do not use the host code since you’ll receive your own Host Dollars plus I’ll still send you the free gift!  This host code can be used by anyone, no club or commitment required.  Let me know if you have any questions.


If you need any stamping supplies, I’d be very happy to be your Demonstrator.  Just click on the Shop Now button on the right side of the screen to go directly to my online store or contact me if you have any questions. 

Thanks for stopping by and Happy Stamping!

Akiko

  • Visit my online store here
  • See the current Stampin’ Up! clearance rack specials here
  • Earn FREE Stampin’ Up! products through my Wildflower Frequent Shopper Program – my way of saying thank you to my online frequent shopper customers.
  • Have any questions? I’d be happy to help, click here to contact me.

Cardstock Cuts for this project:

  • Fresh Freesia – 5-1/2″ x 8-1/2″ card base scored at 4-1/4″, 4″ x 5″ (punched flowers)
  • Soft Succulent – 1-1/2″ x 3″ (punched leaves)
  • Basic White – two 4″ x 5-1/4″ panels (inside panel and front mat), 1-1/2″ x 3″ (label)

Stampin’ Up! products used in this project:


Stampin’ Up! Quiet Meadow Thinking of You Card

Good morning! One of my favorite bundles in the new 2021-2022 Annual Catalog is the Stampin’ Up! Quiet Meadow bundle. I love the detail botanical print floral images in the cling stamp set along with the wildflower silhouette die cuts and the simple, yet elegant sentiments. Today’s card is a quick and easy card that shows off the beautiful die cuts with the 2021-2022 In Color 6″x6″ designer series paper. You can find the supplies I used at the bottom of my post along with the sizes of cardstock used.

I adhered a panel of Soft Succulent 2021-2022 In Color 6″x6″ designer series paper to the top of a Basic White panel and adhered the contrasting Soft Succulent 2021-2022 In Color 6″x6″ DSP to the bottom. I adhered the panel to the front of a Soft Succulent card base.

I cut a the two flower die cuts with the Meadow dies from the Stampin’ Up! Quiet Meadow bundle from Basic White card stock and adhered them to the card front with glue dots. I stamped the sentiment in Versamark ink on Soft Succulent card stock and sprinkled it with white embossing powder. I heat set the powder with my heat tool until it was shiny and cut out the label with the label die.

I popped the label on the card front with dimensionals. I cut the butterfly from the pretty Soft Succulent Shimmer Vellum and adhered it to the card front with a little liquid glue on the body.


For the inside of the card, I adhered the checked Soft Succulent DSP to the bottom of a Basic White panel. I adhered the panel to the inside of the card.

The result is a simple monotone card in pretty Soft Succulent that shows off the beauty of the wildflower die cuts from the Stampin’ Up! Quiet Meadow bundle. This versatile bundle can be used in a lot of different ways and is perfect to experiment with different coloring techniques! Or, as you can see from this card, simply left as die cuts without color!


Connect, Craft & Collect $25 Going on Now!

The Connect, Craft & Collect $25 promotion is underway! Through June 14, 2021, qualifying Stampin’ Up! orders and parties over $250 will receive an extra $25 in BONUS Stampin’ Rewards!

Here is the Host Dollars chart for the promotion:

Full details can be found on my Stampin’ Up! Promotions page. Let me know if you have any questions.


January – June 2021 Mini Catalog Last Chance Products Sale Going on Now!

Last chance products from the January–June 2021 Mini Catalog are available while supplies last so shop early for the best selection! Many items will sell out fast, so don’t delay – head over to my Online Store to start shopping now! 

Click Here to download a PDF of the LAST CHANCE retiring items from the Jan-Jun 2021 Mini Catalog.

Click Here to down load an Excel file with the LAST CHANCE retiring items from the Jan-Jun 2021 Mini Catalog


Current Host Code: VZMG92YZ

Use this host code when you order $50 or more and receive a free gift from me!  The free gift is your choice of any item valued up to $10.00 in the 2021 – 2022 Annual Catalog or in the Jan-Jun 2021 Mini Catalog!

If your order is over $150, please do not use the host code since you’ll receive your own Host Dollars plus I’ll still send you the free gift!  This host code can be used by anyone, no club or commitment required.  Let me know if you have any questions.


If you need any stamping supplies, I’d be very happy to be your Demonstrator.  Just click on the Shop Now button on the right side of the screen to go directly to my online store or contact me if you have any questions. 

Thanks for stopping by and Happy Stamping!

Akiko

  • Visit my online store here
  • See the current Stampin’ Up! clearance rack specials here
  • Earn FREE Stampin’ Up! products through my Wildflower Frequent Shopper Program – my way of saying thank you to my online frequent shopper customers.
  • Have any questions? I’d be happy to help, click here to contact me.

Cardstock Cuts for this project:

  • Soft Succulent – 4-1/4″ x 11″ card base scored at 5-1/2″, 1-1/4″ x 3-1/2″ (label)
  • 2021-2023 In Color Shimmer Vellum – 1″ x 1-1/4″ (butterfly die cut)
  • Basic White – two 4″ x 5-1/4″ x 5″ (inside panel and front mat)
  • 2021-2023 In Color DSP – 3-7/8″ x 5-1/8″ (front background), 1-1/2″ x 3-7/8″ (plaid bottom background), 3/4″ x 4″ (inside trim)

Stampin’ Up! products used in this project:


Stampin’ Up! Peaceful Moments Friendship Card

Good morning! Today I’m sharing a simple friendship card made with the Stampin’ Up! Peaceful Moments cling stamp set and the wonderful Brilliant Wings dies. And my background is from the pretty Pansy Petals designer series paper pack! You can find the supplies I used at the bottom of my post along with the sizes of cardstock used.

I adhered a panel of Pansy Petals designer series paper to an Evening Evergreen mat and popped it on to the front of a Fresh Freesia card base with dimensionals.

I cut out the butterfly from Pale Papaya Shimmer vellum with the Brilliant Wings dies and adhered it to the card front with glue dots, leaving room for the label. I added Pale Papaya jewels to the body for extra sparkle.

I stamped the sentiment from the Stampin’ Up! Peaceful Moments stamp set in Evening Evergreen ink on a Pale Papaya panel and punched the ends with the Lovely Labels Pick A Punch. I adhered a strip of Pale Papaya gingham DSP to the card front and popped the label on top with dimensionals.


For the inside of the card, stamped the sentiment from the Stampin’ Up! Peaceful Moments stamp set in Evening Evergreen ink on a Basic White panel and adhered a panel of Pansy Patch DSP to the side. I adhered the panel to the inside of the card.

The new In Color Shimmer Vellum is beautiful and make amazing die cut butterflies with the Brilliant Wings dies. And the wonderful sentiments from the Stampin’ Up! Peaceful Moments stamp set go beautifully with everything.

We’ll be heading home tomorrow after three weeks in sunny Tucson. It’s been great to see the grandkids again, but I’m eager to get back to stamping and blogging on a regular basis!


Connect, Craft & Collect $25 Going on Now!

The Connect, Craft & Collect $25 promotion is underway! Through June 14, 2021, qualifying Stampin’ Up! orders and parties over $250 will receive an extra $25 in BONUS Stampin’ Rewards!

Here is the Host Dollars chart for the promotion:

Full details can be found on my Stampin’ Up! Promotions page. Let me know if you have any questions. 

Today is the Last Day for the Join+ Starter Kit Bonus!

Today is the last day to join Stampin’ Up! as new team member and get even MORE FREE products in your Starter Kit. New team members can get $125 $155 worth of products for only $99 + free business supplies + free shipping + all the fun being a Stampin’ Up! Demonstrator! See the complete details on my Stampin’ Up! Promotions page.

If you have any questions about joining or being a Stampin’ Up! Demonstrator, please drop me a note and I’ll be happy to talk to you about the benefits of joining my team. If you would like additional information about joining check out my Join My Team Page.

Last Chance Products Sale Starts Tomorrow!

The January–June 2021 Mini Catalog will be retiring on June 30, so it’s time to stock up on your favorite products from the catalog before they’re gone for good. And some of the items are on Sale!!

Click Here to download a PDF of the LAST CHANCE retiring items from the Jan-Jun 2021 Mini Catalog.

Click Here to down load an Excel file with the LAST CHANCE retiring items from the Jan-Jun 2021 Mini Catalog.

DETAILS:

  • Starts: 1 June 2021 at 1:00 PM (MT)
  • Ends: 30 June 2021 at 11:59 PM (MT)
  • All products are available while supplies last, and there are no purchase limits.

Note the later start time – this is to ensure that strong Stampin’ Up! support is available for the event! Don’t forget, the last chance items are available while supplies last so shop early for the best selection! 

Click Here to go to my Online Store now!

Let me know if you have any questions and have fun shopping!


Current Host Code: VZMG92YZ

Use this host code when you order $50 or more and receive a free gift from me!  The free gift is your choice of any item valued up to $10.00 in the 2021 – 2022 Annual Catalog or in the Jan-Jun 2021 Mini Catalog!

If your order is over $150, please do not use the host code since you’ll receive your own Host Dollars plus I’ll still send you the free gift!  This host code can be used by anyone, no club or commitment required.  Let me know if you have any questions.


If you need any stamping supplies, I’d be very happy to be your Demonstrator.  Just click on the Shop Now button on the right side of the screen to go directly to my online store or contact me if you have any questions. 

Thanks for stopping by and Happy Stamping!

Akiko

  • Visit my online store here
  • See the current Stampin’ Up! clearance rack specials here
  • Earn FREE Stampin’ Up! products through my Wildflower Frequent Shopper Program – my way of saying thank you to my online frequent shopper customers.
  • Have any questions? I’d be happy to help, click here to contact me.

Cardstock Cuts for this project:

  • Fresh Freesia – 5-1/2″ x 8-1/2″ card base scored at 4-1/4″
  • Evening Evergreen – 4″ x 5-1/4″ (front mat)
  • Pale Papaya – 3/4″ x 4″ (label)
  • 2021-2023 In Color Shimmer Vellum – 2-1/4″ x 3″ (butterfly die cut)
  • Basic White – 4″ x 5-1/4″ x 5″ (inside panel)
  • Pansy Petals DSP – 3-7/8″ x 5-1/8″ (front background), 5/8″ x 4″ (gingham trim), 1-1/2″ x 4″ (inside trim)

Stampin’ Up! products used in this project:


Stampin’ Up! Vine Design for the Happy Inkin’ Thursday Blog Hop

Good Morning and welcome to the Happy Inkin’ Thursday Blog Hop! Have you seen the pretty Stampin’ Up! Vine Design bundle? It has some of the prettiest floral die cuts and wonderful sentiments and I paired it with the Fresh Freesia gingham from the Pansy Petals designer series paper for a sweet and simple Hello note card. You can find the supplies used to create this card at the bottom of my post along with the sizes of cardstock used.

We have a sketch challenge this week and here is the wonderful sketch we are using:

I adhered a panel of Fresh Freesia gingham from the Pansy Petals designer series paper pack to the front of a Fresh Freesia card base.

I cut the circle flower die from the Flowering Vines dies from Soft Sea Foam and Fresh Freesia panels and 8 of the little solid flower dies from Basic White. I cut out all of the Fresh Freesia flowers with my paper snips and adhered each to a Basic White solid flower. I then adhered the flowers on top of the flowers on the Soft Sea Foam die cut. I adhered the layered floral circle die cut to the card front with glue dots.

I stamped the sentiment from the Stampin’ Up! Vine Design cling stamp set in Fresh Freesia ink on Basic White and cut it out with the smallest scalloped rectangle from the Stitched So Sweetly dies. I adhered the label to the card front with dimensionals and finished the card by adhering a small Fresh Freesia In Color jewel to each of the flowers.

For the inside of the card, I stamped the flower and leaf from the Stampin’ Up! Vine Design stamp set in Fresh Freesia and Soft Sea Foam inks in the corner of a Basic White panel. I trimmed the bottom with a strip of the Fresh Freesia Pansy Petals DSP and adhered the panel to the inside of the card.

The Stampin’ Up! Vine Design bundle is a wonderful bundle with it’s floral dies! There’s a rectangle, oval and this circle floral die and the coordinating stamps have flowers to match and great sentiments. Try making a die cut inlay design!

On with the Hop! Click the Next button below to visit Karen Ksenzakovic’s blog.

And just in case you get lost along the way, here’s a list of the team members participating in the hop today:


Current Host Code: YGDSB9H4

Use this host code when you order $50 or more and receive a free gift from me!  The gift is your choice of any item valued up to $10.00 in the 2021-2022 Annual Catalog or in the 2021 January-June Mini Catalog!

If your order is over $150, please do not use the host code since you’ll receive your own Host Dollars plus I’ll still send you the free gift!  This host code can be used by anyone, no commitment required.  Let me know if you have any questions.


If you need any stamping supplies, I’d be very happy to be your Demonstrator.  Just click on the Shop Now Button on the right side of the screen to go directly to my online store or contact me if you have any questions.  Happy Stamping!

Thanks for visiting!

Akiko

  • Visit my online store here
  • See the current Stampin’ Up! clearance rack specials here
  • Earn FREE Stampin’ Up! products through my Wildflower Frequent Shopper Program – my way of saying thank you to my frequent shopper online customers.
  • Have any questions? I’d be happy to help, click here to contact me.

Cardstock Cuts for this project:

  • Fresh Freesia – 4-1/4″ x 11″ card base scored at 5-1/2″, 3-1/2″ x 3-1/2″ (die cut flowers)
  • Soft Sea Foam – 13-1/2″ x 3-1/2″ (die cut vine)
  • Basic White – 4″ x 5-1/4″ (inside panel), 1″ x 2-1/2″ (label), 2″ x 4″ (die cut flowers)
  • Pansy Petals DSP – 3″ x 5-1/2″ (gingham panel), 1/2″ x 4″ (inside trim)

Stampin’ Up! products used in this project:


Stampin’ Up! Many Messages Hello Card

Good morning! Today I’m sharing a colorful Hello card made with the awesome Stampin’ Up! Many Messages bundle and the new Host designer series paper Pattern Party. You can find the supplies I used at the bottom of my post along with the sizes of cardstock used.

I adhered a panel striped Pattern Party designer series paper to the bottom of a Granny Apple Green panel with liquid glue and adhered the floral panel from Pattern Party on the top. I wrapped the panel with the pretty Real Red stitched ribbon and tied a bow on the side.

I used the Pierced Blooms dies to cut the flowers and leaves from Balmy Blue, Daffodil Delight and Granny Apple Green card stock. I cut two of each flower and four leaves so that I would have enough die cuts for a flower for the inside of the card. I adhered the two flower die cuts together with a glue dot and adhered a red rhinestone to the center.

I stamped the sentiment the Stampin’ Up! Many Messages stamp set on a Basic White panel in Real Red ink. I used my Stamparatus to hold the big stamp and it helped to center the sentiment on the panel. Then I cut it out with the Messages die. I adhered the leaves to the panel with glue dots and the label and flower with dimensionals. Then I adhered the panel to the front of a Bumblebee card base with dimensionals.


For the inside of the card, I assembled the second flower and adhered it to the top of a Basic White panel with the leaves. I used the little circle from the Label Me Fancy punch to cut a Real Red circle for the flower center. I adhered a strip of the floral Pattern Party DSP to the bottom of the panel and adhered the panel to the inside of the card.

The Stampin’ Up! Many Messages bundle is so versatile with sentiments for so many occasions and I am impressed at how useful I have found the Messages die. I have found so many sentiments from other stamp sets that fit in the different labels just beautifully, and a fancy label really adds a lot to a simple card like this one! And don’t forget the pretty Pattern Party Host designer series paper – It has so many colorful designs, and it can only be purchased with the Host Dollars that you earn from a qualifying order or by hosting a party.


Connect, Craft & Collect $25 Going on Now!

The Connect, Craft & Collect $25 promotion is underway! Through June 14, 2021, qualifying Stampin’ Up! orders and parties over $250 will receive an extra $25 in BONUS Stampin’ Rewards!

Here is the Host Dollars chart for the promotion:

Full details can be found on my Stampin’ Up! Promotions page. Let me know if you have any questions. 

Join+ is Going On Now!

May is a fabulous time to join Stampin’ Up! as new team members get even MORE FREE products in their customizable Starter Kit. From 4–31 May, new team members can get $125 $155 worth of products for only $99 + free business supplies + free shipping + all the fun being a Stampin’ Up! Demonstrator! See the complete details on my Stampin’ Up! Promotions page.

If you have any questions about joining or being a Stampin’ Up! Demonstrator, please drop me a note and I’ll be happy to talk to you about the benefits of joining my team. If you would like additional information about joining check out my Join My Team Page.


Current Host Code: YGDSB9H4

Use this host code when you order $50 or more and receive a free gift from me!  The free gift is your choice of any item valued up to $10.00 in the 2021 – 2022 Annual Catalog or in the Jan-Jun 2021 Mini Catalog!

If your order is over $150, please do not use the host code since you’ll receive your own Host Dollars plus I’ll still send you the free gift!  This host code can be used by anyone, no club or commitment required.  Let me know if you have any questions.


If you need any stamping supplies, I’d be very happy to be your Demonstrator.  Just click on the Shop Now button on the right side of the screen to go directly to my online store or contact me if you have any questions. 

Thanks for stopping by and Happy Stamping!

Akiko

  • Visit my online store here
  • See the current Stampin’ Up! clearance rack specials here
  • Earn FREE Stampin’ Up! products through my Wildflower Frequent Shopper Program – my way of saying thank you to my online frequent shopper customers.
  • Have any questions? I’d be happy to help, click here to contact me.

Cardstock Cuts for this project:

  • Bumblebee – 4-1/4″ x 11″ card base scored at 5-1/2″
  • Granny Apple Green – 4″ x 5-1/4″ (front mat), 1″ x 4″ (die cut leaves)
  • Balmy Blue – 1-1/4″ x 2-1/2″ (large die cut flowers)
  • Daffodil Delight – 1/2″ x 1″ (small die cut flowers)
  • Real Red – scrap to punch out a tiny circle for the inside flower center
  • Basic White – 4″ x 5-1/4″ x 5″ (inside panel), 1-1/4″ x 2″ (label)
  • Pattern Party DSP – 3-5/8″ x 3-7/8″ (striped front panel), 1-1/2″ x 3-7/8″ (floral front panel), 1/2″ x 4″ (inside trim)

Stampin’ Up! products used in this project: