Stampin’ Up! Have a Hoot for the Inkin’ Krew Blog Hop

Good Morning! Welcome to the Inkin’ Krew Monthly Blog Hop! Our talented team has created projects this month with the theme of Halloween Fun. Be sure to check out all the projects for great inspiration for Halloween, as it’s just around the corner!

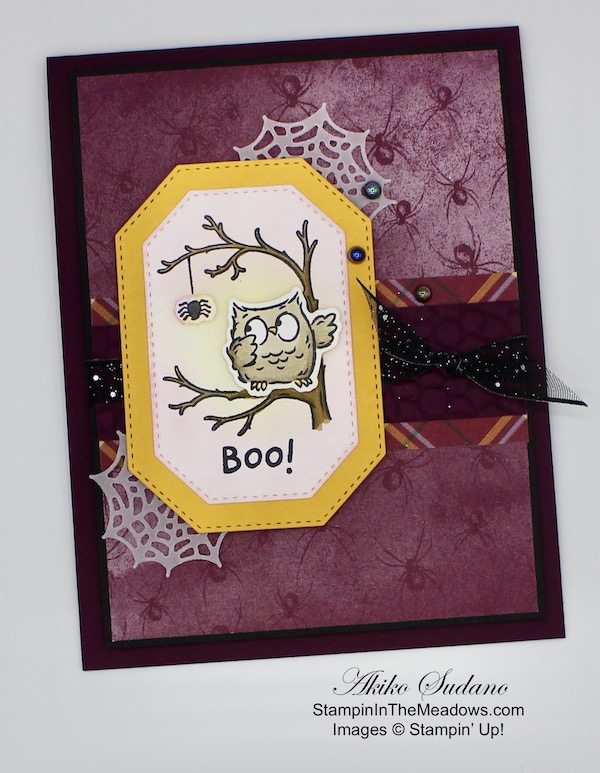
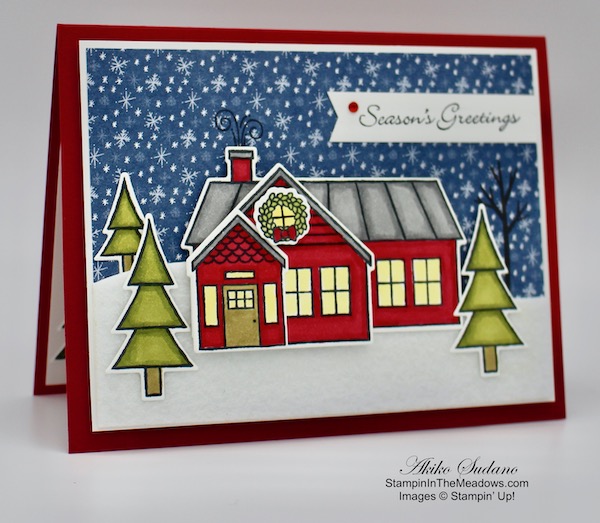
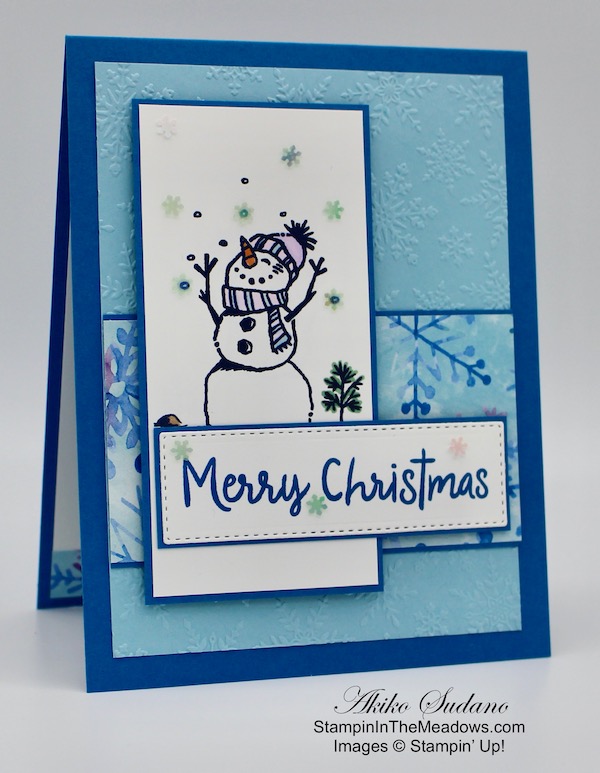
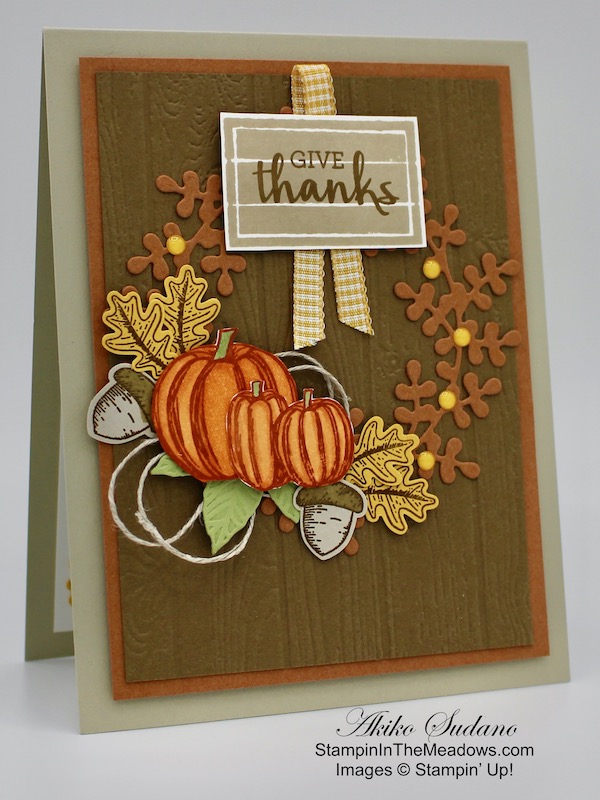
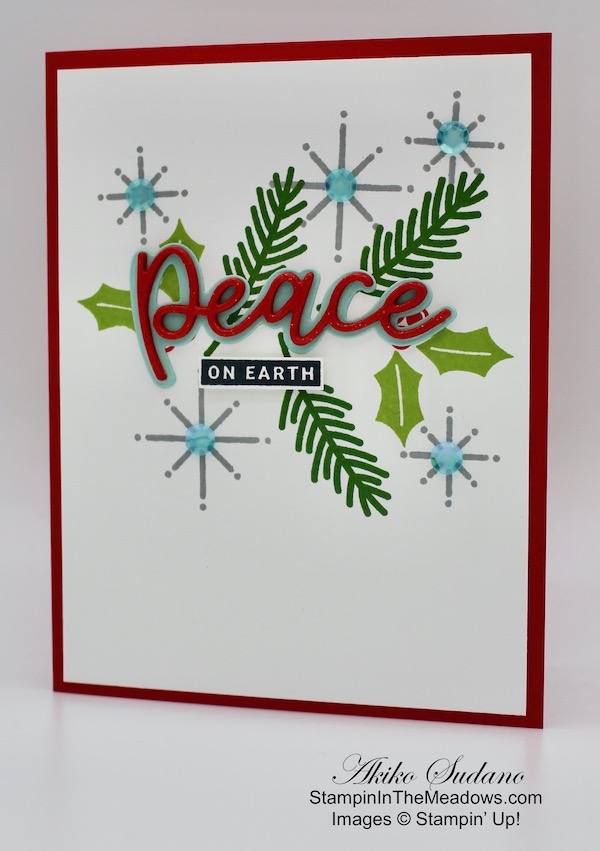
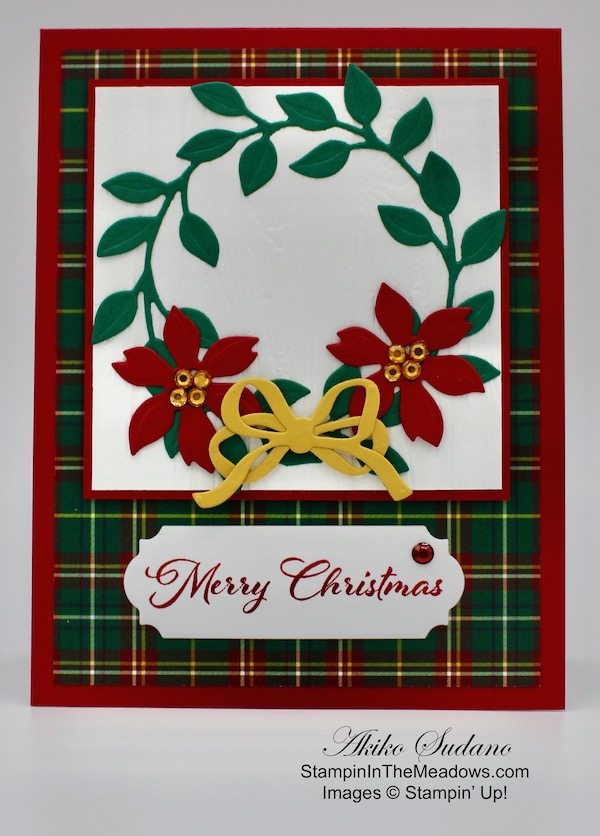
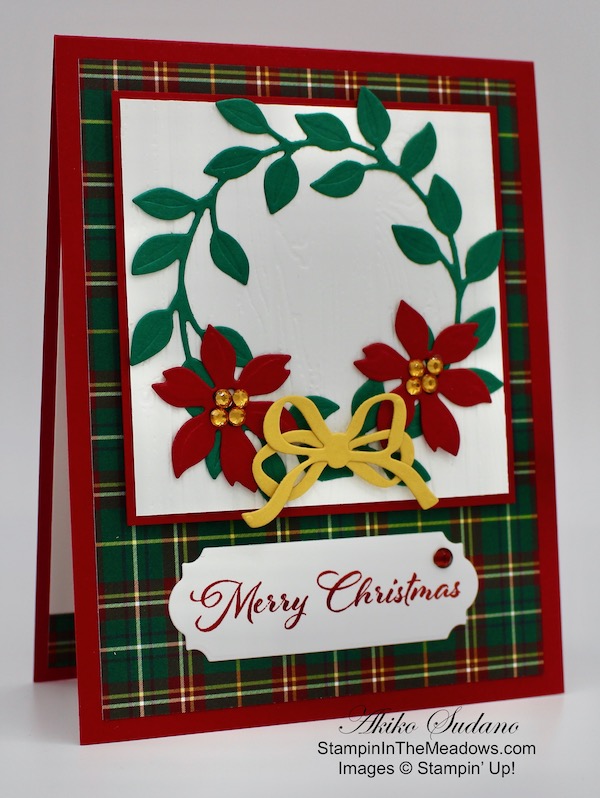
I made a Halloween card with the Stampin’ Up! Have a Hoot bundle for our hop today. These little little owls are so cute, so I had to get them! Here’s my card. You can find the supplies used to create this card at the bottom of my post along with the sizes of cardstock used.

I adhered a panel of the Plaid Tidings designer series paper to a panel of Magic in the Night designer series paper and then adhered it to a Basic Black mat. I embossed a strip of Blackberry Bliss card stock with the Hammered Metal 3D embossing folder and adhered it on top. I then wrapped a length of Black glitter ribbon around the panels and made a knot on the side. I popped the panel to the front of a Blackberry Bliss card base with dimensionals.

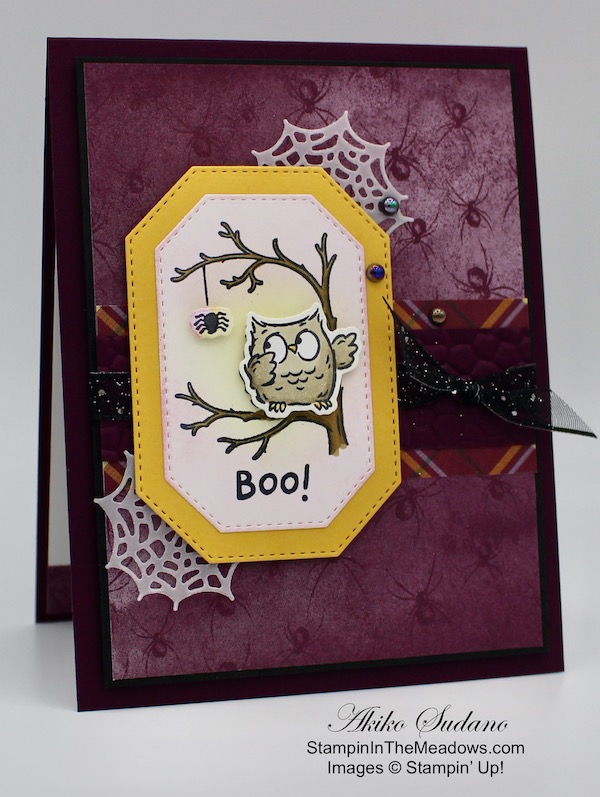
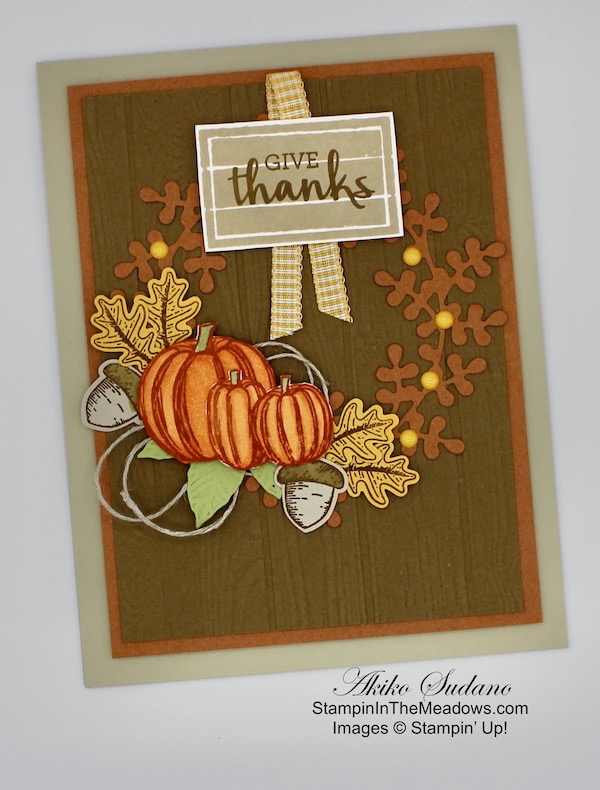
I stamped the little owl and spider and Boo! sentiment from the Stampin’ Up! Have a Hoot stamp set in Memento Tuxedo black on a Whisper White panel and cut it out with the frame from the Hippo & Friends Dies. I sponged the background with Rich Razzleberry and Bumblebee ink and colored the tree with Soft Suede Stampin’ Blends. I stamped another image on a smaller whisper White panel and cut the owl and spider out with the coordinating die from the Peek a Hoot Dies. I sponged the edges of these die cuts to match and colored the owl with Crumb Cake Stampin’ Blends and the spider with the Basic Black Stampin Blends.

I cut out a Bumblebee mat from the next larger Hippo & Friends Dies and adhered it to the back of the stamped die cut. I cut out two spider webs from Vellum card stock with the die from the Peek a Hoot Dies and adhered them to the back of the layered die cuts. I popped the owl and spider on the front with dimensionals and popped the layered die cuts on the card front. I finished it off with three iridescent pearls.

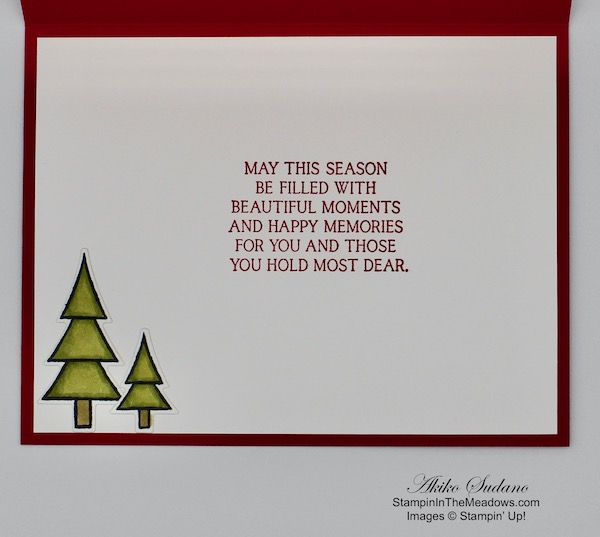
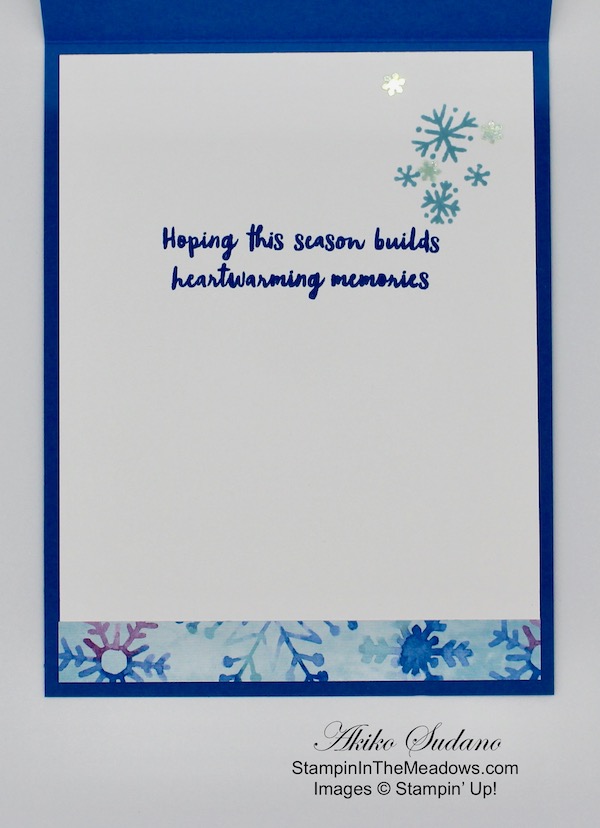
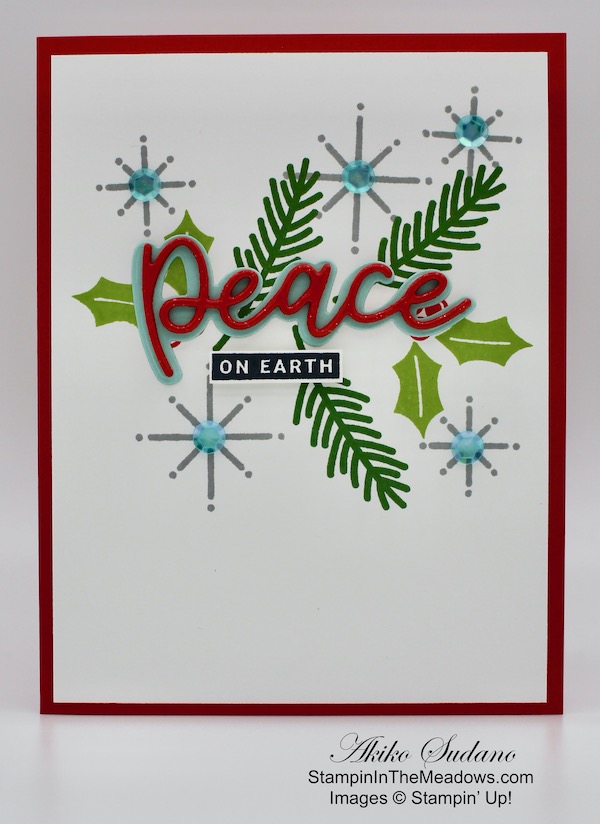
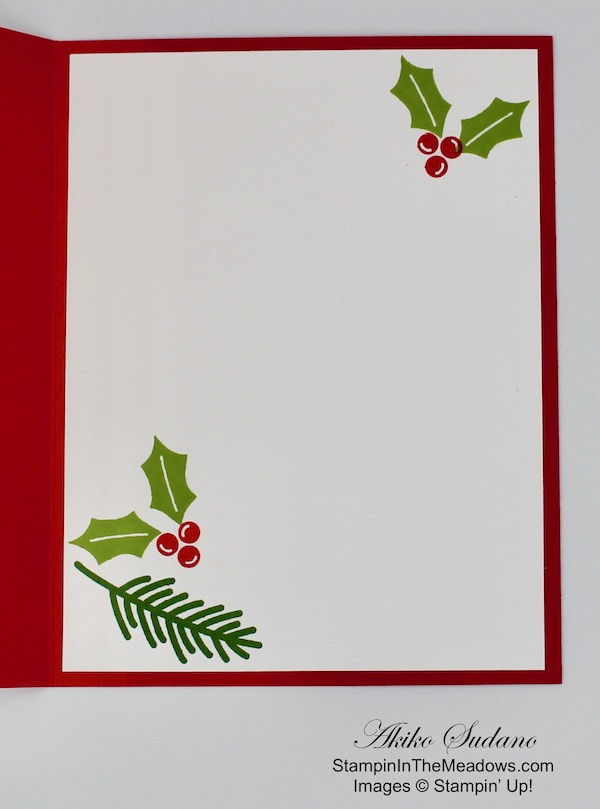
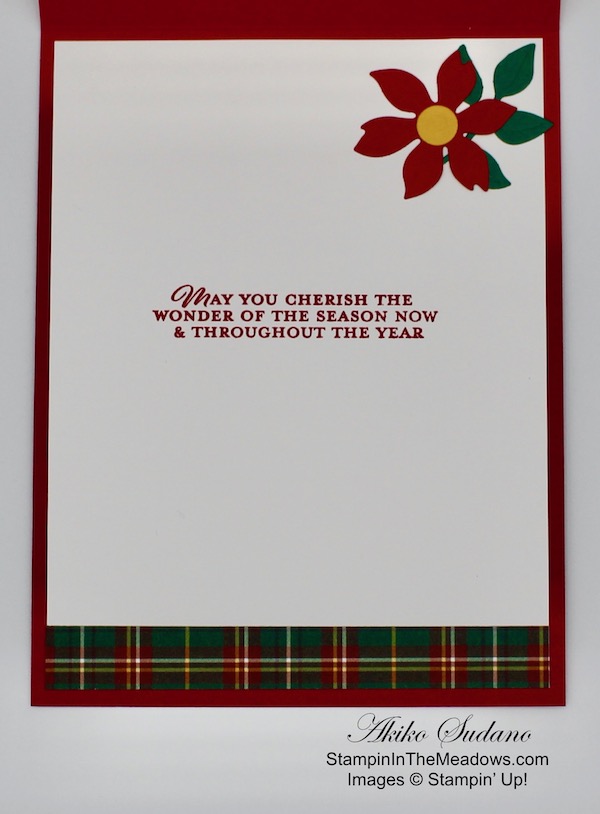
I stamped the owl and pumpkin and sentiment from the Stampin’ Up! Have a Hoot stamp set in Memento Tuxedo Black ink on a Whisper White panel. I colored the image in Crumb Cake, Pumpkin Pie, Daffodil Delight and Old Olive Stampin Blends. I carefully inked up the spider with Memento Tuxedo Black ink and stamped it in the upper corner. I added a strip of Magic in This Night DSP to the bottom and adhered it to the inside of the card.

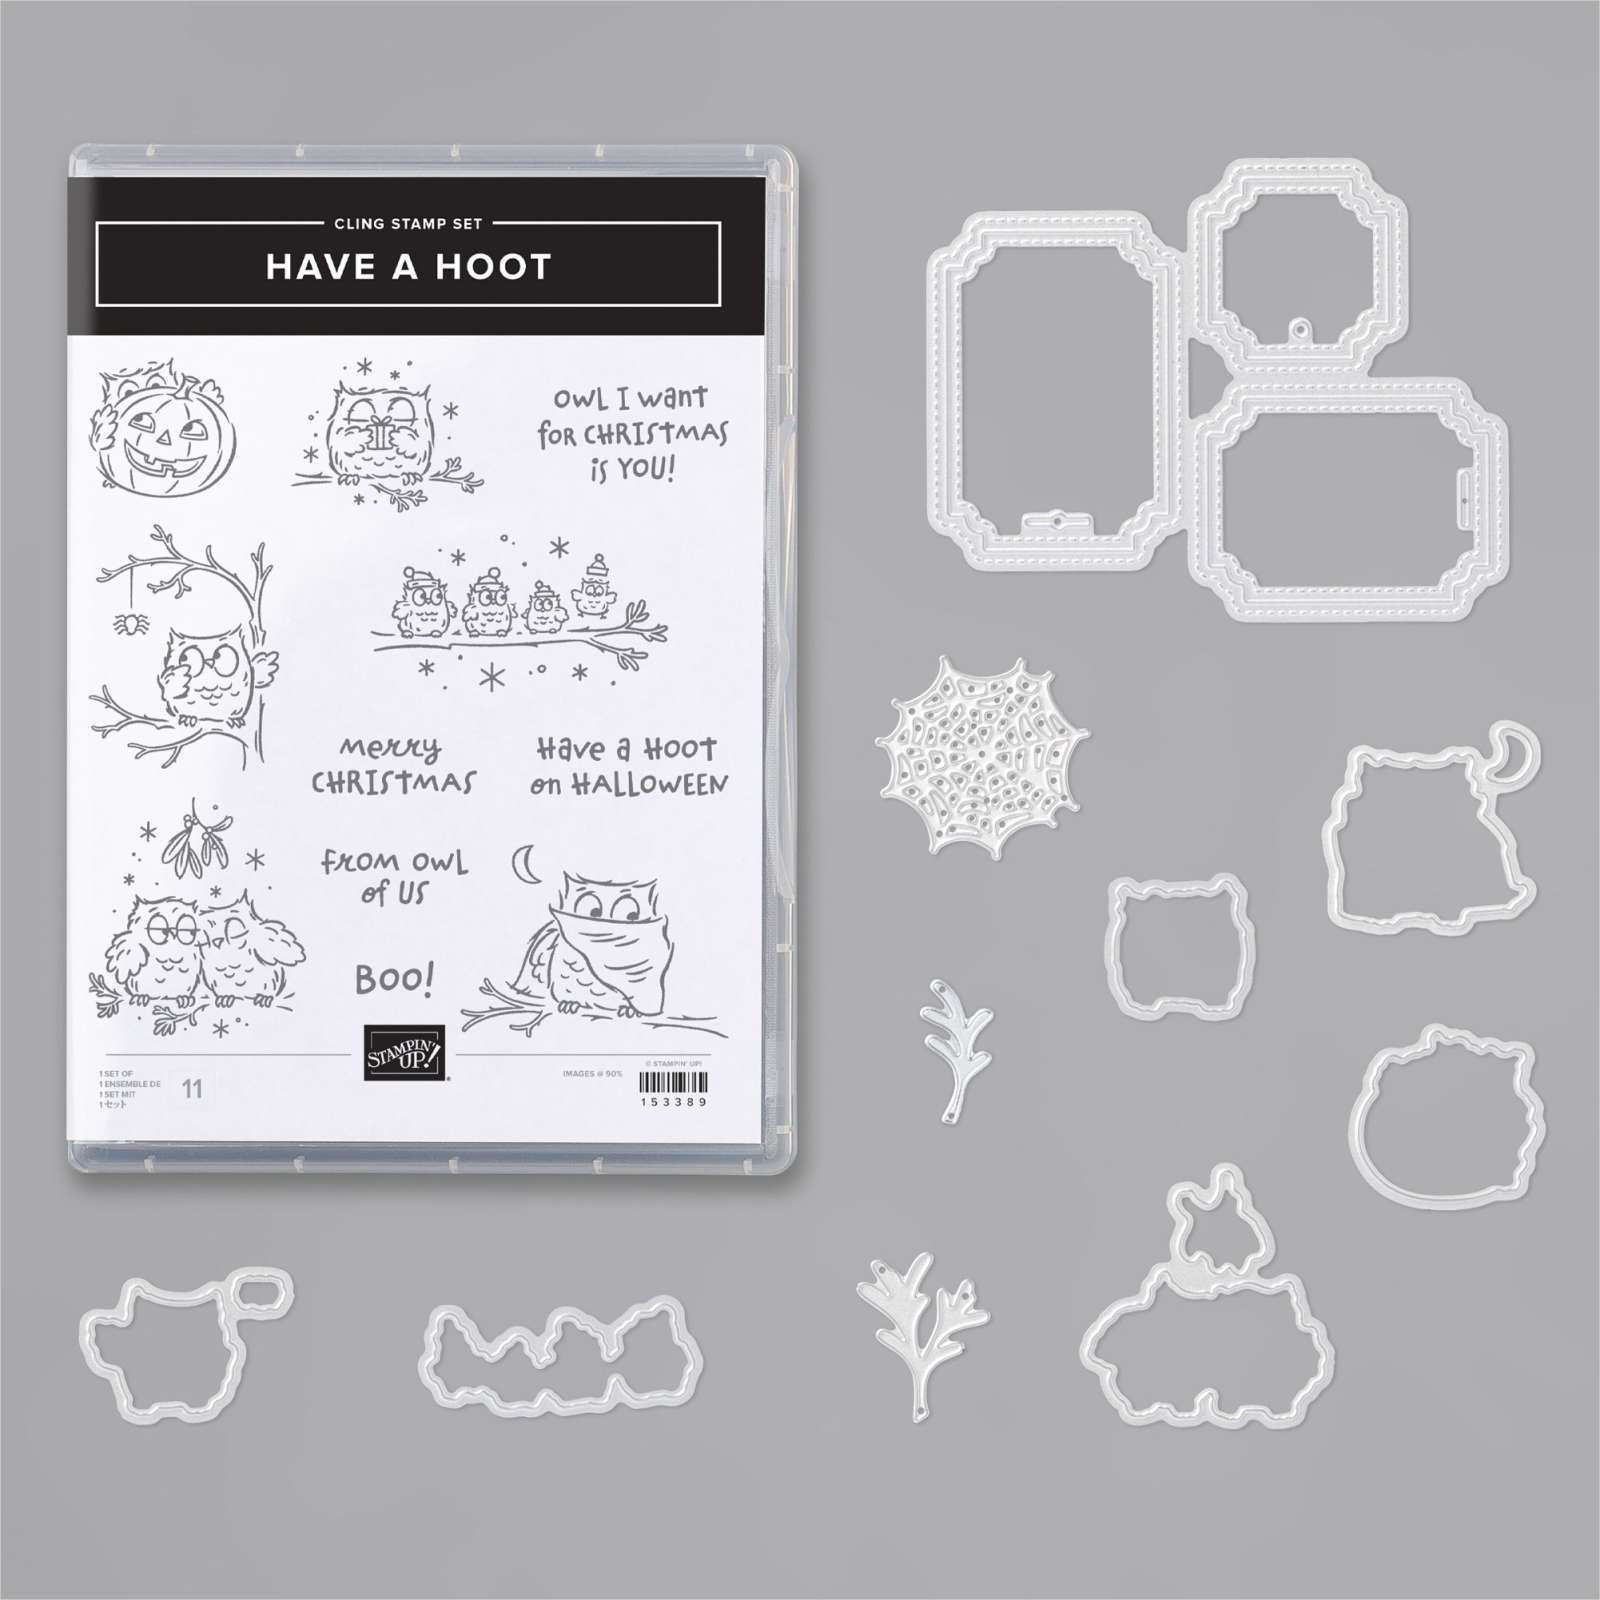
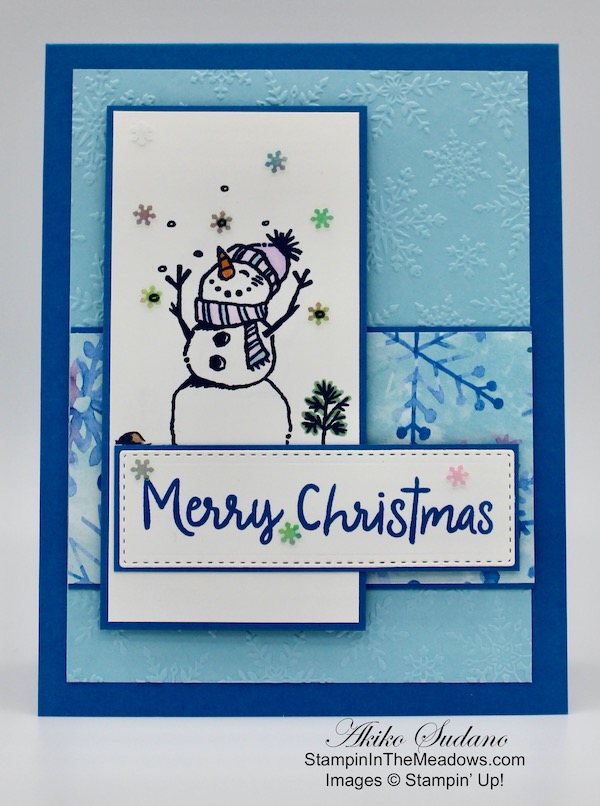
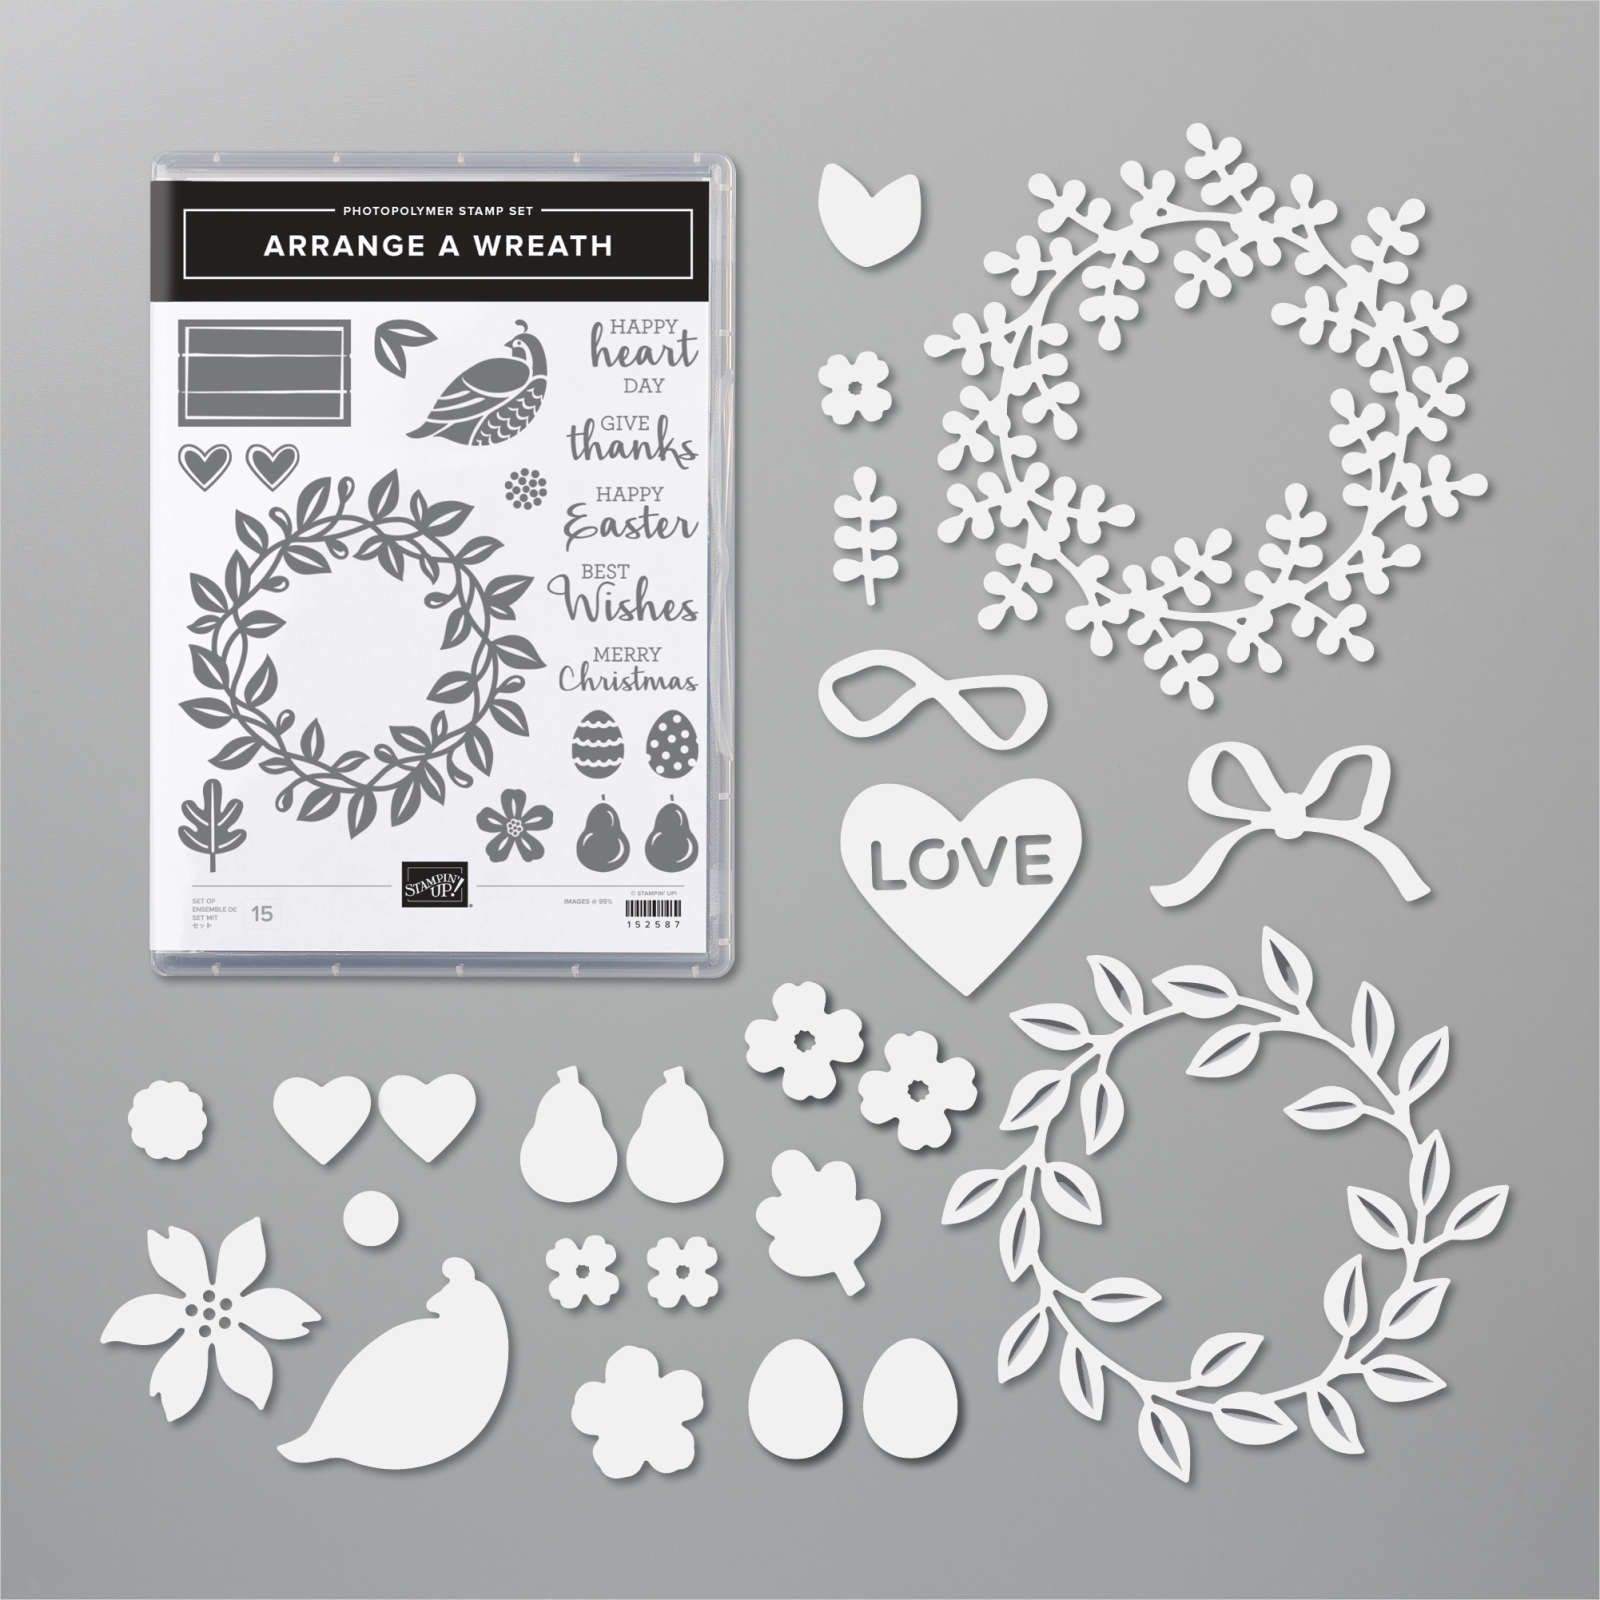
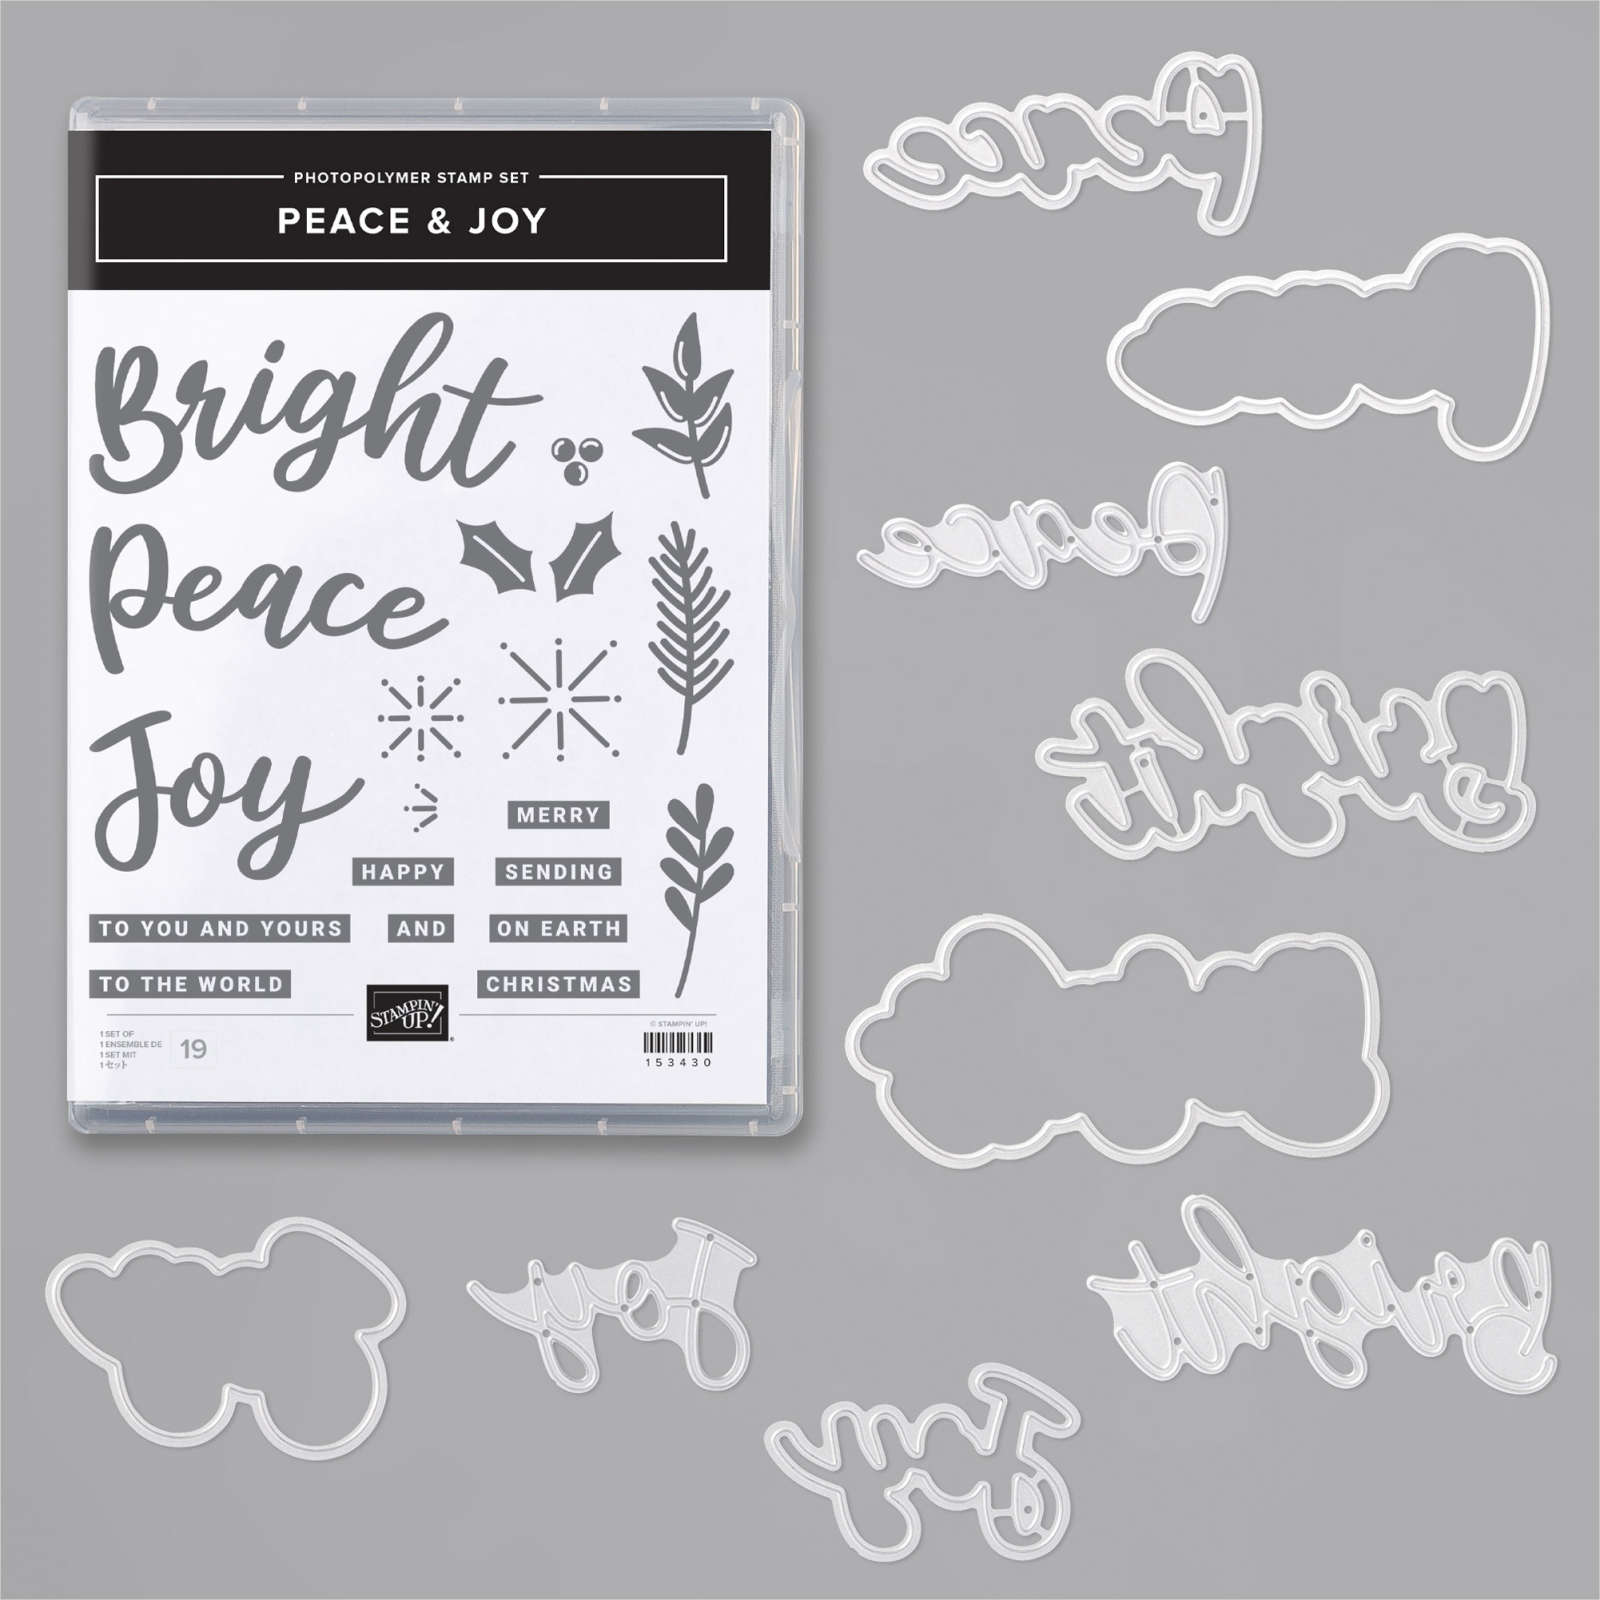
A colorful fun card to celebrate Halloween! Here’s a close up of the bundle – the Stampin’ Up! Have a Hoot cling stamps with the Peek a Hoot Dies. Aren’t those owls so cute?


Click on the Next Blog button to move forward to Karen Finkle’s project or click the Previous Blog button to move back to see the project that Donna Leonard created.

If you get lost along the way, here are the participants for the hop:


September 1-15 Host Code: 9UZFD3BH

Use this host code when you order $50 or more and receive a free gift from me!  The gift is your choice of any item valued up to $10.00 in the 2020-21 Annual Catalog or the Aug–Dec 2020 Mini Catalog. This includes some of the host exclusive sets!

If your order is over $150, please do not use the host code since you’ll receive your own Host Dollars plus I’ll still send you the free gift!  This host code can be used by anyone, no commitment required.  Let me know if you have any questions.


If you need any stamping supplies, I’d be very happy to be your Demonstrator.  Just click on the Order Stampin’ Up! Online Now button on the right side of the screen to go directly to my online store or contact me if you have any questions.  Happy Stamping!

Thanks for visiting!

Akiko

  • Visit my online store here
  • See the current Stampin’ Up! clearance rack specials here
  • Earn FREE Stampin’ Up! products through my Wildflower Frequent Shopper Program – my way of saying thank you to my frequent shopper online customers.
  • Sign up for my weekly newsletter here
  • Have any questions? I’d be happy to help, click here to contact me.

Cardstock Cuts for this project:

  • Blackberry Bliss – 4-1/4″ x 11″ card base scored at 5-1/2″, 1″ x 3-3/4″ (embossed strip)
  • Basic Black – 3-7/8″ x 5-1/8″ (front mat)
  • Bumblebee – 2-1/2″ x 3-1/2″ (die cut mat)
  • Vellum – 2″ x 3-1/4″ (die cut spider webs)
  • Whisper White – 4″ x 5-1/4″ (inside panel), 2-1/4″ x 3-1/4″ (stamped die cut frame), 1-3/4″ x 2″ (die cut spider and owl)
  • Plaid Tidings DSP – 1-1/2″ x 3-3/4″ (decorative strip)
  • Magic in This Night DSP – 3-3/4″ x 5″ (front background), 1/2″ x 4″ (inside trim)

Stampin’ Up! products used in this project:


Stampin’ Up! Coming Home Video Tutorial

Good Morning! Today I’m sharing a Christmas card made with the Stampin’ Up! Coming Home bundle that I made during my Facebook Live video tutorial yesterday afternoon. For today’s card, I used felt for the snow! I have wanted to play with felt for a long time and I finally made it happen with this card! You can find the supplies used to create this card at the bottom of my post along with the sizes of cardstock used.

Here is the Facebook Live video showing how I made the card:

I will also edit and post a concise tutorial on my YouTube Channel, so look for that soon. You can find it here.

I started by cutting a 1-3/4″ x 5″ panel of while felt from the Festive Felt sheet combo pack with the rolling hillside die from the Home Together Dies. I was really pleased at how easy it was to cut!! I also cut a panel of Whisper White to match and adhered the felt to the front. This gives me a bright white snow bank as my sample card was adhered to the DSP directly and looks a little dingy.

I stamped all my die cuts in Memento Tuxedo Black ink on Whisper White and cut them out with the coordinating dies. I stamped 4 houses, three large pine trees, two small pine trees and a wreath from the Stampin’ Up! Coming Home photopolymer stamp set. I colored them all with Stampin’ Blends – Old Olive, Smoky Slate, Real Red, Daffodil Delight and Soft Suede. I stamped the bare tree and adhered the snowbank to the Trimming the Town DSP and then the DSP to a Whisper White mat. I tucked the small pine tree under the snow bank, stamped the smoke and adhered the large house with dimensionals and liquid glue.

I adhered the two smaller houses together with liquid glue and popped them on the larger house with dimensionals. I added the wreath with dimensionals and the two large pine trees with dimensionals and liquid glue. I stamped the sentiment from the Itty Bitty Christmas stamp set in Tuxedo Black in on a strip of Whisper White. I trimmed the end with the new Banners Pick a Punch and adhered it to the front with liquid glue. I finished the label with a red rhinestone. I popped the little scene onto the front of a Real Red card base with dimensionals.

I stamped the sentiment from the Toile Christmas stamp set in real red ink and adhered the last two trees to the bottom of a Whisper White panel. I adhered the panel to the inside of the card.

The Stampin’ Up! Coming Home bundle has so many cute elements to make different kinds of houses for holidays as well as to congratulate someone who got a new home or welcome someone who just moved in next door. Click the image below to get the full details of this bundle in my Online Store.


The Stampin’ Cut & Emboss Machine is Here!

If you need a new die cutting machine, check out the new Stampin’ Cut & Emboss machine! This is a well built, smooth running machine and I used it on today’s project! Details are on my Promotions page.


The September Paper Pumpkin Kit Celebrates Fall!

September’s Paper Pumpkin kit has a multi-occasion stamp set and enough supplies to design 20 cracker box treat packages – you can create custom fall crafts to celebrate Halloween, Thanksgiving, pumpkins, and leaves.

If you’re interested in subscribing to Paper Pumpkin, you can either sign up for a subscription where you are billed monthly for your kit or you can purchase a prepaid subscription in my online store. To see more information and to sign up for the monthly subscription click here. To see the options for prepaid subscriptions in my online store, click here.

Sign up deadline for the September 2020 kit is September 10, 2020. Supplies may be limited toward the end of the subscription period.


September 1 – 15 Host Code: 9UZFD3BH

Use this host code when you order $50 or more and receive a free gift from me!  The free gift is your choice of any item valued up to $10.00 in the 2019 – 2020 Annual Catalog or in the 2020 Mini Catalog!  That includes some of the Host Exclusive stamp sets!

If your order is over $150, please do not use the host code since you’ll receive your own Host Dollars plus I’ll still send you the free gift!  This host code can be used by anyone, no club or commitment required.  Let me know if you have any questions.


If you need any stamping supplies, I’d be very happy to be your Demonstrator.  Just click on the Shop Now button on the right side of the screen to go directly to my online store or contact me if you have any questions.  Happy Stamping!

Thanks for stopping by and have a great week!

Akiko

  • Visit my online store here
  • See the current Stampin’ Up! clearance rack specials here
  • Earn FREE Stampin’ Up! products through my Wildflower Frequent Shopper Program – my way of saying thank you to my online frequent shopper customers.
  • Sign up for my weekly newsletter here
  • Have any questions? I’d be happy to help, click here to contact me.

Cardstock Cuts for this project:

  • Real Red – 5-1/2″ x 8-1/2″ card base scored at 4-1/4″
  • Whisper White – 4″ x 5-1/4″ (inside panel), 3-7/8″ x 5-1/8″ (front mat), 1/2″ x 3 (label banner), 1-3/4″ x 5″ (felt lining)
  • Trimming the Town DSP – 3-3/4″ x 5″

Stampin’ Up! products used in this project:


Stampin’ Up! Snowman Season Christmas Card

Good Morning! Today I have another Christmas card with a cheery snowman from the Stampin’ Up! Snowman Season photopolymer stamp set. This set is a returning favorite and this little snowman is my favorite – so happy for the snow! You can find the supplies used to create this card at the bottom of my post along with the sizes of cardstock used.

The layout for my card was inspired by the SSC238 Sketch from Sunday Stamps:

I embossed a panel of Balmy Blue card stock with the Winter Snow embossing folder and adhered a matted panel of Snowflake Splendor designer series paper across it. I adhered the panel to the front of a Pacific Point card base.

I stamped the cheery snowman from the Stampin’ Up! Snowman Season stamp set in Night of Navy ink on a Whisper White panel. I colored the little scene with Stampin’ Blends – Pumpkin Pie for the carrot, Purple Posy and Balmy Blue for the scarf and hat, Just Jade for the tree and Bronze for the rocks. I adhered the panel to a Pacific Point mat and popped it on the card front with dimensionals.

I stamped the sentiment from the Stampin’ Up! Snowman Season stamp set in Pacific Point ink on a strip of Whisper White and cut it out with the die from the Ornate Layers Dies using the two step die cutting method. I adhered it to a Pacific Point mat and adhered it to the card front with liquid glue and dimensionals. I added adhesive iridescent snowflakes to the card front.

I stamped the sentiment from the Stampin’ Up! Snowman Season stamp set in Pacific Point ink on a Whisper White panel and stamped the snowflake cluster in Balmy Blue ink. I adhered a strip of Snowflake Splendor DSP to the bottom of the panel and adhered the panel to the inside of the card. I also adhered some adhesive backed snowflakes to the inside.

I’m so happy to use the beautiful Snowflake Splendor DSP with this little snowman. Snowman Christmas cards are so whimsical and loved, even in places that don’t get snow at Christmas! And snowman stamps can also be used for winter cards, so they are pretty versatile.


September 1-15 Host Code: 9UZFD3BH

Use this host code when you order $50 or more and receive a free gift from me!  The gift is your choice of any item valued up to $10.00 in the 2020-21 Annual Catalog or the Aug – Dec 2020 Mini Catalog. This includes some of the host exclusive sets!

If your order is over $150, please do not use the host code since you’ll receive your own Host Dollars plus I’ll still send you the free gift!  This host code can be used by anyone, no commitment required.  Let me know if you have any questions.


If you need any stamping supplies, I’d be very happy to be your Demonstrator.  Just click on the Shop Now Button on the right side of the screen to go directly to my Online store or contact me if you have any questions.  Happy Stamping!

Thanks for stopping by and have a great day!

Akiko

  • Visit my Online store here
  • See the current Stampin’ Up! clearance rack specials here
  • Earn FREE Stampin’ Up! products through my Wildflower Frequent Shopper Program – my way of saying thank you to my frequent shopper online customers.
  • Sign up for my monthly newsletter here
  • Have any questions? I’d be happy to help, click here to contact me.

Cardstock Cuts for this project:

  • Pacific Point – 4-1/4″ x 11″ card base scored at 5-1/2″, 2-1/8″ x 3-3/4″ (DSP strip mat), 2-1/8″ x 4-1/4″ (snowman panel mat), 1″ x 3-1/4″ (label mat)
  • Balmy Blue – 3-3/4″ x 5″ (embossed panel)
  • Whisper White – 4″ x 5-1/4″ (inside panel), 2″ x 4-1/8″ (snowman panel), 1-1/4″ x 3-1/4″ (label)
  • DSP – 2″ x 3-3/4″ (front DSP strip), 1/2″ x 4″ (inside trim)

Stampin’ Up! products used in this project:


Stampin’ Up! Beautiful Autumn for the Happy Inkin’ Thursday Blog Hop

Good Morning! Welcome to another Happy Inkin’ Thursday Blog Hop! For today’s blog hop, I pulled out the beautiful Gilded Autumn specialty designer series paper with its copper foil leaves and decided to let it be the star of the show. I simply added a beautiful thank you label stamped with the sentiment from the Stampin’ Up! Beautiful Autumn stamp set. You can find the supplies used to create this card at the bottom of my post along with the sizes of cardstock used.

We have a sketch challenge this week, and here is the sketch we are using:

I embossed a strip of Mint Macaron card stock with the Subtle 3D embossing folder and adhered it to the side on the front of of a Mint Macaron card base. I adhered another panel of Mint Macaron card stock to the back of a panel of beautiful Gilded Autumn specialty Designer series paper and adhered the thin strip of brushed copper foil next to it. This makes the DSP a little stronger and allows me to pop it on the card front with dimensionals.

I stamped the sentiment from the Stampin’ Up! Beautiful Autumn photopolymer stamp set in Soft Suede ink on a small panel of Mint Macaron card stock and cut it out with a die from the Stitched Rectangles Dies. I cut the top of the large fern from the Forever Flourishing Dies from a piece of Vellum card stock and adhered it to the back of the label.

I cut the cute loop trim from the Painted Labels Dies from brushed copper foil and adhered it to the bottom of the label. I adhered a copper ribbon bow to the front and adhered the label to the front of the card with dimensionals. I finished the card front with three pearls.

I stamped two leaf sprigs from the Stampin’ Up! Beautiful Autumn stamp set in Soft Suede ink on a Whisper White panel. I added a strip of the Gilded Autumn DSP to the bottom of the panel and adhered it to the inside of the card.

The Gilded Autumn specialty designer series paper is gorgeous and makes it really easy to make beautiful fall cards.

On with the Hop! Click the Next button below to visit Karen Ksenzakovic’s blog.

And just in case you get lost along the way, here’s a list of the team members participating in the hop today:


September 1-15 Host Code: 9UZFD3BH

Use this host code when you order $50 or more and receive a free gift from me!  The gift is your choice of any item valued up to $10.00 in the 2019-20 Annual Catalog or in the 2020 January-June Mini Catalog!  That includes some of the Host Exclusive stamp sets!

If your order is over $150, please do not use the host code since you’ll receive your own Host Dollars plus I’ll still send you the free gift!  This host code can be used by anyone, no commitment required.  Let me know if you have any questions.


If you need any stamping supplies, I’d be very happy to be your Demonstrator.  Just click on the Shop Now Button on the right side of the screen to go directly to my online store or contact me if you have any questions.  Happy Stamping!

Thanks for visiting!

Akiko

  • Visit my online store here
  • See the current Stampin’ Up! clearance rack specials here
  • Earn FREE Stampin’ Up! products through my Wildflower Frequent Shopper Program – my way of saying thank you to my frequent shopper online customers.
  • Sign up for my weekly newsletter here
  • Have any questions? I’d be happy to help, click here to contact me.

Cardstock Cuts for this project:

  • Mint Macaron– 4-1/4″ x 11″ card base scored at 5-1/2″, 3/4″ x 5-1/2″ (embossed strip), 3-3/8″ x 5-1/2″ (DSP backing), 1-1/2″ x 3-1/2″ (die cut label)
  • Brushed Copper Foil – 1/4″ x 5-1/2″ (DSP trim), 3/4″ x 3-1/4″ (label die cut trim)
  • Whisper White – 4″ x 5-1/4″ (inside panel)
  • Vellum – 2″ x 2-1/4″ (die cut leaf sprig)
  • Gilded Autumn DSP – 3-1/2″ x 5-1/2″ (front background), 1/2″ x 4″ (inside trim)

Stampin’ Up! products used in this project:


Welcome September, Welcome New Promotions

Hello! Stampin’ Up! has several exciting new things starting today!

The New Stampin’ Cut & Emboss Machine is Here!

The brand new standard size Stampin’ Cut & Emboss Machine and Magnetic Plate are now available to order! Yay!! The machine has been in development for a while now and is finally ready. Tis is a durable, strong machine that is easy to use and the fold up plates make it simple to store and portable.

The new Stampin’ Cut & Emboss Machine (item 149653) comes with all the plates you need to get started: 1 Base Plate (Plate 1), 1 Die Plate (Plate 2), 2 Cutting Plates (Plate 3), and 1 Specialty Plate (Plate 4).

The new Magnetic Plate (item 150673)is a thin, fully magnetic sheet with a self-healing cutting surface and holds dies securely in place, even nested dies. This slim, portable sheet replaces a Cutting Plate in your sandwich, making it even easier to take with you!

Here’s a video introducing the new Stampin’ Cut & Emboss machine:

Note that the new Mini Stampin’ Cut & Emboss machine will be available later in the year.


Get & Go Starter Kit Joining Promotion

The Get & Go Starter Kit is a limited time promotion meant to give new Stampin’ Up! demonstrators additional products to help your get started right away. In addition to the already great valued Starter Kit, you recruits will receive precut paper, stamps, and embellishments to use in your first event.

Here are the details:

  • Promotion Dates:  September 1, 2020 – September 30, 2020
  • New demonstrators who submit their Independent Demonstrator Agreement (IDA) before 1 September or after 30 September will not be eligible for this promotion.
  • In addition to the regular starter kit (choose $125 worth of products for $99) you will also receive enough cardstock pieces to make 16 cards, a pack of Rhinestone Basic Jewels, the So Much Love stamp set, and the Queen Anne’s Lace stamp set—all for your first event.
  • 8 packs of precut cardstock of the coastal cabana pack will be provided, and 8 packs of precut cardstock of the Granny Apple Green pack, for a total of 16 cards (packs include envelopes). They even provide pictures of sample cards with recipes that you can use for your event.  Click here to see the cards and recipes.
  • Important note: Ink, adhesive, cutting tool, and clear block for stamping must be purchased separately. However, these products may be included as part of your Starter Kit product selection.

Here are the additional products that you’ll receive:


And the Stampin’ Up! Clearance Rack was Updated with Exciting New Savings!

Be sure to check it out!!


The September Paper Pumpkin Kit Celebrates Fall!

As the autumn season approaches, prepare to celebrate with the September Paper Pumpkin Kit! There’s so much to love about fall—some love the haunts of Halloween, many love the time to give thanks, and others love the changing colors and cooler temperatures. Whatever you love most about fall, September’s kit has everything you need to celebrate the season your way! Between a multi-occasion stamp set and enough supplies to design 20 cracker box treat packages, you can create custom fall crafts to celebrate Halloween, Thanksgiving, pumpkins, and leaves. Whether you make them all the same or mix ‘n’ match your crafts, there’s something for everyone in this kit!

Here are the Details:

  • Kit contains enough supplies to create 20 cracker box treat packages.
  • Each cracker box treat package can be customized to celebrate Halloween, Thanksgiving, the autumn season, or all three!

Coordinating Colors: Bumblebee, Basic Black, Cajun Craze, Cinnamon Cider, Mossy Meadow, Old Olive, Pumpkin Pie, white

If you’re interested in subscribing to Paper Pumpkin, you can either sign up for a subscription where you are billed monthly for your kit or you can purchase a prepaid subscription in my online store. To see more information and to sign up for the monthly subscription click here. To see the options for prepaid subscriptions in my online store, click here.

Sign up deadline for the September 2020 kit is September 10, 2020. Supplies may be limited toward the end of the subscription period.


September 1 – 15 Host Code: 9UZFD3BH

Use this host code when you order $50 or more and receive a free gift from me!  The gift is your choice of any item valued up to $10.00 in the 2020-21 Annual Catalog or the Aug – Dec 2020 Mini Catalog. This includes some of the host exclusive sets!

If your order is over $150, please do not use the host code since you’ll receive your own Host Dollars plus I’ll still send you the free gift!  This host code can be used by anyone, no commitment required.  Let me know if you have any questions.


If you need any stamping supplies, I’d be very happy to be your Demonstrator.  Just click on the Shop Now Button on the right side of the screen to go directly to my Online store or contact me if you have any questions.  Happy Stamping!

Thanks for stopping by and have a great day!

Akiko

  • Visit my Online store here
  • See the current Stampin’ Up! clearance rack specials here
  • Earn FREE Stampin’ Up! products through my Wildflower Frequent Shopper Program – my way of saying thank you to my frequent shopper online customers.
  • Sign up for my monthly newsletter here
  • Have any questions? I’d be happy to help, click here to contact me.

Stampin’ Up! Arrange a Wreath Video Tutorial

Good Morning! Today I’m sharing a Fall card made with the Stampin’ Up! Arrange a Wreath bundle that I made during my Facebook Live video tutorial yesterday afternoon. Actually, I used three different stamp sets for this card. I pulled in the pumpkins from the Gather Together stamp set and the oak leaves and acorns from the Beautiful Autumn bundle. You can find the supplies used to create this card at the bottom of my post along with the sizes of cardstock used.

Here is the Facebook Live video showing how I made the card:

I will also edit and post a concise tutorial on my YouTube Channel, so look for that soon. You can now find my edited YouTube video here.

I started by stamping the sign using the boards and sentiment stamps from the Stampin’ Up! Arrange a Wreath photopolymer stamp set in Sahara Sand and Soft Suede inks on Whisper White. I cut out the sign with a thin white outline. I stamped the pumpkins from the Stampin’ Up! Gather Together photopolymer stamp set in Cajun Craze ink on Whisper White and colored it with Mossy Meadow and Pumpkin Pie Stampin Blends. I fussy cut the pumpkins with my paper snips. I also used the Gathered Leaves Dies to cut a small embossed maple leaf from Pear Pizzazz card stock.

I stamped six oak leaves from the Beautiful Autumn photopolymer stamp set in Soft Suede ink on Bumblebee card stock and punched them out with the coordinating punch from the Autumn Punch Pack. I stamped three acorns from the same set in Soft Suede ink on Sahara Sand card stock and punched them out. I die cut the wreath from Cinnamon Cider Card stock using the Wreath Builder Dies. I embossed a panel of Soft Suede card stock with the Pinewood Planks 3D embossing folder and adhered it to a Cinnamon Cider mat. I adhered the wreath to the embossed panel using liquid glue and adhered linen thread using Stampin’ Seal.

I adhered the die cut leaf with glue dots so that it covered the Stampin’ Seal. I adhered the pumpkins together with liquid glue and popped them on the wreath with dimensionals. I adhered the oak leaves and acorns with glue dots, tucking the ends behind the pumpkins. I adhered the Bumblebee gingham ribbon to the sign with glue dots and adhered the sign to the top of the wreath with dimensionals. I finished off the wreath with Bumblebee enamel dots and adhered the piece to the front of a Sahara Sand card base.

I adhered the last oak leaves and acorn to a Whisper White pane and adhered the panel to the inside of the card.

The Stampin’ Up! Arrange a Wreath bundle is so versatile!! The stamped images and sentiments support wreaths for many occasions and it can be combined with lots of other stamp sets to create any themed wreath for any occasion. And who doesn’t love a wreath? Click the image below to get the full details of this bundle and shop in my Online Store.


Today is the Last Day to redeem your Bonus Days coupon codes!!

If you still have coupon codes, you can use them to get a discount on the Stampin’ Up! Arrange a Wreath bundle – Don’t let them expire!


August 15 – 31 Host Code: TV9N9BHQ

September 1 – 15 Host Code: 9UZFD3BH

Use this host code when you order $50 or more and receive a free gift from me!  The free gift is your choice of any item valued up to $10.00 in the 2019 – 2020 Annual Catalog or in the 2020 Mini Catalog!  That includes some of the Host Exclusive stamp sets!

If your order is over $150, please do not use the host code since you’ll receive your own Host Dollars plus I’ll still send you the free gift!  This host code can be used by anyone, no club or commitment required.  Let me know if you have any questions.


If you need any stamping supplies, I’d be very happy to be your Demonstrator.  Just click on the Shop Now button on the right side of the screen to go directly to my online store or contact me if you have any questions.  Happy Stamping!

Thanks for stopping by and have a great week!

Akiko

  • Visit my online store here
  • See the current Stampin’ Up! clearance rack specials here
  • Earn FREE Stampin’ Up! products through my Wildflower Frequent Shopper Program – my way of saying thank you to my online frequent shopper customers.
  • Sign up for my weekly newsletter here
  • Have any questions? I’d be happy to help, click here to contact me.

Cardstock Cuts for this project:

  • Sahara Sand – 4-1/4″ x 11″ card base scored at 5-1/2″, 1-1/2″ x 2-1/2″ (punched acorns)
  • Cinnamon Cider – 3-3/4″ x 5″ (front mat), 4″ x 4″ (wreath die cut)
  • Soft Suede – 3-1/2″ x 4-3/4″ (embossed background)
  • Bumblebee – 1-1/4″ x 4″ (punched leaves)
  • Pear Pizzazz – 1-1/2″ x 1-1/2″ (die cut leaf)
  • Whisper White – 3-3/4″ x 5″ (inside panel), 2″ x 4-1/2″ (fussy cut images)

Stampin’ Up! products used in this project:

Product List

Stampin’ Up! Peace and Joy Christmas Card

Good Morning! Today I have simple Christmas card made with the Stampin’ Up! Peace and Joy bundle. This is a simple holiday stamp set with layered word dies! You can find the supplies used to create this card at the bottom of my post along with the sizes of cardstock used.

I stamped the Christmas images from the Stampin’ Up! Peace and Joy photopolymer stamp set on a Whisper White panel using Granny Apple Green, Poppy Parade, Garden Green and Smoky Slate ink. I adhered the panel to the front of a Poppy Parade Card base with Stampin’ Seal.

I cut five of the thin peace words from the Joy Dies from Poppy Parade card stock. I put Shimmery Crystal Effects on one of the words and let it dry. I adhered the five die cut words together with the fine tip glue pen, with the shiny one on top. This gives me a thicker word, like it was made from chipboard. I cut the medium thickness peace word die from Pool Party card stock and adhered the stacked Poppy Parade words on top with the fine tip glue pen. I adhered it to the card front with liquid glue. Can you see the glittery shine?

I stamped the on earth sentiment from the Stampin’ Up! Peace and Joy in Memento Tuxedo Black ink on a small piece of Whisper White. I cut it out with paper snips and popped it on the card with dimensionals. I added Blue sequins to each of the Smoky Slate stars to finish the card front.

I used the same colors as the card front to stamp some holly and pine sprigs in the corners of a Whisper White panel and adhered the panel to the inside of the card. Here’s a close up of the shiny stacked Peace word.

Here’s the Stampin’ Up! Peace and Joy bundle, and you can see the three different sized word dies. The medium sized die can also be used to cut out the stamped words that come in the stamp set.

I love the layered word dies because they are so versatile and allow the word to really stand out. But the images in the stamp set are great all-around Christmas images that are great for accenting many styles of Christmas Cards. Here are a couple more cards that the Stampin’ Up! artists have created using this set to give you some more ideas. Click the image to download a PDF of the instructions.


The September Paper Pumpkin Kit Celebrates Fall!

As the autumn season approaches, prepare to celebrate with the September Paper Pumpkin Kit! There’s so much to love about fall—some love the haunts of Halloween, many love the time to give thanks, and others love the changing colors and cooler temperatures. Whatever you love most about fall, September’s kit has everything you need to celebrate the season your way! Between a multi-occasion stamp set and enough supplies to design 20 cracker box treat packages, you can create custom fall crafts to celebrate Halloween, Thanksgiving, pumpkins, and leaves. Whether you make them all the same or mix ‘n’ match your crafts, there’s something for everyone in this kit!

Here are the Details:

  • Kit contains enough supplies to create 20 cracker box treat packages.
  • Each cracker box treat package can be customized to celebrate Halloween, Thanksgiving, the autumn season, or all three!

Coordinating Colors: Bumblebee, Basic Black, Cajun Craze, Cinnamon Cider, Mossy Meadow, Old Olive, Pumpkin Pie, white

If you’re interested in subscribing to Paper Pumpkin, you can either sign up for a subscription where you are billed monthly for your kit or you can purchase a prepaid subscription in my online store. To see more information and to sign up for the monthly subscription click here. To see the options for prepaid subscriptions in my online store, click here.

Sign up deadline for the September 2020 kit is September 10, 2020. Supplies may be limited toward the end of the subscription period.


August 16 – 31 Host Code: TV9N9BHQ

Use this host code when you order $50 or more and receive a free gift from me!  The gift is your choice of any item valued up to $10.00 in the 2020-21 Annual Catalog or the Aug – Dec 2020 Mini Catalog. This includes some of the host exclusive sets!

If your order is over $150, please do not use the host code since you’ll receive your own Host Dollars plus I’ll still send you the free gift!  This host code can be used by anyone, no commitment required.  Let me know if you have any questions.


If you need any stamping supplies, I’d be very happy to be your Demonstrator.  Just click on the Shop Now Button on the right side of the screen to go directly to my Online store or contact me if you have any questions.  Happy Stamping!

Thanks for stopping by and have a great day!

Akiko

  • Visit my Online store here
  • See the current Stampin’ Up! clearance rack specials here
  • Earn FREE Stampin’ Up! products through my Wildflower Frequent Shopper Program – my way of saying thank you to my frequent shopper online customers.
  • Sign up for my monthly newsletter here
  • Have any questions? I’d be happy to help, click here to contact me.

Cardstock Cuts for this project:

  • Poppy Parade – 5-1/2″ x 8-1/2″ card base scored at 4-1/4″, 3-1/4″ x 4-1/4″ (die cut word)
  • Whisper White – two 4″ x 5-1/4″ panels (front and inside panels)
  • Pool Party – 1-1/2″ x 3-1/4″ (word background)

Stampin’ Up! products used in this project:


Stampin’ Up! In The Pines Christmas Card

Good Morning! Today I have another Christmas card made with the new Stampin’ Up! In The Pines bundle. This is a sweet two-step photopolymer stamp set with several rustic hand drawn pine trees and it comes bundled with the coordinating Pine Woods Dies. You can find the supplies used to create this card at the bottom of my post along with the sizes of cardstock used.

I adhered a panel of the red Heartwarming Hugs designer series paper to a Mossy Meadow mat and then to a panel of the striped Heartwarming Hugs DSP. I adhered these to the front of a Real Red card base. I cut a small Whisper White panel with the Stitched Rectangles Dies and embossed it with the Evergreen Forest 3D embossing folder. I adhered it to a Real Red mat.

I stamped the large outline tree from the Stampin’ Up! In the Pines stamp set in VersaMark Ink on a Mossy Meadow panel. I sprinkled it with gold embossing powder and heat set until shiny. I cut it out with the coordinating die and popped it on the dry embossed panel with dimensionals. I wrapped it in metallic Real Red ribbon and gold cord and added a bow on top with a glue dot. I popped the tree on the card front with dimensionals.

I stamped the sentiment from the Stampin’ Up! In the Pines stamp set in Real Red ink on a strip of Whisper White. I cut it out with the small die from the Stitched Rectangles Dies and popped it on the bottom of the tree panel with dimensionals. I finished off the card front with three red Wonderful Gems.

I stamped the sentiment from the Dove of Hope stamp set in Real Red ink on a Whisper White panel. I stamped some of the trees from the tree cluster stamp from the Stampin’ Up! In the Pines stamp set in Mossy Meadow ink on the bottom of the panel and trimmed it with more striped Heartwarming Hugs DSP. I adhered it to the inside of the card with Stampin’ Seal.

I love the scribble style boughs in these pine trees and it’s really nice to have dies that cut them out. And the Heartwarming Hugs designer series paper is real colorful and festive. It will be nice in December to pull this card out and address it to someone in my family.


August 16 – 31 Host Code: TV9N9BHQ

Use this host code when you order $50 or more and receive a free gift from me!  The gift is your choice of any item valued up to $10.00 in the 2020-21 Annual Catalog or the Aug – Dec 2020 Mini Catalog. This includes some of the host exclusive sets!

If your order is over $150, please do not use the host code since you’ll receive your own Host Dollars plus I’ll still send you the free gift!  This host code can be used by anyone, no commitment required.  Let me know if you have any questions.


If you need any stamping supplies, I’d be very happy to be your Demonstrator.  Just click on the Shop Now Button on the right side of the screen to go directly to my Online store or contact me if you have any questions.  Happy Stamping!

Thanks for stopping by and have a great day!

Akiko

  • Visit my Online store here
  • See the current Stampin’ Up! clearance rack specials here
  • Earn FREE Stampin’ Up! products through my Wildflower Frequent Shopper Program – my way of saying thank you to my frequent shopper online customers.
  • Sign up for my monthly newsletter here
  • Have any questions? I’d be happy to help, click here to contact me.

Cardstock Cuts for this project:

  • Real Red – 4-1/4″ x 11″ card base scored at 5-1/2″, 2-1/2″ x 3-7/8″ (art panel mat)
  • Mossy Meadow – 2-1/4″ x 4″ (pine tree die cut), 2-1/4″ x 4″ (red DSP mat)
  • Whisper White – 4″ x 5-1/4″ (inside panel), 2-3/8″ x 3-3/4″ (embossed panel), 3/4″ x 3″ (label)
  • Heartwarming Hugs DSP – 4″ x 5-1/4″ (front striped background), 2″ x 4″ (front red panel), 1/2″ x 4″ (inside trim)

Stampin’ Up! products used in this project:


Stampin’ Up! Cherish the Season Wreath Christmas Card

Good Morning! Today I used the wonderful Wreath Builder Dies to create a pretty Christmas Wreath to go with the sentiments from the Stampin’ Up! Cherish the Season cling stamps for a Christmas Card! You can find the supplies used to create this card at the bottom of my post along with the sizes of cardstock used.

I adhered a panel of the Shaded Spruce plaid paper from the Plaid Tidings 6″ x 6″ designer series paper pack to the front of a Real Red card base with Stampin’ Seal. I embossed a panel of Whisper White card stock with the Pinewood Planks 3D embossing folder and adhered it to a Real Red mat before popping it on the card front with dimensionals.

I cut the leaf wreath from the Wreath Builder Dies from Shaded Spruce card stock, two poinsettias from Real Red card stock and the two pieced bow from Bumblebee card stock. I adhered the wreath and poinsettias on embossed panel with liquid glue and popped the bow on with a piece of a dimensional. I accented the centers of the poinsettias with yellow rhinestones.

I stamped the Merry Christmas sentiment from the Stampin’ Up! Cherish the Season stamp set in Real Red ink on a strip of Whisper White and cut it out with the label die from the Ornate Frames Dies. I adhered it to the card front with liquid glue and decorated it with a red rhinestone.

I stamped the sentiment from the Stampin’ Up! Cherish the Season stamp set in Real Red ink on a Whisper White panel and trimmed the bottom with a strip of Plaid Tidings DSP. I added another poinsettia and small piece of the leaf wreath to the upper corner and adhered the panel to the inside of the card.

I love wreath Christmas cards and the Wreath Builder Dies make beautiful ones, whether simple or more elaborate. Plus, it’s fun – like decorating a holiday wreath for your front door!!


August 16 – 31 Host Code: TV9N9BHQ

Use this host code when you order $50 or more and receive a free gift from me!  The gift is your choice of any item valued up to $10.00 in the 2020-21 Annual Catalog or the Aug – Dec 2020 Mini Catalog. This includes some of the host exclusive sets!

If your order is over $150, please do not use the host code since you’ll receive your own Host Dollars plus I’ll still send you the free gift!  This host code can be used by anyone, no commitment required.  Let me know if you have any questions.


If you need any stamping supplies, I’d be very happy to be your Demonstrator.  Just click on the Shop Now Button on the right side of the screen to go directly to my Online store or contact me if you have any questions.  Happy Stamping!

Thanks for stopping by and have a great day!

Akiko

  • Visit my Online store here
  • See the current Stampin’ Up! clearance rack specials here
  • Earn FREE Stampin’ Up! products through my Wildflower Frequent Shopper Program – my way of saying thank you to my frequent shopper online customers.
  • Sign up for my monthly newsletter here
  • Have any questions? I’d be happy to help, click here to contact me.

Cardstock Cuts for this project:

  • Real Red – 4-1/4″ x 11″ card base scored at 5-1/2″, 3-3/8″ x 3-3/8″ (mat)
  • Bumblebee – 1-1/4″ x 3″ (bow die cuts)
  • Shaded Spruce – 3-3/4″ x 3-3/4″ (wreath die cuts)
  • Whisper White – 4″ x 5-1/4″ (inside panel), 1-1/2″ x 3-1/3″ (label), 3-1/4″ x 3-1/4″ (embossed panel)
  • Plaid Tidings DSP – 4″ x 5-1/4″ (front background), 1/2″ x 4″ (inside trim)

Stampin’ Up! products used in this project:


Stampin’ Up! Perfect Parcel Christmas Gift Box Video Tutorial

Good Morning! Today I’m sharing a cute little Christmas gift box made with the Stampin’ Up! Perfect Parcel dies that I made during my Facebook Live video tutorial yesterday afternoon. This die set has been available since last year and now you can update it using products from the August -December 2020 Mini Catalog. You can find the supplies used to create this project at the bottom of my post along with the sizes of cardstock used.

Here is the Facebook Live video showing how I made the blue box and snowflake tag:

I also posted the video to my YouTube Channel and you can view it here if you prefer.

I cut two of the box using the box die from the Stampin’ Up! Perfect Parcel Die set from Misty Moonlight card stock. I creased the box along the top and bottom score lines and adhered the box together with tear & tape. See the video for how to apply the tear & tape.

I applied the Snowflake Splendor designer series paper to the side and top box panels and folded the top down, tucking the flaps into the sides. I tied a length of metallic Seaside Spray ribbon around the box. I used the tag topper die from the Stampin’ Up! Perfect Parcel dies to cut the top of the Seaside Spray tag panel and adhered a strip of Snowflake Splendor DSP to the bottom of the tag.

I stamped the sentiment from the Itty Bitty Christmas stamp set in Misty Moonlight ink on a Whisper White panel and cut it out with the label die. I popped the label on the tag with dimensionals. I cut the small snowflake from the So Many Snowflakes dies using Balmy Blue Glimmer paper and the medium snowflake from Misty Moonlight cardstock. I adhered the snowflakes together and adhered them to the tag. I finished the tag with rhinestone gems and used the metallic twine to loop the tag onto the ribbon before tying the bow.

The Stampin’ Up! Perfect Parcel dies makes a really nice little gift box! It’s perfectly sized to hold a gift card or sweets or maybe even handmade jewelry. And it’s perfect for coordinating your card with a fancy box for that extra special gift.


Today is the last day to earn Double Wildflower Points!!

To celebrate the new catalog, I announced Double Wildflower Points. But since I couldn’t blog for days, I decided to extend this for another week – But today is the last day! My Wildflower Points program is my way of saying thank you to my frequent shoppers.  For every $50 you order from my online store, you earn 1 point, and when you earn 8 points, I owe you a FREE $40 order of your choice!  With Double Wildflower Points, you get 2 points for each $50 order, 4 points for each $100 order, and so on, reaching the goal of 8 points faster!  Yay!!  For complete details on the program, see my Customer Rewards page.  Let me know if you have any questions!


And don’t forget to redeem your Bonus Days Coupon Codes before the end of the month!!


August 16 – 31 Host Code: TV9N9BHQ

Use this host code when you order $50 or more and receive a free gift from me!  The free gift is your choice of any item valued up to $10.00 in the 2020 – 2021 Annual Catalog or the new Aug-Dec 2020 Mini Catalog.  This includes some of the host exclusive sets!

If your order is over $150, please do not use the host code since you’ll receive your own Host Dollars plus I’ll still send you the free gift!  This host code can be used by anyone, no club or commitment required.  Let me know if you have any questions.


If you need any stamping supplies, I’d be very happy to be your Demonstrator.  Just click on the Shop Now button on the right side of the screen to go directly to my online store or contact me if you have any questions.  Happy Stamping!

Thanks for stopping by and have a great week!

Akiko

  • Visit my online store here
  • See the current Stampin’ Up! clearance rack specials here
  • Earn FREE Stampin’ Up! products through my Wildflower Frequent Shopper Program – my way of saying thank you to my online frequent shopper customers.
  • Sign up for my weekly newsletter here
  • Have any questions? I’d be happy to help, click here to contact me.

Cardstock Cuts for this project:

  • Basic Box and Tag
    • Box card stock – two 4-1/4″ x 6-1/4″ panels
    • Box DSP – two 1-1/4″ x 3-3/8″ (box sides), 7/8″ x 3-3/8″ (box top flaps), 1/4″ x 2″ (tag trim)
    • Tag – 2″ x 3-1/2″
    • Label – 1-1/2″ x 2-1/2″
    • plus anything else needed to embellish the box
  • Cherry Cobbler Box and Tag
    • Thick Whisper White – two 4-1/4″ x 6-1/4″ panels (box die cuts)
    • Cherry Cobbler – 2″ x 3-1/2″ (tag)
    • Shaded Spruce – 1″ x 2″ (pine sprigs)
    • Silver Foil – 1-1/2″ x 2-1/2″ (jingle bells)
    • ‘Tis The Season DSP – two 1-1/4″ x 3-3/8″ (box sides), 7/8″ x 3-3/8″ (box top flaps), 1/4″ x 2″ (tag trim)
    • Whisper White – 1-1/2″ x 2-1/2″ (label)
  • Snowflake Splendor Box and Tag
    • Misty Moonlight – two 4-1/4″ x 6-1/4″ panels (box die cuts), 2″ x 2″ (large snowflake)
    • Seaside Spray – 2″ x 3-1/2″ (tag)
    • Balmy Blue Glimmer – 1-1/4″ x 1-1/4″ (small snowflake)
    • Snowflake Splendor DSP – two 1-1/4″ x 3-3/8″ (box sides), 7/8″ x 3-3/8″ (box top flaps), 1/4″ x 2″ (tag trim)
    • Whisper White – 1-1/2″ x 2-1/2″ (label)

Stampin’ Up! products used in this project: