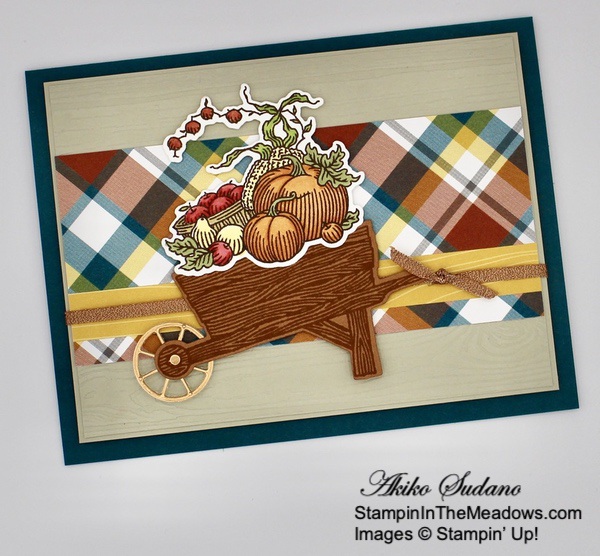
Good Morning! Welcome to the Inkin’ Krew Monthly Blog Hop! Our talented team has created projects this month with the theme of Give Thanks. I’ve used the Stampin’ Up! Autumn Goodness stamp bundle to make a card with the wonderful wheelbarrow filled with festive fall harvest foods placed against a background of embossed card stock and Plaid Tidings designer series paper.

I started by embossing a panel of Sahara Sand with the Pinewood Planks embossing folder and adhering a strip of Plaid Tidings designer series paper across the middle. I adhered a strip of Bumblebee 6″ x 6″ wood grained designer series paper on top of the Plaid Tidings paper and adhered it all to a Sahara Sand mat. Then I wrapped a piece of copper ribbon around it and tied a knot on the side. I adhered the panel to the front of a Pretty Peacock card base with dimensionals.

I stamped the wheelbarrow from the Stampin’ Up! Autumn Goodness photopolymer stamp set in Cinnamon Cider ink on a Cinnamon Cider panel and cut it out with the coordinating die. I cut out the wheel from copper foil and adhered it to the back and punched a small dot from the copper foil to cover the axel.

I stamped the harvest foods stamp from the Stampin’ Up! Autumn Goodness stamp set in Early Espresso ink on a Whisper White panel. I cut it out with the coordinating die and colored it with Stampin’ Blends – Pumpkin Pie, So Saffron, Poppy Parade, Soft Suede, Calypso Coral, Mossy Meadow and Granny Apple Green.

I adhered the harvest foods to the wheelbarrow with a little liquid glue and popped the entire piece on the card front with dimensionals.

I stamped the Happy Thanksgiving sentiment from the Banner Year photopolymer stamp set in Cajun Craze ink on a Whisper White panel. I stamped the harvest foods from the Stampin’ Up! Autumn Goodness stamp set in the lower corner in Sahara Sand ink after stamping off and adhered a strip of Plaid Tidings DSP to the bottom before adhering it to the inside of the card.
Isn’t the Stampin’ Up! Autumn Goodness wheelbarrow the cutest? And it’s great that there are lots stamps and dies that go with it beautifully! And don’t forget that the Plaid Tidings designer series paper is on sale at 15% discount during October! Yay!!
On with the hop! Be sure to check out each project that our talented team has created. Click on the Next Blog button to move forward to Donna Leonard’s project or click the Previous Blog button to move back to see the project that Karen Finkle created.


If you get lost along the way, here are the participants for the hop:
- Jaimie Babarczy
- Karen Ksenzakovic
- Mary Deatherage
- Karen Finkle
- Akiko Sudano <– you are here
- Donna Leonard
- Krista Yagci
- Lisa Jurich
- Tara Carpenter
- Terry Lynn Bright
- Amy Koenders
Stampin’ Up! Designer Series Paper Sale Going on Now!
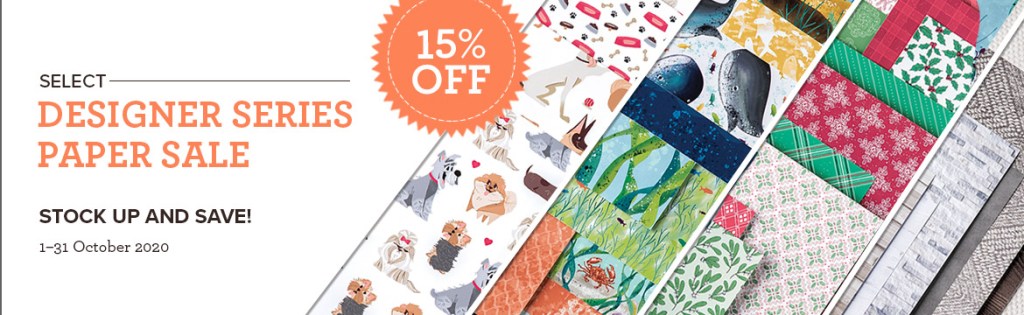
Stampin’ Up! has beautiful Designer Series Paper and during the Month of October they’re putting a select list of those on sale with a 15% discount! This is a fantastic opportunity for you to stock up and save on paper. And the sale includes some of the designs from the August-December 2020 Mini Catalog too! Get the details on my Promotion Page or click on the image above to download a printable PDF with all the selections. Click Here to shop the Designer Series Paper Sale in My Online Store now!
October 1-15 Host Code: F4UK7V36
Use this host code when you order $50 or more and receive a free gift from me! The gift is your choice of any item valued up to $10.00 in the 2020-21 Annual Catalog or the Aug–Dec 2020 Mini Catalog. This includes some of the host exclusive sets!
If your order is over $150, please do not use the host code since you’ll receive your own Host Dollars plus I’ll still send you the free gift! This host code can be used by anyone, no commitment required. Let me know if you have any questions.
If you need any stamping supplies, I’d be very happy to be your Demonstrator. Just click on the Order Stampin’ Up! Online Now button on the right side of the screen to go directly to my online store or contact me if you have any questions. Happy Stamping!
Thanks for visiting!
Akiko
- Visit my online store here
- See the current Stampin’ Up! clearance rack specials here
- Earn FREE Stampin’ Up! products through my Wildflower Frequent Shopper Program – my way of saying thank you to my frequent shopper online customers.
- Sign up for my weekly newsletter here
- Have any questions? I’d be happy to help, click here to contact me.
Cardstock Cuts for this project:
- Pretty Peacock – 5-1/2″ x 8-1/2″ card base scored at 4-1/4″
- Copper foil – 1-1/4″ x 1-1/4″ (wheel)
- Sahara Sand – 3-3/4″ x 5″ (embossed panel), 3-7/8″ x 5-1/8″ (front mat)
- Cinnamon Cider – 2″ x 3-1/2″ (wheelbarrow die cut)
- Whisper White – 4″ x 5-1/4″ (inside panel), 2-1/4″ x 2-3/4″ (stamped die cut harvest foods),
- Plaid Tidings DSP – 2-1/4″ x 5″ (front strip), 1/2″ x 5-1/4″ (inside trim)
- 2020-2022 In Color 6″ x 6″ DSP – 1/2″ x 5″ (front trim)
Stampin’ Up! products used in this project:

")


 Designer Series Paper")
 Designer Series Paper")


 Designer Series Paper")


")

 Ribbon")


 Sheer Ribbon")


")


 Sheer Ribbon")


")


")
")


 Designer Series Paper")


