Stampin’ Up! Sentimental Park for the Inkin’ Krew Blog Hop

Good Morning! Welcome to the December Inkin’ Krew Team Blog Hop! The theme for this month’s hop is “Celebrate” and I used the Stampin’ Up! Sentimental Park stamp set with the beautiful new Flight and Airy Sale-A-Bration designer series paper that will be available on January 4, 2024. You can find the supplies I used along with card stock cuts at the bottom of my post.

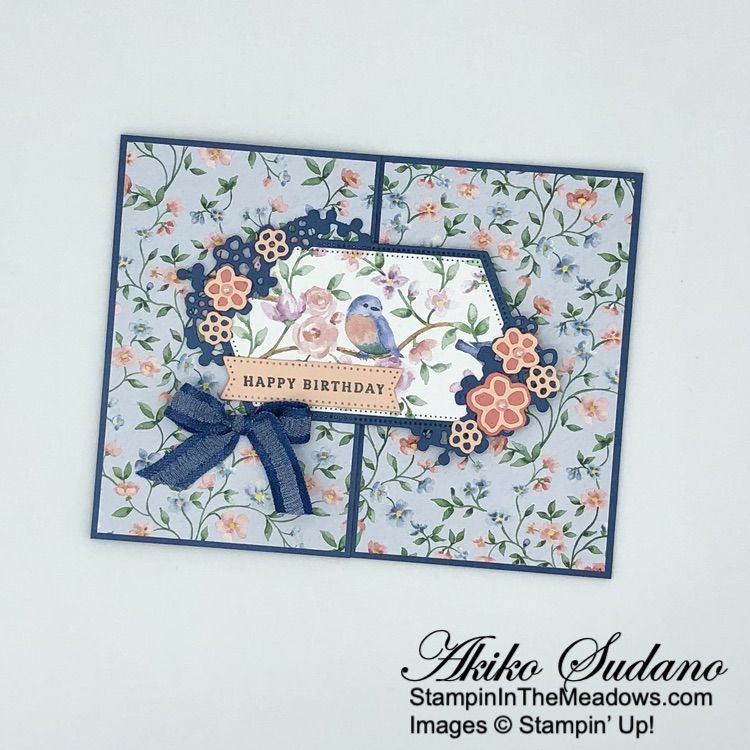
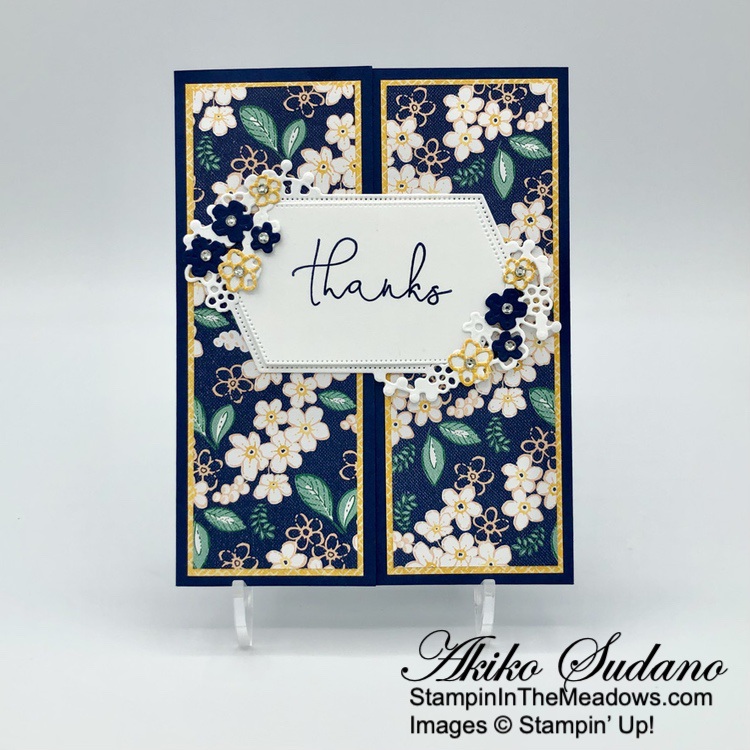
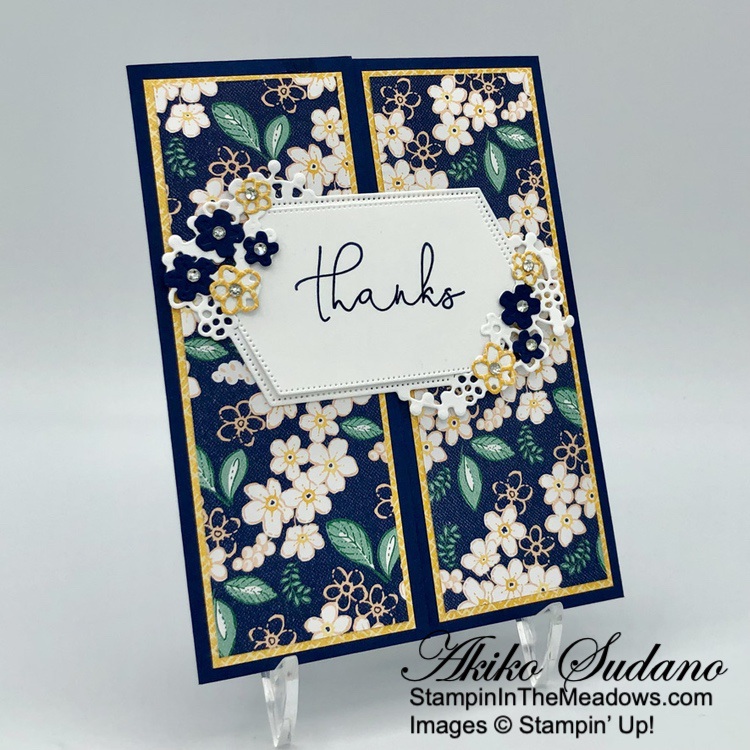
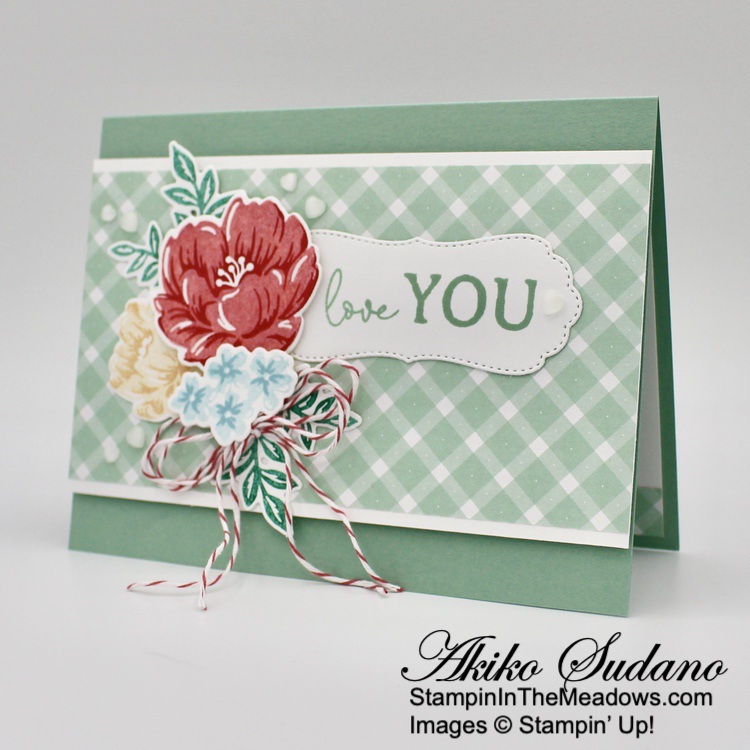
Today’s card is celebrating a special birthday and it’s a dainty gate fold card.

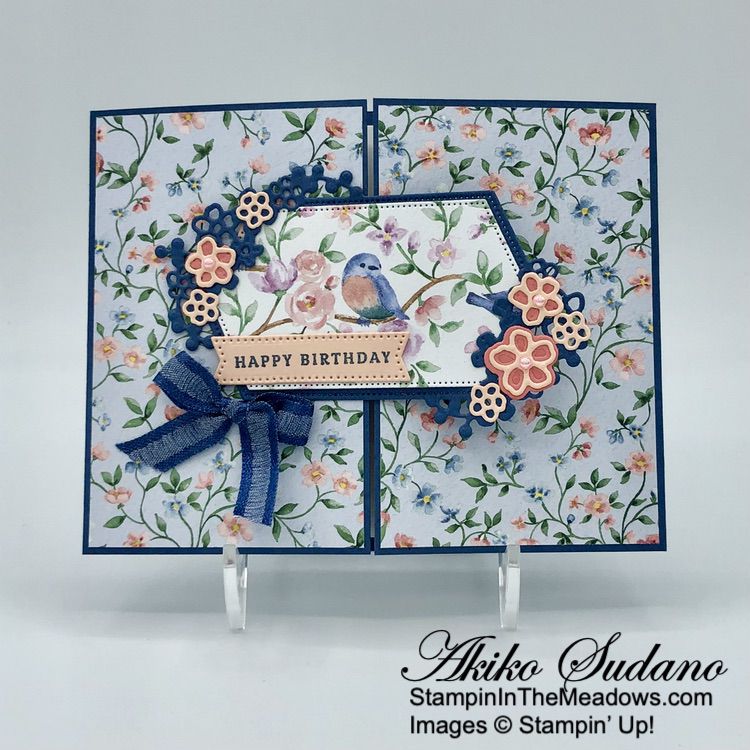
I adhered panels of the new Flight and Airy designer series paper to the front panels of a Misty Moonlight card base with liquid glue. I cut a Misty Moonlight panel with the large floral label die from the Stampin’ Up! Sentimental Park dies and I cut a panel of Flight and Airy DSP with a sweet bird with the plain die. I inserted the bird die cut into the slots of the floral die cut – I love how this works!

I cut several small flowers from Flirty Flamingo and Petal Pink and adhered them to the larger die cut and adhered some pink pearls to some flower centers. I adhered the panel to the left side of the card with liquid glue applied to half of the die cut.

I stamped the sentiment from the Stampin’ Up! Sentimental Park stamp set in Misty Moonlight ink on Petal Pink and cut it out with the small banner die from the Stylish Shapes dies using the two-step die cutting technique. I adhered it to the card with glue dots and finished the card front with a Night of Navy bow.

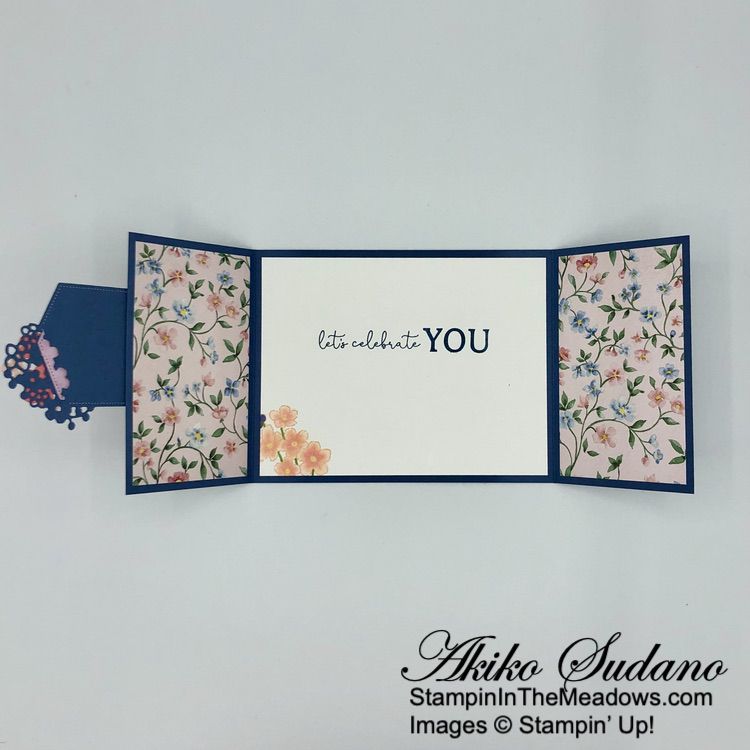
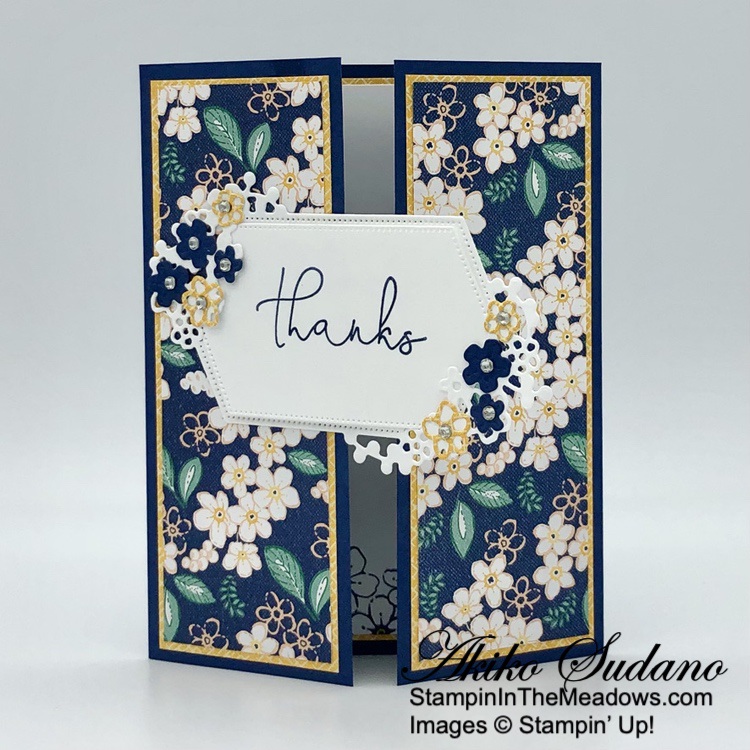
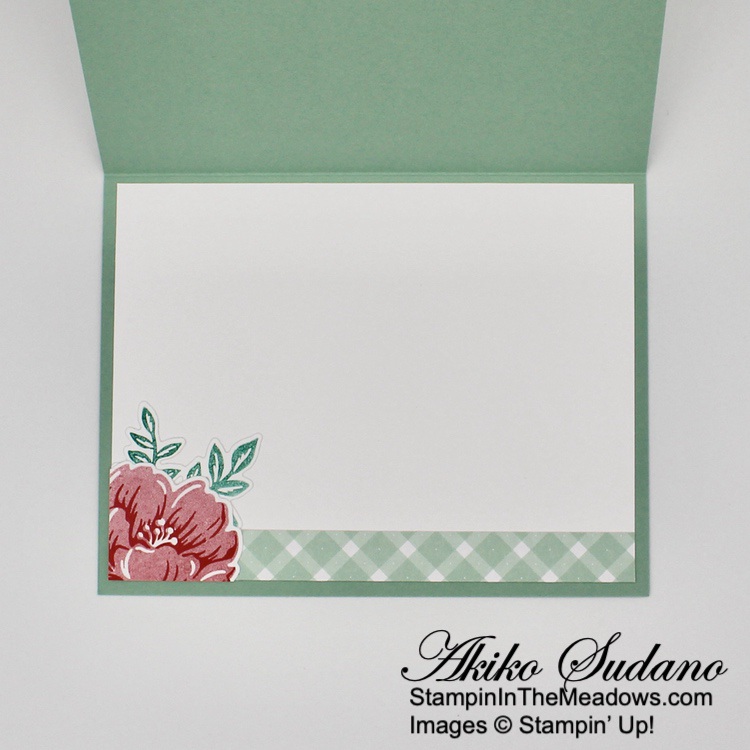
For the inside of the card, I stamped the sentiments from the Stampin’ Up! Sentimental Park stamp set in Misty Moonlight ink on a Basic White panel. I stamped the flowers in Petal Pink ink in the corner and colored them with Daffodil Delight, Petal Pink and Flirty Flamingo Stampin’ Blends. I used the dark Granny Apple Green Stampin’ Blend to color the berries and made some stems. I adhered the panel to the inside of the card and adhered two floral panels of Flight and Airy DSP to the inside of the front flaps.

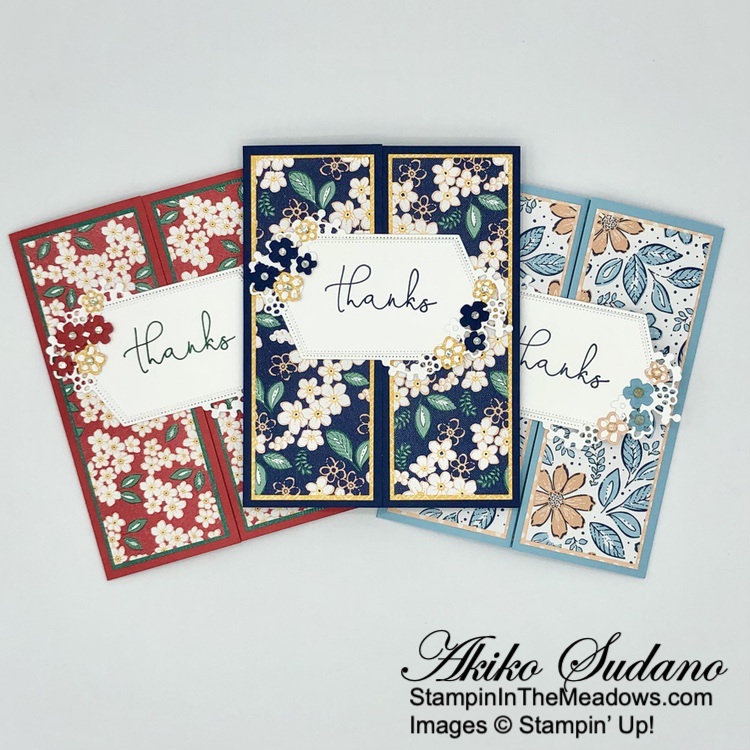
The Flight and Airy DSP is a Sale-A-Bration item that you will be able to get for free with a $50 purchase when Sale-A-Bration starts on January 4, 2024 and it’s so pretty! And it goes so well with the Stampin’ Up! Sentimental Park stamp set and dies and so many other current and retired Stampin’ Up sets. Be sure to check it out!

On With The Hop! Click on the Next Blog button to move forward to Nel Thames’ project or click the Previous Blog button to move back to see the project that Terry Lynn Bright created.

If you get lost along the way, here are the participants for the hop:


Current Host Code: 27CYQXTT

Use this host code when you order $50 or more and receive a Thank You gift from me!  The free gift is your choice of any currently available item valued up to $10.00.

If your order is over $150, please do not use the host code since you’ll receive your own Host Dollars plus I’ll still send you the Thank You gift!  This host code can be used by anyone, no club or commitment required. Let me know if you have any questions.


If you need any stamping supplies, I’d be very happy to be your Demonstrator.  Just click on the Shop Now button on the right side of the screen to go directly to my online store or contact me if you have any questions.  Happy Stamping!

Thanks for stopping by and have a great week!

Akiko

  • Visit my online store here
  • See the current Stampin’ Up! clearance rack specials here
  • Earn FREE Stampin’ Up! products through my Wildflower Frequent Shopper Program – my way of saying thank you to my online frequent shopper customers.
  • Have any questions? I’d be happy to help, click here to contact me.

Cardstock Cuts for this project:

  • Misty Moonlight – 4-1/4″ x 11″ card base scored at 2-3/4″ and 8-1/4″
  • Petal Pink – 2″ x 3″ (die cut flowers), 1″ x 3″ (label)
  • Flirty Flamingo – 1″ x 3″ (die cut flowers)
  • Basic White – 4″ x 5-1/4″ (inside panel)
  • Light and Airy DSP – 2″ x 4″ (die cut bird), two 2-5/8″ x 4-1/8″ panels (front background panels), two 2-1/2″ x 4″ (inside panels)

Stampin’ Up! products used in this project:

Stampin’ Up! Places in the Heart Mother’s Day Card and Video Tutorial

Good Morning! Mother’s Day is a couple of weeks away so I used the sweet Stampin’ Up! Places in the Heart cling stamp set to make a Mother’s day card during my Facebook Live yesterday afternoon. I used it with the new Bright and Beautiful 6″ x 6″ designer series paper and you can find the currently available supplies I used at the bottom of my post along with the sizes of cardstock used.

You can watch my FB Live video on my Facebook page HERE. I also posted the video to my YouTube Channel and you can view it HERE.

I adhered a panel of striped Bright and Beautiful 6″ x 6″ designer series paper to the side of a lighter patterned panel of the DSP and adhered them both to the front of an Azure Afternoon card base with liquid glue. Azure Afternoon is one of the new core colors that is coming with the color refresh tomorrow!

I stamped the scene from the Stampin’ Up! Places in the Heart stamp set in Pebbled Path ink (one of the new 20223-2025 In Colors) and colored it with Stampin’ Blends. I used light Bubble Bath, light Petal Pink, light Pecan Pie, light Wild Wheat on the Mom and light Lemon Lime Twist, light Pecan Pie, light Smoky Slate and light Petal Pink on the child. I used a blending brush and mask to apply Azure Afternoon ink to the sky and used light Pretty Peacock Stampin’ Blend on the ground. I cut it out with the fourth largest Deckled Rectangle die.

I stamped the sentiment from the Welcoming Windows photopolymer stamp set in the sky and adhered it to an Azure Afternoon mat. I adhered a Lemon Lime Twist bow to the back with a glue dot and popped it on the card front with dimensionals. I finished the card front with pink Loose Frosted Gems.

For the inside of the card, I stamped the sentiment from the Stampin’ Up! Places in the Heart stamp set in Pebbled Path ink on a Basic White panel and trimmed the side with a strip of Bright and Beautiful DSP. I adhered the panel to the inside of the card with Stampin’ Seal.

So many of the inks, blends and card stocks I used are new colors that will be available on Tuesday when the new catalog launches. The new colors are also used in the Bright and Beautiful 6″ x 6″ DSP, and along with the sweet Stampin’ Up! Places In The Heart stamp set they make for a colorful, bright and beautiful Mother’s day card.


Last Chance Products Sale Ends Today!

This Last Chance Products promotion includes two lists of products that will no longer be available once the catalogs retire today. There will be one for the 2022-2023 Annual Catalog and one for the January-April 2023 Mini Catalog. For these retiring catalogs, you can find carryover products in the upcoming 2023-2024 Annual Catalog.

Items on the retiring list are only available while supplies last, so order soon to make sure that you are able to get the items that you are wanting! Some of the items will have sale prices listed with discounts up to 60% off.

The last day to order from these catalogs is TODAY!

Click HERE to download a PDF of the Retiring Last Chance Products from the 2022-2023 Annual Catalog.

Click HERE to download a PDF of the Retiring Last Chance Products from the January-April 2023 Mini Catalog.


New 2023-2024 Annual Catalog Opens Tomorrow!

The new Stampin’ Up! 2023-2024 Annual Catalog debuts tomorrow! I have sent out catalogs to my current customers. If you would like a copy, simply place an order and I will be happy to send you one, too!!

Get the complete details on the new 2023-2025 In Colors and the Color Refresh on my Stampin’ Up! Promotions Page.


Current Host Code: 6EDCPU4T

Use this host code when you order $50 or more and receive a Thank You gift from me!  The free gift is your choice of any item valued up to $10.00 currently available!

If your order is over $150, please do not use the host code since you’ll receive your own Host Dollars plus I’ll still send you the Thank You gift!  This host code can be used by anyone, no club or commitment required. Let me know if you have any questions.


If you need any stamping supplies, I’d be very happy to be your Demonstrator.  Just click on the Shop Now button on the right side of the screen to go directly to my online store or contact me if you have any questions.  Happy Stamping!

Thanks for stopping by and have a great week!

Akiko

  • Visit my online store here
  • See the current Stampin’ Up! clearance rack specials here
  • Earn FREE Stampin’ Up! products through my Wildflower Frequent Shopper Program – my way of saying thank you to my online frequent shopper customers.
  • Have any questions? I’d be happy to help, click here to contact me.

Cardstock Cuts for this project:

  • Azure Afternoon – 4-1/4″ x 11″ card base scored at 5-1/2″, 2-3/4″ x 4-1/8″ (art panel mat)
  • Basic White – 4″ x 5-1/4″ (inside panel),3″ x 4-1/4″ (art panel)
  • Bright and Beautiful 6″ x 6″ DSP – 4″ x 5-1/4″ (front background), 1-1/4″ x 5-1/4″ (front side strip), 1/2″ x 5-1/4″ (inside trim)

Stampin’ Up! products used in this project:


Stampin’ Up! Sentimental Park Thank You Card and Video Tutorial

Good Morning! The Stampin’ Up! Sentimental Park bundle is a wonderful photopolymer stamp set with gorgeous floral dies for making fancy labels. It’s full of sentiments for all occasions and some pretty florals that coordinate with the beautiful Regency Park 6″ x 6″ designer series paper. I used the bundle to make a simple gate fold thank you card during my Facebook Live yesterday and you can find the supplies I used at the bottom of my post along with the sizes of cardstock used.

You can watch my FB Live video on my Facebook page HERE. I also posted the video to my YouTube Channel and you can view it HERE.

I adhered plain panels of Regency Park 6″ x 6″ designer series paper to the back of floral panels to use as contrasting mats and adhered the panels to each side of the front of a gate fold card base.

I cut the layered label dies from the Stampin’ Up! Sentimental Park dies from Basic White. I stamped the sentiment in Night of Navy ink on the smaller one and slipped it into the larger floral label die cut. I love how the layered panels give the look of a double stitched edge!

I cut the small solid and outline flowers from the Stampin’ Up! Sentimental Park dies from Night of Navy card stock and Mango Melody Regency Park DSP and adhered them to the label. For the outline flowers, I applied adhesive sheets to the back of the DSP before die cutting and removed the backing from the die cut flowers before adhering them. I decorated the flower centers with rhinestones and adhered the label to the left side of the gate fold card front, being careful to apply adhesive to only one side of the card.

For the inside of the card, I stamped the small flowers from the Stampin’ Up! Sentimental Park stamp set in Night of Navy on the bottom of a Basic White panel. I used a Daffodil Delight Stampin’ Blend to color the centers and adhered the panel to a Regency Park mat before adhering the panel to the inside of the card. Here’s the finished card with the samples I made for my video.

The layered label from the Stampin’ Up! Sentimental Park bundle is gorgeous and pretty much all you need to make a beautiful card. Luckily the stamp set and dies are returning in the upcoming 2023 – 2024 Annual Catalog, but the bundle discount will no longer be offered. And sadly, the Regency Park DSP will be retiring soon, so now is the time to pick it up before it’s gone for good.


New 2023-2024 Annual Catalog Coming Soon!

The new Stampin’ Up! 2023-2024 Annual Catalog will debut on May 2, 2023! The Demonstrator pre-order is happening now, so there will be sneak peeks of wonderful new products and colors! I have sent out catalogs to my current customers. If you would like a copy, simply place an order and I will be happy to send you one, too!!

Get the complete details on the new 2023-2025 In Colors and the Color Refresh on my Stampin’ Up! Promotions Page.


Last Chance Products Sale Going On Now!

This Last Chance Products promotion includes two lists of products that will no longer be available once the catalogs retire on May 1, 2023. There will be one for the 2022-2023 Annual Catalog and one for the January-April 2023 Mini Catalog. For these retiring catalogs, you can find carryover products in the upcoming 2023-2024 Annual Catalog.

Items on the retiring list are only available while supplies last, so order soon to make sure that you are able to get the items that you are wanting! Some of the items will have sale prices listed with discounts up to 60% off.

Several wonderful retiring items have already sold out!

The last day to order from these catalogs will be May 1, 2023.

Click HERE to download a PDF of the Retiring Last Chance Products from the 2022-2023 Annual Catalog.

Click HERE to download a PDF of the Retiring Last Chance Products from the January-April 2023 Mini Catalog.


Current Host Code: 6EDCPU4T

Use this host code when you order $50 or more and receive a Thank You gift from me!  The free gift is your choice of any item valued up to $10.00 currently available!

If your order is over $150, please do not use the host code since you’ll receive your own Host Dollars plus I’ll still send you the Thank You gift!  This host code can be used by anyone, no club or commitment required. Let me know if you have any questions.


If you need any stamping supplies, I’d be very happy to be your Demonstrator.  Just click on the Shop Now button on the right side of the screen to go directly to my online store or contact me if you have any questions.  Happy Stamping!

Thanks for stopping by and have a great week!

Akiko

  • Visit my online store here
  • See the current Stampin’ Up! clearance rack specials here
  • Earn FREE Stampin’ Up! products through my Wildflower Frequent Shopper Program – my way of saying thank you to my online frequent shopper customers.
  • Have any questions? I’d be happy to help, click here to contact me.

Cardstock Cuts for this project:

  • Night of Navy – 5-1/2″ x 8-1/2″ card base scored at 2-1/8″ and 6-3/8″, 1″ x 2″ (die cut flowers)
  • Basic White – 3-7/8″ x 5-1/8″ (inside panel), 4-1/2″ x 5-1/4″ (die cut label layers)
  • Regency Park 6″ x 6″ DSP – 4″ x 5-1/4″ (inside mat), two 1-7/8″ x 5-1/4″ panels (front mats), two 1-3/4″ x 5-1/8″ panels (front background panels), 1″ x 2″ (die cut flowers)

Stampin’ Up! products used in this project:


Stampin’ Up! Petal Park for the Inkin’ Krew Blog Hop

Good morning! Welcome to the February Inkin’ Krew Team Blog Hop! The theme for this month’s hop is “Birthday” and I used the sweet Stampin’ Up! Petal Park bundle to make a simple fun fold Birthday card! You can find the supplies I used at the bottom of my post along with the sizes of cardstock used.

I adhered a panel of Balmy Blue Country Gingham 6″ x 6″ designer series paper to a panel of Balmy Blue card stock with liquid glue. I adhered a panel of Regency Park 6″ x 6″ designer series paper to the front of a 3″ mini card and adhered the mini card to the DSP panel with liquid glue.

I stamped the large leaf spray line image from the Stampin’ Up! Petal Park photopolymer stamp set in Shaded Spruce ink on Basic White and used stamped off Shaded Spruce ink to stamp the filler image. I cut it with the largest circle die from the Stylish Shapes dies.

I stamped the three large outline flowers from the Stampin’ Up! Petal Park stamp set in Night of Navy ink on Basic White. I stamped the filler flower image in Balmy Blue and cut the flowers out with the coordinating punch. I adhered the flowers to the die cut circle with dimensionals and adhered Milky Dots to the centers. I adhered the decorated circle to the card with liquid glue.

I stamped the birthday sentiment from the Sentimental Park stamp set in Versamark ink on a strip of Night of Navy. I sprinkled it with white embossing powder and shook off the excess. I heated the powder with my heat tool until it was bright and shiny. I cut the sentiment out with the small label die from the Sending dies, using the two step die cutting method. I adhered the label to the card with glue dots. I made a bow with Starry Sky metallic ribbon and tucked it under one of the flowers, adhering it with a glue dot. I finished the card with a dragonfly trinket, adhered with a glue dot.

For the inside of the card, I stamped the the flowers from the Stampin’ Up! Petal Park stamp set in Night of Navy in the corner of a Basic White panel. I stamped the flower filler image in Balmy Blue and the leaves in Shaded Spruce – full strength for the outline and stamped off for the filler. I stamped the sentiments from the Sentimental Park stamp set in Night of Navy and trimmed the bottom with a strip of Regency Park 6″ x 6″ DSP before adhering it to the inside of the card.

A pretty floral birthday wish with the beautiful Stampin’ Up! Petal Park bundle and Regency Park 6″ x 6″ DSP!

On With The Hop! Click on the Next Blog button to move forward to Amy Koenders’ project or click the Previous Blog button to move back to see the project that Mary Deatherage created.

If you get lost along the way, here are the participants for the hop:


Current Host Code: ZYNDU2N9

Use this host code when you order $50 or more and receive a free gift from me!  The free gift is your choice of any item currently available valued up to $10.00 in the 2022-2023 Annual Catalog or the January-April 2023 Mini Catalog!

If your order is over $150, please do not use the host code since you’ll receive your own Host Dollars plus I’ll still send you the free gift!  This host code can be used by anyone, no club or commitment required. Let me know if you have any questions


If you need any stamping supplies, I’d be very happy to be your Demonstrator.  Just click on the Shop Now button on the right side of the screen to go directly to my online store or contact me if you have any questions. 

Thanks for stopping by and Happy Stamping!

Akiko

  • Visit my online store here
  • See the current Stampin’ Up! clearance rack specials here
  • Earn FREE Stampin’ Up! products through my Wildflower Frequent Shopper Program – my way of saying thank you to my online frequent shopper customers.
  • Have any questions? I’d be happy to help, click here to contact me.

Cardstock Cuts for this project:

  • Balmy Blue – 4-1/4″ x 5″ main card base, 3″ x 11″ mini card base scored at 5-1/2″
  • Night of Navy – 3/4″ x 3″ (label)
  • Basic White – 2-3/4″ x 5-1/4″ (inside panel), 3-1/4″ x 3-1/4″ (die cut circle), 2-1/2″ x 3″ (punched flowers)
  • Country Gingham 6″ x 6″ DSP – 4″ x 5-1/4″ (main card base background)
  • Regency Park 6″ x 6″ DSP – 2-3/4″ x 5-1/4″ (mini card base background), 3/4″ x 2-3/4″ (inside trim)

Stampin’ Up! products used in this project:


Stampin’ Up! Petal Park Friendship Card

Good Morning! The Stampin’ Up! Petal Park bundle is a pretty two step stamping floral bundle with a wonderful coordinating punch. It’s part of the new Regency Park suite and coordinates well with the Sentimental Park bundle and Regency Park 6″ x 6″ designer series paper and I used all three for my card today. You can find the supplies I used at the bottom of my post along with the sizes of cardstock used.

I adhered the striped panel of Regency Park 6″ x 6″ designer series paper to the floral panel with liquid glue and adhered the layered panel to the front of a Night of Navy card base. I stamped the leaf spray from the Stampin’ Up! Petal Park photopolymer stamp set using Shaded Spruce ink. I stamped the line image full strength and stamped the filler image over it in stamped off ink. I adhered the panel to a Night of Navy mat.

I stamped the two step triple flower image from the Stampin’ Up! Petal Park stamp set on a panel of Basic White. I stamped the line image in Sweet Sorbet ink and stamped the filler image over it in Petal Pink ink. I punched the flowers out with the coordinating punch and adhered them to the leaf spray with dimensionals. I stamped the sentiment from the Sentimental Park stamp set in Night of Navy ink on Petal Pink and adhered it to a Night of Navy mat. I adhered it to the floral panel with liquid glue.

I popped the layered panel on the card front with dimensionals. I colored a length of white crinkle ribbon with a dark Petal Pink Stampin’ Blend and adhered it to the card with a glue dot. I finished the card with blue flower gems.

For the inside of the card, I stamped the floral image from the Sentimental Park stamp set using Petal Pink ink in the corner of a Basic White panel. I stamped the sentiment in Night of Navy ink and trimmed the bottom with a strip of Regency Park 6″ x 6″ DSP. I adhered the panel to the inside of the card with Stamping’ Seal.

The Stampin’ Up! Petal Park bundle has pretty two step stamping flowers and leaves with a coordinating punch. The punch cuts three different sizes of flowers and a leaf. The two step stamping can be done with different colors or in full strength and stamped off ink, or can be colored with other coloring methods. It’s a pretty versatile set, so check it out!


Sale-A-Bration is Stampin’ Up!’s best promotion of the year with specials for shopping, hosting and joining! It will run through February 28, 2023 and will be the only Sale-A-Bration this year!

SHOP

Orders placed during Sale-A-Bration will receive FREE products for orders of $50 or more(before shipping and taxes). There are 7 items that are available for free with orders of $50 or greater and 2 items that are available for free with orders of $100 or greater. The free Sale-A-Bration items are stackable, so if you place an order of $150, you can choose to add 3 $50 items or a $100 item and a $50 item to your order! And that’s in addition to the regular host rewards! The Sale-A-Bration items are only available while supplies last, so order early if there are items that you are really wanting! 

There’s even more to Sale-A-Brate with more FREE products that you can earn while you shop! Click on the image below to download a Flyer with all the details:

HOST

There’s also a host exclusive stamp set on page 16 of the Sale-A-Bration Brochure that is ONLY AVAILABLE to those ordering $300 or greater in a single order or who host a party with sales of $300 or greater during Sale-a-bration.  If you’d like to set up a host code to see if you can collect $300 in orders to earn that stamp set, I’d be happy to help you with that!  Reach out to me at apsudano@stampininthemeadows.com.

JOIN

Stampin’ Up! has three great joining promotion options during Sale-a-bration!

OPTION 1: Pay $129 and receive the exclusive Boho Blue Mini Machine (a $63 value) + choose $175 in Stampin’ Up! Products for your Starter Kit*.

OPTION 2: Pay $129 and receive the original white Mini Machine (a $63 value) + choose $175 in Stampin’ Up! Products for your Starter Kit*.

OPTION 3: Pay $99 and choose $175 in Stampin’ Up! Products for your Starter Kit*.

Once you join, you’ll get at least a 20% discount on all of your Stampin’ Up! merchandise purchases AND you get to order early from upcoming catalogs!  There is NO COMMITMENT and NO REQUIREMENT TO SELL to anyone.  You can join and just get the discount for yourself!  Contact me at apsudano@stampininthhemeadows.com if you’d like more information about joining or purchasing the Starter Kit! 

*That’s $50 more product than the standard Starter Kit offer!


Current Host Code: Y7X69NCW

Use this host code when you order $50 or more and receive a Thank You gift from me!  The free gift is your choice of any item valued up to $10.00 in the 2022-2023 Annual Catalog or the January-April 2023 Mini Catalog!

If your order is over $150, please do not use the host code since you’ll receive your own Host Dollars plus I’ll still send you the Thank You gift!  This host code can be used by anyone, no club or commitment required. Let me know if you have any questions.


If you need any stamping supplies, I’d be very happy to be your Demonstrator.  Just click on the Shop Now button on the right side of the screen to go directly to my online store or contact me if you have any questions.  Happy Stamping!

Thanks for stopping by and have a great week!

Akiko

  • Visit my online store here
  • See the current Stampin’ Up! clearance rack specials here
  • Earn FREE Stampin’ Up! products through my Wildflower Frequent Shopper Program – my way of saying thank you to my online frequent shopper customers.
  • Have any questions? I’d be happy to help, click here to contact me.

Cardstock Cuts for this project:

  • Night of Navy – 4-1/4″ x 11″ card base scored at 5-1/2″, 3″ x 4-1/4″ (floral mat), 7/8″ x 2-1/2″ (label mat)
  • Petal Pink – 3/4″ x 2-3/8″ (label)
  • Basic White – 4″ x 5-1/4″ (inside panel), 2-3/4″ x 4″ (floral panel), 2-1/2″ x 3″ (punched flowers)
  • Regency Park DSP – 4″ x 5-1/4″ (front background), 2″ x 4″ (front stripe), 31/2″ x 4″ (inside trim)

Stampin’ Up! products used in this project:


Stampin’ Up! Two-Tone Flora for the Happy Inkin’ Thursday Blog Hop

Good Morning and welcome to the Happy Inkin’ Thursday Blog Hop! Here’s a country bouquet love you card made with the pretty Stampin’ Up! Two Tone Flora bundle and the Country Gingham 6″ x 6″ designer series paper. You can find the supplies I used along with card stock cuts at the bottom of my post.

We have a sketch challenge in the Blog Hop and here is the pretty card sketch we are using this week:

I adhered a panel of Mint Macaron Country Gingham 6″ x 6″ designer series paper to a Basic White panel and popped the layered panel on the front of a Mint Macaron card base with dimensionals. I stamped the flowers from the Stampin’ Up! Two-Tone Flora photopolymer stamp set using the two-step stamping method by stamping the detailed stamp first in full strength ink and the background stamp next in stamped off ink. I stamped the large rose using Sweet Sorbet ink, the small rose using Pale Papaya ink and the small flower cluster using Balmy Blue ink. I also stamped a second large rose for the inside of the card and cut them all out with the coordinating dies.

I stamped three leaf sprigs from the Stampin’ Up! Two-Tone Flora stamp set in stamped off Shaded Spruce and cut them out with the coordinating die (I saved one for the inside). I stamped the sentiments from the Sentimental Park photopolymer stamp set in Mint Macaron on Basic White and cut it out with the pretty label die from the Potted Succulents dies. I arranged the die cuts on the card front and adhered the label and leaves with glue dots. I adhered the small rose with glue dots and the large rose with dimensionals. I colored the large rose with Wink of Stella to give it some sparkle.

Before adhering the small flower clusters, I made a triple bow with Sweet Sorbet baker’s twine and adhered it to the card with a glue dot. I adhered the small flower cluster with dimensionals and finished the card with several adhesive translucent pearl hearts.

For the inside of the card, I adhered the strip of Country Gingham 6″ x 6″ DSP to the bottom of a Basic White panel. I adhered the leaf sprig and large rose with liquid glue and trimmed the overhang with paper snips before adhering the panel to the inside of the card with Stampin’ Seal.

The flowers in the Stampin’ Up! Two-Tone Flora bundle are really pretty and come out so well using the two step stamping method. I love that there are coordinating dies to cut them out and the background floral die is the best ever. It’s definitely one of my favorites!

On with the Hop! Click on the Next Blog button to move forward to see the beautiful project Karen Ksenzakovic has created.

If you get lost along the way, here are the participants for the hop:


Current Host Code: Y7X69NCW

Use this host code when you order $50 or more and receive a free gift from me!  The free gift is your choice of any item valued up to $10 in the 2022-2023 Annual Catalog or the January-April 2023 Mini Catalog!

If your order is over $150, please do not use the host code since you’ll receive your own Host Dollars plus I’ll still send you the free gift!  This host code can be used by anyone, no club or commitment required. Let me know if you have any questions.


If you need any stamping supplies, I’d be very happy to be your Demonstrator.  Just click on the Shop Now button on the right side of the screen to go directly to my online store or contact me if you have any questions. 

Thanks for stopping by and Happy Stamping!

Akiko

  • Visit my online store here
  • See the current Stampin’ Up! clearance rack specials here
  • Earn FREE Stampin’ Up! products through my Wildflower Frequent Shopper Program – my way of saying thank you to my online frequent shopper customers.
  • Have any questions? I’d be happy to help, click here to contact me.

Cardstock Cuts for this project:

  • Mint Macaron – 5-1/2″ x 8-1/2″ card base scored at 4-1/4″
  • Basic White – 4″ x 5-1/4″ (inside panel), 3-1/4″ x 5-1/2″ (DSP mat), 1-1/2″ x 3-1/2″ (label), 2″ x 7″ (die cut flowers), 2-1/4″ x 5-1/2″ (die cut leaves)
  • Country Gingham 6″ x 6″ DSP – 3″ x 5-1/2″ (front background), 1/2″ x 5-1/4″ (inside trim)

Stampin’ Up! products used in this project: