Stampin’ Up! Under My Umbrella Card for the Happy Inkin’ Thursday Blog Hop

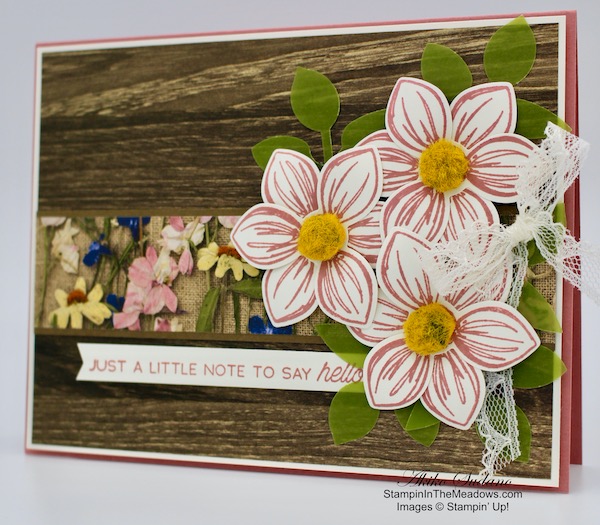
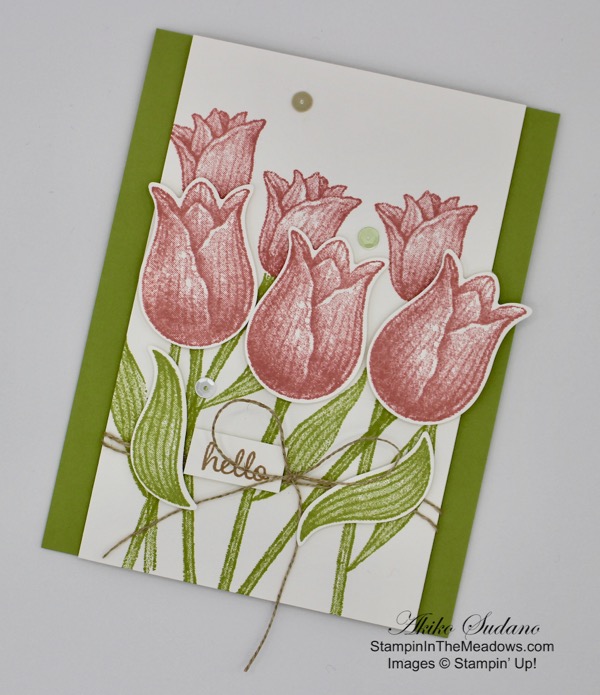
Good Morning! Welcome to another Happy Inkin’ Thursday Blog Hop! I am ready for Spring and warm weather and sunshine, so I made this little hello card with the Stampin’ Up! Under My Umbrella stamp bundle.

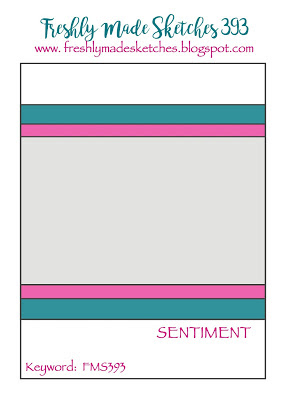
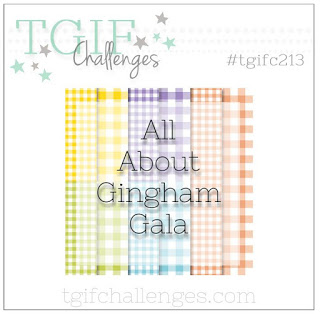
We have a cute sketch challenge this week, and here is the sketch we are using:

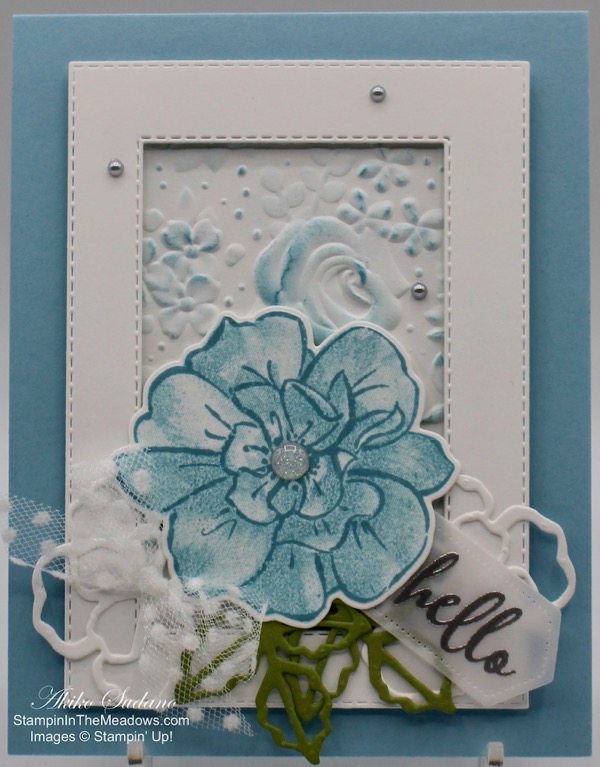
I started by running a panel of Balmy Blue card stock through the Subtle embossing folder and adhering it to a Balmy blue card base with liquid glue. I took a panel of the raindrop paper from the Pleased as Punch designer series paper that is part of the Coordination Release and cut it with the largest scalloped rectangle in the Stitched So Sweetly dies. I also cut a panel of Thick Whisper White with the same die and adhered it to the back of the raindrop paper.

I punched three umbrellas from the umbrella paper in the Pleased as Punch DSP pack with the Umbrella Builder punch and also adhered them to an umbrella punched from Thick Whisper White paper. I stamped 3 umbrella handles from the Stampin’ Up! Under My Umbrella stamp set in Memento Tuxedo Black ink on Smoky Slate card stock and punched them out with the umbrella handle in the Umbrella Builder punch. I arranged the umbrellas on the raindrop panel and adhered the handles with liquid glue and the umbrella tops with dimensionals.

I stamped the Hello Sunshine greeting from the Stampin’ Up! Under My Umbrella stamp set in Granny Apple Green ink on a panel of Blushing Bride. I cut it out with the second smallest rectangle of the Stitched so Sweetly dies using the two step die cutting method so that it is just a little bit shorter. I adhered it to the raindrop panel with liquid glue. I stamped and colored 7 large and 1 small floral clusters in Light Granny Apple Green, Dark Calypso Coral, Dark Pool Party, Dark Mango Melody, Light Flirty Flamingo, Dark Daffodil Delight and Light Highland Heather Stampin’ Blends. I fussy cut them out and adhered the small flowers to the label and three of the large ones to the bottom of the panel with liquid glue. I finished off the panel with a Whisper White twine bow on an umbrella panel and popped it on the embossed card base with dimensionals.

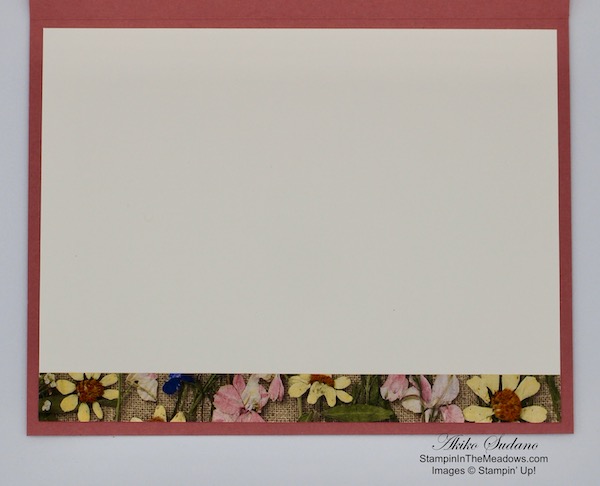
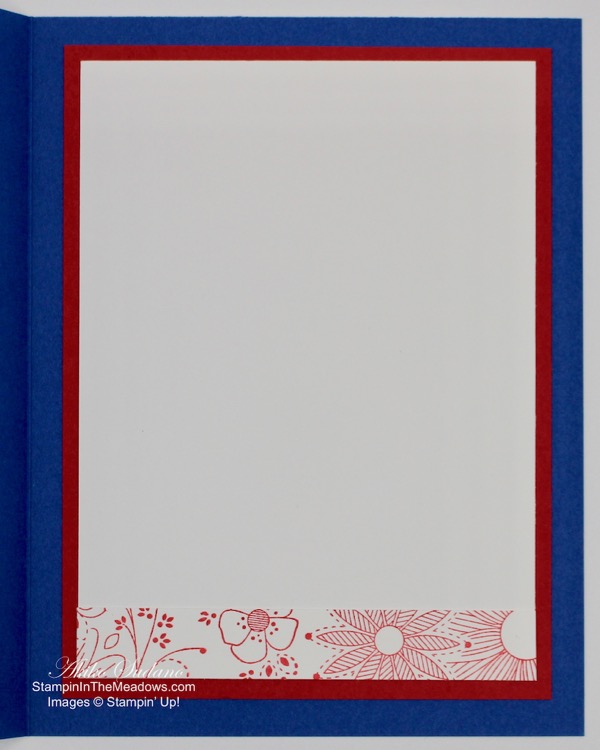
On the inside of the card, I trimmed the bottom of a Whisper White panel with the raindrop DSP. I adhered the remaining flower clusters across the bottom with liquid glue and adhered the Whisper White panel to the inside of the card.

On with the Hop! Click the Next button below to visit Karen Ksenzakovic’s blog.

And just in case you get lost along the way, here’s a list of the team members participating in the hop today:


February 1 – 15 Host Code: ZSQEMEKE

Use this host code when you order $50 or more and receive a free gift from me!  The gift is your choice of any item valued up to $10.00 in the 2019-20 Annual Catalog or in the 2020 January-June Mini Catalog!  That includes some of the Host Exclusive stamp sets!

If your order is over $150, please do not use the host code since you’ll receive your own Host Dollars plus I’ll send you the free gift!  This host code can be used by anyone, no commitment required.  Let me know if you have any questions.


If you need any stamping supplies, I’d be very happy to be your Demonstrator.  Just click on the Shop Now button on the right side of the screen to go directly to my online store or contact me if you have any questions.  Happy Stamping!

Thanks for visiting!

Akiko

  • Visit my online store here
  • See the current Stampin’ Up! clearance rack specials here
  • Earn FREE Stampin’ Up! products through my Wildflower Frequent Shopper Program – my way of saying thank you to my frequent shopper online customers.
  • Sign up for my weekly newsletter here
  • Have any questions? I’d be happy to help, click here to contact me.

Cardstock Cuts for this project:

  • Balmy Blue – 4 1/4″ x 11″ scored at 5 1/2″ (card base) 4 1/4″ x 5 1/2″ (embossed panel)
  • Smoky Slate – 1/2″ x 6″ (umbrella handles)
  • Thick Whisper White – 3″ x 4 1/2″ (umbrella backings), 3 1/4″ x 4 1/4″ (raindrop panel backing)
  • Blushing Bride – 1 1/2″ x 3″
  • Whisper white 3 3/4″ x 5″, (3) 1″ x 5″ (scraps for flower clusters)
  • Pleased as Punch DSP – 3 1/4″ x 4 1/4″ (raindrop panel die cut) 1/2″ x 3 3/4″ (raindrop inside trim), 3 umbrellas to punch out.

Stampin’ Up! products used in this project:


Stampin’ Up! Floral Essence Hello Card for the Happy Inkin’ Thursday Blog Hop

Good Morning and Welcome to another Happy Inkin’ Thursday Blog Hop! I hope you’re enjoying everyone’s projects and I’m sure everyone loved your handmade Christmas Cards! While we’re awaiting the launch of the new Mini Catalog on January 3, I thought I would return to some old favorites for a Hello Card for today’s Hop. Here is my card:

We have a color challenge this week, and here is the color pallette we are using:

I started by stamping six flowers from the Stampin’ Up! Floral Essence stamp set in Rococo Rose on Very Vanilla Card Stock. I punched them out with the Perennial Flower Punch and curled the petals with my bone folder. I adhered the centers of two petal clusters to make three flowers and added a Perennial Essence floral center to each. I punched 5 leaf clusters from Old Olive vellum using the Leaf punch.

I adhered a panel of the wood grain paper from the Pressed Petals specialty designer series paper to a very vanilla mat. I adhered a strip of the floral Pressed Petals paper to a soft suede mat and adhered it to the wood grained panel background. I stamped the hello sentiment from the A Little Lace stamp set using Rococo Rose ink on a strip of Very Vanilla and trimmed the end before adhering it to the panel.

I arranged the vellum leaves and flowers on the panel and adhered it with glue dots. I made a bow from the Very Vanilla scalloped lace trim and adhered it next to the flowers. I adhered the decorated panel to a Rococo Rose card base using dimensionals.

I kept the inside of the card simple and only decorated it by adhering a strip of the floral Pressed Petals DSP to the bottom of a Very Vanilla panel and adhering to the inside of the card. This leaves plenty of room to write a personal hello message!

I can’t wait to mix up these flowers with some of the new items in the upcoming Mini Catalog!

On with the Hop! Click the Next button below to visit Karen K’s blog.

And just in case you get lost along the way, here’s a list of the team members participating in the hop today:


December 16 – 31 Host Code: A99JPHA3

Use this host code when you order $50 or more and receive a free gift from me!  The gift is your choice of any item valued up to $10.00 in the 2019-20 Annual Catalog or in the 2019 Holiday Catalog!  That includes some of the Host Exclusive stamp sets!

If your order is over $150, please do not use the host code since you’ll receive your own Host Dollars plus I’ll send you the free gift!  This host code can be used by anyone, no commitment required.  Let me know if you have any questions.


If you need any stamping supplies, I’d be very happy to be your Demonstrator.  Just click on the Shop Now button on the right side of the screen to go directly to my online store or contact me if you have any questions.  Happy Stamping!

Thanks for visiting!

Akiko

  • Visit my online store here
  • See the current Stampin’ Up! clearance rack specials here
  • Earn FREE Stampin’ Up! products through my Wildflower Frequent Shopper Program – my way of saying thank you to my frequent shopper online customers.
  • Sign up for my weekly newsletter here
  • Have any questions? I’d be happy to help, click here to contact me.

Cardstock Cuts for this project:

  • Rococo Rose 5 1/2″ x 8 1/2″ scored at 4 1/4″ (card base)
  • Very Vanilla – 2″ x 8 1/2″ (flower petal clusters), 4 1/8″ x 5 3/8″ (front mat), 4″ x 5 1/4″ (inside)
  • Soft Suede – 1 1/4″ x 5 1/4″
  • Pressed Petals DSP – 4″ x 5 1/4″ (wood, front background), 1 1/8″ x 5 1/4″ (flower, front band), 1/2″ x 5 1/4″ (flower, inside trim)
  • Old Olive Vellum – 2 1/2″ x 5″ (punched leaf clusters)

Stampin’ Up! products used in this project:

<

Stampin’ Up! Timeless Tulips Hello Sneak Peek

Good Morning! Today I am sharing a video that I did yesterday during my Sunday Facebook Live session. At Stampin’ Up! On Stage a couple of weeks ago, we made a pretty card with the Stampin’ Up! Timeless Tulips bundle that will be available in the new January – June Mini Catalog next month. But my card did not come out very well because I stamped the stems of the tulips before the flowers, so I ended up with a mess. So this project’s purpose is to fix my card. And my card came out much better than the initial one I made at Stampin’ Up! On Stage.

Here’s the Facebook Live video:

I also posted the video to my YouTube channel and you can view it here.

I started by stamping the large tulip 3 times in Rococo Rose on a scrap piece of Whisper White card stock. Then I stamped the medium tulip 3 times across a Whisper White panel with the bottoms of the flowers about 1/3 the way down from the top. I then stamped the stems for the flowers in Pear Pizzazz. I stamped the last 3 stems for the large tulips, positioning them so that they large tulips would have room on top of the stems. I stamped some leaves to fill in the bottom of the card. Finally, I stamped two leaves in Pear Pizzazz on a scrap piece of Whisper White to be punched out later. I tied linen thread in a bow around the panel and adhered the large tulips and extra leaves with dimensionals. I stamped the hello sentiment on a panel of whisper white and cut it out with paper snips. I adhered the sentiment to the panel with dimensionals and the panel to a Pear Pizzazz card base with dimensionals as well. I finished off the card front with 3 adhesive sequins.

For the inside, I stamped a tulip, stem and leaf on a Whisper White panel and adhered it to the inside of the card with liquid glue.

Here’s the card I originally made at Stampin’ Up! On Stage. At least the flowers are attached to stems, but they cover each other up and they’re all clumped in the middle, leaving too much white space on the sides. And What’s up with those leaves? Oh Well!! I’m going to make this bad picture small so it’s harder to see.

This one’s much better.

The Stampin’ Up! Timeless Tulips Bundle will be available on January 3 when the new January – June Mini Catalog comes out. It comes with the Timeless Tulips photopolymer stamp set and the Tulip Builder punch. And it has lots of pretty sentiments to celebrate a variety of occasions.


Stampin’ Up! January – June 2020 Mini Catalog and Sale-A-Bration coming in January!

I will order catalogs for my customers tomorrow morning with expedited shipping.  If you placed an order with me, I will send you one via priority mail as soon as my order arrives!

If you have not placed an order with me but want to be on my mailing list for the new catalogs too, simply place an order through my online store by the end of the week and you’ll automatically be added to my mailing list to get your catalogs ASAP!

The new January – June 2020 Mini Catalog will be open for ordering on January 3, 2020.


Stampin’ Up! Year-End Closeout begins tomorrow!

Stampin’ Up!’s Year-End Closeout begins tomorrow! While supplies last, you can save big on a selection of retiring and surplus items including holiday catalog items, stamp sets, and Paper Pumpkin past kits. Shop early to avoid missing out! Supplies are limited and popular items will sell out quickly. This amazing sale ends on January 2.


December 1 – 15 Host Code: R497392Q

Use this host code when you order $50+ and receive a free gift from me!  If your order is over $150, please do not use this code, but you’ll still get the free gift.  The free gift is your choice of any item valued up to $10.00 in the 2018-19 Annual Catalog or in the 2019 Occasions Catalog!  That includes some of the Host Exclusive stamp sets!

If your order is over $150, please do not use the host code since you’ll receive your own Host Dollars plus I’ll send you the free gift!  This host code can be used by anyone, no club or commitment required.  Let me know if you have any questions.


If you need any stamping supplies, I’d be very happy to be your Demonstrator.  Just click on the Shop Now button on the right side of the screen to go directly to my online store or contact me if you have any questions.  Happy Stamping!

Thanks for stopping by and have a great week!

Akiko

  • Visit my online store here
  • See the current Stampin’ Up! clearance rack specials here
  • Earn FREE Stampin’ Up! products through my Wildflower Frequent Shopper Program – my way of saying thank you to my frequent shopper online customers.
  • Have any questions? I’d be happy to help, click here to contact me.

Cardstock Cuts for this project:

  • Pear Pizzazz- 4 1/4″ x 11″, scored at 5 1/2″
  • Whisper White – 3 1/2″ x 5 1/2″ (front panel), 3 3/4″ x 5″ (inside), (2) 2 1/2″ x 5″ (scraps for punched tulips, leaves and sentiment)

Stampin’ Up! products used in this project:


Stampin’ Up! Bloom and Grow Hello Card

Good Morning! Today I have a pretty pink hello card made with the Stampin’ Up! Bloom & Grow cling stamp set. This stamp set has three different images of floral bouquets and some pretty sentiments. It is currently available with the matching Budding Blooms dies in a bundle at 10% discount. You can find the supplies used to create this card at the bottom of my post along with the sizes of cardstock used.

This card is entered in the Paper Players Sketch Challenge PP452.

I started by stamping the long floral image from the Stampin’ Up! Bloom & Grow stamp set in Memento Tuxedo Black ink on Thick Whisper White cardstock. I colored it with Petal Pink, Old Olive, So Saffron and Crumb Cake Stampin’ blends and then die cut it with the coordinating die.

I took a small panel of whisper white cardstock and ran it through the Tufted 3D embossing folder and then through the stitched rectangle die. I adhered it to the pink polka dot DSP panel from the Bird Ballad designer series paper and then to Whisper White mat.

I embossed the Hello from the Free as a Bird stamp set in white on a scrap of Petal Pink and cut it out with the smallest of the Stitched Nested Labels dies. I adhered it to the panel with glue dots.

I then took a piece of the beautiful Organdy Striped Ribbon and tied it around the panel and made a bow. I attached the flowers on top with dimensionals. I attached the panel to a Petal Pink card base with dimensionals.

I decorated the inside of the card by attaching a strip of the Bird Ballad Polka Dot DSP to a Whisper White panel and added two die cut sprigs from the Stampin’ Up! Bloom & Grow stamp set. I then attached it to the inside of the card.

All the floral images in this stamp set are so pretty and I can’t wait to use the rest. The line images are perfect for coloring with any of the Stampin’ Up! coloring tools, Stampin’ Blends, watercolor pencils or Stampin’ Write Markers. And they’re small enough that it goes pretty quickly with beautiful results. I hope you enjoyed today’s card. Thanks for visiting and have a great weekend!

Akiko


We’re in the redemption period of Bonus Days! Don’t forget to redeem those $5 coupons that you earned for purchases in July. See the full details on the Stampin’ Up! Promotions Page and contact me if you have any questions.


August 1 – 15 Host Code: WG237RFK

Use this host code when you order and receive a free gift from me!  If your order is over $150, please do not use this code, but you’ll still get the free gift.  The free gift is your choice of any item valued up to $10.00 in the 2018-19 Annual Catalog or in the 2019 Occasions Catalog!  That includes some of the Host Exclusive stamp sets!


If you need any stamping supplies, I’d be very happy to be your Demonstrator.  Just click on the Shop Now button on the right side of the screen to go directly to my online store or contact me if you have any questions.  Happy Stamping!

  • Visit my online store here
  • See the current Stampin’ Up! clearance rack specials here
  • Earn FREE Stampin’ Up! products through my Wildflower Frequent Shopper Program – my way of saying thank you to my frequent shopper online customers.
  • Have any questions? I’d be happy to help, click here to contact me.

Cardstock Cuts for this project:

  • Petal Pink – 5 1/2″ x 8 1/2″, 2″ x 3″ scrap
  • Whisper White – (2) 3 3/4″ x 5″, 3″ x 4 1/2″
  • Thick Whisper White – 2 1/2″ x 5″
  • Bird Ballad DSP – 3 5/8″ x 4 7/8″, 1/2″ x 5″

Stampin’ Up! products used in this project:


Stampin’ Up! To A Wild Rose Hello Card

Good Morning! Today I have a blue floral hello card featuring the Stampin’ Up! To A Wild Rose photopolymer stamp set. I also used the coordinating Wild Rose Dies and both of these come in the To A Wild Rose Bundle at 10% off!

My design for this card was inspired by the current challenge at the Global Design Project #196 (#GDP196) where we CASE (copy and selectively edit) the designer. Here is the inspiration project. Isn’t it beautiful!

You can find supplies used to create this card at the bottom of my post along with the sizes of cardstock used. I started by die cutting the frame using the Stitched Rectangle dies on Thick Whisper White cardstock. I next took a piece of Whisper White cardstock and ran it through the Country Floral embossing folder and lightly sponging with Balmy Blue ink. I took the embossed piece and attached it to a Balmy Blue card base with snail adhesive. I took the floral frame and attached it to the card base with dimensionals so that it floats above the embossed piece.

I then started working on the floral arrangement. I stamped the large outline flower from the Stampin’ Up! To A Wild Rose stamp set in Balmy Blue ink on a piece of Thick Whisper White cardstock. I stamped the other two large flower stamps also in Balmy Blue after stamping off once. I die cut it with the coordinating die and brushed it lightly with Wink of Stella to give it a little sparkle. Too bad it doesn’t show up in the picture. I die cut two of the floral outline shapes in Thick Whisper White and two of the outline leaves in Old Olive

I took a scrap of Vellum and brushed it with the embossing buddy and stamped the ‘hello’ greeting from the Stampin’ Up! To A Wild Rose stamp set in Versamark Ink and sprinkled it with silver embossing powder and heat set. When cool, I die cut it with the Stitched Nested Labels die.

I made a bow with the Whisper White Polka Dot Tulle ribbon. I arranged the elements by attaching the die cuts to the back of the rose with glue dots. I added dimensionals to the back of the rose so that it would also float above the embossed background and I added glue from the fine tipped glue pen behind the die cuts where they would meet the frame. I attached the bow with glue dots. I finished off the rose with a glitter enamel dot and the background with Silver Metallic Pearls.

For the inside of the card, I stamped the flower three times on Whisper White after stamping off and masking. I attached the Whisper White panel to the inside of the card with snail. I decorated the envelope using the same stamping technique.

My sister and I have a thing that roses shouldn’t be blue because it’s not natural. But the rose is so pretty and the blue and white is so refreshing. Thanks for visiting!

I hope you have a wonderful 4th of July tomorrow!

Akiko


Don’t forget that we are in the earning period of Bonus Days where you get a coupon for $5 to redeem in August for every $50 you spend (before shipping and taxes) in July. See the full details on the Stampin’ Up! Promotions Page.


July 1 – 15 Host Code: 6X3A6D6C

Use this host code when you order and receive a free gift from me!  If your order is over $150, please do not use this code, but you’ll still get the free gift.  The free gift is your choice of any item valued up to $10.00 in the 2018-19 Annual Catalog or in the 2019 Occasions Catalog!  That includes some of the Host Exclusive stamp sets!


If you need any stamping supplies, I’d be very happy to be your Demonstrator.  Just click on the Shop Now button on the right side of the screen to go directly to my online store or contact me if you have any questions.  Happy Stamping!

  • Visit my online store here
  • See the current Stampin’ Up! clearance rack specials here
  • Earn FREE Stampin’ Up! products through my Wildflower Frequent Shopper Program – my way of saying thank you to my frequent shopper online customers.
  • Have any questions? I’d be happy to help, click here to contact me.

Cardstock Cuts for this project:

  • Balmy Blue – 4 1/4″ x 11″
  • Whisper White – 3 3/4″ x 5″, 3″ x 4″
  • Thick Whisper White – 3″ x 3″, (2) 2 1/4 x 2 1/4
  • Old Olive – (2) 2″ x 2″
  • Vellum – 2 1/2″ x 1 1/2″

Stampin’ Up! products used in this project:


Stampin’ Up! A Little Lace Hello Card

Happy Monday Morning! With the last card and 4th of July just around the corner, I wanted to make another red, white and blue card. I also wanted to play with the Stampin’ Up! A Little Lace cling stamp set to see how it would work in a randomly stamped all over pattern – like handmade DSP. Here is the result. You can find supplies used to create this card at the bottom of my post along with the sizes of cardstock used.

I was also inspired by this week’s sketch at Freshly Made Sketches – Freshly Made Sketches #393 – A Sketch by Lee Ann. This is a great clean and simple card sketch that is pretty easy to do and results in beautiful cards, so visit them for more inspiration.

I started with a piece of Whisper White card stock and stamped the large image from the Stampin’ Up! A Little Lace cling stamp set and the little rose image several times on a piece of Whisper White cardstock using Real Red ink. I did this again with a strip of whisper white for the inside. I die cut 2 strips of Whisper white on the large stitched lace die, and then cut one edge with the border die. It came out so delicate and pretty!

Using the multipurpose liquid glue, I adhered the lace strips to the top and bottom back of the stamped panel. I then attached the thin Real Red strips to the border, also with liquid multipurpose glue. I colored come of the Clear Faceted Gems red with the Dark Real Red Stampin’ Blends marker and attached them to the center of the flowers.

I made a Blueberry Bushel card base and stamped the hello sentiment from the Stampin’ Up! A Little Lace stamp set on the bottom of the card base using Versamark ink after dusting it with the embossing buddy. I sprinkled it with White embossing powder and heat set. Since I stamped directly on the card base, it was a little warped after heating, so I put the card base under a stack of books for a couple of hours to flatten it. I was relieved that this worked!

For the inside, I attached the stamped strip to the bottom of a Whisper White panel and adhered it to a Real Red mat with snail. Then I attached it to the inside of the card with snail.

As a final touch, I stamped the small rose image to the back of the envelope flap with Real Red ink to coordinate with the card. I have seen so many pretty cards with the large floral spray as the focal image, and I am pleased that it worked out so well when randomly stamped all over like a DSP.

I hope you enjoyed this little patriotic hello card and I hope you have a great week. Thanks for stopping by!

Akiko


June 16 – 30 Host Code: 3ZXWQ49Y

Use this host code when you order and receive a free gift from me!  If your order is over $150, please do not use this code, but you’ll still get the free gift.  The free gift is your choice of any item valued up to $10.00 in the 2018-19 Annual Catalog or in the 2019 Occasions Catalog!  That includes some of the Host Exclusive stamp sets!


If you need any stamping supplies, I’d be very happy to be your Demonstrator.  Just click on the Shop Now button on the right side of the screen to go directly to my online store or contact me if you have any questions.  Happy Stamping!

  • Visit my online store here
  • See the current Stampin’ Up! clearance rack specials here
  • Earn FREE Stampin’ Up! products through my Wildflower Frequent Shopper Program – my way of saying thank you to my frequent shopper online customers.
  • Have any questions? I’d be happy to help, click here to contact me.

Cardstock Cuts for this project:

  • Blueberry Bushel – 5 1/2″ x 8 1/2″
  • Real Red – 3 3/4″ x 5″, (2) 1/8″ x 4″
  • Whisper White – 4″ x 3″, (2) 3/4″ x 4, 1/2″ x 3 1/2″, 3 1/2″ x 4 3/4″

Stampin’ Up! products used in this project:


Stampin’ Up! All That You Are Hello Card

Good Morning! Today’s card is another happy gingham card using the Stampin’ Up! All That You Are Stamp Set and the Stampin’ Up! Gingham Gala Designer Series Paper or DSP. Both of these items are from the 2019 Occasions Catalog and are being retired so they are currently available while supplies last through June 3.

For this card, I used an old technique called ‘Stained Glass’. This is where you emboss a line stamp design on vellum and use a marker to color the back. This gives a soft look that mimics stained glass because you can sort of see through the vellum. In this case, I used white embossing powder to outline the image and colored the back with Old Olive Stampin’ Blends and a yellow and berry copic markers. You can also use regular markers with this technique. One thing to remember is that markers take longer to dry on vellum, so be careful not to smudge your coloring while it’s drying.

I stamped the big flower image from the Stampin’ Up! All That You Are Stamp set on a piece of vellum using versamark ink after using the embossing buddy. I sprinkled it with white embossing powder and heat set. I colored the back using yellow and berry copics and the dark Old Olive Stampin’ Blend and put it aside to dry. I stamped the ‘hello beautiful’ sentiment from the Stampin’ Up! Butterfly Gala stamp set on a piece of Whisper White using Old Olive ink. I used the label die cuts from a retired Stampin’ Up set called Special Reason since it fit the sentiment perfectly. I die cut the larger label in Daffodil Delight and used the smaller label to die cut the Whisper White stamped sentiment. I adhered the labels together using multipurpose liquid glue.

I adhered a piece of the Daffodil Delight paper from the Gingham Gala DSP to an Old Olive mat with snail. I cut a banner bottom in the dried vellum panel and used a glue dot hidden behind the label to secure the vellum to the gingham paper. I ran a line of multipurpose liquid glue at the top where the ribbon would be tied and set a stamp block on top to secure it while it dried.

One of the challenges of using vellum is that it is transparent, so glue shows through, so you need to attach the vellum in places where it will be hidden. After the glue dried I tied the ribbon around the top. I used dimensionals to attach the panel to a Daffodil Delight Card base and again to attach the label.

For the inside of the card, I embossed one of the single flowers from the Stampin’ Up! All That You Are stamp set in white on Daffodil Delight cardstock and two of the leaves in white on Old Olive cardstock. I fussy cut these with the paper snips. I adhered a strip of the Daffodil Delight gingham paper to the bottom of the inside Whisper White panel and matted it with Old Olive. I attached the flower and leaves using multipurpose liquid glue and adhered the panel to the inside of the card using snail.

I love the look and texture that vellum adds to a card, and though it can be tricky to work with, the end result is worth the extra effort.

Thanks for looking and have a great weekend!

Akiko

Evening Update

I found out that at TGIF Challenges! the new challenge from yesterday is #TGIFC213 All About that Gingham.

How perfect! Click on the picture above to check out the other entries and get more gingham inspiration. Thanks.

Akiko


Don’t forget that the new Stampin’ Up! 2019- 2020 Annual Catalog becomes active on June 4, 2019. On June 4, ordering will be unavailable from midnight to noon (MT) while we transition the system to the new catalog. Ordering will be available again no later than noon (MT).

Until then, make sure you pick up products that you want from the 2019 Occasions Catalog and 2018 – 2019 Annual Catalog that are retiring. See the details here.


May 16 – 31 Host Code: MU6CCTMM

Use this host code when you order and receive a free gift from me!  If your order is over $150, please do not use this code, but you’ll still get the free gift.  The free gift is your choice of any item valued up to $10.00 in the 2018-19 Annual Catalog or in the 2019 Occasions Catalog!  That includes some of the Host Exclusive stamp sets!


If you need any stamping supplies, I’d be very happy to be your Demonstrator.  Just click on the Shop Now button on the right side of the screen to go directly to my online store or contact me if you have any questions.  Happy Stamping!

  • Visit my online store here
  • See the current Stampin’ Up! clearance rack specials here
  • Earn FREE Stampin’ Up! products through my Wildflower Frequent Shopper Program – my way of saying thank you to my frequent shopper online customers.
  • Have any questions? I’d be happy to help, click here to contact me.

Cardstock Cuts for this project:

  • Daffodil Delight – 4 1/4″ x 11″ card base, (2) 2 1/2″ x 3″ scraps for label and flower
  • Old Olive – 5 1/8″ x 3 7/8″, 3 5/8″ x 4 7/8″ for mats, 1″ x 2″ scrap for leaves
  • Whisper White – 5″ x 3 3/4″ for inside, 2″ x 2 1/2″ scrap for label
  • Gingham Gala DSP – 3 1/2″ x 4 3/4″, 1/2″ x 3 3/4″
  • Vellum – 3″ x 4 1/2″

Stampin’ Up! products used in this project: