Stampin’ Up! Impressions Abloom Card

Good Morning! Welcome the new Stampin’ Up! 2025-2026 Annual Catalog! Today is the first day that the catalog is open for orders! It’s full of new products and returning favorites. Click on the picture below to download a copy or view it online.

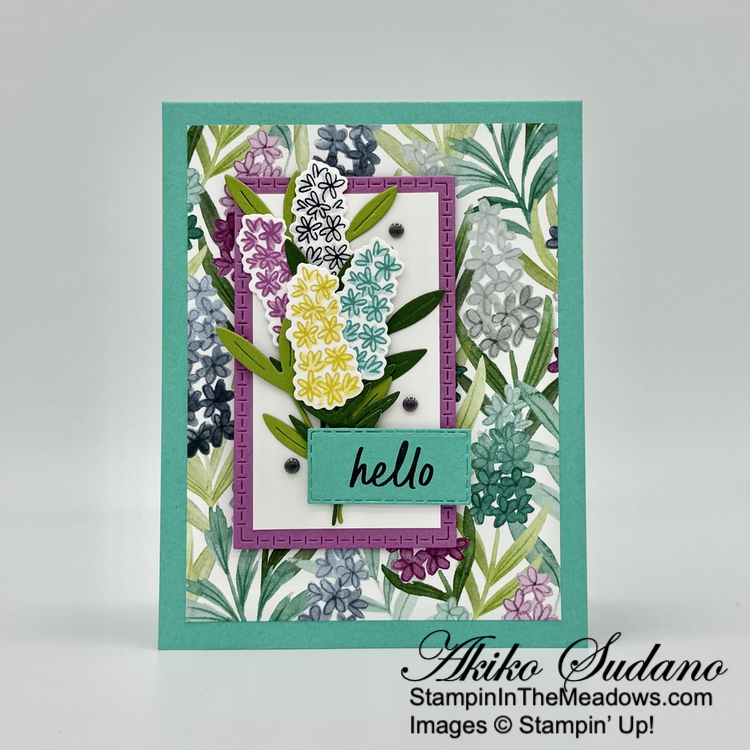
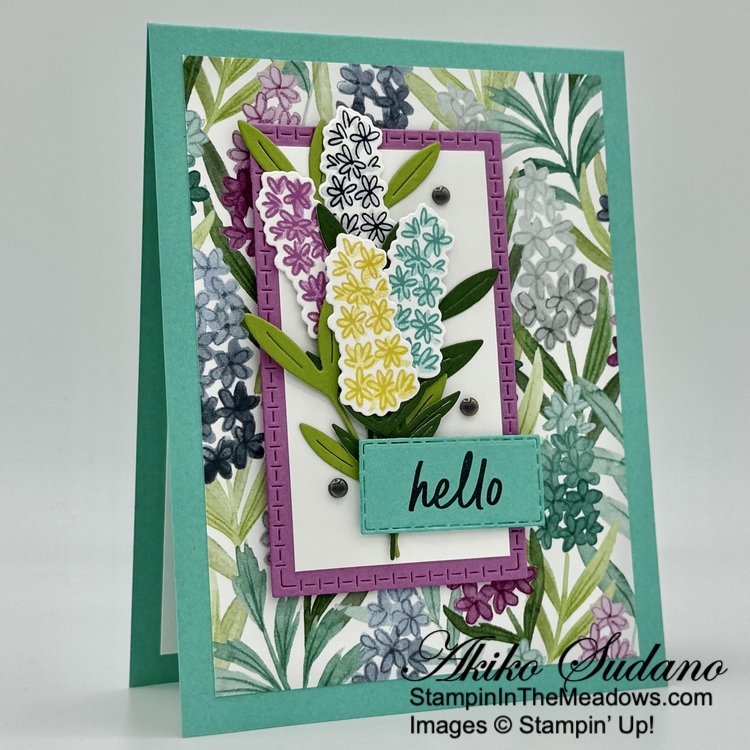
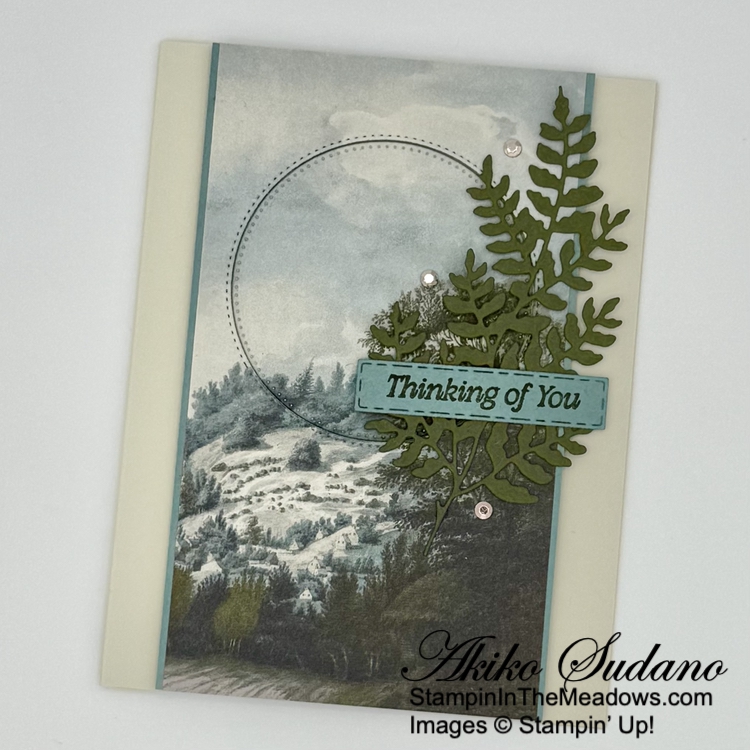
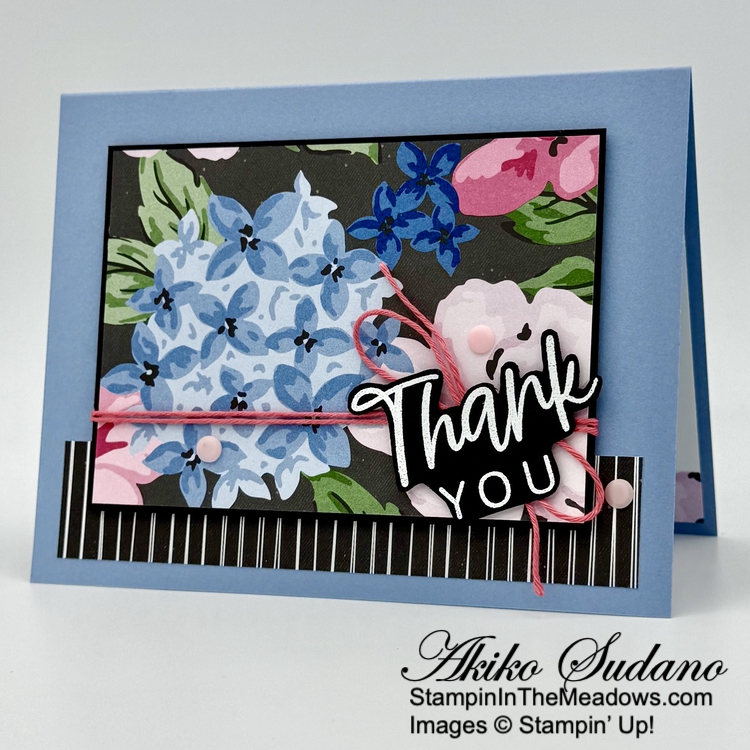
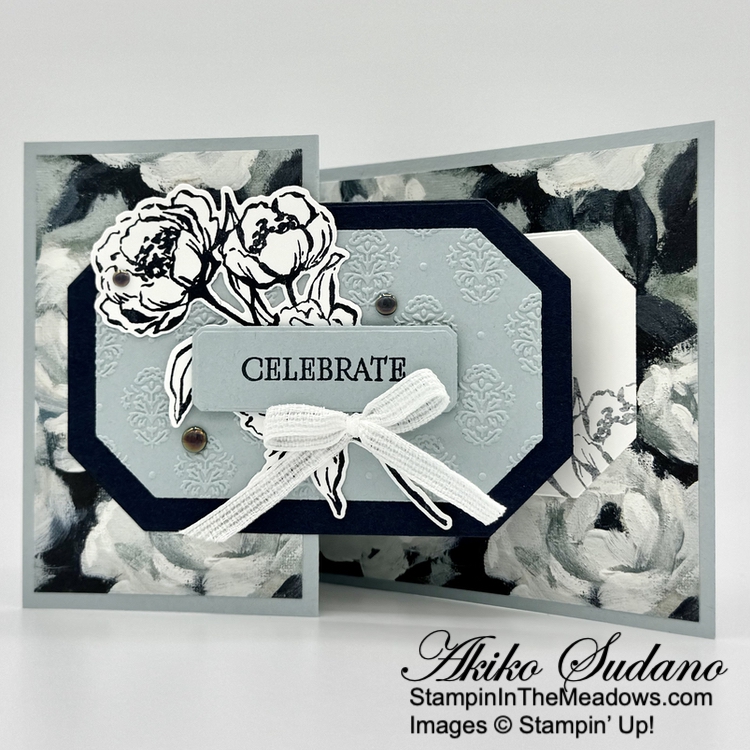
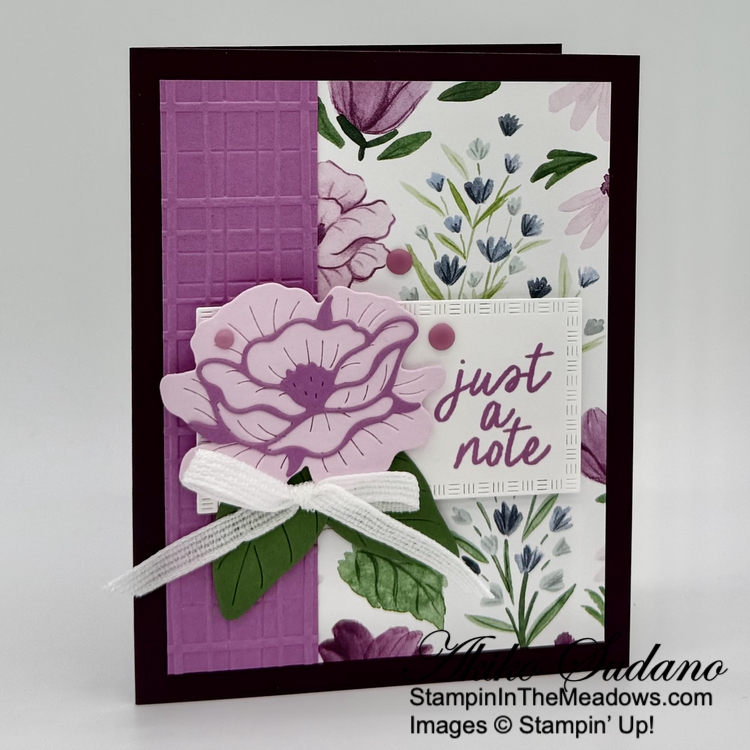
In addition to the new catalog, a new release of Online Exclusive products is available today and I used one of the new bundles, the Stampin’ Up! Impressions Abloom bundle to make a quick card. You can find the products I used at the bottom of my post along with the card stock sizes.

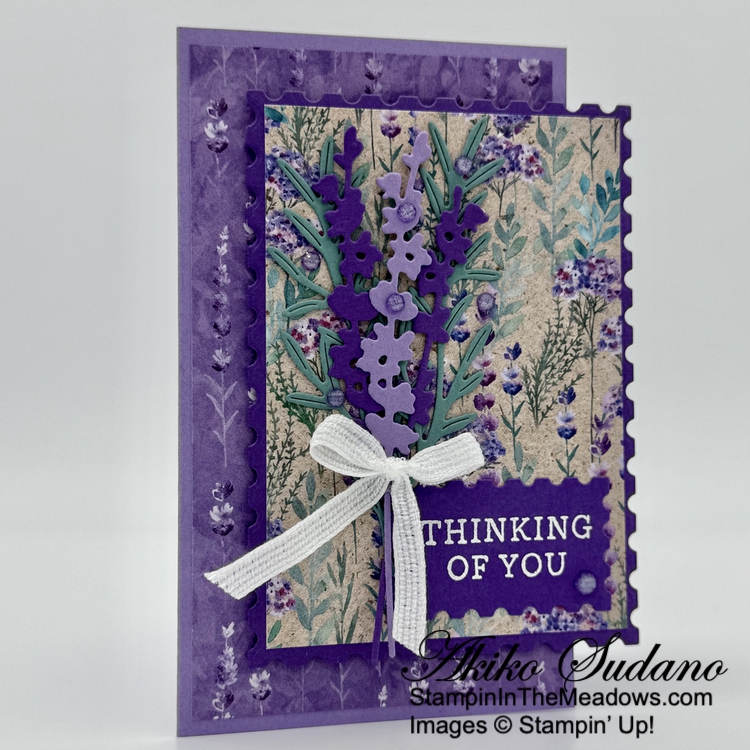
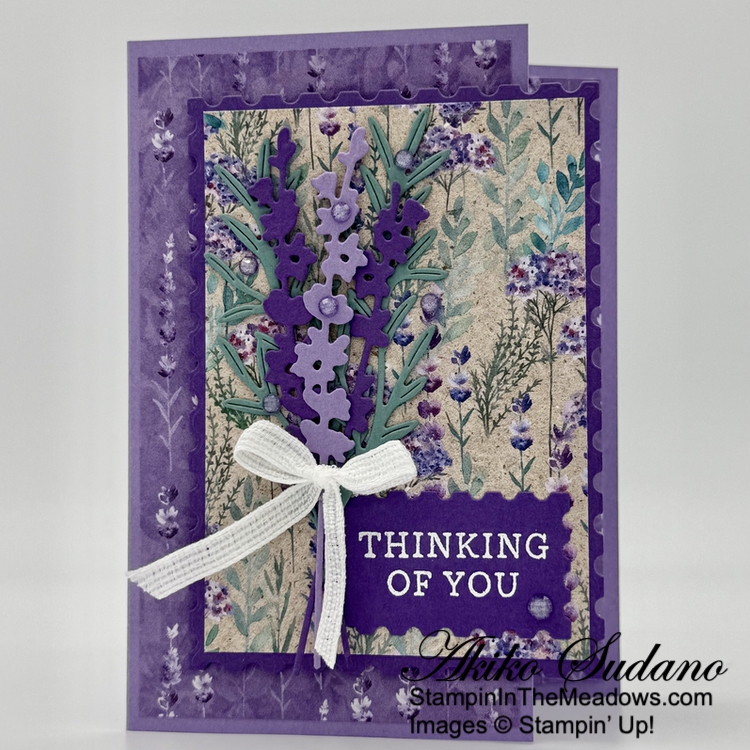
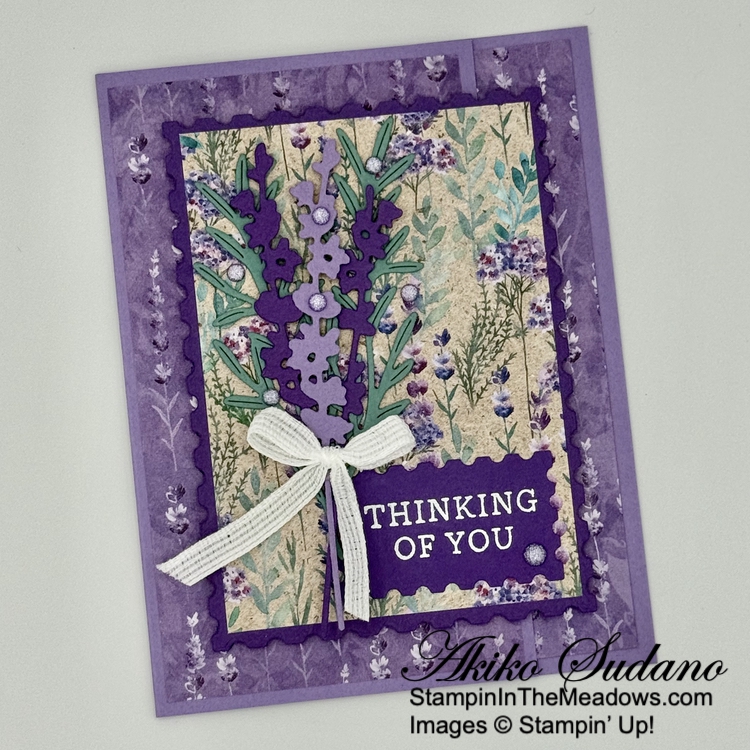
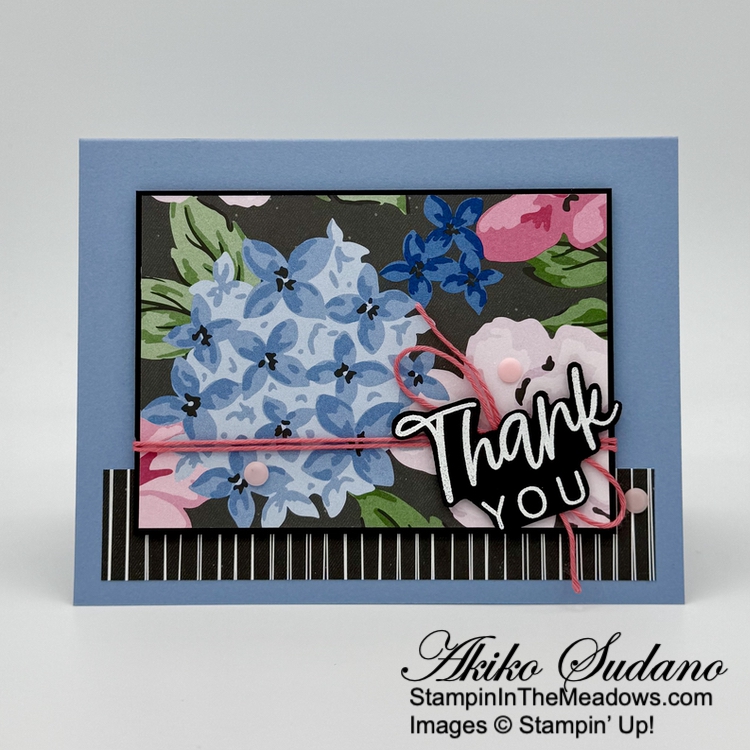
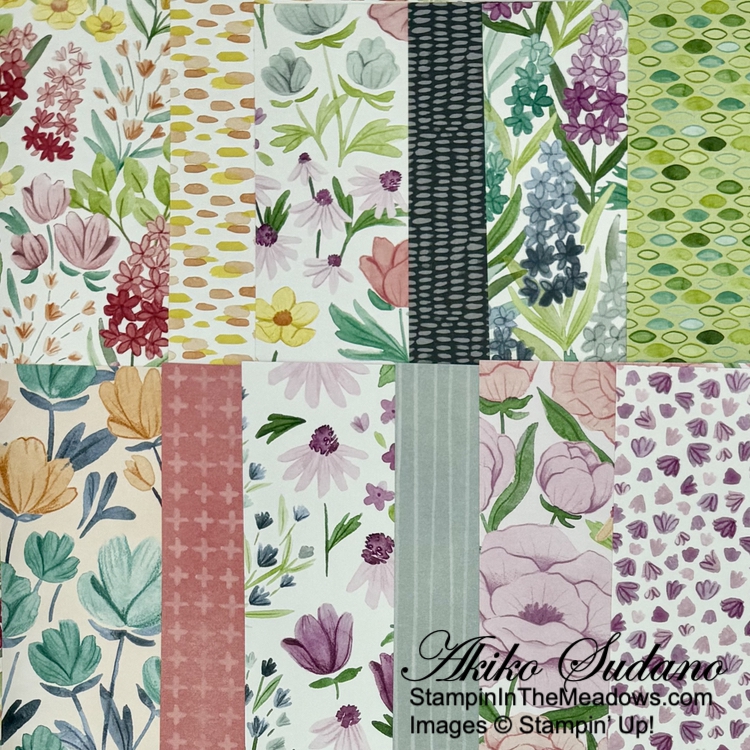
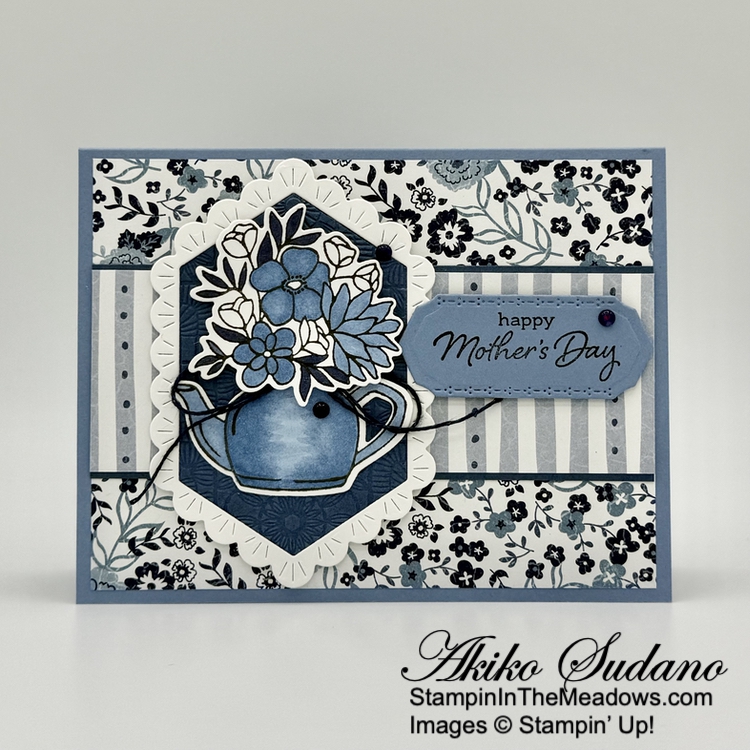
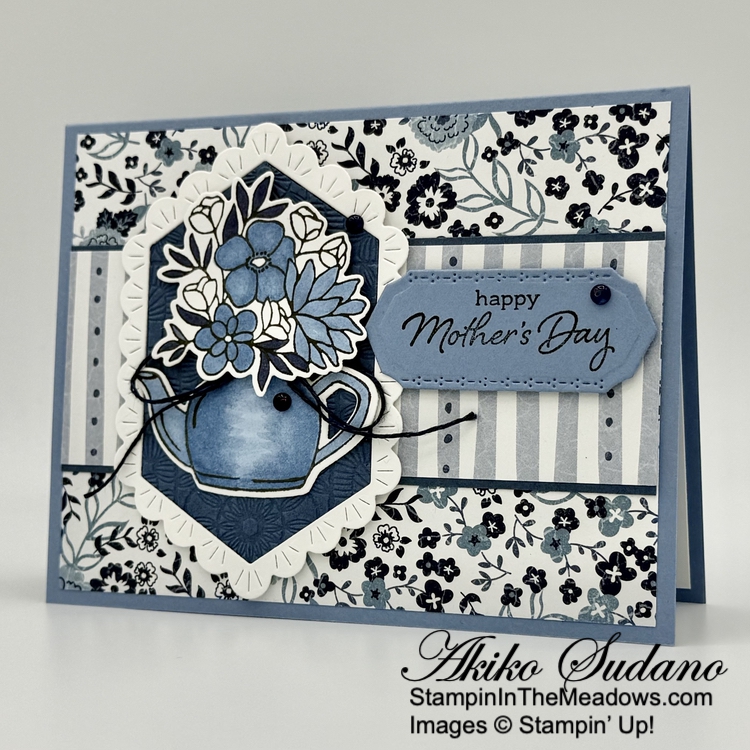
I used the Basic White Note cards and envelopes for my card base – the card size is 3-1/2″ x 5″ and they are also good for mailing. I adhered a panel of Pool Party Floral Impressions designer series paper to a Pool Party mat.

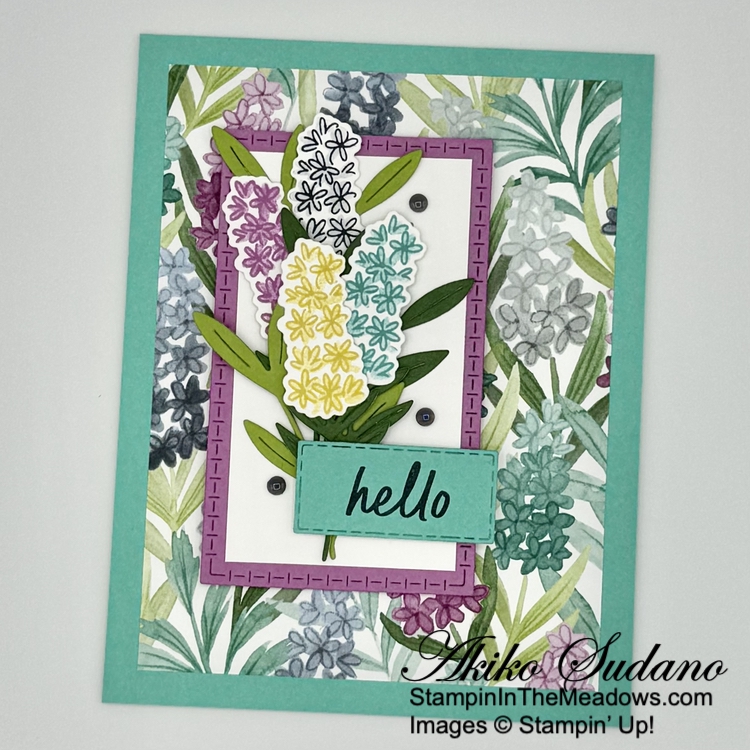
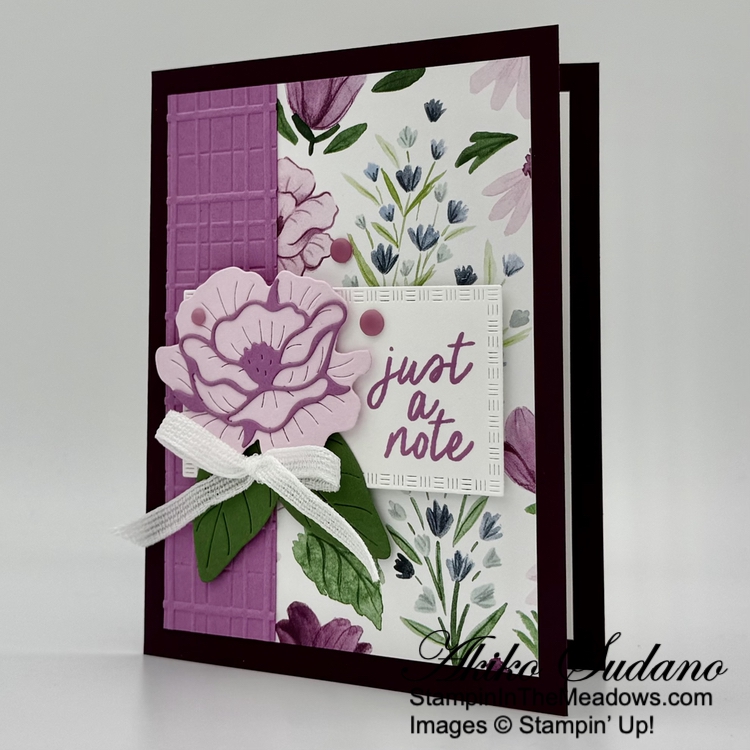
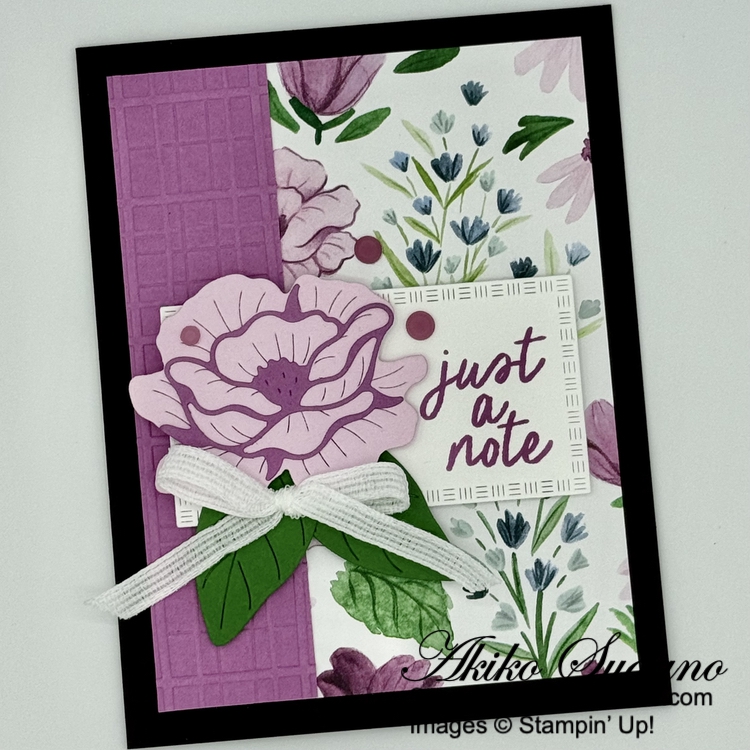
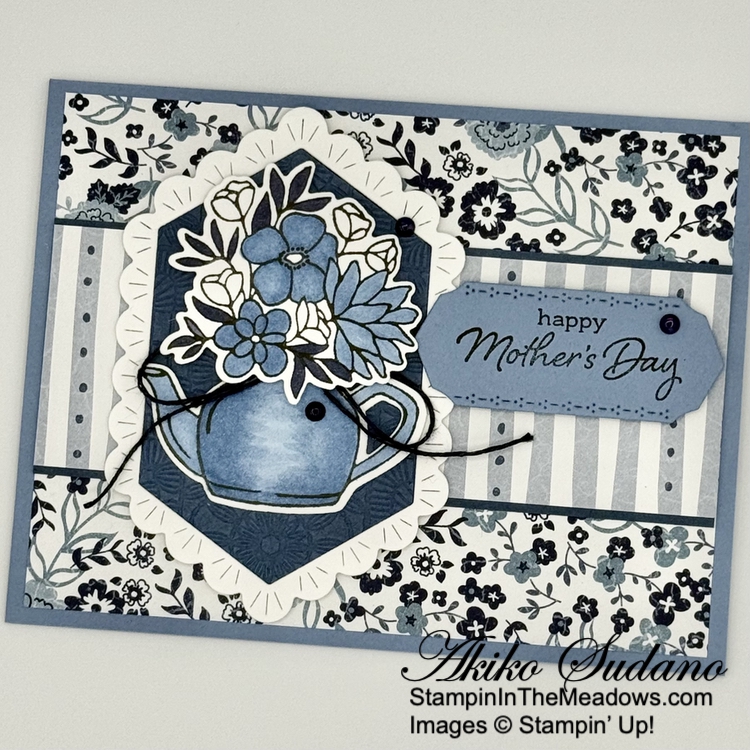
I used the large and small flower dies from the Stampin’ Up! Impressions Abloom dies with the inserts to cut a Strawberry Slush panel. Strawberry Slush is one of the new 2025-2027 In Colors. I used a sponge dauber to apply Strawberry Slush ink to the center of the large die cut flower and the edges of both flowers. I curved the petals of the large flower downward and the petals of the small flower upwards with my fingers to give it dimension and adhered the flowers together with a glue dot. I cut the small flower center with the two sets of dies from Timid Tiger, another new 2025-2027 In Color, and adhered the flower center with a dimensional.

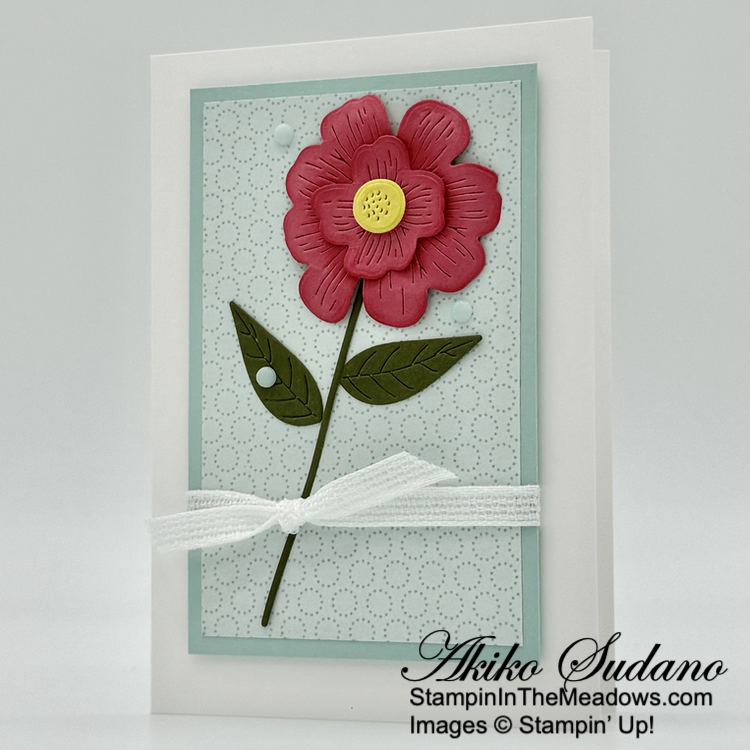
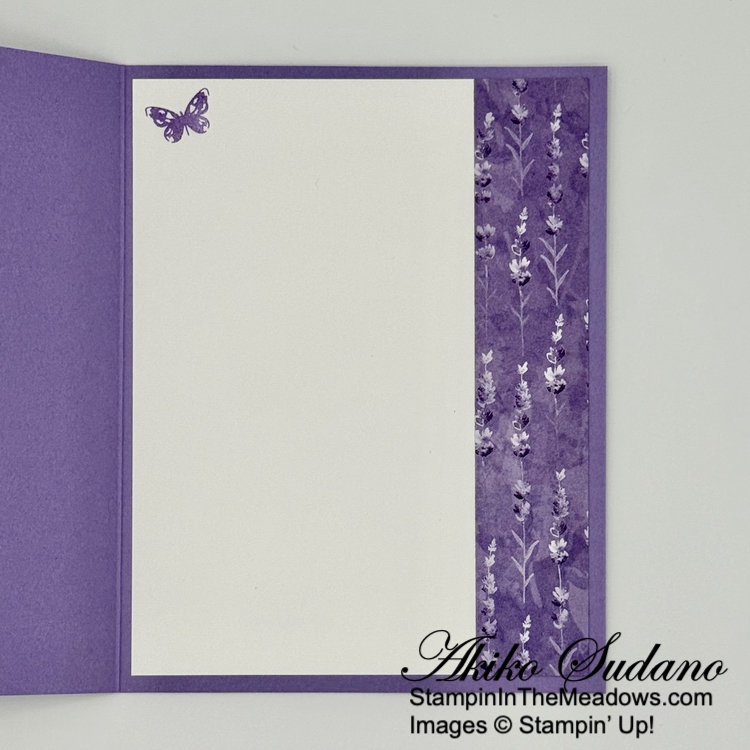
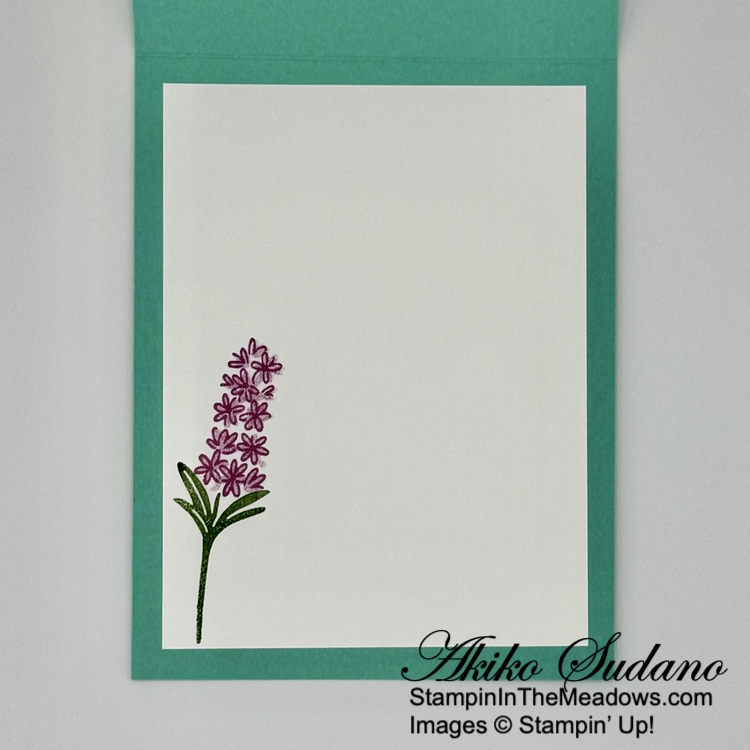
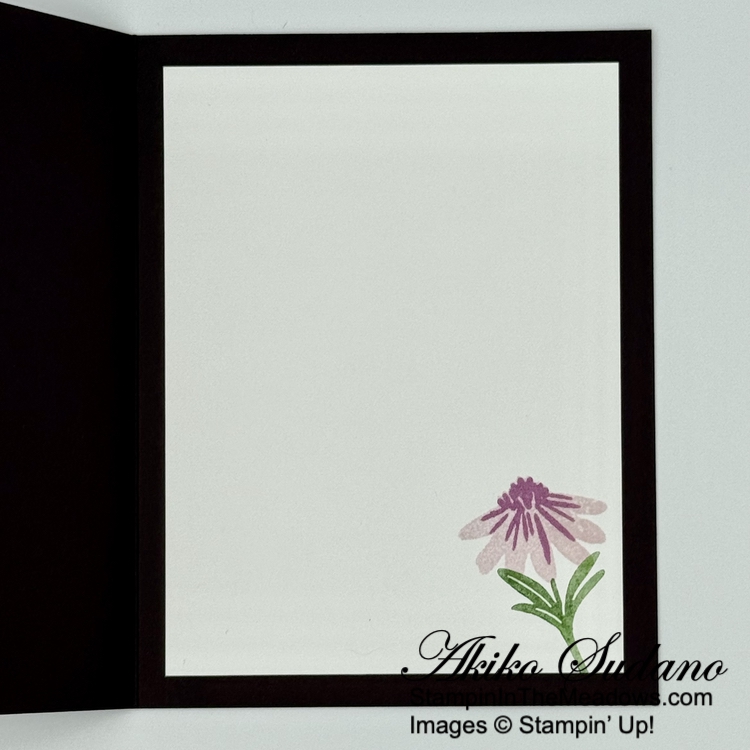
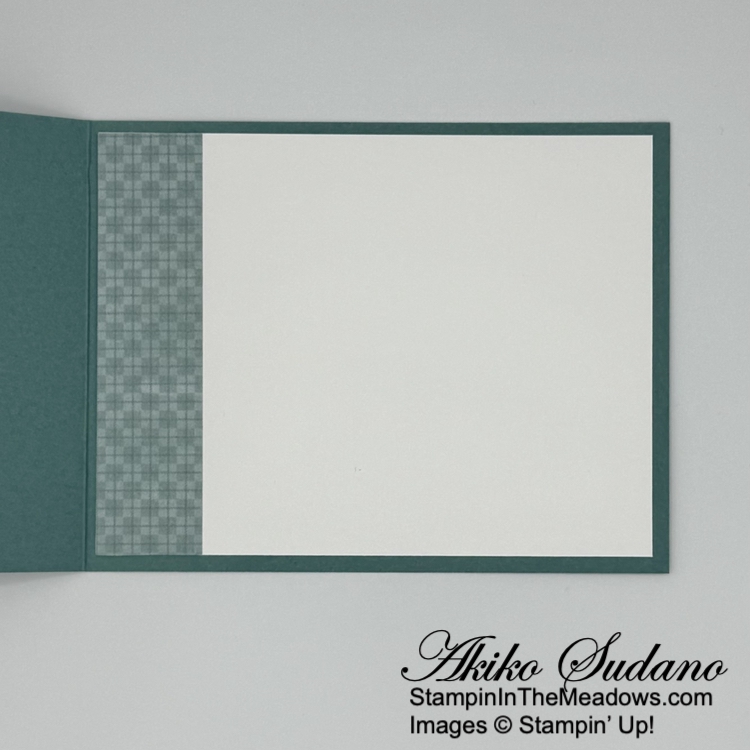
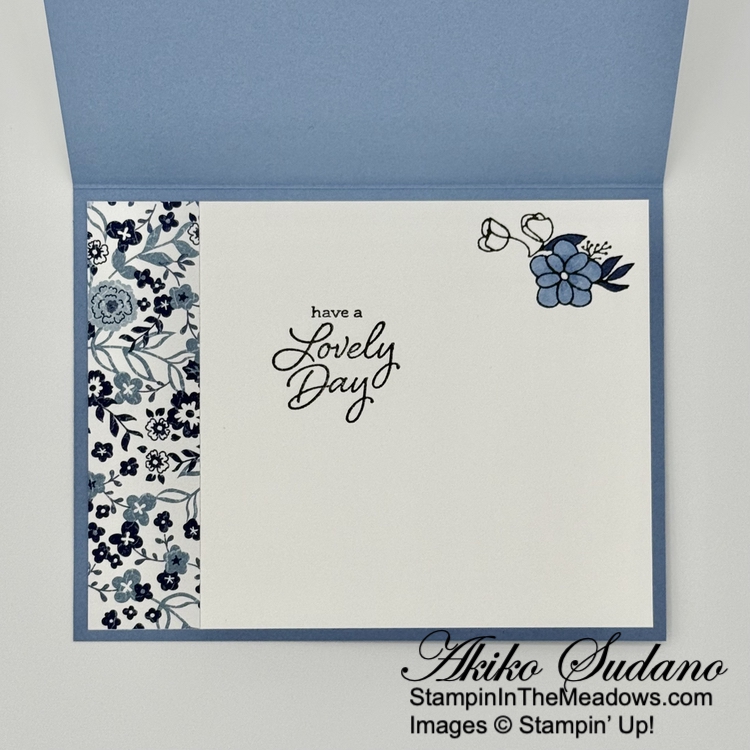
I cut the single stem and two leaf dies from the Stampin’ Up! Impressions Abloom dies from Mossy Meadow card stock and adhered the stem to the back of the flower with a glue dot. I adhered the flower and leaves to the DSP panel with glue dots. I wrapped the panel with white ribbon tying a knot over the stem and adhered the panel to the front of a Basic White note card with dimensionals. I finished the card with Pool Party dots. The stamp set has pretty sentiments, but I didn’t use one for this card and I also left the inside blank.

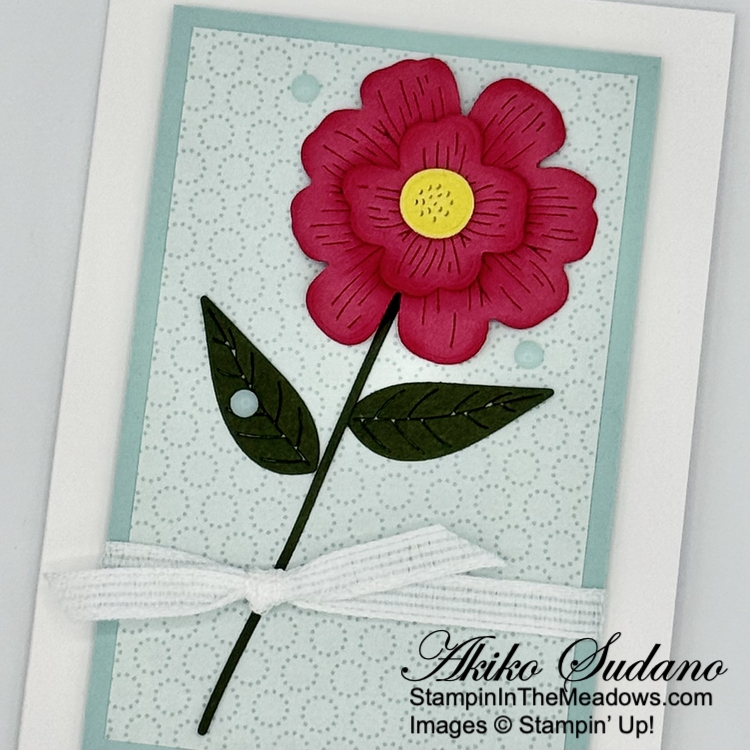
The Stampin’ Up! Impressions Abloom stamps have pretty two step stamping florals and sentiments. And the dies are unique in that they can cut stamped images or be used with the inserts for textured flowers like I made for today’s card. And it’s finally available today!!


If you need any stamping supplies, I’d be very happy to be your Demonstrator.  Just click on the Shop Now Button on the right side of the screen to go directly to my Online store or contact me if you have any questions.  Happy Stamping!

Thanks for stopping by and have a great day!

Akiko

  • Visit my online store here
  • See the current Stampin’ Up! Last Chance items here
  • Have any questions? I’d be happy to help, click here to contact me.

Cardstock Cuts for this project:

  • Basic White Note Cards and Envelopes – 5″ x 7″ card base, scored at 3-1/2″
  • Pool Party – 2-3/4″ x 4-1/4″ (DSP mat)
  • Strawberry Slush – 2″ x 3-1/2″ (flower die cuts)
  • Timid Tiger – 1″ x 1″ (flower center die cut)
  • Mossy Meadow – 1″ x 4″ (stem and leaves die cuts)
  • Floral Impressions DSP – 2-1/2″ x 4″ (front background)

Stampin’ Up! products used in this project:


Stampin’ Up! Painted Lavender Thinking of You Card

Good Morning! One of the prettiest bundles from the last few years is the Stampin’ Up! Painted Lavender stamp set and dies and they are currently on the Last Chance products list with wonderful discounts! I used it with the pretty Perennial Lavender designer series paper to make a simple fun fold Thinking of You card. You can find the products I used at the bottom of my post along with the card stock sizes.

Adhere a panel of Perennial Lavender designer series paper to the front panel of the Highland Heather card base. Cut a Gorgeous Grape panel with the second largest Perennial Postage dies and adhere another panel of the DSP to the die cut.

Stamp the sentiment from the Simply Said stamp set using Versamark ink on Gorgeous Grape. Sprinkle the sentiment with white embossing powder and shake off the excess. Heat the powder with a heat tool until it’s bright and shiny and cut it out with the rectangle die from the Perennial Postage dies. Adhere it to the layered die cut with glue dots.

Cut two leaf sprigs using the Stampin’ Up! Painted Lavender dies from Lost Lagoon and adhere them to the large die cut with glue dots. Cut two double floral sprigs from Gorgeous Grape and Highland Heather and adhere three of the sprigs to the die cut panel with bits of dimensionals at the top and glue dots at the bottom. Adhere the die cut panel to the card front with dimensionals and finish with a white bow and purple shimmer gems.

For the inside of the card, stamp the little butterfly from the Stampin’ Up! Painted Lavender stamp set using Highland Heather ink on a Basic White panel. Adhere a strip of DSP to the side and adhere the panel to the inside of the card with Stampin’ Seal so that the DSP shows when the card is closed.

The pretty Perennial Lavender designer series paper and purple shimmer gems are carried over in the new Annual Catalog and are perfect for making cards for those special ladies who love purple. Definitely check out the Stampin’ Up! Painted Lavender stamp set and dies on the Last Chance list for a great bargain while supplies last!


If you need any stamping supplies, I’d be very happy to be your Demonstrator.  Just click on the Shop Now Button on the right side of the screen to go directly to my Online store or contact me if you have any questions.  Happy Stamping!

Thanks for stopping by and have a great day!

Akiko

  • Visit my online store here
  • See the current Stampin’ Up! Last Chance items here
  • Have any questions? I’d be happy to help, click here to contact me.

Cardstock Cuts for this project:

  • Highland Heather – 5-1/2″ x 7-1/2″ card base scored at 3-1/4″, 1″ x 4-1/2″ (double lavender sprig die cut)
  • Gorgeous Grape – 3-1/2″ x 4-3/4″ (large postage stamp die cut), 1-1/2″ x 3″ (label), 1″ x 4-1/2 (double lavender sprig die cut)
  • Lost Lagoon – 2-1/2″ x 4″ (leaf sprig die cuts)
  • Basic White – 4″ x 5-1/4″ (inside panel)
  • Perennial Lavender DSP – 3″ x 5-1/4″ (front background), 1″ x 5-1/4″ (inside trim), 3″ x 4-1/4″ (die cut panel)

Stampin’ Up! products used in this project:


Stampin’ Up! Pretty Florals for the Happy Inkin’ Thursday Blog Hop

Good Morning and welcome to the Happy Inkin’ Thursday Blog Hop! The Stampin’ Up! Pretty Florals bundle is a new bundle from the upcoming Stampin’ Up! 2025-2026 Annual Catalog that will be available next week on May 6, 2025. I used it with the pretty Florals In Bloom designer series paper to make a hello card with a pretty bouquet. You can find the currently available supplies I used along with card stock cuts at the bottom of my post.

We have a color challenge this week and I used four of the colors:

I adhered a floral panel of Flowers In Bloom DSP to the front of a Summer Splash card base. I cut a Petunia Pop panel with the third largest Textured Notes rectangle die and adhered a Basic White panel to the inside with liquid glue. I popped it onto the card front with dimensionals.

I stamped the flowers from the Stampin’ Up! Pretty Florals stamp set on Basic White and cut them out with the coordinating die. These are two-step stamping flowers and I used the same color for both stamps. I used Darling Duckling, Summer Splash and Petunia Pop inks where I stamped the outline first using full strength ink and stamped off before stamping the filler stamp. For the last flower, I used the new In Color Secret Sea, but stamped off the filler stamp three times before stamping. I cut four single stems from Garden Green card stock and adhered them to the back of the flowers.

I used the leaf cluster die from the Stampin’ Up! Pretty Florals stamp set to cut two Granny Apple Green clusters and a Garden Green cluster. I adhered a Granny Apple Green Green cluster with glue dots and adhered the Secret Sea and Petunia Pop flowers on top. I adhered the Garden Green leaf cluster and the last Granny Apple Green leaf cluster with glue dots and finished with the Summer Splash and Darling Duckling flowers adhered with glue dots and dimensionals. I stamped the sentiment from the Simply Said stamp set using Secret Sea ink on Summer Splash and cut it out with the second smallest Textured notes rectangle die using the two step method. I adhered the label to the card with dimensionals and finished with new Secret Sea In Color dots.

For the inside of the card I stamped the single stem from the Stampin’ Up! Pretty Florals stamp set using Garden Green ink on Basic White. I stamped the flower using Petunia Pop like the flowers on the card front and adhered the panel to the inside of the card with Stampin’ Seal.

The Stampin’ Up! Pretty Florals bundle is really pretty and makes so many different flowers. And the Florals In bloom DSP even has some flowers that can be cut out with the dies. So there are so many creative options. Here’s the bundle:

And here’s the pretty Florals In Bloom DSP:

These pretty new items will be available on May 6.

On with the Hop! Click on the Next Blog button to move forward to see the beautiful project Karen Ksenzakovic has created.

If you get lost along the way, here are the participants for the hop:


If you need any stamping supplies, I’d be very happy to be your Demonstrator.  Just click on the Shop Now button on the right side of the screen to go directly to my online store or contact me if you have any questions. 

Thanks for stopping by and Happy Stamping!

Akiko

  • Visit my online store here
  • See the current Stampin’ Up! Last Chance items here
  • Have any questions? I’d be happy to help, click here to contact me.

Cardstock Cuts for this project:

  • Summer Splash – 4-1/4″ x 11″” card base, scored at 5-1/2″, 1″ x 2-1/2″ (label)
  • Petunia Pop – 2-1/2″ x 4-1/4″ (floral panel)
  • Granny Apple Green – 2-1/4″ x 2″ (die cut leaf clusters)
  • Garden Green – 3″ x 3-1/2″ (die cut leaf cluster and flower stems)
  • Basic White – 3-3/4″ x 5″ (inside panel), 1-7/8″ x 3-3/8″ (flower panel), 2″ x 4″ (die cut flowers)
  • Florals in Bloom DSP – 3-3/4″ x 5″ (front background)

Stampin’ Up! products used in this project:

Stampin’ Up! Beautiful Motifs for the Happy Inkin’ Thursday Blog Hop

Good Morning and welcome to the Happy Inkin’ Thursday Blog Hop! The Stampin’ Up! Beautiful Motifs bundle is a new bundle from the upcoming Stampin’ Up! 2025-2026 Annual Catalog that will be available on May 6, 2025. I used it with a pretty landscape pattern of Beautiful Gallery 6″ x 6″ designer series paper to make a thinking of you card for today. You can find the currently available supplies I used along with card stock cuts at the bottom of my post.

We have a pretty sketch challenge this week:

I adhered a pretty landscape panel of Beautiful Gallery DSP to a Lost Lagoon mat by applying liquid glue around the outside edge. I used the second largest circle die from the Stylish Shapes dies to cut a circle from the layered DSP and adhered the outside to the front of a Basic Beige card base with dimensionals.

I adhered the die cut circle to the inside of the circle with liquid glue to get a two layer effect. I cut a Mossy Meadow panel with the pretty fern die from the Stampin’ Up! Beautiful Motifs dies and adhered it to the card with glue dots and bits of dimensionals.

I stamped the sentiment from the Stampin’ Up! Beautiful Motifs stamp set using Mossy Meadow ink on Lost Lagoon and cut it out with the long Textured notes label die using a two step methog. I adhered it to the card with glue dots and dimensionals and finished with a three small copper gems.

I left the inside of the card, blank, simply trimming the side of a Basic White panel with more of the landscape DSP and adhering it to the inside of the card with Stampin’ Seal.

The landscape panels of the Beautiful Gallery DSP are real pretty. I love the sentiments from the Stampin’ Up! Beautiful Motifs stamp set and the fern die is just gorgeous. The flourish dies are interesting in that they do a partial die cut – I need to play with them a bit to get comfortable. Here is the pretty Stampin’ Up! Beautiful Motifs bundle:

It will be available with the Beautiful Gallery 6″ x 6″ designer series paper are part of the new Beautiful Gallery Suite in the upcoming Stampin’ Up! 2025-2026 Annual Catalog on May 6.

On with the Hop! Click on the Next Blog button to move forward to see the beautiful project Karen Ksenzakovic has created.

If you get lost along the way, here are the participants for the hop:


If you need any stamping supplies, I’d be very happy to be your Demonstrator.  Just click on the Shop Now button on the right side of the screen to go directly to my online store or contact me if you have any questions. 

Thanks for stopping by and Happy Stamping!

Akiko

  • Visit my online store here
  • See the current Stampin’ Up! Last Chance items here
  • Have any questions? I’d be happy to help, click here to contact me.

Cardstock Cuts for this project:

  • Basic Beige – 5-1/2″ x 8-1/2″ card base, scored at 4-1/4″
  • Lost Lagoon – 3-1/4″ x 5-1/2″ (DSP mat), 1″ x 3″ (label)
  • Mossy Meadow – 2-1/4″ x 4-1/4″ (die cut fern)
  • Basic White – 3-3/4″ x 5″ (inside panel)
  • Beautiful Gallery 6″ x 6″ DSP – 3-1/8″ x 5-1/2″ (front background), 3/4″ x 5″ (inside trim)

Stampin’ Up! products used in this project:

Stampin’ Up! With You In Mind Thank You Card

Good Morning! Here’s a simple thank you card made with the pretty Stampin’ Up! With You In Mind stamp set and the beautiful Lovely Garden designer series paper. The big, bold sentiments in the stamp set go well with thebold and beautiful flowers in the DSP. You can find the products I used at the bottom of my post along with the card stock sizes.

Adhere a striped strip of Lovely Garden designer series paper to the bottom of a retiring Boho Blue card base with liquid glue.

Adhere another floral pattern of the Lovely Garden DSP to a Basic Black mat and wrap it with Strawberry Slush baker’s twine and make a bow on the right side. Adhere the layered panel to the card with dimensionals.

Stamp the sentiment from the Stampin’ Up! With You In Mind stamp set using Versamark Ink on Basic Black. Sprinkle it with white embossing powder, shake off the excess and heat the powder with a heat tool until it is bright and shiny. Fussy cut the sentiment with paper snips. Adhere the sentiment to the card over the bow with dimensionals. Finish with three Pretty In Pink dots.

For the inside of the card, adhere a strip of DSP to the bottom of a Basic White panel and adhere the panel to the inside of the card with Stampin’ Seal.

The pretty Lovely Garden designer series paper makes for quick & easy pretty layered cards. And I love the casual bold sentiments in the Stampin’ Up! With You In Mind stamp set. It is perfect for many occasions and has simple images that can be stamped for a DIY DSP in any color palette.


If you need any stamping supplies, I’d be very happy to be your Demonstrator.  Just click on the Shop Now Button on the right side of the screen to go directly to my Online store or contact me if you have any questions.  Happy Stamping!

Thanks for stopping by and have a great day!

Akiko

  • Visit my online store here
  • See the current Stampin’ Up! Last Chance items here
  • Have any questions? I’d be happy to help, click here to contact me.

Cardstock Cuts for this project:

  • Boho Blue – 5-1/2″ x 8-1/2″ card base scored at 4-1/4″
  • Basic Black – 3-1/8″ x 4-3/8″ (DSP mat), 2″ x 3″ (label)
  • Basic White – 4″ x 5-1/2″ (inside panel)
  • Lovely Garden DSP – 3″ x 4-1/4″ (floral panel), 1″ x 5″ (striped strip), 1/2″ x 5-1/4″ (inside trim)

Stampin’ Up! products used in this project:


Stampin’ Up! Round We Go with Wildflower Birthday Card

Good Morning! Here is a quick birthday card made with the pretty sentiments from the Stampin’ Up! Round We Go stamp set and the beautiful Wildflower Birthday specialty designer series paper. You can find the products I used at the bottom of my post along with the card stock sizes.

I adhered a Peach Pie panel of the beautiful Wildflower Birthday specialty designer series paper to the side of a floral panel with gold foil accents. I adhered the layered panel to a Night of Navy mat and popped it on the front of a Pretty In Pink card base with dimensionals.

I stamped the sentiment from the Stampin’ Up! Round We Go stamp set using Night of Navy Ink on one of the label panels of the Wildflower Birthday specialty DSP and adhered it to the card with glue dots.

I used gold trim to make a bow and adhered it with a glue dot and adhered one of the small floral cut outs from the Wildflower Birthday specialty DSP with dimensionals. I finished with a gold dot in the center of the flower.

For the inside panel, I stamped the the sentiment from the Stampin’ Up! round We Go stamp set using Night of Navy ink on a Basic White panel. I adhered a tiny flower to the top of the panel and trimmed the bottom with DSP. I adhered the panel to the inside of the card with Stampin’ Seal.

I love the birthday sentiments from the Stampin’ Up! Round We Go stamp set – they are so festive and go with anything. And the Wildflower Birthday designer series paper is just beautiful!


If you need any stamping supplies, I’d be very happy to be your Demonstrator.  Just click on the Shop Now Button on the right side of the screen to go directly to my Online store or contact me if you have any questions.  Happy Stamping!

Thanks for stopping by and have a great day!

Akiko

  • Visit my online store here
  • See the current Stampin’ Up! Last Chance items here
  • Have any questions? I’d be happy to help, click here to contact me.

Cardstock Cuts for this project:

  • Pretty In Pink – 4-1/4″ x 11″ card base scored at 5-1/2″
  • Night of Navy – 3-7/8″ x 5-1/8″ (front mat)
  • Basic White – 3-3/4″ x 5-1/4″ (inside panel)
  • Wildflower Birthday specialty DSP – 1″ x 5″ (side stripe), 3-3/4″ x 5″ (floral background), 1/2″ x 3-3/4″ (inside trim), medium bouquet, small bouquet, label

Stampin’ Up! products used in this project:


Stampin’ Up! Gallery Blooms Sneak Peek for the Happy Inkin’ Thursday Blog Hop

Good Morning and welcome to the Happy Inkin’ Thursday Blog Hop! The Stampin’ Up! Gallery Blooms bundle is another new bundle from the upcoming Stampin’ Up! 2025-2026 Annual Catalog that will be available on May 6, 2025. I used it with the retiring Countryside Coners dies and some pretty vintage floral Beautiful Gallery 6″ x 6″ designer series paper to make a Z-fold Wedding card for today. You can find the currently available supplies I used along with card stock cuts at the bottom of my post. Note: My supply list may not be very useful since most of the items I used are from the upcoming Annual Catalog.

This week’s challenge is to make a fun fold card!

After scoring and burnishing the Cloud Cover card base, I adhered floral panels of Beautiful Gallery 6″ x 6″ designer series paper to the front flap and back panel with liquid glue. I embossed a Cloud Cover panel with the new Damask Designs embossing folder and adhered it to the middle section.

I cut a Secret Sky panel with the second largest retiring Countryside Corners die and cut a Cloud Cover panel with the third largest die. I embossed the Cloud Cover die cut with the Damask Designs embossing folder and adhered it to the larger die cut. I adhered the layered die cuts to the card front flap with liquid glue. I stamped the large roses from the Stampin’ Up! Gallery Blooms stamp set using Secret Sky ink on Basic White and cut it out with the coordinating die. I adhered it to the embossed panel with glue dots.

I stamped the sentiment from the Beautiful Motifs stamp set using Secret Sea ink on Cloud Cover and cut it out with the small Countryside Corners die. I adhered it to the card with dimensionals and finished with a white bow and Secret Sea dots.

For the inside of the card, stamped the sentiment from the Beautiful Motifs stamp set using Secret Sea ink on Basic White. I used twice stamped off Secret Sea ink to stamp the large floral from the Stampin’ Up! Gallery Blooms stamp set in the corner and cut it out with the third largest Countryside corners die. I adhered it to the back panel of the card with liquid glue so it is hidden when the card is closed.

The Stampin’ Up! Gallery Blooms bundle has beautiful florals with a vintage feel and wonderful coordinating dies. And it has a pretty double frame die that makes your cards look like they belong in an art museum. Here is the stamp set and dies:

And here is the Gallery Motifs bundle:

These bundles and the Beautiful Gallery 6″ x 6″ designer series paper are part of the new Beautiful Gallery Suite in the upcoming Stampin’ Up! 2025-2026 Annual Catalog that will be available on May 6.

On with the Hop! Click on the Next Blog button to move forward to see the beautiful project Karen Ksenzakovic has created.

If you get lost along the way, here are the participants for the hop:


If you need any stamping supplies, I’d be very happy to be your Demonstrator.  Just click on the Shop Now button on the right side of the screen to go directly to my online store or contact me if you have any questions. 

Thanks for stopping by and Happy Stamping!

Akiko

  • Visit my online store here
  • See the current Stampin’ Up! Last Chance items here
  • Have any questions? I’d be happy to help, click here to contact me.

Cardstock Cuts for this project:

  • Cloud Cover – 4-1/4″ x 11″ card base, scored at 2-3/4″ and 5-1/2″, 2-1/2″ x 4″ (embossed panel), 2-3/4″ x 4-1/4″ (embossed die cut), 1″ x 3″ (label
  • Secret Sea – 3-1/4″ x 4-3/4″ (die cut mat)
  • Basic White – 2-3/4″ x 4-1/4″ (inside die cut)
  • Beautiful Gallery 6″ x 6″ DSP – 4″ x 5-1/4″ (inside background), 2-1/2″ x 4″ (front flap panel)

Stampin’ Up! products used in this project:

Product List

Stampin’ Up! Pretty Florals Note Card

Good Morning! Here’s another sneak peek of the new Stampin’ Up! Pretty Florals bundle from the upcoming 2025-2026 Annual Catalog. This is such a versatile bundle with different flowers to stamp using a two step stamp method. There are also outline dies for the stamped images and coordinating floral dies. I used the bundle with the pretty Florals In Bloom designer series paper that it coordinates with. You can find the currently available products I used at the bottom of my post along with the card stock sizes.

I embossed Petunia Pop card stock with the Forever Plaid 3D embossing folder and adhered it to a panel of Florals in Bloom designer series paper. I adhered the layered DSP to the front of a Blackberry Bliss card base with liquid glue.

I stamped the sentiment from the Simply Said stamp set on the right side of a Basic White panel using Petunia Pop ink and cut it out with one of the Textured Notes rectangle dies. I adhered it to the card with dimensionals.

I cut a Bubble Bath panel with the large flower die from the Stampin’ Up! Pretty Florals dies and cut a Petunia Pop panel with the detailed die. I adhered the detailed die to the large flower with dots of liquid glue. I cut two large leaves from Garden Green. I adhered the leaves to the card with glue dots and dimensionals and popped the flower on top with dimensionals. I finished with a white bow and Petunia Pop dots.

For the inside of the card, I stamped the daisy like flower from the Stampin’ Up! Pretty Florals stamp set. I started with the detailed flower stamp in Petunia Pop. I stamped the background flower stamp in Bubble Bath ink and finished with the stem in stamped off Garden Green. I adhered the panel to the inside of the card with Stampin’ Seal.

It’s also great that the dies cut out some of the images in the DSP as well as stamped images. The Stampin’ Up! Pretty Florals bundle and Florals in Bloom designer series paper will be available May 6, 2025 when the new Annual Catalog opens for ordering.

The pretty Stampin’ Up! Florals In Bloom designer series paper is 12″ x 12″ and here are the patterns in the pack:

And here’s the Pretty Florals bundle – so many options for stamped and die cut flowers:


If you need any stamping supplies, I’d be very happy to be your Demonstrator.  Just click on the Shop Now Button on the right side of the screen to go directly to my Online store or contact me if you have any questions.  Happy Stamping!

Thanks for stopping by and have a great day!

Akiko

  • Visit my online store here
  • See the current Stampin’ Up! Last Chance items here
  • Have any questions? I’d be happy to help, click here to contact me.

Cardstock Cuts for this project:

  • Blackberry Bliss – 5-1/2″ x 8-1/2″ card base scored at 4-1/4″
  • Petunia Pop – 1-1/4″ x 5″ (embossed strip), 1-3/4″ x 2-1/4″ (die cut flower detail)
  • Bubble Bath – 2″ x 2-3/4″ (die cut flower)
  • Garden Green – 1″ x 4″ (die cut leaves)
  • Basic White – 3-3/4″ x 5″ (inside panel), 2″ x 3-1/2″ (label)
  • Florals In Bloom DSP – 3-3/4″ x 5″ (front background)

Stampin’ Up! products used in this project:


Stampin’ Up! Grow With Love for the Happy Inkin’ Thursday Blog Hop

Good Morning and welcome to the Happy Inkin’ Thursday Blog Hop! The Stampin’ Up! Grow with Love bundle is a fun herb and seed themed set with beautiful stamped images and fun seed envelope dies. But I just used the beautiful herb stamps and pretty sentiment for today’s card. You can find the supplies I used along with card stock cuts at the bottom of my post.

We have a pretty sketch challenge this week and I took some liberties by resizing the sketch and mounting it on a DSP background:

I adhered a panel of Timeless Plaid 6″ x 6″ designer series paper to the front of a Lost Lagoon card base with liquid glue.

I stamped the herbs from the Stampin’ Up! Grow With Love stamp set on Basic Beige. Before the final stamping, I practiced several times on printer paper to arrange the herbs and select the right color combinations until I came up with the right mix of colors and herb placement. For my final run, I stamped the mint in Grammy Apple Green in the middle of the panel. Next, I inked up the basil using Garden Green ink and applied Blackberry Bliss to the buds with sponge daubers before stamping it next to the mint. Then I stamped the rosemary using Shaded Spruce ink and finished with thyme in Lost lagoon on either side. I filled in the bottom and sides with the top of the mint stamp in full strength and stamped off Granny Apple Green. I adhered the stamped panel to a Shaded Spruce mat and adhered it to the card with liquid glue.

I stamped the sentiment from the Stampin’ Up! Grow With Love stamp set using Shaded Spruce ink on Lost Lagoon and cut it out with the small label die. I used Garden Green linen thread to make a bow and adhered it to the back with a glue dot before adhering the label to the card with dimensionals. I finished with the cute mini bee trinkets adhered with glue dots.

For the inside of the card, I kept it simple, trimming the side of a Basic White panel with DSP and adhering the panel to the inside of the card with Stampin’ Seal.

The herb stamps in the Stampin’ Up! Grow with Love stamp set are so detailed and realistic, and they look beautiful no matter what color you use. I had fun playing with all the different shades of green as I was working on my arrangement.

On with the Hop! Click on the Next Blog button to move forward to see the beautiful project Karen Ksenzakovic has created.

If you get lost along the way, here are the participants for the hop:


If you need any stamping supplies, I’d be very happy to be your Demonstrator.  Just click on the Shop Now button on the right side of the screen to go directly to my online store or contact me if you have any questions. 

Thanks for stopping by and Happy Stamping!

Akiko

  • Visit my online store here
  • See the current Stampin’ Up! Last Chance items here
  • Have any questions? I’d be happy to help, click here to contact me.

Cardstock Cuts for this project:

  • Lost Lagoon – 4-1/4″ x 11″ card base, scored at 5-1/2″1-1/4″ x 3″ (label)
  • Shaded Spruce – 3-1/8″ x 5-1/2″ (herb mat)
  • Basic Beige – 3″ x 5-1/2″ (herb panel)
  • Basic White – 4″ x 5-1/4″ (inside panel)
  • Timeless Plaid 6″ x 6″ DSP – 4-1/4″ x 5-1/2 (front background), 1″ x 4″ (inside trim)

Stampin’ Up! products used in this project:

Stampin’ Up! Country Flowers for the Inkin’ Krew Blog Hop

Good Morning! Welcome to the April Inkin’ Krew Team Blog Hop! The theme for this month’s hop is “For the Ladies/Girls” and I used the some retiring products to make a Mother’s Day Card, including the pretty Stampin’ Up! Country Flowers bundle and the Countryside Inn designer series paper. You can find the supplies I used along with card stock cuts at the bottom of my post.

I adhered a panel striped panel of the retiring Countryside Inn designer series paper to a Misty Moonlight mat with liquid glue. I adhered it to a floral panel of the Countryside Inn DSP and then adhered the layered DSP to the front of a Boho Blue card base. Boho Blue is one of the retiring 2023-3035 In Colors.

I stamped teapot and flowers from the retiring Stampin’ Up! Country Flowers stamp set using Memento Tuxedo Black ink on Basic White and cut them out with the coordinating dies. I colored the teapot with light Boho Blue Stampin’ Blend, shading it to give the teapot dimension. I colored the flowers with the light Boho Blue Stampin’ Blend and the dark Night of Navy Stampin’ Blend, leaving some flowers white.

I cut panels of Misty Moonlight and Basic White with the large octagonal die from the retiring Wildflower Designs dies. I embossed the inside of the Misty Moonlight panel with the retiring Cute Crochet 3D embossing folder. I adhered the Basic White frame to the card with dimensionals on the top and bottom and adhered the embossed panel with liquid glue. Doesn’t it look like a lacy doily? With the DSP stripe layer, the embossed inside and frame are almost level. I adhered the teapot with glue dots and popped the flowers on top with dimensionals.

I stamped the sentiment from the retiring Flower Cart stamp set using Memento Tuxedo Black ink on Boho Blue and cut it out with the medium label die from the Mixed Labels dies. I used the two step method to make the die cut a little longer and was glad it worked out pretty well! I adhered the label to the card with dimensionals and finished with Night of Navy gems and a loopy Night of Navy linen thread bow.

For the inside of the card, I stamped a flower cluster from the Country Birdhouse stamp set using Memento Tuxedo Black ink in the corner of a Basic White panel and colored it with Boho Blue and Night of Navy Stampin’ Blends. I stamped the sentiment from the Flower Card stamp set in Memento Tuxedo Black ink and trimmed the side with DSP. I adhered the panel to the inside of the card with Stampin’ Seal.

The Stampin’ Up! Country Flowers stamp set and dies are such a sweet set and I’m sorry to see it retiring. I don’t usually like to use so many different stamp sets and tools on cards, but I think all of these items work well together to make a sweet, feminine Mother’s Day card. Many of the retiring products I used for today’s card have been discounted in the Last Chance section of the Online Store. Many times the individual discounted prices of the stamp sets and dies total less than the bundled prices, so make sure to double check before adding them to your card.

On With The Hop! Click on the Next Blog button to move forward to Amy Koenders’ project or click the Previous Blog button to move back to see the project that Tara Carpenter created.

If you get lost along the way, here are the participants for the hop:

  1. Christine King
  2. Karen Ksenzakovic 
  3. Karen Finkle 
  4. Ann Louise Fogdaard 
  5. Terry Lynn Bright 
  6. Tara Carpenter
  7. Akiko Sudano <– you are here
  8. Amy Koenders

If you need any stamping supplies, I’d be very happy to be your Demonstrator.  Just click on the Shop Now button on the right side of the screen to go directly to my online store or contact me if you have any questions.  Happy Stamping!

Thanks for stopping by and have a great week!

Akiko

  • Visit my online store here
  • See the current Stampin’ Up! Last Chance items here
  • Have any questions? I’d be happy to help, click here to contact me.

Cardstock Cuts for this project:

  • Boho Blue – 5-1/2″ x 8-1/2″ card base, scored at 4-1/4″, 1-1/2″ x 3″ (label)
  • Misty Moonlight – 2″ x 5-1/4″ (DSP mat), 3″ x 4-1/4″ (octagonal frame)
  • Basic White – 4″ x 5-1/4″ (inside panel), 3″ x 4-1/4″ (octagonal frame), 2-1/2″ x 3-1/2″ (die cut teapot and flowers)
  • Countryside Inn DSP – 1-7/8″ x 5-1/4″ (front stripe), 4″ x 5-1/4″ (front background), 1″ x 4″ (inside trim)

Stampin’ Up! products used in this project: