Stampin’ Up! Charming Day Thanks For Being You Card

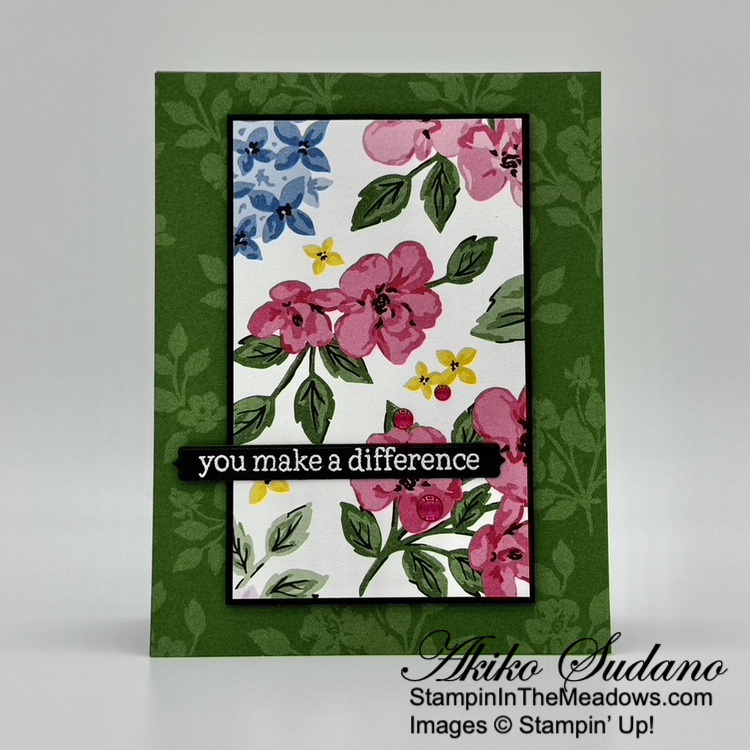
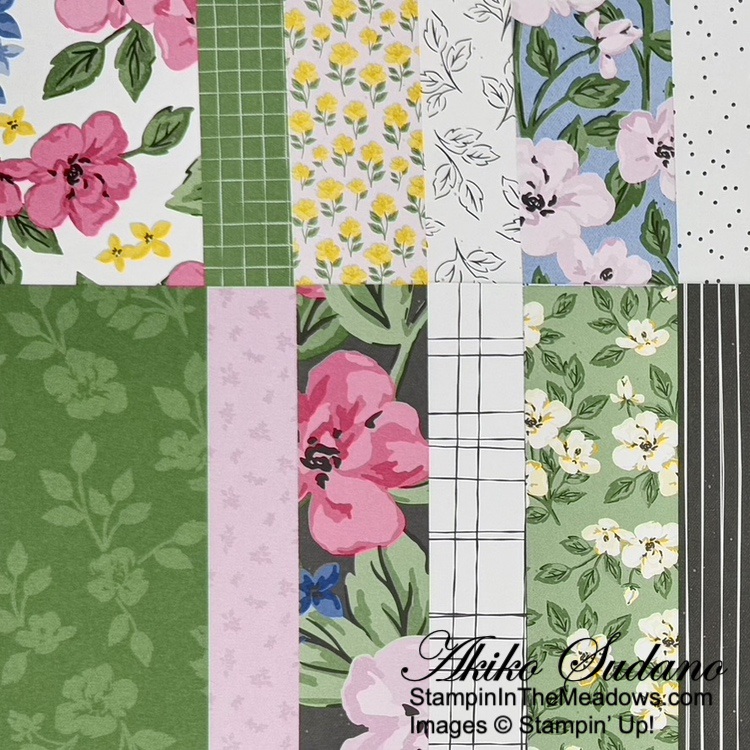
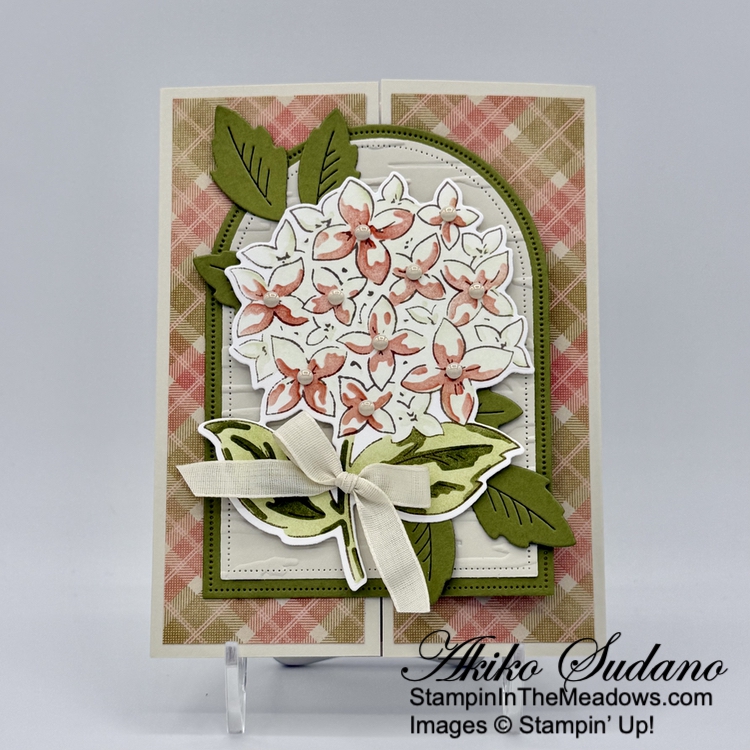
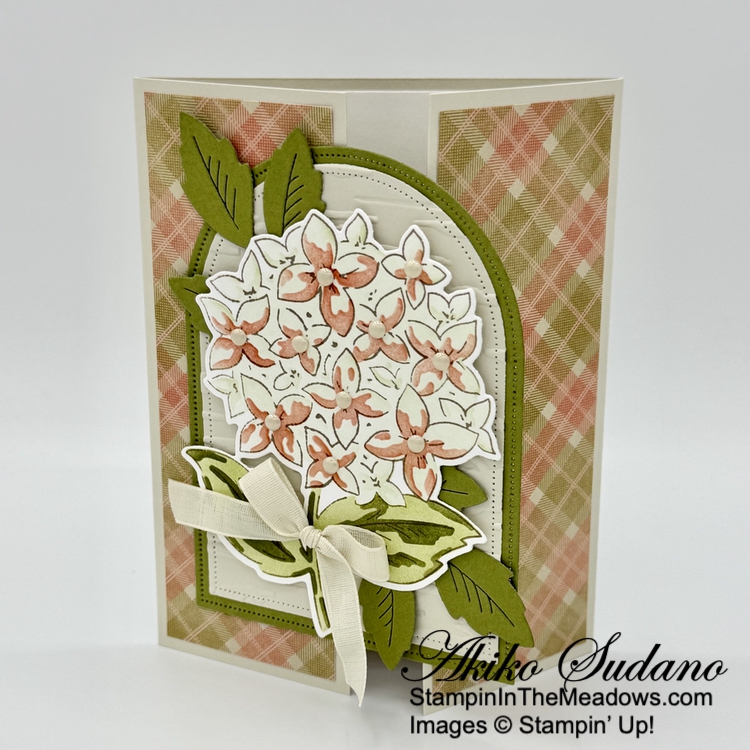
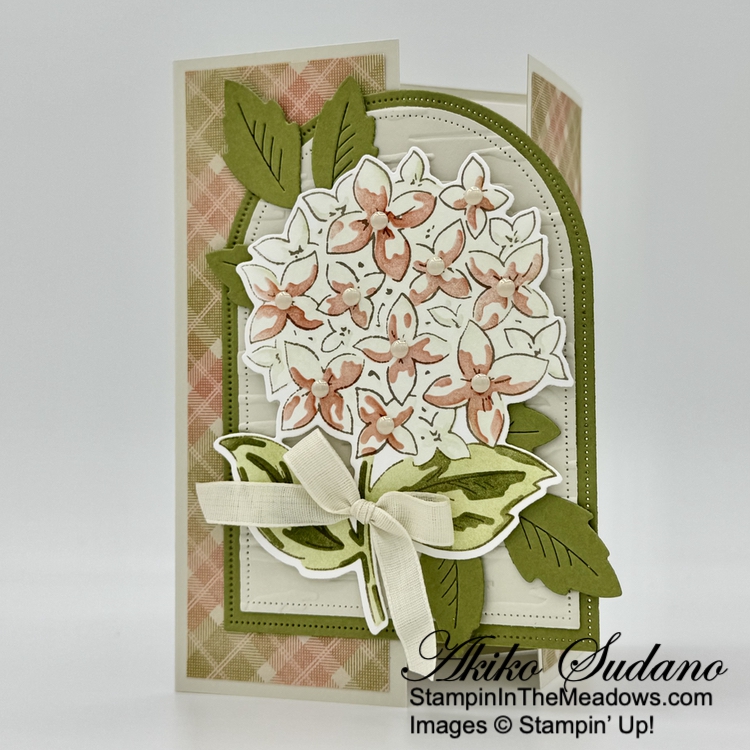
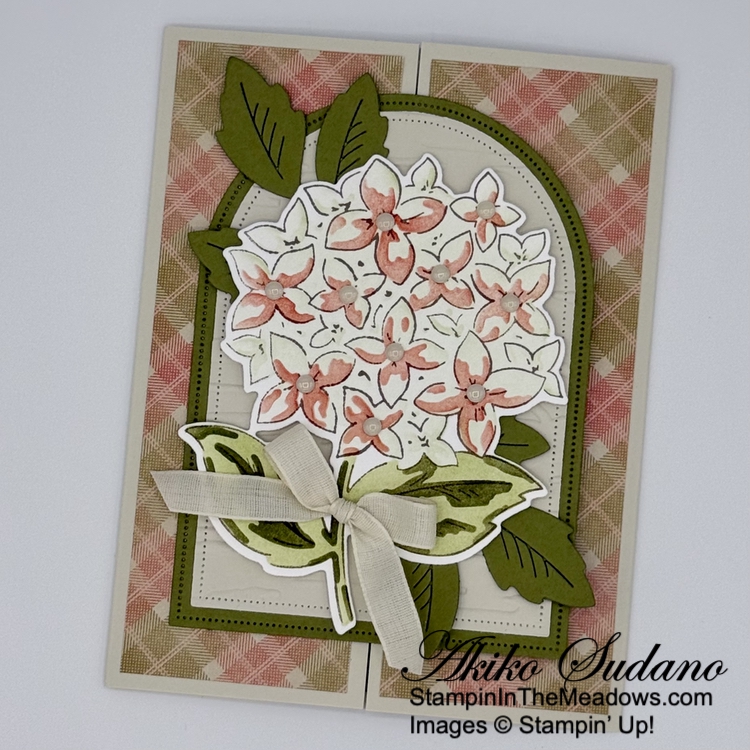
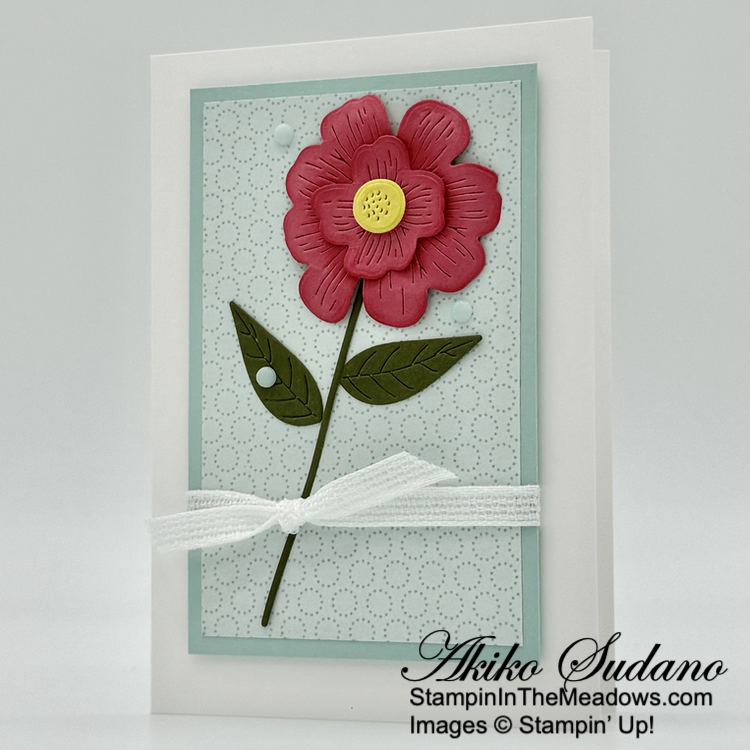
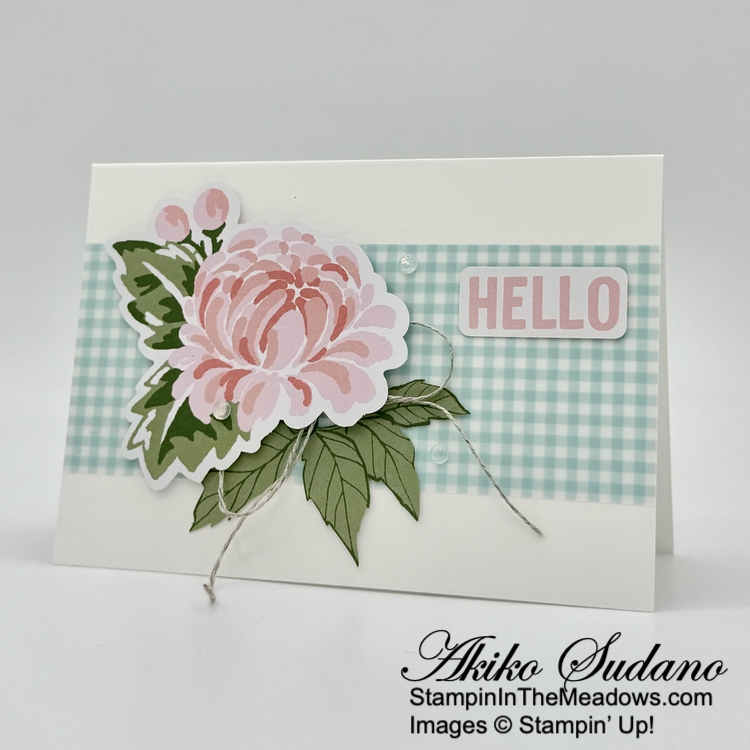
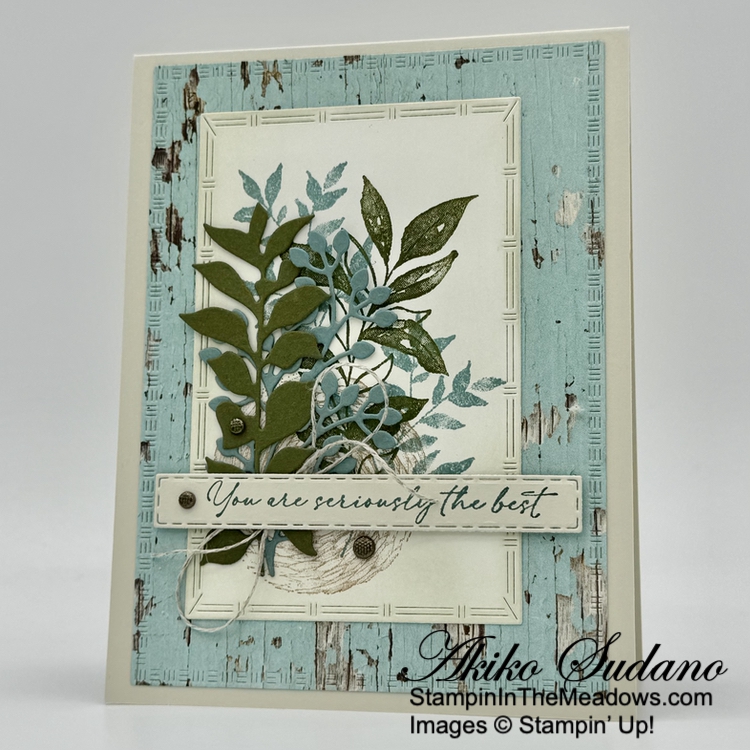
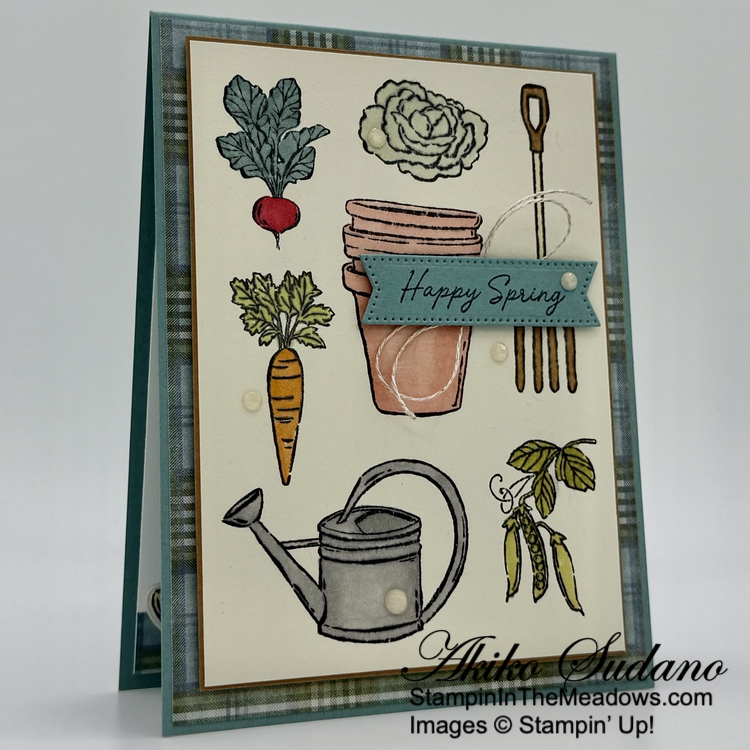
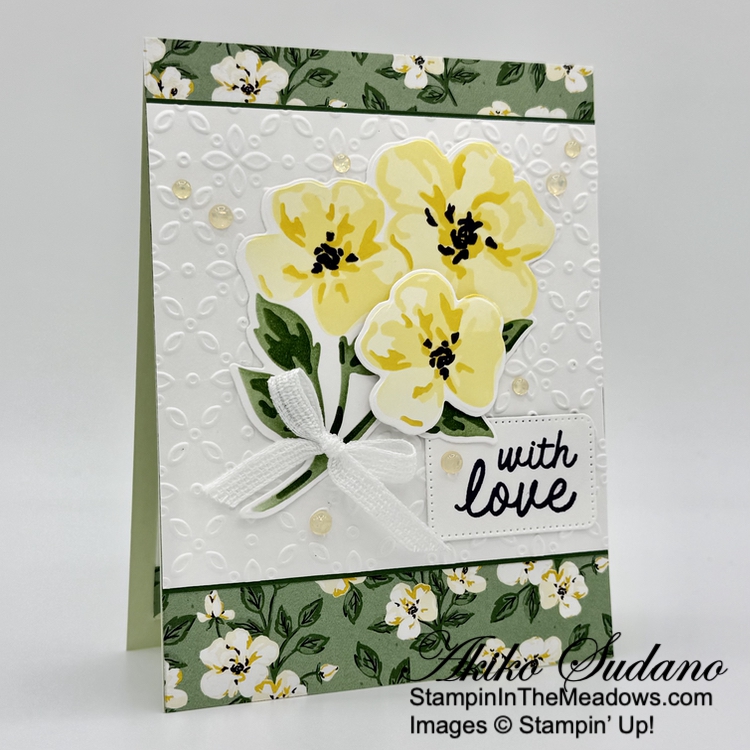
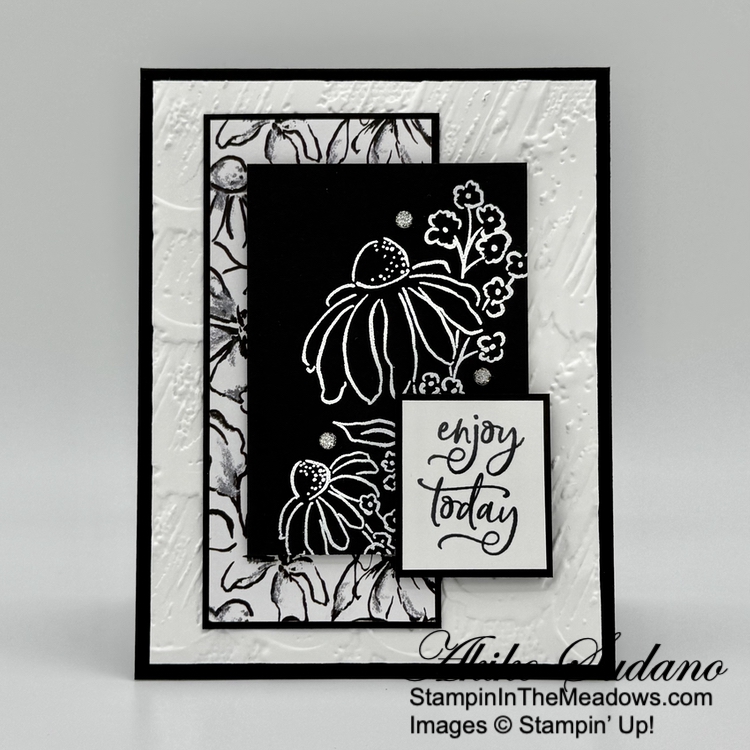
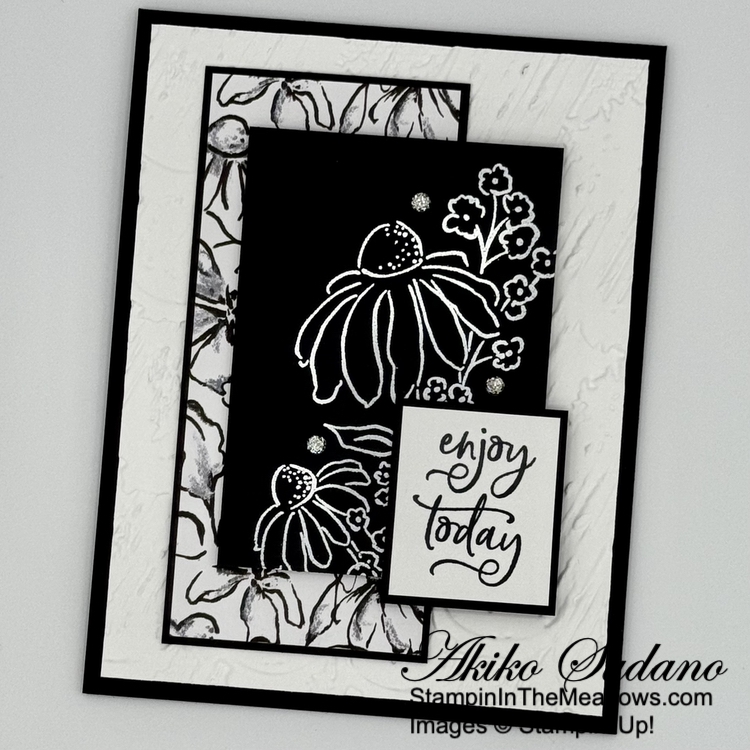
Good Morning! The Floral Charm designer series paper is so pretty with florals in lush Fall colors and complimenting designs. I picked a couple of patterns to use with the Stampin’ Up! Charming Day bundle to make a simple card to express gratitude and friendship. You can find the card stock cuts along with supplies at the bottom of my post.

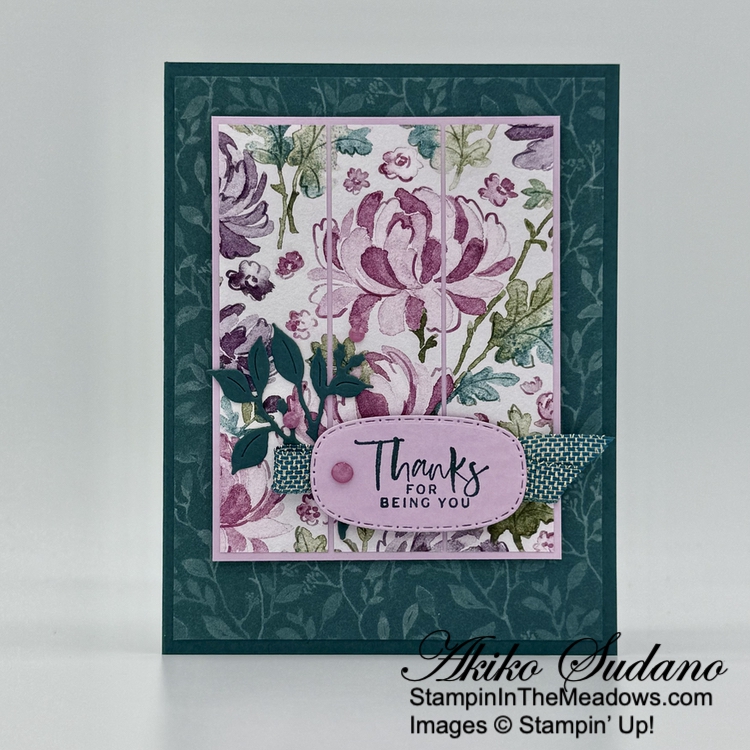
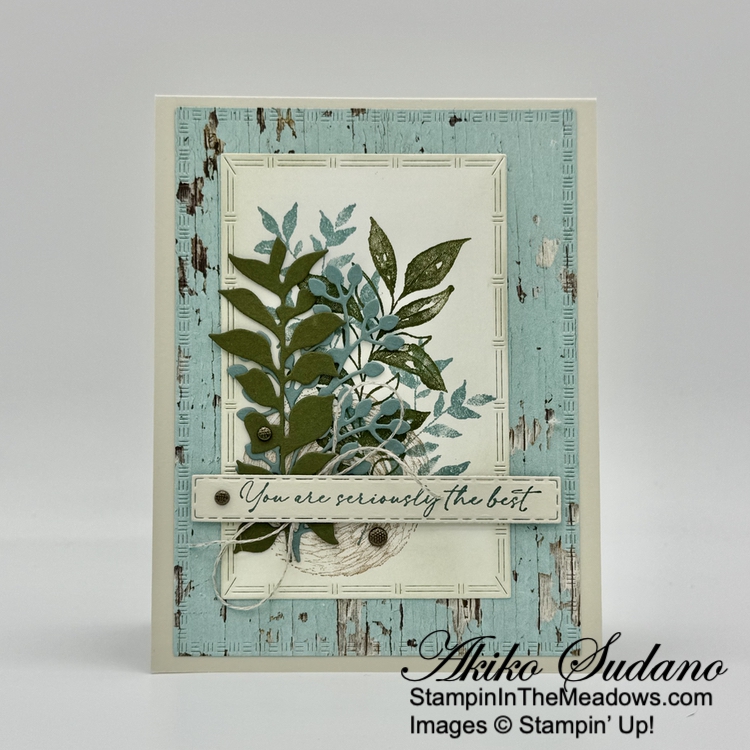
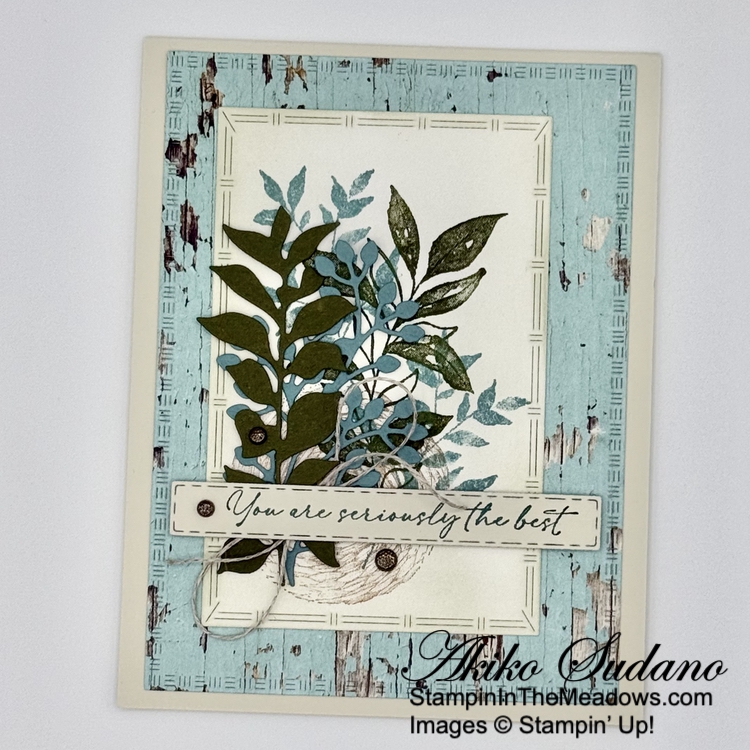
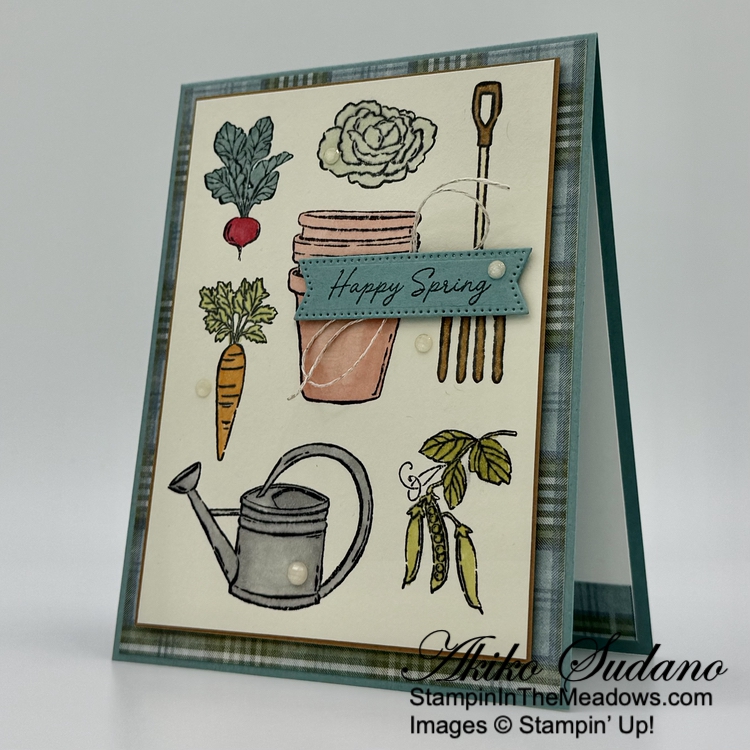
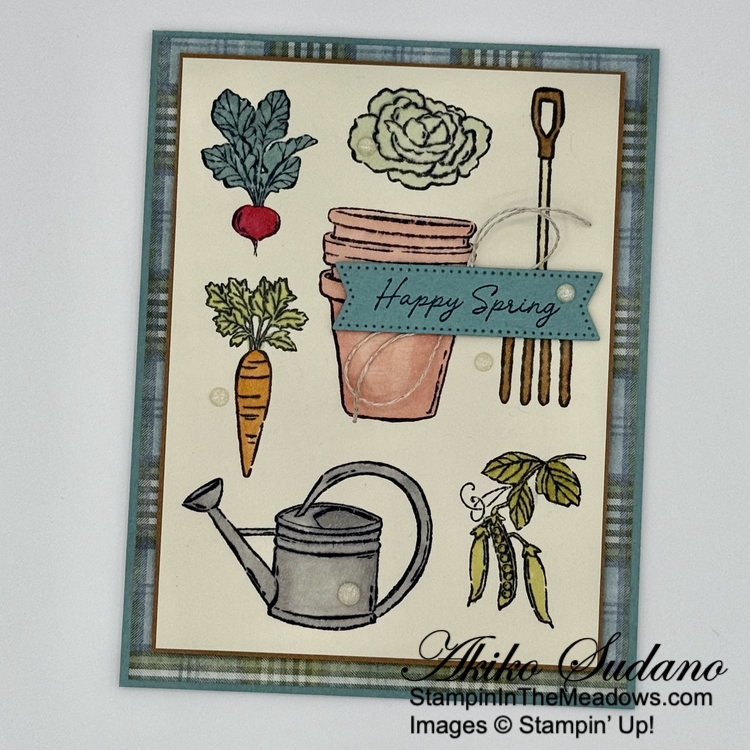
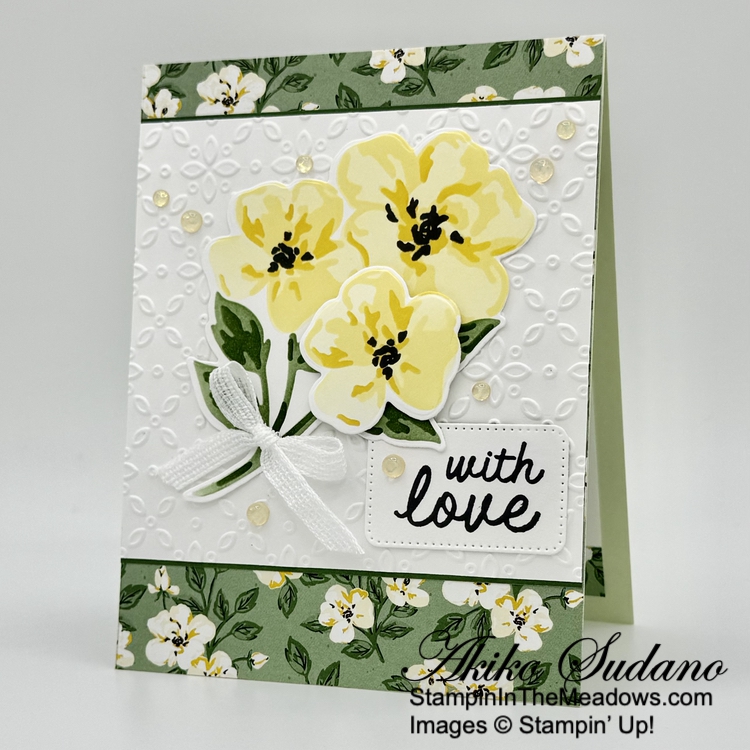
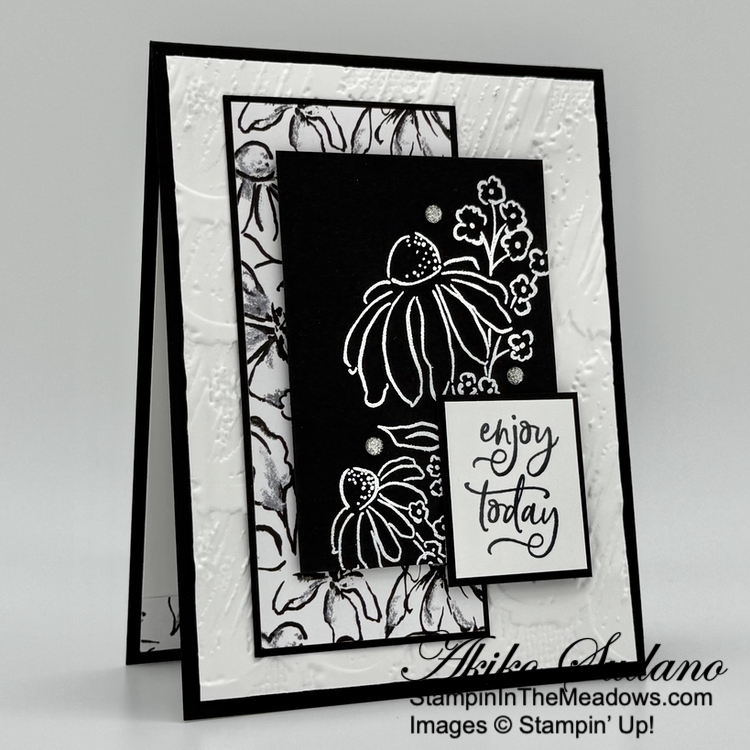
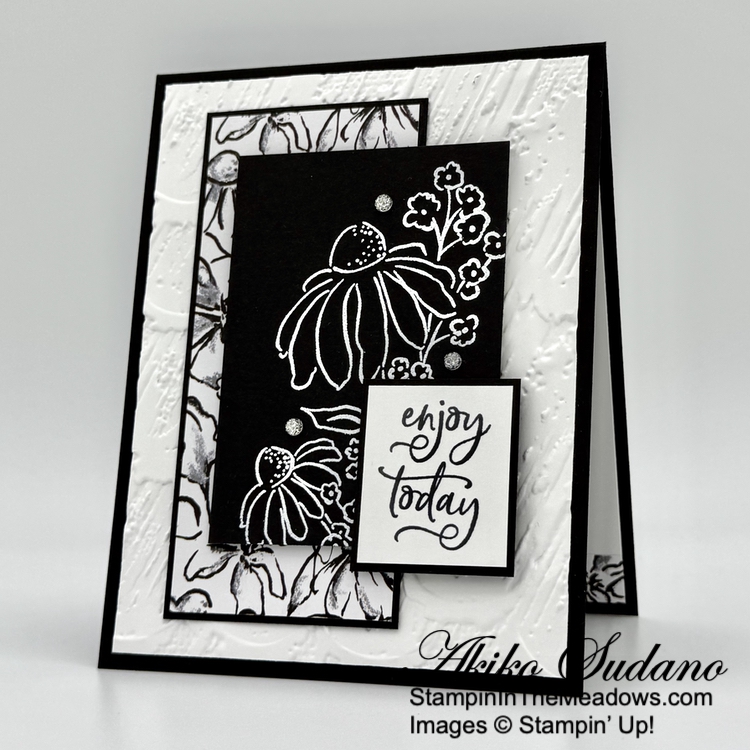
Adhere a Pretty Peacock leafy panel of Floral Charm designer series paper to the front of a Pretty Peacock card base with liquid glue. Cut a floral panel of the DSP into three strips and adhere them to a Fresh Freesia mat. Adhere the mat to the card front with dimensionals.

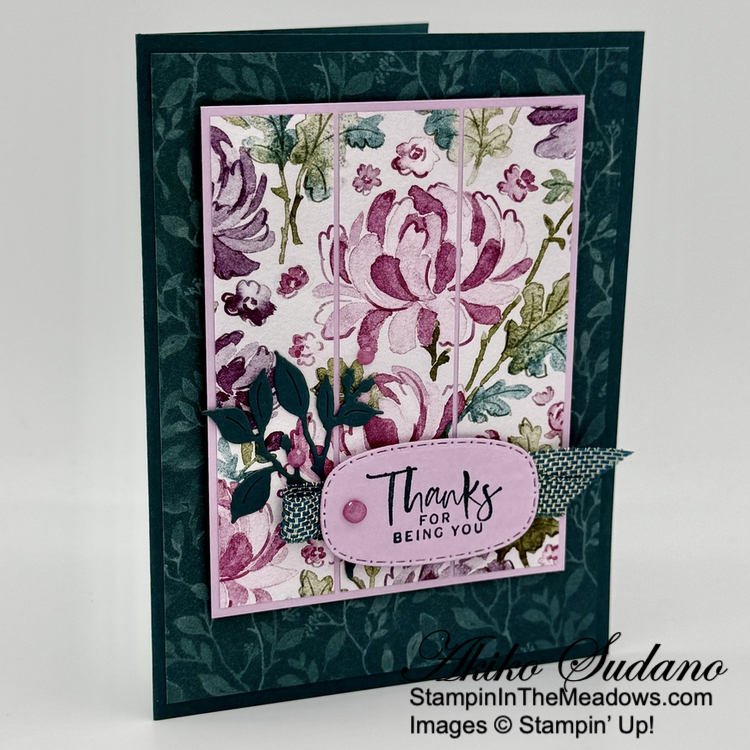
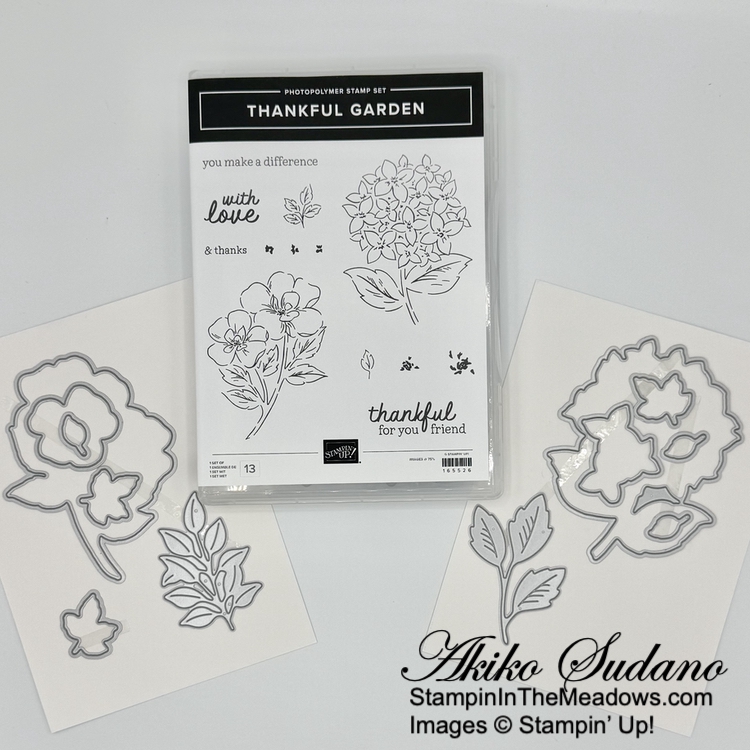
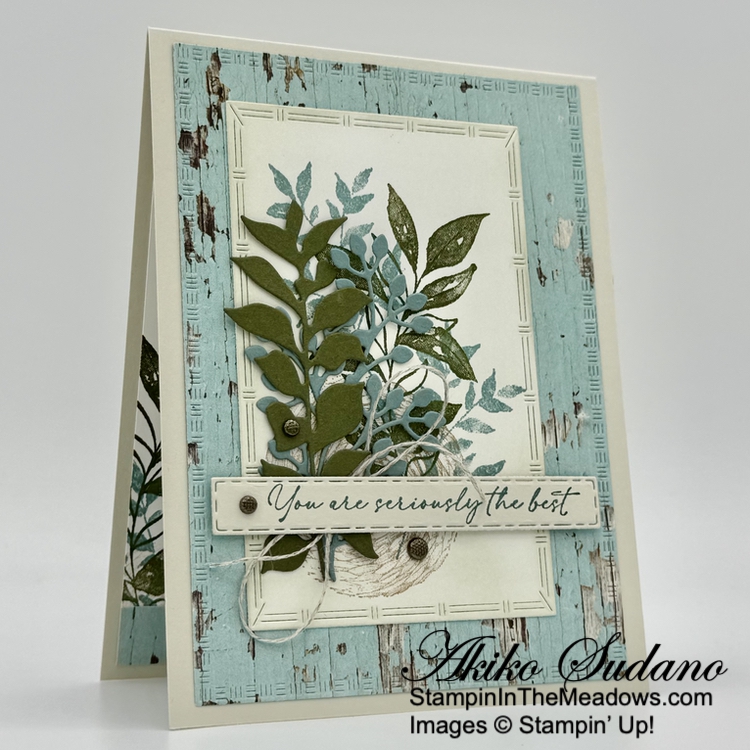
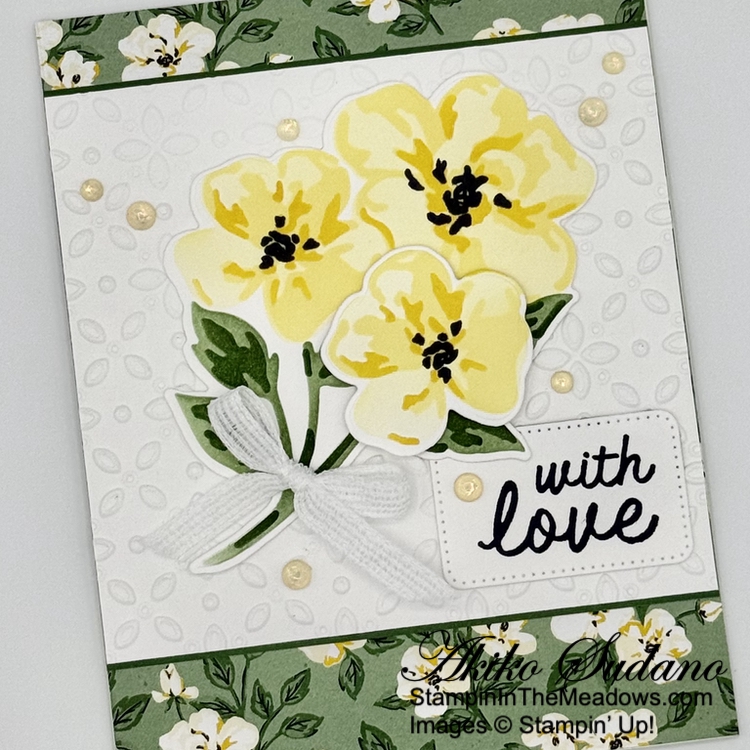
Cut the top part of the leafy sprig die from the Stampin’ Up! Charming Day dies from Pretty Peacock and adhere it to the card with glue dots. Fold a length of ribbon and adhere it to the card with Stampin’ Seal. I used a retired Pretty Peacock and Gold ribbon for a touch of glamour, but you could also use the Pretty Peacock Stampin’ Blends to color a white ribbon and use that instead.

Stamp the sentiment from the Stampin’ Up! Charming Day stamp set on a Fresh Freesia panel using Pretty Peacock ink. Cut it out using the small oval label die from the pretty Traditional Labels dies and adhere it to the card with dimensionals. Finish with Petunia Pop shimmer gems.

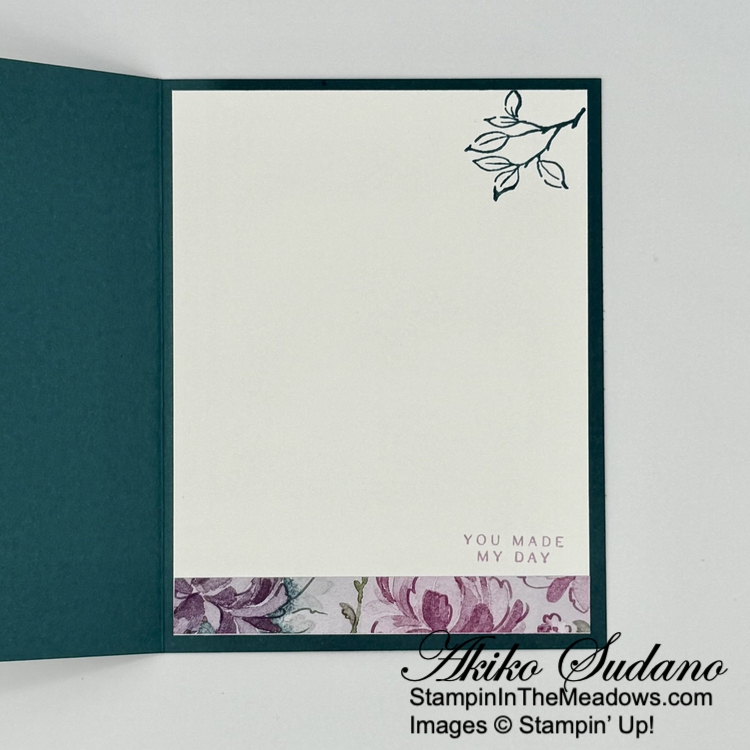
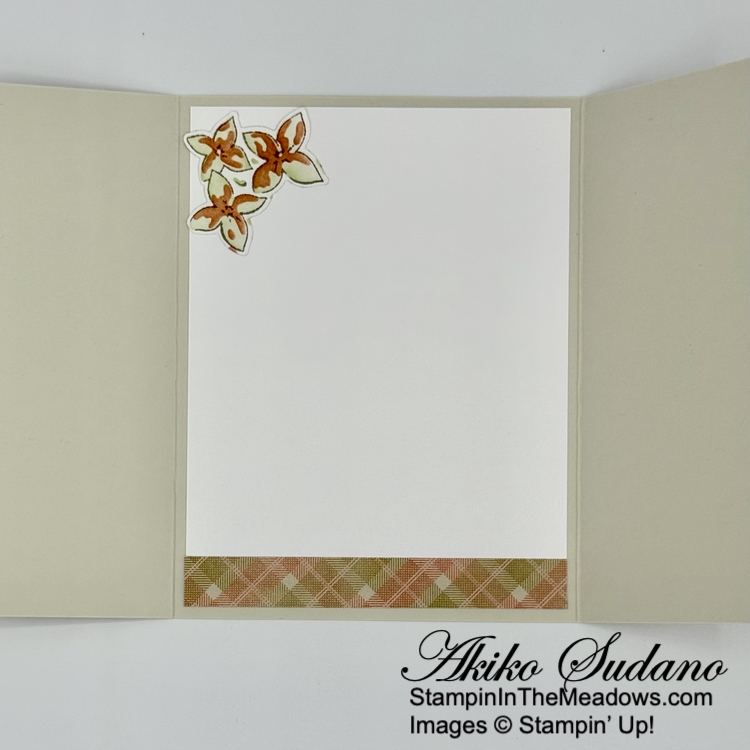
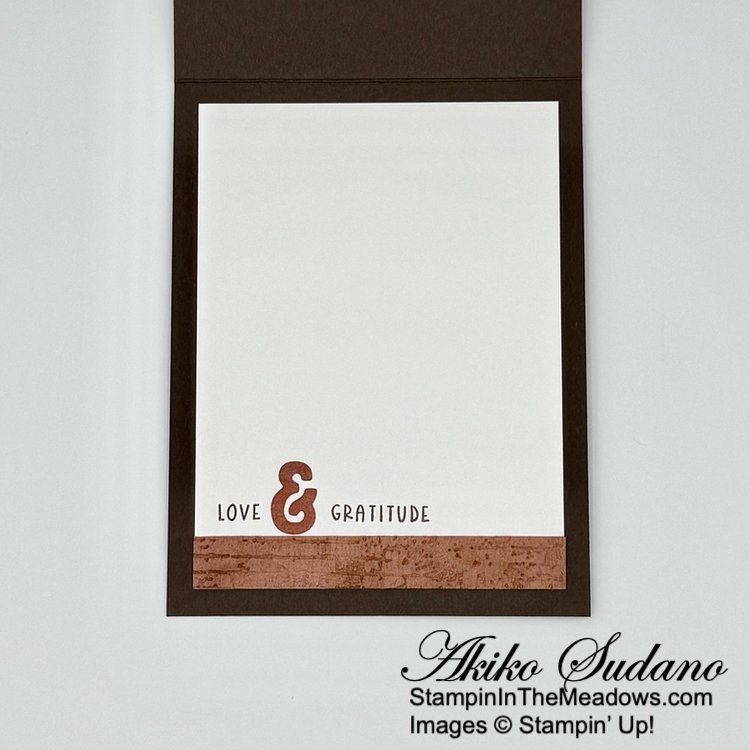
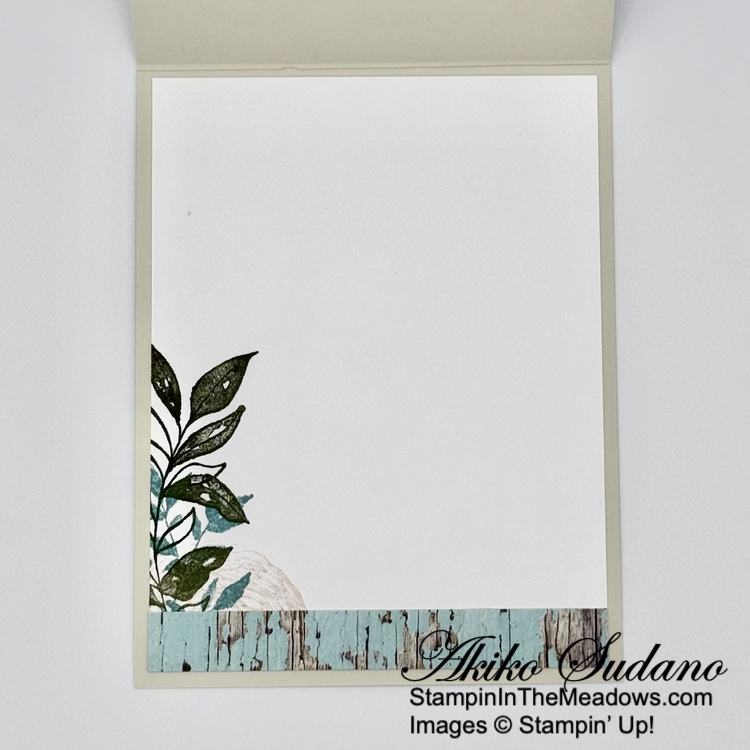
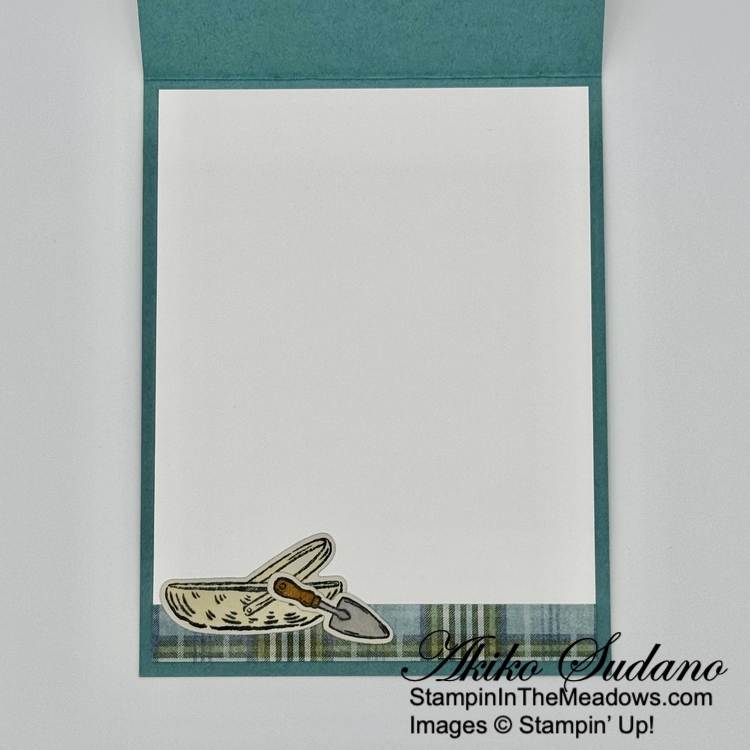
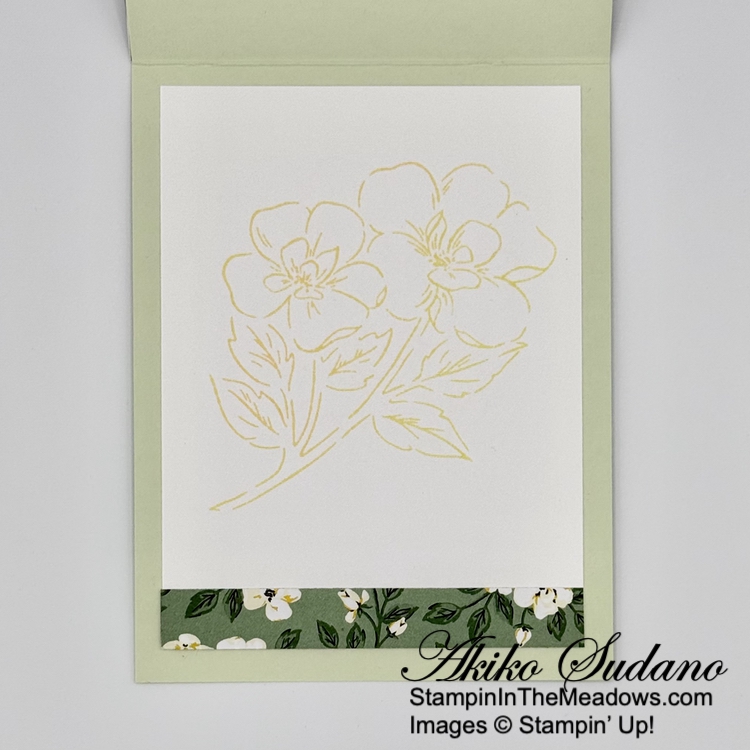
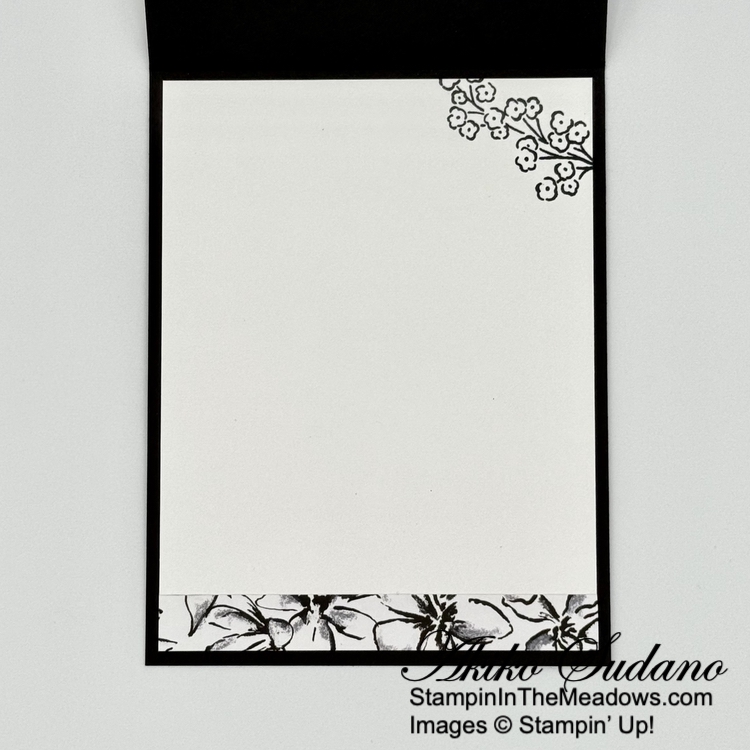
For the inside panel, stamp the leaf sprig from the Stampin’ Up! Charming Day stamp set in the corner of a Basic White panel using Pretty Peacock ink. Stamp the sentiment in Fresh Freesia ink towards the bottom, leaving room for a DSP trim. Adhere it to the inside of the card.

I can’t decide which of the florals in the Floral Charm designer series paper pack are my favorite, but a simple card design like this is a good way to show off pretty papers. Cutting the floral pattern in thirds adds a little extra interest to the card design without too much complication.

Thanks so much for stopping by and Happy Stamping!!

Akiko

Cardstock Cuts for this project:

  • Pretty Peacock – 5-1/2″ – 8-1/2″ card base, scored at 4-1/4″, 2″ x 2″ (die cut leaves)
  • Fresh Freesia – 3-1/4″ x 4-1/8″ (DSP mat), 1-1/4″ x 2-1/2″ (label)
  • Basic White – 4″ x 5-1/4″ (inside panel)
  • Floral Charm DSP – 4″ x 5-1/4″ (front background), 3″ x 4″, cut into three 1″ x 4″ strips (floral panel), 1/2″ x 4″ (inside trim

Stampin’ Up! products used in this project:


Stampin’ Up! Thankful Garden Fall Card

Good Morning! Hope you had a wonderful weekend! Here is a gate fold card made with the pretty Stampin’ Up! Thankful Garden bundle that came out earlier this year. The thing is, my hydrangeas are Lil’ Limelight, which means that they have greenish white flowers that turn a beautiful bronze in the fall (the ones the deer don’t eat, that is). And they’re at the peak of their color right now, so I wanted to make a card using this pretty bundle to capture these Fall hydrangeas. You can find the card stock cuts along with supplies at the bottom of my post.

After scoring and burnishing the card base for the center gate fold card, adhere panels of Timeless Plaid 6″ x 6″ designer series paper to the front flaps. Use the third largest die from the Everyday Arches dies to cut Old Olive and the next smallest to cut Basic Beige. Emboss the Basic Beige arch with the Birch Wood 3D embossing folder and adhere it to the Old Olive arch. Adhere the layered arches to the left side of the card base.

Stamp the large hydrangea flower from the Stampin’ Up! Thankful Garden stamp set using Gray Granite ink and color it using the masks and blending brushes (masks are included in the bundle or can be purchased separately). Color the hydrangea first using Soft Sea Foam for mask #1 and #2 (the color will be darker with the second mask). For mask #3, start with Calypso Coral and add a little Cajun Craze at the end. Use Old Olive to color the leaves with masks #4 and #5. Cut the hydrangea out with the large coordinating die.

Cut two large leaf clusters using the Stampin’ Up! Thankful Garden dies from Old Olive card stock and adhere them to the card with glue dots. Pop the flower on top with dimensionals and decorate the centers with antique pearls. Finish with a Basic Beige bow.

For the inside panel, trim the bottom of a Basic White panel with DSP. Find the section of the hydrangea from the Stampin’ Up! Thankful Garden stamp set that goes with the small flower die and stamp it using Gray Granite ink on Basic White. Color with blending brushes like the large flower on the front and cut it out with the small hydrangea die. Adhere it to the panel and adhere the panel to the inside of the card.

I was happy with how the hydrangea came out using the masks for coloring. My first attempt using Stampin’ Blends didn’t work out nearly as well 😞. I didn’t put any sentiments on the front or inside of this card, but you can use it for a Fall birthday or for any other occasion. I love plaids in the Fall and so many of the Timeless Plaid designs would be great for a Fall card, so don’t forget those items hiding in your stash! Enjoy!

And don’t forget that tomorrow is the Big Day for the new Stampin’ Up! 2025 September-December Mini Catalog to open and a new release of Online Exclusive products!

Thanks so much for stopping by and Happy Stamping!!

Akiko

Cardstock Cuts for this project:

  • Basic Beige – 5-1/2″ – 8-1/2″ card base, scored at 2-1/8″ and 6-3/8″, 3-1/4″ x 4-1/2″ (embossed arch)
  • Old Olive – 3-1/2″ x 4-3/4″ (arch mat), 2″ x 5-1/2″ (die cut leaves)
  • Basic White – 4″ x 5-1/4″ (inside panel), 3-3/4″ x 4-1/2″ (flower), 1-3/4″ x 2-3/4″ (inside flower)
  • Timeless Plaid 6″ x 6″ DSP – two 1-7/8″ x 5-1/4″ (front flap backgrounds), 1/2″ x 4″ (inside trim)

Stampin’ Up! products used in this project:


Stampin’ Up! Choose Happy for the Inkin’ Krew Blog Hop

Good Morning! Welcome to the August Inkin’ Krew Team Blog Hop! The theme for this month’s hop is “Fall Frenzy” and I used the Stampin’ Up! Choose Happy stamp set with the pretty Splendid Autumn 6″ x 6″ designer series paper for a Fall card. You can find the supplies I used along with card stock cuts at the bottom of my post.

Emboss a panel of Splendid Autumn 6″ x 6″ designer series paper with the distressed brick 3D embossing folder and sponge it lightly with Pecan Pie ink. Adhere it to an Early Espresso mat and wrap a Timid Tiger ribbon around it, tying a knot at the side. Adhere it to an Early Espresso card base with dimensionals.

Cut two panels of Splendid Autumn 6″ x 6″ DSP with the Everyday Arches dies. Stamp the sentiment from the Stampin’ Up! Choose Happy stamp set on the Fall tree arch die cut with Early Espresso ink and adhere it to the the larger arch die cut mat.

Use the Mini Alphabet dies to cut the letters F-A-L-L from Early Espresso card stock and Splendid Autumn DSP. Adhere each DSP letter to the card stock letter with liquid glue, slightly offset.

Adhere the layered letters to the Fall tree arch die cut and pop the layered arches on the card front with dimensionals. Finish with a gold druzy dot.

Stamp the sentiments from the Stampin’ Up! Choose Happy stamp set using Early Espresso ink on the bottom of a Basic White panel. Cut the ampersand from a DSP panel using the Mini Alphabet dies and adhere it between the words. Trim the bottom with a sponged and embossed DSP strip and adhere the panel to the inside of the card with Stampin’ Seal.

The Stampin’ Up! Choose Happy stamp set has nice sentiments for different occasions and it goes well with theMini Alphabet dies. But the Everyday Arches dies are the real star of this card, transforming a pretty Splendid Autumn DSP image into something special.

On With The Hop! Click on the Next Blog button to move forward to Terry Lynn Bright’s project or click the Previous Blog button to move back to see the project that Ann Louise Fodgaard created.

If you get lost along the way, here are the participants for the hop:

  1. Karen Finkle
  2. Tara Carpenter 
  3. Christie King 
  4. Karen Ksenzakovic 
  5. Nicole Bloxom 
  6. Mary Deatherage
  7. Ann Louise Fodgaard 
  8. Akiko Sudano  <– you are here
  9. Terry Lynn Bright
  10. Amy Koenders

Thanks for stopping by and have a great week!

Akiko


Cardstock Cuts for this project:

  • Early Espresso – 4-1/4″ x 11″ card base, scored at 5-1/2″, 3-7/8″ x 5-1/8″ (DSP mat), two 2″ x 2″ scraps (die cut letter shadows)
  • Basic White – 3-3/4″ x 5″ (inside panel)
  • Splendid Autumn 6″ x 6″ DSP – 3-3/4″ x 5″ (front background), 1/2″ x 3-3/4″ (inside trim), 2-1/2″ x 4″ (Fall tree arch), 2-3/4″ x 4-1/4″ (arch mat), three 2″ x 2″ panels (die cut letters)

Stampin’ Up! products used in this project:

Stampin’ Up! Impressions Abloom Card

Good Morning! Welcome the new Stampin’ Up! 2025-2026 Annual Catalog! Today is the first day that the catalog is open for orders! It’s full of new products and returning favorites. Click on the picture below to download a copy or view it online.

In addition to the new catalog, a new release of Online Exclusive products is available today and I used one of the new bundles, the Stampin’ Up! Impressions Abloom bundle to make a quick card. You can find the products I used at the bottom of my post along with the card stock sizes.

I used the Basic White Note cards and envelopes for my card base – the card size is 3-1/2″ x 5″ and they are also good for mailing. I adhered a panel of Pool Party Floral Impressions designer series paper to a Pool Party mat.

I used the large and small flower dies from the Stampin’ Up! Impressions Abloom dies with the inserts to cut a Strawberry Slush panel. Strawberry Slush is one of the new 2025-2027 In Colors. I used a sponge dauber to apply Strawberry Slush ink to the center of the large die cut flower and the edges of both flowers. I curved the petals of the large flower downward and the petals of the small flower upwards with my fingers to give it dimension and adhered the flowers together with a glue dot. I cut the small flower center with the two sets of dies from Timid Tiger, another new 2025-2027 In Color, and adhered the flower center with a dimensional.

I cut the single stem and two leaf dies from the Stampin’ Up! Impressions Abloom dies from Mossy Meadow card stock and adhered the stem to the back of the flower with a glue dot. I adhered the flower and leaves to the DSP panel with glue dots. I wrapped the panel with white ribbon tying a knot over the stem and adhered the panel to the front of a Basic White note card with dimensionals. I finished the card with Pool Party dots. The stamp set has pretty sentiments, but I didn’t use one for this card and I also left the inside blank.

The Stampin’ Up! Impressions Abloom stamps have pretty two step stamping florals and sentiments. And the dies are unique in that they can cut stamped images or be used with the inserts for textured flowers like I made for today’s card. And it’s finally available today!!


If you need any stamping supplies, I’d be very happy to be your Demonstrator.  Just click on the Shop Now Button on the right side of the screen to go directly to my Online store or contact me if you have any questions.  Happy Stamping!

Thanks for stopping by and have a great day!

Akiko

  • Visit my online store here
  • See the current Stampin’ Up! Last Chance items here
  • Have any questions? I’d be happy to help, click here to contact me.

Cardstock Cuts for this project:

  • Basic White Note Cards and Envelopes – 5″ x 7″ card base, scored at 3-1/2″
  • Pool Party – 2-3/4″ x 4-1/4″ (DSP mat)
  • Strawberry Slush – 2″ x 3-1/2″ (flower die cuts)
  • Timid Tiger – 1″ x 1″ (flower center die cut)
  • Mossy Meadow – 1″ x 4″ (stem and leaves die cuts)
  • Floral Impressions DSP – 2-1/2″ x 4″ (front background)

Stampin’ Up! products used in this project:


Stampin’ Up! Mix & Match Ephemera Pack Note Cards

Good Morning! Sorry it’s been a while since I posted, I’ve been busy playing with Grandkids, traveling and cleaning. So I pulled out my Stampin’ Up! Mix & Match Ephemera Packs and put together some quick and fun note cards to slowly get back into the swing. You can find the products I used at the bottom of my post along with the card stock sizes.

The first card is a homage to Tucson, AZ, where we just spent the last few weeks. I embossed a pool Party panel with the Mini Corrugated 3D embossing folder and adhered it to a Basic White Note Card. I layered it with pieces from the Something For Everything and Labels & Layers ephemera packs – they capture the beauty of the mountains and of course I had to use the saguaro cactus!! And the sentiment is perfect – every day is a good day in the Southwest! I finished with a Copper Clay baker’s twine bow and Faux Glass dots.

My second card is simpler, using the pretty flower and leaves from the Fully Flowering ephemera pack and a simple hello from the Saying Something ephemera pack. I just adhered a panel of Pool Party vellum gingham to a Basic White Note card and adhered everything on top with glue dots and dimensionals. I finished with a loopy linen thread bow and clear Opal Gems.

For my last card, I used a Basic Beige card base and piled on some things on from the Labels & Layers and Something For Everything ephemera packs. Kind of making it look like a messy desk with a throwback typewriter instead of computer. But I don’t really have a bird on my desk, I just thought it was cute. But I love that sentiment from the Saying Something ephemera pack. I finished with a Flirty Flamingo baker’s twine bow and dots.

All the cards are different and yet since they use Stampin’ Up! Colors, you can easily find ribbons, paper and embellishments to coordinate. There is so much variety in themes and occasions so you can really express your creativity!

The Stampin’ Up! Mix & Match Ephemera Packs first came out in the current Annual Catalog and I’m so happy that they will continue in the upcoming Stampin’ Up! 2025-2026 Annual Catalog in May. The Fully Flowering and Saying Something ephemera packs will be carried over in the new Annual Catalog and there will be additional new packs, too!


If you need any stamping supplies, I’d be very happy to be your Demonstrator.  Just click on the Shop Now Button on the right side of the screen to go directly to my Online store or contact me if you have any questions.  Happy Stamping!

Thanks for stopping by and have a great day!

Akiko

  • Visit my online store here
  • See the current Stampin’ Up! Last Chance items here
  • Have any questions? I’d be happy to help, click here to contact me.

Cardstock Cuts for this project:

  • Pool Party – 3″ x 4-1/2″ (card #1 embossed panel)
  • Gingham Vellum – 2″ x 5″ (card #2 stripe)
  • Basic Beige – 5″ x 7″ card base scored at 3-1/2″ (card #3 card base)
  • Basic White Note Cards – card #1 & #2 card bases
  • Various die cuts from the ephemera packs

Stampin’ Up! products used in this project:


Stampin’ Up! Textured Notes Card

Good Morning! The Stampin’ Up! Textured Notes bundle is part of the new Online Exclusives release and has these wonderful bordered rectangle dies. I used the bundle with the pretty Country Woods designer series paper and the leaf sprig dies from the Textured Floral dies for today’s card. You can find the products I used at the bottom of my post along with the card stock sizes.

I used the large rectangle die from the Stampin’ Up! Textured Notes dies to cut a Pool Party panel of Country Woods designer series paper and adhered it to the front of a basic Beige card base with liquid glue.

I lightly applied Basic Beige ink to a Basic White panel with a blending brush to give it a little color and stamped the large leaf sprig from the Stampin’ Up! Textured Notes stamp set using Mossy Meadow ink. I stamped the round basket using Crumb Cake and I used Lost Lagoon to stamp the small leaf sprig twice. I cut the stamped image out with the third largest rectangle die and applied more Basic Beige ink to the edges. I adhered the panel to the card with liquid glue.

I cut the large leaf sprig die from the Textured Florals dies from Mossy Meadow and the small sprig from Lost Lagoon. I adhered the leaf sprigs to the card with glue dots. I stamped the sentiment from the Stampin’ Up! Textured Notes stamp set using Lost Lagoon ink on Basic Beige. I cut it out with the long skinny die and adhered a Linen Thread bow to the back before popping it on the card with dimensionals. I finished the card with textured metallic dots.

For the inside panel, I stamped the leaf sprigs and round basket from the Stampin’ Up! Textured Notes stamp set using the same colors as the card front on a Basic White panel. I trimmed the bottom with DSP and adhered it to the inside of the card with Stampin’ Seal.

The Stampin’ Up! Textured Notes bundle is wonderful for stamping textured collages and can be combined with images from other stamp sets, such as letters, graphic designs and naturals such as flowers and butterflies. I also think the leaves from the Textured Floral dies nicely coordinate with the stamped images in the stamp set. And I just love these new bordered rectangle dies!


If you need any stamping supplies, I’d be very happy to be your Demonstrator.  Just click on the Shop Now Button on the right side of the screen to go directly to my Online store or contact me if you have any questions.  Happy Stamping!

Thanks for stopping by and have a great day!

Akiko

  • Visit my online store here
  • See the current Stampin’ Up! Last Chance items here
  • Have any questions? I’d be happy to help, click here to contact me.

Cardstock Cuts for this project:

  • Basic Beige – 4-1/4″ x 11″ card base scored at 5-1/2″, 1″ x 4″ (label)
  • Mossy Meadow – 1-1/4″ x 3-1/2″ (die cut leaf sprig)
  • Lost Lagoon – 2-1/2″ x 2-3/4″ (die cut leaf sprig)
  • Basic White – 4″ x 5-1/4″ (inside panel), 3″ x 4-1/2″ (stamped panel)
  • Country Woods DSP – 4-1/4″ x 5-1/2″ (front background), 1/2″ x 4″ (inside trim)

Stampin’ Up! products used in this project:


Stampin’ Up! Storybook Garden Patch for the Inkin’ Krew Blog Hop

Good Morning! Welcome to the March Inkin’ Krew Team Blog Hop! The theme for this month’s hop is “Celebrate Spring” and I used the Stampin’ Up! Storybook Garden Patch bundle to make a Happy Spring card. The fun garden tools and veggies make me excited to clean up my garden and plant new things in the dirt! You can find the supplies I used along with card stock cuts at the bottom of my post.

I adhered a panel of Timeless Plaid 6″ x 6″ designer series paper to the front of a Lost Lagoon card base with liquid glue.

I stamped the veggies and tools from the Stampin’ Up! Storybook Garden Patch stamp set using Memento Tuxedo Black ink on Basic Beige. In order to get the veggies and tools lined up, I arranged most of them (everything but the carrot) on a single large block and stamped on typing paper make sure I had the arrangement just right (I test stamped several times) and filled in with the carrot afterward. Then I colored each with Stampin’ Blends. Here are the colors I used:

  • Radish – light Pretty Peacock and light Real Red
  • Lettuce – dark Soft Sea Foam
  • Pitchfork – light Crumb Cake and light Pecan Pie
  • Carrot – light Granny Apple Green and light Pumpkin Pie
  • Clay Pots – light Calypso Coral
  • Watering Can – light Smoky Slate
  • Peas – light Old Olive

I adhered the stamped panel to a Pecan Pie mat and popped it on the card front with dimensionals.

I stamped the pretty sentiment from the Storybook Friends stamp set using Memento Tuxedo Black ink on Lost Lagoon and cut it out with a banner die from the Stylish Shapes dies. I made a Linen Thread bow and adhered it to the back of the label before popping the label on the card with dimensionals. I finished the card with Basic Beige shimmer gems..

For the inside of the card, I stamped the basket and shovel from the Stampin’ Up! Storybook Garden Patch stamp set using Memento Tuxedo Black ink on Basic Beige. I colored them with the light Crumb Cake, light Pecan Pie and light Smoky Slate Stampin’ Blends and cut them out with the coordinating die. I trimmed the bottom of a Basic White panel with DSP and adnered the die cuts with liquid glue. I adhered the panel to the inside of the card with Stampin’ Seal.

I was inspired by a card in the current Mini Catalog for the layout of this card because I just love all these cute garden images from the Stampin’ Up! Storybook Garden Patch bundle. And I think the weather is warming up enough to begin Spring garden clean up – Let the planting begin!

On With The Hop! Click on the Next Blog button to move forward to Tara Carpenter’s project or click the Previous Blog button to move back to see the project that Mary Deatherage created.

If you get lost along the way, here are the participants for the hop:


If you need any stamping supplies, I’d be very happy to be your Demonstrator.  Just click on the Shop Now button on the right side of the screen to go directly to my online store or contact me if you have any questions.  Happy Stamping!

Thanks for stopping by and have a great week!

Akiko

  • Visit my online store here
  • See the current Stampin’ Up! Last Chance items here
  • Have any questions? I’d be happy to help, click here to contact me.

Cardstock Cuts for this project:

  • Lost Lagoon – 4-1/4″ x 11″ card base, scored at 5-1/2″,1″ x 3″ (label)
  • Basic Beige 3-5/8″ x 4-7/8″ (stamped panel), 1″ x 4″ (inside die cuts)
  • Pecan Pie – 3-3/4″ x 5″ (stamped panel mat)
  • Basic White – 4″ x 5-1/4″ (inside panel)
  • Timeless Plaid 6″ x 6″ DSP – 4-1/8″ x 5-3/8″ (front background), 1/2″ x 4″ (inside trim)

Stampin’ Up! products used in this project:

Stampin’ Up! Thankful Garden Love Card

Good Morning! There’s a new release of Online Exclusives today and one of the new bundles is the pretty Stampin’ Up! Thankful Garden bundle. This is a stamp, die and mask bundle with big, bold flowers and pretty sentiments. I used the masks to make my flowers today and I’ve paired it with the coordinating Lovely Garden designer series paper. You can find the products I used at the bottom of my post along with the card stock sizes.

I adhered a panel of Lovely Garden designer series paper to the front of a Soft Sea Foam card base with liquid glue. I was going to use Garden Green, but I wanted a softer color – I think it works. I embossed a Basic White panel with the Eyelet 3D embossing folder and adhered strips of dark Garden Green two-tone card stock to the top and bottom edges. The two Tone card stock is thinner than regular card stock and I didn’t want the extra bulk and since I was adhering the embossed panel with liquid glue, I think it’s a great option! It gives me just a little stronger definition between the embossed panel and DSP.

The masks for the Stampin’ Up! Thankful Garden bundle are numbered 1 – 5 and have little notches to help line them up. I applied Lemon Lolly with Blending Brushes to 1 and 2. I applied the ink a little darker on the second mask. I used Daffodil Delight on the third mask to get the darkest highlights. The last two masks are for the leaves and I used Garden Green ink, making the ink darker on the last one. I used Memento Tuxedo Black ink to stamp the flower centers and cut the flowers out with the large coordinating die. I had to do this twice because the die didn’t line up correctly the first time. So on the second attempt, I snugged the stems up tighter against the flower and checked my die after I laid down enough Garden Green ink. For the third flower, I just used ink on the smaller flower in the masks (no need to do the stems). and cut it out with the small flower die. I adhered the flower and stems to the card with glue dots and popped the small flower on top with dimensionals.

I stamped sentiment from the Stampin’ Up! Thankful Garden stamp set using Memento Tuxedo Black ink on Basic White and cut it out with the small rectangle die from the Nested Essentials dies. I adhered the label to the card with glue dots. I made a bow with the new white ribbon and adhered it with a glue dot and finished with daffodil Delight opal rounds.

For the inside panel, I stamped the the flowers from the Stampin’ Up! Thankful Garden stamp set using Lemon Lolly ink on a Basic White panel. I trimmed the bottom with DSP and adhered it to the inside of the card with Stampin’ Seal.

The flowers from the Stampin’ Up! Thankful Garden bundle are so versatile and can be colored in so many ways. I think it would have been a little easier to align the coordinating die if I had stamped the whole flower first, but I wanted the look without the stamped image. And I love the black stamped center accents!

Next, I’ll have to try coloring the stamped outline image. This pretty bundle can be used in so many ways. Check it out along with the other new Online Exclusives here.


If you need any stamping supplies, I’d be very happy to be your Demonstrator.  Just click on the Shop Now Button on the right side of the screen to go directly to my Online store or contact me if you have any questions.  Happy Stamping!

Thanks for stopping by and have a great day!

Akiko

  • Visit my online store here
  • See the current Stampin’ Up! Last Chance items here
  • Have any questions? I’d be happy to help, click here to contact me.

Cardstock Cuts for this project:

  • Soft Sea Foam – 4-1/4″ x 11″ card base scored at 5-1/2″
  • Garden Green Two-Tone – two 1″ x 4-1/4″ strips (embossed panel mat)
  • Basic White – 4″ x 4-1/4″ (embossed front background), 3-3/4″ x 5″ (inside panel), 3-1/2″ x 3-1/2″ (die cut flowers), 2-1/2″ x 2-1/2″ (die cut flower), 1-1/2″ x 2″ (label)
  • Lovely Garden DSP – 4-1/4″ x 5-1/2″ (front background), 1/2″ x 3-3/4″ (inside trim)

Stampin’ Up! products used in this project:


Stampin’ Up! Mixed Florals Card

Good Morning! I used the pretty daisy image from the Stampin’ Up! Mixed Florals stamp set with the pretty sentiment from the Labeled with Love stamp set o make an monochromatic black and white card for today. You can find the products I used at the bottom of my post along with the card stock sizes.

I embossed a Basic White panel with the Plaster Painting 3D embossing folder and adhered it to the front of a Basic Black card base with liquid glue. I adhered a black and white floral panel of Mixed Media Florals designer series paper to a Basic Black mat and adhered it to the card.

I stamped the daisy image from the Stampin’ Up! Mixed Florals stamp set using Versamark ink on a Basic Black panel. I sprinkled it with white embossing powder and shook off the excess. I heated the powder with my heat tool until it was bright and shiny and popped it on the card with dimensionals.

I stamped sentiment from the Labeled with Love stamp set using Memento Tuxedo Black ink ink on Basic White and adhered it to a basic Black mat. I adhered it to the card with glue dots and finished the card with clear sparkle dots.

For the inside panel, I stamped the the floral sprig from the Stampin’ Up! Mixed Florals stamp set using Memento Tuxedo Black ink on a Basic White panel. I trimmed the bottom with DSP and adhered it to the inside of the card with Stampin’ Seal.

I love the Mixed Media Florals designer series paper and the floral images go well with the stamped daisy from the Stampin’ Up! Mixed Florals stamp set. And I love that sentiment from the Labeled with Love stamp set – the curvy script goes perfect with the flowers. And the sentiment is the perfect start to the week – Enjoy!!


If you need any stamping supplies, I’d be very happy to be your Demonstrator.  Just click on the Shop Now Button on the right side of the screen to go directly to my Online store or contact me if you have any questions.  Happy Stamping!

Thanks for stopping by and have a great day!

Akiko

  • Visit my online store here
  • See the current Stampin’ Up! Last Chance items here
  • Have any questions? I’d be happy to help, click here to contact me.

Cardstock Cuts for this project:

  • Basic Black – 4-1/4″ x 11″ card base scored at 5-1/2″, 2-1/8″ x 4-5/8″ (DSP mat), 1-3/8″ x 1-5/8″ (label mat), 2-1/2″ x 3-1/2″ (floral panel)
  • Basic White – two 4″ x 5-1/4″ (embossed front background and inside panel), 1-1/4″ x 1-1/2 (label)
  • Mixed Media Florals DSP – 2″ x 4-1/2″ (floral strip), 1/2″ x 4″ (inside trim)

Stampin’ Up! products used in this project:


Stampin’ Up! Thankful Garden Sneak Peek for the Happy Inkin’ Thursday Blog Hop

Good Morning and welcome to the Happy Inkin’ Thursday Blog Hop! The Stampin’ Up! Thankful Garden is part of the new Online Exclusives release that will be available on March 4. It includes a pretty floral stamp set with coordinating dies and there is also a set of designer series paper that goes with it – the Lovely Garden designer series paper. I used both of these for a simple encouragement card. You can find the currently available supplies I used along with card stock cuts at the bottom of my post and I also included a picture of the bundle and the beautiful DSP as well.

We have a pretty sketch challenge this week:

I adhered a panel of Lovely Garden designer series paper to the front of a Garden Green card base with liquid glue. I adhered a colorful panel of the DSP to a Basic Black mat and adhered it to the card with dimensionals.

I stamped the sentiment from the Stampin’ Up! Thankful Garden stamp set using Versamark ink on Basic Black and sprinkled it with white embossing powder. I shook off the excess and heated the powder with my heat tool until it was bright and shiny. I cut out the sentiment with the long label die from the Delightful Wishes dies.

I adhered the label to the card with glue dots and dimensionals and finished with three Melon Mambo glossy dots.

For the inside, I stamped the flower from the Stampin’ Up! Thankful Garden stamp set using twice stamped off Melon Mambo ink on Basic White. I trimmed the bottom with DSP and adhered the panel to the inside of the card with Stampin’ Seal. Isn’t that big flower impressive!

The Stampin’ Up! Thankful Garden bundle is so bold and the beautiful Lovely Garden DSP is so colorful and bright. Here is a picture of the stamp set and dies that are included in the bundle. There is also a set of masks for coloring the flowers, but I forgot to include it in the picture. I need to use the masks to color one of these flowers soon!

And here is the pretty DSP. It will be great for all sorts of Spring card making.

These products are part of the Lovely Garden Suite Collection and will be available next week on March 4, 2025!

On with the Hop! Click on the Next Blog button to move forward to see the beautiful project Karen Ksenzakovic has created.

If you get lost along the way, here are the participants for the hop:


Current Host Code: CCXFTCJQ

Use this host code when you order $50 or more and receive a free gift from me!  The free gift is your choice of any item currently available valued up to $10.00!

If your order is over $150, please do not use the host code since you’ll receive your own Host Dollars plus I’ll still send you the free gift!  This host code can be used by anyone, no club or commitment required. Let me know if you have any questions.


If you need any stamping supplies, I’d be very happy to be your Demonstrator.  Just click on the Shop Now button on the right side of the screen to go directly to my online store or contact me if you have any questions. 

Thanks for stopping by and Happy Stamping!

Akiko

  • Visit my online store here
  • See the current Stampin’ Up! Last Chance items here
  • Earn FREE Stampin’ Up! products through my Wildflower Frequent Shopper Program – my way of saying thank you to my online frequent shopper customers.
  • Have any questions? I’d be happy to help, click here to contact me.

Cardstock Cuts for this project:

  • Garden Green – 4-1/4″ x 11″ card base, scored at 5-1/2″
  • Basic Black – 2-7/8″ x 4-5/8″ (DSP mat), 3/4″ x 4″ (label)
  • Basic White – 4″ x 5-1/4″ (inside panel), 2-1/4″ x 3-3/4″ (small die cut hexagon)
  • Lovely Garden DSP – 4-1/4″ x 5-1/2″ (front background), 2-3/4″ x 4-1/2″ (DSP panel), 1/2″ x 4″ (inside trim)

Stampin’ Up! products used in this project: