Stampin’ Up! High Tide for the Happy Inkin’ Thursday Blog Hop

Good Morning and welcome to the Happy Inkin’ Thursday Blog Hop! I used the pretty Stampin’ Up! High Tide photopolymer stamp set to make a pretty lighthouse seaside scene for today’s Hop. This pretty stamp set is on the retiring list, but it’s a classic – mine is in the old green packaging! You can find the supplies used to create this card at the bottom of my post along with the sizes of cardstock used.

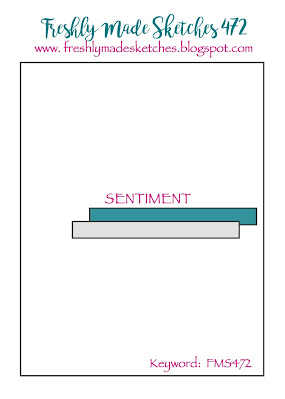
We have a sketch challenge this week and pretty sketch we are using:

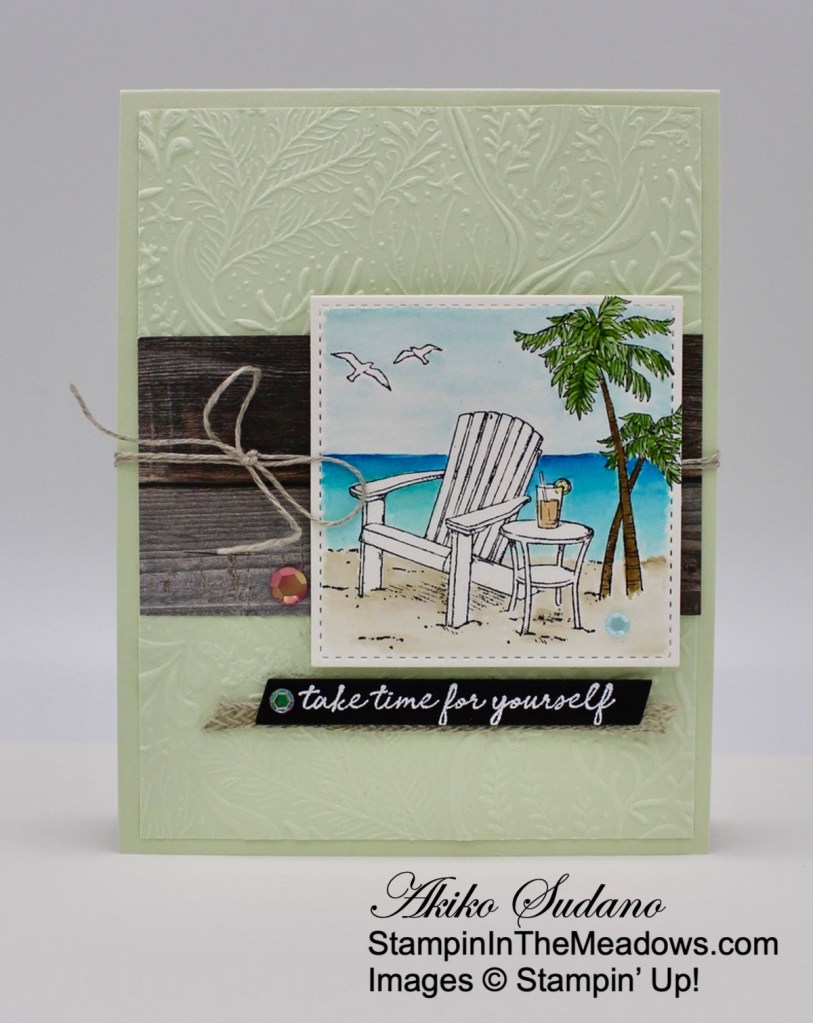
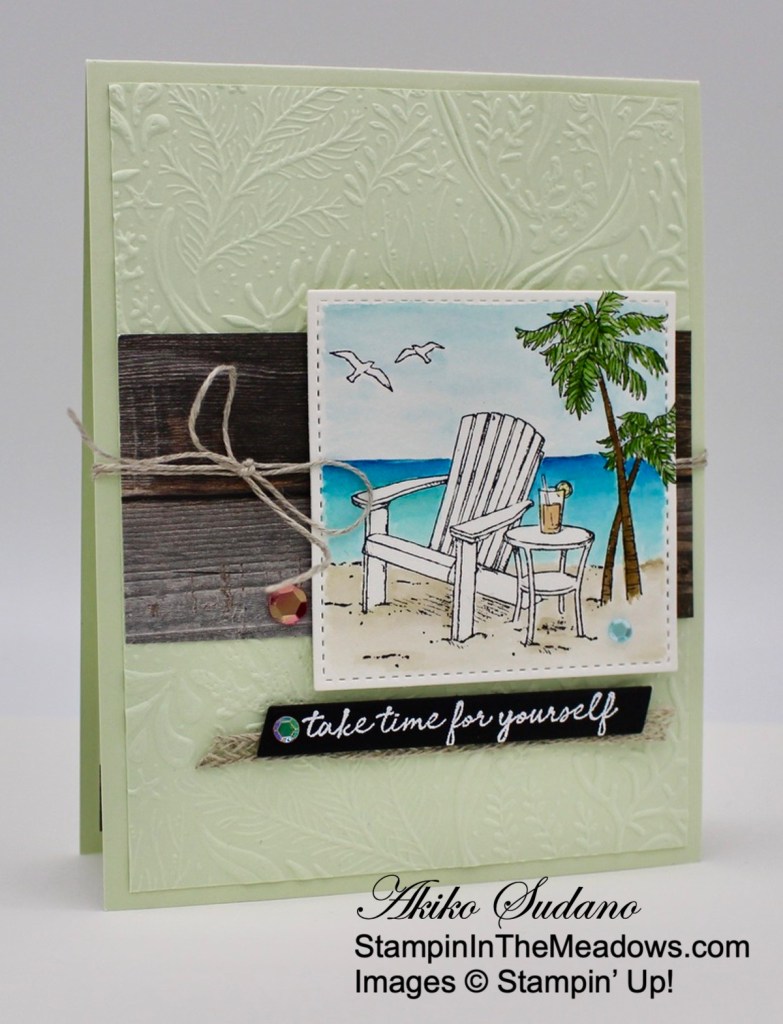
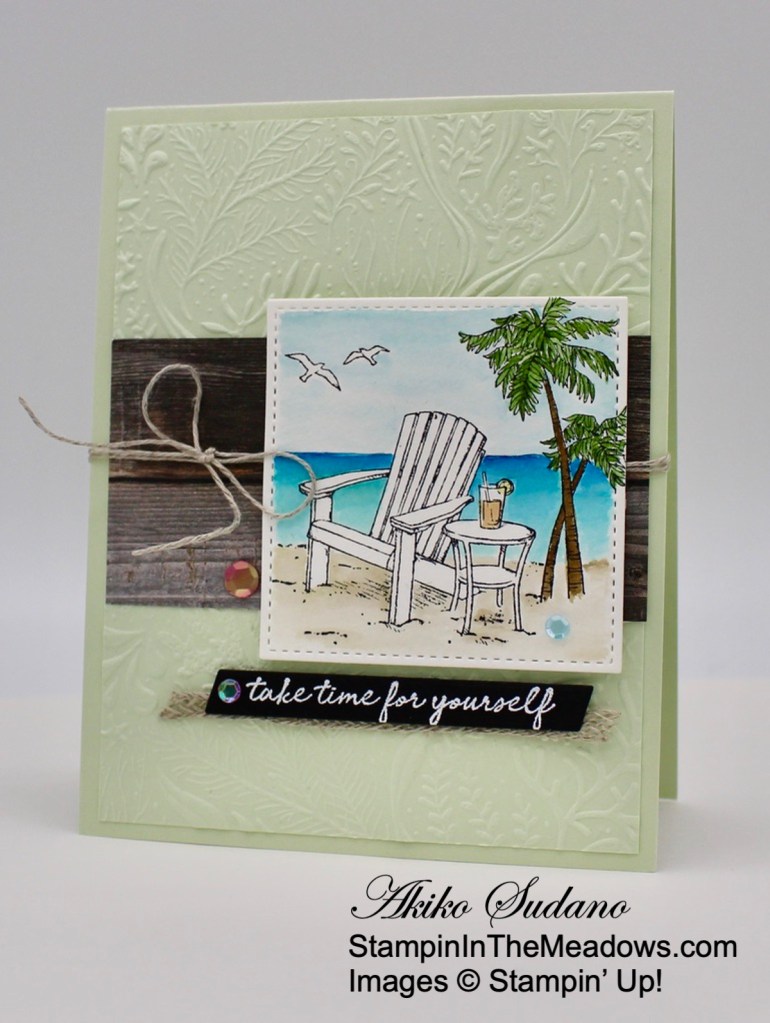
I embossed a Pretty Peacock panel with the Seabed 3D embossing folder and adhered it to the front of a Pretty Peacock card base. I cut out a panel of the Whale of a Time 6″ x 6″ designer series paper with the third largest Stitched Rectangles die and adhered it to a Bermuda Bay mat. I adhered the DSP panel to the the card front on an angle.

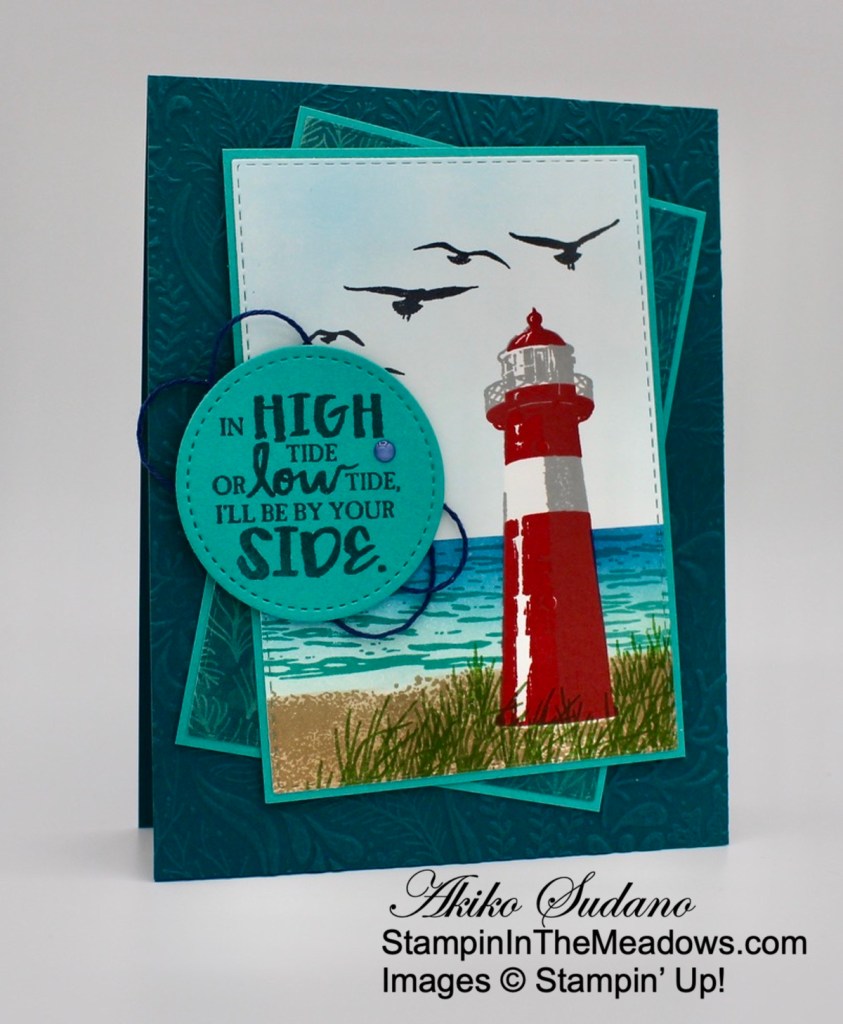
I stamped the lighthouse from the Stampin’ Up! High Tide photopolymer stamp set in Smoky Slate and Real Red ink on a Basic White panel. I stamped the Smoky Slate stamp on a large Post it note and cut it out for a lighthouse mask. I stamped the sand in Crumb Cake ink under the lighthouse, and re-inked it and stamped it again to extend the sand across the bottom of the panel. I covered the lighthouse with the mask and stamped the water in Bermuda Bay ink on both sides of the lighthouse. I masked off a horizon line above the water and the sand. Using my blending brushes, I applied Pool Party ink over the water. I gradually blended in Pacific Point ink over the Pool Party ink and finished with Night of Navy on a sponge dauber at the horizon.

I used a blending brush to apply Crumb Cake ink on the bottom of the panel over the sand. I stamped the grasses from the Stampin’ Up! High Tide stamp set in Garden Green ink around the base of the lighthouse. I used my blending brush again to apply Balmy Blue and Pacific Point inks to the sky and stamped the birds in Memento Tuxedo Black ink. I cut the panel out with the third largest Stitched Rectangle die and adhered it to a Bermuda Bay mat and then to the card front. I stamped the sentiment in Pretty Peacock on a Bermuda Bay panel and cut it out with the second smallest circle from the Stitched Shapes dies. I adhered a couple of loops of Misty Moonlight twine to the card front and popped the label on top with dimensionals. I finished the card with a Misty Moonlight enamel dot on the label.

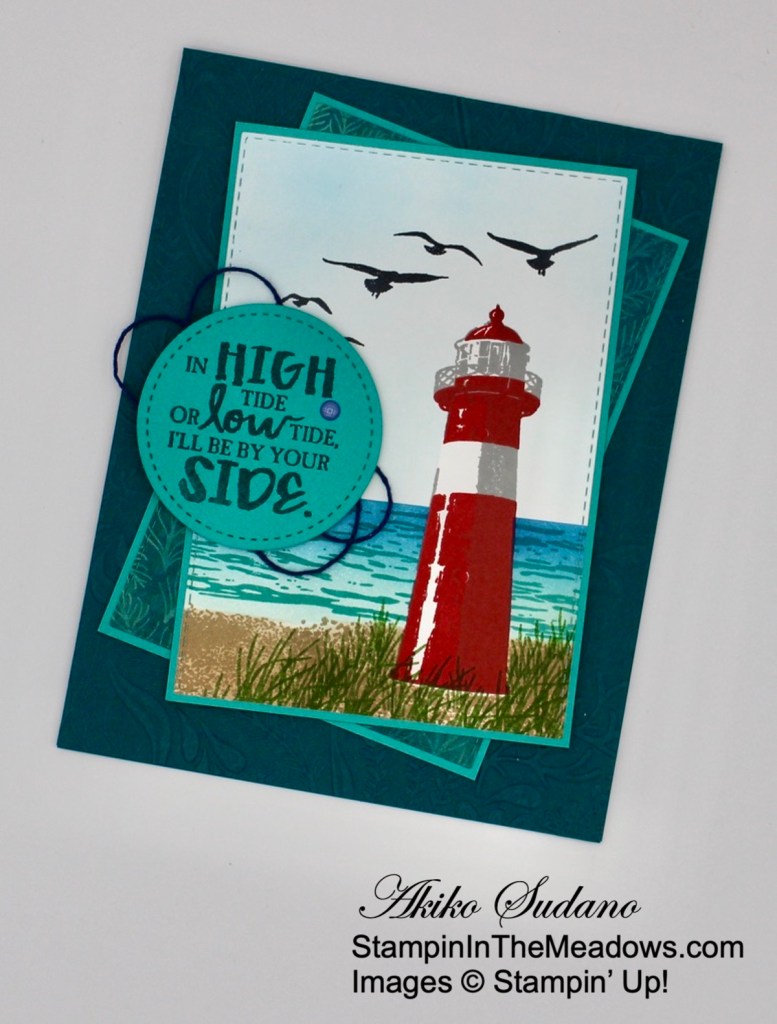
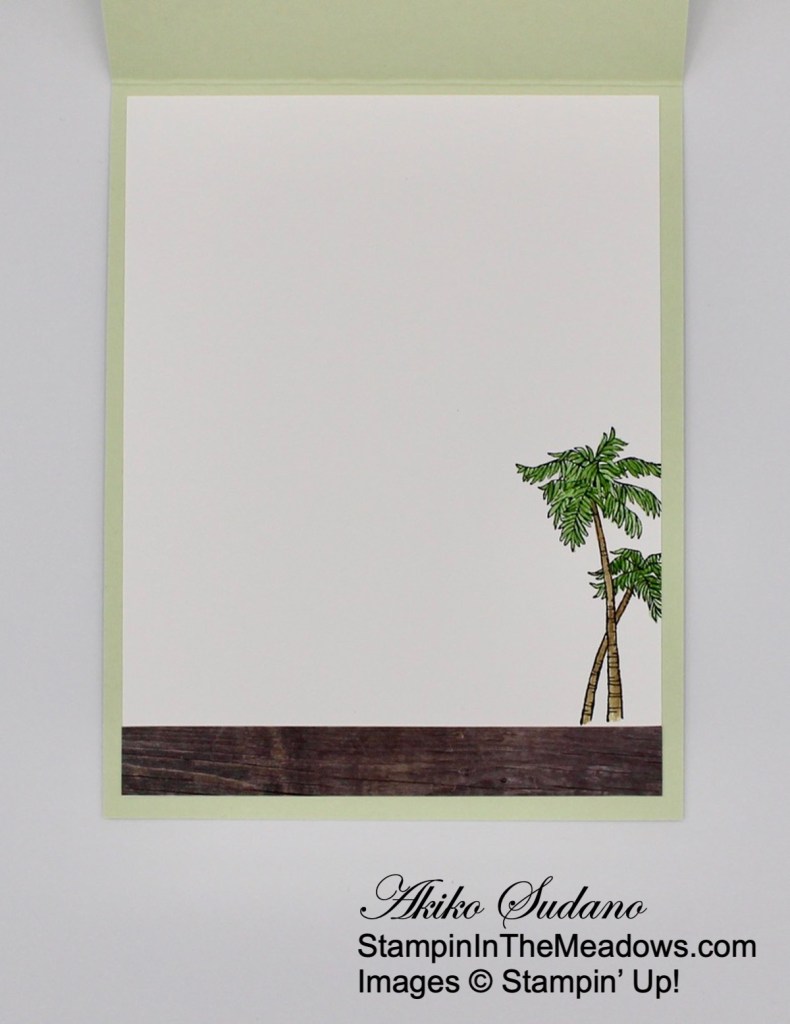
For the inside of the card, I stamped the lighthouse from the Stampin’ Up! High Tide stamp set in Smoky Slate and Real Red on a Basic White panel. I stamped the sand in Crumb Cake. I inked up the water with Bermuda Bay and used a sponge dauber to lighten the ink on the right side. I masked the light house and stamped the water. I used the blending brushes and sponge dauber to color the water just like the card front, fading the color toward the center of the panel. I stamped the grasses in Garden Green and the birds in Memento Tuxedo Black and adhered the panel to the inside of the card.

Though it’s time to say good bye to the Stampin’ Up! High Tide stamp set, it will remain one of the all time favorites. The stamps are so well designed that you can create so many different seaside scenes. And it looks great with so many different coloring techniques that are fun to play with. So get yours before it’s gone!

On with the Hop! Click the Next button below to visit Karen Ksenzakovic’s blog.

And just in case you get lost along the way, here’s a list of the team members participating in the hop today:


Current Host Code: ARFDXWP4

Use this host code when you order $50 or more and receive a free gift from me!  The gift is your choice of any item valued up to $10.00 in the 2020-2021 Annual Catalog or in the 2021 January-June Mini Catalog!

If your order is over $150, please do not use the host code since you’ll receive your own Host Dollars plus I’ll still send you the free gift!  This host code can be used by anyone, no commitment required.  Let me know if you have any questions.


If you need any stamping supplies, I’d be very happy to be your Demonstrator.  Just click on the Shop Now Button on the right side of the screen to go directly to my online store or contact me if you have any questions.  Happy Stamping!

Thanks for visiting!

Akiko

  • Visit my online store here
  • See the current Stampin’ Up! clearance rack specials here
  • Earn FREE Stampin’ Up! products through my Wildflower Frequent Shopper Program – my way of saying thank you to my frequent shopper online customers.
  • Sign up for my weekly newsletter here
  • Have any questions? I’d be happy to help, click here to contact me.

Cardstock Cuts for this project:

  • Pretty Peacock – 4-1/4″ x 11″ card base scored at 5-1/2″, 4-1/4″ x 5-1/2″ (embossed panel)
  • Bermuda Bay – two 3-1/8″ x 4-1/2″ panels (front mats), 2-1/4″ x 2-1/4″ (label)
  • Basic White – 4″ x 5-1/4″ (inside panel), 3-1/4″ x 4-1/4″ (stamped panel)
  • Whale of a Time 6″ x 6″ DSP – 3-1/4″ x 4-1/4″ (die cut panel)

Stampin’ Up! products used in this project:


Stampin’ Up! Dragonfly Garden Friendship Card

Good morning! Today I have a friendship card made with the Stampin’ Up! Dragonfly Garden bundle along with the Dandy Garden 6″ x 6″ designer series paper. And it’s a fun fold card – a Z-fold that is so simple to make! You can find the supplies I used at the bottom of my post along with the sizes of cardstock used.

I stamped the wildflowers from the Stampin’ Up! Dragonfly Garden cling stamp set in Memento Tuxedo Black ink on a Basic White panel twice. I colored the flowers with Stampin’ Blends – Rich Razzleberry, Mossy Meadow, Mango Melody, Highland Heather, Soft Suede and Crumb Cake. I used my blending brushes to lightly sponge some Balmy Blue ink on the open sky area and some Old Olive ink on the wildflower stems.

I cut a Mossy Meadow panel with the Stitched So Softly scalloped rectangle die and adhered the stamped panel to the front. I stamped the sentiment from the Stampin’ Up! Dragonfly Garden stamp set on a Bumblebee panel in Mossy Meadow and cut it out with the smallest scalloped rectangle from the Stitched Rectangles dies. I adhered it to the stamped panel. I adhered the Bumblebee panels of the Dandy Garden designer series paper to the Mossy Meadow card base on both ends. I adhered the white panel in the middle.

I stamped the open tailed dragonfly from the Stampin’ Up! Dragonfly Garden stamp set in stamped off Bumblebee ink on a Basic White panel and cut it out with the Stitched So Sweetly die. I adhered it to the large section of the card base that will be the inside of the card. I applied Tear & Tape to the left side of the layered stamped panel, being careful so that it didn’t go past the fold. I removed the tape strip covers and adhered it to the panel to the closed card, aligning the pane with the scalloped panel on the inside.

I punched a small dragonfly from Vellum with the Dragonflies punch and adhered it to the card front with a glue dot. I adhered a Bumblebee enamel dot on the dragonfly. I adhered a Mossy Meadow braided trim bow to the label, and my card was done.

The Stampin’ Up! Dragonfly Garden bundle is such a pretty set – I love the wildflowers stamp image – and it goes so beautifully with the Dandy Garden designer series paper. This style of Z-fold card is really easy to make, yet really makes the card extra special – try it!


Current Host Code: 9WJYHP76

Use this host code when you order $50 or more and receive a free gift from me!  The free gift is your choice of any item valued up to $10.00 in the 2019 – 2020 Annual Catalog or in the Jan-Jun 2021 Mini Catalog!

If your order is over $150, please do not use the host code since you’ll receive your own Host Dollars plus I’ll still send you the free gift!  This host code can be used by anyone, no club or commitment required.  Let me know if you have any questions.


If you need any stamping supplies, I’d be very happy to be your Demonstrator.  Just click on the Shop Now button on the right side of the screen to go directly to my online store or contact me if you have any questions.  Happy Stamping!

Thanks for stopping by and have a great weekend!

Akiko

  • Visit my online store here
  • See the current Stampin’ Up! clearance rack specials here
  • Earn FREE Stampin’ Up! products through my Wildflower Frequent Shopper Program – my way of saying thank you to my online frequent shopper customers.
  • Sign up for my weekly newsletter here
  • Have any questions? I’d be happy to help, click here to contact me.

Cardstock Cuts for this project:

  • Mossy Meadow – 5-1/2″ x 8-1/2″ card base scored at 2-1/8″ (mountain) and 4-1/4″ (valley), 3-1/4″ x 4-1/4″ (scalloped rectangle die cut)
  • Bumblebee – 1″ x 2-1/4″ (label)
  • Basic White – 3-1/4″ x 4-1/4″ (scalloped rectangle die cut for inside panel), 2-9/16″ x 3-3/4″ (art panel)
  • Vellum – 1″ x 1″ (small dragonfly)
  • Dandy Garden 6″ x 6″ DSP – 4″ x 5-1/4″ panel (inside Bumblebee), two 1-7/8″ x 5-1/4″ (Bumblebee for the front and white for the center panel)

Stampin’ Up! products used in this project:


Stampin’ Up! Butterfly Brilliance Cards

Good Morning! Today I want to share some pretty cards made with the Stampin’ Up! Butterfly Brilliance bundle. This is an early release from the upcoming 2021-2022 Annual Catalog that is available now. And it’s full of six gorgeous butterfly stamps in different sizes with detailed and outline dies for each one! Here are some cards made by the Stampin’ Up! Design team to give you some ideas:

One of the nice things I like about these cards is that they do do a nice job of showing how you can use the large butterfly stamp as background stamp and just ink it up and stamp it once!

The butterflies can be colored using many different techniques and in many different colors. There are outline dies for each butterfly, so you can use it as an embellishment. I love the variety in shapes and sizes!

The background dies are really cool – like this basketweave! And the bricks are neat too!

And finally there are all the detailed dies. This card leaves the little pieces in the watercolored die cuts for an artistic look, but they can be nicely used in conjunction with the stamped images for a variety of looks. And again, I love all the different sizes!

There are simple recipes for making these cards with the Stampin’ Up! Butterfly Brilliance bundle, and you can get them HERE. And check out the trio of Butterfly Brilliance cards I posted earlier this week here.

Here are close ups of the stamps and dies. Click on the pictures to get the full descriptions and to shop in my Online Store.

Thanks for looking and I hope you consider the Stampin’ Up! Butterfly Brilliance bundle for your next stamp purchase.


The April Paper Pumpkin Kit is So Cool!

The So Cool Paper Pumpkin Kit is a little taste of summer fun, with enough supplies to make 12 colorful, shaped cards with coordinating envelopes. Six card bases are popsicle shaped, the other six are semicircles: three watermelons and three rainbows. All of the cards are splashed with cheerful, vivid watercolor images. The kit also includes two full-size, matching sticker sheets, die-cut accents, fun embellishments, and more. But, even more cool: it’s the first Paper Pumpkin kit designed with kids in mind!

Coordinating Colors: Blackberry Bliss, Bermuda Bay, Bumblebee, Cinnamon Cider, Old Olive, Terracotta Tile

If you’re interested in subscribing to Paper Pumpkin, you can either sign up for a subscription where you are billed monthly for your kit or you can purchase a prepaid subscription in my online store. To see more information and to sign up for the monthly subscription click here. To see the options for prepaid subscriptions in my online store, click here.

Sign up deadline for the April 2021 kit is April 10, 2021. Supplies may be limited toward the end of the subscription period. 


Current Host Code: 9WJYHP76

Use this host code when you order $50 or more and receive a free gift from me!  The gift is your choice of any item valued up to $10.00 in the 2020-21 Annual Catalog or the Jan-Jun 2021 Mini Catalog.

If your order is over $150, please do not use the host code since you’ll receive your own Host Dollars plus I’ll still send you the free gift!  This host code can be used by anyone, no commitment required.  Let me know if you have any questions.


If you need any stamping supplies, I’d be very happy to be your Demonstrator.  Just click on the Shop Now Button on the right side of the screen to go directly to my Online store or contact me if you have any questions.  Happy Stamping!

Thanks for stopping by and have a great day!

Akiko

  • Visit my Online store here
  • See the current Stampin’ Up! clearance rack specials here
  • Earn FREE Stampin’ Up! products through my Wildflower Frequent Shopper Program – my way of saying thank you to my frequent shopper online customers.
  • Sign up for my monthly newsletter here
  • Have any questions? I’d be happy to help, click here to contact me.

Stampin’ Up! Dragonfly Garden for the Happy Inkin’ Thursday Blog Hop

Good Morning and welcome to the Happy Inkin’ Thursday Blog Hop! For today’s card I used the pretty Stampin’ Up! Dragonfly Garden bundle to make a pretty wildflower friendship card. I love the images in this stamp set and the pretty Dandy Garden designer series paper. You can find the supplies used to create this card at the bottom of my post along with the sizes of cardstock used.

We have a color challenge this week and here is the pretty color palette we are using – it just called out for the Dandy Garden designer series paper!!

I started by trimming the bottom of a Calypso Coral strip of the Dandy Garden 6″ x 6″ DSP with the Banner Triple Punch and adhering the banner to a colorful panel of the DSP. I adhered the layered panel to a Blackberry Bliss panel and wrapped it with a length of Bumblebee ribbon, securing it in the back. Then I wrapped a length of Mossy Meadow braided trim on top of the Bumblebee ribbon, tied a knot on the side and fluffed and trimmed the ends.

I stamped the wildflowers from the Stampin’ Up! Dragonfly Garden cling stamp set on a Basic White panel with Memento Tuxedo Black ink and colored it with Mango Melody, Mossy Meadow, Cinnamon Cider, Misty Moonlight, Old Olive and Crumb Cake Stampin’ Blends. I stamped the sentiment in Blackberry Bliss ink next to the flowers and cut it out with the largest stitched oval from the Stitched Shapes Dies. I cut the largest scalloped oval from the Layering Ovals dies from Blackberry Bliss and adhered the stitched oval on top.

I adhered the oval panel to the banner panel with dimensionals. I used the Dragonflies Punch to punch a large Blackberry Bliss dragonfly from the Dandy Garden DSP pack and adhered it to the panel with glue dots. I adhered 4 ladybug trinkets to the front with more glue dots and popped the panel to the front of a Blackberry Bliss card base.

For the inside of the card, I stamped the the wildflowers from the Stampin’ Up! Dragonfly Garden stamp set in Memento Tuxedo Black ink on thee side of a Basic White panel. I colored the flowers with Stampin’ blends just like the front oval panel. I stamped the sentiment in Blackberry Bliss next to the flowers and punched a little dragonfly from the Dandy Garden DSP. After adhering the little dragonfly to the top corner, I adhered the panel to the inside of the card.

The Stampin’ Up! Dragonfly Garden bundle has beautiful dragonfly and wildflower images and wonderful sentiments – it’s one of my many favorites in the current Mini Catalog. And the ladybug trinkets are just too cute!

On with the Hop! Click the Next button below to visit Karen Ksenzakovic’s blog.

And just in case you get lost along the way, here’s a list of the team members participating in the hop today:


March Host Code: 9WJYHP76

Use this host code when you order $50 or more and receive a free gift from me!  The gift is your choice of any item valued up to $10.00 in the 2019-20 Annual Catalog or in the 2020 January-June Mini Catalog!  That includes some of the Host Exclusive stamp sets!

If your order is over $150, please do not use the host code since you’ll receive your own Host Dollars plus I’ll still send you the free gift!  This host code can be used by anyone, no commitment required.  Let me know if you have any questions.


If you need any stamping supplies, I’d be very happy to be your Demonstrator.  Just click on the Shop Now Button on the right side of the screen to go directly to my online store or contact me if you have any questions.  Happy Stamping!

Thanks for visiting!

Akiko

  • Visit my online store here
  • See the current Stampin’ Up! clearance rack specials here
  • Earn FREE Stampin’ Up! products through my Wildflower Frequent Shopper Program – my way of saying thank you to my frequent shopper online customers.
  • Sign up for my weekly newsletter here
  • Have any questions? I’d be happy to help, click here to contact me.

Cardstock Cuts for this project:

  • Blackberry Bliss – 4-1/4″ x 11″ card base scored at 5-1/2″, 4″ x 5-1/4″ (front mat), 2-3/4″ x 4″ (scalloped oval mat)
  • Basic White – 3″ x 4″ (stitched oval art panel), 4″ x 5-1/4″ (inside panel)
  • Dandy Garden DSP – 3-7/8″ x 5-1/8″ (front background), 2″ x 5″ (Calypso Coral banner), large dragonfly, small dragonfly

Stampin’ Up! products used in this project:


Stampin’ Up! Cute Fruit Friendship Card II

Happy Tuesday! Today I’m bringing back the Stampin’ Up! Cute Fruit photopolymer stamp set for another friendship card. For this card, I used a random stamp all over technique to create a faux designer series paper that I cut into strips for my card sketch. This time, I used more of the stamps, and you can see how it ceases beautiful solid image fruits. You can find the supplies used to create this card at the bottom of this post along with the sizes of card stock used.

My card is also inspired by the sketch in the Sunday Stamps current challenge SSC250 – Split It Up:

I stamped the images randomly on a Basic White panel. I used Bumblebee and Mossy Meadow on the pineapples, Melon Mambo and Shaded Spruce on the watermelons, So Saffron and Crumb Cake on the bananas, Pumpkin Pie on the oranges and Granny Apple Green (stamped off once) for the kiwis.

Then I used the second largest of the long Stitched Rectangles dies to cut the panel into three sections. I matted each panel on Melon Mambo card stock and adhered them to a So Saffron panel. I popped the panel on the front of a Granny Apple Green card base with dimensionals.

I stamped the sentiment from the Stampin’ Up! Cute Fruit stamp set in Shaded Spruce ink on a Basic White strip. I trimmed the ends of a Shaded Spruce strip with the Lovely Labels Pick a punch and adhered the stamped strip to the punched strip. I adhered it to the front of the card with dimensionals.

For the inside of the card, I stamped the fruits along the bottom of a Basic White panel using the same colors as the card front. I adhered the panel to a Melon Mambo mat and then to the inside of the card.

The Stampin’ Up! Cute Fruit stamp set is a fun little set that is in the Beginner’s Brochure – you can download a PDF by clicking on the image in the sidebar. It’s great for beginner stampers because it’s complete with several two step fruit stamps and sentiments that go with the fruit theme. And fruity cards are great way to bring colorful fun to dreary, cold winter days.


TWO WEEKS LEFT TO SALE A BRATE – Sale A Bration ends on February 28!

Sale A Bration is Stampin’ Up!’s biggest event of the year with three ways to earn FREE products – SHOP – HOST – JOIN!

SHOP

During Sale-A-Bration, for every $50 or $100 you spend, you can choose between two purchasing levels of free products! Depending on the amount you spend, you’ll be able to mix ‘n’ match the Sale-A-Bration items you earn and you can choose from stunning stamp sets and designer series papers. There are 8 free products available to pick from at the $50 level and 2 free products to pick from at the $100 level. Click on the Sale A Bration brochure to the right to see these products.

HOST

Stampin’ Up! is offering an exclusive host stamp set called Punch Party and you can get it for FREE with an order of $300 or greater placed during Sale-a-bration or by hosting a workshop with orders totaling $300 or greater during Sale-a-bration!  And this is on top of the normal Stampin’ Rewards you get when you host a workshop!

JOIN

There’s no better time to Join Stampin’ Up! than during Sale A Bration! And joining is easy! You purchase your Starter kit for $99 by choosing $125 in Stampin’ Up! products (and shipping is FREE). If you join during Sale A Bration, you get an additional five FREE full size packs of 6″ x 6″ Designer Series Paper from the upcoming 2021-2022 Annual Catalog with your Starter Kit (the current 6″ x 6″ designer series paper goes for $11.50 per pack!). 

See my Join My Team page for all the benefits starting with a minimum 20% discount!  Contact me if you have any questions.  Click here to purchase your Starter Kit.

Contact me if you need a copy of the new Jan-Jun Mini Catalog and Sale A Bration brochure, and I’ll be happy to send you one!


March Paper Pumpkin is Here’s To You!

Three cheers for mountain air, a sky filled with sunshine, and finding joy in life’s journey! Adventure awaits inside this month’s majestic, mountain-themed kit. With enough elements and embellishments to create eight cards and coordinating envelopes, the Here’s to You Paper Pumpkin Kit is the perfect pick for celebrating life’s little moments and mountain-high milestones! Love those Wildflowers!!

What makes March’s kit one-of-a-kind? The spectacular set of four free stencils—and a stamping sponge—that you’ll find inside! Pair this pack of stunning stencils with the kit’s contents to stamp a springtime scene, then store the set to stamp for any season in the future. Clean up your binoculars and dust off your hiking boots—the Here’s to You Paper Pumpkin Kit is ready to lead you on an excursion to explore your creativity!

Here are the Details:

  • Kit contains enough supplies to create 8 cards—4 each of 2 designs—and coordinating envelopes. 
  • The kit’s contents include printed card bases, die-cut paper pieces, embellishments, adhesive, and more!
  • Card size: 4-1/4″ x 5-1/2″ 
  • Envelope size: 4-1/2″ x 5-3/4″
  • Includes four free stencils and a stamping sponge!
  • Arrives in a cute and collectible box.

Coordinating Colors: Bumblebee, Calypso Coral, Old Olive, Petal Pink, Pretty Peacock, Seaside Spray

Here’s a little video preview of the kit:

If you’re interested in subscribing to Paper Pumpkin, you can either sign up for a subscription where you are billed monthly for your kit or you can purchase a prepaid subscription in my Online Store. To see more information and to sign up for the monthly subscription click here. To see the options for prepaid subscriptions in my Online Store, click here.

Sign up deadline for the March 2021 kit is March 10, 2021.  Note: Supplies may be limited toward the end of the subscription period.


February Host Code: JNWPB7A4

Use this host code when you order $50 or more and receive a free gift from me!  The gift is your choice of any item valued up to $10.00 in the 2020-21 Annual Catalog or the Jan-Jun 2021 Mini Catalog.

If your order is over $150, please do not use the host code since you’ll receive your own Host Dollars plus I’ll still send you the free gift!  This host code can be used by anyone, no commitment required.  Let me know if you have any questions.


If you need any stamping supplies, I’d be very happy to be your Demonstrator.  Just click on the Shop Now Button on the right side of the screen to go directly to my Online store or contact me if you have any questions.  Happy Stamping!

Thanks for stopping by and have a great day!

Akiko

  • Visit my Online store here
  • See the current Stampin’ Up! clearance rack specials here
  • Earn FREE Stampin’ Up! products through my Wildflower Frequent Shopper Program – my way of saying thank you to my frequent shopper online customers.
  • Sign up for my monthly newsletter here
  • Have any questions? I’d be happy to help, click here to contact me.

Cardstock Cuts for this project:

  • Granny Apple Green – 5-1/2″ x 8-1/2″ card base scored at 4-1/4″
  • Melon Mambo – three 1-3/8″ x 3-3/8″ (front mats), 3-7/8″ x 5-1/8″ (inside mat)
  • So Saffron – 3-1/2″ x 4-3/8″ (front panel)
  • Shaded Spruce – 1/2″ x 3-3/4″ (punched label strip)
  • Basic White – two 3-3/4″ x 5″ panel (front stamped panel and inside panel), 3/8″ x 2-5/8″ (label strip)

Stampin’ Up! products used in this project:


Stampin’ Up! Cute Fruit Friendship Card

Good morning and welcome to Simple Stamping Saturday! Today I’m sharing a cute friendship card made with the Stampin’ Up! Cute Fruit stamp set. This is one of the cute stamp sets in the Beginner’s Brochure and you can view the brochure in the right sidebar if you haven’t seen it yet. You can find the supplies used to create this card at the bottom of my post along with the sizes of cardstock used.

And today’s card was inspired by Freshly Made Sketches #472 – a perfect sketch for many simple stamping techniques!

The Stampin’ Up! Cute Fruit photopolymer stamp set is a light hearted two step stamp set with pretty fruits, little smily faces and punny sentiments. I stamped the pineapple top in Mossy Meadow ink on a Basic White panel and then stamped the pineapple body under it in Bumblebee ink. I found it easier to line up when I stamped the top first because the ink is darker and it’s easier to see through the lighter inked stamp for better alignment. Then I stamped the pineapple on a post-it note and fussy cut it to make a mask.

I adhered the post-it note mask to cover the pineapple and stamped the watermelon center from the Stampin’ Up! Cute Fruit stamp set in Melon Mambo ink next to the pineapple, overlapping the masked pineapple. Doesn’t it make the watermelon look like it’s behind the pineapple? I stamped the watermelon rind in Shaded Spruce next to the watermelon, aligning the tops. On a separate Basic White panel, I stamped the orange center in Pumpkin Pie after stamping off and then the orange peel in Pumpkin Pie, aligning the centers. I fussy cut the orange. I stamped the sentiment in Memento Tuxedo Black ink and adhered the panel to a Mossy Meadow mat.

I trimmed the ends of strips of Melon Mambo, Mossy Meadow and Bumblebee DSP and adhered them together and then to the panel with glue dots. I adhered the orange to the panel with dimensionals and adhered a linen thread bow next to it with a glue dot. I popped the panel on the front of a Melon Mambo card base.

For the inside of the card, I stamped the pineapple in Mossy Meadow and Bumblebee like the front in the corner of a Basic White panel. I covered it with the post-it note mask and stamped the watermelon next to it in Melon Mambo and Shaded Spruce. In the opposite corner, I stamped the orange in Pumpkin Pie and then adhered the panel to the inside of the card.

There are other fruits in the Stampin’ Up! Cute Fruit stamp set, so I’ll have to play with it again soon. In addition to the stamp set, you can purchase the Cute Fruit Cards & Tags Project Collection (item 155420) which comes with the stamp set, a stamp block, a pack of White card stock and a set of 8 Stampin’ Spots ink pads for $58.25 (before shipping and taxes). This is perfect for a beginning stamper because it has everything you need in one package! And it will also qualify for a Level 1 Sale A Bration item through the end of this month!


Stampin’ Up! Sale A Bration is going on Now!

Sale A Bration is Stampin’ Up!’s biggest event of the year with three ways to earn FREE products – SHOP – HOST – JOIN!

SHOP

During Sale-A-Bration, for every $50 or $100 you spend, you can choose between two purchasing levels of free products! Depending on the amount you spend, you’ll be able to mix ‘n’ match the Sale-A-Bration items you earn and you can choose from stunning stamp sets and designer series papers. There are 8 free products available to pick from at the $50 level and 2 free products to pick from at the $100 level. Click on the Sale A Bration brochure to the right to see these products.

HOST

Stampin’ Up! is offering an exclusive host stamp set called Punch Party and you can get it for FREE with an order of $300 or greater placed during Sale-a-bration or by hosting a workshop with orders totaling $300 or greater during Sale-a-bration!  And this is on top of the normal Stampin’ Rewards you get when you host a workshop!

JOIN

There’s no better time to Join Stampin’ Up! than during Sale A Bration! And joining is easy! You purchase your Starter kit for $99 by choosing $125 in Stampin’ Up! products (and shipping is FREE). If you join during Sale A Bration, you get an additional five FREE full size packs of 6″ x 6″ Designer Series Paper from the upcoming 2021-2022 Annual Catalog with your Starter Kit (the current 6″ x 6″ designer series paper goes for $11.50 per pack!). 

See my Join My Team page for all the benefits starting with a minimum 20% discount!  Contact me if you have any questions.  Click here to purchase your Starter Kit.

Contact me if you need a copy of the new Jan-Jun Mini Catalog and Sale A Bration brochure, and I’ll be happy to send you one!


February Host Code: JNWPB7A4

Use this host code when you order $50 or more and receive a free gift from me!  The gift is your choice of any item valued up to $10.00 in the 2020-21 Annual Catalog or the Jan-Jun 2021 Mini Catalog.

If your order is over $150, please do not use the host code since you’ll receive your own Host Dollars plus I’ll still send you the free gift!  This host code can be used by anyone, no commitment required.  Let me know if you have any questions.


If you need any stamping supplies, I’d be very happy to be your Demonstrator.  Just click on the Shop Now Button on the right side of the screen to go directly to my Online store or contact me if you have any questions.  Happy Stamping!

Thanks for stopping by and have a great day!

Akiko

  • Visit my Online store here
  • See the current Stampin’ Up! clearance rack specials here
  • Earn FREE Stampin’ Up! products through my Wildflower Frequent Shopper Program – my way of saying thank you to my frequent shopper online customers.
  • Sign up for my monthly newsletter here
  • Have any questions? I’d be happy to help, click here to contact me.

Cardstock Cuts for this project:

  • Melon Mambo – 4-1/4″ x 11″ card base scored at 5-1/2″
  • Mossy Meadow – 3-7/8″ x 5-1/8″ panel (front mat)
  • Basic White – two 3-3/4″ x 5″ panel (inside panel and front panel), 1-1/4″ x 1-1/4″ (orange)
  • 2020-2022 In Color 6″ x 6″ DSP – 1/4″ x 3-1/4″ (Bumblebee strip)
  • Brights 6″ x 6″ DSP – 1/4″ x 3-1/4″ (Melon Mambo strip)
  • Dandy Garden 6″ x 6″ DSP – 1/4″ x 3-1/4″ (Mossy Meadow strip)

Stampin’ Up! products used in this project:


Stampin’ Up! Hydrangea Haven for the Happy Inkin’ Thursday Blog Hop

Good Morning and welcome to the Happy Inkin’ Thursday Blog Hop! Today I have a sweet floral card made with the Stampin’ Up! Hydrangea Haven bundle and the beautiful Hydrangea Hill designer series paper. You can find the supplies used to create this card at the bottom of my post along with the sizes of cardstock used.

We have a color challenge this week, and here’s the beautiful color palette we’re using. Luckily all of these colors are in the beautiful Hydrangea Hill panel I chose, but I did use Seaside Spray, Misty Moonlight and Old Olive for my flower and sentiments.

I adhered a panel of Hydrangea Hill designer series paper to a Seaside Spray mat and popped it on the front of a Misty Moonlight card base with dimensionals. I stamped the outline of the hydrangea from the Stampin’ Up! Hydrangea Haven photopolymer stamp set in Old Olive ink on a Thick Whisper White panel. I stamped the solid leaves and stem over the outline image in Old Olive and cut out the flower with the coordinating die.

I used the top of the flower die to cut a Seaside Spray panel with the flower. After trimming the stem, I adhered it to the top of the Thick Basic White flower. I stamped the solid flower from the Stampin’ Up! hydrangea Haven stamp set in Seaside Spray ink on a Basic White panel. I cut it out with the pierced petal flower die and gently bent each petal upward. I adhered it to the Seaside Spray flower with tiny dots of liquid glue and adhered a pearl to each flower center. I applied some adhesive sheets to the back of the Old Olive panel and cut out the outline leaves and stem die. I peeled off the adhesive backing and applied it to the stem and leaves.

I stamped the sentiment from the Stampin’ Up! Hydrangea Haven stamp set in Misty Moonlight ink on a Basic White panel and cut it out with the second largest Stitched So Sweetly scalloped Rectangle die. I adhered the label to the card front with liquid glue and popped the flower on with dimensionals. I adhered a Metallic Seaside Spray bow to the flower to finish the card front.

For the inside of the card, I stamped the sentiment from the Stampin’ Up! Hydrangea Haven stamp set in Misty Moonlight ink on a Basic White panel. I stamped the flowers in the corner in Seaside Spray ink and masked the flowers and added some leaves to the bottom. I trimmed the side of the panel with a strip of the Hydrangea Hill DSP and adhered the panel to a Seaside Spray mat before adhering it to the inside of the card.

The Stampin’ Up! Hydrangea Haven bundle is a great bundle for making hydrangeas, and it has so many sweet sentiments! And the Hydrangea Hill designer series paper is really beautiful!

On with the Hop! Click the Next button below to visit Karen Ksenzakovic’s blog.

And just in case you get lost along the way, here’s a list of the team members participating in the hop today:


February Host Code: JNWPB7A4

Use this host code when you order $50 or more and receive a free gift from me!  The gift is your choice of any item valued up to $10.00 in the 2019-20 Annual Catalog or in the 2020 January-June Mini Catalog!  That includes some of the Host Exclusive stamp sets!

If your order is over $150, please do not use the host code since you’ll receive your own Host Dollars plus I’ll still send you the free gift!  This host code can be used by anyone, no commitment required.  Let me know if you have any questions.


If you need any stamping supplies, I’d be very happy to be your Demonstrator.  Just click on the Shop Now Button on the right side of the screen to go directly to my online store or contact me if you have any questions.  Happy Stamping!

Thanks for visiting!

Akiko

  • Visit my online store here
  • See the current Stampin’ Up! clearance rack specials here
  • Earn FREE Stampin’ Up! products through my Wildflower Frequent Shopper Program – my way of saying thank you to my frequent shopper online customers.
  • Sign up for my weekly newsletter here
  • Have any questions? I’d be happy to help, click here to contact me.

Cardstock Cuts for this project:

  • Misty Moonlight – 5-1/2″ x 8-1/2″ card base scored at 4-1/4″
  • Seaside Spray – two 3-7/8″ x 5-1/8″ panels (front and inside mats), 2-1/2″ x 2-1/2″ (hydrangea flower die cut)
  • Old Olive – 2″ x 3-1/4″ – (die cut leaves & stem)
  • Basic White – 3-3/4″ x 5″ (inside panel), 1-1/2″ x 2-1/2″ (die cut label), 2-1/2″ x 2-1/2″ panel (die cut hydrangea flower head)
  • Thick Basic White – 3-1/4″ x 4-1/2″ (die cut flower)
  • Hydrangea Hill DSP – 3-3/4″ x 5″ (front background), 1/2″ x 3-3/4″ (inside trim)

Stampin’ Up! products used in this project:


Stampin’ Up! In Bloom Cards

Good Morning! Today I want to share some pretty cards made with the Stampin’ Up! In Bloom bundle. This is a versatile floral bundle with bold, modern graphic designs and fun sentiments. And the flower die cuts have stitched motifs that give the flowers extra texture and interest! Here are some simple cards made by the Stampin’ Up! Design team to give you some ideas:

I love how the large flowers are double stamped, giving a fuller flower and adding dimension. See the cute stitched die cut flowers? I have to try the pleated ribbon technique soon – that’s such a nice touch.


This card is so retro and I just love it! I especially love the diagonal sentiment inset contrasting with the stamped floral faux DSP!

This card really shows off the stitched die cut flowers and leaves. How cleaver to have a box opening with a burst of flowers!

There are simple recipes for making these cards with the Stampin’ Up! In Bloom bundle, and you can get them HERE. I need to get this bundle out and play with it more this week as I have only used it on last week’s card with the Paper Blooms Sale A Bration DSP. Here are close ups of the stamps and dies. Click on the pictures to get the full descriptions and to shop in my Online Store.

Thanks for looking and I hope you consider the Stampin’ Up! In Bloom bundle for your next floral stamp set.


Join me for a Facebook Live at 1:00 PM ET Today

I’m planning to go live on my Facebook page at 1:00 ET this afternoon. Stop by my Facebook Page to see my card made with the Handsomely Suited bundle. Look forward to seeing you then!


Stampin’ Up! Sale A Bration is going on Now!

Sale A Bration is Stampin’ Up!’s biggest event of the year with three ways to earn FREE products – SHOP – HOST – JOIN!

SHOP

During Sale-A-Bration, for every $50 or $100 you spend, you can choose between two purchasing levels of free products! Depending on the amount you spend, you’ll be able to mix ‘n’ match the Sale-A-Bration items you earn and you can choose from stunning stamp sets and designer series papers. There are 8 free products available to pick from at the $50 level and 2 free products to pick from at the $100 level. Click on the Sale A Bration brochure to the right to see these products.

HOST

Stampin’ Up! is offering an exclusive host stamp set called Punch Party and you can get it for FREE with an order of $300 or greater placed during Sale-a-bration or by hosting a workshop with orders totaling $300 or greater during Sale-a-bration!  And this is on top of the normal Stampin’ Rewards you get when you host a workshop!

JOIN

There’s no better time to Join Stampin’ Up! than during Sale A Bration! And joining is easy! You purchase your Starter kit for $99 by choosing $125 in Stampin’ Up! products (and shipping is FREE). If you join during Sale A Bration, you get an additional five FREE full size packs of 6″ x 6″ Designer Series Paper from the upcoming 2021-2022 Annual Catalog with your Starter Kit (the current 6″ x 6″ designer series paper goes for $11.50 per pack!). 

See my Join My Team page for all the benefits starting with a minimum 20% discount!  Contact me if you have any questions.  Click here to purchase your Starter Kit.

Contact me if you need a copy of the new Jan-Jun Mini Catalog and Sale A Bration brochure, and I’ll be happy to send you one!


FREE SHIPPING

This week is my 2 year anniversary with Stampin’ Up! and to celebrate I am offering FREE standard shipping on all orders over $50 through February 9th. 

To get free shipping, you will need to:

  • Place an order at my Online Store between now and Monday February 9th using my current Host Code JNWPB7A4.
  • Send me an email at apsudano@stampininthemeadows.com of how you would like your shipping charges refunded to you, PayPal or check.
  • Once your order is processed and shipped, I will refund your standard shipping charges.

Your order will also qualify you for my thank you gift and for Wildflower Points! Orders over $150 will also qualify you for Stampin’ Rewards, so if your order is $150 or more, don’t use my host code so that you don’t miss out on your own Stampin’ Rewards from Stampin’ Up! Have fun shopping!


February Host Code: JNWPB7A4

Use this host code when you order $50 or more and receive a free gift from me!  The gift is your choice of any item valued up to $10.00 in the 2020-21 Annual Catalog or the Jan-Jun 2021 Mini Catalog.

If your order is over $150, please do not use the host code since you’ll receive your own Host Dollars plus I’ll still send you the free gift!  This host code can be used by anyone, no commitment required.  Let me know if you have any questions.


If you need any stamping supplies, I’d be very happy to be your Demonstrator.  Just click on the Shop Now Button on the right side of the screen to go directly to my Online store or contact me if you have any questions.  Happy Stamping!

Thanks for stopping by and have a great day!

Akiko

  • Visit my Online store here
  • See the current Stampin’ Up! clearance rack specials here
  • Earn FREE Stampin’ Up! products through my Wildflower Frequent Shopper Program – my way of saying thank you to my frequent shopper online customers.
  • Sign up for my monthly newsletter here
  • Have any questions? I’d be happy to help, click here to contact me.

Stampin’ Up! Seaside View Video Tutorial

Happy February! This is the card I made during my Facebook Live video tutorial yesterday afternoon featuring the Stampin’ Up! Seaside View cling stamp set in a card with a watercolor technique on the pretty image. And it was a perfect time for a dreamy beach scene, as it started snowing just before I went live. You can find the supplies I used at the bottom of my post along with the sizes of cardstock used.

Here is the Facebook Live video showing how I made the card:

I posted a copy of the video in my YouTube channel here so you can view it there if you prefer.

I embossed a Soft Sea Foam panel with the Seabed 3D embossing folder and adhered it to the front of a Soft Sea Foam card base. I adhered a panel of weathered wood from the In Good Taste designer series paper across the front and wrapped it twice with linen thread and made a bow.

I stamped the chair, trees and birds from the Stampin’ Up! Seaside View stamp set using Stazon ink on watercolor paper. I cut it out with the largest stitched square from the Stitched Shapes dies. I drew a line with a pencil for the horizon and colored the image in sections with the small water painter and inks. For the sand, sea and sky, I first brushed the section with the water painter to moisten the watercolor paper. Then I dabbed the ink on a stamp block and pulled some ink to mix with water from the water painter. The ink comes out dark at first and then lightens as more water flows through the water painter. I used Sahara Sand on the sand, Balmy Blue on the sky and Pacific Point and Bermuda Bay for the water. When I painted the water, I started with a dark Pacific Point line over the pencil line on the horizon and gradually shifted to Bermuda Bay by the shore. I also used Garden Green and Soft Suede inks for the trees and Cinnamon Cider and Daffodil Delight inks for the drink

I adhered the dried image to the card front with dimensionals. I stamped the sentiment from the Stampin’ Up! Seaside View stamp set in Versamark Ink and sprinkled it with white embossing powder. I heat set the embossing powder until it was shiny and cut the sentiment out with the long sentiment die from the Always dies. I pulled some Braided linen trim widthwise so it would be thicker and adhered it to the back of the label with glue dots. I adhered the layered label to the front of the card with dimensionals and finished off the card front with some sequins.

For the inside, I stamped the tree in Stazon ink on a Basic White panel. I colored the tree like the card front, but used my blender pen instead of the water painter, as I wanted the color to be more intense and I didn’t want to mess up the card stock. I adhered a strip of In Good Taste DSP to the bottom and adhered the panel to the inside of the card.

The water coloring is slow, so I only colored portions of the image during the video. Afterwards, I finished the image I was working on, so I have it pictured here with the card I made. All the images in the Stampin’ Up! Seaside View stamp set would be great watercolored, and it’s relaxing and fun. Why not give it a try?


Stampin’ Up! Sale A Bration is going on Now!

Sale A Bration is Stampin’ Up!’s biggest event of the year with three ways to earn FREE products – SHOP – HOST – JOIN!

SHOP

During Sale-A-Bration, for every $50 or $100 you spend, you can choose between two purchasing levels of free products! Depending on the amount you spend, you’ll be able to mix ‘n’ match the Sale-A-Bration items you earn and you can choose from stunning stamp sets and designer series papers. There are 8 free products available to pick from at the $50 level and 2 free products to pick from at the $100 level. Click on the Sale A Bration brochure to the right to see these products.

HOST

Stampin’ Up! is offering an exclusive host stamp set called Punch Party and you can get it for FREE with an order of $300 or greater placed during Sale-a-bration or by hosting a workshop with orders totaling $300 or greater during Sale-a-bration!  And this is on top of the normal Stampin’ Rewards you get when you host a workshop!

JOIN

There’s no better time to Join Stampin’ Up! than during Sale A Bration! And joining is easy! You purchase your Starter kit for $99 by choosing $125 in Stampin’ Up! products (and shipping is FREE). If you join during Sale A Bration, you get an additional five FREE full size packs of 6″ x 6″ Designer Series Paper from the upcoming 2021-2022 Annual Catalog with your Starter Kit (the current 6″ x 6″ designer series paper goes for $11.50 per pack!). 

See my Join My Team page for all the benefits starting with a minimum 20% discount!  Contact me if you have any questions.  Click here to purchase your Starter Kit.

Contact me if you need a copy of the new Jan-Jun Mini Catalog and Sale A Bration brochure, and I’ll be happy to send you one!


Stampin’ Up! Hey Chick and Hey Birthday Chick Bundles available Tomorrow!

The Hey Birthday Chick cling stamp set is a fun set that is a follow on to the Hey Chick stamp set that came out during Sale A Bration a few years ago. And tomorrow is the big day that the Hey Chick stamp set returns with coordinating dies for both sets! The bundles will be available through June 30 and if you already have the stamps, you can get the coordinating dies. And they are so cute!! Click on the image above to download a PDF with all the details.


February Host Code: JNWPB7A4

Use this host code when you order $50 or more and receive a free gift from me!  The free gift is your choice of any item valued up to $10.00 in the 2019 – 2020 Annual Catalog or in the Aug-Dec 2020 Mini Catalog!  That includes some of the Host Exclusive stamp sets!

If your order is over $150, please do not use the host code since you’ll receive your own Host Dollars plus I’ll still send you the free gift!  This host code can be used by anyone, no club or commitment required.  Let me know if you have any questions.


If you need any stamping supplies, I’d be very happy to be your Demonstrator.  Just click on the Shop Now button on the right side of the screen to go directly to my online store or contact me if you have any questions.  Happy Stamping!

Thanks for stopping by and have a great week!

Akiko

  • Visit my online store here
  • See the current Stampin’ Up! clearance rack specials here
  • Earn FREE Stampin’ Up! products through my Wildflower Frequent Shopper Program – my way of saying thank you to my online frequent shopper customers.
  • Sign up for my weekly newsletter here
  • Have any questions? I’d be happy to help, click here to contact me.

Cardstock Cuts for this project:

  • Soft Sea Foam – 4-1/4″ x 11″ card base scored at 5-1/2″, 4″ x 5-1/4″ (embossed background)
  • Basic White – 4″ x 5-1/4″ (inside panel)
  • Watercolor paper – 3-1/2″ x 3-1/2″ (stamped panel)
  • Basic Black – 1″ x 3-1/2″(label)
  • In Good Taste DSP – 2″ x 4″ (front accent), 1/2″ x 4″ (inside trim)

Stampin’ Up! products used in this project:


Stampin’ Up! In Bloom Pocket Friendship Note Card

Good morning! Today I have a quick fun card made with the Stampin’ Up! In Bloom photopolymer stamp set and the Paper Blooms Sale A Bration designer series paper. It’s a pocket card! So it has a panel that is pulled out to write your sentiment. And it all fits in a regular A2 sized envelope. You can find the supplies used to create this card at the bottom of my post along with the sizes of cardstock used.

I adhered the short side of the Paper Blooms designer series paper down with Stampin’ Seal and adhered the two sides with Tear & Tape to create a pocket. This is a fun way to see both sides of the pretty designer series paper. Then I adhered the pocket to a Night of Navy card base with Stampin’ Seal.

I stamped the sentiment from the Stampin’ Up! In Bloom stamp set in Night of Navy ink on a Basic White panel and punched it out with the Label Me Fancy Punch. I punched a Rococo Rose panel with the Label Me Lovely Punch and adhered the label on top with dimensionals. I adhered it to the pocket flap with Stampin’ Seal and finished the pocket with a Night of Navy bow and rhinestone.

I stamped the little flower from the Stampin’ Up! In Bloom stamp set in Rococo Rose at the top and bottom of a Basic White panel. I stamped the flower centers in Night of Navy ink and adhered the panel to a Night of Navy mat. This leaves plenty of room to write a message and the card easily slides in and out of the pocket.

The Sale A Bration Paper Blooms designer series paper is FREE with a $50 order before shipping and handling and it goes beautifully with the Stampin’ Up! In Bloom bundle! Both sides of the paper are so pretty and this pocket card design is a great way to show them both off. Plus it’s easy to make and a fun and different project. Give it a try!


Join me for a Facebook Live at 1:00 PM ET Today

I’m planning to go live on my Facebook page at 1:00 ET this afternoon. Stop by my Facebook Page to see my card made with the Seaside View cling stamp set. Look forward to seeing you then!


Stampin’ Up! Sale A Bration is going on Now!

Sale A Bration is Stampin’ Up!’s biggest event of the year with three ways to earn FREE products – SHOP – HOST – JOIN!

SHOP

During Sale-A-Bration, for every $50 or $100 you spend, you can choose between two purchasing levels of free products! Depending on the amount you spend, you’ll be able to mix ‘n’ match the Sale-A-Bration items you earn and you can choose from stunning stamp sets and designer series papers. There are 8 free products available to pick from at the $50 level and 2 free products to pick from at the $100 level. Click on the Sale A Bration brochure to the right to see these products.

HOST

Stampin’ Up! is offering an exclusive host stamp set called Punch Party and you can get it for FREE with an order of $300 or greater placed during Sale-a-bration or by hosting a workshop with orders totaling $300 or greater during Sale-a-bration!  And this is on top of the normal Stampin’ Rewards you get when you host a workshop!

JOIN

There’s no better time to Join Stampin’ Up! than during Sale A Bration! And joining is easy! You purchase your Starter kit for $99 by choosing $125 in Stampin’ Up! products (and shipping is FREE). If you join during Sale A Bration, you get an additional five FREE full size packs of 6″ x 6″ Designer Series Paper from the upcoming 2021-2022 Annual Catalog with your Starter Kit (the current 6″ x 6″ designer series paper goes for $11.50 per pack!). 

See my Join My Team page for all the benefits starting with a minimum 20% discount!  Contact me if you have any questions.  Click here to purchase your Starter Kit.

Contact me if you need a copy of the new Jan-Jun Mini Catalog and Sale A Bration brochure, and I’ll be happy to send you one!


January Host Code: 4YZ2J366

February Host Code: JNWPB7A4

Use this host code when you order $50 or more and receive a free gift from me!  The gift is your choice of any item valued up to $10.00 in the 2020-21 Annual Catalog or the Jan-Jun 2021 Mini Catalog.

If your order is over $150, please do not use the host code since you’ll receive your own Host Dollars plus I’ll still send you the free gift!  This host code can be used by anyone, no commitment required.  Let me know if you have any questions.


If you need any stamping supplies, I’d be very happy to be your Demonstrator.  Just click on the Shop Now Button on the right side of the screen to go directly to my Online store or contact me if you have any questions.  Happy Stamping!

Thanks for stopping by and have a great day!

Akiko

  • Visit my Online store here
  • See the current Stampin’ Up! clearance rack specials here
  • Earn FREE Stampin’ Up! products through my Wildflower Frequent Shopper Program – my way of saying thank you to my frequent shopper online customers.
  • Sign up for my monthly newsletter here
  • Have any questions? I’d be happy to help, click here to contact me.

Cardstock Cuts for this project:

  • Night of Navy – 4-1/4″ x 5-1/2″ (card base), 3-1/4″ x 5″ (inside panel mat)
  • Basic White – 3″ x 4-3/4″ (inside panel), 1-1/2″ x 3″ (punched label)
  • Rococo Rose – 2-1/2″ x 2-1/2″ (label mat)
  • Paper Blooms DSP – 4″ x 10-1/2″ panel scored at 5-1/4″ (mountain) and 9-1/4″ (valley) (card base pocket)

Stampin’ Up! products used in this project: