Stampin’ Up! Forever Fern for the Happy Inkin’ Thursday Blog Hop

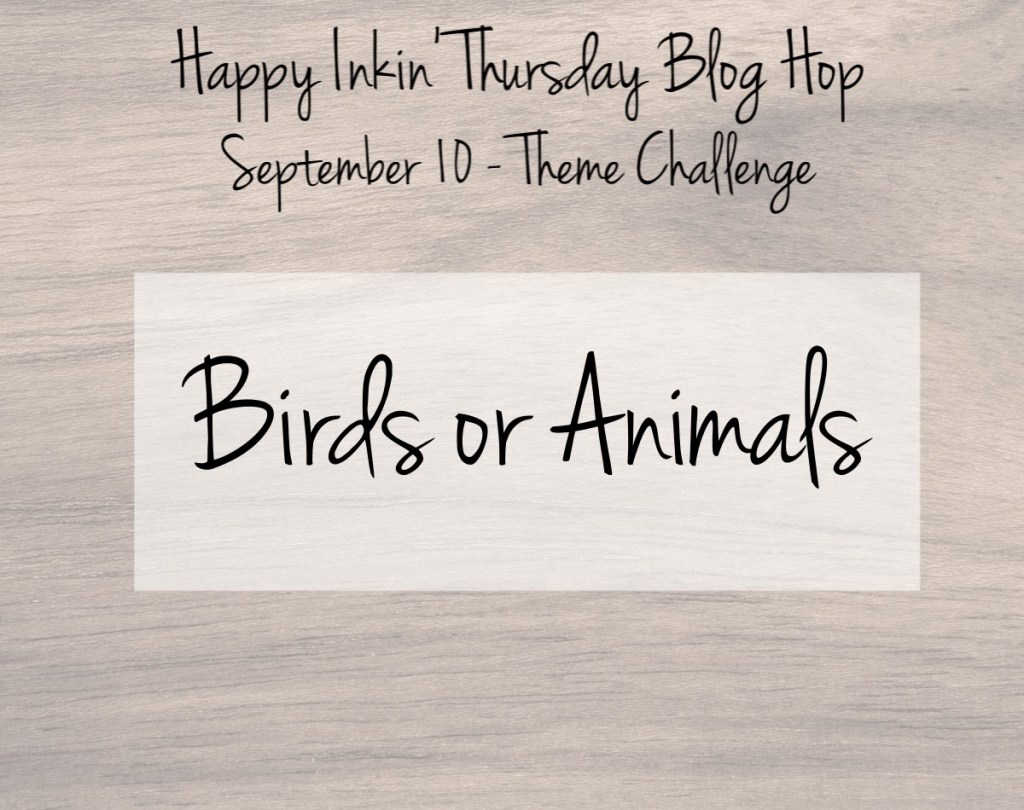
Good Morning! Welcome to another Happy Inkin’ Thursday Blog Hop! The beautiful leaf cluster stamps and dies in the Stampin’ Up! Forever Fern bundle are wonderful in all the different shades of green. But I have been impressed by the Fall take on these leaves and have wanted to use them in different colors. We have a color challenge in our Blog Hop today and its the perfect occasion to use these stamps in different colors. You can find the supplies used to create this card at the bottom of my post along with the sizes of cardstock used.

Like I said we have a color challenge this week, and here is the color palette we are using. Be sure to check out all the pretty projects in the Blog Hop!

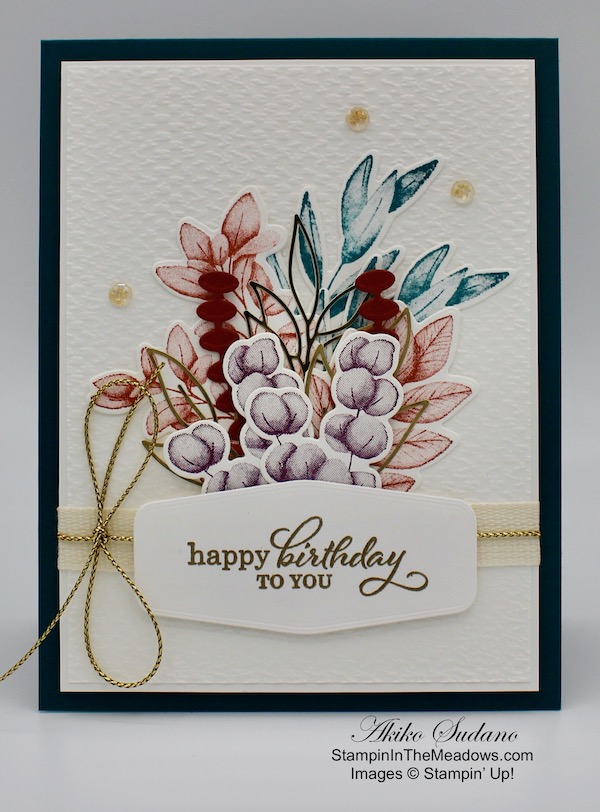
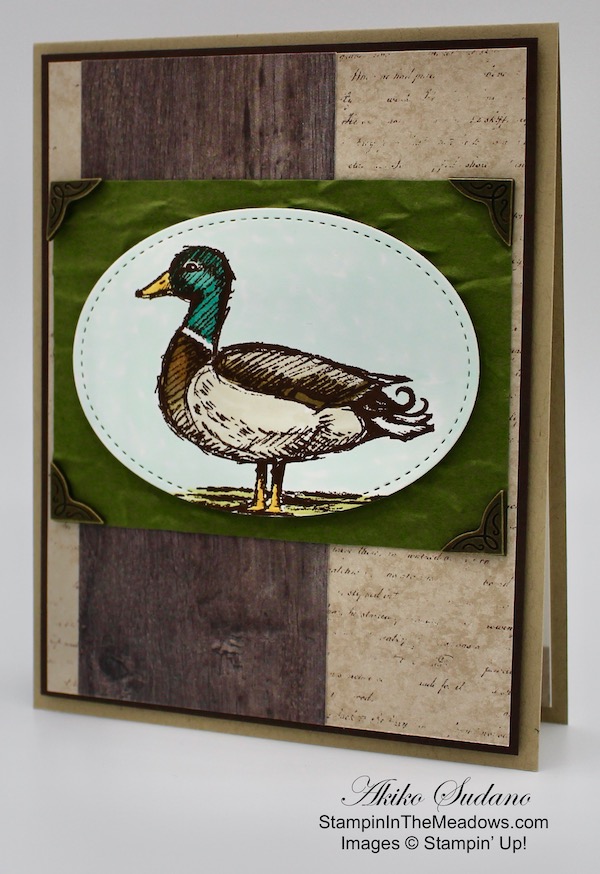
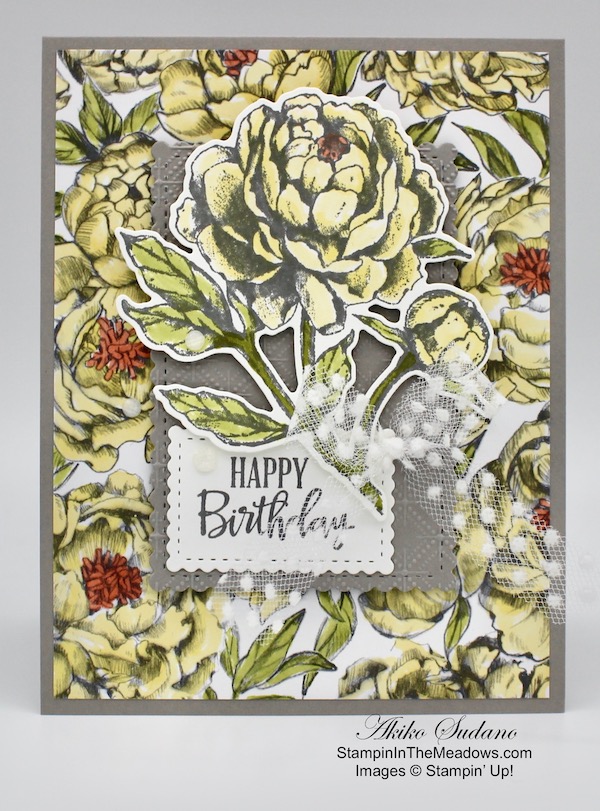
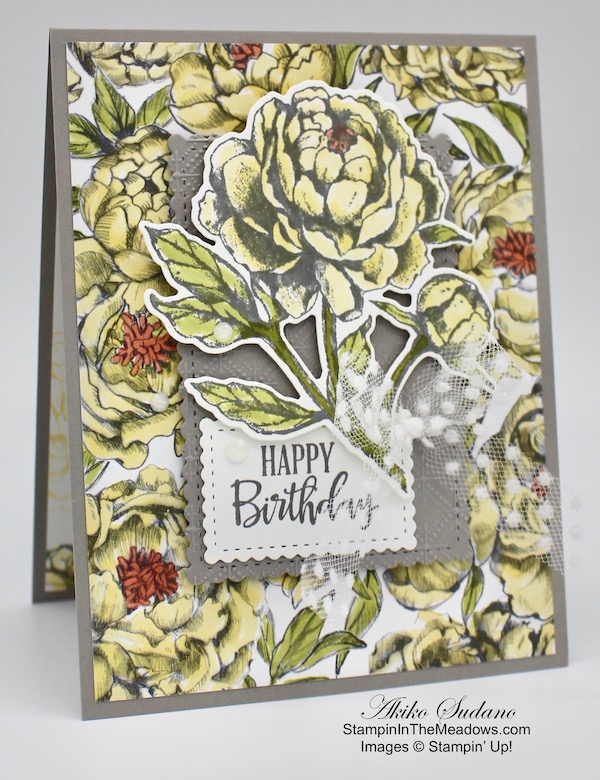
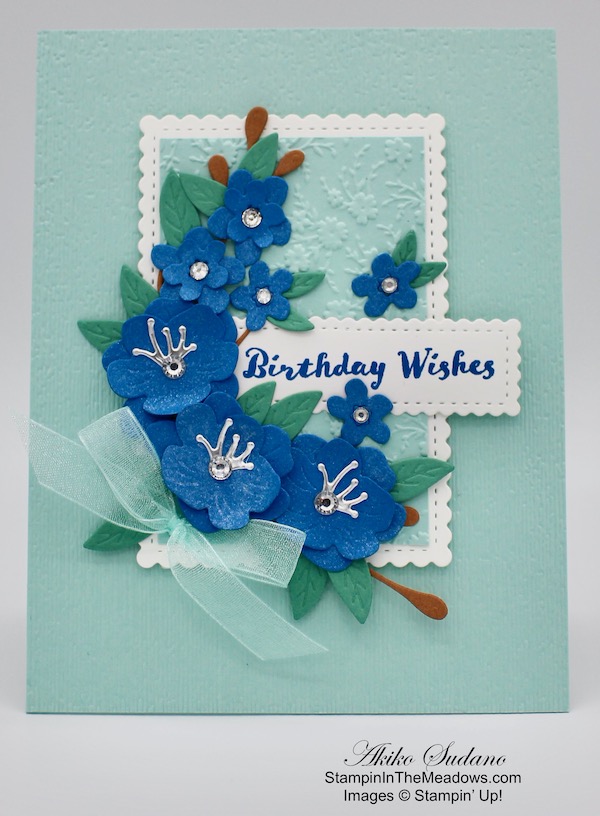
I started by stamping six leaves in the Stampin’ Up! Forever Fern cling stamp set in Pretty Peacock, Cajun Craze and Blackberry Bliss ink on Whisper White after stamping off once. I cut them out with the coordinating die. I embossed a Whisper White panel with the Tasteful Textile embossing folder and adhered it to a Whisper White mat.

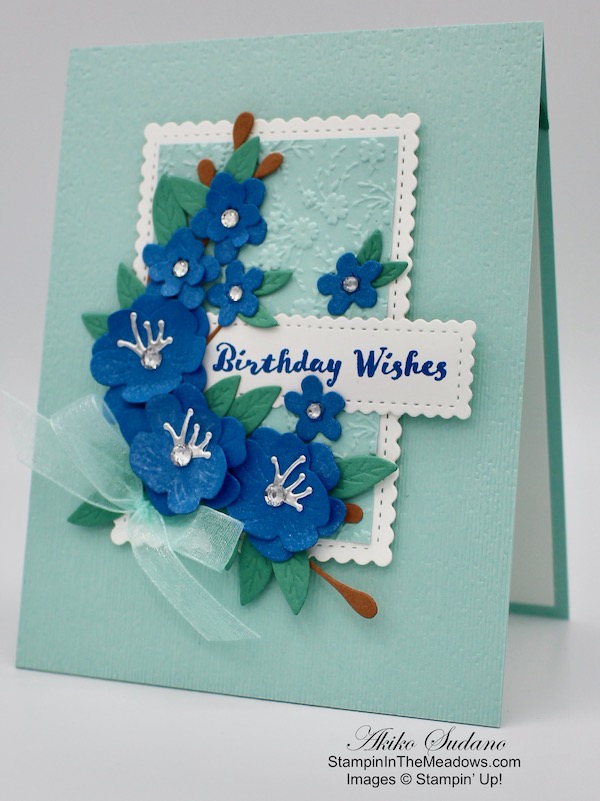
I punched three small leaf clusters from the Forever Gold Laser Cut specialty designer series paper and cut two Forever Flourishing dies from Cajun Craze card stock. I arranged them with the stamped and die cut leaves on the embossed panel. I adhered them with liquid glue and added a piece of dimensional behind the tops of the small Blackberry Bliss leaves in the front to add dimension. I wrapped a length of Vanilla ribbon around the bottom of the arrangement securing it in the back and tied a piece of gold cord around the ribbon making a bow on the side.

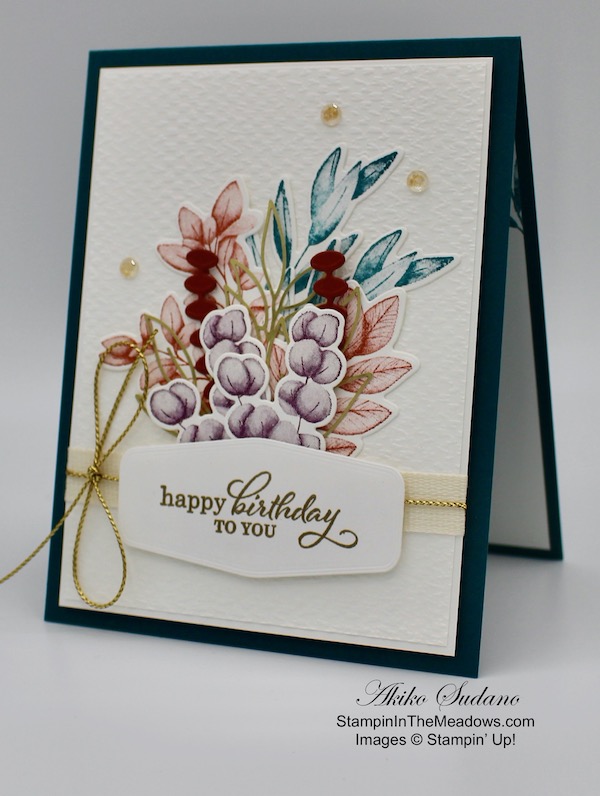
I stamped the birthday sentiment from the Best Year stamp set in Versamark Ink on a Whisper White panel and sprinkled it with gold embossing powder. I heat set the powder until it was shiny and cut it out with the Tasteful Labels die. I popped it on the panel with dimensionals and adhered the panel to the front of a Pretty Peacock card base with dimensionals. I finished the card front with three clear Wonderful Gems.

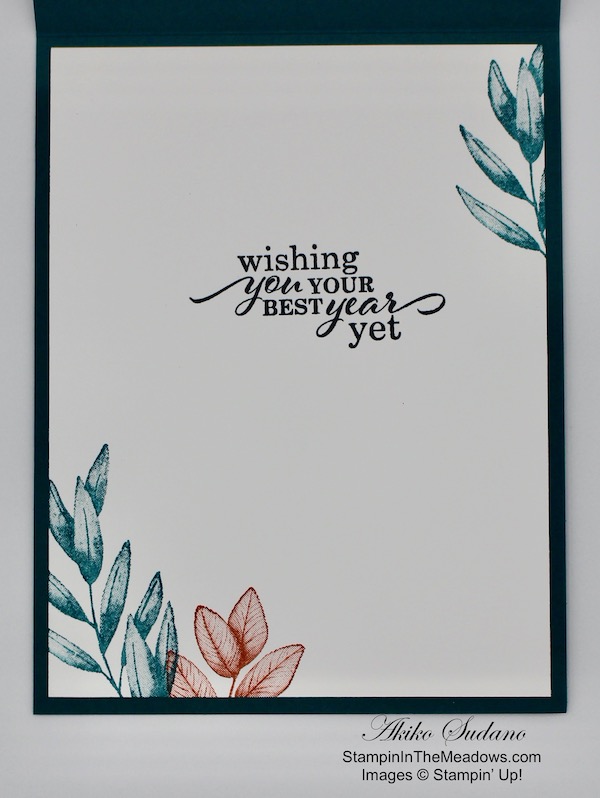
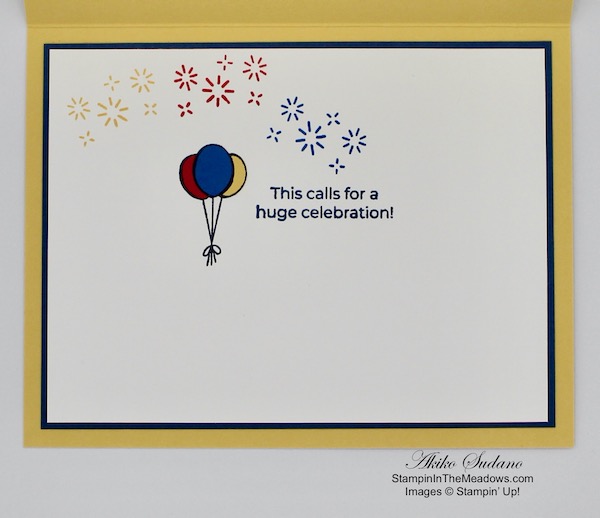
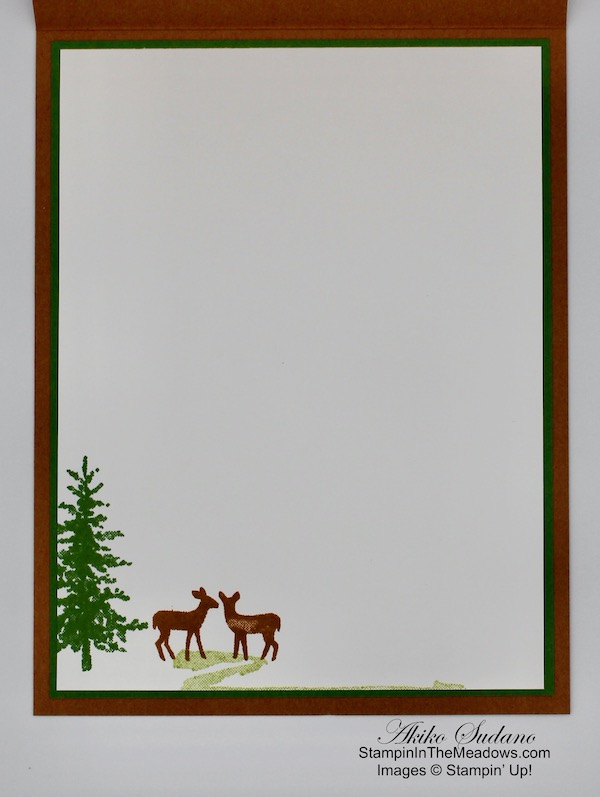
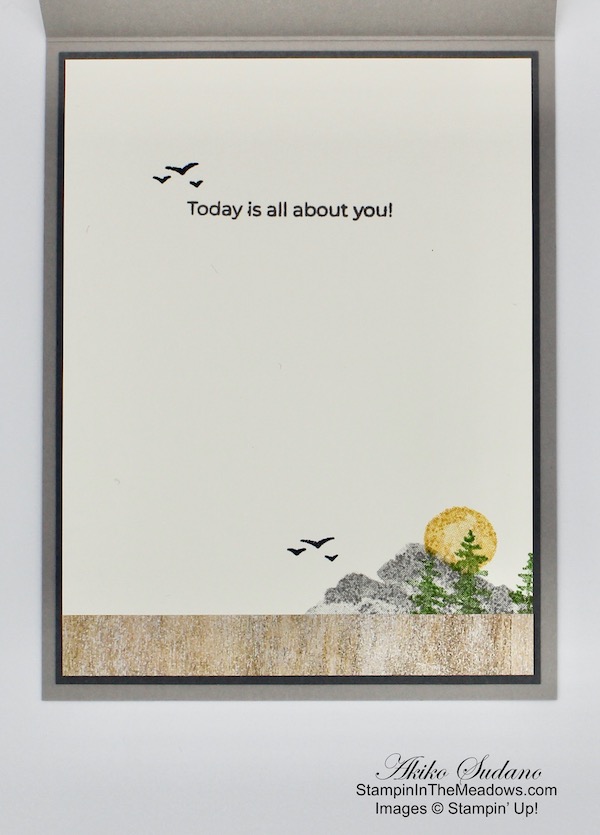
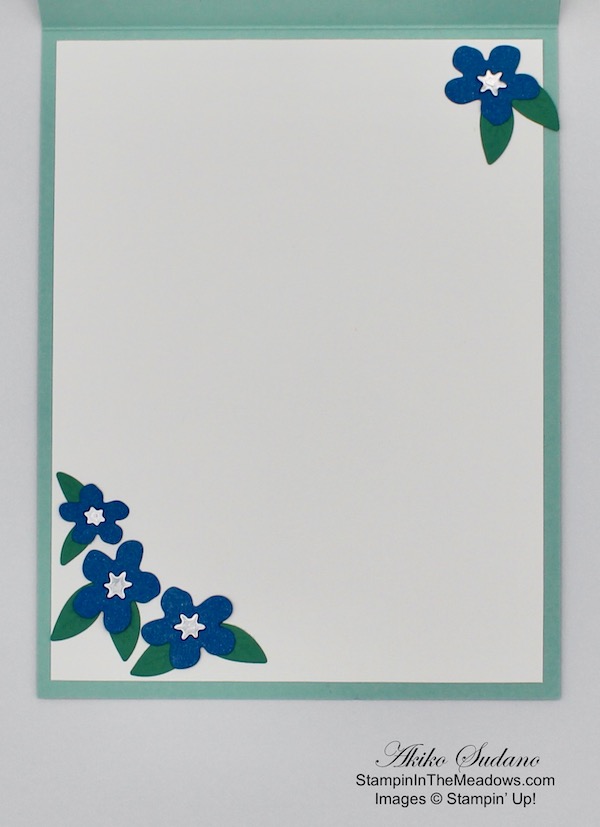
I stamped the sentiment from the Best Year stamp set in Memento Tuxedo Black ink on a Whisper White panel. I stamped some leaves in Pretty Peacock and Cajun Craze on the top and bottom of the panel and adhered the panel to the inside of the card.

So I got all five Challenge colors in the card along with some touches of gold. I’m really impressed that these leaves are also so beautiful in these colors!

On with the Hop! Click the Next button below to visit Karen Ksenzakovic’s blog.

And just in case you get lost along the way, here’s a list of the team members participating in the hop today:


September 16 – 30 Host Code: V9FPKC9R

Use this host code when you order $50 or more and receive a free gift from me!  The gift is your choice of any item valued up to $10.00 in the 2019-20 Annual Catalog or in the 2020 January-June Mini Catalog!  That includes some of the Host Exclusive stamp sets!

If your order is over $150, please do not use the host code since you’ll receive your own Host Dollars plus I’ll still send you the free gift!  This host code can be used by anyone, no commitment required.  Let me know if you have any questions.


If you need any stamping supplies, I’d be very happy to be your Demonstrator.  Just click on the Shop Now Button on the right side of the screen to go directly to my online store or contact me if you have any questions.  Happy Stamping!

Thanks for visiting!

Akiko

  • Visit my online store here
  • See the current Stampin’ Up! clearance rack specials here
  • Earn FREE Stampin’ Up! products through my Wildflower Frequent Shopper Program – my way of saying thank you to my frequent shopper online customers.
  • Sign up for my weekly newsletter here
  • Have any questions? I’d be happy to help, click here to contact me.

Cardstock Cuts for this project:

  • Pretty Peacock – 4-1/4″ x 11″ card base scored at 5-1/2″
  • Cajun Craze – 1″ x 4-1/2″ (leaf die cuts)
  • Whisper White – 5″ x 6″ (leaf die cuts), 3-3/4″ x 5″ (embossed front panel), 3-7/8″ x 5-1/8″ (front mat), 4″ x 5-1/4″ (inside panel), 2″ x 3-1/2″ (label)

Stampin’ Up! products used in this project:


Stampin’ Up! Last A Lifetime Best Wishes Card

Good Morning! Today I have a pretty card for a very special person made with the Stampin’ Up! Last A Lifetime cling stamp set, the Lasting Elegance Dies and the Magic In This Night designer series paper. The Magic In This Night paper is for Halloween, but it has some gorgeous floral images, so I thought I would pair it with the beautiful Stampin’ Up! Last a Lifetime stamp set for a Wedding or Birthday card for that Halloween lover celebrating in the fall. You can find the supplies used to create this card at the bottom of my post along with the sizes of cardstock used.

I adhered a panel of the Magic In This Night designer series paper to the front of a Basic Black card base. I cut a strip of Basic Black with the fancy border die from the Ornate Borders Dies and adhered it to the bottom of the black background paper from the Magic In This Night designer series paper. I cut the end with the Triple Banner punch and adhered it to the card front.

I cut a Cajun Craze panel with the large die from the Lasting Elegance Dies and adhered it to a Basic Black scalloped square from the Layering Squares Dies. I popped it on the card front with dimensionals.

I finished the card front with a black glitter ribbon bow and three iridescent pearls.

I stamped the sentiment from the Stampin’ Up! Last A Lifetime stamp set in Basic Black on a Whisper White panel. I stamped the flower in Cajun Craze after stamping off once. I trimmed the bottom of the panel with a strip of Magic In This Night designer series paper and adhered the panel to the inside of the card.

So this is a different card, and not for everyone, but there are so many Halloween lovers out there, that you must know someone who would love to receive a goth card for a special birthday or wedding.


Get & Go Starter Kit – Limited Time Joining Promotion

The Get & Go Starter Kit is a limited time promotion designed to give new Stampin’ Up! demonstrators additional products to help you get started right away. In addition to the already great valued Starter Kit, you will receive precut paper, stamps, and embellishments to use in your first event.

Full Details are on my Promotion Page, or you can contact me – I’d love to talk to you about joining my team!


The Stampin’ Cut & Emboss Machine is Here!

If you need a new die cutting machine, check out the new Stampin’ Cut & Emboss machine! This is a well built, smooth running machine and I used it on today’s project along with the wonderful Magnetic Cutting Plate! Details are on my Promotions page – and I’ve even posted the Stampin’ Up! Videos that show the some of the sandwiches.


September 16-30 Host Code: V9FPKC9R

Use this host code when you order $50 or more and receive a free gift from me!  The gift is your choice of any item valued up to $10.00 in the 2020-21 Annual Catalog or the Aug – Dec 2020 Mini Catalog. This includes some of the host exclusive sets!

If your order is over $150, please do not use the host code since you’ll receive your own Host Dollars plus I’ll still send you the free gift!  This host code can be used by anyone, no commitment required.  Let me know if you have any questions.


If you need any stamping supplies, I’d be very happy to be your Demonstrator.  Just click on the Shop Now Button on the right side of the screen to go directly to my Online store or contact me if you have any questions.  Happy Stamping!

Thanks for stopping by and have a great day!

Akiko

  • Visit my Online store here
  • See the current Stampin’ Up! clearance rack specials here
  • Earn FREE Stampin’ Up! products through my Wildflower Frequent Shopper Program – my way of saying thank you to my frequent shopper online customers.
  • Sign up for my monthly newsletter here
  • Have any questions? I’d be happy to help, click here to contact me.

Cardstock Cuts for this project:

  • Basic Black – 4-1/4″ x 11″ card base scored at 5-1/2″, 3″ x 3″ (scalloped square), 1/2″ x 4″ (die cut lace border)
  • Cajun Craze – 2-1/8″ x 2-1/8″ (floral die cut)
  • Whisper White – 3-7/8″ x 5-1/8″ (inside panel)
  • Magic In This Night DSP – 4″ x 5-1/4″ (front background), 1/2″ x 3-7/8″ (inside trim), 1-1/4″ x 4″ (front accent banner)

Stampin’ Up! products used in this project:


Stampin’ Up! Zoo Globe for the Happy Inkin’ Thursday Blog Hop

Good Morning! Welcome to another Happy Inkin’ Thursday Blog Hop! I made a fun birthday card with the cute Stampin’ Up! Zoo Globe photopolymer stamp set.

We have a theme challenge this week, and here is this week’s theme:

For today’s card, I did a lot of fussy cutting and some paper piecing. I stamped the Stampin’ Up! Zoo Globe animals and trees with Memento Tuxedo Black ink on colored card stock. I stamped the trees in on Just Jade card stock and fussy cut them out. I stamped the trees (trunk part) again on Early Espresso and fussy cut out the trunks and adhered them to the top of the Just Jade trees. I stamped the grass on Just Jade and fussy cut it out – I had to stamp several times across the panel and used my Basic Black Stampin’ Write marker to connect the sections of grass before fussy cutting. I embossed it with the Subtle 3D embossing folder to give it some texture.

I stamped the giraffe on Bumblebee card stock and fussy cut. I chose to color the spots with dark Cinnamon Cider Stampin’ Blend – I did not have the patience to fussy cut and paper piece each spot. I stamped and fussy cut the koala on Crumb Cake and adhered it to one of the trees. I stamped and fussy cut the elephant on Gray Granite card stock. I stamped and fussy cut the two birds on Poppy Parade and I stamped four sets of balloons – one on Whisper White, Poppy Parade, Pacific Point and So Saffron. I fussy cut the Whisper White balloon as one piece and cut the other colors individually and adhered them to the Whisper White balloon. I stamped the sentiment from the Stampin’ Up! Zoo Globe stamp set in Misty Moonlight ink on Whisper White and cut it out with the word bubble die from the Special Day Dies (yay for die cutting!). With all the parts cut out, I’m ready to start assembling!

I positioned the grass on a panel of Artistry Blooms designer series paper and marked where I would place the giraffe and elephant. I removed the grass and stamped the giraffe on the DSP and the balloons on the DSP by the elephant’s trunk. I then adhered the grass to the DSP. I adhered the giraffe and balloons on the stamped outlines. I adhered the elephant so it would look like it’s holding the balloons and the trees on the ends. I adhered the panel to a Misty Moonlight mat and wrapped it with linen thread and made a bow. I adhered the sentiment and adhered the birds. I popped the panel on the front of a So Saffron card base with dimensionals.

I stamped the balloons again in Memento Tuxedo Black in and paper pieced the balloons in the same card stock colors as the ones on the front. I stamped the sentiment from the Many Mates cling stamp set in Misty Moonlight ink next to the balloons and stamped the fireworks from the Pattern Play photopolymer stamp set in So Saffron, Poppy Parade and Pacific Point ink across the top. I adhered the Whisper White panel to a Misty Moonlight mat and then adhered it to the inside of the card.

The Stampin’ Up! Zoo Globe photopolymer stamp set has some really cute zoo animals and would make a great card for children of all age. It has several sweet sentiments and stamps for a snow globe and stand that coordinate with the Snow Globe Scene Dies to create a fun shaker card!

On with the Hop! Click the Next button below to visit Karen Ksenzakovic’s blog.

And just in case you get lost along the way, here’s a list of the team members participating in the hop today:


September 1-15 Host Code: 9UZFD3BH

Use this host code when you order $50 or more and receive a free gift from me!  The gift is your choice of any item valued up to $10.00 in the 2019-20 Annual Catalog or in the 2020 January-June Mini Catalog!  That includes some of the Host Exclusive stamp sets!

If your order is over $150, please do not use the host code since you’ll receive your own Host Dollars plus I’ll still send you the free gift!  This host code can be used by anyone, no commitment required.  Let me know if you have any questions.


If you need any stamping supplies, I’d be very happy to be your Demonstrator.  Just click on the Shop Now Button on the right side of the screen to go directly to my online store or contact me if you have any questions.  Happy Stamping!

Thanks for visiting!

Akiko

  • Visit my online store here
  • See the current Stampin’ Up! clearance rack specials here
  • Earn FREE Stampin’ Up! products through my Wildflower Frequent Shopper Program – my way of saying thank you to my frequent shopper online customers.
  • Sign up for my weekly newsletter here
  • Have any questions? I’d be happy to help, click here to contact me.

Cardstock Cuts for this project:

  • So Saffron – 5-1/2″ x 8-1/2″ card base scored at 4-1/4″, 3/4″ x 2″ (balloons)
  • Early Espresso – 1″ x 4-1/4″ (tree trunks)
  • Just Jade – 1-1/2″ x 5″ (trees), 1-1/4″ x 5″ (grass)
  • Poppy Parade – 3/4″ x 3″ (balloons and birds)
  • Crumb Cake – 1/2″ x 1″ (koala)
  • Bumblebee – 3/4″ x 2-1/4″ (giraffe)
  • Gray Granite – 1-1/2″ x 1-1/2″ (elephant)
  • Misty Moonlight – two 3-7/8″ x 5-1/8″ (mats)
  • Lovely Lipstick – 3-1/4″ x 4-1/2″ (flower panel mat)
  • Whisper White – 3-3/4″ x 5″ (inside panel), 3/4″ x 1″ (balloon), 1″ x 2-1/2″ (label)
  • Artistry Blooms DSP – 3-3/4″ x 5″ (front background)

Stampin’ Up! products used in this project:


Stampin’ Up! Field Journal Birthday Card

Good Morning! Today I have a simple masculine birthday card made with the Stampin’ Up! Field Journal Cling stamp set. You can find the supplies used to create this card at the bottom of my post along with the sizes of cardstock used.

I stamped the duck from the Stampin’ Up! Field Journal stamp set in Early Espresso ink on a Whisper White panel. I cut it out with the largest stitched oval from the Stitched Shapes Dies. I colored it with Bermuda Bay, Cinnamon Cider, Soft Suede, Crumb Cake and Mango Melody Stampin’ Blends. I colored the ground with Old Olive Stampin’ Blends and the background with Pool Party Stampin’ Blends.

I embossed a panel of Mossy Meadow card stock with the Old World Paper 3D embossing folder. I adhered an antique corner to each corner with a glue dot. I adhered a panel of World of Good specialty designer series paper to an Early Espresso mat. I adhered a strip of In Good Taste designer series paper on top.

I adhered the embossed Mossy Meadow panel on the layered DSP panel and popped the art panel on top with dimensionals. I popped the panel on the front of a Crumb Cake card base.

I stamped the Happy Birthday sentiment from the Pallet Thoughts cling stamp set in Early Espresso ink on a Whisper White panel. I stamped the plant from the Stampin’ Up! Field Journal stamp set in Crumb Cake ink after stamping off twice. I trimmed the bottom with a strip of World of Good DSP to the bottom and adhered it to the inside of the card.

The Stampin’ Up! Field Journal stamp set is like a walk in the woods. The pretty line drawn images are great for coloring and would make a great card for any nature lover.


Double Wildflower Points Extended to August 17!!

To celebrate the new catalog, I announced Double Wildflower Points. But since I couldn’t blog for days, I decided to extend this for another week! My Wildflower Points program is my way of saying thank you to my frequent shoppers.  For every $50 you order from my online store, you earn 1 point, and when you earn 8 points, I owe you a FREE $40 order of your choice!  With Double Wildflower Points, you get 2 points for each $50 order, 4 points for each $100 order, and so on, reaching the goal of 8 points faster!  Yay!!  For complete details on the program, see my Customer Rewards page.  Let me know if you have any questions!


August 1 – 15 Host Code: B76NYDVU

Use this host code when you order $50 or more and receive a free gift from me!  The gift is your choice of any item valued up to $10.00 in the 2020-21 Annual Catalog or the Aug – Dec 2020 Mini Catalog. This includes some of the host exclusive sets!

If your order is over $150, please do not use the host code since you’ll receive your own Host Dollars plus I’ll still send you the free gift!  This host code can be used by anyone, no commitment required.  Let me know if you have any questions.


If you need any stamping supplies, I’d be very happy to be your Demonstrator.  Just click on the Shop Now Button on the right side of the screen to go directly to my Online store or contact me if you have any questions.  Happy Stamping!

Thanks for stopping by and have a great day!

Akiko

  • Visit my Online store here
  • See the current Stampin’ Up! clearance rack specials here
  • Earn FREE Stampin’ Up! products through my Wildflower Frequent Shopper Program – my way of saying thank you to my frequent shopper online customers.
  • Sign up for my monthly newsletter here
  • Have any questions? I’d be happy to help, click here to contact me.

Cardstock Cuts for this project:

  • Crumb Cake – 4-1/4″ x 11″ card base scored at 5-1/2″
  • Early Espresso – 4″ x 5-1/4″ (front mat)
  • Mossy Meadow – 2-3/4″ x 3-3/4″ (embossed panel)
  • Whisper White – 4″ x 5-1/4″ (inside panel), 2-3/4″ x 3-3/4″ (art panel)
  • World of Good DSP – 3-7/8″ x 5-1/8″ (front background), 1/2″ x 4″ (inside trim)
  • In Good Taste DSP 2″ x 5-1/8″ (front wood grained strip)

Stampin’ Up! products used in this project:


Stampin’ Up! Snow Front Birthday Card Video Tutorial

Good Morning! Today I’m sharing a Masculine Birthday Card made with the Stampin’ Up! Snow Front photopolymer stamp set that I made during my Facebook Live video tutorial yesterday afternoon. Nature cards are always good themes for masculine birthdays and the Stampin’ Up! Snow Front stamp set is one that helps you create beautiful natural landscapes that look like watercolor paintings. You can find the supplies used to create this card at the bottom of my post along with the sizes of cardstock used.

Here is the Facebook Live video showing how I made the card:

I also posted the video to my YouTube Channel and you can view it here if you prefer.

I started by stamping the mountains from the Stampin’ Up! Snow Front stamp set in Gray Granite ink twice along the middle of a Whisper White panel. I stamped the large pine tree in Garden Green ink, the deer in Cinnamon Cider ink and the lake in Balmy Blue ink. I used the swirl stamp to stamp some Pear Pizzazz ink on the ground after stamping off.

I lightly sponged the sky above the mountains in Balmy Blue ink with my sponge dauber and lightly sponged some Pear Pizzazz ink on the ground and mountains. I adhered the stamped panel to a Garden Green mat with Stampin’ Seal. I wrapped Linen Thread around the layered panel and tied a knot and popped it on the front of a Cinnamon Cider card base.

I stamped the Happy Birthday sentiment from the Pallet Thoughts cling stamp set in Cinnamon Cider ink on a small Garden Green panel and cut it out with the banner die from the Tasteful Labels Dies. I added a small silver metallic pearl and adhered it to the card with dimensionals.

I stamped the tree, deer and ground in the corner of a Whisper White panel using the same colors as the card front. I adhered the panel to a Garden Green mat and then to the inside of the card.

The Stampin’ Up! Snow Front stamp set has lots of elements to create beautiful watercolor – like landscapes just by stamping and it’s easy and fun. You can use it with other stamp sets such as the similar Waterfront and My Meadow stamp sets. I kept this card simple and used the entire card front for my stamped image so it has a lot of white space, but you can also stamp a smaller image and layer it with embossed card stock or natural texture designer series paper. It’s very versatile and the results are amazing!


It’s time to start redeeming those Bonus Days Coupon Codes!

  • Redemption Deadline:  August 31 2020, by 11:50 PM (MT)
  • There is no limit to the number of coupon codes participants can use on an order during redemption.
  • Bonus Days coupon codes may be redeemed for any product (excluding Starter Kits and Paper Pumpkin monthly subscriptions).
    • New prepaid Paper Pumpkin codes may be discounted using Bonus Days coupon codes.
  • Bonus Days coupon codes will reduce the amount of an order.
    • Note that rewards and gifts are based on the final value of your order after your coupon codes have been applied. 
  • Bonus Days coupon codes may be redeemed one time only.

Today is the last day to sign up for the August Paper Pumpkin Kit!

Celebrate and appreciate the everyday heroes in your life with the August Paper Pumpkin Kit. The cards included in this kit are specifically designed for celebrating life’s champions! The kit includes Distinktive stamps, which are photo-realistic stamps that create an impressive detailed image with a single stamp. While the elements of the August kit can be used to show appreciation for anyone, the card designs also have a masculine feel – perfect for the men in your life!

Here are the Details:

  • Kit contains enough supplies to create nine cards and coordinating envelopes.
  • Card size: 4-1/4” x 5-1/2”
  • Envelope size: 4-1/2” x 5-3/4”
  • The kit’s stamp set includes Distinktive stamps

Coordinating Colors: Bumblebee, gold, Mint Macaron, Pacific Point, Soft Suede, white

Watch this video to catch a glimpse of the World’s Greatest by Paper Pumpkin:

If you’re interested in subscribing to Paper Pumpkin, you can either sign up for a subscription where you are billed monthly for your kit or you can purchase a prepaid subscription in my online store. To see more information and to sign up for the monthly subscription click here. To see the options for prepaid subscriptions in my online store, click here.


August 1 – 15 Host Code: B76NYDVU

Use this host code when you order $50 or more and receive a free gift from me!  The free gift is your choice of any item valued up to $10.00 in the 2019 – 2020 Annual Catalog or in the August – December 2020 Mini Catalog!  That includes some of the Host Exclusive stamp sets!

If your order is over $150, please do not use the host code since you’ll receive your own Host Dollars plus I’ll still send you the free gift!  This host code can be used by anyone, no club or commitment required.  Let me know if you have any questions.


If you need any stamping supplies, I’d be very happy to be your Demonstrator.  Just click on the Shop Now button on the right side of the screen to go directly to my online store or contact me if you have any questions.  Happy Stamping!

Thanks for stopping by and have a great week!

Akiko

  • Visit my online store here
  • See the current Stampin’ Up! clearance rack specials here
  • Earn FREE Stampin’ Up! products through my Wildflower Frequent Shopper Program – my way of saying thank you to my online frequent shopper customers.
  • Sign up for my weekly newsletter here
  • Have any questions? I’d be happy to help, click here to contact me.

Cardstock Cuts for this project:

  • Cinnamon Cider – 4-1/4″ x 11″ card base scored at 5-1/2″
  • Garden Green – (2) 4″ x 5-1/4″ panels (front and inside mats), 1″ x 3″ (label)
  • Whisper White – (2) 3-7/8″” x 5-1/8″ panels (stamped front and inside)

Stampin’ Up! products used in this project:


Stampin’ Up! Prized Peony Birthday Card

Good Morning! Today I want to share a birthday card made with the beautiful Stampin’ Up! Prized Peony bundle and the Peony Garden designer series paper. You can find the supplies used to create this card at the bottom of my post along with the sizes of cardstock used.

I colored a panel of the Peony Garden designer series paper with my Stampin’ Blends to create a background of yellow peonies. I colored the flowers with So Saffron and the leaves with Old Olive. I added touches of Light Calypso Coral to the centers. I colored a strip of the same paper to trim the bottom of the inside panel. I adhered the DSP panel to the front of a Gray Granite card base with Stampin’ Seal.

I cut a panel of Gray Granite card stock with a Stitched So Sweetly scalloped rectangle die and embossed it with the Dainty Diamonds 3D embossing folder. I stamped the Happy Birthday sentiment from the Peaceful Moments cling stamp set in Basic Gray ink on a small panel of Whisper White. I cut it out with a smaller scalloped rectangle die using the two step method so that it is shorter and I adhered it to the embossed panel with multipurpose liquid glue. I popped the layered embossed panel onto the front of the card with dimensionals.

I stamped the large peony flower from the Stampin’ Up! Prized Peony stamp set in Basic Gray ink on a Whisper White panel. I colored the flower with So Saffron, Old Olive and Calypso Coral Stampin’ Blends and cut it out with the coordinating die from the Peony Dies. I brushed some clear Wink of Stella on the flowers to add some glitter and popped it on the card front with dimensionals. I added a Whisper White Polka Dot Tulle Ribbon bow and some Elegant Faceted Gems to finish off the card front.

I stamped three of the medium peonies from the Stampin’ Up! Prized Peony stamp set in So Saffron ink on a Whisper White panel. I stamped the sentiment from the Peaceful Moments stamp set in Basic Gray ink and trimmed the bottom with the colored strip of Peony Garden DSP. I adhered the panel to the inside of the card with Stampin’ Seal.

Coloring DSP with Stampin’ Blends gives a whole new look to the paper and gives you an opportunity to bring in a totally different color palette. Plus it’s relaxing fun – Why not give it a try?


Stampin’ In The Meadows August-December 2020 Mini Catalog Product Shares – Sunday is the Last Day to Order!

The Stampin’ In The Meadows product shares for the new Mini Catalog are still available, but they’re filling up fast and the ordering deadline is on Sunday!! If you would like samples of all the new products from the new August-December 2020 Mini Catalog, check it out. I am offering 6×6 samples of all the new designer series papers for $25 + $7 Priority Shipping and samples of all the new embellishments for $26 + $7 Priority Shipping. And if you want both, you can get an I WANT IT ALL share for $51 + $7 Priority Shipping.

Visit my New Catalog Product Shares Page to get the full details of what is included. Fill out the order form or drop me an email if you have questions. Ordering deadline is August 2. Please note that I can only ship to addresses in the US.


Stampin Up! Bonus Days are back!

We’re in the final days to to earn Bonus Days coupon codes! We’ll be able to start redeeming the coupon codes on Tuesday, August 4! If you need a refresher on this promotion, here’s how it works: For every $50 (before shipping and tax) you spend between today and August 3, you earn a $5 USD Bonus Days coupon code that can be redeemed between August 4 and August 31. There’s no limit on how many coupon codes you can earn or redeem, but they must be redeemed by August 31. For full details, see my Promotions Page.


July 16 – 31 Host Code: FD627X9W

August 1 – 15 Host Code: B76NYDVU

Use this host code when you order $50 or more and receive a free gift from me!  The gift is your choice of any item valued up to $10.00 in the 2020-21 Annual Catalog!

If your order is over $150, please do not use the host code since you’ll receive your own Host Dollars plus I’ll still send you the free gift!  This host code can be used by anyone, no commitment required.  Let me know if you have any questions.


If you need any stamping supplies, I’d be very happy to be your Demonstrator.  Just click on the Shop Now Button on the right side of the screen to go directly to my Online store or contact me if you have any questions.  Happy Stamping!

Thanks for stopping by and have a great day!

Akiko

  • Visit my Online store here
  • See the current Stampin’ Up! clearance rack specials here
  • Earn FREE Stampin’ Up! products through my Wildflower Frequent Shopper Program – my way of saying thank you to my frequent shopper online customers.
  • Sign up for my monthly newsletter here
  • Have any questions? I’d be happy to help, click here to contact me.

Cardstock Cuts for this project:

  • Gray Granite – 4-1/4″ x 11″ card base scored at 5-1/2″, 2-3/4″ x 4″ (embossed die cut panel)
  • Whisper White – 4″ x 5-1/4″ (inside panel), 1-3/4″ x 2-1/2″ (label), 3-3/4″ x 4-3/4″ (die cut flower)
  • Peony Garden DSP – 4″ x 5-1/4″ (front background), 1/2″ x 4″ (inside trim)

Stampin’ Up! products used in this project:


Stampin’ Up! Waterfront and Rooted in Nature Birthday Card

Good Morning! I do not have a sneak peek this morning, it is an oldies but goodies kind of day. I made a nature themed masculine birthday card with the Stampin’ Up! Waterfront and Stampin’ Up! Rooted in Nature stamp sets. You can find the supplies used to create this card at the bottom of my post along with the sizes of cardstock used.

I started by stamping the mountains from the Stampin’ Up! Waterfront stamp set in Basic Gray ink across a panel of light wood grained In Good Taste designer series paper. I masked part of the mountain and stamped the sun in Daffodil Delight ink. I removed the mask and stamped the trees in Garden Green ink and some grass using the double stroke stamp in Pear Pizzazz ink. I finished off the mountain scene by stamping the birds from the Mountain Air stamp set in Memento Tuxedo Black ink.

I stamped the tree from the Stampin’ Up! Rooted in Nature stamp set using my stamparatus. I inked up the trunk using Soft Suede ink and stamped. Then, I inked the leaves using Garden Green ink and stamped again. The stamparatus gives me the precision of stamping in the same place with different ink colors. Then I cut the tree out with the coordinating die from the Nature’s Roots Dies.

I stamped the Happy Birthday sentiment from the Itty Bitty Birthdays cling stamp set in Basic Gray ink on the right side of a Very Vanilla strip. I adhered it to a Basic Gray mat and then adhered it to the stamped DSP panel with Stampin’ Seal. I adhered the stamped layered In Good Taste DSP panel to a Basic Gray mat and then popped it on the front of a Gray Granite card base with dimensionals. I adhered the die cut tree to the card front with dimensionals.

I stamped the mountains, sun and tree on the bottom corner of a Very Vanilla panel using the same colors as the card front, except that I stamped each off first so it would be lighter. I stamped the sentiment from the Many Mates stamp set in Basic Gray ink in the top portion of the panel and added more birds next to it. I adhered a strip of the light wood grain DSP to the bottom of the panel and then adhered it to a Basic Gray mat. I adhered it to the inside of the card with Stampin’ Seal.

I was pleased that the image stamped so well on the light wood grain DSP! And it was nice to use some old favorite stamp sets again – especially with some new DSP! I bet there are other oldies but goodies, even retired ones, that would go great with the In Good Taste designer series paper!


Stampin’ In The Meadows August-December 2020 Mini Catalog Product Shares

I am pleased to announce that the Stampin’ In The Meadows product shares for the new Mini Catalog is open for orders! If you would like samples of all the new products from the new August-December 2020 Mini Catalog, check it out. I am offering 6×6 samples of all the new designer series papers for $25 + $7 Priority Shipping and samples of all the new embellishments for $26 + $7 Priority Shipping. And if you want both, you can get an I WANT IT ALL share for $51 + $7 Priority Shipping.

Visit my New Catalog Product Shares Page to get the full details of what is included. Fill out the order form or drop me an email if you have questions. Please note that I can only ship to addresses in the US.


Stampin Up! Bonus Days are back!

Good news – Bonus Days are back! That means it’s time to start earning coupon codes to redeem in August! If you need a refresher on this promotion, here’s how it works: For every $50 (before shipping and tax) you spend between today and August 3, you earn a $5 USD Bonus Days coupon code that can be redeemed between August 4 and August 31. There’s no limit on how many coupon codes you can earn or redeem, but they must be redeemed by August 31. For full details, see my Promotions Page.


July 16 – 31 Host Code: FD627X9W

Use this host code when you order $50 or more and receive a free gift from me!  The gift is your choice of any item valued up to $10.00 in the 2020-21 Annual Catalog!

If your order is over $150, please do not use the host code since you’ll receive your own Host Dollars plus I’ll still send you the free gift!  This host code can be used by anyone, no commitment required.  Let me know if you have any questions.


If you need any stamping supplies, I’d be very happy to be your Demonstrator.  Just click on the Shop Now Button on the right side of the screen to go directly to my Online store or contact me if you have any questions.  Happy Stamping!

Thanks for stopping by and have a great day!

Akiko

  • Visit my Online store here
  • See the current Stampin’ Up! clearance rack specials here
  • Earn FREE Stampin’ Up! products through my Wildflower Frequent Shopper Program – my way of saying thank you to my frequent shopper online customers.
  • Sign up for my monthly newsletter here
  • Have any questions? I’d be happy to help, click here to contact me.

Cardstock Cuts for this project:

  • Gray Granite – 4-1/4″ x 11″ card base scored at 5-1/2″
  • Basic Gray – (2) 4″ x 5-1/4″ panels (front mat and inside mat), 7/8″ x 3-7/8″ (label mat)
  • Very Vanilla – 3-7/8″ x 5-1/8″ (inside panel), 2-1/4″ x 3-1/4″ (die cut tree), 3/4″ x 3-7/8″ (label)
  • In Good Taste DSP – 3-7/8″ x 5-1/8″ (stamped front panel), 1/2″ x 3-7/8″ (inside trim)

Stampin’ Up! products used in this project:


Stampin’ Up! Cherry Blossoms for the Happy Inkin’ Thursday Blog Hop

Good Morning! Welcome to another Happy Inkin’ Thursday Blog Hop! I used the Stampin’ Up! Cherry Blossoms Dies and the Itty Bitty Birthdays cling stamp set to make a floral birthday card full of sparkle!

We have a color challenge this week, and here is the color palette we are using:

I chose Silver Foil as the fourth color and decided to make the centers of my flowers shiny with silver foil and Rhinestones – more sparkle! I had decided that I wanted to make Pacific Point flowers with Just Jade leaves, and I was struggling with which stamps to use when I saw a card on page 69 of the new 2020-2021 Annual Catalog that used the Stampin’ Up! Cherry Blossoms Dies with the In Color Memories and More Cards and Envelopes. I decided that I had to reproduce it with our challenge palette!

I embossed a panel of Pool Party card stock with the Subtle 3D embossing folder and adhered it to the front of a Pool Party card base. I embossed a smaller panel of Pool Party with the Ornate Floral 3D embossing folder and adhered it to a die cut scalloped Whisper White panel, cut out with the Stitched So Sweetly Dies. I adhered the panel to the card front with dimensionals. I used the Stampin’ Up! Cherry Blossoms Dies to cut out the flowers, leaves and branch. Using Pacific Point card stock, I cut out 3 extra large flowers, 3 large flowers, 3 sets of medium and 3 sets of small flowers. I added a couple drops of White Shimmer Paint to my Stampin’ Spritzer with some water and sprayed the flowers to give them some shimmer – more sparkle! I cut 5 sets of each size of leaves from Just Jade card stock and the branch from Cinnamon Cider. Finally I cut the flower centers from Silver Foil.

I stamped the sentiment from the Itty Bitty Birthdays stamp set in Pacific Point ink on a strip of Whisper White and cut it out with the smallest scalloped rectangle die from the Stitched So Sweetly Dies using the two step method. I adhered the branch and label to the small panel with multipurpose liquid glue. I also curled some of the flower petals with my bone folder and doubled them up. I added the Silver Foil flower centers to the larger flowers and added Rhinestones to all. I adhered them to the panel with mini glue dots, tucking the leaves underneath. I finished off the card front with a Pool Party bow made with the new Shimmer ribbon!

I saved a couple of flowers and leaves for a Whisper White panel on the inside of the card, adding silver foil centers to the flowers.

I love the layered flowers created by the Stampin’ Up! Cherry Blossoms dies – they are so dimensionals and make very special birthday cards!

On with the Hop! Click the Next button below to visit Karen Ksenzakovic’s blog.

And just in case you get lost along the way, here’s a list of the team members participating in the hop today:


July 16 – 31 Host Code: FD627X9W

Use this host code when you order $50 or more and receive a free gift from me!  The gift is your choice of any item valued up to $10.00 in the 2019-20 Annual Catalog or in the 2020 January-June Mini Catalog!  That includes some of the Host Exclusive stamp sets!

If your order is over $150, please do not use the host code since you’ll receive your own Host Dollars plus I’ll still send you the free gift!  This host code can be used by anyone, no commitment required.  Let me know if you have any questions.


If you need any stamping supplies, I’d be very happy to be your Demonstrator.  Just click on the Shop Now Button on the right side of the screen to go directly to my online store or contact me if you have any questions.  Happy Stamping!

Thanks for visiting!

Akiko

  • Visit my online store here
  • See the current Stampin’ Up! clearance rack specials here
  • Earn FREE Stampin’ Up! products through my Wildflower Frequent Shopper Program – my way of saying thank you to my frequent shopper online customers.
  • Sign up for my weekly newsletter here
  • Have any questions? I’d be happy to help, click here to contact me.

Cardstock Cuts for this project:

  • Pool Party – 4-1/4″ x 11″ card base scored at 5-1/2″, 4-1/4″ x 5-1/2″ (Subtle embossed background), 2-1/8″ x 3-1/4″ (floral embossed panel)
  • Pacific Point – 4-1/4″ x 5-1/2″ (die cut flowers)
  • Just Jade – 2-1/2″ x 4 (die cut leaves)
  • Cinnamon Cider – 2 1/2″ x 5″ (branch die cut)
  • Whisper White – 4″ x 5-1/4″ (inside panel), 2-3/8″ x 3-1/2″ (scalloped panel), 1″ x 3-1/4″ (label)
  • Silver Foil – 1″ x 2″ (flower centers)

Stampin’ Up! products used in this project:


Stampin’ Up! Blossoms in Bloom Birthday Card for the Happy Inkin’ Thursday Blog Hop

Good Morning! Welcome to another Happy Inkin’ Thursday Blog Hop! I used the beautiful Stampin’ Up! Blossoms in Bloom photopolymer stamp set to make a birthday card to share today.

We have a sketch challenge this week, and here is the sketch we are using:

I embossed a Highland Heather card stock panel with the Ornate Floral embossing folder and adhered it to a Whisper White mat with Stampin’ Seal. I adhered the layered panel to the front of a Highland Heather card base with dimensionals.

I stamped large floral stamp from the Stampin’ Up! Blossoms in Bloom stamp using Highland Heather ink on a Whisper White panel. I stamped the dotted flower centers with Daffodil Delight ink and a few leaves in Garden Green ink. I added a couple of drops of Frost White Shimmer Paint to a Stampin’ Spritzer and added water. I shook it up and sprayed the stamped image and let it dry a bit. After it dried, I slid it in between a folded sheet of printer paper and carefully pressed it with a dry iron and then laid it under a pile of books for a couple of hours. This was to flatten the image – I’m not sure if there’s a better way to do this, but it worked ok for me. The Frost White Shimmer Paint spray gave the image a really nice shimmer that I wish you could see better. I used the third largest die from the Stitched Rectangles dies to cut the image out, and adhered it to a Garden Green mat.

I adhered the layered art piece to the card front with dimensionals. I stamped the Happy Birthday sentiment from the Stampin’ Up! Blossoms in Bloom stamp set in Highland Heather ink on a strip of Whisper White. I adhered it to a Garden Green mat and then to the card front. I finished off the card with three frosted Elegant Faceted Gems and a bow made with the gorgeous new Snowflake Splendor 1/4″ Ribbon (available August 4).

For the inside of the card, I stamped the large floral image from the Stamen’ Up! Blossoms in Bloom stamp set in Highland Heather ink (after stamping off) in the corner of a Whisper White panel. I stamped the centers in Daffodil Delight after stamping off and the leaves in Garden Green after stamping off twice. I embossed a strip of Highland Heather using the Ornate Floral embossing folder and adhered it to the bottom with Stampin’ Seal, and adhered the panel to a Garden Green mat. I adhered it to the inside of the card.

The shimmery floral image with the gems and ribbon make a nice contrast with the matte look of the embossed background and really makes the card special!

On with the Hop! Click the Next button below to visit Karen Ksenzakovic’s blog.

And just in case you get lost along the way, here’s a list of the team members participating in the hop today:


July 1-15 Host Code: DVHGBQ7V

Use this host code when you order $50 or more and receive a free gift from me!  The gift is your choice of any item valued up to $10.00 in the 2019-20 Annual Catalog or in the 2020 January-June Mini Catalog!  That includes some of the Host Exclusive stamp sets!

If your order is over $150, please do not use the host code since you’ll receive your own Host Dollars plus I’ll still send you the free gift!  This host code can be used by anyone, no commitment required.  Let me know if you have any questions.


If you need any stamping supplies, I’d be very happy to be your Demonstrator.  Just click on the Shop Now Button on the right side of the screen to go directly to my online store or contact me if you have any questions.  Happy Stamping!

Thanks for visiting!

Akiko

  • Visit my online store here
  • See the current Stampin’ Up! clearance rack specials here
  • Earn FREE Stampin’ Up! products through my Wildflower Frequent Shopper Program – my way of saying thank you to my frequent shopper online customers.
  • Sign up for my weekly newsletter here
  • Have any questions? I’d be happy to help, click here to contact me.

Cardstock Cuts for this project:

  • Highland Heather – 4-1/4″ x 11″ card base scored at 5-1/2″, 3-7/8″ x 5-1/8″ (embossed panel), 1/2″ x 3-7/8″ (inside embossed strip)
  • Garden Green – 4″ x 5-1/4″ (inside mat), 3-1/8″ x 4-1/2″ (art panel mat), 3/8″ x 3-5/8″ (label mat)
  • Whisper White – 4″ x 5-1/4″ (front mat), 3-7/8″ x 5-1/8″ (inside panel), 3-1/4″ x 4-1/2″ (art panel), 1/2″ x 2-1/2″ (label)

Stampin’ Up! products used in this project:


Stampin’ Up! Seaside Notions and Whale Done Birthday Card for the Happy Inkin’ Thursday Blog Hop

Good Morning! Welcome to the Happy Inkin’ Thursday Blog Hop! I made an undersea adventure Birthday Card featuring seahorses with the Stampin’ Up! Seaside Notions and Whale Done stamp sets.

We have a color challenge this week, and here is the color palette we are using:

I stamped some of the seaweed from the Stampin’ Up! Whale Done photopolymer stamp set in Pretty Peacock ink on the bottom of a panel of the fishes Whale of a Time 6×6 designer series paper panel. I adhered the panel to a Whisper White mat and then to the front of a Pacific Point card base with dimensionals.

I cut the seaweed with the Smooth Sailing Dies from Pretty Peacock, Just Jade and Pear Pizzazz card stock. I cut the Pear Pizzazz seaweed in half and just used the leafy side and arranged the seaweed and adhered it to the card front on top of the stamped seaweed with multipurpose liquid glue. I stamped the Happy Birthday sentiment from the Stampin’ Up! Seaside Notions cling stamp set in Just Jade ink on Pear Pizzazz card stock. I stamped the small seahorse from the Stampin’ Up! Whale Done stamp set next to the sentiment in Pretty Peacock ink. I cut the sentiment out with the Tasteful Labels Die and adhered it to the card front with liquid glue.

I stamped the large seahorse from the Stampin’ Up! Seaside Notions stamp set using Pretty Peacock ink on Pear Pizzazz card stock. I fussy cut the seahorse with my paper snips and then covered it with Shimmery Crystal Effects to give it a shiny look. After it dried, I added a yellow rhinestone for the eye and popped it on the card front with dimensionals. You can see the shine and sparkle of the seahorse in the picture below.

I finished off the card front by adhering a bunch of sequins from the Woven Threads and Whale of a Time sequins all over the card front with glue dots.

For the inside of the card, I stamped the sentiment from the Stampin’ Up! Whale Done stamp set in Just Jade ink on a Whisper White panel. Next to the sentiment I stamped some seaweed in Pear Pizzazz ink after stamping off as well as a school of fish in Calypso Coral, Pacific Point, Just Jade and Gorgeous Grape. These fish resemble the fish swimming on the card front. I added a strip of the Whale of a Time DSP to the bottom before adhering the panel to the inside of the card.

On with the Hop! Click the Next button below to visit Karen Ksenzakovic’s blog.

And just in case you get lost along the way, here’s a list of the team members participating in the hop today:


June 15 – 30 Host Code: HMXBV3WG

Use this host code when you order $50 or more and receive a free gift from me!  The gift is your choice of any item valued up to $10.00 in the 2020-2021 Annual Catalog.

If your order is over $150, please do not use the host code since you’ll receive your own Host Dollars plus I’ll still send you the free gift!  This host code can be used by anyone, no commitment required.  Let me know if you have any questions.


If you need any stamping supplies, I’d be very happy to be your Demonstrator.  Just click on the Shop Now Button on the right side of the screen to go directly to my online store or contact me if you have any questions.  Happy Stamping!

Thanks for visiting!

Akiko

  • Visit my online store here
  • See the current Stampin’ Up! clearance rack specials here
  • Earn FREE Stampin’ Up! products through my Wildflower Frequent Shopper Program – my way of saying thank you to my frequent shopper online customers.
  • Sign up for my weekly newsletter here
  • Have any questions? I’d be happy to help, click here to contact me.

Cardstock Cuts for this project:

  • Pacific Point – 4-1/4″ x 11″ card base scored at 5-1/2″
  • Pear Pizzazz – 3-1/2″ x 4″ (sea horse, die cut label and die cut seaweed)
  • Pretty Peacock – 1-3/4″ x 3-1/2″ (die cut seaweed)
  • Just Jade – 1-3/4″ x 3-1/2″ (die cut seaweed)
  • Whisper White – (2) 4″ x 5-1/4″ (front mat and inside panel)
  • Whale of a Time DSP – 3-7/8″ x 5-1/8″ (front background), 1/2″ x 4″ (inside trim)

Stampin’ Up! products used in this project: