Stampin’ Up! Ice Cream Swirl for the Happy Inkin’ Thursday Blog Hop

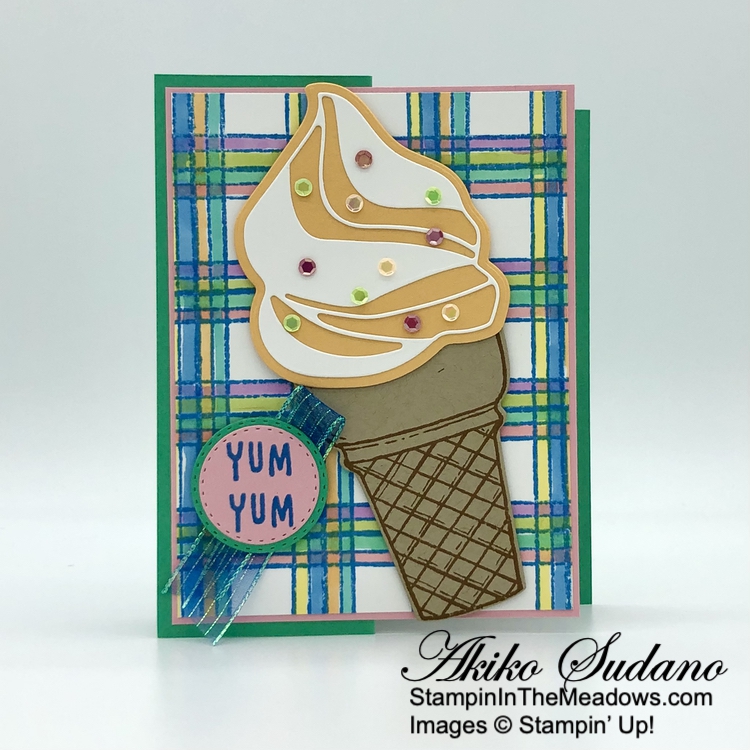
Good Morning and welcome to the Happy Inkin’ Thursday Blog Hop! Last week I spent a couple of days in Ocean City, MD with my visiting family, and you guessed it, we had ice cream. So I had to use the Stampin’ Up! Ice Cream Swirl bundle to make a card. And I wanted beachy colors, so I used the Sketched Plaid background stamp to make ‘DSP’ for the background. You can find the supplies I used along with card stock cuts at the bottom of my post.

We have a theme challenge this week and no veggies or fruits, but ice cream is a food, so yay!

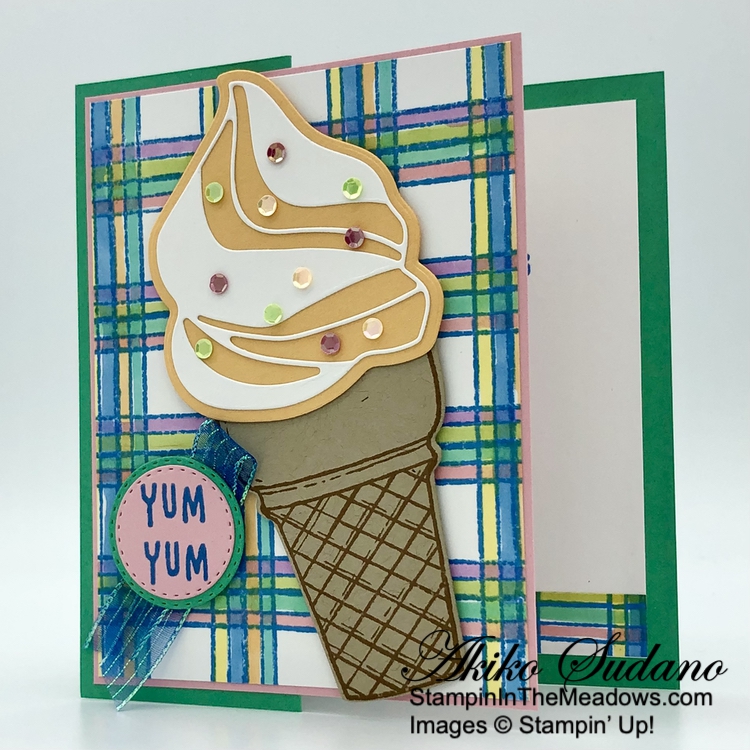
I stamped the sketched plaid background stamp in Azure Afternoon ink on a Basic White panel and colored the stripes with Stampin’ Blends. I used light Pretty In Pink, light Shy Shamrock, light Granny Apple Green and dark Fresh Freesia for the horizontal stripes and dark Lemon Lolly, light Azure Afternoon, light Peach Pie and light Summer Splash for the vertical stripes. I just colored the stripes and I wasn’t too careful. I adhered the stamped panel to a Pretty In Pink mat and to the front of a Shy Shamrock Z-Fold card base with liquid glue. I also stamped and colored a panel for the middle of the card and for the inside panel trim.

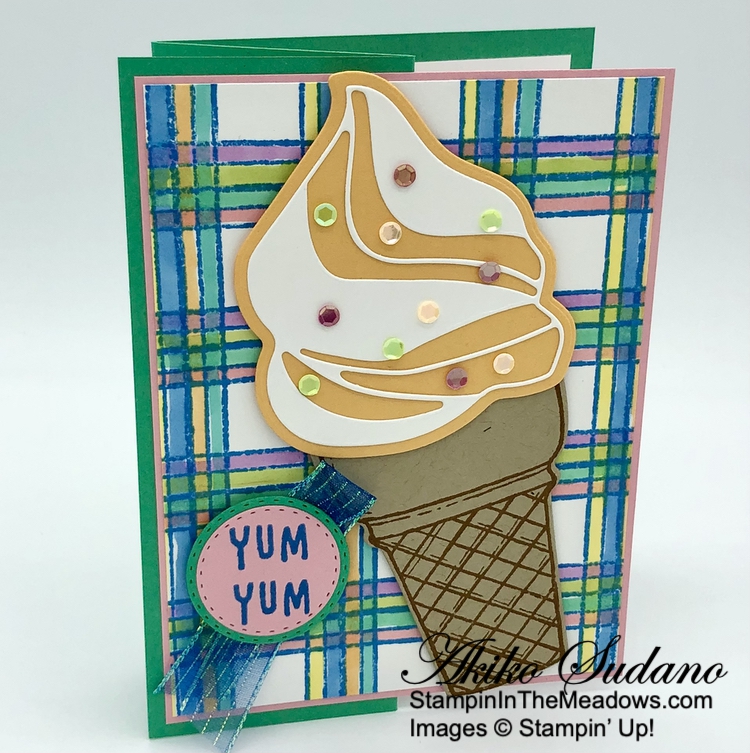
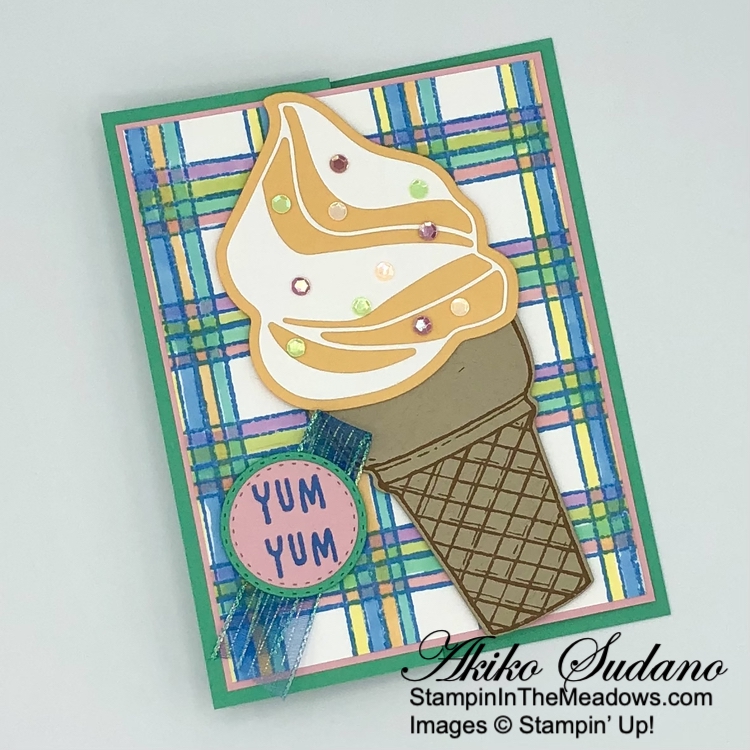
I used the Stampin’ Up! Ice Cream Swirl dies to cut my ice cream, using Peach Pie for the background die and Basic White for the detailed die. This is exactly like the Creamsicle/Vanilla cone I had at the beach (my husband had chocolate/vanilla swirl). I stamped the cone using Pecan Pie ink on Crumb Cake and cut it out with the coordinating die. I adhered the ice cream cone die cuts together and popped it on the card front with dimensionals.

I stamped the sentiment from the Stampin’ Up! Ice Cream Swirl stamp set using Azure Afternoon ink on Pretty In Pink card stock. I cut it out with the small circle from the Unbounded Love dies and adhered it to the larger circle cut from Shy Shamrock card stock. I adhered a folded length of Azure Afternoon ribbon to the back and adhered it to the card with dimensionals. I used Shiny Sequins as sprinkles on my ice cream.

For the inside of the card, I stamped the sentiment from the Stampin’ Up! Ice Cream Swirl stamp set using Azure Afternoon ink. I adhered a strip of my stamped and colored plaid to the bottom and adhered the panel to the inside of the card with Stampin’ Seal. You can see the last panel on the left side – this is the middle section of the Z-Fold.

With Summer upon us, it’s time for ice cream – cones, sandwiches, sundaes, any ways. And the Stampin’ Up! Ice Cream Swirl bundle is perfect to celebrate. And OK, fruits and veggies are good too.

On with the Hop! Click on the Next Blog button to move forward to see the beautiful project Karen Ksenzakovic has created.

If you get lost along the way, here are the participants for the hop:


Current Host Code: XQZKDQU9

Use this host code when you order $50 or more and receive a free gift from me!  The free gift is your choice of any item currently available valued up to $10.00!

If your order is over $150, please do not use the host code since you’ll receive your own Host Dollars plus I’ll still send you the free gift!  This host code can be used by anyone, no club or commitment required. Let me know if you have any questions.


If you need any stamping supplies, I’d be very happy to be your Demonstrator.  Just click on the Shop Now button on the right side of the screen to go directly to my online store or contact me if you have any questions. 

Thanks for stopping by and Happy Stamping!

Akiko

  • Visit my online store here
  • See the current Stampin’ Up! clearance rack specials here
  • Earn FREE Stampin’ Up! products through my Wildflower Frequent Shopper Program – my way of saying thank you to my online frequent shopper customers.
  • Have any questions? I’d be happy to help, click here to contact me.

Cardstock Cuts for this project:

  • Shy Shamrock – 5-1/2″ x 8-1/2″ card base, scored at 2-1/8″ and 5-1/2″, 1-1/2″ x 1-1/2″ (label mat)
  • Pretty In Pink – 1-1/2″ x 1-1/2″ (label)
  • Peach Pie – 3″ x 3-1/4″ (ice cream die cut)
  • Crumb Cake – 2-1/2″ x 3-1/4″ (cone die cut)
  • Basic White – 3-3/4″ x 5″ (inside panel), 3-7/8″ x 5-1/8″ (stamped front background), 1-7/8″ x 5-1/4″ (stamped middle panel), 1/2″ x 3-3/4″ (stamped inside trim), 2-1/2″ x 3″ (ice cream die cut)

Stampin’ Up! products used in this project:


Stampin’ Up! Adventurous Sky Father’s Day Card

Good Morning! The Stampin’ Up! Adventurous Sky bundle is the coolest bi-plane set ever with different plane and cloud images, coordinating dies, great masculine sentiments and dies to make a wonderful die cut bi-plane. I used the die cut bi-plane for today’s Father’s Day card and combined it with the wonderful Take to the Sky designer series paper. You can find the products I used at the bottom of my post along with the card stock sizes.

I adhered a panel of Take to the Sky designer series paper to a Basic White mat with liquid glue and popped it on the front of a Gray Granite card base with dimensionals. I used the largest circle from the Stylish Shapes dies to cut a cloud filled panel and adhered it to the card.

I used the dies from the Stampin’ Up! Adventurous Sky dies to cut Crushed Curry, Misty Moonlight and Gray Granite card stock to make the plane. I adhered the die cuts together with liquid glue and popped the plane on the card with dimensionals.

I stamped the sentiment from the Stampin’ Up! Adventurous Sky stamp set in Misty Moonlight ink on Boho Blue card stock and cut it out with a circle die from the Stylish Shapes dies. I adhered it to the card with a dimensional and finished the card with white adhesive sequins.

For the inside of the card I stamped the sentiment from the Stampin’ Up! Adventurous Sky stamp set in Misty Moonlight ink on a Basic White panel. I stamped the small plane in Gray Granite and the clouds in three times stamped off Boho Blue ink. I trimmed the bottom with a strip of DSP and adhered the panel to the inside of the card with Stampin’ Seal.

I love vintage machines for masculine cards and the die cut bi-plane in the Stampin’ Up! Adventurous Sky bundle is such a fun interpretation. And this bundle is currently on sale, with an extra 10% off, so hurry and get yours.


Stampin’ Up! Bundle Sale Going On NOW!

Everyone loves a good deal, which is why Stampin’ Up! is offering an additional 10% off all stamp and die bundles! Between June 5, 2024 and June 30, 2024, take advantage of the sale and add some new bundles to your collection. Plus, save 10% on the Stampin’ Cut & Emboss Machine and the Mini Stampin’ Cut & Emboss Machine. These machines make the perfect crafting partner for stamp and die bundles.

Promotion Details:

  • Sales Period: June 5, 2024 – June 30, 2024
  • Get an additional 10% discount on stamp and die bundles only (that’s a total of 20% discount on stamp and die bundles!).
  • This excludes suite collections, stamp and punch bundles and any other bundles*.
  • Save 10% on Stampin’ Cut & Emboss Machine and Mini Stampin’ Cut & Emboss Machine (white and Boho Blue). 
  • The 10% discount applies automatically to stamp and die bundles in all orders including Starter Kit orders.

*Please note Close to My Heart products are not included in this promotion.


Current Host Code: SSMUTY4A

Use this host code when you order $50 or more and receive a Thank You gift from me!  The free gift is your choice of any item currently available valued up to $10.00.

If your order is over $150, please do not use the host code since you’ll receive your own Host Dollars plus I’ll still send you the Thank You gift!  This host code can be used by anyone, no club or commitment required. Let me know if you have any questions.


If you need any stamping supplies, I’d be very happy to be your Demonstrator.  Just click on the Shop Now Button on the right side of the screen to go directly to my Online store or contact me if you have any questions.  Happy Stamping!

Thanks for stopping by and have a great day!

Akiko

  • Visit my online store here
  • See the current Stampin’ Up! clearance rack specials here
  • Earn FREE Stampin’ Up! products through my Wildflower Frequent Shopper Program – my way of saying thank you to my online frequent shopper customers.
  • Have any questions? I’d be happy to help, click here to contact me.

Cardstock Cuts for this project:

  • Gray Granite – 5-1/2″ x 8-1/2″ card base, scored at 4-1/4″, 3/4″ x 1-1/2″ (propeller die cut)
  • Boho Blue – 1-1/2″ x 1-1/2″ (label)
  • Crushed Curry – 1-3/4″ x 4-1/4″ (plane body)
  • Misty Moonlight – 1-3/4″ x 4-1/4″ (plane wings)
  • Basic White – (2) 4″ x 5-1/4″ panels (inside panel and front mat)
  • Take To The Sky DSP – 3-7/8″ x 5-1/8″ (front background), 3-1/4″ x 3-1/4″ (die cut circle), 1/2″ x 4″ (inside trim)

Stampin’ Up! products used in this project:


Stampin’ Up! Thoughtful Wishes Thank You Card

Good Morning! I’ve been having family visiting for the past few weeks, so I haven’t been posting as much. So I’m slowly getting back into the swing with this simple thank you card featuring the pretty Stampin’ Up! Thoughtful Wishes bundle and the beautiful Thoughtful Journey designer series paper. You can find the products I used at the bottom of my post along with the card stock sizes.

I embossed a Misty Moonlight panel with the Timeworn Type 3D embossing folder and adhered it to the front of a Misty Moonlight card base. I used the pretty, large flourish die from the Stampin’ Up! Thoughtful Wishes dies to cut a panel of Thoughtful Designs specialty DSP and adhered it to the card with glue dots.

I adhered a panel of Thoughtful Journey DSP to a Fresh Freesia mat and wrapped it with a single strand of Boho Blue jute, tying a knot. I cut two flowers from the Thoughtful Designs specialty DSP using the dies from the Stampin’ Up! Thoughtful Wishes dies. and adhered them to the panel with glue dots, tucking them under the jute.

I stamped the sentiment from the Stampin’ Up! Thoughtful Wishes stamp set in Versamark ink on a panel of Thoughtful Journey DSP and sprinkled it with white embossing powder. I shook off the excess and heated the powder with my heat tool until it was bright and shiny. I cut it out with the small rectangle die from the Everyday Details dies using a two step method, so it would be shorter. I adhered the die cut label to the DSP panel with dimensionals and adhered the panel to the card front with dimensionals. I finished the card with Blackberry Bliss shimmer gems.

For the inside of the card I stamped the sentiment from the Stampin’ Up! Thoughtful Wishes stamp set in Misty Moonlight ink on a Basic White panel. I stamped the flowers using stamped-off Fresh Freesia ink and trimmed the side with DSP. I adhered the panel to a Fresh Freesia mat before adhering the panel to the inside of the card with Stampin’ Seal.

Thankfully, it’s so quick and easy to make fancy handmade cards with pretty DSP. And pair it with the pretty dies and images from the Stampin’ Up! Thoughtful Wishes bundle and a few embellishments and you’re set.


Stampin’ Up! Bundle Sale Going On NOW!

Everyone loves a good deal, which is why Stampin’ Up! is offering an additional 10% off all stamp and die bundles! Between June 5, 2024 and June 30, 2024, take advantage of the sale and add some new bundles to your collection. Plus, save 10% on the Stampin’ Cut & Emboss Machine and the Mini Stampin’ Cut & Emboss Machine. These machines make the perfect crafting partner for stamp and die bundles.

Promotion Details:

  • Sales Period: June 5, 2024 – June 30, 2024
  • Get an additional 10% discount on stamp and die bundles only (that’s a total of 20% discount on stamp and die bundles!).
  • This excludes suite collections, stamp and punch bundles and any other bundles*.
  • Save 10% on Stampin’ Cut & Emboss Machine and Mini Stampin’ Cut & Emboss Machine (white and Boho Blue). 
  • The 10% discount applies automatically to stamp and die bundles in all orders including Starter Kit orders.

*Please note Close to My Heart products are not included in this promotion.


Current Host Code: SSMUTY4A

Use this host code when you order $50 or more and receive a Thank You gift from me!  The free gift is your choice of any item currently available valued up to $10.00.

If your order is over $150, please do not use the host code since you’ll receive your own Host Dollars plus I’ll still send you the Thank You gift!  This host code can be used by anyone, no club or commitment required. Let me know if you have any questions.


If you need any stamping supplies, I’d be very happy to be your Demonstrator.  Just click on the Shop Now Button on the right side of the screen to go directly to my Online store or contact me if you have any questions.  Happy Stamping!

Thanks for stopping by and have a great day!

Akiko

  • Visit my online store here
  • See the current Stampin’ Up! clearance rack specials here
  • Earn FREE Stampin’ Up! products through my Wildflower Frequent Shopper Program – my way of saying thank you to my online frequent shopper customers.
  • Have any questions? I’d be happy to help, click here to contact me.

Cardstock Cuts for this project:

  • Misty Moonlight – 4-1/4″ x 11″ card base, scored at 5-1/2″, 4-1/4″ x 5-1/2″ (embossed panel)
  • Fresh Freesia – 2-1/4″ x 4″ (DSP mat), 3-7/8″ x 5-1/8″ (inside mat)
  • Basic White – 3-3/4″ x 5″ (inside panel)
  • Thoughtful Designs specialty DSP – 2-1/2″ x 5″ (die cut flourish and flowers)
  • Thoughtful Journey DSP – 2-1/8″ x 3-7/8″ (front panel), 1/2″ x 5″ (inside trim), 1-1/4″ x 2-1/4″ (label)

Stampin’ Up! products used in this project:


Stampin’ Up! Happiest Day Card

Good Morning! The Stampin’ Up! Happiest Day stamp set is a fun photopolymer stamp set with the best sentiments and cheerful images. I used it with the colorful Bright and Beautiful 6″ x 6″ designer series paper and Countryside Corners dies for today’s card. You can find the products I used at the bottom of my post along with the card stock sizes.

I adhered a panel of Bright and Beautiful designer series paper to a Lemon Lime Twist card base with liquid glue. I stamped the sentiment from the Stampin’ Up! Happiest Day stamp set using Versamark ink on a panel of Bright and Beautiful DSP and sprinkled it with white embossing powder. I shook off the excess and heated the powder with my heat tool. I cut it out with the 4th largest die from the Countryside Corners dies. I cut a Blueberry Bushel panel with the next largest size die and adhered the label to the Blueberry Bushel die cut. I adhered the label to the card with dimensionals.

I stamped the dragonfly outline from the Stampin’ Up! Happiest Day stamp set in Memento Tuxedo Black ink three times on Basic White. I used the wing filler stamps to color the wings, using Balmy Blue and Fresh Freesia, Lost Lagoon and Lemon Lime Twist, and Berry Burst and Bubble Bath inks. I love those dotted wing filler stamps! I fussy cut the dragonflies with my paper snips and adhered them to the card with dimensionals and glue dots.

I decorated the space around the dragonflies with colorful small sequins and used Lemon Lolly baker’s twine to wrap around the top and tie a bow.

For the inside of the card I stamped the sun and sun rays from the Stampin’ Up! Happiest Day stamp set in daffodil Delight ink in the top corner of a Basic White panel. I used a Blending Brush to apply Lemon Lolly ink around the sun and trimmed the bottom with a strip of DSP. I adhered the panel to the inside of the card with Stampin’ Seal.

Isn’t that sentiment the best! The Stampin’ Up! Happiest Day stamp set is perfect for making cheerful, happy cards that make people smile.


Stampin’ Up! Bundle Sale Starting June 5, 2024!

Everyone loves a good deal, which is why Stampin’ Up! is offering an additional 10% off all stamp and die bundles! Between June 5, 2024 and June 30, 2024, take advantage of the sale and add some new bundles to your collection. Plus, save 10% on the Stampin’ Cut & Emboss Machine and the Mini Stampin’ Cut & Emboss Machine. These machines make the perfect crafting partner for stamp and die bundles.

Promotion Details:

  • Sales Period: June 5, 2024 – June 30, 2024
  • Get an additional 10% discount on stamp and die bundles only (that’s a total of 20% discount on stamp and die bundles!).
  • This excludes suite collections, stamp and punch bundles and any other bundles*.
  • Save 10% on Stampin’ Cut & Emboss Machine and Mini Stampin’ Cut & Emboss Machine (white and Boho Blue). 
  • The 10% discount applies automatically to stamp and die bundles in all orders including Starter Kit orders.

*Please note Close to My Heart products are not included in this promotion.


Current Host Code: SSMUTY4A

Use this host code when you order $50 or more and receive a Thank You gift from me!  The free gift is your choice of any item currently available valued up to $10.00.

If your order is over $150, please do not use the host code since you’ll receive your own Host Dollars plus I’ll still send you the Thank You gift!  This host code can be used by anyone, no club or commitment required. Let me know if you have any questions.


If you need any stamping supplies, I’d be very happy to be your Demonstrator.  Just click on the Shop Now Button on the right side of the screen to go directly to my Online store or contact me if you have any questions.  Happy Stamping!

Thanks for stopping by and have a great day!

Akiko

  • Visit my online store here
  • See the current Stampin’ Up! clearance rack specials here
  • Earn FREE Stampin’ Up! products through my Wildflower Frequent Shopper Program – my way of saying thank you to my online frequent shopper customers.
  • Have any questions? I’d be happy to help, click here to contact me.

Cardstock Cuts for this project:

  • Lemon Lime Twist – 4-1/4″ x 11″ card base, scored at 5-1/2″
  • Blueberry Bushel – 3″ x 4-1/2″ (sentiment mat)
  • Basic White – 3-3/4″ x 5″ (inside panel), 1-1/4″ x 6″ (fussy cut dragonflies)
  • Bright and Beautiful 6″ x 6″ DSP – 3-3/4″ x 5″ (front background), 2-1/4″ x 3-3/4″ (label)

Stampin’ Up! products used in this project:


Stampin’ Up! Coffee With Friends Thinking Of You Card

Good Morning! The Stampin’ Up! Coffee With Friends stamp set is a fun set expressing friendship and I used it with the pretty A Little Latte designer series paper to make a simple fun fold thinking of you card. You can find the products I used at the bottom of my post along with the card stock sizes.

I adhered plaid panel of A Little Latte designer series paper to a Calypso Coral card base with liquid glue. I adhered another panel with pretty coffee cups to the front of a Lost Lagoon mini card and adhered it to the main card base with liquid glue.

I stamped the sentiment from the Stampin’ Up! Coffee With Friends stamp set in Pecan Pie Ink on a Petal Pink panel. I cut it out with the circle die from the Radiating Stitches dies. Sadly, I learned that these dies have retired since I made the card, so I would recommend using the awesome Spotlight on Nature dies or the Everyday Details dies instead.

I made a bow with Crumb Cake baker’s twine and adhered it to the back of the label and adhered the label to the card with dimensionals. I finished the card with Petal Pink swirl dots.

For the inside of the card I stamped the ladies on the bench from the Stampin’ Up! Coffee with Friends stamp set in Pecan Pie ink on a Basic White panel. I stamped the sentiment in Lost Lagoon ink and adhered the panel to the inside of the Mini Card with Stampin’ Seal.

The A Little Latte designer series paper is so pretty and I thought it would coordinate with the Stampin’ Up! Coffee With Friends stamp set. There are so many little coffee shops near me that are great to catch up with friends and relax. I hope you have some places near you too!


The June Paper Pumpkin Kit – Life Is Sweet!

Celebrate the sweet things in life with textured, artistic cards.

  • Makes 9 cards: 3 each of 3 designs with 9 coordinating envelopes
  • Iridescent glimmer sentiments and precut paper pieces
  • Vellum accents, iridescent pearls, and linen thread
  • Shy Shamrock Classic Stampin’ Spot

Coordinating Colors: Poppy Parade, Peach Pie, Lemon Lolly, Shy Shamrock, Pool Party, Pretty In Pink

And the coordinating add-on is the Thanks and Beyond dies. These dies coordinate with the Best There Is kit and will also coordinate with the June kit.

If you’re interested in subscribing to Paper Pumpkin, you can either sign up for a subscription where you are billed monthly for your kit or you can purchase a prepaid subscription in my Online Store. To see more information and to sign up for the monthly subscription click here. To see the options for prepaid subscriptions in my Online Store, click here.

Sign up deadline for the June 2024 kit is June 10, 2024. Note: Supplies may be limited toward the end of the subscription period.


Stampin’ Up! Bundle Sale Starting June 5, 2024!

Everyone loves a good deal, which is why Stampin’ Up! is offering an additional 10% off all stamp and die bundles! Between June 5, 2024 and June 30, 2024, take advantage of the sale and add some new bundles to your collection. Plus, save 10% on the Stampin’ Cut & Emboss Machine and the Mini Stampin’ Cut & Emboss Machine. These machines make the perfect crafting partner for stamp and die bundles.

Promotion Details:

  • Sales Period: June 5, 2024 – June 30, 2024
  • Get an additional 10% discount on stamp and die bundles only (that’s a total of 20% discount on stamp and die bundles!).
  • This excludes suite collections, stamp and punch bundles and any other bundles*.
  • Save 10% on Stampin’ Cut & Emboss Machine and Mini Stampin’ Cut & Emboss Machine (white and Boho Blue). 
  • The 10% discount applies automatically to stamp and die bundles in all orders including Starter Kit orders.

*Please note Close to My Heart products are not included in this promotion.


Current Host Code: SSMUTY4A

Use this host code when you order $50 or more and receive a Thank You gift from me!  The free gift is your choice of any item currently available valued up to $10.00.

If your order is over $150, please do not use the host code since you’ll receive your own Host Dollars plus I’ll still send you the Thank You gift!  This host code can be used by anyone, no club or commitment required. Let me know if you have any questions.


If you need any stamping supplies, I’d be very happy to be your Demonstrator.  Just click on the Shop Now Button on the right side of the screen to go directly to my Online store or contact me if you have any questions.  Happy Stamping!

Thanks for stopping by and have a great day!

Akiko

  • Visit my online store here
  • See the current Stampin’ Up! clearance rack specials here
  • Earn FREE Stampin’ Up! products through my Wildflower Frequent Shopper Program – my way of saying thank you to my online frequent shopper customers.
  • Have any questions? I’d be happy to help, click here to contact me.

Cardstock Cuts for this project:

  • Calypso Coral – 4-1/4″ x 5-1/2″ card base
  • Lost Lagoon – 3″ x 8-1/2″ mini card Base, scored at 4-1/4
  • Petal Pink – 1-3/4″ x 1-3/4″ (label)
  • Basic White – 2-3/4″ x 4″ (inside panel)
  • A Little Latte DSP – 4″ x 5-1/4″ (large front background), 2-3/4″ x 4″ (mini card background)

Stampin’ Up! products used in this project:


Stampin’ Up! Thoughtful Expressions Card

Good Morning! The Stampin’ Up! Thoughtful Expressions stamp set has beautiful images, but today I focused on the great sentiments and paired it with the beautiful Thoughtful Journey 6″ x 6″ designer series paper to make a sympathy card. You can find the products I used at the bottom of my post along with the card stock sizes.

I adhered a strip of pretty Thoughtful Designs specialty 6″ x 6″ designer series paper to the front of a Wild Wheat card base with liquid glue. I adhered a pretty panel of Thougthful Journey 6″ x 6″ DSP on top of it with liquid glue.

I stamped the sentiment from the Stampin’ Up! Thoughtful Expressions stamp set in Versamark ink on a Mossy Meadow panel. I sprinkled it with white embossing powder and shook off the excess. I heated it until it was bright and shiny and cut it out with the long label die from the Autumn Leaves dies.

I adhered a length of Petunia Pop ribbon to the card with Stampin’ Seal and adhered the label on top with dimensionals. I finished the card with three brass birds.

For the inside of the card, I the flower sprig from the Stampin’ Up! Thoughtful Expressions stamp set in Memento Tuxedo Black ink on a Basic White panel. I colored the flowers with light Petunia Pop Stampin’ Blend and the leaves with light Mossy Meadow. I stamped the sentiment using Mossy Meadow ink and trimmed the side with DSP. I adhered the panel to the inside of the card with Stampin’ Seal.

Sympathy cards are hard to make and the sentiments in the Stampin’ Up! Thoughtful Expressions stamp set are simple and pretty. Paired with pretty designer series paper, it becomes easier.


Stampin’ Up! May Joining Special!

Exciting News! Between May 1 and May 31, anyone who becomes a Stampin’ Up! demonstrator will receive four 2024–2026 In Color products in their Starter Kit for FREE! This is one of our richest offerings yet!

Promotion Details:

  • Dates: May 1, 2024 – May 31, 2024
  • New Demonstrators will receive the following products in their Starter Kit at no additional cost:
    • 2024–2026 In Color Classic Stampin’ Pad Bundle
    • 2024–2026 In Color 8-1/2″ x 11″ Cardstock
    • 2024–2026 In Color 6″ x 6″ Designer Series Paper
    • 2024–2026 In Color Stampin’ Write Markers
  • New team members may not use their team leader’s shipping address to ship their kit. 
  • New team members may only pay for their kit using a credit card on which they are listed as an authorized user. 
  • All orders should be closed by 31 May. 
  • New demonstrators who submit their Independent Demonstrator Agreement (IDA) before 1 May or after 31 May will not be eligible for this Starter Kit offer.

Click on the picture below to download a flyer to see more:

In addition to the In Color products, new Demonstrators will pick $125 USD worth of products of their choice for $99! When you join, the In Color products will be automatically added to your Starter Kit. You will also receive free business supplies with your order and free shipping. Not to mention all the fun that comes with being a part of our wonderful crafting community. Click the button below to Join Now, or get additional details on my Join My Team page


Current Host Code: SSMUTY4A

Use this host code when you order $50 or more and receive a Thank You gift from me!  The free gift is your choice of any item currently available valued up to $10.00.

If your order is over $150, please do not use the host code since you’ll receive your own Host Dollars plus I’ll still send you the Thank You gift!  This host code can be used by anyone, no club or commitment required. Let me know if you have any questions.


If you need any stamping supplies, I’d be very happy to be your Demonstrator.  Just click on the Shop Now Button on the right side of the screen to go directly to my Online store or contact me if you have any questions.  Happy Stamping!

Thanks for stopping by and have a great day!

Akiko

  • Visit my online store here
  • See the current Stampin’ Up! clearance rack specials here
  • Earn FREE Stampin’ Up! products through my Wildflower Frequent Shopper Program – my way of saying thank you to my online frequent shopper customers.
  • Have any questions? I’d be happy to help, click here to contact me.

Cardstock Cuts for this project:

  • Wild Wheat – 4-1/4″ x 11″ card base, scored at 5-1/2″
  • Mossy Meadow – 1-1/2″ x 3″ (label)
  • Basic White – 4″ x 5-1/4″ x 4″ (inside panel)
  • Thoughtful Designs specialty DSP – 1″ x 5-1/4″
  • Thoughtful Journey 6″ x 6″ DSP – 3-1/2″ x 4-3/4″ (front background), 1/2″ x 5-1/4″ (inside trim)

Stampin’ Up! products used in this project:


Stampin’ Up! Country Flowers Friendship Card

Good Morning! The Stampin’ Up! Country Flowers bundle has pretty flowers, greenery and containers and sweet sentiments. One of the containers is a teapot and for today’s card, I stamped it on a panel of Country Woods designer series paper for a rustic look. You can find the products I used at the bottom of my post along with the card stock sizes.

I embossed a panel of Crumb Cake card stock with the Eyelet 3D embossing folder and adhered it to a Crumb Cake card base with liquid glue. I stamped the teapot from the Stampin’ Up! Country Flowers stamp set using Memento Tuxedo Black ink on a panel of Country Woods designer series paper. I colored it with a Blender Pen and Gray Granite ink and adhered the panel to a Crumb Cake mat.

I stamped the flowers from the Stampin’ Up! Country Flowers on another panel of Country Woods designer series paper using Memento Tuxedo Black ink. I colored the flowers with a Blender Pen using Petunia Pop, Peach Pie, Lost Lagoon, Lemon Lime Twist, Melon Mambo and Daffodil Delight inks. I cut out the flowers with the coordinating die and adhered it to the DSP panel with dimensionals. I adhered the decorated panel to the card with dimensionals.

I stamped sentiment from the Stampin’ Up! Country Flowers stamp set using Memento Tuxedo Black ink on Gray Granite and popped it on the card with dimensionals. I used white baker’s twine to make a small bow and adhered it with a glue dot and finished the card with Brushed Brass Butterflies.

For the inside of the card, I stamped the little eyelet design from the Stampin’ Up! Country Flowers stamp set using Gray Granite ink on a Basic White panel. I adhered the panel to a mat using the same Country Woods designer series paper as the card front and adhered the layered panel to the inside of the card.

Today’s card was inspired by the images for the Stampin’ Up! Country Flowers bundle in the new Annual Catalog. The images on the wood grain DSP remind me of paintings on wood like you would find in an old country farmhouse.


Stampin’ Up! May Joining Special!

Exciting News! Between May 1 and May 31, anyone who becomes a Stampin’ Up! demonstrator will receive four 2024–2026 In Color products in their Starter Kit for FREE! This is one of our richest offerings yet!

Promotion Details:

  • Dates: May 1, 2024 – May 31, 2024
  • New Demonstrators will receive the following products in their Starter Kit at no additional cost:
    • 2024–2026 In Color Classic Stampin’ Pad Bundle
    • 2024–2026 In Color 8-1/2″ x 11″ Cardstock
    • 2024–2026 In Color 6″ x 6″ Designer Series Paper
    • 2024–2026 In Color Stampin’ Write Markers
  • New team members may not use their team leader’s shipping address to ship their kit. 
  • New team members may only pay for their kit using a credit card on which they are listed as an authorized user. 
  • All orders should be closed by 31 May. 
  • New demonstrators who submit their Independent Demonstrator Agreement (IDA) before 1 May or after 31 May will not be eligible for this Starter Kit offer.

Click on the picture below to download a flyer to see more:

In addition to the In Color products, new Demonstrators will pick $125 USD worth of products of their choice for $99! When you join, the In Color products will be automatically added to your Starter Kit. You will also receive free business supplies with your order and free shipping. Not to mention all the fun that comes with being a part of our wonderful crafting community. Click the button below to Join Now, or get additional details on my Join My Team page


Current Host Code: SSMUTY4A

Use this host code when you order $50 or more and receive a Thank You gift from me!  The free gift is your choice of any item currently available valued up to $10.00.

If your order is over $150, please do not use the host code since you’ll receive your own Host Dollars plus I’ll still send you the Thank You gift!  This host code can be used by anyone, no club or commitment required. Let me know if you have any questions.


If you need any stamping supplies, I’d be very happy to be your Demonstrator.  Just click on the Shop Now Button on the right side of the screen to go directly to my Online store or contact me if you have any questions.  Happy Stamping!

Thanks for stopping by and have a great day!

Akiko

  • Visit my online store here
  • See the current Stampin’ Up! clearance rack specials here
  • Earn FREE Stampin’ Up! products through my Wildflower Frequent Shopper Program – my way of saying thank you to my online frequent shopper customers.
  • Have any questions? I’d be happy to help, click here to contact me.

Cardstock Cuts for this project:

  • Crumb Cake – 5-1/2″ x 8-1/2″ card base, scored at 4-1/4″, 3-1/2″ x 4-3/4″ (embossed panel), 3-1/8″ x 3-1/8″ (DSP mat)
  • Gray Granite – 3/8″ x 1-1/4″ (label)
  • Basic White – 2-3/4″ x 4″ (inside panel)
  • Country Woods DSP – 3″ x 3″ (tea pot panel), 2″ x 2-1/4″ (die cut flowers), 3-1/2″ x 4-3/4″ (inside mat)

Stampin’ Up! products used in this project:


Stampin’ Up! Grassy Grove for the Happy Inkin’ Thursday Blog Hop

Good Morning and welcome to the Happy Inkin’ Thursday Blog Hop! The Stampin’ Up! Grassy Grove stamp set and Grove dies are a wonderful set for creating natural outdoors scenes and dioramas. I used it with the pretty new Thoughtful Journey 6″ x 6″ designer series paper to make a thank you card and it was pretty simple to do. You can find the supplies I used along with card stock cuts at the bottom of my post.

We have a theme challenge this week and the Stampin’ Up! Grassy Grove stamps set and Grove dies were perfect!

I adhered a panel of Thoughtful Journey to the front of a Pretty Peacock card base with liquid glue. I cut an old Olive panel with the large tree frame die from the Grove dies. I felt it was kind of plain, so I used a sponge dauber to add some ink. I used Mossy Meadow on the tree trunks and Pretty Peacock on the leafy canopy and ground cover. I finished with Wild Wheat around the edge of the frame.

I adhered the frame to the card front with dimensionals. I cut the doe and fawn from Pecan Pie card stock using the Grove dies and adhered them to the card with glue dots, tucking them under the frame ground cover.

I stamped the sentiment from the Stampin’ Up! Grassy Grove stamp set using Versamark ink on a Pretty Peacock panel. I sprinkled it with gold embossing powder and shook off the excess and heated it with my heat tool until it was bright and shiny. I cut it out with the label die from the Unbounded Love dies using a two step method, so it was a little shorter. I adhered it to the card with dimensionals and finished it with a small green Blooming Pearl.

I left the inside of the card blank, and simply trimmed the side of a Basic White panel with Thoughtful Journey DSP. I adhered the panel to the inside of the card with Stampin’ Seal.

The natural scenes in the Thoughtful Journey designer series paper go perfect with nature frame dies like the one in the Grove dies. And it saves time, because you don’t need to create a background scene for the frame. Just pop on some cute die cut deer!

On with the Hop! Click on the Next Blog button to move forward to see the beautiful project Karen Ksenzakovic has created.

If you get lost along the way, here are the participants for the hop:


Current Host Code: SSMUTY4A

Use this host code when you order $50 or more and receive a free gift from me!  The free gift is your choice of any item currently available valued up to $10.00!

If your order is over $150, please do not use the host code since you’ll receive your own Host Dollars plus I’ll still send you the free gift!  This host code can be used by anyone, no club or commitment required. Let me know if you have any questions.


If you need any stamping supplies, I’d be very happy to be your Demonstrator.  Just click on the Shop Now button on the right side of the screen to go directly to my online store or contact me if you have any questions. 

Thanks for stopping by and Happy Stamping!

Akiko

  • Visit my online store here
  • See the current Stampin’ Up! clearance rack specials here
  • Earn FREE Stampin’ Up! products through my Wildflower Frequent Shopper Program – my way of saying thank you to my online frequent shopper customers.
  • Have any questions? I’d be happy to help, click here to contact me.

Cardstock Cuts for this project:

  • Pretty Peacock – 5-1/2″ x 8-1/2″ card base, scored at 4-1/4″
  • Old Olive – 3-3/4″ x 5″ (die cut tree frame)
  • Pecan Pie – 1-1/2″ x 3″ (die cut deer)
  • Basic White – 4″ x 5-1/4″ (inside panel)
  • Thoughtful Journey 6″ x 6″ DSP – 4″ x 5-1/4″ (front background), 3/4″ x 4″ (inside trim)

Stampin’ Up! products used in this project:


Stampin’ Up! Feathered Flight for the Inkin’ Krew Blog Hop

Good Morning! Welcome to the May Inkin’ Krew Team Blog Hop! The theme for this month’s hop is “For the Boys/Men” so I pulled out my Feathered Flight stamp set to make a simple, masculine thinking of you card. The beautiful Thoughtful Journey 6″ x 6″ designer series paper makes a wonderful background for the ducks in the stamp set. You can find the supplies I used along with card stock cuts at the bottom of my post.

I stamped the small flying ducks from the Stampin’ Up! Feathered Flight cling stamp set using Wild Wheat ink on a panel of Thoughtful Journey designer series paper. I adhered the stamped DSP to a Misty Moonlight mat using liquid glue.

I separated a length of Wild Wheat jute and wrapped a single strand around the DSP panel and tied a knot. I adhered the panel to the front of a Boho Blue card base with dimensionals.

I cut two pine sprigs from the Encircled In Nature dies and adhered them to the card with glue dots, tucking them under the jute.

I stamped the sentiment from the Stampin’ Up! Feathered Flight stamp set using Wild Wheat ink on a Boho Blue panel. I cut out the sentiment with the Deckled Rectangles dies using a two step method, lining up one corner and cutting two sides and then cutting the opposite corner and the remaining sides. I adhered the label to the card using dimensionals over the jute and die cut sprigs.

For the inside of the card, I stamped the sentiment from the Stampin’ Up! Feathered Flight stamp set in Wild Wheat ink on a Basic White panel. I used twice stamped off Misty Moonlight ink to stamp the large duck and trimmed the side with DSP. I adhered the panel to a Misty Moonlight mat and then to the inside of the card with Stampin’ Seal.

The Thoughtful Journey 6″ x 6″ designer series paper is so beautiful and I love how it looks with the flying ducks from the Stampin’ Up! Feathered Flight stamp set. A quiet, beautiful morning in the woods with a loved one!

On With The Hop! Click on the Next Blog button to move forward to Carol Buckalew’s project or click the Previous Blog button to move back to see the project that Ann Louise Fodgaard created.

If you get lost along the way, here are the participants for the hop:


Current Host Code: SSMUTY4A

Use this host code when you order $50 or more and receive a Thank You gift from me!  The free gift is your choice of any currently available item valued up to $10.00.

If your order is over $150, please do not use the host code since you’ll receive your own Host Dollars plus I’ll still send you the Thank You gift!  This host code can be used by anyone, no club or commitment required. Let me know if you have any questions.


If you need any stamping supplies, I’d be very happy to be your Demonstrator.  Just click on the Shop Now button on the right side of the screen to go directly to my online store or contact me if you have any questions.  Happy Stamping!

Thanks for stopping by and have a great week!

Akiko

  • Visit my online store here
  • See the current Stampin’ Up! clearance rack specials here
  • Earn FREE Stampin’ Up! products through my Wildflower Frequent Shopper Program – my way of saying thank you to my online frequent shopper customers.
  • Have any questions? I’d be happy to help, click here to contact me.

Cardstock Cuts for this project:

  • Boho Blue – 5-1/2″ x 8-1/2″ card base scored at 4-1/4″, 1″ x 3″ (label)
  • Misty Moonlight – two 4″ x 5-1/4″ panels (front mat and inside mat)
  • Wild Wheat – 1-3/4″ x 2-3/4″ (die cut pine sprigs)
  • Basic White – 3-7/8″ x 5-1/8″ (inside panel)
  • Thoughtful Journey 6″ x 6″ DSP – 3-7/8″ x 5-1/8″ (front background), 1/2″ x 5-1/8″ (inside trim)

Stampin’ Up! products used in this project:

Stampin’ Up! Thoughtful Wishes Thinking Of You Card

Good Morning! The Stampin’ Up! Thoughtful Wishes bundle is a really sweet wildflower themed bundle with wonderful sentiments and great dies. I used it with the Beautiful Thoughtful Journey 6″ x 6″ designer series paper to make a thinking of you card with watercolor techniques. You can find the products I used at the bottom of my post along with the card stock sizes.

I adhered pretty panel of Thoughtful Journey 6″ x 6″ designer series paper to a Mossy Meadow mat with liquid glue. I cut a panel of Lost Lagoon with the leaf dies from the Stampin’ Up! Thoughtful Journey dies and adhered two of them to the DSP panel with glue dots.

I cut a Basic White panel with the thistle dies from the Stampin’ Up! Thoughtful Journey dies twice. I used a water painter and Heather Highland ink to color the flowers and Lost Lagoon and Mossy Meadow inks to color the stems. I did this quickly so that it has a splotchy look with different shades of color. After they dried, I adhered them to the DSP panel with dots of liquid glue. I adhered the last two Lost Lagoon die cut leaves on top with glue dots.

I used my light Mossy Meadow Stampin’ Blend to color a length of Linen Thread and wrapped it around the panel twice and made a bow and adhered the panel to the front of a Boho Blue card base. I stamped the sentiment from the Stampin’ Up! Thoughtful Wishes stamp set in Mossy Meadow ink on Wild Wheat and cut it out with the label die from the Perennial Postage dies. I adhered the label to the card with dimensionals and finished with several brass dragonfly embellishments.

For the inside of the card I used Highland Heather and Lost Lagoon Stampin’ Write markers to ink up the thistle stamp from the Stampin’ Up! Thoughtful Wishes stamp set. I used a sponge dauber to add touches of Mossy Meadow to the stamp. I lightly spritzed the stamp with water and stamped the side of a Basic White panel. I used the spatter stamp to apply some twice stamped off Wild Wheat ink to the corner before adhering it to the inside of the card.

I was inspired by the beautiful watercolor look of the Thoughtful Journey 6″ x 6″ DSP to use water techniques to make todays card. It’s a lot of fun to use different coloring techniques and get nice results. And water coloring with ink is pretty easy on small cuts like these thistle from the Stampin’ Up! Thoughtful Wishes bundle. Give it a try!


The June Paper Pumpkin Kit – Life Is Sweet!

Celebrate the sweet things in life with textured, artistic cards.

  • Makes 9 cards: 3 each of 3 designs with 9 coordinating envelopes
  • Iridescent glimmer sentiments and precut paper pieces
  • Vellum accents, iridescent pearls, and linen thread
  • Shy Shamrock Classic Stampin’ Spot

Coordinating Colors: Poppy Parade, Peach Pie, Lemon Lolly, Shy Shamrock, Pool Party, Pretty In Pink

And the coordinating add-on is the Thanks and Beyond dies. These dies coordinate with the Best There Is kit and will also coordinate with the June kit.

If you’re interested in subscribing to Paper Pumpkin, you can either sign up for a subscription where you are billed monthly for your kit or you can purchase a prepaid subscription in my Online Store. To see more information and to sign up for the monthly subscription click here. To see the options for prepaid subscriptions in my Online Store, click here.

Sign up deadline for the June 2024 kit is June 10, 2024. Note: Supplies may be limited toward the end of the subscription period.


Stampin’ Up! May Joining Special!

Exciting News! Between May 1 and May 31, anyone who becomes a Stampin’ Up! demonstrator will receive four 2024–2026 In Color products in their Starter Kit for FREE! This is one of our richest offerings yet!

Promotion Details:

  • Dates: May 1, 2024 – May 31, 2024
  • New Demonstrators will receive the following products in their Starter Kit at no additional cost:
    • 2024–2026 In Color Classic Stampin’ Pad Bundle
    • 2024–2026 In Color 8-1/2″ x 11″ Cardstock
    • 2024–2026 In Color 6″ x 6″ Designer Series Paper
    • 2024–2026 In Color Stampin’ Write Markers
  • New team members may not use their team leader’s shipping address to ship their kit. 
  • New team members may only pay for their kit using a credit card on which they are listed as an authorized user. 
  • All orders should be closed by 31 May. 
  • New demonstrators who submit their Independent Demonstrator Agreement (IDA) before 1 May or after 31 May will not be eligible for this Starter Kit offer.

Click on the picture below to download a flyer to see more:

In addition to the In Color products, new Demonstrators will pick $125 USD worth of products of their choice for $99! When you join, the In Color products will be automatically added to your Starter Kit. You will also receive free business supplies with your order and free shipping. Not to mention all the fun that comes with being a part of our wonderful crafting community. Click the button below to Join Now, or get additional details on my Join My Team page


Current Host Code: SSMUTY4A

Use this host code when you order $50 or more and receive a Thank You gift from me!  The free gift is your choice of any item currently available valued up to $10.00.

If your order is over $150, please do not use the host code since you’ll receive your own Host Dollars plus I’ll still send you the Thank You gift!  This host code can be used by anyone, no club or commitment required. Let me know if you have any questions.


If you need any stamping supplies, I’d be very happy to be your Demonstrator.  Just click on the Shop Now Button on the right side of the screen to go directly to my Online store or contact me if you have any questions.  Happy Stamping!

Thanks for stopping by and have a great day!

Akiko

  • Visit my online store here
  • See the current Stampin’ Up! clearance rack specials here
  • Earn FREE Stampin’ Up! products through my Wildflower Frequent Shopper Program – my way of saying thank you to my online frequent shopper customers.
  • Have any questions? I’d be happy to help, click here to contact me.

Cardstock Cuts for this project:

  • Boho Blue – 5-1/2″ x 8-1/2″ card base, scored at4-1/4″, 1-1/4″ x 2-1/2″ (label)
  • Mossy Meadow – 4″ x 5-1/4″ (front Mat)
  • Lost Lagoon – 1″ x 5″ (die cut leaves)
  • Wild Wheat – 1-1/4″ x 2-1/2″
  • Basic White – 4″ x 5-1/4″ (inside panel), 2″ x 6″ (die cut flowers)
  • Thoughtful Journey 6″ x 6″ DSP – 3-7/8″ x 5-1/8″ (front background)

Stampin’ Up! products used in this project: