Stampin’ Up! Designer Series Paper Sale Starts October 1

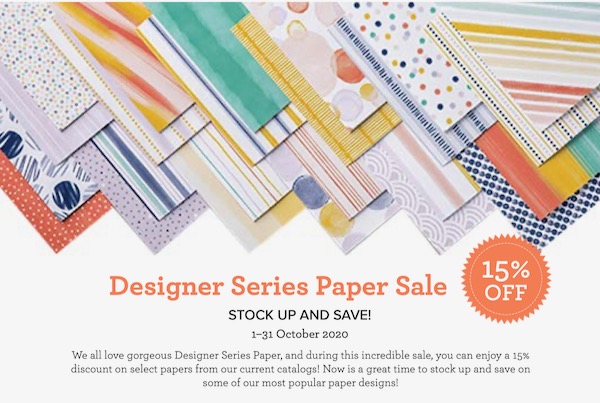
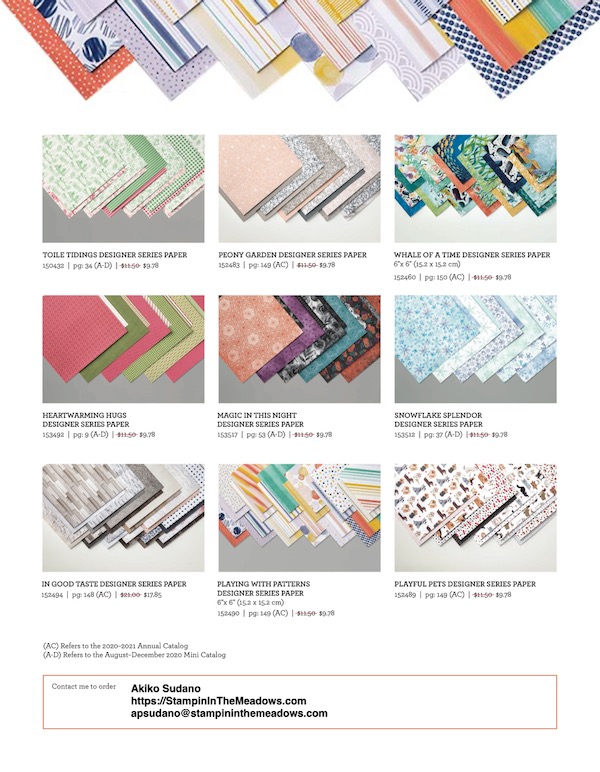
Stampin’ Up! has beautiful Designer Series Paper and during the Month of October they’re putting a select list of those on sale with a 15% discount! This is a fantastic opportunity for you to stock up and save on paper. And the sale includes some of the designs from the August-December 2020 Mini Catalog too!

Sales Details:

  • Sales Period: October 1–31
  • All order types qualify for this promotion. 
  • There is no limit to how many packages of Designer Series Paper may be purchased during this promotion.
  • Only select Designer Series Papers are available at a 15% discount during this promotion.
  • Orders must be placed—and closed—during the promotion period for the 15% discount to apply.
  • Designer Series Paper ordered as part of a Starter Kit or with Stampin’ Rewards qualify for the 15% discount
  • Online orders must be placed prior to 11:50 pm (MT) October 31, 2020

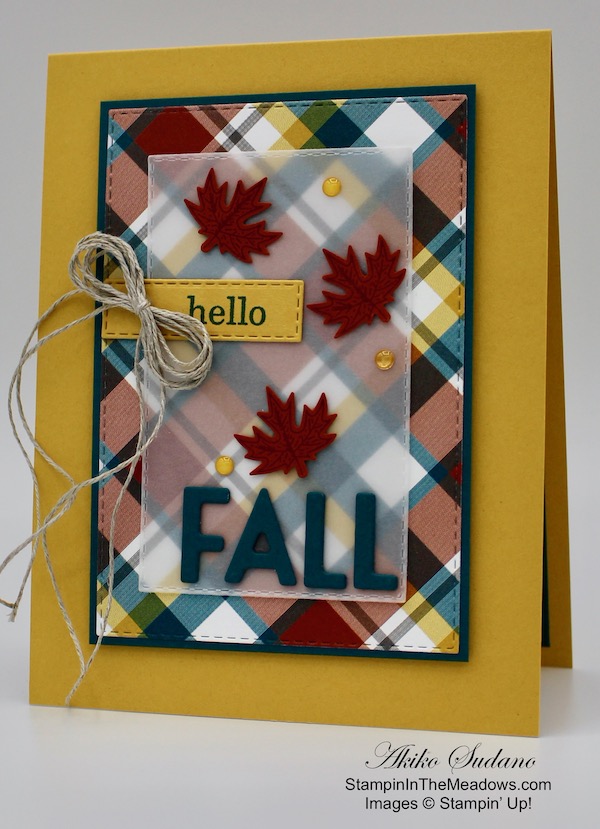
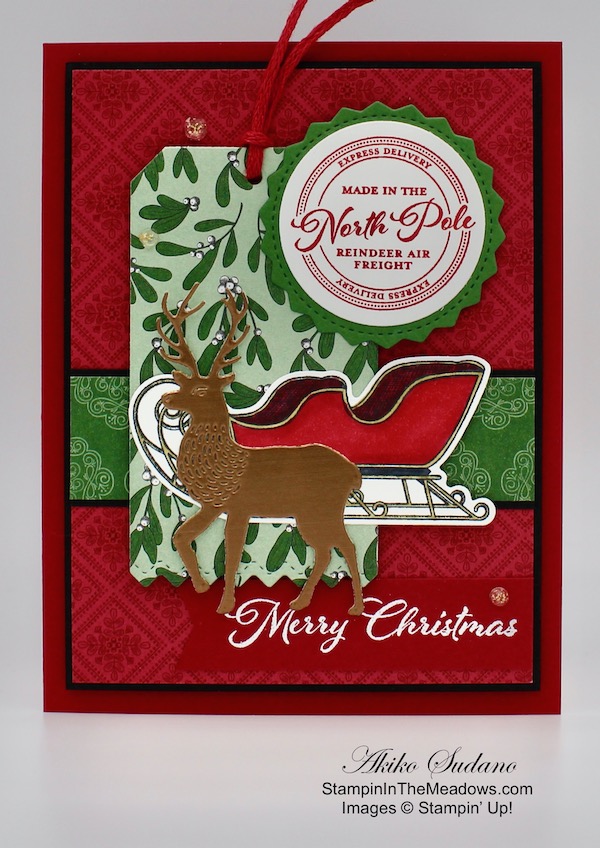
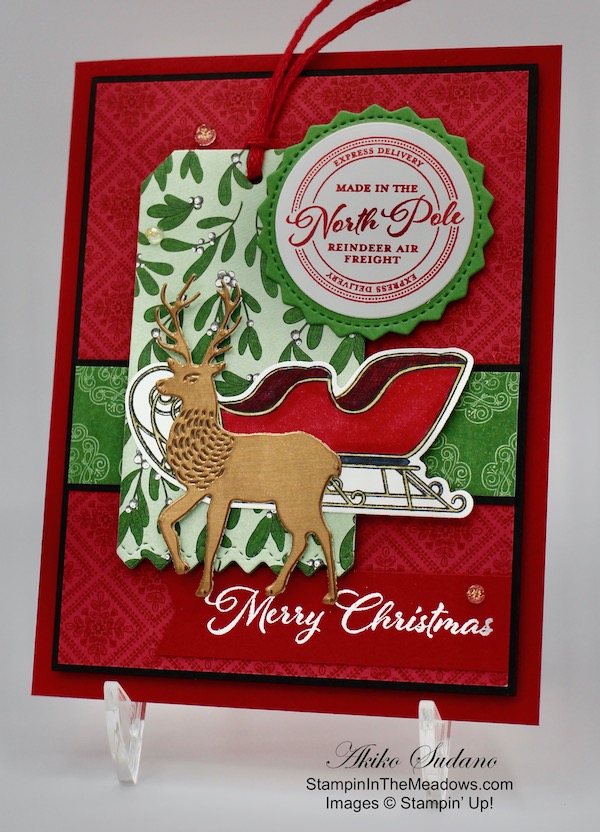
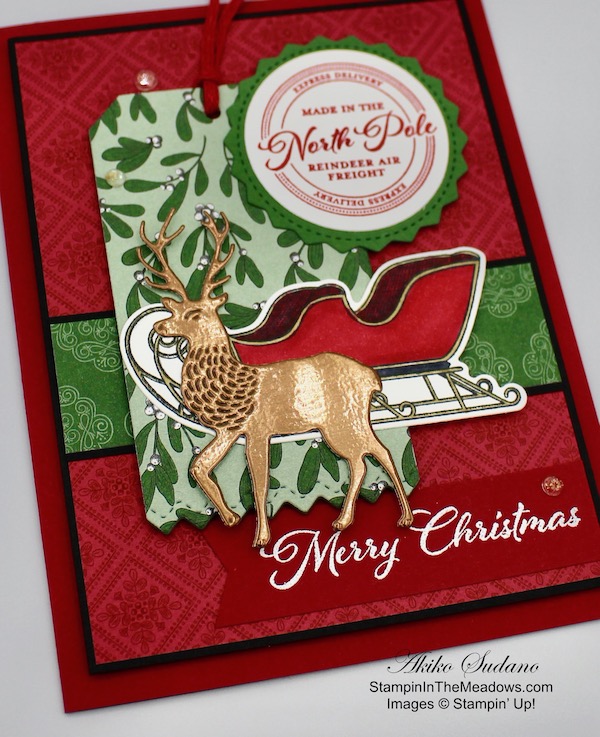
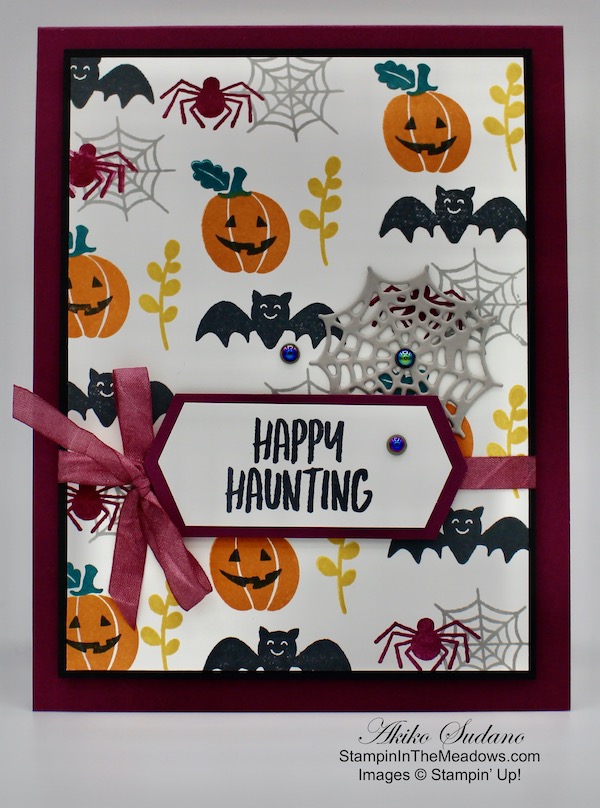
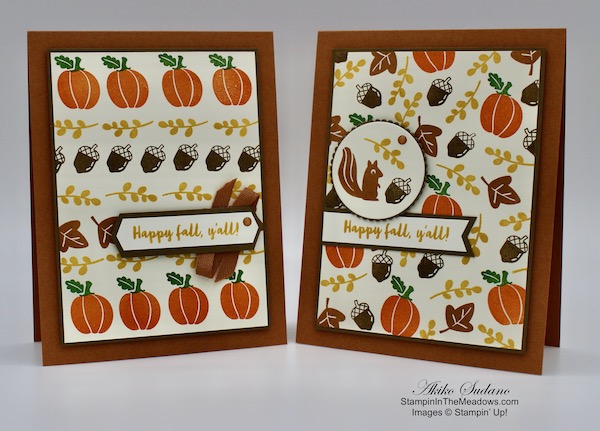
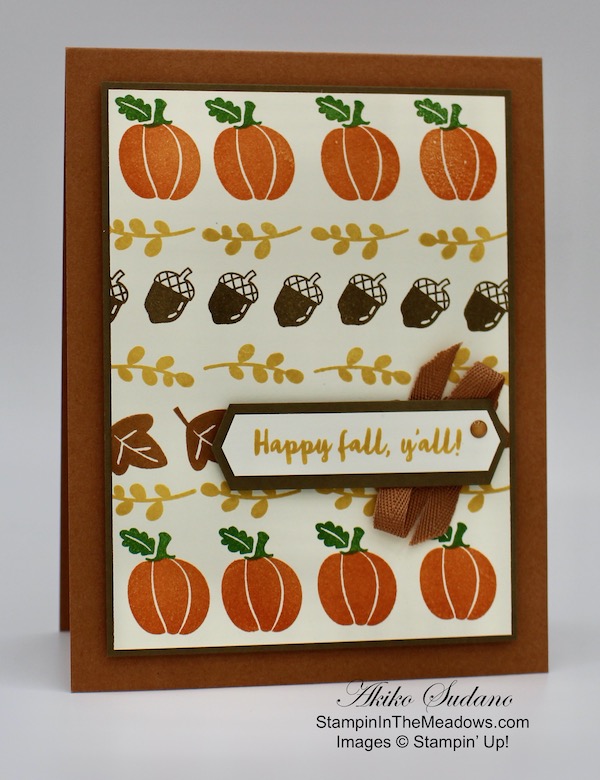
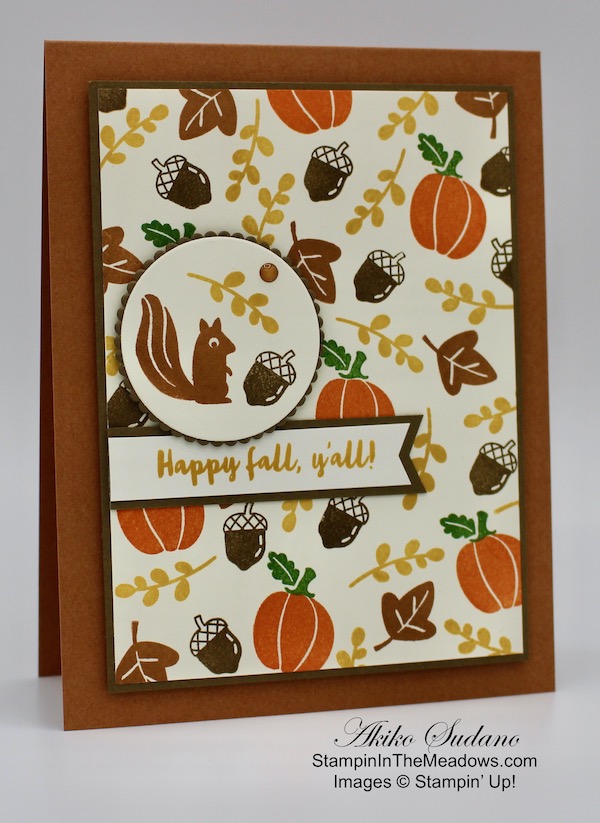
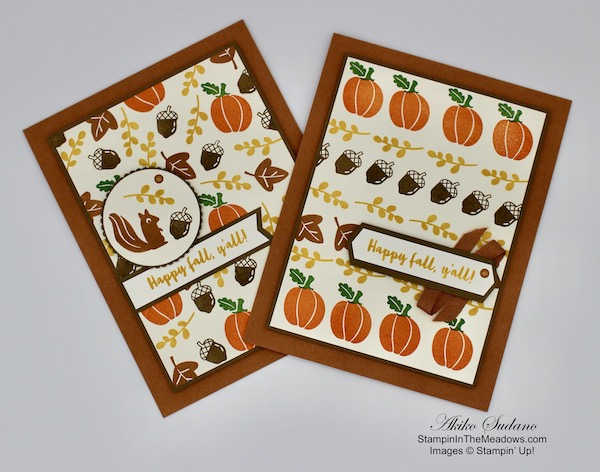
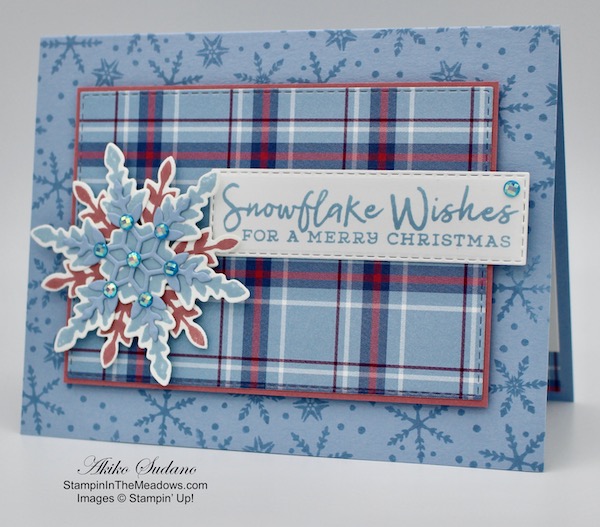
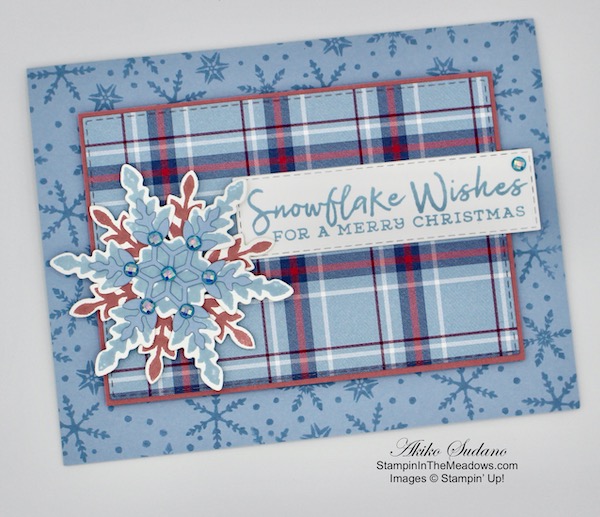
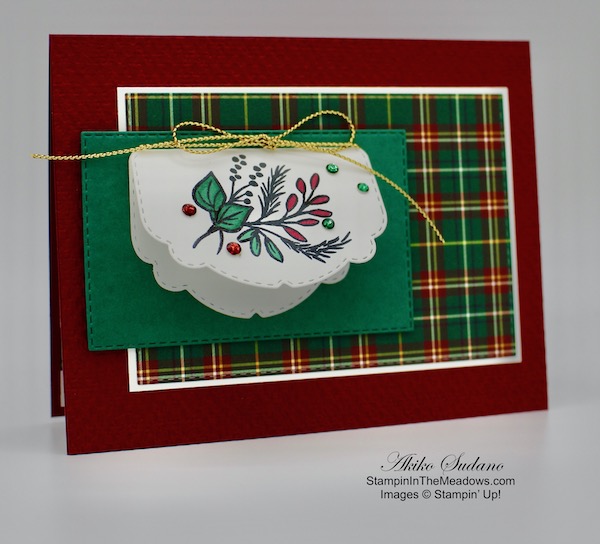
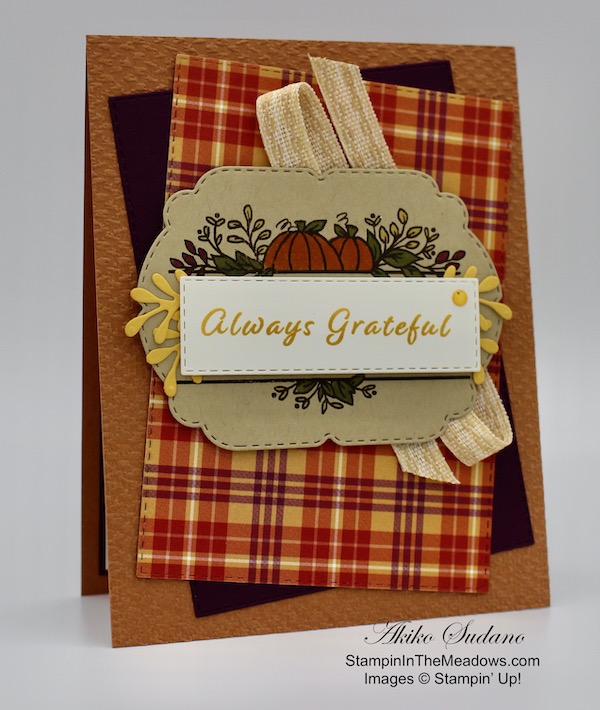
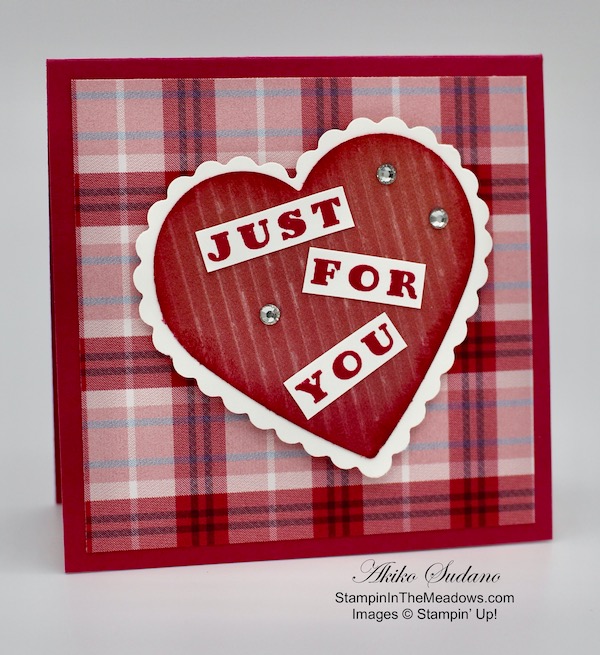
Check it out! Click on one of the pictures below to download a printable PDF of all the papers that will go on sale.


Inkin’ Krew World Card Making Day Facebook Event – This Saturday, October 3!

World Card Making Day is next Saturday, October 3 and we’re going to celebrate again with a fun all-day event on Facebook! All are welcome to join us!  We’ll be setting up a Facebook page to host the event and we’ll be sharing the link to the page later this week. Let me know if you are interested and I’ll be sure to send you an invite at end of the week. Can’t wait to stamp with you all then!!


Stampin’ In The Meadows Double Wildflower Points through September 30!

To celebrate the end of a great Stampin’ Up! year, I’m offering Double Wildflower Points!! If you don’t know about my Wildflower Points program, here’s how it works:

  • For each $50 that you order from my online store (before shipping) you will earn one Wildflower point.
  • You will earn one Wildflower point for each friend that you refer when they place their first order of $50+ from my online store.
  • When you have earned 8 Wildflower points you will get a FREE product order valued up to $40.00, your choice and mailed directly to you!

With DOUBLE Wildflower points you get 2 points for each $50 order, 4 points for each $100 order, and so on, reaching your FREE order faster!!

For complete details on my Wildflower Rewards, scroll to the bottom of my Customer Rewards page or contact me. To start shopping now, head over to my Online Store!


Get & Go Starter Kit Promotion Ends September 30!

These are only a few days left in the The Get & Go Starter Kit limited time promotion. This fantastic offer is designed to give new Stampin’ Up! demonstrators additional products to help you get started right away. In addition to the already great valued Starter Kit – $125 worth of products for $99 – you will receive card stock to make 16 cards, two stamp sets, and rhinestone basic jewels to use in your first event.

Full Details are on my Promotion Page, or you can contact me – I’d love to talk to you about joining my team!


And you are welcome to join me at 1:00 today on my Facebook Business Page as I show how to make a card using the Celebrate Sunflowers stamp set.


September 16-30 Host Code: V9FPKC9R

Use this host code when you order $50 or more and receive a free gift from me!  The gift is your choice of any item valued up to $10.00 in the 2020-21 Annual Catalog or the Aug – Dec 2020 Mini Catalog. This includes some of the host exclusive sets!

If your order is over $150, please do not use the host code since you’ll receive your own Host Dollars plus I’ll still send you the free gift!  This host code can be used by anyone, no commitment required.  Let me know if you have any questions.


If you need any stamping supplies, I’d be very happy to be your Demonstrator.  Just click on the Shop Now Button on the right side of the screen to go directly to my Online store or contact me if you have any questions.  Happy Stamping!

Thanks for stopping by and have a great day!

Akiko

  • Visit my Online store here
  • See the current Stampin’ Up! clearance rack specials here
  • Earn FREE Stampin’ Up! products through my Wildflower Frequent Shopper Program – my way of saying thank you to my frequent shopper online customers.
  • Sign up for my monthly newsletter here
  • Have any questions? I’d be happy to help, click here to contact me.

Stampin’ Up! Beautiful Autumn Hello Fall Card

Good Morning! Here’s a Fall hello card made with the pretty leaves from the Stampin’ Up! Beautiful Autumn bundle, the Playful Alphabet Dies and the wonderful Plaid Tidings 6″ x 6″ designer series paper. You can find the supplies used to create this card at the bottom of my post along with the sizes of cardstock used.

I cut a panel of the Plaid Tidings designer series paper with the Stitched Rectangles Dies and adhered it to a Pretty Peacock Mat. I cut three each of the F-A-L-L letters from the Playful Alphabet Dies and adhered them together so that each letter was three deep. I stamped the hello sentiment from the Best Year cling stamp set in Pretty Peacock ink on a strip of Bumblebee card stock and cut it out with the small long stitched rectangle die using the two step die cutting method.

I stamped six maple leaves from the Stampin’ Up! Beautiful Autumn stamp set in Cajun Craze ink on Cajun Craze card stock and cut them out with the coordinating punch. I cut a panel of vellum with the Stitched Rectangles dies. I adhered the letters leaves and label to the vellum panel.

I adhered the vellum panel to the DSP panel with glue dots placed behind the letters, leaves and label. I made a loopy bow with Linen Thread and adhered it to the label. I finished the panel with three Bumblebee enamel dots and popped the panel to the front of a Bumblebee card base with dimensionals.

I adhered a strip of the Plaid Tidings DSP to the bottom of a Whisper White panel and adhered the last three of the Stampin’ Up! Beautiful Autumn punched maple leaves. I added a Pretty Peacock mat before adhering it to the inside of the card.

I love using vellum on cards and I also love die cut words, so this card combines two of my favorites with the pretty Plaid Tidings paper for a card to welcome Fall!


And to celebrate the end of a great Stampin’ Up! year, I’m offering Double Wildflower Points!! If you don’t know about my Wildflower Points program, here’s how it works:

  • For each $50 that you order from my online store (before shipping) you will earn one Wildflower point.
  • You will earn one Wildflower point for each friend that you refer when they place their first order of $50+ from my online store.
  • When you have earned 8 Wildflower points you will get a FREE product order valued up to $40.00, your choice and mailed directly to you!

With DOUBLE Wildflower points you get 2 points for each $50 order, 4 points for each $100 order, and so on, reaching your FREE order faster!!

For complete details on my Wildflower Rewards, scroll to the bottom of my Customer Rewards page or contact me. To start shopping now, head over to my Online Store!


September 16-30 Host Code: V9FPKC9R

Use this host code when you order $50 or more and receive a free gift from me!  The gift is your choice of any item valued up to $10.00 in the 2020-21 Annual Catalog or the Aug – Dec 2020 Mini Catalog. This includes some of the host exclusive sets!

If your order is over $150, please do not use the host code since you’ll receive your own Host Dollars plus I’ll still send you the free gift!  This host code can be used by anyone, no commitment required.  Let me know if you have any questions.


If you need any stamping supplies, I’d be very happy to be your Demonstrator.  Just click on the Shop Now Button on the right side of the screen to go directly to my Online store or contact me if you have any questions.  Happy Stamping!

Thanks for stopping by and have a great day!

Akiko

  • Visit my Online store here
  • See the current Stampin’ Up! clearance rack specials here
  • Earn FREE Stampin’ Up! products through my Wildflower Frequent Shopper Program – my way of saying thank you to my frequent shopper online customers.
  • Sign up for my monthly newsletter here
  • Have any questions? I’d be happy to help, click here to contact me.

Cardstock Cuts for this project:

  • Bumblebee – 4-1/4″ x 11″ card base scored at 5-1/2″, 1″ x 3-1/2″ (label)
  • Pretty Peacock – 1″ x 6″ (letters), 3-1/8″ x 4-1/2″ (front mat), 3-7/8″ x 5-1/8″ (inside mat)
  • Cajun Craze – 1″ x 6″ (punched leaves)
  • Whisper White – 3-3/4″ x 5″ (inside panel)
  • Vellum – 2-1/2″ x 4″ (front overlay)
  • Plaid Tidings DSP – 3-1/4″ x 4-5/8″ (front background), 1/2″ x 3-3/4″ (inside trim)

Stampin’ Up! products used in this project:


Stampin’ Up! Wishes & Wonder Christmas Card

Good Morning! Today I made a tag Christmas Card with the pretty new Stampin’ Up! Wishes & Wonder bundle and the ‘Tis The Season 6″ x 6″ designer series paper. You can find the supplies used to create this card at the bottom of my post along with the sizes of cardstock used.

I adhered a panel of Real Red ‘Tis The Season 6″ x 6″ designer series paper to a black mat. I added a matted stripe of a Garden Green ‘Tis The Season paper across the middle and popped the panel on the front of a Real Red card base with dimensionals. I cut another piece of the ‘Tis The Season DSP with the tag die from the North Pole Wonder Dies and adhered on top of a Garden Green tag to give it some thickness. I looped a length of red braided thread through the hole.

I stamped the sled from the Stampin’ Up! Wishes & Wonder stamp set in Memento Tuxedo Black ink and colored it with Soft Suede, Real Red and Basic Black Stampin’ Blends. I cut it out with the coordinating North Pole Wonder Dies and adhered it to the front of the tag. Then I cut the deer from the brushed copper foil using the deer die. I adhered the deer to the sled and then adhered both to the tag. I stamped the sentiment in Real Red and cut it out with the circle die and adhered it to a die cut Garden Green pinked circle. I adhered the layered circle to the top of the tag and popped everything on the card front with dimensionals.

I stamped the Merry Christmas sentiment from the Cherish the Season stamp set in Versamark ink and sprinkled it with white embossing powder. I heat set until shiny and trimmed the ends with the Banners Pick A Punch before adhering it to the bottom of the card with Stampin’ Seal. I finished the card with three clear Wonderful Gems.

I stamped the sentiment from the Stampin’ Up! Wishes & Wonder stamp set in Real Red ink in the center of a Whisper White panel. I stamped the mistletoe in Garden Green ink after stamping off in the top and bottom corner. I adhered the panel to a Basic Black mat and then to the inside of the card.

The Stampin’ Up! Wishes & Wonder bundle has the gorgeous sled stamp and deer and fun coordinating stamps and dies that can be combined to create beautifully layered tags and cards. Click on the picture below for all the details in my Online Store.


Tomorrow is the Big Day for the 24 Hour Stamp Sale – Is your shopping list ready?

Click here for a downloadable PDF of the stamp sets that will be on sale at a 15% discount!


Inkin’ Krew World Card Making Day Facebook Event – Saturday, October 3!

World Card Making Day is October 3 and we’re going to celebrate again with a fun all-day event on Facebook! All are welcome to join us!  We’ll be setting up a Facebook page to host the event and we’ll be sharing the link to the page in late September. Can’t wait to stamp with you all then!!


September 16-30 Host Code: V9FPKC9R

Use this host code when you order $50 or more and receive a free gift from me!  The gift is your choice of any item valued up to $10.00 in the 2020-21 Annual Catalog or the Aug – Dec 2020 Mini Catalog. This includes some of the host exclusive sets!

If your order is over $150, please do not use the host code since you’ll receive your own Host Dollars plus I’ll still send you the free gift!  This host code can be used by anyone, no commitment required.  Let me know if you have any questions.


If you need any stamping supplies, I’d be very happy to be your Demonstrator.  Just click on the Shop Now Button on the right side of the screen to go directly to my Online store or contact me if you have any questions.  Happy Stamping!

Thanks for stopping by and have a great day!

Akiko

  • Visit my Online store here
  • See the current Stampin’ Up! clearance rack specials here
  • Earn FREE Stampin’ Up! products through my Wildflower Frequent Shopper Program – my way of saying thank you to my frequent shopper online customers.
  • Sign up for my monthly newsletter here
  • Have any questions? I’d be happy to help, click here to contact me.

Cardstock Cuts for this project:

  • Real Red – 5-1/2″ x 8-1/2″ card base scored at 4-1/4″, 3/4″ x 3-1/4″ (label)
  • Brushed Copper Foil – 2″ x 3″ (deer)
  • Garden Green – 2-1/8″ x 4″ (tag backing), 2-1/4″ x 2-1/4″ (pinked die cut)
  • Basic Black – 3-7/8″ x 5-1/8″ (front mat), 1-1/8″ x 3-3/4″ (front stripe mat), 3-3/4″ x 5″ (inside mat)
  • Whisper White – 3-5/8″ x 4-7/8″ (inside panel), 2″ x 2″ (circle label), 2-1/4″ x 4″ (sled)
  • ‘Tis The Season DSP – 3-3/4″ x 5″ (front background), 1″ x 3-3/4″ (green stripe), 2-1/8″ x 4″ (tag)

Stampin’ Up! products used in this project:


Stampin’ Up! Banner Year Happy Haunting Card Video Tutorial

Good Morning! Today I’m sharing a Halloween card made with the Stampin’ Up! Banner Year bundle that I made during my Facebook Live video tutorial yesterday afternoon. Last week I made a pair of Fall cards with this bundle and today’s card uses another technique for designing and stamping your own ‘designer series paper’ for a card background. You can find the supplies used to create this card at the bottom of my post along with the sizes of cardstock used.

Here is the Facebook Live video showing how I made the card:

I will also edit and post a concise tutorial on my YouTube Channel, so look for that soon. You can find the YouTube video here.

I planned a little rectangle of images from the Stampin’ Up! Banner Year photopolymer stamp set and the colors that I wanted to use. In order to fill all the spaces, I needed to put a spider in the spider web, so I used in the spider from the Celebration Tidings stamp set. Then I just stamped the pattern in a row. I shifted the pattern and stamped the next row and repeated until I covered the panel. I used Rich Razzleberry, Smoky Slate, Bumblebee, Pumpkin Pie, Pretty Peacock and Memento Tuxedo Black inks on a Whisper White panel.

I trimmed my stamped panel and adhered it to a Basic Black mat. I colored a length of white crinkle seam binding ribbon with dark Rich Razzleberry Stampin’ Blend and wrapped it around the panel, tying a bow. I cut the spider web from Smoky Slate card stock using the Peek A Hoot Dies and adhered it to the panel with a glue dot. I trimmed the ends of my labels with the Banners Pick A Punch and stamped the sentiment from the Stampin’ Up! Banner Year stamp set in Memento Tuxedo Black. I adhered the label to the mat and popped it on the panel with dimensionals. I finished the panel with three iridescent pearls and popped it on the front of a Rich Razzleberry card base with dimensionals.

I stamped the images similar to the card front on a Whisper White panel. I added the Boo sentiment from the Stampin’ Up! Banner Year stamp set in Memento Tuxedo Black ink and adhered the panel to the inside of the card.

The cute images in the Stampin’ Up! Banner Year stamp set are perfect for stamping all over a sheet of card stock to make your own custom designer series paper for a One Sheet Wonder project for all the upcoming holidays!  The little images are also great for accenting labels or tags that go on other projects. Click the image below to get the full details of this bundle in my Online Store.


September 16 – 30 Host Code: V9FPKC9R

Use this host code when you order $50 or more and receive a free gift from me!  The free gift is your choice of any item valued up to $10.00 in the 2019 – 2020 Annual Catalog or in the 2020 Mini Catalog!  That includes some of the Host Exclusive stamp sets!

If your order is over $150, please do not use the host code since you’ll receive your own Host Dollars plus I’ll still send you the free gift!  This host code can be used by anyone, no club or commitment required.  Let me know if you have any questions.


If you need any stamping supplies, I’d be very happy to be your Demonstrator.  Just click on the Shop Now button on the right side of the screen to go directly to my online store or contact me if you have any questions.  Happy Stamping!

Thanks for stopping by and have a great week!

Akiko

  • Visit my online store here
  • See the current Stampin’ Up! clearance rack specials here
  • Earn FREE Stampin’ Up! products through my Wildflower Frequent Shopper Program – my way of saying thank you to my online frequent shopper customers.
  • Sign up for my weekly newsletter here
  • Have any questions? I’d be happy to help, click here to contact me.

Cardstock Cuts for this project:

  • Rich Razzleberry – 4-1/4″ x 11″ card base scored at 5-1/2″, 1-1/8″ x 2-1/2″ (label mat)
  • Smoky Slate – 2″ x 2″ (spider web die cut)
  • Basic Black – 3-3/4″ x 5″ (front mat)
  • Whisper White – two 3-3/4″ x 5″ (front stamped background and inside panel), 1″ x 2-1/4″ (label)

Stampin’ Up! products used in this project:


Stampin’ Up! Banner Year Happy Fall Cards

Good Morning! Today I have a pair of fall cards made with the cute Stampin’ Up! Banner Year bundle. This is a versatile stamp set with images and sentiments for fall, Halloween, Thanksgiving, Christmas and Valentine’s Day. It also comes with the Banners Pick A Punch, so you can punch out angled or fishtail banners for three different widths of cardstock strips. You can find the supplies used to create this card at the bottom of my post along with the sizes of cardstock used.

On this first card, I decided to stamp rows of images on Very Vanilla card stock to resemble stripes. I used Pumpkin Pie, Garden Green, Bumblebee, Soft Suede and Cinnamon Cider to stamp the different images in the Stampin’ Up! Banner Year photopolymer stamp set. I used the angle punch for my label and decorated it with Cinnamon Cider ribbon and an enamel dot.

For the second card, I used the same images and ink and stamped randomly instead of in rows. I used the same sentiment from the Stampin’ Up! Banner Year stamp set and used the fishtail side of the Banners Pick A Punch. And I stamped a motif with the little squirrel that I cut out with the Layering Circles Dies instead of the ribbon. For both cards, I adhered the Very Vanilla panel to a Soft Suede mat and popped it on a Cinnamon Cider card base with dimensionals.

On the inside, I stamped the pumpkin, acorn and leaf cluster in the same colors as the front on a Very Vanilla panel and adhered it to the inside of the card.

The cute images in the Stampin’ Up! Banner Year stamp set are perfect for stamping all over a sheet of card stock in either of these patterns to make your own custom designer series paper for a One Sheet Wonder project.

Click on the picture below to see the complete details of the Stampin’ Up! Banner Year bundle in my Online Store.


Get & Go Starter Kit – Limited Time Joining Promotion

The Get & Go Starter Kit is a limited time promotion designed to give new Stampin’ Up! demonstrators additional products to help you get started right away. In addition to the already great valued Starter Kit, you will receive precut paper, stamps, and embellishments to use in your first event.

Full Details are on my Promotion Page, or you can contact me – I’d love to talk to you about joining my team!


The Stampin’ Cut & Emboss Machine is Here!

If you need a new die cutting machine, check out the new Stampin’ Cut & Emboss machine! This is a well built, smooth running machine and I used it on today’s project along with the wonderful Magnetic Cutting Plate! Details are on my Promotions page – and I’ve even posted the Stampin’ Up! Videos that show the some of the sandwiches.


September 1-15 Host Code: 9UZFD3BH

Use this host code when you order $50 or more and receive a free gift from me!  The gift is your choice of any item valued up to $10.00 in the 2020-21 Annual Catalog or the Aug – Dec 2020 Mini Catalog. This includes some of the host exclusive sets!

If your order is over $150, please do not use the host code since you’ll receive your own Host Dollars plus I’ll still send you the free gift!  This host code can be used by anyone, no commitment required.  Let me know if you have any questions.


If you need any stamping supplies, I’d be very happy to be your Demonstrator.  Just click on the Shop Now Button on the right side of the screen to go directly to my Online store or contact me if you have any questions.  Happy Stamping!

Thanks for stopping by and have a great day!

Akiko

  • Visit my Online store here
  • See the current Stampin’ Up! clearance rack specials here
  • Earn FREE Stampin’ Up! products through my Wildflower Frequent Shopper Program – my way of saying thank you to my frequent shopper online customers.
  • Sign up for my monthly newsletter here
  • Have any questions? I’d be happy to help, click here to contact me.

Cardstock Cuts for this project:

  • Cinnamon Cider – 4-1/4″ x 11″ card base scored at 5-1/2″
  • Very Vanilla – 3-3/4″ x 5″ (inside panel), 3-1/2″ x 4-3/4″ (front panel), 1/2″ x 3″ (label), 2″ x 2″ (circle)
  • Soft Suede – 3-5/8″ x 4-7/8″ (front mat), 3/4″ x 3″ (label mat), 2″ x 2″ (scalloped circle)

Stampin’ Up! products used in this project:


Stampin’ Up! Snowflake Wishes for the Happy Inkin’ Thursday Blog Hop

Good Morning! Welcome to another Happy Inkin’ Thursday Blog Hop! I pulled out the versatile Stampin’ Up! Snowflake Wishes bundle for today’s card to show a cozy homespun snowflake Christmas card. I paired the Stampin’ Up! Snowflake Wishes bundle with the Plaid Tidings 6″ x 6″ designer series paper. You can find the supplies used to create this card at the bottom of my post along with the sizes of cardstock used.

We have a sketch challenge this week, and here is the sketch we are using:

I started by stamping the front of a Seaside Spray card base with the large snowflake cluster stamp from the Stampin’ Up! Snowflake Wishes stamp set using Seaside Spray ink. I cut a panel of the Plaid Tidings designer series paper with one of the Stitched Rectangles Dies and adhered it to a Rococo Rose mat. I popped the layered designer series paper on the card front with dimensionals.

I stamped the large snowflake from the Stampin’ Up! Snowflake Wishes stamp set in Seaside Spray ink on a panel of Whisper White and cut it out with the coordinating die. I stamped the second largest snowflake in Rococo Rose ink on Whisper White and cut it out with the coordinating die. I cut out the medium detailed snowflake from Seaside Spray and layered all the snowflakes together, adhering them with liquid glue. I added light blue adhesive backed gems to the snowflake.

I stamped the sentiment from the Stampin’ Up! Snowflake Wishes stamp set in Seaside Spray ink on Whisper White. I cut it out with the Stitched Rectangles Dies using the two step die cutting method. I adhered the label to the card front with Stampin’ Seal and decorated it with another blue adhesive backed gem. I popped the layered snowflake on with dimensionals.

I stamped the sentiment from the Snowman Season photopolymer stamp set in Rococo Rose ink on a Whisper White panel. I stamped snowflakes from the Stampin’ Up! Snowflake Wishes stamp set in the corners and trimmed the bottom with a strip of the Plaid Tidings DSP. I adhered the panel to the inside of the card.

This Christmas card reminds me of a warm fleece blanket – the perfect thing for a cold Christmas morning!

On with the Hop! Click the Next button below to visit Karen Ksenzakovic’s blog.

And just in case you get lost along the way, here’s a list of the team members participating in the hop today:


September 16-30 Host Code: V9FPKC9R

Use this host code when you order $50 or more and receive a free gift from me!  The gift is your choice of any item valued up to $10.00 in the 2019-20 Annual Catalog or in the 2020 January-June Mini Catalog!  That includes some of the Host Exclusive stamp sets!

If your order is over $150, please do not use the host code since you’ll receive your own Host Dollars plus I’ll still send you the free gift!  This host code can be used by anyone, no commitment required.  Let me know if you have any questions.


If you need any stamping supplies, I’d be very happy to be your Demonstrator.  Just click on the Shop Now Button on the right side of the screen to go directly to my online store or contact me if you have any questions.  Happy Stamping!

Thanks for visiting!

Akiko

  • Visit my online store here
  • See the current Stampin’ Up! clearance rack specials here
  • Earn FREE Stampin’ Up! products through my Wildflower Frequent Shopper Program – my way of saying thank you to my frequent shopper online customers.
  • Sign up for my weekly newsletter here
  • Have any questions? I’d be happy to help, click here to contact me.

Cardstock Cuts for this project:

  • Seaside Spray –5-1/2″ x 8-1/2″ card base scored at 4-1/4″, 2″ x 2″ (die cut snowflake)
  • Rococo Rose – 3-1/8″ x 4-1/2″ (DSP mat)
  • Whisper White – 4″ x 5-1/4″ (inside panel), 3″ x 5-1/2″ (snowflakes), 1-1/4″ x 4″ (label)
  • Plaid Tidings DSP – 3-1/4″ x 4-5/8″ (front die cut), 1/2″ x 5-1/4″ (inside trim)

Stampin’ Up! products used in this project:


Stampin’ Up! Celebration Tidings Team Meeting Projects

Good Morning! Today I have some cards that we made at our Inkin’ Krew Team Meeting last weekend! Our Team Leader Amy Koenders sent out tutorials and we prepared our kits and made cards along with the card designers during our virtual quarterly in-person meeting via Zoom – it will be nice when we are able to meet in person again – sigh.

Anyway, all the cards featured the versatile Stampin’ Up! Celebration Tidings bundle. The first card is a real cutie designed by Jaime Babarczy – a Christmas card with a flip panel! It says Merry Christmas underneath! It has a rich Cherry Cobbler card base, embossed with the Tasteful Textile 3D embossing folder and the great Plaid Tidings DSP background. So much fun. Jaime is a wonderful designer and you can find more of her work on her blog Stamp it up with Jaime.

The second card is a Thanksgiving card designed by Mary Deatherage. Mary used the cute pumpkin patch stamp from the Stampin’ Up! Celebration Tidings and the wonderful Thanksgiving sentiment. Starting with an embossed Cinnamon Cider card base, she layered Blackberry Bliss and Plaid Tidings die cut panels, Embroidered Ribbon and the stamped panel colored with Stampin’ Blends. Mary’s cards are always gorgeous and you can find more of her work in her blog Stamps-n-Lingers.

Amy designed our next project which is a bag topper. The Stampin’ Up! Celebration Tidings dies make perfect bag toppers that are great for any time of year. You should check out Amy’s blog Stamp with Amy K because she uses the larger Mosaic Gusseted Cellophane bag and and made larger topper. I made a smaller version, so my poinsettia is not as grand (and her bag is filled with chocolate😊). But it shows how you can take a design and modify it based on what you have!!

Our final card was designed by Sue Prather and it’s a Valentine!! The Stampin’ Up! Celebration Tidings has great Valentine’s Day designs, so I’m glad Sue chose to share this with us. She paired the Plaid Tidings DSP with a Melon Mambo card base and mounted the sentiment on a layered heart made with the Heart Punch Pack. I am always amazed by Sue’s work, because it’s always simple and always perfect. You can see what I mean by visiting her blog Stamp with Sue Prather.

These projects show how versatile the Stampin’ Up! Celebration Tidings bundle is. And there are even designs for Halloween that we didn’t explore. Click on the picture below to get the full details and more inspiration in my Online Store.

It was great to be able to craft with others even though it was virtual. And we had a great turnout for out quarterly meeting as you can see.

My own team is much smaller and growing, and yet we have the advantage of being a part of this wonderful, talented, supportive and inspiring group of paper crafters.

If you’d like to join my team, I’d love to have you!  You can join by paying $99 for your Starter kit and choose $125 of products to put in it! And then you get a 20% – 25% discount on your purchases! There is no commitment and no penalty if you decide that being a Demonstrator isn’t right for you.  Why not give it a try?  You can read more about the benefits on my Join My Team Page, or drop me a note and I’d be happy to tell you more.

And this is a great time to consider joining because there is a special Starter Kit promotion happening in September – check it out below!


Get & Go Starter Kit – Limited Time Joining Promotion

The Get & Go Starter Kit is a limited time promotion designed to give new Stampin’ Up! demonstrators additional products to help you get started right away. In addition to the already great valued Starter Kit, you will receive precut paper, stamps, and embellishments to use in your first event.

Full Details are on my Promotion Page, or you can contact me – I’d love to talk to you about joining my team!


September 1-15 Host Code: 9UZFD3BH

September 16 – 30 Host Code: V9FPKC9R

Use this host code when you order $50 or more and receive a free gift from me!  The gift is your choice of any item valued up to $10.00 in the 2020-21 Annual Catalog or the Aug – Dec 2020 Mini Catalog. This includes some of the host exclusive sets!

If your order is over $150, please do not use the host code since you’ll receive your own Host Dollars plus I’ll still send you the free gift!  This host code can be used by anyone, no commitment required.  Let me know if you have any questions.


If you need any stamping supplies, I’d be very happy to be your Demonstrator.  Just click on the Shop Now Button on the right side of the screen to go directly to my Online store or contact me if you have any questions.  Happy Stamping!

Thanks for stopping by and have a great day!

Akiko

  • Visit my Online store here
  • See the current Stampin’ Up! clearance rack specials here
  • Earn FREE Stampin’ Up! products through my Wildflower Frequent Shopper Program – my way of saying thank you to my frequent shopper online customers.
  • Sign up for my monthly newsletter here
  • Have any questions? I’d be happy to help, click here to contact me.

Stampin’ Up! Snowflake Wishes Christmas Card Video Tutorial

Good Morning! Today I’m sharing a Christmas card made with the Stampin’ Up! Snowflake Wishes bundle that I made during my Facebook Live video tutorial yesterday afternoon. This is such a simple card, but is amazing because of the touches of silver foil card stock. You can find the supplies used to create this card at the bottom of my post along with the sizes of cardstock used.

Here is the Facebook Live video showing how I made the card. Note that in the video, I did a lot of prep work ahead of time to move things along:

I will also edit and post a concise tutorial on my YouTube Channel, so look for that soon. You can now view it here.

I embossed a panel of Seaside Spray card stock with the Winter Snow embossing folder and adhered it to a silver foil mat. I wrapped a length of Seaside Spray metallic ribbon around the panel about 1″ from the bottom. I stamped the Merry Christmas sentiment from the Cherish the Season cling stamp set using Versamark ink on a strip of Seaside Spray. I sprinkled it with Silver embossing powder and heat set until shiny. I cut it out with a die from the Ornate Labels Dies.

I cut out the snowflakes from silver foil using the So Many Snowflakes Dies from the Stampin’ Up! Snowflake Wishes bundle. I cut one of the large snowflakes and two of the small snowflakes. I also cut two of the smallest snowflakes from the Christmas Layers Dies. I placed the label on the ribbon and arranged the silver foil die cut snowflakes on the panel, adhering them with liquid glue. I adhered the label with glue dots and added some rhinestones.

I stamped the sentiment from the Cherish the Season stamp set in Seaside Spray ink and stamped some snowflakes in Seaside Spray ink around a Whisper White panel. I adhered the panel to the inside of the card.

The Stampin’ Up! Snowflake Wishes bundle is so versatile for creating snowflake cards for Christmas and for the winter with intricate die cuts that make beautiful snowflakes and other die cuts that cut out stamped snowflakes! The hex frame is also perfect for making a shaker card – you can see one that I made a while back here. Click the image below to get the full details of this bundle in my Online Store.


The Stampin’ Cut & Emboss Machine is Here!

If you need a new die cutting machine, check out the new Stampin’ Cut & Emboss machine! This is a well built, smooth running machine and I used it on today’s project! Details are on my Promotions page.


The October Paper Pumpkin Kit is Joy to the World!

This holiday season, share the joy of Paper Pumpkin! The Joy to the World Paper Pumpkin Kit is an exclusive holiday kit that provides a specially-designed box, enough supplies to create eight elegant cards, and an opportunity to connect with the Stampin’ Up! global community. 

With October’s magical kit, not only will you get a head start on holiday crafting—you’ll get to create Christmas cards, share project ideas, and spread holiday cheer with Stampin’ Up! customers and demonstrators around the world! And after you subscribe to the October kit, be sure to join the Paper Pumpkin Joy To The World Facebook Group to make the most of your kit.

Here are the Details:

  • Kit contains enough supplies to create eight cards—four each of two designs—and coordinating envelopes.
  • Kit includes die-cut pieces in English, French, and German. This will allow you to create cards you can use to connect with other customers and demonstrators around the world—in their language!
    • Card size: 4-1/4″ x 5-1/2″
    • Envelope size: 4-1/2″ x 5-3/4″

Coordinating Colors: Cherry Cobbler, Crumb Cake, Early Espresso, Just Jade, Soft Sea Foam

If you’re interested in subscribing to Paper Pumpkin, you can either sign up for a subscription where you are billed monthly for your kit or you can purchase a prepaid subscription in my online store. To see more information and to sign up for the monthly subscription click here. To see the options for prepaid subscriptions in my online store, click here.

Sign up deadline for the October 2020 kit is October 10, 2020. Supplies may be limited toward the end of the subscription period.


September 1 – 15 Host Code: 9UZFD3BH

September 16 – 30 Host Code: V9FPKC9R

Use this host code when you order $50 or more and receive a free gift from me!  The free gift is your choice of any item valued up to $10.00 in the 2019 – 2020 Annual Catalog or in the 2020 Mini Catalog!  That includes some of the Host Exclusive stamp sets!

If your order is over $150, please do not use the host code since you’ll receive your own Host Dollars plus I’ll still send you the free gift!  This host code can be used by anyone, no club or commitment required.  Let me know if you have any questions.


If you need any stamping supplies, I’d be very happy to be your Demonstrator.  Just click on the Shop Now button on the right side of the screen to go directly to my online store or contact me if you have any questions.  Happy Stamping!

Thanks for stopping by and have a great week!

Akiko

  • Visit my online store here
  • See the current Stampin’ Up! clearance rack specials here
  • Earn FREE Stampin’ Up! products through my Wildflower Frequent Shopper Program – my way of saying thank you to my online frequent shopper customers.
  • Sign up for my weekly newsletter here
  • Have any questions? I’d be happy to help, click here to contact me.

Cardstock Cuts for this project:

  • Seaside Spray – 4-1/4″ x 11″ card base scored at 5-1/2″, 3/5/8″ x 4-7/8″ (embossed background), 1-1/4″ x 3-1/4″ (label)
  • Silver Foil – 3-3/4″ x 5″ (front mat), 2-1/4″ x 2-1/2″ (snowflake die cuts)
  • Whisper White – 4″ x 5-1/4″ (inside panel)

Stampin’ Up! products used in this project:


Stampin’ Up! Life is Beautiful Fall Friendship Card

Good Morning! For today I made a Fall card with the sweet tree from the Stampin’ Up! Life is Beautiful photopolymer stamp set. I paired it with pumpkins from the Stampin’ Up! Gather Together photopolymer stamp set and the coordinating Gathered Leaves Dies. You can find the supplies used to create this card at the bottom of my post along with the sizes of cardstock used.

I cut the top and bottom edge of a panel of Bumblebee card stock with the small bubble edge die from the Ornate Borders Dies and adhered an panel of Plaid Tidings 6″x6″ designer series paper to the front. I cut a panel of Shimmery White card stock with a die from the Stitched Rectangles Dies and used old Olive and Pool Party inks with my water painters to do a color wash background. After it dried, I pressed the panel and stamped the tree from the Stampin’ Up! Life is Beautiful stamp set in Early Espresso ink on the side. I stamped the leaves in Bumblebee, Pumpkin Pie and Cajun Craze inks and adhered the panel to a Soft Suede mat.

I stamped the pumpkins from the Stampin’ Up! Gather Together stamp set in Cajun Craze ink on Whisper White and cut them out with the coordinating dies from the Gathered Leaves Dies. I colored them with Mossy Meadow and Pumpkin Pie Stampin’ Blends. I stamped the sentiment from the Stampin’ Up! Gather Together stamp set in Soft Suede ink on Whisper White, cut it out with the small label die from the Stitched Rectangles Dies and adhered it to a Soft Suede mat.

I adhered the tree panel to the card front with dimensionals. I tied a length of Bumblebee Gingham ribbon with linen thread and adhered it to the panel with glue dots. I adhered the label with dimensionals and popped the pair of pumpkins on the panel with dimensionals. I brushed some clear Wink of Stella glitter on the pumpkins so they would shimmer like the background.

I stamped the leaves from the Stampin’ Up! Life is Beautiful stamp set in Bumblebee, Pumpkin Pie and Cajun Craze inks in the top corner of a Whisper White panel. I adhered a strip of Plaid Tidings DSP to the bottom and the large pumpkin in the corner. I adhered the panel to the inside of the card.

The Stampin’ Up! Life is Beautiful stamp set has the pretty tree that can be used for all seasons. It has beautiful sentiments, and coordinates well with many other stamp sets.


September 1-15 Host Code: 9UZFD3BH

Use this host code when you order $50 or more and receive a free gift from me!  The gift is your choice of any item valued up to $10.00 in the 2020-21 Annual Catalog or the Aug – Dec 2020 Mini Catalog. This includes some of the host exclusive sets!

If your order is over $150, please do not use the host code since you’ll receive your own Host Dollars plus I’ll still send you the free gift!  This host code can be used by anyone, no commitment required.  Let me know if you have any questions.


If you need any stamping supplies, I’d be very happy to be your Demonstrator.  Just click on the Shop Now Button on the right side of the screen to go directly to my Online store or contact me if you have any questions.  Happy Stamping!

Thanks for stopping by and have a great day!

Akiko

  • Visit my Online store here
  • See the current Stampin’ Up! clearance rack specials here
  • Earn FREE Stampin’ Up! products through my Wildflower Frequent Shopper Program – my way of saying thank you to my frequent shopper online customers.
  • Sign up for my monthly newsletter here
  • Have any questions? I’d be happy to help, click here to contact me.

Cardstock Cuts for this project:

  • Pumpkin Pie – 4-1/4″ x 11″ card base scored at 5-1/2″
  • Bumblebee – 3-1/4″ x 4-1/4″ (die cut mat)
  • Soft Suede – 3-1/8″ x 4-1/2″ (tree panel mat), 5/8″ x 2-5/8″ (label mat)
  • Shimmery White – 3-1/4″ x 4-3/4″ ( tree panel)
  • Whisper White – 4″ x 5-1/4″ (inside panel), 1″ x 3″ (label), 2″ x 3″ (pumpkin die cuts)
  • Plaid Tidings DSP – 2-3/4″ x 4-1/4″ (front background), 1/2″ x 4″ (inside trim)

Stampin’ Up! products used in this project:


Stampin’ Up! In The Pines Rustic Christmas Card

Good Morning! Today I’m sharing a Christmas Card made with the versatile new Stampin’ Up! In The Pines stamp bundle. I’m using the large Pine Tree die cuts to make a Christmas Tree card! You can find the supplies used to create this card at the bottom of my post along with the sizes of cardstock used.

I die cut the background large tree background from Just Jade card stock and the detailed tree from Shaded Spruce card stock using the Pine Woods Dies. I adhered them together with dots of liquid glue. I cut a large oval from Whisper White and a large scalloped oval from Cherry Cobbler using the Layering Ovals Dies. I embossed the Whisper White oval with the Wrapped in Texture embossing folder and adhered it to the front of the Cherry Cobbler scalloped oval. I popped the layered tree on top with dimensionals and accented it with rhinestones.

I adhered a panel of ‘Tis the Season 6″x6″ designer series paper to a Basic Black mat. I embossed a strip of Cherry Cobbler with the Wrapped in Texture embossing folder and adhered it to the bottom of the plaid paper. I colored a length of Whisper White crinkle seam binding ribbon with the light Cherry Cobbler Stampin’ Blend and wrapped it around the seam and tied a bow. I stamped the Seasons Greetings sentiment from the Stampin’ Up! In The Pines photopolymer stamp set in Memento Tuxedo Black ink on a strip of Whisper White. I cut it out with the smallest die from the Stitched Rectangles Dies and adhered it to the embossed red panel on the plaid layered panel.

I adhered the layered plaid panel to the front of a Just Jade card base with dimensionals. I adhered the layered oval panel to the card front with dimensionals.

For the inside of the card, I stamped the sentiment from the Dove of Hope stamp set in Memento Tuxedo Black ink on a Whisper White panel. Next to the sentiment, I stamped the medium tree from the Stampin’ Up! In The Pines stamp set in stamped off Just Jade ink. I trimmed the bottom with a strip of the green plaid ‘Tis The Season DSP and adhered it to a Basic Black mat and then to the inside of the card.

The Stampin’ Up! In The Pines bundle is so versatile with so many sizes and styles of trees. They make great Christmas Trees, but they can also be used to create outdoor scenes. You can see the detailed image below and you can click on the it to go to my online store and see the complete details.


Tomorrow is the last day to sign up for the September Paper Pumpkin Kit!

September’s Paper Pumpkin kit has a multi-occasion stamp set and enough supplies to design 20 cracker box treat packages – you can create custom fall crafts to celebrate Halloween, Thanksgiving, pumpkins, and leaves.

If you’re interested in subscribing to Paper Pumpkin, you can either sign up for a subscription where you are billed monthly for your kit or you can purchase a prepaid subscription in my online store. To see more information and to sign up for the monthly subscription click here. To see the options for prepaid subscriptions in my online store, click here.


Get & Go Starter Kit – Limited Time Joining Promotion

The Get & Go Starter Kit is a limited time promotion designed to give new Stampin’ Up! demonstrators additional products to help you get started right away. In addition to the already great valued Starter Kit, you will receive precut paper, stamps, and embellishments to use in your first event.

Full Details are on my Promotion Page, or you can contact me – I’d love to talk to you about joining my team!


September 1-15 Host Code: 9UZFD3BH

Use this host code when you order $50 or more and receive a free gift from me!  The gift is your choice of any item valued up to $10.00 in the 2020-21 Annual Catalog or the Aug – Dec 2020 Mini Catalog. This includes some of the host exclusive sets!

If your order is over $150, please do not use the host code since you’ll receive your own Host Dollars plus I’ll still send you the free gift!  This host code can be used by anyone, no commitment required.  Let me know if you have any questions.


If you need any stamping supplies, I’d be very happy to be your Demonstrator.  Just click on the Shop Now Button on the right side of the screen to go directly to my Online store or contact me if you have any questions.  Happy Stamping!

Thanks for stopping by and have a great day!

Akiko

  • Visit my Online store here
  • See the current Stampin’ Up! clearance rack specials here
  • Earn FREE Stampin’ Up! products through my Wildflower Frequent Shopper Program – my way of saying thank you to my frequent shopper online customers.
  • Sign up for my monthly newsletter here
  • Have any questions? I’d be happy to help, click here to contact me.

Cardstock Cuts for this project:

  • Just Jade – 5-1/2″ x 8-1/2″ card base scored at 4-1/4″, 2-1/2″ x 3-3/4″ (die cut tree)
  • Shaded Spruce – 2-1/2″ x 3-3/4″ (die cut tree)
  • Cherry Cobbler – 2-3/4″ x 3-3/4″ (scalloped oval die cut), 1″ x 3-3/4″ (embossed strip)
  • Basic Black – two 3-7/8″ x 5-1/8″ (mats)
  • Whisper White – 3-3/4″ x 5″ (inside panel), 2-1/2″ x 3-1/2″ (embossed oval die cut), 3/4″ x 2-3/4″ (label)
  • ‘Tis The Season DSP – 3-3/4″ x 5″ (front background), 1/2″ x 3-3/4″ (inside trim)

Stampin’ Up! products used in this project: