Stampin’ Up! Under My Umbrella Hello Sunshine Card

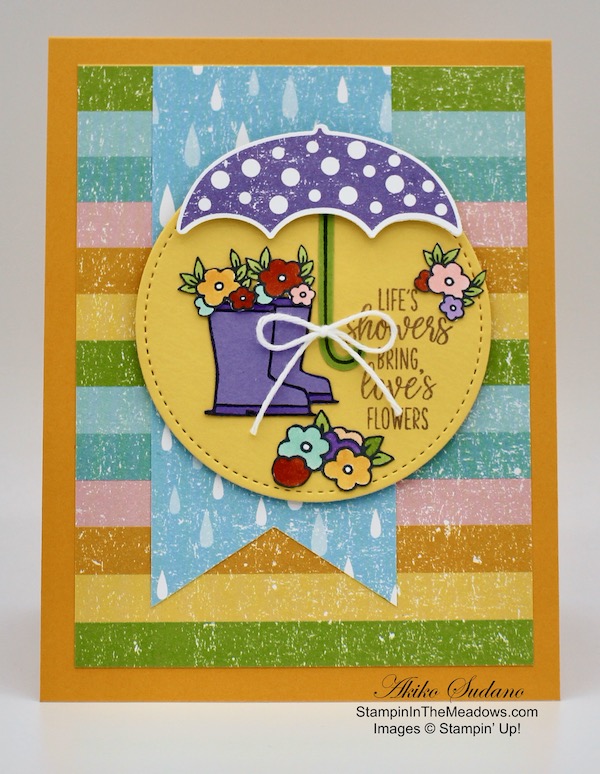
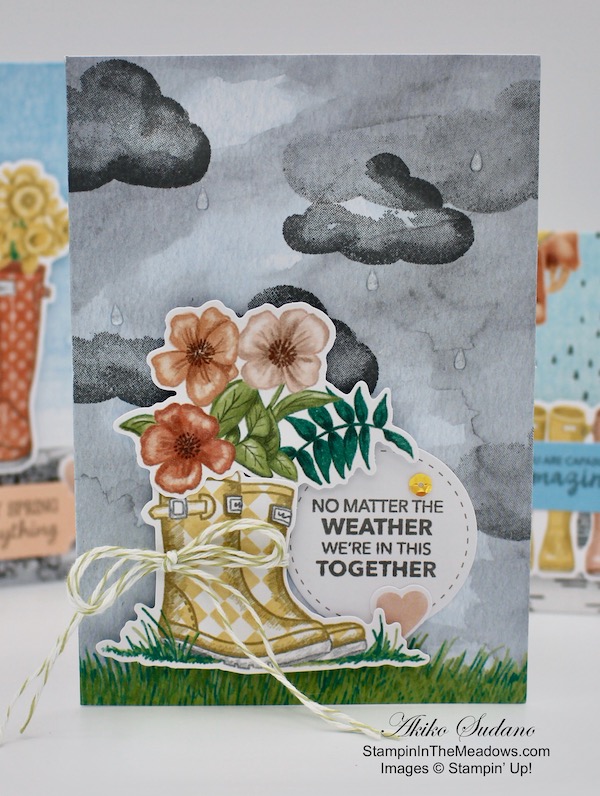
Good Morning! Last week when the tropical storm came through, I decided I needed to pull out the Stampin’ Up! Under My Umbrella photopolymer stamp set to cheer up a rainy day. And then we lost power for a couple of days and I couldn’t blog, so I get to finally share it today! You can find the supplies used to create this card at the bottom of my post along with the sizes of cardstock used.

My layout was inspired by the pretty Fab Friday 195 Sketch Challenge. Check it out:

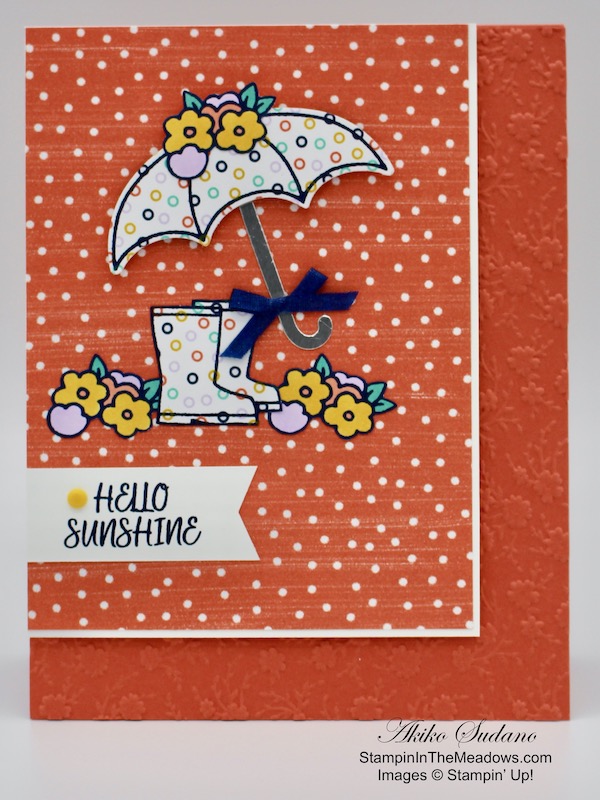
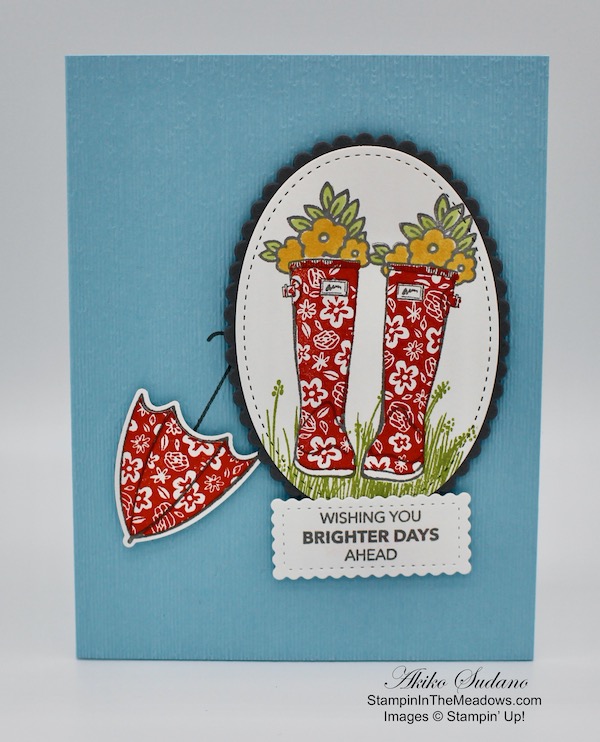
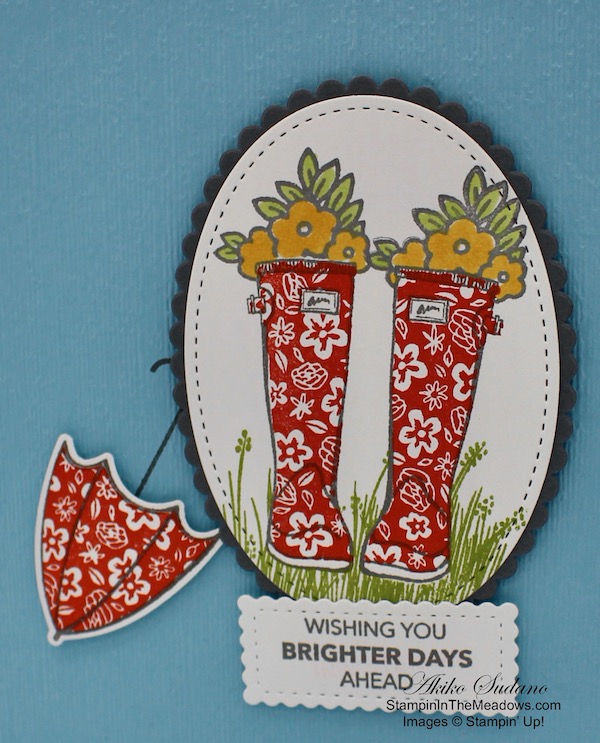
I embossed a panel of Calypso Coral card stock with the Ornate Floral 3D embossing folder and adhered it to the front of a Calypso Coral card base. I adhered a panel of the Calypso Coral with Whisper White dots Playing with Patterns designer series paper to a Whisper White mat so that only two sides of the Whisper White shows (the right and bottom sides). I adhered the DSP panel to the upper left corner of the card front with dimensionals.

I stamped the umbrella from the Stampin’ Up! Under My Umbrella photopolymer stamp set in Night of Navy ink on the Playing with Patterns multicolor circle paper. I punched it out with the Umbrella Builder Punch. I punched another umbrella top from Whisper White card stock and adhered it to the back. I punched out an umbrella handle from Silver Foil. When using the punch, if you don’t have enough paper to position the paper properly, adhere it to a post-it-note so you have a handle to move the paper around until you get the alignment you want.

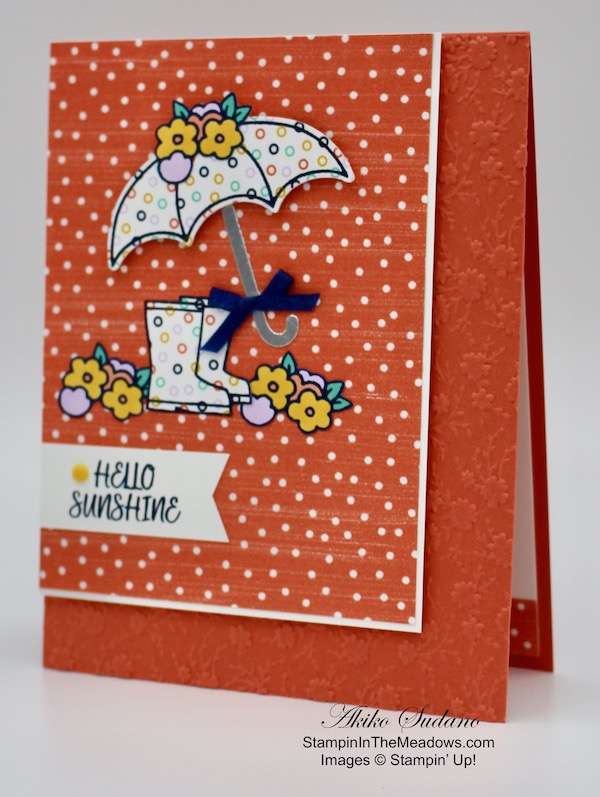
I stamped the boots from the Stampin’ Up! Under My Umbrella stamp set in Night of Navy ink on a small panel of Playing with Patterns DSP and fussy cut it out with my paper snips. I stamped the flowers three times in Night of Navy on Whisper White and colored the flowers with the Purple Posy, Daffodil Delight, Bermuda Bay and Calypso Coral Stampin’ Blends. I fussy cut the flowers. I stamped the sentiment in Night of Navy on a strip of Whisper White and trimmed the end with the new Banners Pick A Punch. I adhered the sentiment, two flowers and boots on the card with multipurpose liquid glue. I adhered the umbrella handle with liquid glue and popped the umbrella on top with dimensionals. I adhered flowers to the top of the umbrella and finished the card front with a resin dot and Night of Navy bow.

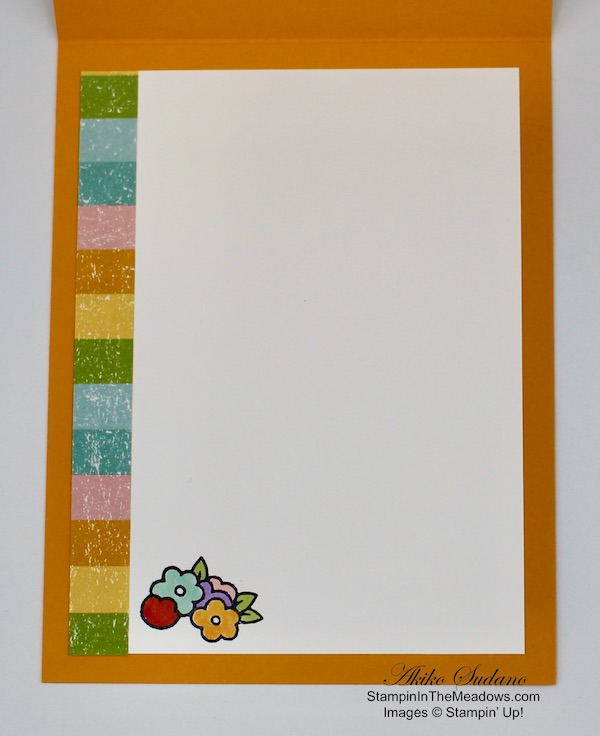
I stamped the flowers again on the lower left corner of a Whisper White panel in Night of Navy Ink and colored it with Stampin’ Blends just like the flowers on the front. I added a strip of Playing with Patterns DSP and adhered the panel to the inside of the card.

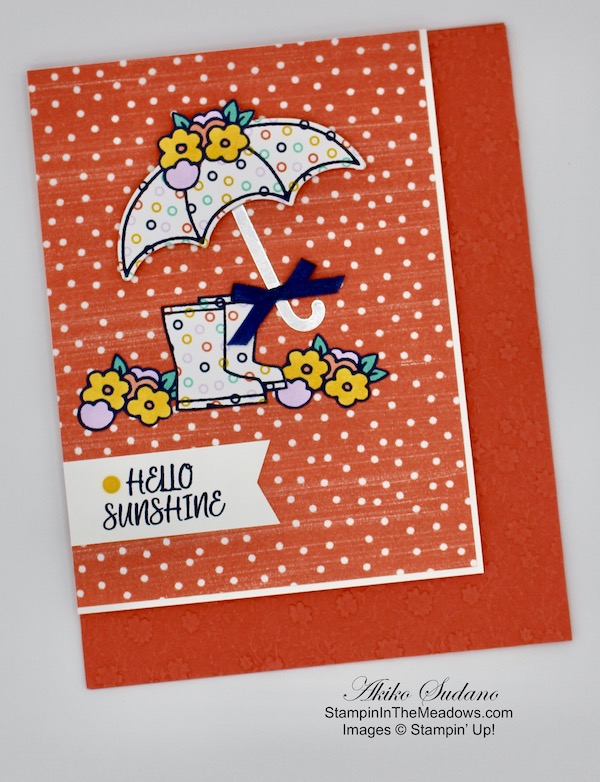
The Stampin’ Up Under My Umbrella stamp set and Umbrella Builder punch are perfect for making cheerful cards for any occasion! And the perfect accompaniment is the Playing with Patterns 6″ x 5″ designer series paper.


Double Wildflower Points Extended to August 17!!

To celebrate the new catalog, I announced Double Wildflower Points. But since I couldn’t blog for days, I decided to extend this for another week! My Wildflower Points program is my way of saying thank you to my frequent shoppers.  For every $50 you order from my online store, you earn 1 point, and when you earn 8 points, I owe you a FREE $40 order of your choice!  With Double Wildflower Points, you get 2 points for each $50 order, 4 points for each $100 order, and so on, reaching the goal of 8 points faster!  Yay!!  For complete details on the program, see my Customer Rewards page.  Let me know if you have any questions!


And don’t forget to redeem your Bonus Days Coupon Codes before the end of the month!!


August 1 – 15 Host Code: B76NYDVU

Use this host code when you order $50 or more and receive a free gift from me!  The gift is your choice of any item valued up to $10.00 in the 2020-21 Annual Catalog or the Aug – Dec 2020 Mini Catalog. This includes some of the host exclusive sets!

If your order is over $150, please do not use the host code since you’ll receive your own Host Dollars plus I’ll still send you the free gift!  This host code can be used by anyone, no commitment required.  Let me know if you have any questions.


If you need any stamping supplies, I’d be very happy to be your Demonstrator.  Just click on the Shop Now Button on the right side of the screen to go directly to my Online store or contact me if you have any questions.  Happy Stamping!

Thanks for stopping by and have a great day!

Akiko

  • Visit my Online store here
  • See the current Stampin’ Up! clearance rack specials here
  • Earn FREE Stampin’ Up! products through my Wildflower Frequent Shopper Program – my way of saying thank you to my frequent shopper online customers.
  • Sign up for my monthly newsletter here
  • Have any questions? I’d be happy to help, click here to contact me.

Cardstock Cuts for this project:

  • Calypso Coral – 4-1/4″ x 11″ card base scored at 5-1/2″, 4-1/4″ x 5″ (embossed background)
  • Silver Foil – 1/2″ x 2″ (umbrella handle)
  • Whisper White – 4″ x 5-1/4″ (inside panel), 3-9/16″ x 4-13/16″ (DSP mat), 1-1/4″ x 2-3/4″ (umbrella backing), 1″ x 4-1/2″ (fussy cut flowers), 3/4″ x 3″ (label)
  • Playing with Patterns DSP – 3-1/2″ x 4-3/4″ (calypso coral dotted front background), 1/2″ x 4″ (inside trim), 1-1/4″ x 4″ (multicolor circles for umbrella and boots)

Stampin’ Up! products used in this project:


Stampin’ Up! March Paper Pumpkin Kit – No Matter The Weather

Good Morning! Today I am sharing another Paper Pumpkin Kit video that I did yesterday during my Sunday Facebook Live session. The Stampin’ Up! March Paper Pumpkin Kit is a really great kit, and I liked all the cards per the instructions, so I made them according to the video pretty much as designed, and used some of the extra stamps to make my card share for the video tutorial.

These are the cards I have made so far with the kit:

Here’s the Facebook Live video where I put together an alternative design card using the stamps from the Stampin’ Up! March Paper Pumpkin Kit along with the Under My Umbrella Bundle.

I also posted the video to my YouTube Channel and you can view it here if you prefer. And here is the alternative design card that I made.

I started by stamping the umbrella handle from the Under My Umbrella photopolymer stamp set in Basic Gray ink on a Balmy Blue Panel. Then I ran the panel through the Subtle embossing folder and adhered it to the front of a Balmy Blue card base. I stamped the boots outline from the Stampin’ Up! March Paper Pumpkin Kit on a Whisper White panel in Basic Gray ink. I stamped the flower boots on top in Poppy Parade ink. I cut masks for the boots out of a post-it note and then stamped the grass stamp in Granny Apple Green ink. I stamped flower bouquets on top of the boots in Basic Gray ink and colored them in with Dark Daffodil Delight and Light Granny Apple Green Stampin’ Blends. I cut it out with the large stitched oval from the Stitched Shapes Dies and adhered it to a Basic Gray mat that was cut with the large scalloped oval die from the Layering Ovals Dies.

I stamped the umbrella from the Under My Umbrella stamp set four times on a Whisper White panel. I punched the first one out with the Umbrella Builder Punch. I carefully stamped the flowered boots on the one section of the other three in Poppy Parade ink so that I had the three sections with the flowered boot designs. You want to be careful to avoid the empty buckle section of the boots and carefully align the middle section so that it is completely covered. Then I fussy cut each umbrella section and adhered it to the punched umbrella with multipurpose liquid glue. I stamped the sentiment from the Stampin’ Up! March Paper Pumpkin kit in Basic Gray ink and cut it out with the smallest scalloped rectangle in the Stitched So Sweetly Dies. I adhered the boots, umbrella and label to the card front with dimensionals.

For the inside of the card, I stamped the grass along the bottom of a Whisper White panel in Granny Apple Green ink and the flowers from the Under My Umbrella Stamp set in the corner in Basic Gray ink. I colored the flowers with Stampin’ Blends and adhered the panel to the inside of the card.

Here are close-ups of the original cards I made using the Kit instructions. For the kit cards, I pretty much followed the instructions in the kit and added some stamping on the insides to decorate them. You can see that in the video.

On this card, I added a Calypso Coral sequin from the Iridescent Sequins pack.

Here, I substituted the sentiment from the Timeless Tulips stamp set to make it a fun Easter card.

Aren’t those cloud stamps great!! And the sentiment perfectly expresses the optimism we need today. I will be sending these to far away friends I haven’t seen for a while with my love.

Let me finish with my five favorite things about the kit. This month’s kit was hard, because there were so many things that I loved, but here are the top five:

  1. The card designs are gorgeous with wonderful backgrounds and die cuts.
  2. The stamp images are great and fun.
  3. The extra stamp set is a great freebie.
  4. The raindrop embellishments are great
  5. The colors are so beautiful.

I hope you enjoy your Stampin’ Up! March Paper Pumpkin kit as much as I did!


April 2020 Paper Pumpkin: My Wonderful Family

For April, Paper Pumpkin has created a fun, family appreciation themed card kit that makes it easy for you to share your hearts with those you love most: mom, dad, daughter, son, sister, and brother. April’s kit even includes Mother’s Day and Father’s Day sentiments, giving you the perfect way to show your appreciation for beloved parents on their special days with a beautiful, handmade card.

One more thing to about this “fam-tastic” kit: The Paper Pumpkin team knows that everyone’s clan is unique. With that in mind, we provided sentiments that would include anyone in your life who feels like family; for instance, “brothers” and “sisters” who have helped you along the journey of life.

Here are the Details:

  • Kit contains supplies for 8 cards and envelopes
  • Card size: 4-1/4″ x 5-1/2″
  • Envelope size: 4-1/2″ x 5-3/4″

Coordinating Colors: Crushed Curry, Early Espresso, Melon Mambo, Mint Macaron, Pear Pizzazz, Shaded Spruce, Soft Sea Foam

If you’re interested in subscribing to Paper Pumpkin, you can either sign up for a subscription where you are billed monthly for your kit or you can purchase a prepaid subscription in my online store. To see more information and to sign up for the monthly subscription click here. To see the options for prepaid subscriptions in my online store, click here. NOTE: Prepaid Subscriptions of 3 months or longer qualify for FREE Sale-A-Bration items!

Sign up deadline for the April 2020 kit is April 10, 2020. Supplies may be limited toward the end of each subscription period.


March 16 – 31 Host Code: RSAF3R27

Use this host code when you order $50+ and receive a free gift from me!  If your order is over $150, please do not use this code, but you’ll still get the free gift.  The free gift is your choice of any item valued up to $10.00 in the 2019 – 2020 Annual Catalog or in the 2020 Mini Catalog!  That includes some of the Host Exclusive stamp sets!

If your order is over $150, please do not use the host code since you’ll receive your own Host Dollars plus I’ll send you the free gift!  This host code can be used by anyone, no club or commitment required.  Let me know if you have any questions.


If you need any stamping supplies, I’d be very happy to be your Demonstrator.  Just click on the Shop Now button on the right side of the screen to go directly to my online store or contact me if you have any questions.  Happy Stamping!

Thanks for stopping by and have a great week!

Akiko

  • Visit my online store here
  • See the current Stampin’ Up! clearance rack specials here
  • Earn FREE Stampin’ Up! products through my Wildflower Frequent Shopper Program – my way of saying thank you to my online frequent shopper customers.
  • Sign up for my weekly newsletter here
  • Have any questions? I’d be happy to help, click here to contact me.

Cardstock Cuts for this project:

  • Balmy Blue – 4-1/4″ x 11″card base scored at 5-1/2″, 4-1/4″ x 5-1/2″ (embossed front)
  • Whisper White – 3-3/4″ x 5″ (inside panel), 3″ x 4″ (boots panel), 3″ x 5″ (umbrella pieces)1″ x 2-1/2″ (label)
  • Basic Gray – 3″ x 4″ (mat)

Stampin’ Up! products used in this project:


Stampin’ Up! Under My Umbrella Card for the Happy Inkin’ Thursday Blog Hop

Good Morning! Welcome to another Happy Inkin’ Thursday Blog Hop! I am ready for Spring and warm weather and sunshine, so I made this little hello card with the Stampin’ Up! Under My Umbrella stamp bundle.

We have a cute sketch challenge this week, and here is the sketch we are using:

I started by running a panel of Balmy Blue card stock through the Subtle embossing folder and adhering it to a Balmy blue card base with liquid glue. I took a panel of the raindrop paper from the Pleased as Punch designer series paper that is part of the Coordination Release and cut it with the largest scalloped rectangle in the Stitched So Sweetly dies. I also cut a panel of Thick Whisper White with the same die and adhered it to the back of the raindrop paper.

I punched three umbrellas from the umbrella paper in the Pleased as Punch DSP pack with the Umbrella Builder punch and also adhered them to an umbrella punched from Thick Whisper White paper. I stamped 3 umbrella handles from the Stampin’ Up! Under My Umbrella stamp set in Memento Tuxedo Black ink on Smoky Slate card stock and punched them out with the umbrella handle in the Umbrella Builder punch. I arranged the umbrellas on the raindrop panel and adhered the handles with liquid glue and the umbrella tops with dimensionals.

I stamped the Hello Sunshine greeting from the Stampin’ Up! Under My Umbrella stamp set in Granny Apple Green ink on a panel of Blushing Bride. I cut it out with the second smallest rectangle of the Stitched so Sweetly dies using the two step die cutting method so that it is just a little bit shorter. I adhered it to the raindrop panel with liquid glue. I stamped and colored 7 large and 1 small floral clusters in Light Granny Apple Green, Dark Calypso Coral, Dark Pool Party, Dark Mango Melody, Light Flirty Flamingo, Dark Daffodil Delight and Light Highland Heather Stampin’ Blends. I fussy cut them out and adhered the small flowers to the label and three of the large ones to the bottom of the panel with liquid glue. I finished off the panel with a Whisper White twine bow on an umbrella panel and popped it on the embossed card base with dimensionals.

On the inside of the card, I trimmed the bottom of a Whisper White panel with the raindrop DSP. I adhered the remaining flower clusters across the bottom with liquid glue and adhered the Whisper White panel to the inside of the card.

On with the Hop! Click the Next button below to visit Karen Ksenzakovic’s blog.

And just in case you get lost along the way, here’s a list of the team members participating in the hop today:


February 1 – 15 Host Code: ZSQEMEKE

Use this host code when you order $50 or more and receive a free gift from me!  The gift is your choice of any item valued up to $10.00 in the 2019-20 Annual Catalog or in the 2020 January-June Mini Catalog!  That includes some of the Host Exclusive stamp sets!

If your order is over $150, please do not use the host code since you’ll receive your own Host Dollars plus I’ll send you the free gift!  This host code can be used by anyone, no commitment required.  Let me know if you have any questions.


If you need any stamping supplies, I’d be very happy to be your Demonstrator.  Just click on the Shop Now button on the right side of the screen to go directly to my online store or contact me if you have any questions.  Happy Stamping!

Thanks for visiting!

Akiko

  • Visit my online store here
  • See the current Stampin’ Up! clearance rack specials here
  • Earn FREE Stampin’ Up! products through my Wildflower Frequent Shopper Program – my way of saying thank you to my frequent shopper online customers.
  • Sign up for my weekly newsletter here
  • Have any questions? I’d be happy to help, click here to contact me.

Cardstock Cuts for this project:

  • Balmy Blue – 4 1/4″ x 11″ scored at 5 1/2″ (card base) 4 1/4″ x 5 1/2″ (embossed panel)
  • Smoky Slate – 1/2″ x 6″ (umbrella handles)
  • Thick Whisper White – 3″ x 4 1/2″ (umbrella backings), 3 1/4″ x 4 1/4″ (raindrop panel backing)
  • Blushing Bride – 1 1/2″ x 3″
  • Whisper white 3 3/4″ x 5″, (3) 1″ x 5″ (scraps for flower clusters)
  • Pleased as Punch DSP – 3 1/4″ x 4 1/4″ (raindrop panel die cut) 1/2″ x 3 3/4″ (raindrop inside trim), 3 umbrellas to punch out.

Stampin’ Up! products used in this project:


Stampin’ Up! Under My Umbrella Life’s Showers Bring Love’s Flowers Card

Good Morning! Today I am sharing a video that I did yesterday during my Sunday Facebook Live session. I made a card using the new Stampin’ Up! Under My Umbrella stamp bundle along with the Pleased as Punch designer series paper that will be available tomorrow in the Coordination Product Release.

Here’s the Facebook Live video showing how to make this pretty card:

I also posted the video to my YouTube channel and you can view it here.

Using the Umbrella Builder Punch, I punched the umbrella from the Pleased as Punch designer series paper. I punched another umbrella from Thick Whisper White card stock and adhered it to the back of the purple umbrella to give it more stiffness. I stamped the umbrella handle from the Stampin’ Up! Under My Umbrella stamp set in Memento Tuxedo Black ink on a scrap of Granny Apple Green card stock and punched it out with the Umbrella Builder Punch.

I cut a stitched circle with the Stitched Shapes dies from Daffodil Delight card stock and stamped the sentiment from the Stampin’ Up! Under My Umbrella stamp set in Highland Heather ink. I stamped the boots in Memento Tuxedo Black ink on Highland Heather card stock and fussy cut it out. I stamped several flower clusters in Memento Tuxedo Black ink on Whisper White. I colored them with Light Granny Apple Green, Dark Calypso Coral, Dark Pool Party, Dark Mango Melody, Light Flirty Flamingo and Light Highland Heather Stampin’ Blends and fussy cut them. I adhered the boots, flowers and umbrella handle to the stitched circle with multipurpose liquid glue and the umbrella with dimensionals. I finished off the circle with a Whisper White Baker’s Twine bow.

I cut a panel of striped Pleased as Punch DSP and adhered it to a Mango Melody card base with snail. I cut a banner with the raindrop paper and adhered it to the striped paper. I popped the circle on the card front with dimensionals.

I added a strip of the striped Pleased as Punch paper to the side of a Whisper White panel and stamped a flower cluster next to it. I colored the flowers with Stampin’ Dimensionals to match the flowers on the front. I adhered the panel to the inside of the card with snail.

Valentine’s Day is just around the corner and this card could be used as a non-traditional card. Or the pretty colors are a big relief from the drab of winter and say hurry up Spring! The groundhog did not see his shadow yesterday and it means we’re in for an early Spring – that would be nice! Or if you have a bridal or baby shower coming up, then Love’s Flowers are definitely called for!


February 1 – 15 Host Code: ZSQEMEKE

Use this host code when you order $50+ and receive a free gift from me!  If your order is over $150, please do not use this code, but you’ll still get the free gift.  The free gift is your choice of any item valued up to $10.00 in the 2018-19 Annual Catalog or in the 2019 Occasions Catalog!  That includes some of the Host Exclusive stamp sets!

If your order is over $150, please do not use the host code since you’ll receive your own Host Dollars plus I’ll send you the free gift!  This host code can be used by anyone, no club or commitment required.  Let me know if you have any questions.


If you need any stamping supplies, I’d be very happy to be your Demonstrator.  Just click on the Shop Now button on the right side of the screen to go directly to my online store or contact me if you have any questions.  Happy Stamping!

Thanks for stopping by and have a great week!

Akiko

  • Visit my online store here
  • See the current Stampin’ Up! clearance rack specials here
  • Earn FREE Stampin’ Up! products through my Wildflower Frequent Shopper Program – my way of saying thank you to my frequent shopper online customers.
  • Have any questions? I’d be happy to help, click here to contact me.

Cardstock Cuts for this project:

  • Mango Melody – 4 1/4″ x 11″ scored at 5 1/2″ (card base)
  • Daffodil Delight – 3 1/2″ x 3 1/2″ (circle die cut)
  • Whisper White – 3 3/4″ x 5″ (inside panel), 1 1/2″ x 5″ (fussy cut flowers)
  • Granny Apple Green – 1 x 2 1/2″ (umbrella handle)
  • Highland Heather – 2″ x 2″ (boots)
  • Thick Whisper White – 1 1/2″ x 2 1/2″ (umbrella)
  • Pleased as Punch DSP – 3 3/4″ x 5″ (card front background), 2″ x 4 1/2″ (raindrop banner), 1/2″ x 5″ (inside trim)

Stampin’ Up! products used in this project: