Stampin’ Up! Dandelion Wishes Winter Wedding Card

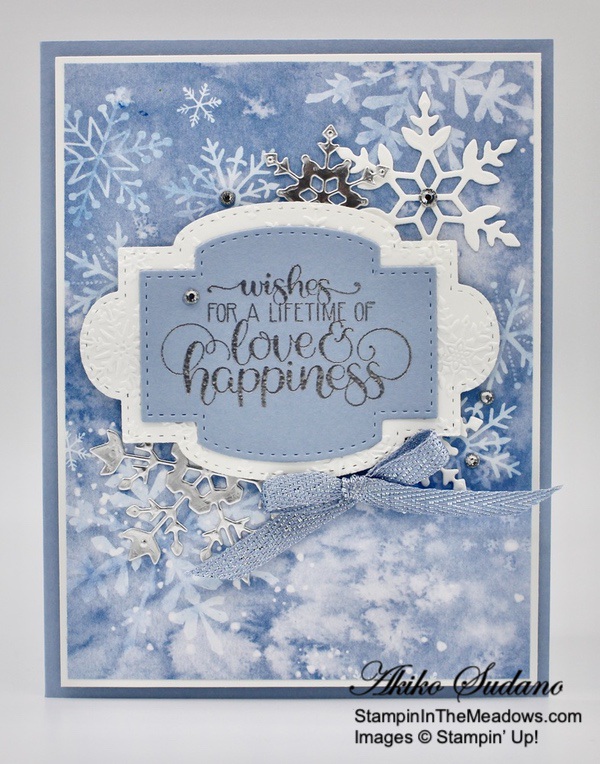
Good Morning! Today I have snowflake Wedding card made with the beautiful sentiment from the Stampin’ Up! Dandelion Wishes stamp set and the pretty Snowflake Splendor designer series paper! You can find the supplies used to create this card at the bottom of my post along with the sizes of cardstock used.

I adhered a panel of the Snowflake Splendor designer series paper to a Whisper White mat. I cut out snowflakes with the So many Snowflakes dies from Silver Foil and Whisper White and adhered them to the panel.

I cut the large fancy label from a Whisper White panel with the Stitched So Sweetly dies and embossed it with the retiring Winter Snow embossing folder. I stamped the beautiful sentiment from the Stampin’ Up! Dandelion Wishes cling stamp set in Versamark ink on a Seaside Spray panel and sprinkled it with Silver embossing powder. I heat set the powder until shiny and after it cooled, I cut it with the next largest Stitched So Sweetly die. I adhered the labels together with liquid glue and to the panel with dimensionals.

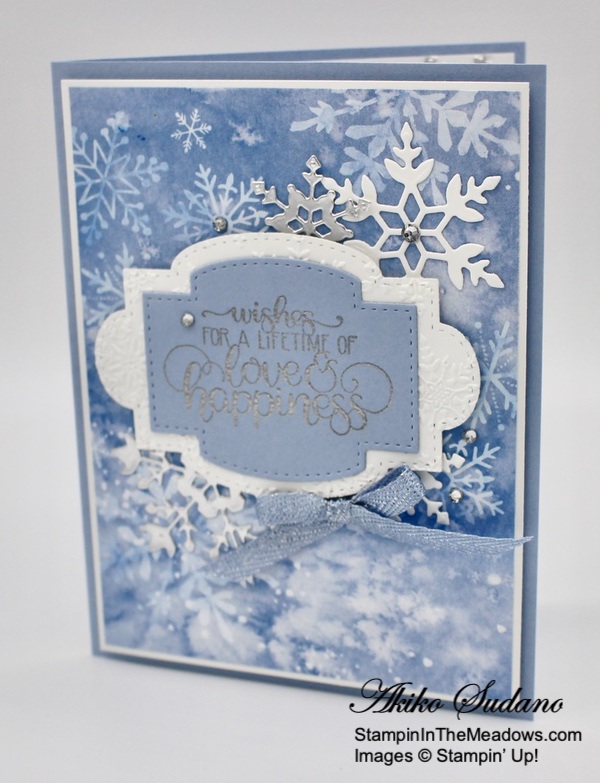
I adhered the panel to the front of a Seaside Spray card front with dimensionals and adhered a Seaside Spray metallic bow under the label with a glue dot. I finished the card front with rhinestone gems.

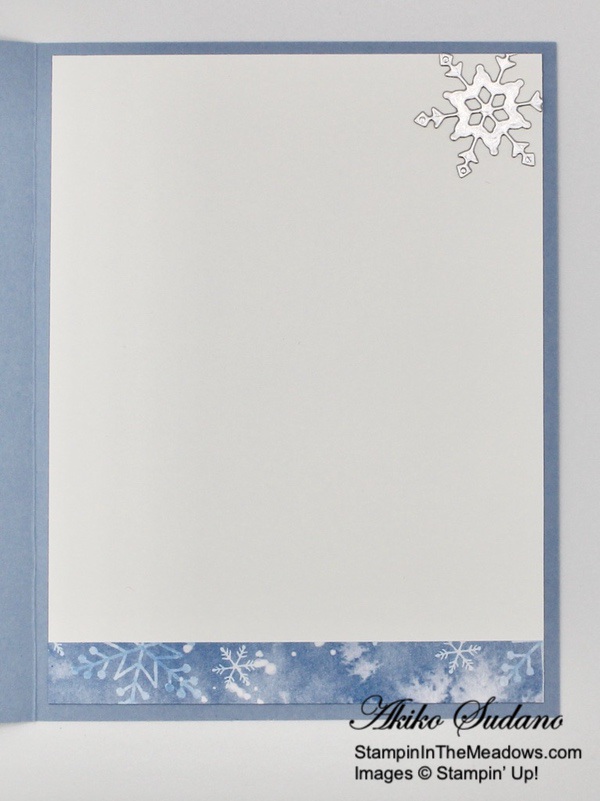
I adhered another silver foil die cut snowflake to a Whisper White panel and trimmed the bottom with a strip of the Snowflake Splendor DSP before adhering it to the inside of the card.

I think the sentiment from the Stampin’ Up! Dandelion Wishes stamp set is the most beautiful ever for Wedding cards. And while snowflakes are not traditional for weddings, the Snowflake Splendor DSP is beautiful and wonderful for a Winter Wedding! It’s currently on sale, along with the Winter Snow embossing folder, and it’s perfect for making cards for winter celebrations and sending winter greetings long after Christmas.


Stampin’ Up!’s Giant Year-End Closeout Sale Is Going on Now!

If you love Great Deals like I do, then the Giant Year-End Closeout event is the perfect time to shop. You’ll get deep discounts on your favorite products (up to 50% off some items) from the August–December 2020 Mini Catalog. Head over to my Online Store to check out the sale.  The retiring items are only available while supplies last!


Stampin’ In The Meadows January – June 2021 Mini Catalog New Product Shares Now Open

Do you want all of the great new products in the new January – June 2021 Mini Catalog but can’t afford everything?  Let’s do a share!  I’m placing an order early on January 5 for all the papers, ribbons and embellishments and I’m going to use the expedited shipping option so I get them fast. When I receive the order, I will cut and bundle the products and have the shares on their way to you by January 15. Go to my New Catalog Product Shares page to get the full details and to join. Please note, I can only ship to addresses within the US. Deadline to sign up for a share is January 3, 2021.


Stampin’ In The Meadows Online Host Club Openings Starting January 1

The Stampin’ In The Meadows Online Host Club is a good way to build up your Stampin’ Up supplies a little at a time without breaking the bank. You make a commitment to join the club for 6 months and place a minimum $25 order each month. A random host is chosen for each month and when you are the host, you get the Stampin’ Rewards Host Dollars for additional products. You can also give your Host Code to your Stampin’ Friends to increase your host rewards! For complete details, see my Online Host Club Page. You can also contact me at (484) 356-5031 or drop me an email at apsudano@stampininthemeadows.com. Sign up Deadline is Monday December 28, 2020.


December 1 – 15 Host Code: E7SDCMYW

Use this host code when you order $50 or more and receive a free gift from me!  The gift is your choice of any item valued up to $10.00 in the 2020-21 Annual Catalog or the Aug – Dec 2020 Mini Catalog. This includes some of the host exclusive sets!

If your order is over $150, please do not use the host code since you’ll receive your own Host Dollars plus I’ll still send you the free gift!  This host code can be used by anyone, no commitment required.  Let me know if you have any questions.


If you need any stamping supplies, I’d be very happy to be your Demonstrator.  Just click on the Shop Now Button on the right side of the screen to go directly to my Online store or contact me if you have any questions.  Happy Stamping!

Thanks for stopping by and have a great day!

Akiko

  • Visit my Online store here
  • See the current Stampin’ Up! clearance rack specials here
  • Earn FREE Stampin’ Up! products through my Wildflower Frequent Shopper Program – my way of saying thank you to my frequent shopper online customers.
  • Sign up for my monthly newsletter here
  • Have any questions? I’d be happy to help, click here to contact me.

Cardstock Cuts for this project:

  • Seaside Spray – 5-1/2″ x 8-1/2″ card base scored at 4-1/4″, 2-1/4″ x 3″ (label)
  • Silver Foil – 2-1/4″ x 3-1/4″ (die cut snowflakes)
  • Whisper White – 4″ x 5-1/4″ (inside panel), 3″ x 4″ (label), 2″ x 3″ (die cut snowflakes)
  • Snowflake Splendor DSP – 3-7/8″ x 5-1/8″ (front background), 1/2″ x 4″ (inside trim)

Stampin’ Up! products used in this project:


Stampin’ Up! Snowflake Wishes Thank You Card Video Tutorial

Good Morning! Today I’m sharing a Winter Thank You card made with the Stampin’ Up! Snowflake Wishes bundle. This is the card I made during my Facebook Live video tutorial yesterday afternoon and I also used the Winter Snow 3D embossing folder and the Snowflake Splendor designer series paper to make sure I had enough snowflakes. Today’s card was inspired by a set of cards I saw on Pinterest made by Australian Demonstrator Gail Ellis. You can find the supplies I used to create this card at the bottom of my post along with the sizes of cardstock used.

Here is the Facebook Live video showing how I made the card:

I posted a copy of the video in my YouTube channel here so you can view it there if you prefer. Later this week I hope to get a quickie version posted to my channel too.

I embossed a Whisper White panel with the Winter Snow embossing folder and adhered it to the front of a Whisper White note card. I adhered the Snowflake Splendor DSP panels to the Balmy Blue mats and adhered it to the card front with liquid glue. I could not believe that when I was Live, I put my liquid glue on the wrong side of the designer series paper!! So I had to change things up a bit and stamped in Pacific Point instead of Balmy Blue. The color is a little more intense, but everything still goes together beautifully!

I stamped the sentiment from the Stampin’ Up! Snowflake Wishes photopolymer stamp set to a Whisper White panel in Pacific Point ink and cut it out with the Tasteful Labels die. I adhered some Snowflake Splendor ribbon to the back and adhered it to the card front with dimensionals.

I cut two small snowflakes and a medium snowflake from Balmy Blue glimmer paper with the So Many Snowflakes dies from the Stampin’ Up! Snowflake Wishes bundle and adhered them to the card front. I finished the card with a blue gem.

I stamped the snowflakes from the Stampin’ Up! Snowflake Wishes photopolymer stamp set in Pacific Point ink after stamping off in the corners of the inside of the card. I also stamped the outside of the envelope with Pacific Point snowflakes to match.

The Whisper White note cards and envelopes are perfect for a quick little thank you note – they are nice and thick, and don’t need an inside panel. Layered panel card designs like this one are a good use for those little scraps of pretty DSP that you can’t bear to throw out. And sending a quick thank you after Christmas is a nice way to reach out and let the joy of the season linger a little longer.


Stampin’ Up! Curvy Celebrations Going On now!

The Stampin’ Up! Curvy Celebrations runs through January 4, 2021. This will include the Quite Curvy bundle, which is an early release of the upcoming January – June 2021 Mini Catalog along with the Curvy Christmas stamp set and Classic Christmas 6″ x 6″ designer series paper. Click on the picture above to view PDF Flyer with all the details. And if you purchase either the Quite Curvy Variety Bundle (item 158396) or the Quite Curvy Bundle (item 156228) from me between now and January 4, you will receive our special Online Tutorial Class with videos. This is an exclusive set of written and video tutorials created by Inkin’ Krew team members who purchase these products during the Curvy Celebrations!


Stampin’ Up! Merry & Bright Online Extravaganza Is Tomorrow!!

The Stampin’ Up! Merry & Bright Online Extravaganza is tomorrow, with 10% off select annual catalog items. Nearly all of the items in the annual catalog are eligible for the discount, but some exclusions do apply. You can see the exclusion list here. So get your wish list ready so you can shop early in my Online Store. The sale only lasts for 24 hours on Tuesday November 24th!


November 15-30 Host Code: N7E9DGB9

Use this host code when you order $50 or more and receive a free gift from me!  The free gift is your choice of any item valued up to $10.00 in the 2019 – 2020 Annual Catalog or in the Aug-Dec 2020 Mini Catalog!  That includes some of the Host Exclusive stamp sets!

If your order is over $150, please do not use the host code since you’ll receive your own Host Dollars plus I’ll still send you the free gift!  This host code can be used by anyone, no club or commitment required.  Let me know if you have any questions.


If you need any stamping supplies, I’d be very happy to be your Demonstrator.  Just click on the Shop Now button on the right side of the screen to go directly to my online store or contact me if you have any questions.  Happy Stamping!

Thanks for stopping by and have a great week!

Akiko

  • Visit my online store here
  • See the current Stampin’ Up! clearance rack specials here
  • Earn FREE Stampin’ Up! products through my Wildflower Frequent Shopper Program – my way of saying thank you to my online frequent shopper customers.
  • Sign up for my weekly newsletter here
  • Have any questions? I’d be happy to help, click here to contact me.

Cardstock Cuts for this project:

  • Balmy Blue – 2-1/8″ x 2-1/8″, 1-1/8″ x 1-1/8″ (DSP mats)
  • Whisper White – 3-1/4″ x 4-3/4″ (embossed background), 2-1/4″ x 2-1/4″ (label)
  • Balmy Blue Glimmer – 2″ x 3-3/4″ (die cut snowflakes)
  • Snowflake Splendor DSP – 2″ x 2″, 1″ x 4″ (front panels)

Stampin’ Up! products used in this project:


Stampin’ Up! Perfect Parcel Christmas Gift Box Video Tutorial

Good Morning! Today I’m sharing a cute little Christmas gift box made with the Stampin’ Up! Perfect Parcel dies that I made during my Facebook Live video tutorial yesterday afternoon. This die set has been available since last year and now you can update it using products from the August -December 2020 Mini Catalog. You can find the supplies used to create this project at the bottom of my post along with the sizes of cardstock used.

Here is the Facebook Live video showing how I made the blue box and snowflake tag:

I also posted the video to my YouTube Channel and you can view it here if you prefer.

I cut two of the box using the box die from the Stampin’ Up! Perfect Parcel Die set from Misty Moonlight card stock. I creased the box along the top and bottom score lines and adhered the box together with tear & tape. See the video for how to apply the tear & tape.

I applied the Snowflake Splendor designer series paper to the side and top box panels and folded the top down, tucking the flaps into the sides. I tied a length of metallic Seaside Spray ribbon around the box. I used the tag topper die from the Stampin’ Up! Perfect Parcel dies to cut the top of the Seaside Spray tag panel and adhered a strip of Snowflake Splendor DSP to the bottom of the tag.

I stamped the sentiment from the Itty Bitty Christmas stamp set in Misty Moonlight ink on a Whisper White panel and cut it out with the label die. I popped the label on the tag with dimensionals. I cut the small snowflake from the So Many Snowflakes dies using Balmy Blue Glimmer paper and the medium snowflake from Misty Moonlight cardstock. I adhered the snowflakes together and adhered them to the tag. I finished the tag with rhinestone gems and used the metallic twine to loop the tag onto the ribbon before tying the bow.

The Stampin’ Up! Perfect Parcel dies makes a really nice little gift box! It’s perfectly sized to hold a gift card or sweets or maybe even handmade jewelry. And it’s perfect for coordinating your card with a fancy box for that extra special gift.


Today is the last day to earn Double Wildflower Points!!

To celebrate the new catalog, I announced Double Wildflower Points. But since I couldn’t blog for days, I decided to extend this for another week – But today is the last day! My Wildflower Points program is my way of saying thank you to my frequent shoppers.  For every $50 you order from my online store, you earn 1 point, and when you earn 8 points, I owe you a FREE $40 order of your choice!  With Double Wildflower Points, you get 2 points for each $50 order, 4 points for each $100 order, and so on, reaching the goal of 8 points faster!  Yay!!  For complete details on the program, see my Customer Rewards page.  Let me know if you have any questions!


And don’t forget to redeem your Bonus Days Coupon Codes before the end of the month!!


August 16 – 31 Host Code: TV9N9BHQ

Use this host code when you order $50 or more and receive a free gift from me!  The free gift is your choice of any item valued up to $10.00 in the 2020 – 2021 Annual Catalog or the new Aug-Dec 2020 Mini Catalog.  This includes some of the host exclusive sets!

If your order is over $150, please do not use the host code since you’ll receive your own Host Dollars plus I’ll still send you the free gift!  This host code can be used by anyone, no club or commitment required.  Let me know if you have any questions.


If you need any stamping supplies, I’d be very happy to be your Demonstrator.  Just click on the Shop Now button on the right side of the screen to go directly to my online store or contact me if you have any questions.  Happy Stamping!

Thanks for stopping by and have a great week!

Akiko

  • Visit my online store here
  • See the current Stampin’ Up! clearance rack specials here
  • Earn FREE Stampin’ Up! products through my Wildflower Frequent Shopper Program – my way of saying thank you to my online frequent shopper customers.
  • Sign up for my weekly newsletter here
  • Have any questions? I’d be happy to help, click here to contact me.

Cardstock Cuts for this project:

  • Basic Box and Tag
    • Box card stock – two 4-1/4″ x 6-1/4″ panels
    • Box DSP – two 1-1/4″ x 3-3/8″ (box sides), 7/8″ x 3-3/8″ (box top flaps), 1/4″ x 2″ (tag trim)
    • Tag – 2″ x 3-1/2″
    • Label – 1-1/2″ x 2-1/2″
    • plus anything else needed to embellish the box
  • Cherry Cobbler Box and Tag
    • Thick Whisper White – two 4-1/4″ x 6-1/4″ panels (box die cuts)
    • Cherry Cobbler – 2″ x 3-1/2″ (tag)
    • Shaded Spruce – 1″ x 2″ (pine sprigs)
    • Silver Foil – 1-1/2″ x 2-1/2″ (jingle bells)
    • ‘Tis The Season DSP – two 1-1/4″ x 3-3/8″ (box sides), 7/8″ x 3-3/8″ (box top flaps), 1/4″ x 2″ (tag trim)
    • Whisper White – 1-1/2″ x 2-1/2″ (label)
  • Snowflake Splendor Box and Tag
    • Misty Moonlight – two 4-1/4″ x 6-1/4″ panels (box die cuts), 2″ x 2″ (large snowflake)
    • Seaside Spray – 2″ x 3-1/2″ (tag)
    • Balmy Blue Glimmer – 1-1/4″ x 1-1/4″ (small snowflake)
    • Snowflake Splendor DSP – two 1-1/4″ x 3-3/8″ (box sides), 7/8″ x 3-3/8″ (box top flaps), 1/4″ x 2″ (tag trim)
    • Whisper White – 1-1/2″ x 2-1/2″ (label)

Stampin’ Up! products used in this project: