Stampin’ Up! Oval Occasions With Triangles Quilt Card

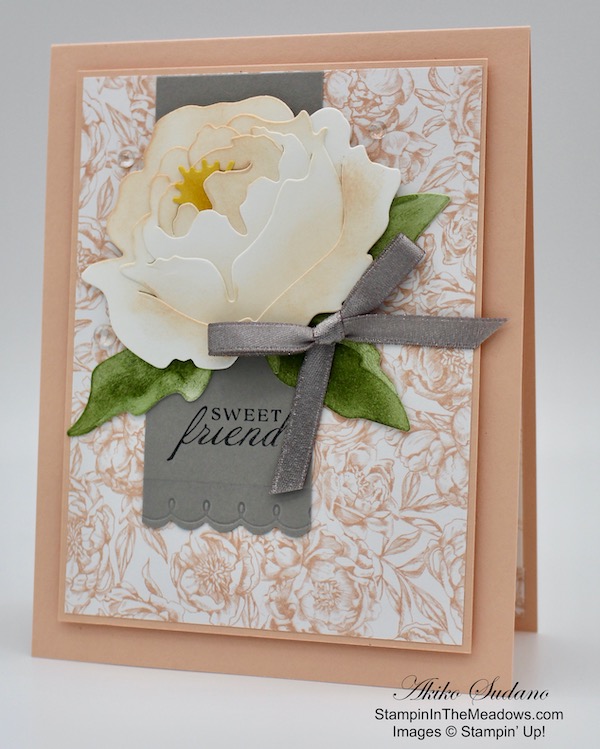
Good morning!  I have always enjoyed making cards with quilt designs and today I use a sentiment from the Stampin’ Up! Oval Occasions stamp set on a quilt card.  I played with the Stitched Triangles dies and the retiring Peony Garden designer series paper to experiment and come up with a quilt square block for my card. You can find the supplies I used at the bottom of my post along with the sizes of cardstock used.

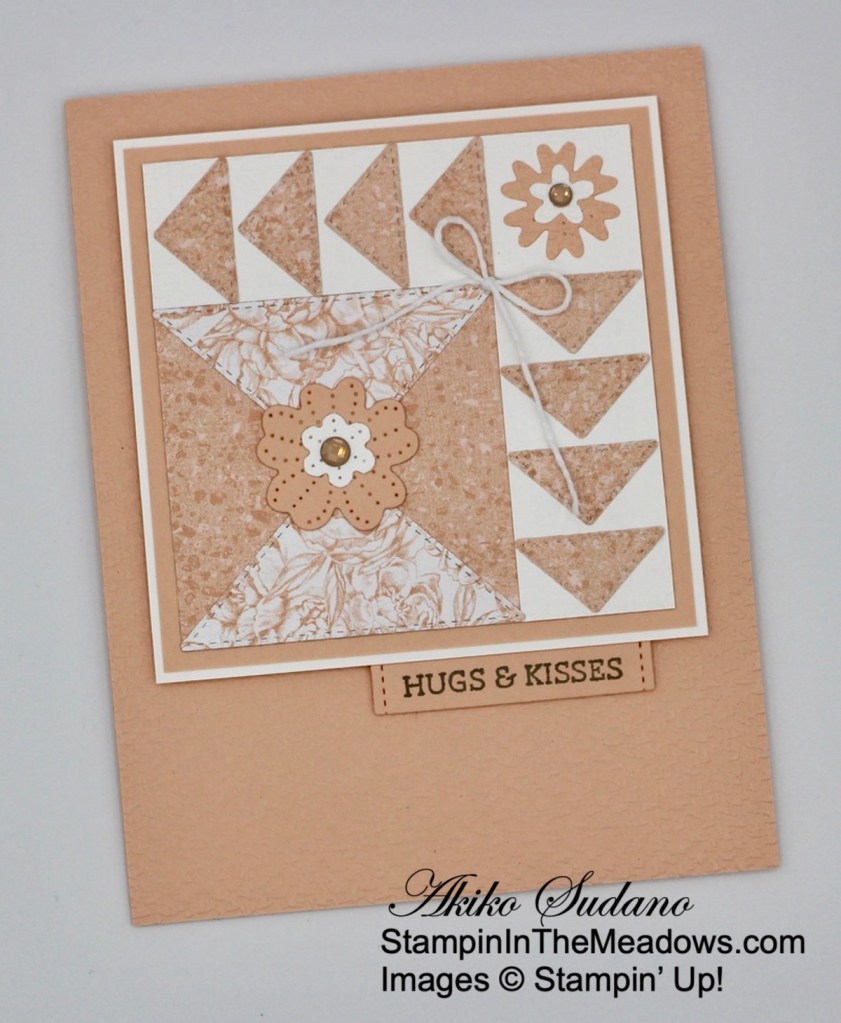
What do you think?  This was a lot of fun and a lot of experimenting, but I’m pretty happy with the result.  I started with a square of the speckled Petal Pink Peony Garden designer series paper and adhered strips of Basic White along the right side and top.  I cut two of the second smallest right triangles from the Stitched Triangles dies from the floral Peony Garden paper and adhered them to the lower left corner of the panel. I cut 8 of the smallest right triangle from the Stitched Triangles dies and adhered them to the top and side of the panel in the Flying Geese quilt pattern.  

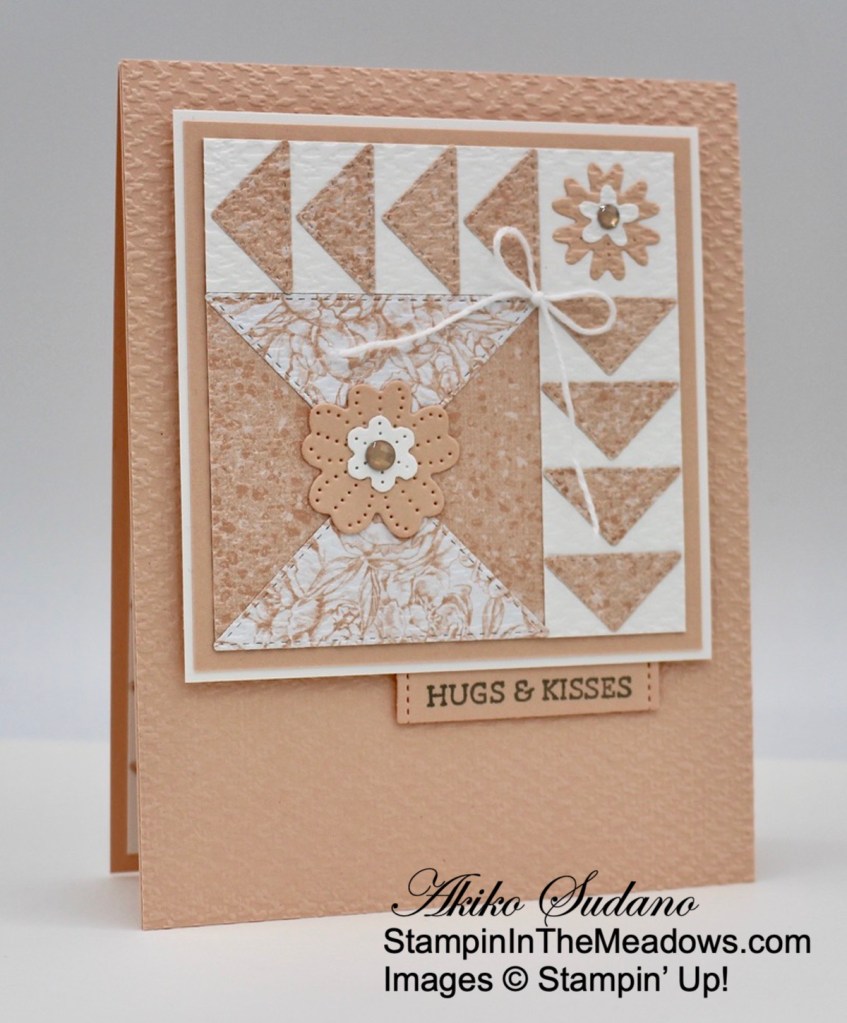
I cut the flower from the Pierced Blooms dies and adhered it to the top right corner. I cut a small Pierced Blooms dies flower and adhered it on top. Then I embossed the panel with the Tasteful Textile 3D embossing folder and adhered it to a Petal Pink mat to border the square. Then I adhered it to a Basic White panel for another border. I cut the larger pierced flower from Petal Pink and the smaller flower from Basic White and adhered it to the lower left square.

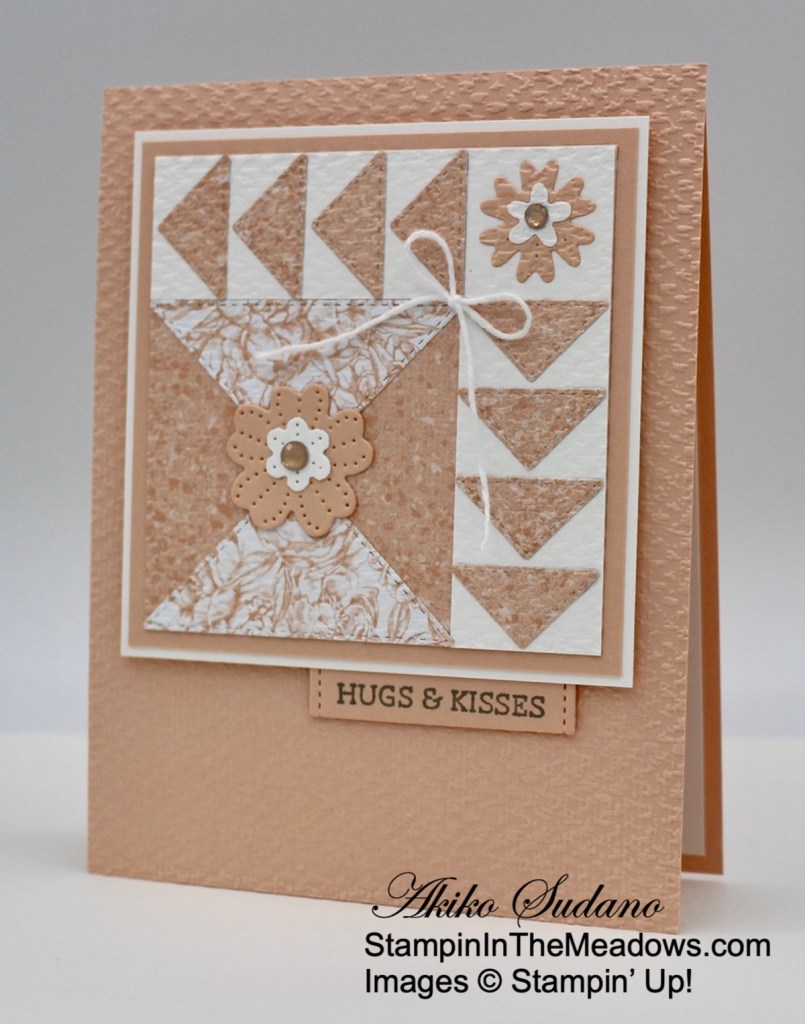
I embossed a Petal Pink panel and adhered it to the front of a Petal Pink card base. I stamped the sentiment from the Stampin’ Up! Oval Occasions stamp set and cut it out with the Messages Die. This is the label that has stitched sides and it was easy to do – just line up the stamped card stock with the label and run it through your die cutting machine. I adhered the label to the back of the quilt panel and adhered it to the card front with dimensionals. I finished the front with two Elegant Gems on the flowers and a white twine bow.


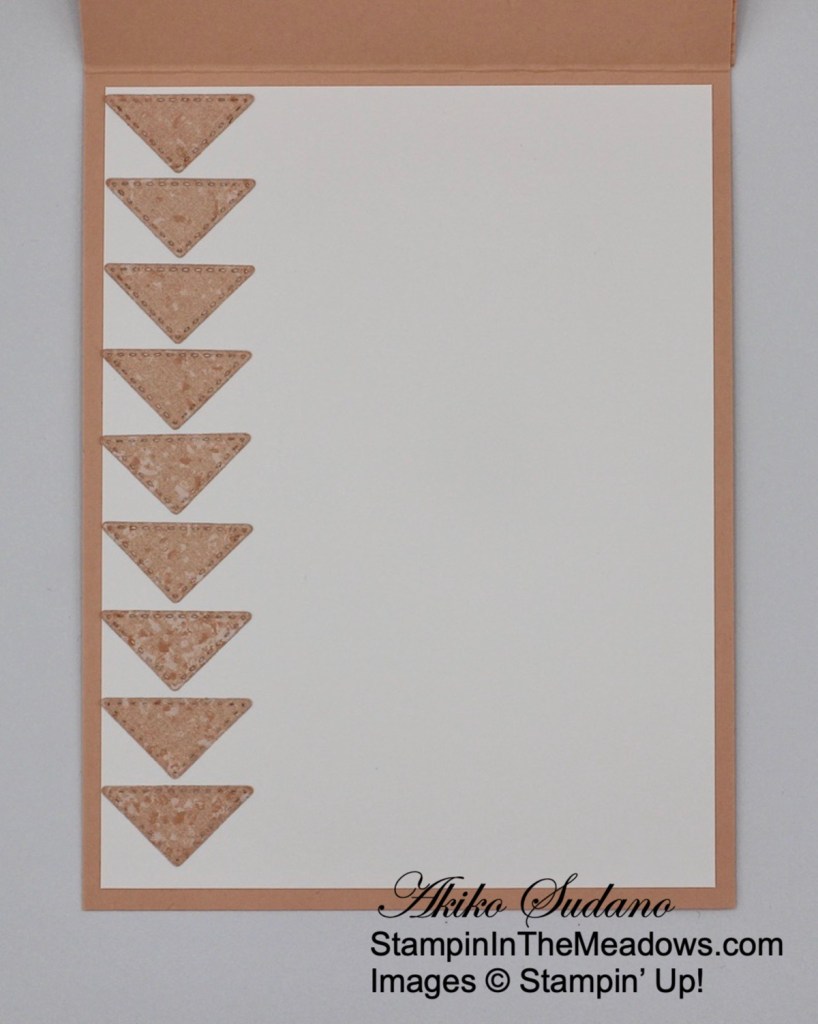
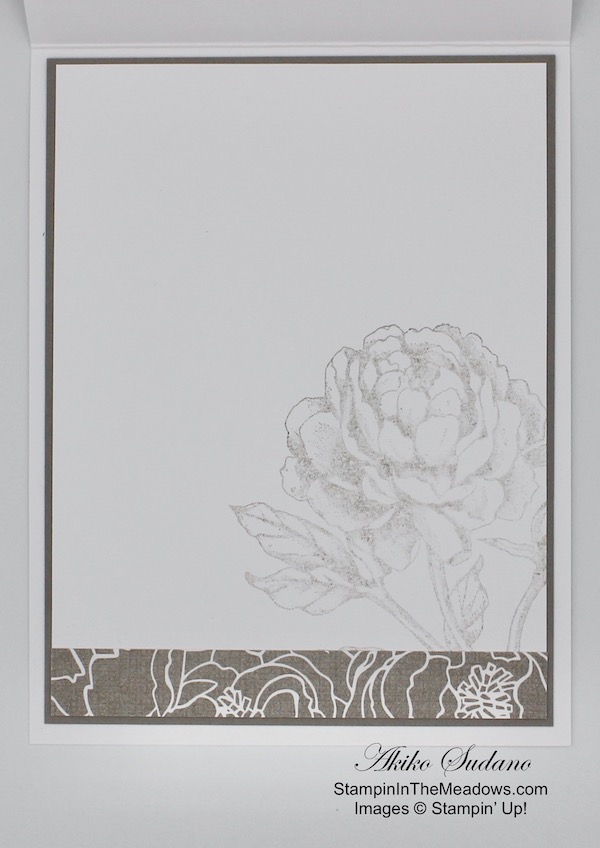
For the inside of the card, I cut 8 more speckled triangles with the smallest right triangle die and adhered them to the side of a Basic White panel in the Flying Geese pattern. I adhered the panel to the inside of the card.

I loved the Christmas Quilt bundle that Stampin’ Up! had a few years back! This took more effort, but allowed me to be more creative in coming up with a design! I wanted to incorporate the Pierced Blooms flower dies because they resemble appliqué flowers and the Tasteful Textile 3D embossing folder gives a fabric-like texture that really adds to the quilted look. What could be nicer than sending a quilt with hugs and kisses?


Stampin’ Up! Last Chance Sale is going on NOW!

Stampin’ Up! has posted the list of items from the 2020-2021 Annual catalog that are retiring and some of the items are on sale! Retiring items will be available only white supplies last! If you love great deals, now is the perfect time to shop.

To download a PDF with the Retiring Items List, click here.

To download an excel file with the Retiring Items List, click here.

Head to my Online Store to get the retiring items you need before they sell out!

The new 2021-2022 Annual Catalog will open for orders on May 4, 2021 and by then it will be too late!


Current Host Code: ARFDXWP4

Use this host code when you order $50 or more and receive a free gift from me!  The free gift is your choice of any item valued up to $10.00 in the 2020 – 2021 Annual Catalog or in the Jan-Jun 2021 Mini Catalog!

If your order is over $150, please do not use the host code since you’ll receive your own Host Dollars plus I’ll still send you the free gift!  This host code can be used by anyone, no club or commitment required.  Let me know if you have any questions.


If you need any stamping supplies, I’d be very happy to be your Demonstrator.  Just click on the Shop Now button on the right side of the screen to go directly to my online store or contact me if you have any questions. 

Thanks for stopping by and Happy Stamping!

Akiko

  • Visit my online store here
  • See the current Stampin’ Up! clearance rack specials here
  • Earn FREE Stampin’ Up! products through my Wildflower Frequent Shopper Program – my way of saying thank you to my online frequent shopper customers.
  • Have any questions? I’d be happy to help, click here to contact me.

Cardstock Cuts for this project:

  • Petal Pink – 4-1/4″ x 11″ card base scored at 5-1/2″, 4-1/4″ x 5-1/2″ (embossed background), 3-1/2″ x 3-1/2″ (quilt border), 1-1/4″ x 2-1/4″ (die cut flowers), 1″ x 2-1/4″ (label)
  • Basic White – 4″ x 5-1/4″ (inside panel), 3-5/8″ x 3-5/8″ (quilt border), 1″ x 3-1/4″ (quilt block side), 1″ x 2-1/4″ (quilt top side), 1″ x 2″ (small die cut flowers)
  • Peony Garden DSP – 3-1/4″ x 3-1/4″ (speckled quilt block), two 1″ x 5″ (speckled small triangles), 2″ x 2-1/4″ (floral large triangles)

Stampin’ Up! products used in this project:


Stampin’ Up! Prized Peony Sympathy Card

Good Morning! Today I am sharing a sympathy card made with the beautiful Stampin’ Up! Prized Peony bundle. I paired it with gorgeous Peony Garden designer series paper to make a simple and elegant sympathy card. You can find the supplies used to create this card at the bottom of my post along with the sizes of cardstock used.

Using Stampin’ Seal, I adhered a panel of Peony Garden designer series paper to the front of a Thick Whisper White card base. I cut a stitched rectangle frame with the 3rd and 4th largest Stitched Rectangle dies using Whisper White card stock.

I stamped the large peony flower from the Stampin’ Up! Prized Peony cling stamp set in Gray Granite ink on Whisper White card stock and cut it out with the coordinating die. I adhered the peony to the frame with dots of multipurpose liquid glue and popped the peony and frame on the card front with dimensionals.

I stamped the sentiment from the Stampin’ Up! Prized Peony stamp set in Versamark ink on Gray Granite card stock. I sprinkled it with white embossing powder and heat set until shiny. I cut it out with the small die from the Tasteful Labels die and adhered it to the frame with liquid glue. I adhered a bow made with Gray Granite shimmer ribbon using glue dots and finished the card with three pink Elegant Faceted Gems.

I stamped the large peony flower from the Stampin’ Up! Prized Peony stamp set in the corner of a Whisper White panel using Gray Granite ink after stamping off twice. I added a strip of the Peony Garden DSP to the bottom and adhered it to a Gray Granite mat and then to the inside of the card.

Sympathy cards are difficult, but the muted colors in the Peony Garden designer series paper makes an elegant card for solemn occasions.


Stampin Up! Bonus Days are back!

Good news – Bonus Days are back! That means it’s time to start earning coupon codes to redeem in August! If you need a refresher on this promotion, here’s how it works: For every $50 (before shipping and tax) you spend between today and August 3, you earn a $5 USD Bonus Days coupon code that can be redeemed between August 4 and August 31. There’s no limit on how many coupon codes you can earn or redeem, but they must be redeemed by August 31. For full details, see my Promotions Page.


July 1-15 Host Code: DVHGBQ7V

Use this host code when you order $50 or more and receive a free gift from me!  The gift is your choice of any item valued up to $10.00 in the 2020-21 Annual Catalog!

If your order is over $150, please do not use the host code since you’ll receive your own Host Dollars plus I’ll still send you the free gift!  This host code can be used by anyone, no commitment required.  Let me know if you have any questions.


If you need any stamping supplies, I’d be very happy to be your Demonstrator.  Just click on the Shop Now Button on the right side of the screen to go directly to my Online store or contact me if you have any questions.  Happy Stamping!

Thanks for stopping by and have a great day!

Akiko

  • Visit my Online store here
  • See the current Stampin’ Up! clearance rack specials here
  • Earn FREE Stampin’ Up! products through my Wildflower Frequent Shopper Program – my way of saying thank you to my frequent shopper online customers.
  • Sign up for my monthly newsletter here
  • Have any questions? I’d be happy to help, click here to contact me.

Cardstock Cuts for this project:

  • Thick Whisper White – 4-1/4″ x 11″ card base scored at 5-1/2″
  • Gray Granite – 4″ x 5-1/4″ (inside mat), 1-1/2″ x 1-1/2″ (label)
  • Whisper White – 3-7/8″” x 5-1/8″ (inside panel), 3″ x 4-1/2″ (frame), 3-1/2″ x 4″ (die cut peony)
  • DSP – 4″ x 5-1/4″ (front background), 1/2″ x 3-7/8″ (inside trim)

Stampin’ Up! products used in this project:


Stampin’ Up! Prized Peony Friendship Card Video Tutorial

Good Morning! Today I’m sharing a friendship card made with the Stampin’ Up! Prized Peony bundle that I made during my Facebook Live video tutorial yesterday afternoon. The Stampin’ Up! Prized Peony bundle is one of the new sets in the 2020-2021 Annual Catalog. I’ve grown peonies in my garden for several years now and they’re one of my favorite flowers. Last week, they started to bloom, but we had some severe storms over the last few days, so they aren’t so pretty anymore ☹️. So I’ll wait for them to bloom next year to get some pictures. You can find the supplies used to create this card at the bottom of my post along with the sizes of cardstock used.

Here is the Facebook Live video showing how I made the card:

I also posted the video to my YouTube Channel and you can view it here if you prefer.

I started by cutting a panel of Gray Granite card stock with the pretty scalloped border die from the Peony Dies. This die cuts the scalloped border and embosses a loopy trim at the same time – it’s so feminine and pretty. I stamped the sweet friend sentiment by covering the parts of the sentiment stamp from the Stampin’ Up! Prized Peony cling stamp set with tape before inking it up with Memento Tuxedo Black ink. After inking, I removed the tape (be careful because it can be very messy) and stamped the bottom of the Gray Granite panel. I adhered the stamped panel to a Peony Garden designer series paper panel and then to a Petal Pink mat with multipurpose liquid glue.

I die cut the leaves and flower parts with the dies from the Peony Dies from Whisper White card stock. I sponged the leaves with Mossy Meadow ink and then the adhered the leaves together. I colored the stamen with Dark Daffodil Delight Stampin’ Blend and I used Petal Pink ink to sponge the flower sections. I made the ink most intense in the back of the flower and in the front section where you can see the inside of the petals.

I assembled the flower with multipurpose liquid glue on the lower edge of each petal. First I adhered the Daffodil Delight stamen to the smallest flower section and then applied the glue to the bottom and carefully slipped it into the next larger flower section, lining up the bottom edge. I repeated this until the flower was assembled. It sounds complicated, but it’s fairly easy because the bottom edges have curves that are pretty simple to line up. I adhered the leaves to the Gray Granite strip with multipurpose liquid glue and adhered the flower with dimensionals on the top and multipurpose liquid glue on the bottom. I added three of the gorgeous Elegant Faceted Gems and a Gray Granite shimmer ribbon bow. I adhered the decorated panel to the front of a Petal Pink card base.

I stamped the medium peony from the Stampin’ Up! Prized Peony to the bottom of a Whisper White panel after stamping off and adhered a strip of the Peony Garden designer series paper to the bottom. I adhered the panel to the inside of the card with multipurpose liquid glue.

The gorgeous Stampin’ Up! Prized Peony bundle is so fantastic! The stamps are gorgeous and each image has a coordinating die so there is no need to fussy cut. There is a variety of sentiments that are really sweet and pretty and even a background stamp for adding texture. And finally the 3D die cut peony flower is absolutely amazing! It is definitely a set that you will want to add to your card making tool chest! And if you have been thinking about joining Stampin’ Up! as a demonstrator, consider getting this as your FREE bundle this month!


Tomorrow Is The Last Day For My Double Wildflower Points Ordering Bonus!

In addition to all the other extra goodies Stampin’ Up! is offering, I am also announcing a DOUBLE Wildflower Points ordering bonus for orders placed through Tuesday June 9

In my Wildflower Rewards Program, you earn one Wildflower point for each $50 that you order from my online store (before shipping). And when you have earned 8 Wildflower points you will get a FREE product order from me valued up to $40.00, your choice and mailed directly to you! With Double Wildflower points you get 2 points for each $50 order, 4 points for each $100 order, and so on, reaching your FREE order faster!

This offer ends on Tuesday June 9, 2020.

For complete details on my Wildflower Rewards, scroll to the bottom of my Customer Rewards page or contact me. To start shopping now, head over to my Online Store!


We’re having a celebration for the new 2020-2021 Annual Catalog and you get the prize! Anyone who holds a party or shops during the month of June will receive extra Stampin’ Rewards with a qualifying purchase. If you place an order or host a party of $250 or more before shipping and taxes you will receive an extra $25 in Stampin’ Rewards!!

Visit my Promotions Page for complete details or drop me an email if you have any questions.


Have you heard about the AWESOME new Stampin’ Up! joining promotion? It’s a bundle bash! If you have been thinking about becoming a Stampin’ Up! demonstrator, now’s the perfect time to join. Not only will you get a Starter Kit – already a great value at $99 for $125 worth of products – but for a limited time, you can also select any stamp/tool bundle from the new 2020–2021 Annual Catalog for FREE.

This is such a great deal!! If you’ve been considering joining, June will be a great time to jump in!  Drop me an email if you have any questions.


June 1 – 15 Host Code: 6TV9W6ZJ

Use this host code when you order $50 or more and receive a free gift from me!  The free gift is your choice of any item valued up to $10.00 in the 2019 – 2020 Annual Catalog or in the 2020 Mini Catalog!  That includes some of the Host Exclusive stamp sets!

If your order is over $150, please do not use the host code since you’ll receive your own Host Dollars plus I’ll still send you the free gift!  This host code can be used by anyone, no club or commitment required.  Let me know if you have any questions.


If you need any stamping supplies, I’d be very happy to be your Demonstrator.  Just click on the Shop Now button on the right side of the screen to go directly to my online store or contact me if you have any questions.  Happy Stamping!

Thanks for stopping by and have a great week!

Akiko

  • Visit my online store here
  • See the current Stampin’ Up! clearance rack specials here
  • Earn FREE Stampin’ Up! products through my Wildflower Frequent Shopper Program – my way of saying thank you to my online frequent shopper customers.
  • Sign up for my weekly newsletter here
  • Have any questions? I’d be happy to help, click here to contact me.

Cardstock Cuts for this project:

  • Petal Pink – 4-1/4″x 11″ card base scored at 5-1/2″, 3-5/8″ x 4-7/8″ (DSP mat)
  • Gray Granite – 1/2″ x 4″ (sentiment banner)
  • Whisper White – 4″ x 5-1/4″ (inside panel), 5″ x 6″ (die cut flowers and leaves)
  • Peony Garden DSP – 3-1/2″ x 4-3/4″ (front panel), 1/2″ x 4″ (inside trim)

Stampin’ Up! products used in this project: