Stampin’ Up! Wildflower Designs Card

Good Morning! The Stampin’ Up! Wildflower Designs bundle is a new cling stamp set with dies bundle from the new Annual Catalog with pretty wildflower images and wonderful sentiments. I didn’t use the dies on this project because I wanted to use the pretty circle dies from the Spotlight on Nature dies. You can find the products I used at the bottom of my post along with the card stock sizes.

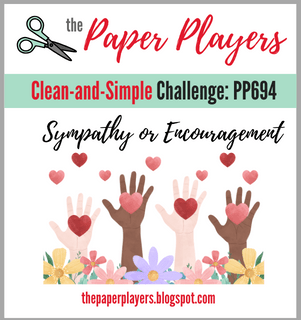
I was inspired by the pretty sketch in the Freshly Made Sketches #641 Challenge:

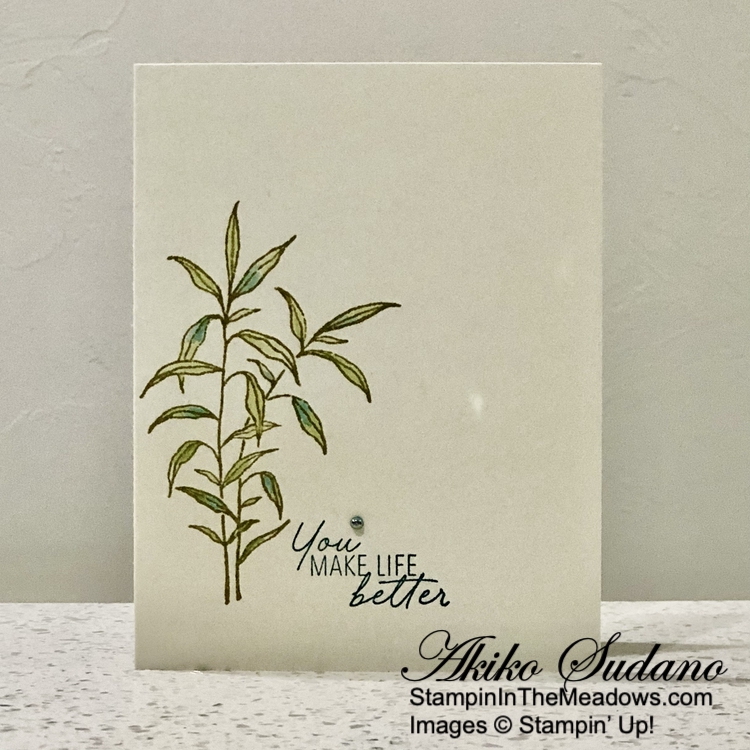
I embossed a panel of Wildly Flowering designer series paper with the Dashing Designs 3D embossing folder and adhered it to the front of a Misty Moonlight card base with liquid glue. I stamped the large flower image from the Stampin’ Up! Wildflower Designs stamp set using Memento Tuxedo Black ink on a Basic White panel and colored it with light Boho Blue and dark Old Olive Stampin’ Blends. I used stamped off Crumb cake ink to stamp more wildflowers in the background and cut it out with the dashed circle die from the Spotlight on Nature dies.

I colored one of the butterfly cutouts from the Paper Butterfly Accents with the light Wild Wheat Stampin’ Blend and adhered it to the corner of the die cut circle with glue dots. I adhered the circle and butterfly to the card with dimensionals.

I stamped sentiment from the Stampin’ Up Wildflower Designs stamp set in Misty Moonlight ink on Basic White. I cut it out with the large Stylish Shapes Banner die using the two step method and adhered it to the card front with glue dots. I finished the card with pretty Boho Blue and Wild Wheat dots.

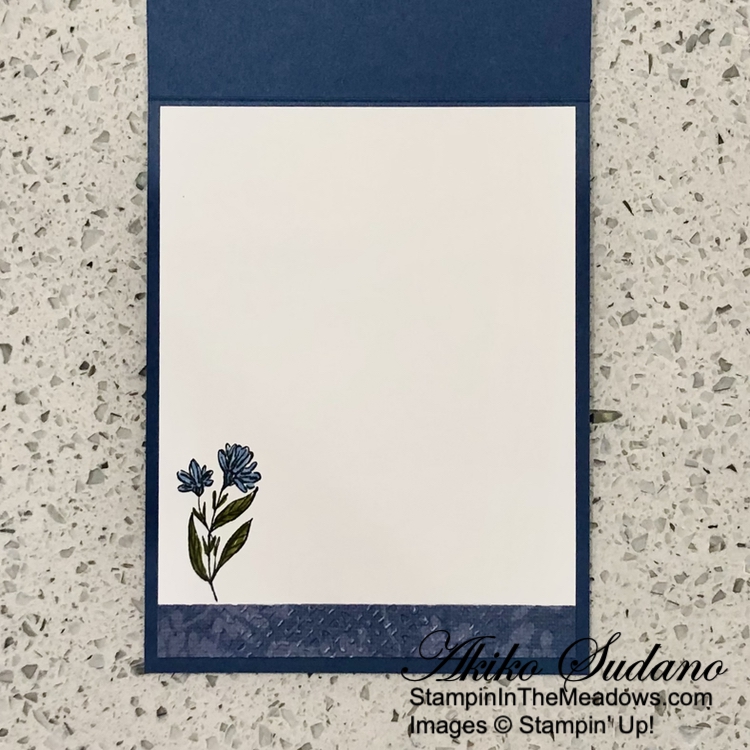
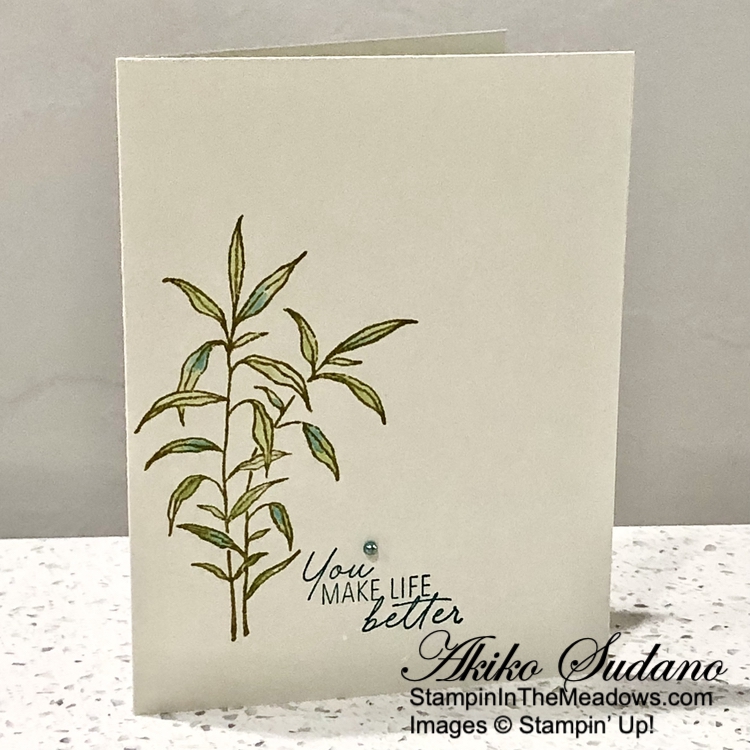
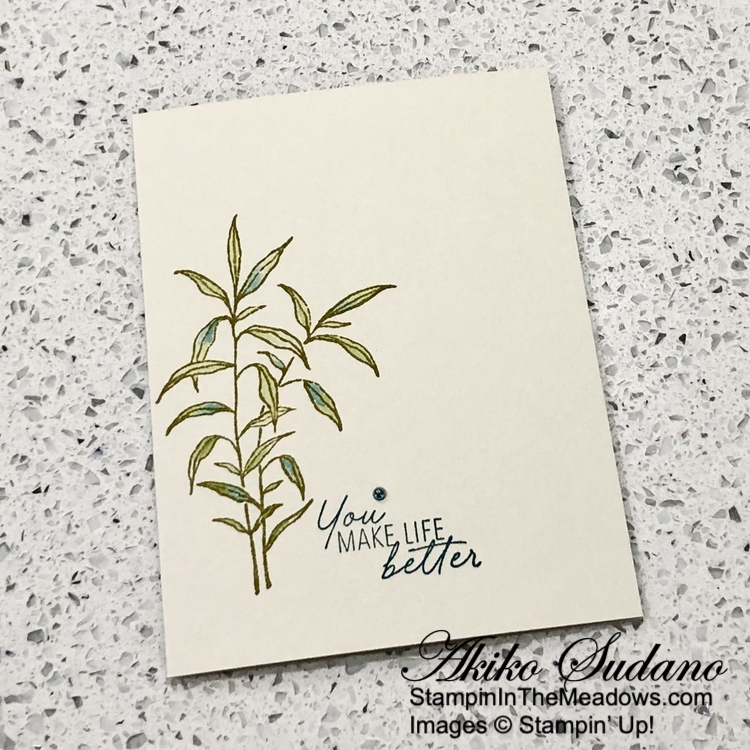
For the inside of the card I stamped another flower from the Stampin’ Up! Wildflower Designs stamp set in Memento Tuxedo Black ink on a Basic White panel. I colored it with light Boho Blue and dark Old Olive Stampin’ Blends. I embossed a strip of Wildly Flowering DSP and adhered it to the bottom of the panel and adhered the panel to the inside of the card with Stampin’ Seal.

The floral images in the Stampin’ Up! Wildflower Designs stamp set are simple and sweet. It’s nice that there are coordinating dies that cut them out, and I’ll have to do that on my next card. And I am loving the Wildly Flowering DSP, with all it’s different patterns and vintage feel.


Stampin’ Up! Bundle Sale Going On NOW!

Everyone loves a good deal, which is why Stampin’ Up! is offering an additional 10% off all stamp and die bundles! Between June 5, 2024 and June 30, 2024, take advantage of the sale and add some new bundles to your collection. Plus, save 10% on the Stampin’ Cut & Emboss Machine and the Mini Stampin’ Cut & Emboss Machine. These machines make the perfect crafting partner for stamp and die bundles.

Promotion Details:

  • Sales Period: June 5, 2024 – June 30, 2024
  • Get an additional 10% discount on stamp and die bundles only (that’s a total of 20% discount on stamp and die bundles!).
  • This excludes suite collections, stamp and punch bundles and any other bundles*.
  • Save 10% on Stampin’ Cut & Emboss Machine and Mini Stampin’ Cut & Emboss Machine (white and Boho Blue). 
  • The 10% discount applies automatically to stamp and die bundles in all orders including Starter Kit orders.

*Please note Close to My Heart products are not included in this promotion.


Current Host Code: XQZKDQU9

Use this host code when you order $50 or more and receive a Thank You gift from me!  The free gift is your choice of any item currently available valued up to $10.00.

If your order is over $150, please do not use the host code since you’ll receive your own Host Dollars plus I’ll still send you the Thank You gift!  This host code can be used by anyone, no club or commitment required. Let me know if you have any questions.


If you need any stamping supplies, I’d be very happy to be your Demonstrator.  Just click on the Shop Now Button on the right side of the screen to go directly to my Online store or contact me if you have any questions.  Happy Stamping!

Thanks for stopping by and have a great day!

Akiko

  • Visit my online store here
  • See the current Stampin’ Up! clearance rack specials here
  • Earn FREE Stampin’ Up! products through my Wildflower Frequent Shopper Program – my way of saying thank you to my online frequent shopper customers.
  • Have any questions? I’d be happy to help, click here to contact me.

Cardstock Cuts for this project:

  • Misty Moonlight – 4-1/4″ x 11″ card base, scored at 5-1/2″
  • Basic White – 4″ x 5-1/4″ (inside panel), 3″ x 3″ (die cut circle), 1-1/4″ x 4-1/4″ (label)
  • Wildly Flowering DSP – 4″ x 5-1/4″ (embossed background), 1/2″ x 4″ (inside trim)
  • Paper Butterfly Accents – small butterfly

Stampin’ Up! products used in this project:


Stampin’ Up! June Paper Pumpkin Kit – Life Is Sweet

Good Morning! I received my June Paper Pumpkin kit last week and put together some of the beautiful cards. This is such a pretty kit with fun painted fruit images, glitter paper sentiments and vellum die cuts.

Here’s the June 2024 Paper Pumpkin kit unboxing video from the Paper Pumpkin YouTube channel. It shows the kit contents and steps for making the cards.

The leafy die cut on the first card is stunning! And there were extra peaches, so I added them to my card.

The second card has vellum leaf sprigs that go with the gorgeous leaf spray. And I love the contrast with the shiny pearls & sentiments and linen thread.

The last card has subtle vellum flowers and I love the scallop theme on this die cut, the envelope flaps and the first card frame.

There’s a refill available!

And here is the Shy Shamrock ink spot and the stamp sets included in the kit.

The coordinating add-on item, the Thanks and Beyond dies are still available:

Here are some alternative designs made by the Paper Pumpkin Team.

It’s a beautiful kit with wonderful elements and designs.


The July Paper Pumpkin Kit – Painted Petals!

Craft beautiful cards with unique watercolor designs and pretty layers!

  • Makes 9 cards: 3 each of 3 designs with 9 coordinating envelopes
  • Printed cards and coordinating envelopes
  • Precut paper pieces and embellishments
  • Gray Granite Classic Stampin’ Spot

Coordinating Colors: Calypso Coral, Gray Granite, Melon Mambo, Mossy Meadow, Old Olive

And the coordinating add-on is the Every Celebration dies.

If you’re interested in subscribing to Paper Pumpkin, you can either sign up for a subscription where you are billed monthly for your kit or you can purchase a prepaid subscription in my Online Store. To see more information and to sign up for the monthly subscription click here. To see the options for prepaid subscriptions in my Online Store, click here.

Sign up deadline for the July 2024 kit is July 10, 2024. Note: Supplies may be limited toward the end of the subscription period.


Current Host Code: XQZKDQU9

Use this host code when you order $50 or more and receive a free gift from me!  The gift is your choice of any currently available item valued up to $10.00!

If your order is over $150, please do not use the host code since you’ll receive your own Host Dollars plus I’ll still send you the free gift!  This host code can be used by anyone, no commitment required.  Let me know if you have any questions.


If you need any stamping supplies, I’d be very happy to be your Demonstrator.  Just click on the Shop Now Button on the right side of the screen to go directly to my Online store or contact me if you have any questions.  Happy Stamping!

Thanks for stopping by and have a great day!

Akiko

  • Visit my online store here
  • See the current Stampin’ Up! clearance rack specials here
  • Earn FREE Stampin’ Up! products through my Wildflower Frequent Shopper Program – my way of saying thank you to my online frequent shopper customers.
  • Have any questions? I’d be happy to help, click here to contact me.

Stampin’ Up! Prepaid Paper Pumpkin Subscription Options:


Stampin’ Up! Thoughtful Wishes CAS Card

Good Morning! The Stampin’ Up! Thoughtful Wishes stamp set has pretty images and sentiments and so today I did something different and I made a single layer CAS (clean and simple) card. You can find the products I used at the bottom of my post along with the card stock sizes.

My card was inspired by the Paper Players PP694 Challenge – Clean-and-Simple.

I stamped the leaf sprig from the Stampin’ Up! Thoughtful Wishes stamp set using Wild Wheat ink on a Basic Beige card base. I used a blender pen to lightly color the leaves with Pretty Peacock and Old Olive inks.

I stamped the sentiment from the Stampin’ Up! Thoughtful Wishes stamp set using Pretty Peacock ink next to the leaves and finished the card with a single small Pretty Peacock iridescent pearl. Since the new Basic Beige color is so light, I didn’t even put an inside panel on the card – you can write your personal message directly on the card base!

I love the new Basic Beige color and I love how well the Wild Wheat, Old Olive and Pretty Peacock inks look with it. And this card was so different for me, single layer, no dies and no adhesives! Clean and Simple – give it a try!


Stampin’ Up! Bundle Sale Going On NOW!

Everyone loves a good deal, which is why Stampin’ Up! is offering an additional 10% off all stamp and die bundles! Between June 5, 2024 and June 30, 2024, take advantage of the sale and add some new bundles to your collection. Plus, save 10% on the Stampin’ Cut & Emboss Machine and the Mini Stampin’ Cut & Emboss Machine. These machines make the perfect crafting partner for stamp and die bundles.

Promotion Details:

  • Sales Period: June 5, 2024 – June 30, 2024
  • Get an additional 10% discount on stamp and die bundles only (that’s a total of 20% discount on stamp and die bundles!).
  • This excludes suite collections, stamp and punch bundles and any other bundles*.
  • Save 10% on Stampin’ Cut & Emboss Machine and Mini Stampin’ Cut & Emboss Machine (white and Boho Blue). 
  • The 10% discount applies automatically to stamp and die bundles in all orders including Starter Kit orders.

*Please note Close to My Heart products are not included in this promotion.


Current Host Code: XQZKDQU9

Use this host code when you order $50 or more and receive a Thank You gift from me!  The free gift is your choice of any item currently available valued up to $10.00.

If your order is over $150, please do not use the host code since you’ll receive your own Host Dollars plus I’ll still send you the Thank You gift!  This host code can be used by anyone, no club or commitment required. Let me know if you have any questions.


If you need any stamping supplies, I’d be very happy to be your Demonstrator.  Just click on the Shop Now Button on the right side of the screen to go directly to my Online store or contact me if you have any questions.  Happy Stamping!

Thanks for stopping by and have a great day!

Akiko

  • Visit my online store here
  • See the current Stampin’ Up! clearance rack specials here
  • Earn FREE Stampin’ Up! products through my Wildflower Frequent Shopper Program – my way of saying thank you to my online frequent shopper customers.
  • Have any questions? I’d be happy to help, click here to contact me.

Cardstock Cuts for this project:

  • Basic Beige – 5-1/2″ x 8-1/2″ card base, scored at 4-1/4″

Stampin’ Up! products used in this project:


Stampin’ Up! Simply Zinnia for the Happy Inkin’ Thursday Blog Hop

Good Morning and welcome to the Happy Inkin’ Thursday Blog Hop! The Stampin’ Up! Simply Zinnia bundle is one of my current favorites, and the pretty Flowering Zinnias designer series paper is so pretty. I’ve used them to make a pretty thinking of you card for today. You can find the supplies I used along with card stock cuts at the bottom of my post.

We have a pretty sketch challenge this week:

I adhered a panel of Flowering Zinnias designer series paper to the front of a Melon Mambo card base with liquid glue. I adhered another panel of leafy Flowering Zinnias DSP to the card with liquid glue.

I adhered a third panel to a Mossy Meadow mat and popped it on the card with dimensionals.

I stamped the sentiment from the Stampin’ Up! Simply Zinnia stamp set using Blackberry Bliss ink on a strip of Melon Mambo card stock and adhered it to the card with dimnesionals and glue dots. I finished the card with Shiny Sequins to add some bling.

For the inside of the card, I stamped the flower bouquet from the Stampin’ Up! Simply Zinnia stamp set using three times stamped off Melon Mambo ink on a Basic White panel. I adhered the panel to the inside of the card with Stampin’ Seal.

This week’s sketch is really simple and pretty and the wonderful colors of the Flowering Zinnias designer series paper make this card so easy, especially with the pretty sentiment from the Stampin’ Up! Simply Zinnia stamp set!

On with the Hop! Click on the Next Blog button to move forward to see the beautiful project Karen Ksenzakovic has created.

If you get lost along the way, here are the participants for the hop:


Current Host Code: XQZKDQU9

Use this host code when you order $50 or more and receive a free gift from me!  The free gift is your choice of any item currently available valued up to $10.00!

If your order is over $150, please do not use the host code since you’ll receive your own Host Dollars plus I’ll still send you the free gift!  This host code can be used by anyone, no club or commitment required. Let me know if you have any questions.


If you need any stamping supplies, I’d be very happy to be your Demonstrator.  Just click on the Shop Now button on the right side of the screen to go directly to my online store or contact me if you have any questions. 

Thanks for stopping by and Happy Stamping!

Akiko

  • Visit my online store here
  • See the current Stampin’ Up! clearance rack specials here
  • Earn FREE Stampin’ Up! products through my Wildflower Frequent Shopper Program – my way of saying thank you to my online frequent shopper customers.
  • Have any questions? I’d be happy to help, click here to contact me.

Cardstock Cuts for this project:

  • Melon Mambo – 5-1/2″ x 8-1/2″ card base, scored at 4-1/4″, 3/4″ x 3-1/2″ (label)
  • Mossy Meadow – 3″ x 3″ (front mat)
  • Basic White – 4″ x 5-1/4″ (inside panel)
  • Flowering Zinnias DSP – 4″ x 5-1/4″ (front background), 2-1/2″ x 3-1/2″ (leaf panel), 2-7/8″ x 2-7/8″ (floral panel)

Stampin’ Up! products used in this project:


Stampin’ Up! Frames & Flowers Thank You Card

Good Morning! The Stampin’ Up! Frames & Flowers specialty designer series paper is such a cool idea, full of pretty floral images and greenery frames. It has three sheets of double sided designer series paper and three sheets of lovely floral and greenery die cuts. You can find the products I used at the bottom of my post along with the card stock sizes.

I adhered one of the die cut panels from the Stampin’ Up! Frames & Flowers specialty designer series paper to a Lost Lagoon mat with liquid glue and popped it onto the front of a Petal Pink card base with dimensionals.

I adhered a floral bouquet die cut from the Stampin’ Up! Frames & Flowers specialty DSP to two greenery die cuts with glue dots and adhered them to the card with dimensionals. I popped a large flower die cut on the bouquet to give it some dimension.

I stamped the part of the sentiment from the Magnolia Mood stamp set in Lost Lagoon ink on a panel of Stampin’ Up! Frames & Flowers specialty DSP (I used the center of one of the large frames) and cut it out with the smallest Countryside Corners die. I adhered the label to the card with dimensionals and glue dots. I finished the card with Peach Pie shimmer gems.

For the inside of the card I adhered a small bouquet from the Stampin’ Up! Frames & Flowers specialty DSP to the corner of a Basic White panel with liquid glue and adhered the panel to the inside of the card with Stampin’ Seal.

The colors in the Stampin’ Up! Frames & Flowers specialty DSP are so soft and pretty and the die cuts are so fun to arrange! I hope you check it out.


Stampin’ Up! Bundle Sale Going On NOW!

Everyone loves a good deal, which is why Stampin’ Up! is offering an additional 10% off all stamp and die bundles! Between June 5, 2024 and June 30, 2024, take advantage of the sale and add some new bundles to your collection. Plus, save 10% on the Stampin’ Cut & Emboss Machine and the Mini Stampin’ Cut & Emboss Machine. These machines make the perfect crafting partner for stamp and die bundles.

Promotion Details:

  • Sales Period: June 5, 2024 – June 30, 2024
  • Get an additional 10% discount on stamp and die bundles only (that’s a total of 20% discount on stamp and die bundles!).
  • This excludes suite collections, stamp and punch bundles and any other bundles*.
  • Save 10% on Stampin’ Cut & Emboss Machine and Mini Stampin’ Cut & Emboss Machine (white and Boho Blue). 
  • The 10% discount applies automatically to stamp and die bundles in all orders including Starter Kit orders.

*Please note Close to My Heart products are not included in this promotion.


New Kits In Kits Collection!

The Kits Collection by Stampin’ Up! provides different options and a range of project types that allow you to choose the crafting experiences that best fits your style and needs. There’s a variety of kits to choose from and these all-inclusive project kits have everything you need in one box! You can Find these kits in the Online Store.

The new kits for June are the beautiful Expressions of Kindness Kit and the fun Scenic Route Travel Journal Kit. Check out the YouTube videos for these new kits to see the contents and learn how to make the cards and journal.

The Kits Collection offering changes frequently as new kits are released, and kit availability fluctuates. To check the availability of these new kits or past kits, visit my Online Store. 


Current Host Code: XQZKDQU9

Use this host code when you order $50 or more and receive a Thank You gift from me!  The free gift is your choice of any item currently available valued up to $10.00.

If your order is over $150, please do not use the host code since you’ll receive your own Host Dollars plus I’ll still send you the Thank You gift!  This host code can be used by anyone, no club or commitment required. Let me know if you have any questions.


If you need any stamping supplies, I’d be very happy to be your Demonstrator.  Just click on the Shop Now Button on the right side of the screen to go directly to my Online store or contact me if you have any questions.  Happy Stamping!

Thanks for stopping by and have a great day!

Akiko

  • Visit my online store here
  • See the current Stampin’ Up! clearance rack specials here
  • Earn FREE Stampin’ Up! products through my Wildflower Frequent Shopper Program – my way of saying thank you to my online frequent shopper customers.
  • Have any questions? I’d be happy to help, click here to contact me.

Cardstock Cuts for this project:

  • Petal Pink – 4-1/4″ x 11″ card base, scored at 5-1/2″
  • Lost Lagoon – 3-7/8″ x 5-1/8″ (front mat)
  • Basic White – 4″ x 5-1/4″ (inside panel)
  • Frames & Florals specialty DSP – large background panel, large bouquet, small bouquet, two greenery sprigs, large flower, frame center (label)

Stampin’ Up! products used in this project:


Stampin’ Up! Ice Cream Swirl for the Happy Inkin’ Thursday Blog Hop

Good Morning and welcome to the Happy Inkin’ Thursday Blog Hop! Last week I spent a couple of days in Ocean City, MD with my visiting family, and you guessed it, we had ice cream. So I had to use the Stampin’ Up! Ice Cream Swirl bundle to make a card. And I wanted beachy colors, so I used the Sketched Plaid background stamp to make ‘DSP’ for the background. You can find the supplies I used along with card stock cuts at the bottom of my post.

We have a theme challenge this week and no veggies or fruits, but ice cream is a food, so yay!

I stamped the sketched plaid background stamp in Azure Afternoon ink on a Basic White panel and colored the stripes with Stampin’ Blends. I used light Pretty In Pink, light Shy Shamrock, light Granny Apple Green and dark Fresh Freesia for the horizontal stripes and dark Lemon Lolly, light Azure Afternoon, light Peach Pie and light Summer Splash for the vertical stripes. I just colored the stripes and I wasn’t too careful. I adhered the stamped panel to a Pretty In Pink mat and to the front of a Shy Shamrock Z-Fold card base with liquid glue. I also stamped and colored a panel for the middle of the card and for the inside panel trim.

I used the Stampin’ Up! Ice Cream Swirl dies to cut my ice cream, using Peach Pie for the background die and Basic White for the detailed die. This is exactly like the Creamsicle/Vanilla cone I had at the beach (my husband had chocolate/vanilla swirl). I stamped the cone using Pecan Pie ink on Crumb Cake and cut it out with the coordinating die. I adhered the ice cream cone die cuts together and popped it on the card front with dimensionals.

I stamped the sentiment from the Stampin’ Up! Ice Cream Swirl stamp set using Azure Afternoon ink on Pretty In Pink card stock. I cut it out with the small circle from the Unbounded Love dies and adhered it to the larger circle cut from Shy Shamrock card stock. I adhered a folded length of Azure Afternoon ribbon to the back and adhered it to the card with dimensionals. I used Shiny Sequins as sprinkles on my ice cream.

For the inside of the card, I stamped the sentiment from the Stampin’ Up! Ice Cream Swirl stamp set using Azure Afternoon ink. I adhered a strip of my stamped and colored plaid to the bottom and adhered the panel to the inside of the card with Stampin’ Seal. You can see the last panel on the left side – this is the middle section of the Z-Fold.

With Summer upon us, it’s time for ice cream – cones, sandwiches, sundaes, any ways. And the Stampin’ Up! Ice Cream Swirl bundle is perfect to celebrate. And OK, fruits and veggies are good too.

On with the Hop! Click on the Next Blog button to move forward to see the beautiful project Karen Ksenzakovic has created.

If you get lost along the way, here are the participants for the hop:


Current Host Code: XQZKDQU9

Use this host code when you order $50 or more and receive a free gift from me!  The free gift is your choice of any item currently available valued up to $10.00!

If your order is over $150, please do not use the host code since you’ll receive your own Host Dollars plus I’ll still send you the free gift!  This host code can be used by anyone, no club or commitment required. Let me know if you have any questions.


If you need any stamping supplies, I’d be very happy to be your Demonstrator.  Just click on the Shop Now button on the right side of the screen to go directly to my online store or contact me if you have any questions. 

Thanks for stopping by and Happy Stamping!

Akiko

  • Visit my online store here
  • See the current Stampin’ Up! clearance rack specials here
  • Earn FREE Stampin’ Up! products through my Wildflower Frequent Shopper Program – my way of saying thank you to my online frequent shopper customers.
  • Have any questions? I’d be happy to help, click here to contact me.

Cardstock Cuts for this project:

  • Shy Shamrock – 5-1/2″ x 8-1/2″ card base, scored at 2-1/8″ and 5-1/2″, 1-1/2″ x 1-1/2″ (label mat)
  • Pretty In Pink – 1-1/2″ x 1-1/2″ (label)
  • Peach Pie – 3″ x 3-1/4″ (ice cream die cut)
  • Crumb Cake – 2-1/2″ x 3-1/4″ (cone die cut)
  • Basic White – 3-3/4″ x 5″ (inside panel), 3-7/8″ x 5-1/8″ (stamped front background), 1-7/8″ x 5-1/4″ (stamped middle panel), 1/2″ x 3-3/4″ (stamped inside trim), 2-1/2″ x 3″ (ice cream die cut)

Stampin’ Up! products used in this project:


Stampin’ Up! Adventurous Sky Father’s Day Card

Good Morning! The Stampin’ Up! Adventurous Sky bundle is the coolest bi-plane set ever with different plane and cloud images, coordinating dies, great masculine sentiments and dies to make a wonderful die cut bi-plane. I used the die cut bi-plane for today’s Father’s Day card and combined it with the wonderful Take to the Sky designer series paper. You can find the products I used at the bottom of my post along with the card stock sizes.

I adhered a panel of Take to the Sky designer series paper to a Basic White mat with liquid glue and popped it on the front of a Gray Granite card base with dimensionals. I used the largest circle from the Stylish Shapes dies to cut a cloud filled panel and adhered it to the card.

I used the dies from the Stampin’ Up! Adventurous Sky dies to cut Crushed Curry, Misty Moonlight and Gray Granite card stock to make the plane. I adhered the die cuts together with liquid glue and popped the plane on the card with dimensionals.

I stamped the sentiment from the Stampin’ Up! Adventurous Sky stamp set in Misty Moonlight ink on Boho Blue card stock and cut it out with a circle die from the Stylish Shapes dies. I adhered it to the card with a dimensional and finished the card with white adhesive sequins.

For the inside of the card I stamped the sentiment from the Stampin’ Up! Adventurous Sky stamp set in Misty Moonlight ink on a Basic White panel. I stamped the small plane in Gray Granite and the clouds in three times stamped off Boho Blue ink. I trimmed the bottom with a strip of DSP and adhered the panel to the inside of the card with Stampin’ Seal.

I love vintage machines for masculine cards and the die cut bi-plane in the Stampin’ Up! Adventurous Sky bundle is such a fun interpretation. And this bundle is currently on sale, with an extra 10% off, so hurry and get yours.


Stampin’ Up! Bundle Sale Going On NOW!

Everyone loves a good deal, which is why Stampin’ Up! is offering an additional 10% off all stamp and die bundles! Between June 5, 2024 and June 30, 2024, take advantage of the sale and add some new bundles to your collection. Plus, save 10% on the Stampin’ Cut & Emboss Machine and the Mini Stampin’ Cut & Emboss Machine. These machines make the perfect crafting partner for stamp and die bundles.

Promotion Details:

  • Sales Period: June 5, 2024 – June 30, 2024
  • Get an additional 10% discount on stamp and die bundles only (that’s a total of 20% discount on stamp and die bundles!).
  • This excludes suite collections, stamp and punch bundles and any other bundles*.
  • Save 10% on Stampin’ Cut & Emboss Machine and Mini Stampin’ Cut & Emboss Machine (white and Boho Blue). 
  • The 10% discount applies automatically to stamp and die bundles in all orders including Starter Kit orders.

*Please note Close to My Heart products are not included in this promotion.


Current Host Code: SSMUTY4A

Use this host code when you order $50 or more and receive a Thank You gift from me!  The free gift is your choice of any item currently available valued up to $10.00.

If your order is over $150, please do not use the host code since you’ll receive your own Host Dollars plus I’ll still send you the Thank You gift!  This host code can be used by anyone, no club or commitment required. Let me know if you have any questions.


If you need any stamping supplies, I’d be very happy to be your Demonstrator.  Just click on the Shop Now Button on the right side of the screen to go directly to my Online store or contact me if you have any questions.  Happy Stamping!

Thanks for stopping by and have a great day!

Akiko

  • Visit my online store here
  • See the current Stampin’ Up! clearance rack specials here
  • Earn FREE Stampin’ Up! products through my Wildflower Frequent Shopper Program – my way of saying thank you to my online frequent shopper customers.
  • Have any questions? I’d be happy to help, click here to contact me.

Cardstock Cuts for this project:

  • Gray Granite – 5-1/2″ x 8-1/2″ card base, scored at 4-1/4″, 3/4″ x 1-1/2″ (propeller die cut)
  • Boho Blue – 1-1/2″ x 1-1/2″ (label)
  • Crushed Curry – 1-3/4″ x 4-1/4″ (plane body)
  • Misty Moonlight – 1-3/4″ x 4-1/4″ (plane wings)
  • Basic White – (2) 4″ x 5-1/4″ panels (inside panel and front mat)
  • Take To The Sky DSP – 3-7/8″ x 5-1/8″ (front background), 3-1/4″ x 3-1/4″ (die cut circle), 1/2″ x 4″ (inside trim)

Stampin’ Up! products used in this project:


Stampin’ Up! Thoughtful Wishes Thank You Card

Good Morning! I’ve been having family visiting for the past few weeks, so I haven’t been posting as much. So I’m slowly getting back into the swing with this simple thank you card featuring the pretty Stampin’ Up! Thoughtful Wishes bundle and the beautiful Thoughtful Journey designer series paper. You can find the products I used at the bottom of my post along with the card stock sizes.

I embossed a Misty Moonlight panel with the Timeworn Type 3D embossing folder and adhered it to the front of a Misty Moonlight card base. I used the pretty, large flourish die from the Stampin’ Up! Thoughtful Wishes dies to cut a panel of Thoughtful Designs specialty DSP and adhered it to the card with glue dots.

I adhered a panel of Thoughtful Journey DSP to a Fresh Freesia mat and wrapped it with a single strand of Boho Blue jute, tying a knot. I cut two flowers from the Thoughtful Designs specialty DSP using the dies from the Stampin’ Up! Thoughtful Wishes dies. and adhered them to the panel with glue dots, tucking them under the jute.

I stamped the sentiment from the Stampin’ Up! Thoughtful Wishes stamp set in Versamark ink on a panel of Thoughtful Journey DSP and sprinkled it with white embossing powder. I shook off the excess and heated the powder with my heat tool until it was bright and shiny. I cut it out with the small rectangle die from the Everyday Details dies using a two step method, so it would be shorter. I adhered the die cut label to the DSP panel with dimensionals and adhered the panel to the card front with dimensionals. I finished the card with Blackberry Bliss shimmer gems.

For the inside of the card I stamped the sentiment from the Stampin’ Up! Thoughtful Wishes stamp set in Misty Moonlight ink on a Basic White panel. I stamped the flowers using stamped-off Fresh Freesia ink and trimmed the side with DSP. I adhered the panel to a Fresh Freesia mat before adhering the panel to the inside of the card with Stampin’ Seal.

Thankfully, it’s so quick and easy to make fancy handmade cards with pretty DSP. And pair it with the pretty dies and images from the Stampin’ Up! Thoughtful Wishes bundle and a few embellishments and you’re set.


Stampin’ Up! Bundle Sale Going On NOW!

Everyone loves a good deal, which is why Stampin’ Up! is offering an additional 10% off all stamp and die bundles! Between June 5, 2024 and June 30, 2024, take advantage of the sale and add some new bundles to your collection. Plus, save 10% on the Stampin’ Cut & Emboss Machine and the Mini Stampin’ Cut & Emboss Machine. These machines make the perfect crafting partner for stamp and die bundles.

Promotion Details:

  • Sales Period: June 5, 2024 – June 30, 2024
  • Get an additional 10% discount on stamp and die bundles only (that’s a total of 20% discount on stamp and die bundles!).
  • This excludes suite collections, stamp and punch bundles and any other bundles*.
  • Save 10% on Stampin’ Cut & Emboss Machine and Mini Stampin’ Cut & Emboss Machine (white and Boho Blue). 
  • The 10% discount applies automatically to stamp and die bundles in all orders including Starter Kit orders.

*Please note Close to My Heart products are not included in this promotion.


Current Host Code: SSMUTY4A

Use this host code when you order $50 or more and receive a Thank You gift from me!  The free gift is your choice of any item currently available valued up to $10.00.

If your order is over $150, please do not use the host code since you’ll receive your own Host Dollars plus I’ll still send you the Thank You gift!  This host code can be used by anyone, no club or commitment required. Let me know if you have any questions.


If you need any stamping supplies, I’d be very happy to be your Demonstrator.  Just click on the Shop Now Button on the right side of the screen to go directly to my Online store or contact me if you have any questions.  Happy Stamping!

Thanks for stopping by and have a great day!

Akiko

  • Visit my online store here
  • See the current Stampin’ Up! clearance rack specials here
  • Earn FREE Stampin’ Up! products through my Wildflower Frequent Shopper Program – my way of saying thank you to my online frequent shopper customers.
  • Have any questions? I’d be happy to help, click here to contact me.

Cardstock Cuts for this project:

  • Misty Moonlight – 4-1/4″ x 11″ card base, scored at 5-1/2″, 4-1/4″ x 5-1/2″ (embossed panel)
  • Fresh Freesia – 2-1/4″ x 4″ (DSP mat), 3-7/8″ x 5-1/8″ (inside mat)
  • Basic White – 3-3/4″ x 5″ (inside panel)
  • Thoughtful Designs specialty DSP – 2-1/2″ x 5″ (die cut flourish and flowers)
  • Thoughtful Journey DSP – 2-1/8″ x 3-7/8″ (front panel), 1/2″ x 5″ (inside trim), 1-1/4″ x 2-1/4″ (label)

Stampin’ Up! products used in this project:


Stampin’ Up! Happiest Day Card

Good Morning! The Stampin’ Up! Happiest Day stamp set is a fun photopolymer stamp set with the best sentiments and cheerful images. I used it with the colorful Bright and Beautiful 6″ x 6″ designer series paper and Countryside Corners dies for today’s card. You can find the products I used at the bottom of my post along with the card stock sizes.

I adhered a panel of Bright and Beautiful designer series paper to a Lemon Lime Twist card base with liquid glue. I stamped the sentiment from the Stampin’ Up! Happiest Day stamp set using Versamark ink on a panel of Bright and Beautiful DSP and sprinkled it with white embossing powder. I shook off the excess and heated the powder with my heat tool. I cut it out with the 4th largest die from the Countryside Corners dies. I cut a Blueberry Bushel panel with the next largest size die and adhered the label to the Blueberry Bushel die cut. I adhered the label to the card with dimensionals.

I stamped the dragonfly outline from the Stampin’ Up! Happiest Day stamp set in Memento Tuxedo Black ink three times on Basic White. I used the wing filler stamps to color the wings, using Balmy Blue and Fresh Freesia, Lost Lagoon and Lemon Lime Twist, and Berry Burst and Bubble Bath inks. I love those dotted wing filler stamps! I fussy cut the dragonflies with my paper snips and adhered them to the card with dimensionals and glue dots.

I decorated the space around the dragonflies with colorful small sequins and used Lemon Lolly baker’s twine to wrap around the top and tie a bow.

For the inside of the card I stamped the sun and sun rays from the Stampin’ Up! Happiest Day stamp set in daffodil Delight ink in the top corner of a Basic White panel. I used a Blending Brush to apply Lemon Lolly ink around the sun and trimmed the bottom with a strip of DSP. I adhered the panel to the inside of the card with Stampin’ Seal.

Isn’t that sentiment the best! The Stampin’ Up! Happiest Day stamp set is perfect for making cheerful, happy cards that make people smile.


Stampin’ Up! Bundle Sale Starting June 5, 2024!

Everyone loves a good deal, which is why Stampin’ Up! is offering an additional 10% off all stamp and die bundles! Between June 5, 2024 and June 30, 2024, take advantage of the sale and add some new bundles to your collection. Plus, save 10% on the Stampin’ Cut & Emboss Machine and the Mini Stampin’ Cut & Emboss Machine. These machines make the perfect crafting partner for stamp and die bundles.

Promotion Details:

  • Sales Period: June 5, 2024 – June 30, 2024
  • Get an additional 10% discount on stamp and die bundles only (that’s a total of 20% discount on stamp and die bundles!).
  • This excludes suite collections, stamp and punch bundles and any other bundles*.
  • Save 10% on Stampin’ Cut & Emboss Machine and Mini Stampin’ Cut & Emboss Machine (white and Boho Blue). 
  • The 10% discount applies automatically to stamp and die bundles in all orders including Starter Kit orders.

*Please note Close to My Heart products are not included in this promotion.


Current Host Code: SSMUTY4A

Use this host code when you order $50 or more and receive a Thank You gift from me!  The free gift is your choice of any item currently available valued up to $10.00.

If your order is over $150, please do not use the host code since you’ll receive your own Host Dollars plus I’ll still send you the Thank You gift!  This host code can be used by anyone, no club or commitment required. Let me know if you have any questions.


If you need any stamping supplies, I’d be very happy to be your Demonstrator.  Just click on the Shop Now Button on the right side of the screen to go directly to my Online store or contact me if you have any questions.  Happy Stamping!

Thanks for stopping by and have a great day!

Akiko

  • Visit my online store here
  • See the current Stampin’ Up! clearance rack specials here
  • Earn FREE Stampin’ Up! products through my Wildflower Frequent Shopper Program – my way of saying thank you to my online frequent shopper customers.
  • Have any questions? I’d be happy to help, click here to contact me.

Cardstock Cuts for this project:

  • Lemon Lime Twist – 4-1/4″ x 11″ card base, scored at 5-1/2″
  • Blueberry Bushel – 3″ x 4-1/2″ (sentiment mat)
  • Basic White – 3-3/4″ x 5″ (inside panel), 1-1/4″ x 6″ (fussy cut dragonflies)
  • Bright and Beautiful 6″ x 6″ DSP – 3-3/4″ x 5″ (front background), 2-1/4″ x 3-3/4″ (label)

Stampin’ Up! products used in this project:


Stampin’ Up! Coffee With Friends Thinking Of You Card

Good Morning! The Stampin’ Up! Coffee With Friends stamp set is a fun set expressing friendship and I used it with the pretty A Little Latte designer series paper to make a simple fun fold thinking of you card. You can find the products I used at the bottom of my post along with the card stock sizes.

I adhered plaid panel of A Little Latte designer series paper to a Calypso Coral card base with liquid glue. I adhered another panel with pretty coffee cups to the front of a Lost Lagoon mini card and adhered it to the main card base with liquid glue.

I stamped the sentiment from the Stampin’ Up! Coffee With Friends stamp set in Pecan Pie Ink on a Petal Pink panel. I cut it out with the circle die from the Radiating Stitches dies. Sadly, I learned that these dies have retired since I made the card, so I would recommend using the awesome Spotlight on Nature dies or the Everyday Details dies instead.

I made a bow with Crumb Cake baker’s twine and adhered it to the back of the label and adhered the label to the card with dimensionals. I finished the card with Petal Pink swirl dots.

For the inside of the card I stamped the ladies on the bench from the Stampin’ Up! Coffee with Friends stamp set in Pecan Pie ink on a Basic White panel. I stamped the sentiment in Lost Lagoon ink and adhered the panel to the inside of the Mini Card with Stampin’ Seal.

The A Little Latte designer series paper is so pretty and I thought it would coordinate with the Stampin’ Up! Coffee With Friends stamp set. There are so many little coffee shops near me that are great to catch up with friends and relax. I hope you have some places near you too!


The June Paper Pumpkin Kit – Life Is Sweet!

Celebrate the sweet things in life with textured, artistic cards.

  • Makes 9 cards: 3 each of 3 designs with 9 coordinating envelopes
  • Iridescent glimmer sentiments and precut paper pieces
  • Vellum accents, iridescent pearls, and linen thread
  • Shy Shamrock Classic Stampin’ Spot

Coordinating Colors: Poppy Parade, Peach Pie, Lemon Lolly, Shy Shamrock, Pool Party, Pretty In Pink

And the coordinating add-on is the Thanks and Beyond dies. These dies coordinate with the Best There Is kit and will also coordinate with the June kit.

If you’re interested in subscribing to Paper Pumpkin, you can either sign up for a subscription where you are billed monthly for your kit or you can purchase a prepaid subscription in my Online Store. To see more information and to sign up for the monthly subscription click here. To see the options for prepaid subscriptions in my Online Store, click here.

Sign up deadline for the June 2024 kit is June 10, 2024. Note: Supplies may be limited toward the end of the subscription period.


Stampin’ Up! Bundle Sale Starting June 5, 2024!

Everyone loves a good deal, which is why Stampin’ Up! is offering an additional 10% off all stamp and die bundles! Between June 5, 2024 and June 30, 2024, take advantage of the sale and add some new bundles to your collection. Plus, save 10% on the Stampin’ Cut & Emboss Machine and the Mini Stampin’ Cut & Emboss Machine. These machines make the perfect crafting partner for stamp and die bundles.

Promotion Details:

  • Sales Period: June 5, 2024 – June 30, 2024
  • Get an additional 10% discount on stamp and die bundles only (that’s a total of 20% discount on stamp and die bundles!).
  • This excludes suite collections, stamp and punch bundles and any other bundles*.
  • Save 10% on Stampin’ Cut & Emboss Machine and Mini Stampin’ Cut & Emboss Machine (white and Boho Blue). 
  • The 10% discount applies automatically to stamp and die bundles in all orders including Starter Kit orders.

*Please note Close to My Heart products are not included in this promotion.


Current Host Code: SSMUTY4A

Use this host code when you order $50 or more and receive a Thank You gift from me!  The free gift is your choice of any item currently available valued up to $10.00.

If your order is over $150, please do not use the host code since you’ll receive your own Host Dollars plus I’ll still send you the Thank You gift!  This host code can be used by anyone, no club or commitment required. Let me know if you have any questions.


If you need any stamping supplies, I’d be very happy to be your Demonstrator.  Just click on the Shop Now Button on the right side of the screen to go directly to my Online store or contact me if you have any questions.  Happy Stamping!

Thanks for stopping by and have a great day!

Akiko

  • Visit my online store here
  • See the current Stampin’ Up! clearance rack specials here
  • Earn FREE Stampin’ Up! products through my Wildflower Frequent Shopper Program – my way of saying thank you to my online frequent shopper customers.
  • Have any questions? I’d be happy to help, click here to contact me.

Cardstock Cuts for this project:

  • Calypso Coral – 4-1/4″ x 5-1/2″ card base
  • Lost Lagoon – 3″ x 8-1/2″ mini card Base, scored at 4-1/4
  • Petal Pink – 1-3/4″ x 1-3/4″ (label)
  • Basic White – 2-3/4″ x 4″ (inside panel)
  • A Little Latte DSP – 4″ x 5-1/4″ (large front background), 2-3/4″ x 4″ (mini card background)

Stampin’ Up! products used in this project: