Stampin’ Up! Stamp Honey Bee Thinking of You Card

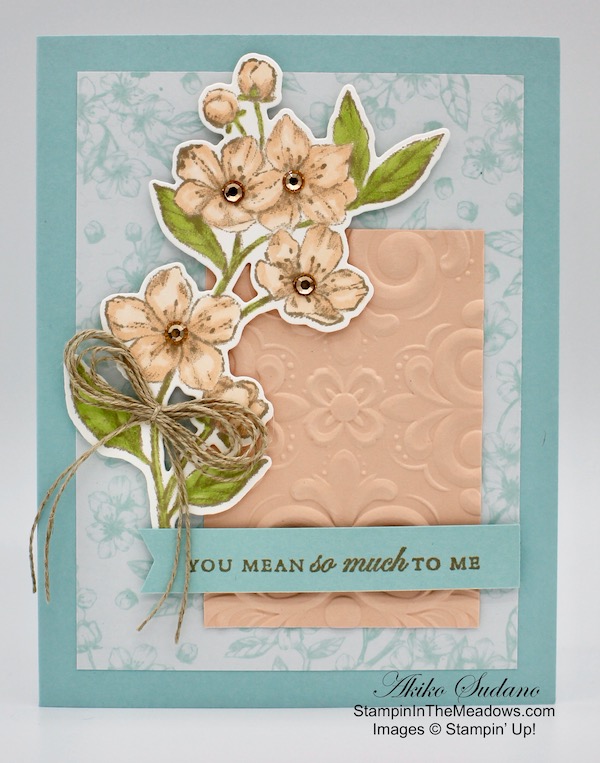
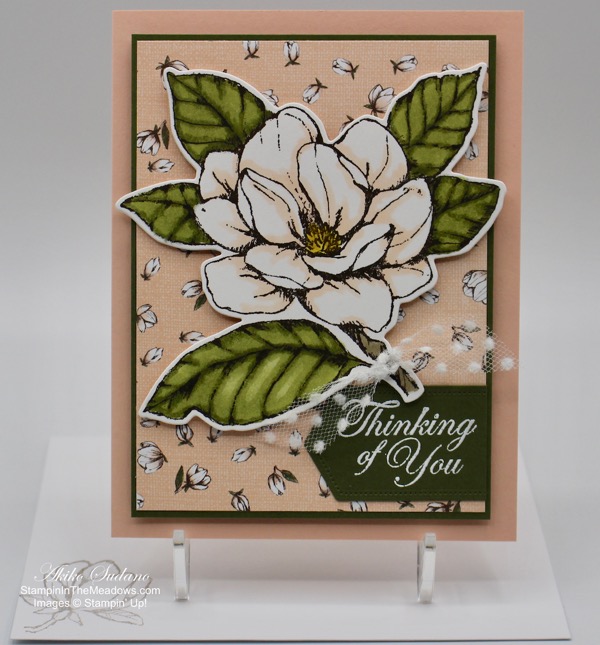
Happy Friday! Today’s card is a Thinking of You card made with the pretty new Stampin’ Up! Honey Bee bundle. The Golden Honey specialty designer series paper that I used with it is available for FREE as a Sale-A-Bration item with a $50 purchase. Yay for Sale-A-Bration!! You can find the supplies used to create this card at the bottom of my post along with the sizes of cardstock used.

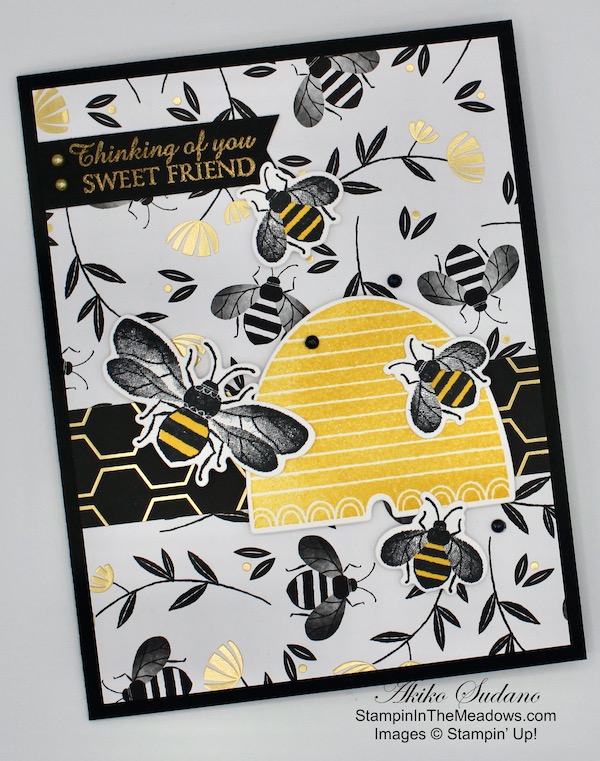
I love the beehive stamp and die in the Stampin’ Up! Honey Bee stamp bundle, so I had to make it a focal point in my card. I stamped it in Daffodil Delight ink on a Thick Whisper White panel and cut it out with the coordinating die. I stamped the large bee and three of the small bees in Memento Tuxedo Black ink on Thick Whisper White and cut them out with the coordinating dies. I colored the bee stripes with the dark Daffodil Delight Stampin Blend.

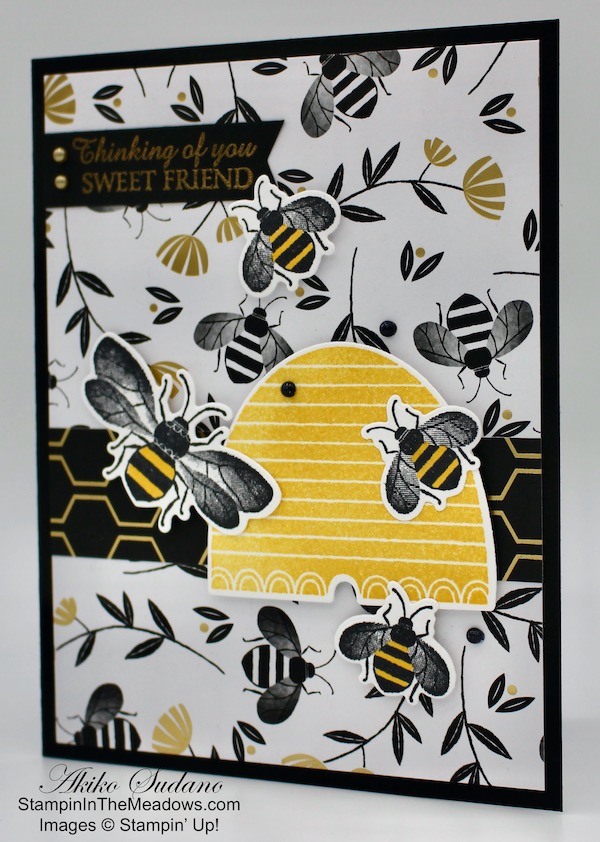
I cut a panel of the Golden Honey specialty designer series paper with the flowers and bees and a strip of the black background honeycomb paper and adhered them together with multipurpose liquid glue. I adhered them to a Basic Black card base. I popped the beehive on the card front with dimensionals and arranged the bees around the hive. I used dimensionals to adhere the bees to the background and multipurpose liquid glue on the bee that is on the beehive.

I stamped the sentiment from the Stampin’ Up! Honey Bee stamp set on a strip of basic black using Versamark ink. I sprinkled gold embossing powder on it and heat set. I trimmed the label and adhered it to the card. I added some gold metallic pearls to the label and colored some regular pearls with the Basic Black Dark Stampin Blend and added them around the beehive.

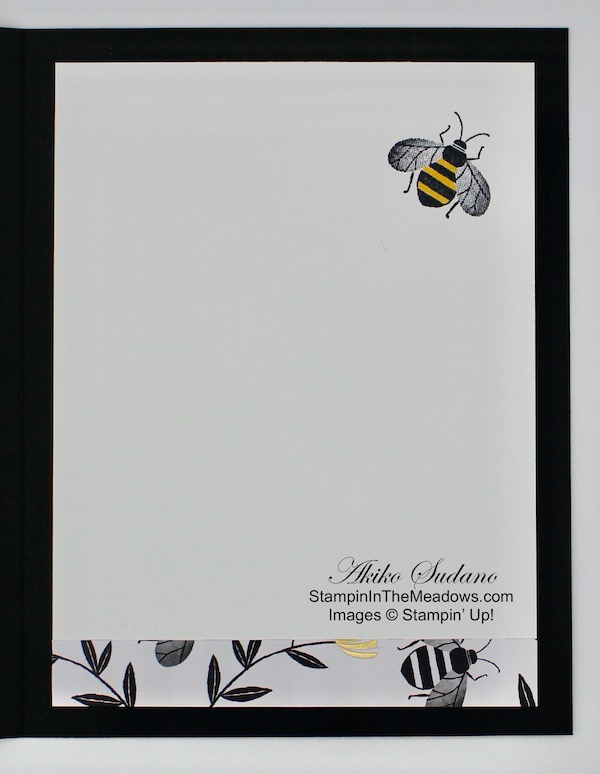
I stamped another small bee in Memento Tuxedo black in the corner of a Whisper White panel, I colored it’s stripes with the Dark Daffodil Delight Stampin’ Blend and added a strip of the Golden Honey Specialty DSP to the bottom. I adhered the panel to the inside of the card.

The Stampin’ Up! Honey Bee bundle is one of the new bundles in the January-June 2020 Mini Catalog. It consists of the Honey Bee cling stamp set and the Detailed Bee dies and is available with a 10% discount. The Golden Honey specialty designer series paper is in the Sale-A-Bration brochure and is available for FREE with a $50 purchase. It has designs that coordinate with the Honey Bee stamps and the bee in today’s card background can be cut out with one of the dies in the set!


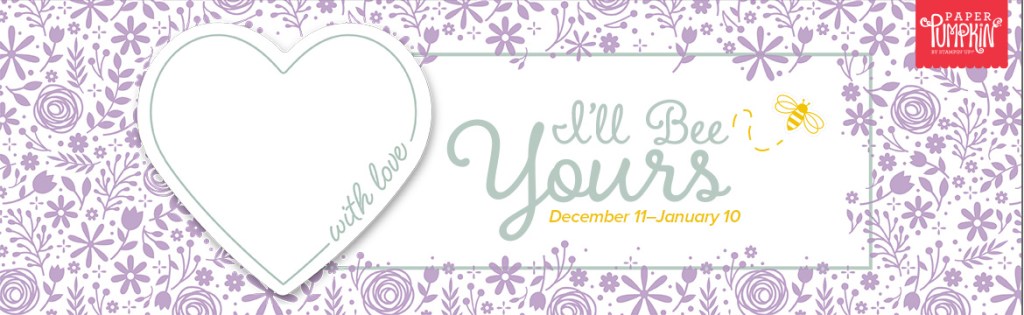
January 2020 Paper Pumpkin: I’ll Bee Yours

Speaking of Bees, Today is the last day to sign up for the January Paper Pumpkin – I’ll Be Yours kit.

Paper Pumpkin’s first kit of 2020 is all about L-O-V-E. Whether you want handmade favors for Valentine’s Day, a bridal shower, or a remarkably romantic wedding, this month’s kit has everything you need to help you celebrate your favorite friendships and love stories. So make it a “LOVE”-ly year with Paper Pumpkin!

  • Kit details: Makes 20 treat bags + 10 mini cards and envelopes
  • Card size: 3″ x 3″
  • Envelope size: 3 1/8″ x 3 1/8″
  • Coordinating colors: Crushed Curry, Highland Heather, Mint Macaron, and Rococo Rose

If you’re interested in subscribing to Paper Pumpkin, you can either sign up for a subscription where you are billed monthly for your kit or you can purchase a prepaid subscription in my online store. To see more information and to sign up for the monthly subscription click here. To see the options for prepaid subscriptions in my online store, click here.


January 1 – 15 Host Code: FB6MBVE3

Use this host code when you order $50 or more and receive a free gift from me!  The gift is your choice of any item valued up to $10.00 in the 2019-20 Annual Catalog or in the 2019 Holiday Catalog!  That includes some of the Host Exclusive stamp sets!

If your order is over $150, please do not use the host code since you’ll receive your own Host Dollars plus I’ll send you the free gift!  This host code can be used by anyone, no commitment required.  Let me know if you have any questions.


If you need any stamping supplies, I’d be very happy to be your Demonstrator.  Just click on the Shop Now button on the right side of the screen to go directly to my online store or contact me if you have any questions.  Happy Stamping!

Thanks for stopping by and have a great day!

Akiko

  • Visit my online store here
  • See the current Stampin’ Up! clearance rack specials here
  • Earn FREE Stampin’ Up! products through my Wildflower Frequent Shopper Program – my way of saying thank you to my frequent shopper online customers.
  • Sign up for my weekly newsletter here
  • Have any questions? I’d be happy to help, click here to contact me.

Cardstock Cuts for this project:

  • Basic Black – 5 1/2″ x 8 1/2″ scored at 4 1/4″ (card base) 1″ x 3″ (label)
  • Thick Whisper White – 3″ x 6″ (bees and beehive die cuts)
  • Golden Honey DSP – 4″ x 5 1/4″ (background), 1″ x 4″ (honeycomb stripe), 1/2″ x 3 3/4″ (inside trim)
  • Whisper White – 3 3/4″ x 5″ (inside)

Stampin’ Up! products used in this project:


Stampin’ Up! Forever Blossoms You Mean So Much Card

Good Morning! Today is the BIG day as the Stampin’ Up! January-June 2020 Mini Catalog is finally open for ordering! I am celebrating with a card made from the beautiful Stampin’ Up! Forever Blossoms bundle. You can find the supplies used to create this card at the bottom of my post along with the sizes of cardstock used.

I cut a panel of the Parisian Blossoms specialty designer series paper and adhered it to a Pool Party card base with multipurpose liquid glue. I embossed a panel of Petal Pink card stock with the Parisian Flourish 3-D embossing folder and adhered it to the card front.

I stamped the large cherry branch from the Stampin’ Up! Forever Blossoms stamp set with Sahara Sand ink on Thick Whisper White card stock. I colored the branch with the Petal Pink and Granny Apple Green Stampin’ Blends and cut it out with the coordinating die from the Cherry Blossoms dies. I adhered the branch to the card with dimensionals and accented the blooms with large champagne gemstones.


I made a bow with Linen Thread and attached it to the cherry blossoms with a glue dot. I stamped the sentiment from the Stampin’ Up! Forever Blossoms stamp set in Sahara Sand ink on a strip of Pool Party card stock. I trimmed the end and adhered it to the card front with dimensionals.

On the inside of the card, I stamped the branch from the Stampin’ Up! Forever Blossoms stamp set in Sahara Sand ink on a panel of Whisper White card stock after stamping off. I trimmed the bottom of the panel with a strip of Parisian Blossoms specialty DSP and adhered it to a Petal Pink mat before adhering it to the inside of the card.

The Stampin’ Up! Forever Blossoms and Cherry Blossoms dies come in a bundle for 10% off in the January-June 2020 Mini Catalog. It is just one of the new beautiful sets that are now available. And the Parisian Blossoms specialty designer series paper, champagne rhinestones and Parisian Flourish 3-D embossing folder are also new items that are part of the Parisian Blossoms Suite in the new catalog.

And Today is also the start of Sale-A-Bration – the best Stampin’ Up! sale of the year.


January 1 – 15 Host Code: FB6MBVE3

Use this host code when you order $50 or more and receive a free gift from me!  The gift is your choice of any item valued up to $10.00 in the 2019-20 Annual Catalog or in the 2019 Holiday Catalog!  That includes some of the Host Exclusive stamp sets!

If your order is over $150, please do not use the host code since you’ll receive your own Host Dollars plus I’ll send you the free gift!  This host code can be used by anyone, no commitment required.  Let me know if you have any questions.


If you need any stamping supplies, I’d be very happy to be your Demonstrator.  Just click on the Shop Now button on the right side of the screen to go directly to my online store or contact me if you have any questions.  Happy Stamping!

Thanks for stopping by and have a great day!

Akiko

  • Visit my online store here
  • See the current Stampin’ Up! clearance rack specials here
  • Earn FREE Stampin’ Up! products through my Wildflower Frequent Shopper Program – my way of saying thank you to my frequent shopper online customers.
  • Sign up for my weekly newsletter here
  • Have any questions? I’d be happy to help, click here to contact me.

Cardstock Cuts for this project:

  • Pool Party – 5 1/2″ x 8 1/2″ scored at 4 1/4 (card base), 1/2″ x 3″ (label)
  • Petal Pink – 2 1/4″ x 3 1/4″ (embossed layer), 3 4/4″ x 5″ (inside mat)
  • Thick Whisper White – 2 1/2″ x 4 1/2″ (cherry blossom branch die cut)
  • Whisper White – 3 5/8″ x 4 7/8″ (inside panel)
  • Parisian Blossoms specialty DSP – 3 5/8″ x 4 7/8″ (card front background), 1/2″ x 3 5/8″ (inside trim)

Stampin’ Up! products used in this project:


Stampin’ Up! High Tide Thinking of You Card

Hello and welcome to Amy’s Inkin Krew Blog Hop. This month’s theme is ‘Celebrate Summer‘ and I have a summer at the shore card featuring the Stampin’ Up! High Tide photopolymer stamp set, the Colorful Season photopolymer stamp set and Seasonal Layers dies.

I started by stamping the waves from the Stampin’ Up! High Tide stamp set in Blueberry Bushel ink on a Pool Party background. I sponged the ocean with Balmy Blue and used my white gel pen to add white highlights. I stamped the flock of seagulls in Memento Tuxedo Black ink. I stamped the sun from the Stampin’ Up! Waterfront stamp set in Daffodil Delight ink on Whisper White cardstock and fussy cut it and adhered it to the Pool Party panel.

I stamped the sand using Sahara Sand ink on Very Vanilla cardstock and stamped second time below. I stamped several times to get the texture I was happy with. I sponged the bottom with Sahara Sand ink and stamped the Thinking of You sentiment in Early Espresso ink. I tore the top of the Very Vanilla piece and attached it to the main panel over the ocean. I stamped the sea grass in Old Olive ink, going over the ocean and attached the panel to a Blueberry Bushel mat.

I die cut two Adirondack chairs in Real Red and glued them together with the fine tipped glue pen and attached the chair to the panel with dimensionals. I used dimensionals to attach the panel to a Sahara Sand card Base.

For the inside, I stamped more sand, seagrass and seagulls on a Very Vanilla panel. I matted it with Blueberry Bushel and adhered it to the inside of the card.

I am usually a traditionalist, but I just love those bright colorful plastic Adirondack chairs that they have at the home improvement stores, so I had to have one for my shore card! Thanks for stopping by and enjoy the Blog Hop.

Akiko


Please take time to visit each blog to see what the Team members are sharing today. Click on the Next Blog button to move forward to Amy Koender’s project or click the Previous Blog button to move back to see the project that Mary Deatherage created.

If you get lost along the way, here are the participants for the hop:


July 1 – 15 Host Code: 6X3A6D6C

Use this host code when you order and receive a free gift from me!  If your order is over $150, please do not use this code, but you’ll still get the free gift.  The free gift is your choice of any item valued up to $10.00 in the 2018-19 Annual Catalog or in the 2019 Occasions Catalog!  That includes some of the Host Exclusive stamp sets!


If you need any stamping supplies, I’d be very happy to be your Demonstrator.  Just click on the Order Stampin’ Up! Online Now button on the right side of the screen to go directly to my online store or contact me if you have any questions.  Happy Stamping!

  • Visit my online store here
  • See the current Stampin’ Up! clearance rack specials here
  • Earn FREE Stampin’ Up! products through my Wildflower Frequent Shopper Program – my way of saying thank you to my frequent shopper online customers.
  • Have any questions? I’d be happy to help, click here to contact me.

Cardstock Cuts for this project

  • †Sahara Sand – 4 1/4″ x 11″
  • Pool Party – 3 3/4″ x 5″
  • Blueberry Bushel – (2) 3 7/8″ x 5 1/8″
  • Very Vanilla – 3 5/8″ x 4 7/8″, 2 1/4″ x 3 3/4″
  • Whisper White – 1″ square scrap

Stampin’ Up! products used in this project:


Stampin’ Up! Daisy Lane Smile Card

Good Morning! I hope you had a good weekend and are ready for the weekday grind. Today I have a card with a cheery Monday morning message, “Smile … It’s your time to shine!“. The card is made with the new Stampin’ Up! Daisy Lane cling bundle. You can find the products used at the bottom of the post.

The layout for today’s card is inspired by Freshly Made Sketches #395. This simple sketch gave me a great opportunity to showcase the wonderful large Stitched Label in vellum. And the striped paper is just enough to break up the patterned background.

And the colors are inspired by Hand Stamped Sentiments Color Challenge #318. This combination is so fresh and summery and it gave me another opportunity to stamp patterned paper.

Be sure to check out the fantastic entries in these challenges for more card making inspiration.

I started today’s card by making another faux DSP – designer series paper or patterned paper. I used the daisy stamps from the Stampin’ Up! Daisy Lane and Stampin’ Up! Daisy Delight stamp sets and the leaf branch from the Stampin’ Up! Free as a Bird stamp set. On a sheet of Whisper White cardstock, I randomly stamped the large daisy in Petal Pink, the small daisy in Calypso Coral and the leaves in Mint Macaron. I lightly sponged each image in the respective colors and then I sponged the rest with So Saffron. Then I ran it through the Subtle embossing folder to add texture. The embossing really made it special!

I cut an extended piece of the striped paper from the Magnolia Lane DSP using the 1″ Stitched Rectangle die. I die cut the large fancy Stitched Label die from vellum and heat embossed the Smile sentiment from the Stampin’ Up! Daisy Lane stamp set on Mink Macaron and die cut it using the smaller Stitched label Die.

I stamped three of the small daisies in Petal Pink on Whisper White and punched them out with the Medium Daisy Punch and curled the ends before attaching them together. I finished the daisy off with a non-SU clear enamel dot from my stash that I colored with the dark Calypso Coral Stampin’ Blends and finally a Mint Macaron leaf branch from the Flourish dies. I arranged all the elements on the card front, matted it in Mint Macaron and then popped it on a Thick Whisper White card base with dimensionals.

For the inside of the card, I stamped the shine sentiment from the Stampin’ Up! Daisy Lane stamp set, added a strip of faux DSP and matted it in Mint Macaron.

Isn’t that a pretty and cheerful way to start a summer week? Thanks for visiting and I hope that you have a week where you do shine!

Akiko


Don’t forget that we are in the earning period of Bonus Days where you get a coupon for $5 to redeem in August for every $50 you spend (before shipping and taxes) in July. See the full details on the Stampin’ Up! Promotions Page.


July 1 – 15 Host Code: 6X3A6D6C

Use this host code when you order and receive a free gift from me!  If your order is over $150, please do not use this code, but you’ll still get the free gift.  The free gift is your choice of any item valued up to $10.00 in the 2018-19 Annual Catalog or in the 2019 Occasions Catalog!  That includes some of the Host Exclusive stamp sets!


If you need any stamping supplies, I’d be very happy to be your Demonstrator.  Just click on the Shop Now button on the right side of the screen to go directly to my online store or contact me if you have any questions.  Happy Stamping!

  • Visit my online store here
  • See the current Stampin’ Up! clearance rack specials here
  • Earn FREE Stampin’ Up! products through my Wildflower Frequent Shopper Program – my way of saying thank you to my frequent shopper online customers.
  • Have any questions? I’d be happy to help, click here to contact me.

Cardstock Cuts for this project:

  • Thick Whisper White – 4 1/4″ x 11″
  • Mint Macaron – (2) 4 7/8″ x 5 1/8″, scraps for label and leaf branch
  • Whisper White – 3 5/8″ x 4 7/8″, 4 1/4″ x 5 1/2″, scraps for daisy
  • Magnolia Lane DSP – 1 1/4″ x 3 3/4″
  • Vellum – 3″ x 3 1/2″

Stampin’ Up! products used in this project:


Stampin’ Up! Good Morning Magnolia Thinking of You Card

Good Morning! Years ago when I was first married, we lived in northwest Florida and we had a magnificent Magnolia Grandiflora tree in the back yard of our little house. Ever since, I have loved these flowers and was thrilled when I saw that Stampin’ Up! has a new bundle showcasing this beautiful force of nature. The Stampin’ Up! Good Morning Magnolia stamp set is part of the Magnolia Lane suite which features lots of coordinating products including DSP, an embossing folder, memories and more card pack, ribbon and cork embellishments. The Good Morning Magnolia bundle has the Cling Stamps and coordinating dies including dies to make 3-D flowers.

So on to today’s card…

I started by stamping the large magnolia flower on Whisper White cardstock using Early Espresso Ink. I used my Stamparatus to stamp it, because I don’t have the large stamping block and it worked wonderfully! I then die cut it using the coordinating die and colored it using the light Petal Pink, light and dark Old Olive and dark Crumb Cake Stampin’ Blends. I used the Pineapple Punch Stampin Write Marker to color the stamen.

I layered a piece of the Magnolia Lane DSP with the dainty flower buds on a Mossy Meadow mat and attached it to a Petal Pink card base with dimensionals. On a scrap of Mossy Meadow, I stamped the Thinking of You stamp in Versamark ink after dusting it with the embossing buddy. I sprinkled it with white embossing powder and heat set. I then cut it out with the Stitched Nested Labels die and trimmed the left side and attached it to the card with glue dots. I went to attach the flower to the card with dimensionals and determined that it was a little floppy, so I die cut another large flower in Whisper White cardstock and glued them together with multipurpose liquid glue before attaching them with dimensionals. The double layer of Whisper White made it much stiffer and better for use with dimensionals.

I finished off the card by tying piece of the Whisper White Polka Dot Tulle ribbon and gluing it to the stem of the flower.

The inside of the card is decorated with a strip of the same DSP as the card front background and a Mossy Meadow mat. I also took the magnolia bud stamp and stamped it in early espresso after stamping it off 4 times. Since I had to stamp it off so much to get it light enough, I decided to use the 4th stamp to accent the envelop. So It was stamp it off 3 times on scrap paper, stamp the envelope and stamp the inside of the card! That Early Espresso goes a long way!

The Stampin’ Up! Good Morning Magnolia stamp set has so many wonderful images and greetings and and the suite has so many coordinating products, so I’ll be bringing this back for more designs. And I can’t wait to make a 3-D flower!

Thanks for stopping by and have a great weekend!

Akiko


June 1 – 15 Host Code: FK7YAMPQ

Use this host code when you order and receive a free gift from me!  If your order is over $150, please do not use this code, but you’ll still get the free gift.  The free gift is your choice of any item valued up to $10.00 in the 2018-19 Annual Catalog or in the 2019 Occasions Catalog!  That includes some of the Host Exclusive stamp sets!


If you need any stamping supplies, I’d be very happy to be your Demonstrator.  Just click on the Shop Now button on the right side of the screen to go directly to my online store or contact me if you have any questions.  Happy Stamping!

  • Visit my online store here
  • See the current Stampin’ Up! clearance rack specials here
  • Earn FREE Stampin’ Up! products through my Wildflower Frequent Shopper Program – my way of saying thank you to my frequent shopper online customers.
  • Have any questions? I’d be happy to help, click here to contact me.

Cardstock Cuts for this project:

  • Petal Pink – 5 1/2″ x 8 1/2″
  • Mossy Meadow – (2) 5″ x 3 3/4″, 2″ x 2 1/2″ scrap for label
  • Whisper White – 4 7/8″ x 3 5/8″ for inside and (2) 4 1/4″ x 5 1/2″ for flower die cuts
  • Magnolia Lane DSP – 4 7/8″ x 3 5/8″, 1/2″ x 3 5/8″

Stampin’ Up! products used in this project: