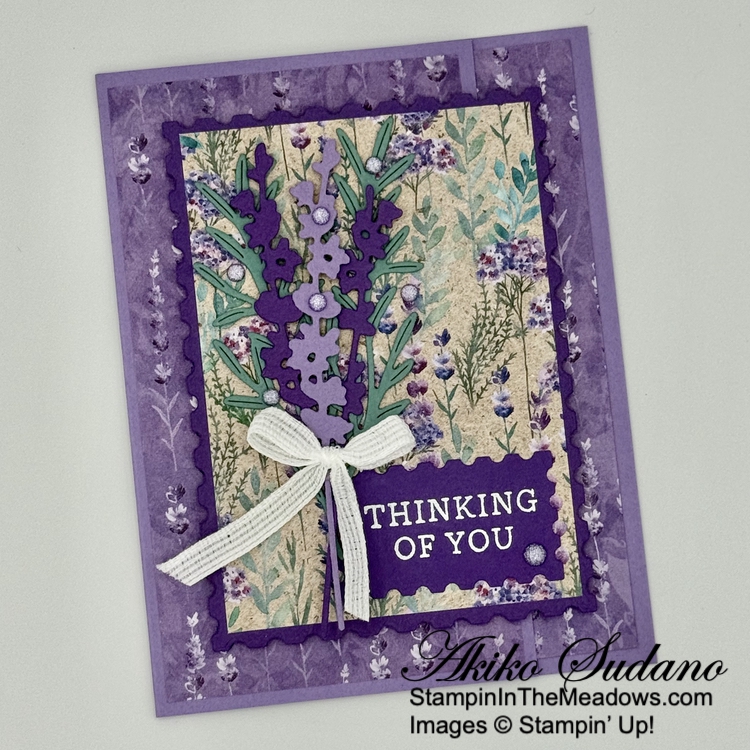
Good Morning! One of the prettiest bundles from the last few years is the Stampin’ Up! Painted Lavender stamp set and dies and they are currently on the Last Chance products list with wonderful discounts! I used it with the pretty Perennial Lavender designer series paper to make a simple fun fold Thinking of You card. You can find the products I used at the bottom of my post along with the card stock sizes.
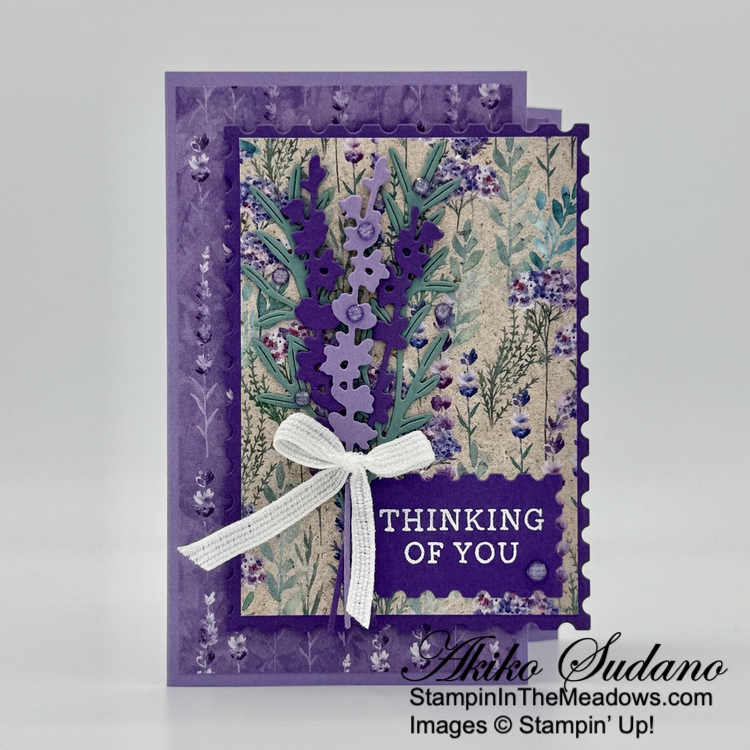
Adhere a panel of Perennial Lavender designer series paper to the front panel of the Highland Heather card base. Cut a Gorgeous Grape panel with the second largest Perennial Postage dies and adhere another panel of the DSP to the die cut.
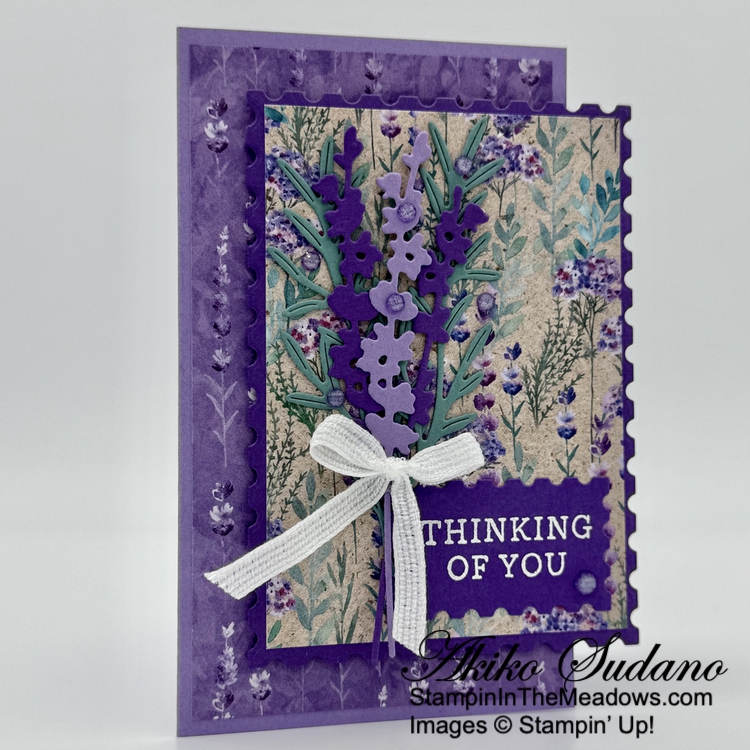
Stamp the sentiment from the Simply Said stamp set using Versamark ink on Gorgeous Grape. Sprinkle the sentiment with white embossing powder and shake off the excess. Heat the powder with a heat tool until it’s bright and shiny and cut it out with the rectangle die from the Perennial Postage dies. Adhere it to the layered die cut with glue dots.
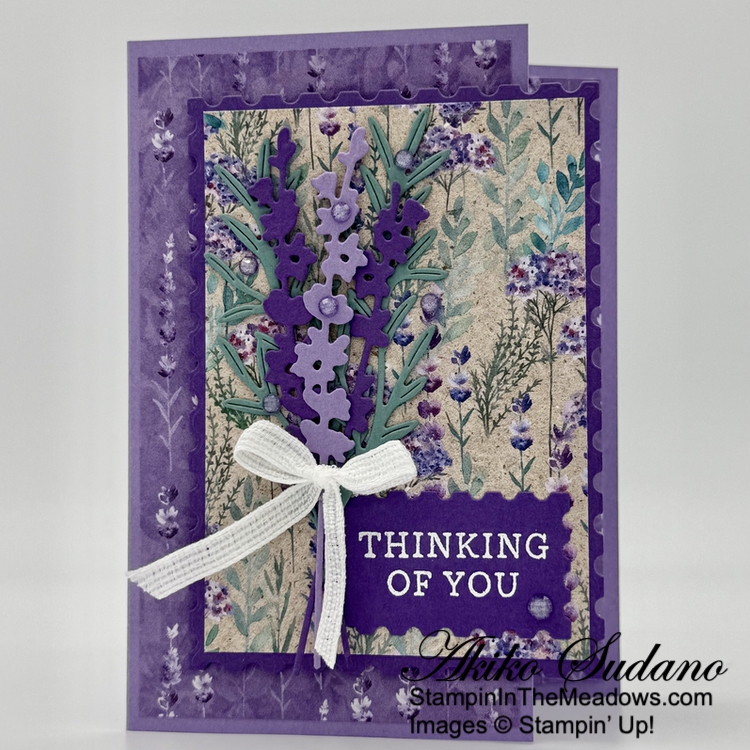
Cut two leaf sprigs using the Stampin’ Up! Painted Lavender dies from Lost Lagoon and adhere them to the large die cut with glue dots. Cut two double floral sprigs from Gorgeous Grape and Highland Heather and adhere three of the sprigs to the die cut panel with bits of dimensionals at the top and glue dots at the bottom. Adhere the die cut panel to the card front with dimensionals and finish with a white bow and purple shimmer gems.
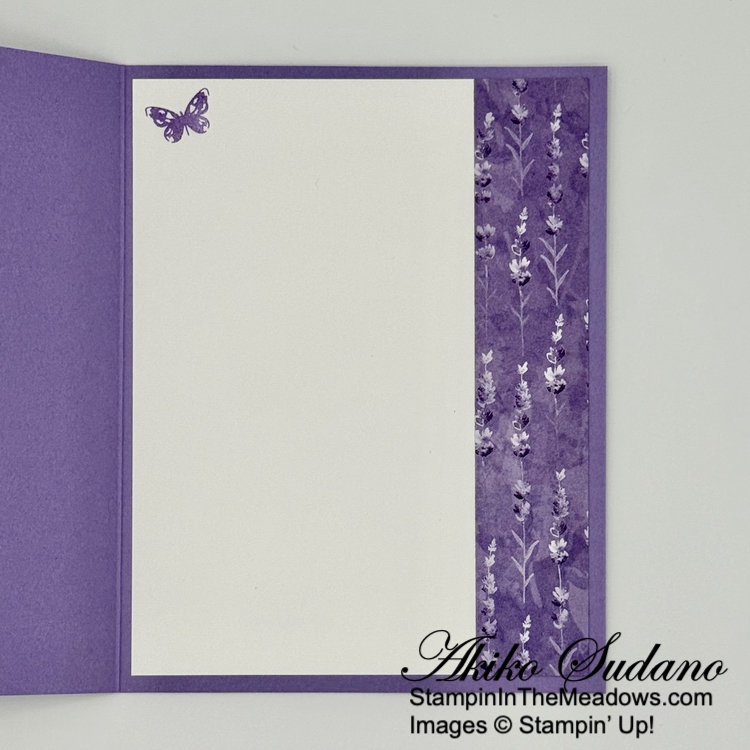
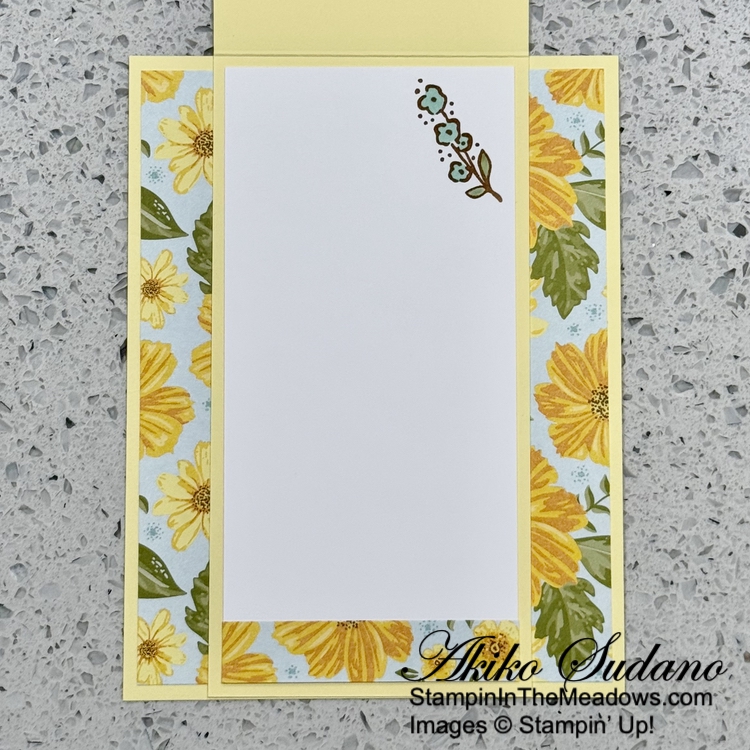
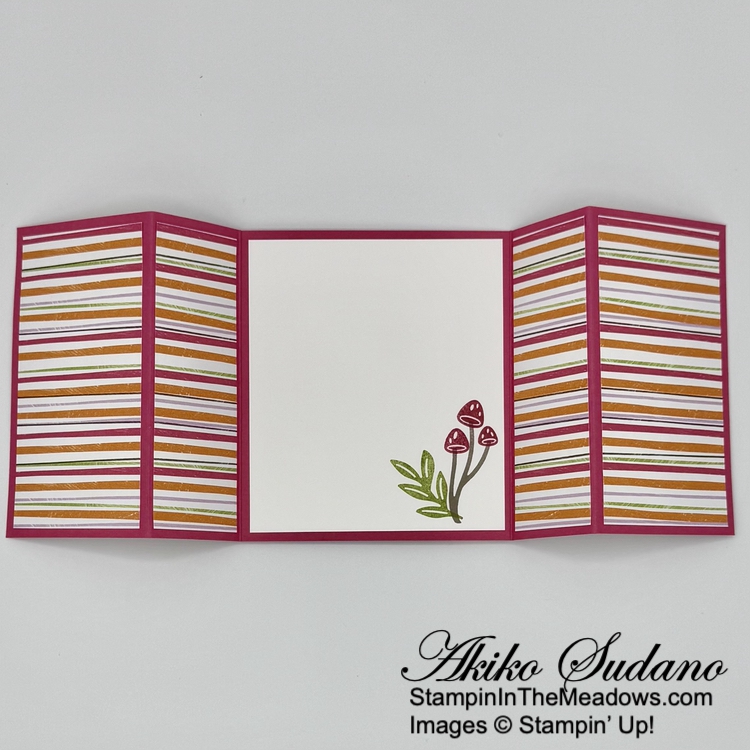
For the inside of the card, stamp the little butterfly from the Stampin’ Up! Painted Lavender stamp set using Highland Heather ink on a Basic White panel. Adhere a strip of DSP to the side and adhere the panel to the inside of the card with Stampin’ Seal so that the DSP shows when the card is closed.
The pretty Perennial Lavender designer series paper and purple shimmer gems are carried over in the new Annual Catalog and are perfect for making cards for those special ladies who love purple. Definitely check out the Stampin’ Up! Painted Lavender stamp set and dies on the Last Chance list for a great bargain while supplies last!
If you need any stamping supplies, I’d be very happy to be your Demonstrator. Just click on the Shop Now Button on the right side of the screen to go directly to my Online store or contact me if you have any questions. Happy Stamping!
Thanks for stopping by and have a great day!
Akiko
- Visit my online store here
- See the current Stampin’ Up! Last Chance items here
- Have any questions? I’d be happy to help, click here to contact me.
Cardstock Cuts for this project:
- Highland Heather – 5-1/2″ x 7-1/2″ card base scored at 3-1/4″, 1″ x 4-1/2″ (double lavender sprig die cut)
- Gorgeous Grape – 3-1/2″ x 4-3/4″ (large postage stamp die cut), 1-1/2″ x 3″ (label), 1″ x 4-1/2 (double lavender sprig die cut)
- Lost Lagoon – 2-1/2″ x 4″ (leaf sprig die cuts)
- Basic White – 4″ x 5-1/4″ (inside panel)
- Perennial Lavender DSP – 3″ x 5-1/4″ (front background), 1″ x 5-1/4″ (inside trim), 3″ x 4-1/4″ (die cut panel)
Stampin’ Up! products used in this project:
![Painted Lavender Photopolymer Stamp Set [ 162594 ]](https://assets1.tamsnetwork.com/images/EC042017NF/162594s.jpg "Painted Lavender Photopolymer Stamp Set [ 162594 ]")
![Simply Said Mix & Match Photopolymer Stamp Set (English) [ 163756 ]](https://assets1.tamsnetwork.com/images/EC042017NF/163756s.jpg "Simply Said Mix & Match Photopolymer Stamp Set (English) [ 163756 ]")
![Painted Lavender Dies [ 162596 ]](https://assets1.tamsnetwork.com/images/EC042017NF/162596s.jpg "Painted Lavender Dies [ 162596 ]")
![Perennial Postage Dies [ 162607 ]](https://assets1.tamsnetwork.com/images/EC042017NF/162607s.jpg "Perennial Postage Dies [ 162607 ]")
![Perennial Lavender 12" X 12" (30.5 X 30.5 Cm) Designer Series Paper [ 162593 ]](https://assets1.tamsnetwork.com/images/EC042017NF/162593s.jpg "Perennial Lavender 12\" X 12\" (30.5 X 30.5 Cm) Designer Series Paper [ 162593 ]")
![Highland Heather 8-1/2" X 11" Cardstock [ 146986 ]](https://assets1.tamsnetwork.com/images/EC042017NF/146986s.jpg "Highland Heather 8-1/2\" X 11\" Cardstock [ 146986 ]")
![Gorgeous Grape 8-1/2" X 11" Cardstock [ 146987 ]](https://assets1.tamsnetwork.com/images/EC042017NF/146987s.jpg "Gorgeous Grape 8-1/2\" X 11\" Cardstock [ 146987 ]")
![Lost Lagoon 8-1/2" X 11" Cardstock [ 133679 ]](https://assets1.tamsnetwork.com/images/EC042017NF/133679s.jpg "Lost Lagoon 8-1/2\" X 11\" Cardstock [ 133679 ]")
![Basic White 8 1/2" X 11" Cardstock [ 166780 ]](https://assets1.tamsnetwork.com/images/EC042017NF/166780s.jpg "Basic White 8 1/2\" X 11\" Cardstock [ 166780 ]")
![Highland Heather Classic Stampin' Pad [ 147103 ]](https://assets1.tamsnetwork.com/images/EC042017NF/147103s.jpg "Highland Heather Classic Stampin' Pad [ 147103 ]")
![Versamark Pad [ 102283 ]](https://assets1.tamsnetwork.com/images/EC042017NF/102283s.jpg "Versamark Pad [ 102283 ]")
![Basics Wow! Embossing Powder [ 165679 ]](https://assets1.tamsnetwork.com/images/EC042017NF/165679s.jpg "Basics Wow! Embossing Powder [ 165679 ]")
![Purple Fine Shimmer Gems [ 162611 ]](https://assets1.tamsnetwork.com/images/EC042017NF/162611s.jpg "Purple Fine Shimmer Gems [ 162611 ]")
![White 1/4" (6.4 Mm) Ribbon [ 165562 ]](https://assets1.tamsnetwork.com/images/EC042017NF/165562s.jpg "White 1/4\" (6.4 Mm) Ribbon [ 165562 ]")


")


 Designer Series Paper")


 Bordered Ribbon")