Stampin’ Up! Celebrate Sunflowers Let’s Celebrate You Card Video Tutorial

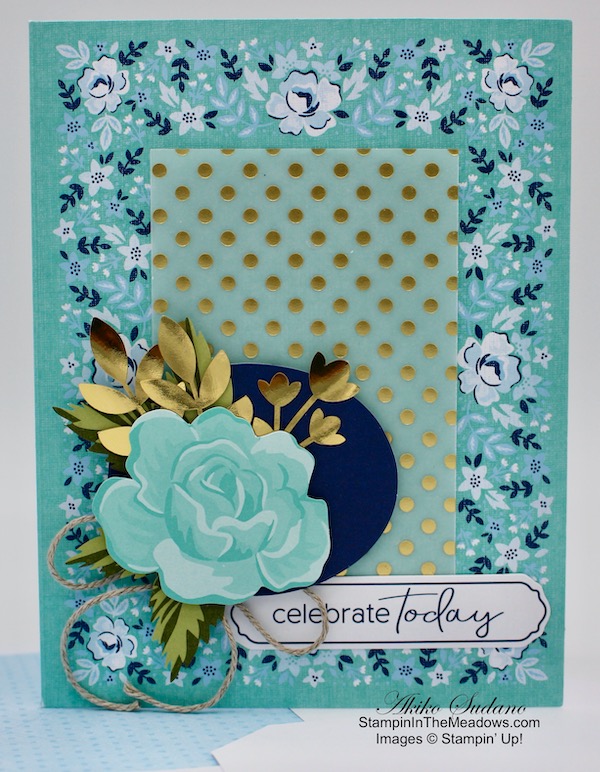
Good Morning! Today I’m sharing a Celebrate You card made with the Stampin’ Up! Celebrate Sunflowers bundle that I made during my Facebook Live video tutorial Saturday afternoon. I made a sweet country style card with the fabulous sunflower and dies and I used many of the new In Colors. You can find the supplies used to create this card at the bottom of my post along with the sizes of cardstock used.

Here is the Facebook Live video showing how I made the card:

I also posted the video to my YouTube Channel and you can view it here if you prefer.

I started by cutting out the outline large sunflower and the flower center from the Sunflower Dies with Cinnamon Cider card stock. I stamped the large sunflower from the Stampin’ Up! Celebrate Sunflowers with Bumblebee ink on Bumblebee card stock and cut it out with the coordinating die. I adhered the Cinnamon Cider outline flower die cut to the stamped flower with dimensionals along the center rim. I adhered the center on top with dimensionals.

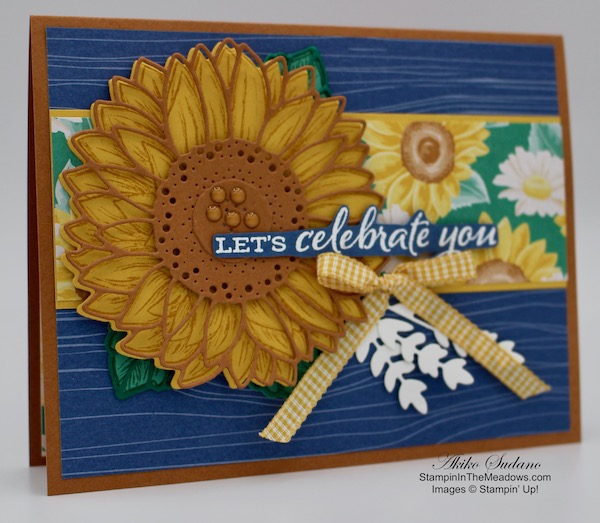
I cut three of the outline leaf die cuts from Shaded Spruce card stock and stamped three large leaves from the Stampin’ Up! Celebrate Sunflowers cling stamp set in Just Jade ink on Just Jade card stock. I cut the leaves out with the coordinating die and adhered the Shaded Spruce outline die cuts on top with liquid glue. I cut the two leaf sprig accents from the Sunflowers Dies from Whisper White card stock and began to assemble the card front. I adhered the panel of Flowers for Every Season designer series paper to a Bumblebee mat and then to the center of a Misty Moonlight 2020-2022 In Color designer series paper panel. I adhered the layered DSP to a Cinnamon Cider card base.

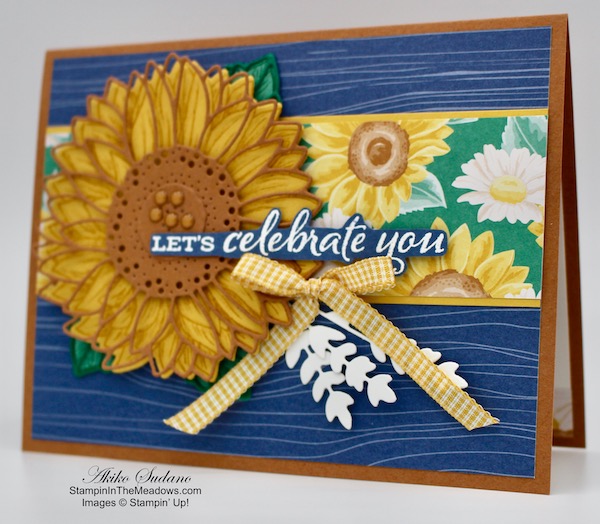
I adhered the layered leaves and Whisper white sprigs to the card front with liquid glue and adhered the sunflower with multipurpose liquid glue. I stamped the sentiment from the Stampin’ Up! Celebrate Sunflowers stamp set in VersaMark Ink on a strip of Misty Moonlight. I sprinkled it with white embossing powder and heat set until shiny. I fussy cut the sentiment and adhered it over the flower with glue dots and the DSP panel with dimensionals. I made a bow with the Bumblebee gingham ribbon and attached it with a glue dot and finished the flower center with Cinnamon Cider enamel dots.

I stamped the large sunflower from the Stampin’ Up! Celebrate Sunflowers stamp set in Bumblebee ink on Whisper White after stamping off twice. I adhered a strip of Flowers for Every Season DSP to the bottom of the panel and adhered the panel to the inside of the card with multipurpose liquid glue.

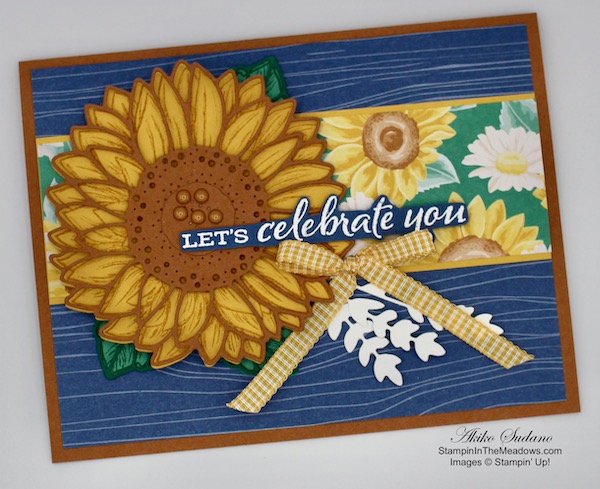
The Stampin’ Up! Celebrate Sunflowers bundle is the best sunflower stamp and die set that I have seen. The stamped images are gorgeous with realistic detail and the outline die cut overlay both takes it to the next level by providing dimension and fun.


Stampin’ In The Meadows Online Host Club has Openings for July

I still have openings for my July – December 2020 Online Host Club! By participating, you are guaranteed a minimum $150 party and get the Host Benefits (FREE Products!!) that come with it.

Here’s How:

  • You sign up for a six month term to place an order for a min $25 each month
  • Club members rotate hosting during the term
  • When you are the Host, you get the Host Benefits!!

Complete details are on my Online Host Club Page.  Please Contact me if you have any questions.

Sign up ends on Friday June 26, 2020.


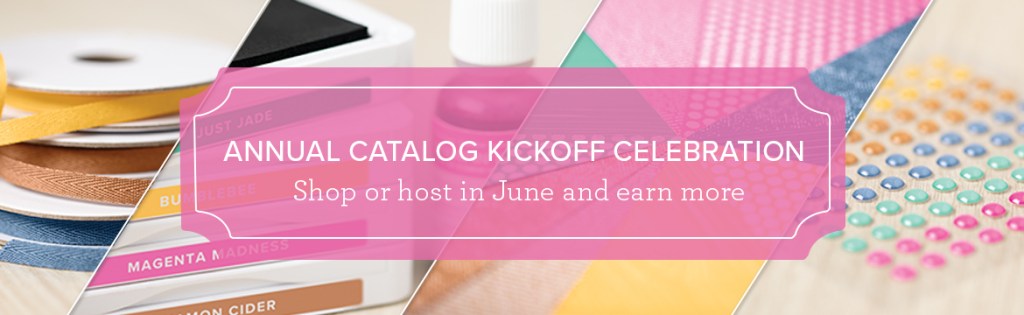
We’re having a celebration for the new 2020-2021 Annual Catalog and you get the prize! Anyone who holds a party or shops during the month of June will receive extra Stampin’ Rewards with a qualifying purchase. If you place an order or host a party of $250 or more before shipping and taxes you will receive an extra $25 in Stampin’ Rewards!!

Visit my Promotions Page for complete details or drop me an email if you have any questions.


Have you heard about the AWESOME new Stampin’ Up! joining promotion? It’s a bundle bash! If you have been thinking about becoming a Stampin’ Up! demonstrator, now’s the perfect time to join. Not only will you get a Starter Kit – already a great value at $99 for $125 worth of products – but for a limited time, you can also select any stamp/tool bundle from the new 2020–2021 Annual Catalog for FREE.

This is such a great deal!! If you’ve been considering joining, June will be a great time to jump in!  Drop me an email if you have any questions.


June 15 – 30 Host Code: HMXBV3WG

Use this host code when you order $50 or more and receive a free gift from me!  The free gift is your choice of any item valued up to $10.00 in the 2019 – 2020 Annual Catalog or in the 2020 Mini Catalog!  That includes some of the Host Exclusive stamp sets!

If your order is over $150, please do not use the host code since you’ll receive your own Host Dollars plus I’ll still send you the free gift!  This host code can be used by anyone, no club or commitment required.  Let me know if you have any questions.


If you need any stamping supplies, I’d be very happy to be your Demonstrator.  Just click on the Shop Now button on the right side of the screen to go directly to my online store or contact me if you have any questions.  Happy Stamping!

Thanks for stopping by and have a great week!

Akiko

  • Visit my online store here
  • See the current Stampin’ Up! clearance rack specials here
  • Earn FREE Stampin’ Up! products through my Wildflower Frequent Shopper Program – my way of saying thank you to my online frequent shopper customers.
  • Sign up for my weekly newsletter here
  • Have any questions? I’d be happy to help, click here to contact me.

Cardstock Cuts for this project:

  • Cinnamon Cider – 5-1/2″ x 8-1/2″ card base scored at 4-1/4″, 3-1/2″ x 3-1/2″ (sunflower outline die cut), 1″ x 1″ (sunflower center die cut)
  • Bumblebee – 3-1/2″ x 3-1/2″ (stamped sunflower die cut), 1-3/4″ x 5-1/4″ (DSP mat)
  • Just Jade – 1-1/2″ x 3-1/2″ (stamped die cut leaves)
  • Shaded Spruce – 1-1/2″ x 3-1/2″ (outline die cut leaves)
  • Misty Moonlight – 1″ x 3-1/2″ (fussy cut label)
  • 2020-2022 In Color DSP – 4″ x 5-1/4″ (card front background)
  • Whisper White – 4″ x 5-1/4″ (inside panel), 1-1/2″ x 3″ (die cut sprigs)
  • Flowers for Every Season DSP – 1-5/8″ x 5-1/5″ (card front strip), 1/2″ x 5-1/4″ (inside trim)

Stampin’ Up! products used in this project:


Stampin’ Up! Kerchief Card Kit

Good Morning! Today I have a set of cards that I made with the FREE Sale-A-Bration Stampin’ Up! Kerchief Card Kit and they are so adorable! I made most of the cards using the examples in the kit, but did made some modifications to two of them to give you a small taste of the possibilities. You can find the supplies used to create this card at the bottom of my post along with the sizes of cardstock used.

The Stampin’ Up! Kerchief Card Kit is a Sale-A-Bration item that is FREE with a $50 purchase. It has all the supplies needed to make 8 4 1/4″ x 5″ cards in two designs. It is inspired by pretty bandana prints and reminds me of my free-spirited youth – tying a bandana around my head to keep my hair out of my face.

The Stampin’ Up! Kerchief Card Kit comes with:

  • 8 printed card bases and envelopes, 4 in blue and 4 in red
  • Printed die-cut accents including printed labels
  • Gold foil accents
  • Vellum accents
  • Twine
  • Adhesive (glue dots and dimensionals)
  • Instruction sheet

The labels have the sentiments printed on them, so there is no need for stamp and ink, and there are sentiments in English, French and German included (I only used the English sentiments).

The colors are Balmy Blue, Coastal Cabana, Early Espresso, gold, Mossy Meadow, Night of Navy, Petal Pink, Pear Pizzazz, Poppy Parade, and white.

I started each card by adhering the vellum to the centers. On the blue cards, I adhered a few glue dots behind the gold dots. On the red cards, I just ran snail down the middle since it will be covered by the label. I punched out all the die cuts and trimmed the excess, including the gold foil accents. On the blue cards, I adhered the labels and then adhered the die cuts and foil accents on the Night of Navy disks. I adhered the flowers with dimensionals and the rest with glue dots. I adhered the disks on the card front with dimensionals and then made the bows and adhered them with glue dots.

On the red cards, I adhered the gold foil accents with glue dots and then adhered the labels with dimensionals. I finally made the bows and adhered them with glue dots.

On these cards, I just changed up the labels so that I had thank you cards. On the blue card, I die cut the thanks sentiment from the Well Written dies in Night of Navy card stock and adhered it to the card in place of the label. On the red card I needed to use a label to cover the center, so I stamped thank you sentiment from the Peaceful Moments stamp set in Poppy Parade ink on a small Whisper White panel and cut it out with the Small Label die from the Painted Labels dies. I applied it in place of the provided label with dimensionals.

The Stampin’ Up! Kerchief Card kit is a pretty and sweet Sale-A-Bration (free with $50 purchase) set that makes pretty and quick any occasion cards. And since it’s Stampin’ Up!, you can also mix the up with other items in your stash to make perfectly matched alternative designs if you want.


Stampin’ Up! Sale-A-Bration is going on now!

Stampin’ Up!’s spectacular Sale-A-Bration is going on now and it’s about to get better with the Sale-A-Bration Second Release. The Sale-A-Bration Second Release offers three additional stamp sets and two new designer series paper packs on top of the current list of items. The items from the Second Release are available now to Stampin’ Up! Demonstrators during the pre-order period and will be available to everyone beginning March 3. Click on the image below to see these new items.

There are three ways to enjoy Sale-A-Bration benefits: Shop – Host – Join.

Sale-A-Bration Shopping Benefits

You earn FREE products for every $50 you spend (before shipping and taxes) during Sale-A-Bration. The Sale-A-Bration brochure has the products that you can choose to add to your order. And the more you spend, the more FREE products you can earn. There are two qualifying levels with spending thresholds, giving you flexibility to choose what you want.

For example, if you spend $150, then you can then choose three level 1 items or one level 1 and one level 2.

Head over to my online store to shop now.

Sale-A-Bration Host Benefits

Hosts with orders of $300 or more can receive the exclusive Little Ladybug Stamp Set (Item 152384).

  • Customer, workshop, and online orders qualify.
  • There is no limit as to how many qualifying orders you can place throughout the promotion.
  • Only one Little Ladybug Stamp Set can be redeemed per order. 
  • Only the host of the order will receive the free stamp set.
  • To qualify, orders must be opened from January 3, and closed by March 31.

Sale-A-Bration Joining Benefits

Recruits who join Stampin’ Up! as an independent Stampin’ Up! demonstrator between January 3–March 31, 2020, will receive the Mini Paper Cutter, a 6″ x 6″ Designer Series Paper sampler, and your choice of stamp set (Host stamp sets and Sale-A-Bration stamp sets not included.). 

  • The 6″ x 6″ Designer Series Paper Sampler in the Join offering has samples from the Lily Impressions Designer Series Paper (Sale-A-Bration brochure), Peaceful Poppies Designer Series Paper (January–June 2020 Mini Catalog), Country Club Designer Series Paper (January–June 2020 Mini Catalog), Birthday Bonanza Designer Series Paper (January–June 2020 Mini Catalog), Tropical Oasis Designer Series Paper (January–June 2020 Mini Catalog), Best Dress 6″ x 6″ Designer Series Paper (January–June 2020 Mini Catalog). 
  • 12 double-sided designs (two double-sided sheets from six different Designer Series Paper packs) QTY: 48 sheets total (four each of 12 designs)
  • Mini Paper Cutter Dimensions: 7-5/8″ x 5-3/8″ x 1-1/4″

And to sweeten the Joining offer, you can add items from the Sale-A-Bration second release to your Starter Kit if you join before March 3, 2020. 

For more details on the benefits of joining Stampin’ Up! as a Demonstrator, see my Join My Team page. There is a Join My Team button at the bottom where you can start the process. Please contact me if you have any questions. I’ll be happy to tell you more.


February 16 – 29 Host Code: KFK3RZHV

Use this host code when you order $50 or more and receive a free gift from me!  The gift is your choice of any item valued up to $10.00 in the 2019-20 Annual Catalog or in the 2020 January-June Mini Catalog!  That includes some of the Host Exclusive stamp sets!

If your order is over $150, please do not use the host code since you’ll receive your own Host Dollars plus I’ll send you the free gift!  This host code can be used by anyone, no commitment required.  Let me know if you have any questions.


If you need any stamping supplies, I’d be very happy to be your Demonstrator.  Just click on the Shop Now button on the right side of the screen to go directly to my online store or contact me if you have any questions.  Happy Stamping!

Thanks for stopping by and have a great day!

Akiko

  • Visit my online store here
  • See the current Stampin’ Up! clearance rack specials here
  • Earn FREE Stampin’ Up! products through my Wildflower Frequent Shopper Program – my way of saying thank you to my frequent shopper online customers.
  • Sign up for my weekly newsletter here
  • Have any questions? I’d be happy to help, click here to contact me.

Cardstock Cuts for this project:

  • Night of Navy – 1 1/4″ x 3″ (die cut ‘thanks’)
  • Whisper White – 2″ x 3 1/2″ (thank you label)

Stampin’ Up! products used in this project: