Stampin’ Up! February Paper Pumpkin Kit – A Lovely Day

Good Morning! Today I am sharing another Paper Pumpkin Kit video that I did yesterday during my Sunday Facebook Live session. The Stampin’ Up! February Paper Pumpkin kit goes well with the Sale-A-Bration Happy Birthday stamp set and I used it to make pretty alternative design cards.

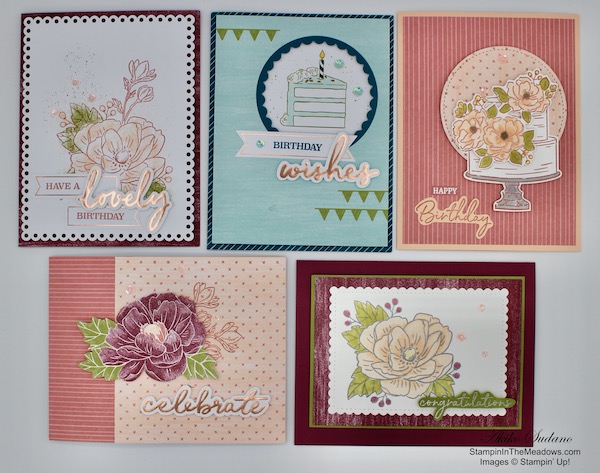
These are the cards I have made so far with the kit:

Here’s the Facebook Live video where I put together some of the cards from the kit and explained how I made the alternative cards. I also showed the contents of the kit and some of the projects that I made during the week. I also talked about my 5 favorite things about the kit.

Unfortunately, I had technical problems downloading my video, so I couldn’t post it to YouTube this week. I’ll look into it more during the week so I can be sure to upload next week’s video and upload yesterday’s too.

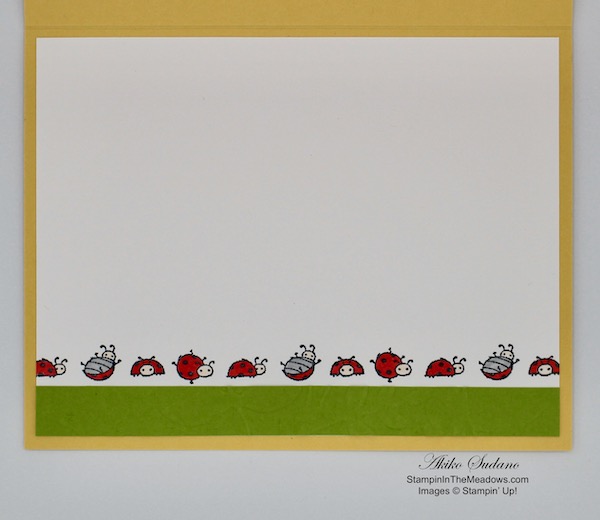
These are the cards that I made according to the instructions provided. I did make some changes though. On the Rich Razzleberry base card, I stamped the HAVE A on the wrong edge, so I couldn’t align the the lovely as in the picture – but I think it worked out ok anyway. On the Pretty Peacock card, I colored the cake icing with my Pool Party Stampin’ Blend and stamped the BIRTHDAY in with my Pretty Peacock ink pad. I also used the iridescent sequins from my stash because I wanted more of a monochromatic look. On the Rococo Rose and Petal Pink card, I just used the celebrate greeting and skipped the label. I also stamped on the inside of the cards and you can see them in the video. The elements in the kit are pretty flexible and you can make pretty cards quite easily!

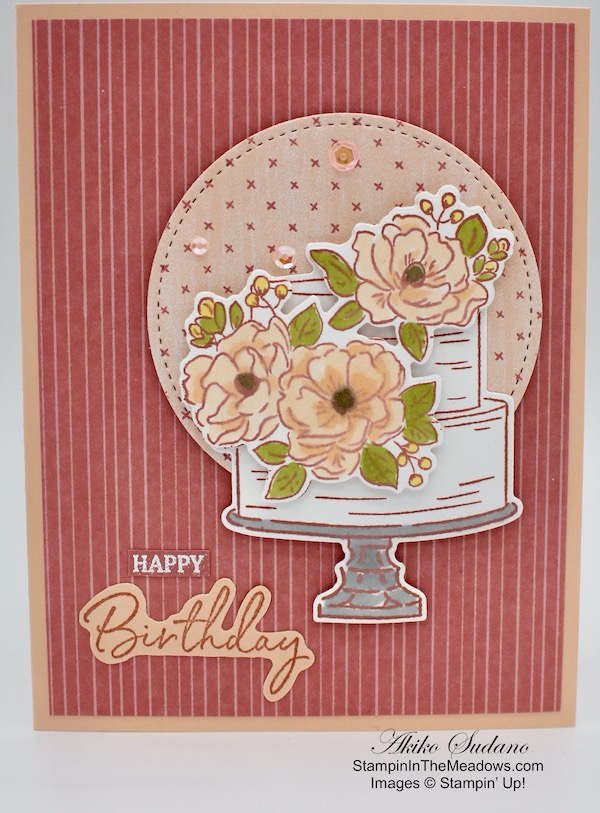
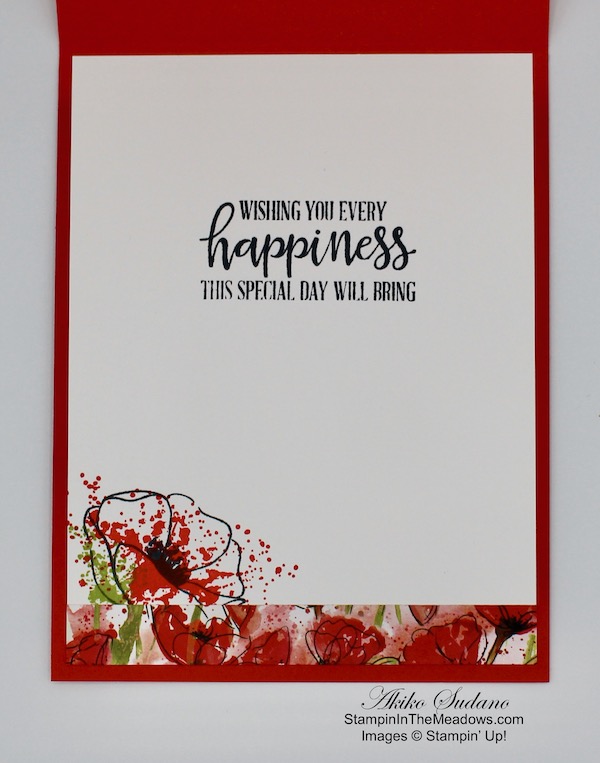
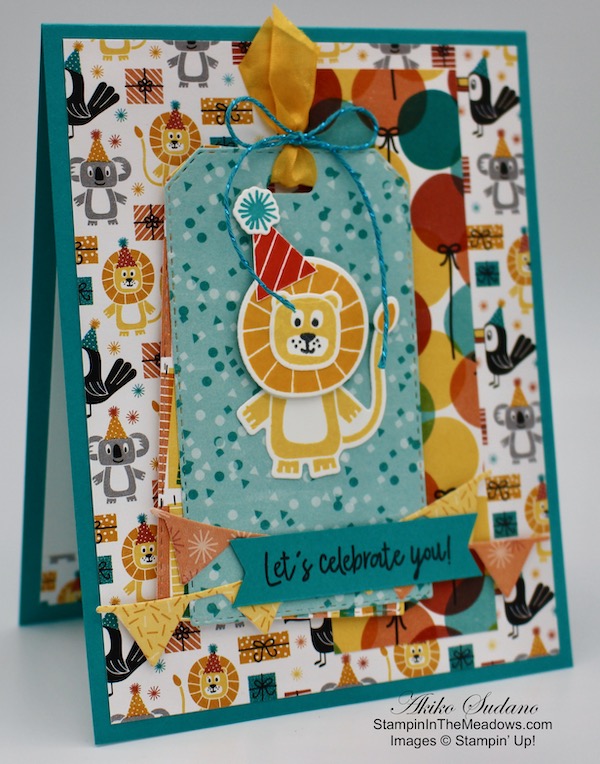
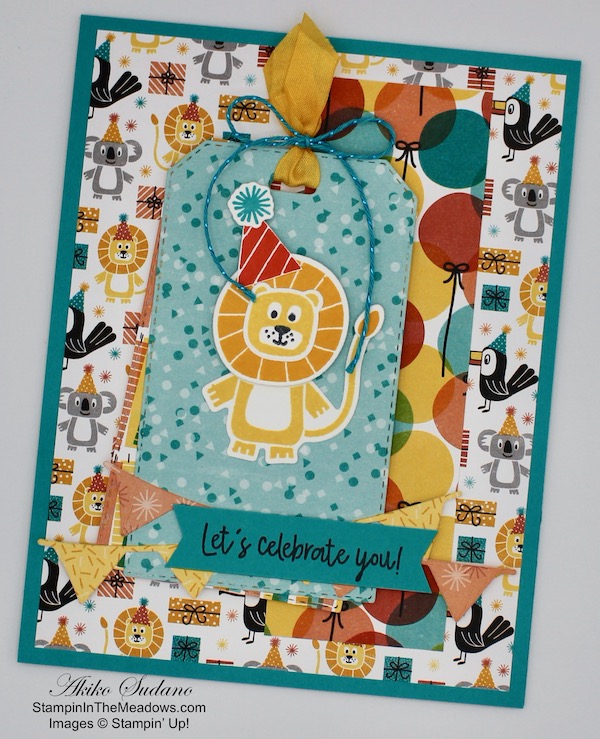
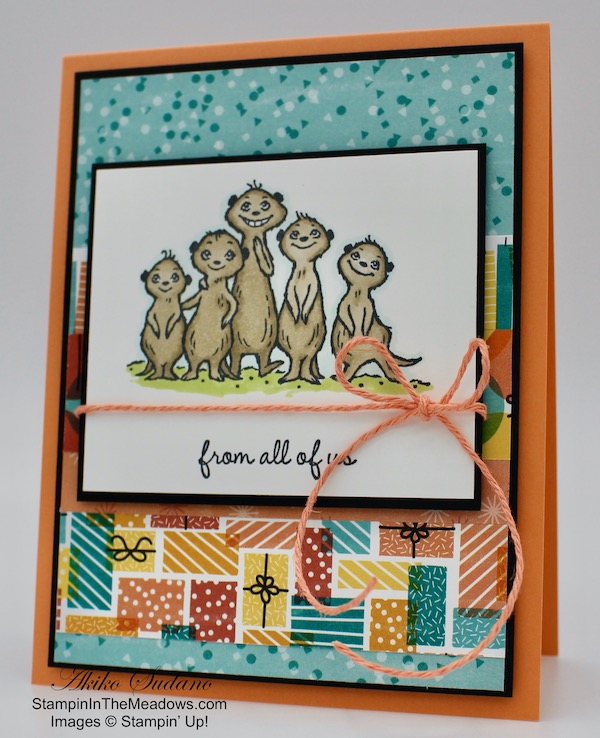
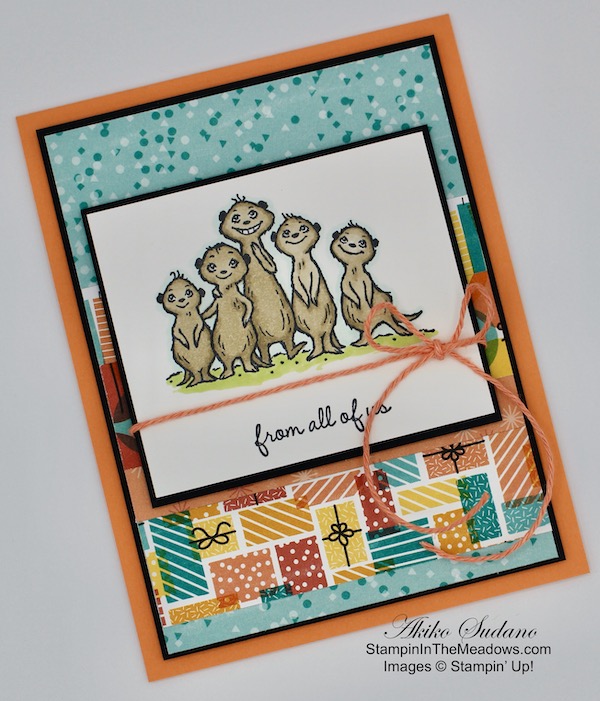
Here is one of the alternative design cards I made with the Stampin’ Up! February Paper Pumpkin kit. I used the papers from the Rococo Rose card and used the pretty floral cake from the Sale-A-
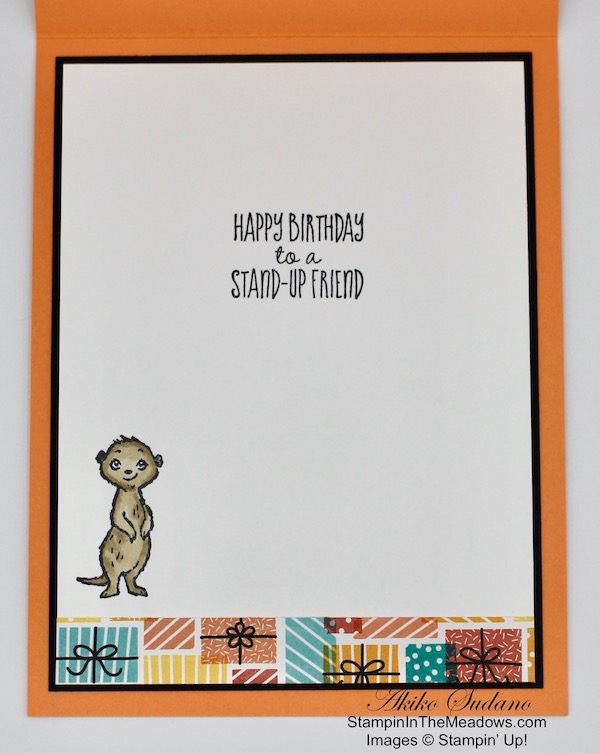
Bration Happy Birthday To You
stamp set. I stamped the cake in Rococo Rose and colored it with my Petal Pink, Old Olive and Smoky Slate Stampin’ Blends. I also used the matching Birthday dies from the Coordination Release and accented the background with those pretty Petal Pink iridescent sequins from the Paper Pumpkin kit. In the video, you can see how I stamped the large flower on the inside of the card.

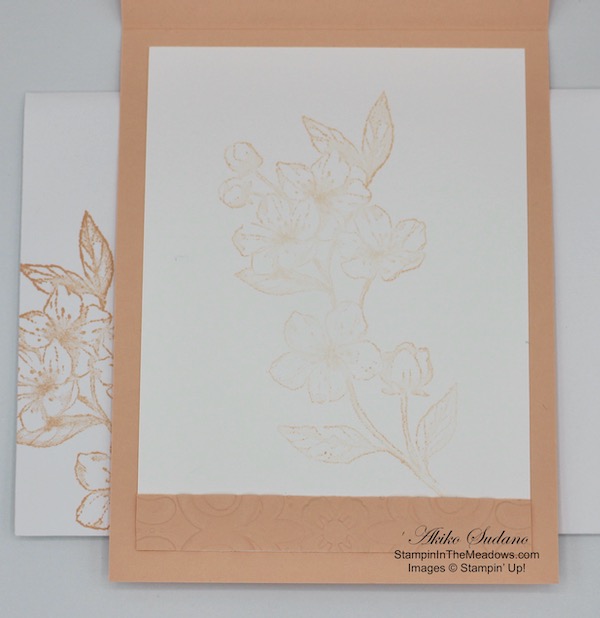
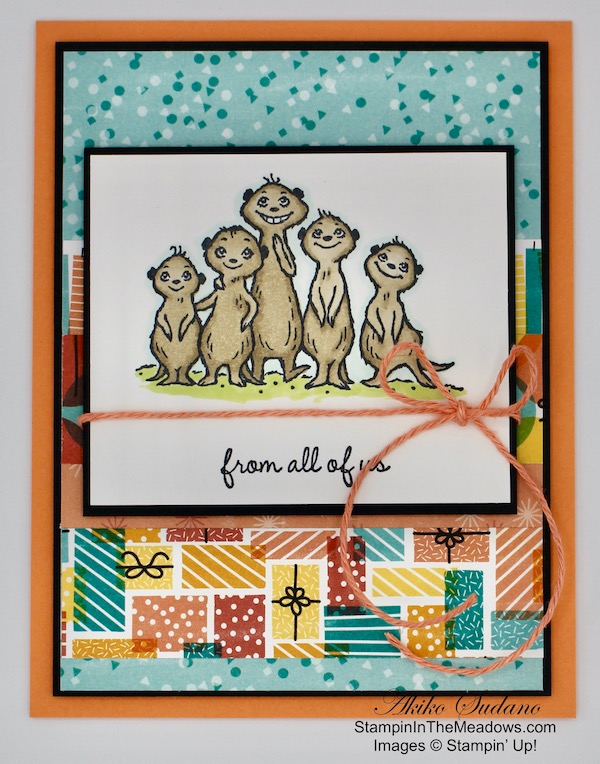
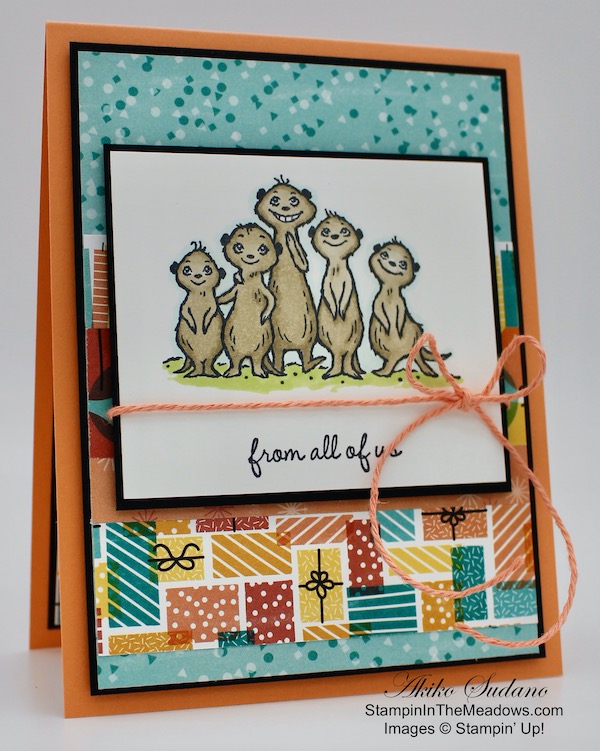
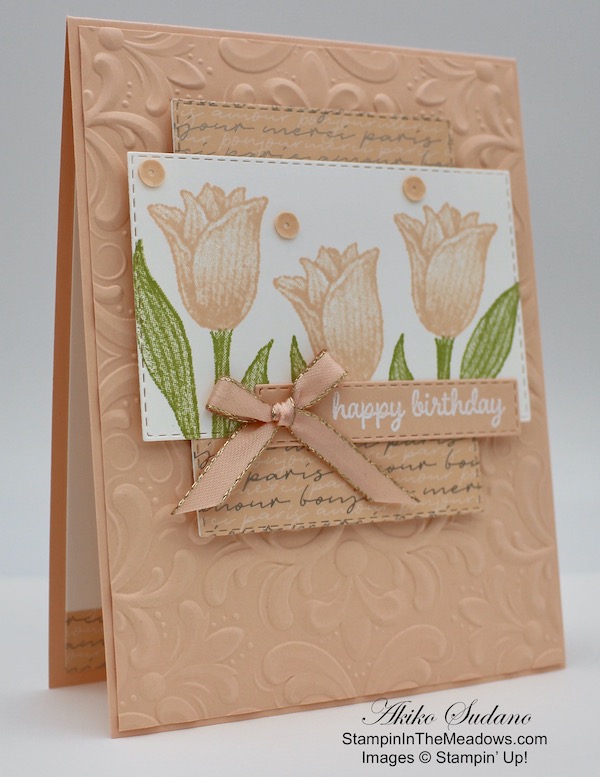
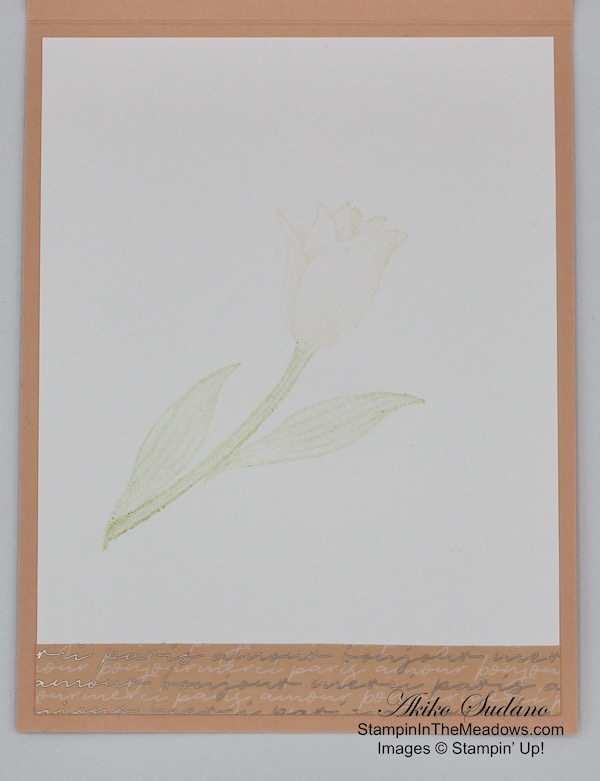
Here is the second alternative design card I made with the Stampin’ Up! February Paper Pumpkin kit. I stamped the large flower in Smoky Slate ink on a panel of Whisper White and cut it out with the Stitched so Sweetly dies. I colored it with Rich Razzleberry, Petal Pink, So Saffron and Old Olive Stampin’ Blends. I stamped the congratulations in Versamark Ink on a panel of Old Olive. I sprinkled it with Silver embossing powder and heat set. I fussy cut around the letters and popped it on the panel with dimensionals. I used the Stitched Rectangle die to cut a panel of the Rick Razzleberry card base from the kit and adhered it to an Old Olive mat. I adhered the floral panel to the top with snail and popped it on a Rich Razzleberry card base.

The elements in the Stampin’ Up! February Paper Pumpkin kit coordinate with many items you may already have in your stash and are flexible and versatile enough make pretty cards that you customize to your exclusive designs.

Here are my five favorite things about the kit:

  1. I love the stamp set included in the kit – it has pretty images and is versatile.
  2. The envelopes in the kit are a nice unique design.
  3. The papers in the kit are pretty.
  4. The die cuts are fantastic
  5. It has pretty clear pink iridescent sequins.

I hope you enjoy your Stampin’ Up! February Paper Pumpkin kit as much as I did!


March 2020 Paper Pumpkin: No Matter the Weather

Cheers to seven years! This March, Paper Pumpkin has reached another exciting milestone: our seventh year of delivering fun, easy, creative projects to you and your customers. To thank everyone who has helped us along the way, we’re including an additional FREE stamp set with every March kit. This means that every subscriber will receive two stamp sets! 

The March 2020 kit will arrive in an exclusive, specially-designed box that you and your subscribers will love! Think daffodils, raindrops, and a fresh spring vibe.

Here are the Details:

  • Kit contains supplies for 12 cards and envelopes (4 cards of 3 designs)
  • Notecard size: 5″ x 3-1/2″ (12.7 x 8.9 cm)
  • Envelope size: 5-1/8″ x 3-5/8″ (13 x 9.2 cm)
  • The additional stamp set coordinates with the March kit design; however, you do not need it to complete the March cards.
  • The additional stamp set is a 4×6 footprint, which is larger than most Paper Pumpkin sets and is designed for use on a variety of crafting projects.

Coordinating Colors: Balmy Blue, Basic Gray, Calypso Coral, Grapefruit Grove, Gray Granite, Pear Pizzazz, Petal Pink, Shaded Spruce, and So Saffron

If you’re interested in subscribing to Paper Pumpkin, you can either sign up for a subscription where you are billed monthly for your kit or you can purchase a prepaid subscription in my online store. To see more information and to sign up for the monthly subscription click here. To see the options for prepaid subscriptions in my online store, click here.

As a bonus during Sale-A-Bration, purchasing a 3-month or longer prepaid subscription qualifies for FREE Sale-A-Bration products!

Sign up deadline for the March 2020 kit is March 10, 2020.


February 16 – 29 Host Code: KFK3RZHV

Use this host code when you order $50+ and receive a free gift from me!  If your order is over $150, please do not use this code, but you’ll still get the free gift.  The free gift is your choice of any item valued up to $10.00 in the 2019 – 2020 Annual Catalog or in the 2020 Mini Catalog!  That includes some of the Host Exclusive stamp sets!

If your order is over $150, please do not use the host code since you’ll receive your own Host Dollars plus I’ll send you the free gift!  This host code can be used by anyone, no club or commitment required.  Let me know if you have any questions.


If you need any stamping supplies, I’d be very happy to be your Demonstrator.  Just click on the Shop Now button on the right side of the screen to go directly to my online store or contact me if you have any questions.  Happy Stamping!

Thanks for stopping by and have a great week!

Akiko

  • Visit my online store here
  • See the current Stampin’ Up! clearance rack specials here
  • Earn FREE Stampin’ Up! products through my Wildflower Frequent Shopper Program – my way of saying thank you to my online frequent shopper customers.
  • Sign up for my weekly newsletter here
  • Have any questions? I’d be happy to help, click here to contact me.

Stampin’ Up! products used in this project:


Stampin’ Up! Peaceful Moments with Painted Poppies Birthday Card

Good Morning! Today I am sharing a video that I did yesterday during my Sunday Facebook Live session. I made a pretty birthday card using stamps and designer series paper from the Stampin’ Up! Peaceful Poppies suite. This includes the Stampin’ Up! Painted Poppies stamp set and the Stampin’ Up! Peaceful Moments stamp set.

Here’s the Facebook Live video showing how to make this pretty card:

I also posted the video to my YouTube channel and you can view it here.

I CASE’d today’s card from one that my upline, Amy Koenders made for one of our Blog Hops. Here’s Amy’s original card. I love this card sketch (that she also designed), because the top layer is wider than the bottom layer and it is unexpected, yet interesting and pleasing to the eye. And it’s also a great way to easily show off pretty designer series paper to make a simple card that doesn’t look too simple.

I adhered the two panels of the Stampin’ Up! Peaceful Poppies designer Series Paper to Old Olive mats with snail. Then I stamped the background of the Poppy Parade card base with the flower and leaf stamp from the Stampin’ Up! Painted Poppies stamp set using Poppy Parade ink, giving it a tone on tone look. I adhered the layered stripe panel to the card base with snail and the flower panel on top with dimensionals.

I stamped the Happy Birthday sentiment from the Stampin’ Up! Peaceful Moments stamp set in Memento Tuxedo Black ink on a Whisper White panel and cut it out with the second smallest scalloped rectangle die from the Stitched So Sweetly dies. I adhered it to the floral panel with glue dots and finished off the card front with Peaceful Poppy sequins.

I decorated the inside of the card by stamping the sentiment from the Stampin’ Up! Peaceful Moments stamp set in Memento Tuxedo Black ink on a panel of Whisper White. I stamped the poppy flower from the Stampin’ Up! Painted Poppies stamp set in the lower corner in black and used the large spatter stamp to ‘paint’ the flower in Poppy Parade. I used the small spatter stamp next to it in Granny Apple Green ink. I trimmed the bottom with a strip of the Peaceful Poppies DSP and adhered to the inside of the card.

All the components of the Peaceful Poppies suite are pretty, making it so easy to quickly make an attractive handmade card that will bring smiles all around.


February 16 – 29 Host Code: KFK3RZHV

Use this host code when you order $50+ and receive a free gift from me!  If your order is over $150, please do not use this code, but you’ll still get the free gift.  The free gift is your choice of any item valued up to $10.00 in the 2018-19 Annual Catalog or in the 2019 Occasions Catalog!  That includes some of the Host Exclusive stamp sets!

If your order is over $150, please do not use the host code since you’ll receive your own Host Dollars plus I’ll send you the free gift!  This host code can be used by anyone, no club or commitment required.  Let me know if you have any questions.


If you need any stamping supplies, I’d be very happy to be your Demonstrator.  Just click on the Shop Now button on the right side of the screen to go directly to my online store or contact me if you have any questions.  Happy Stamping!

Thanks for stopping by and have a great week!

Akiko

  • Visit my online store here
  • See the current Stampin’ Up! clearance rack specials here
  • Earn FREE Stampin’ Up! products through my Wildflower Frequent Shopper Program – my way of saying thank you to my frequent shopper online customers.
  • Have any questions? I’d be happy to help, click here to contact me.

Cardstock Cuts for this project:

  • Poppy Parade – 4 1/4″ x 11″ scored at 5 1/2″ (card base)
  • Old Olive – 2 7/8″ x 3 3/8″, 2 3/8″ x 3 7/8″ (mats)
  • Whisper White – 3 3/4″ x 5″ (inside panel), 2″ x 3″ (label)
  • Peaceful Poppies DSP – 2 3/4″ x 3 1/4″ (stripes panel), 2 1/4″ x 3 3/4″ (floral panel)

Stampin’ Up! products used in this project:


Stampin’ Up! Cherry Blossoms Birthday Card for the Inkin’ Krew Blog Hop

Good Morning! Welcome to another Inkin’ Krew Monthly Blog Hop! The theme for this month’s hop is Birthday and I made a pretty pink birthday card with the Stampin’ Up! Cherry Blossoms dies to share.

I started by embossing a panel of Petal Pink card stock with the Parisian Flourish embossing folder and adhering it to a Petal Pink card base with snail.

To make the flowers, I cut out three sets of the two largest petals and three sets of the two smallest petals from Whisper White card stock using the Stampin’ Up Cherry Blossom dies. Note that the small petals have two flower clusters on each die, so I ended up with six of each of the smaller petal clusters and three of each of the larger petal clusters. I sponged the edges of each petal cluster with Petal Pink ink and curled the edges up with my bone folder. I assembled three large flowers with multipurpose liquid glue, layering four flowers from largest on the bottom to smallest on top, turning each so that the petals fall between the petals on the layer below. I assembled three small flowers starting with a 1/4″ x 1/4″ scrap of Whisper White and layering the two smallest petal clusters on top of it with multipurpose liquid glue, turning each layer so the petals fall between the petals below.

I cut five sets of the large embossed leaves and three sets of the smallest embossed leaves. I adhered three leaves on the back of each of the large flowers and two leaves on the back of the small flowers with multipurpose liquid glue. I adhered champagne rhinestones in the center of each flower. I cut a Sahara Sand branch using the die from the Stampin’ Up! Cherry Blossoms dies.

I stamped the Happy Birthday sentiment from the Magnolia Blooms stamp set in Petal Pink ink on a Whisper White panel. I cut it out with the small label die from the Painted Labels dies. I arranged the flowers and branch on the card with the label and adhered everything down with glue dots. I tied a length of Petal Pink ribbon and adhered it with a glue dot.

I stamped the large floral branch from the Forever Blossoms cling stamp set in Petal Pink ink on a Whisper White panel. I embossed a strip of Petal Pink with the Parisian Flourish embossing folder and adhered it to the bottom. I adhered the panel to the inside of the card with snail. I stamped the floral branch on a medium Whisper White envelope to coordinate with the card.


Let’s visit the other beautiful projects in the Blog Hop. Click on the Next Blog button to move forward to Mary Deatherage’s project or click the Previous Blog button to move back to see the project that Connie Troyer created.

If you get lost along the way, here are the participants for the hop:


February 1 – 15 Host Code: ZSQEMEKE

Use this host code when you order $50 or more and receive a free gift from me!  The gift is your choice of any item valued up to $10.00 in the 2019-20 Annual Catalog or in the 2020 January-June Mini Catalog!  That includes some of the Host Exclusive stamp sets!

If your order is over $150, please do not use the host code since you’ll receive your own Host Dollars plus I’ll send you the free gift!  This host code can be used by anyone, no commitment required.  Let me know if you have any questions.


If you need any stamping supplies, I’d be very happy to be your Demonstrator.  Just click on the Order Stampin’ Up! Online Now button on the right side of the screen to go directly to my online store or contact me if you have any questions.  Happy Stamping!

Thanks for visiting!

Akiko

  • Visit my online store here
  • See the current Stampin’ Up! clearance rack specials here
  • Earn FREE Stampin’ Up! products through my Wildflower Frequent Shopper Program – my way of saying thank you to my frequent shopper online customers.
  • Sign up for my weekly newsletter here
  • Have any questions? I’d be happy to help, click here to contact me.

Cardstock Cuts for this project:

  • Petal Pink – 4 1/4″ x 11″ scored at 5 1/2″ (card base), 3 7/8″ x 5 1/8″ (embossed background), 1/2″ x 3 3/4″ (inside embossed trim)
  • Old Olive – 1″ x 6″ (leaf die cuts)
  • Sahara Sand – 2 1/2″ x 5″ (branch die cut)
  • Whisper White – 3 3/4″ x 5″ (inside panel), (2) 1″ x 5″ & (2) 1 1/4″ x 5″ (flower die cuts), 2″ x 3″ (label)

Stampin’ Up! products used in this project:


Stampin’ Up! Little Ladybug Birthday Card for the Happy Inkin’ Thursday Blog Hop

Good Morning! Welcome to another Happy Inkin’ Thursday Blog Hop! One of my favorite sets from Sale-A-Bration is the Stampin’ Up! Little Ladybug stamp set, so I’m featuring it in this week’s blog hop:

We have a sketch challenge this week, and here is the sketch we are using:

I embossed a panel of Granny Apple Green card stock with the Layered Leaves embossing folder and adhered it to a Basic Black mat. Using the largest circle in the Stitched Shapes dies, I cut a circle with Pool Party card stock. I used the largest scalloped circle from the Layering Circles dies to cut a mat with Basic Black card stock.

I stamped the large flower from the Stampin’ Up! Little Ladybug stamp set in Memento Tuxedo Black ink on Whisper White card stock. I colored it with So Saffron, Light Mango Melody, Light Granny Apple Green and Dark Smoky Slate Stampin’ Blends. I cut it out with the coordinating die from the Ladybugs dies. I cut it again with the large stitched circle die so that it aligns with the Pool Party circle. I adhered the flower to the Pool Party circle and then to the Basic Black scalloped circle mat with multipurpose liquid glue. I adhered the layered circles to the Granny Apple Green embossed background with multipurpose liquid glue and popped them all on a So Saffron card base with dimensionals.

I stamped the ladybug in Memento Tuxedo Black on Thick Whisper White and colored it with Light Real Red, Light Petal Pink and both Smoky Slate Stampin’ Blends. I cut it out with the coordinating die from the Ladybugs dies and popped it on the Pool Party circle with dimensionals. I stamped the Happy Birthday sentiment from the Stampin’ Up Little Ladybug stamp set on a strip of So Saffron card stock in Memento Tuxedo Black ink. I cut it out with the banner die from the Sending Flowers dies. I cut a backing from Granny Apple Green card stock using the scalloped label die from the Sending Flowers dies. I adhered these together with glue dots. I adhered a length of Whisper White Flax ribbon behind the labels with glue dots and adhered the layered label on the card with a glue dot behind the circle and dimensionals on the embossed background. I finished off the card front with a Daffodil Delight bow and three red gemstones.

On the inside of the card, I stamped a row of the little playful ladybugs from the Stampin’ Up! Little Ladybug stamp set on a Whisper White panel using Memento Tuxedo Black ink. I colored them with the Light Petal Pink, Light Real Red and Light Smoky Slate Stampin’ Blends. I embossed a strip of Granny Apple Green card stock with the Layered Leaves embossing folder and adhered it to the bottom of the panel. I adhered the panel to the inside of the card with snail.

The cute Stampin’ Up! Little Ladybug set is a Sale-A-Bration host item that is FREE when your party is over $300 in sales (or if you place an order over $300). The Ladybugs dies is a Coordination Release item that is currently available to demonstrators during Pre-Order and will be available to Customers starting February 4, 2020. The Sending Flowers dies is also a Coordination Release item that will be available on February 4th. Visit my Stampin’ Up! Promotions page for full details on Sale-A-Bration and the Coordination Products Release.

On with the Hop! Click the Next button below to visit Karen Ksenzakovic’s blog.

And just in case you get lost along the way, here’s a list of the team members participating in the hop today:


January 16 – 31 Host Code: EFVWTZUQ

Use this host code when you order $50 or more and receive a free gift from me!  The gift is your choice of any item valued up to $10.00 in the 2019-20 Annual Catalog or in the 2019 Holiday Catalog!  That includes some of the Host Exclusive stamp sets!

If your order is over $150, please do not use the host code since you’ll receive your own Host Dollars plus I’ll send you the free gift!  This host code can be used by anyone, no commitment required.  Let me know if you have any questions.


If you need any stamping supplies, I’d be very happy to be your Demonstrator.  Just click on the Shop Now button on the right side of the screen to go directly to my online store or contact me if you have any questions.  Happy Stamping!

Thanks for visiting!

Akiko

  • Visit my online store here
  • See the current Stampin’ Up! clearance rack specials here
  • Earn FREE Stampin’ Up! products through my Wildflower Frequent Shopper Program – my way of saying thank you to my frequent shopper online customers.
  • Sign up for my weekly newsletter here
  • Have any questions? I’d be happy to help, click here to contact me.

Cardstock Cuts for this project:

  • So Saffron – 5 1/2″ x 8 1/2″ scored at 4 1/4″ (card base), 1″ x 4″ (label)
  • Granny Apple Green – 3 3/4″ x 5″ (embossed background), 1/2″ x 5 1/4″ (inside trim), 1″ x 4″ (label)
  • Pool Party – 3 1/4″ x 3 1/4″
  • Basic Black – 5 1/8″ x 3 7/8″ (front mat), 3 1/2″ x 3 1/2″ (scalloped circle mat)
  • Whisper White – 4″ x 5 1/4″ (inside panel), 3″ x 3″ (large flower die cut)
  • Thick Whisper White – 2 1/2″ x 2 1/2″ (ladybug die cut)

Stampin’ Up! products used in this project:


Stampin’ Up! Bonanza Buddies Birthday Card

Good Morning! Today I have a cute, colorful birthday card made with the new Stampin’ Up! Bonanza Buddies bundle from the new Stampin’ Up! January-June 2020 Mini Catalog. The Bonanza Buddies photopolymer stamp set has the cutest little critters and the Birthday Bonanza designer series paper has fun colors with pretty party designs. You can find the supplies used to create this card at the bottom of my post with the sizes of cardstock used.

The lay out for my card is based on the sketch in CAS(E) this Sketch #354:

I adhered a panel of the Birthday Bonanza designer series paper to a Bermuda Bay card base. I added another strip of the DSP (the one with the balloons) along the side. Then I used the tag die from the Bonanza dies, that is part of the Stampin’ Up! Bonanza Buddies bundle, to cut tags from the speckled light Bermuda Bay and birthday candles paper in the Birthday Bonanza DSP pack. I offset the tags and adhered them together with multipurpose liquid glue added some Crushed Curry seam binding ribbon to the top tied with the metallic Bermuda Bay twine. This twine is from the Metallic Baker’s Twine and Sequins pack that is FREE as part of Sale-A-Bration with a $50 order.

I adhered the tags to the card front with dimensionals. I stamped and die cut the lion from the Stampin’ Up! Bonanza Buddies bundle next. The lion is made with 3 stamps – one with the body and head, one with the mane and tail tip and one with the face. I stamped the body and head in Daffodil Delight, the mane and tail in Mango Melody and the face with Memento Tuxedo Black, all on whisper white card stock. Then there are two dies – one with the head and body and one with the mane and tail. So I cut them out using the dies – giving me four die cuts. I adhered the face to the mane and the tail tip to the tail. Then I adhered the body to the tag with multipurpose liquid glue and the face and mane on top with dimensionals. Then I stamped the hat in Poppy Parade ink and the Pompom in Bermuda Bay ink on a scrap of Whisper White and die cut them with the coordinating dies. I die cut the hat a little crooked so I used my paper snips to straighten it out and adhered it to the lion’s head with multipurpose liquid glue.

I die cut two of the pennant banners from the Birthday Bonanza DSP and adhered them to the bottom, using multipurpose liquid glue over the tags, and dimensionals over the background. I stamped the sentiment from the Stampin’ Up! Birthday Bonanza stamp set with Memento Tuxedo Black ink on a strip of Bermuda Bay card stock. I trimmed the ends and adhered it to the card with multipurpose liquid glue and a piece of a dimensional.

I decorated the inside by stamping the balloons in Memento Tuxedo Black, Bermuda Bay, Poppy Parade and Daffodil Delight on a Whisper White panel. I stamped the Happy Birthday sentiment from the Stampin’ Up! Bonanza Buddies stamp set and added a strip of the Birthday Bonanza DSP to the bottom before adhering to the inside of the card.

The Stampin’ Up! Bonanza Buddies bundle has so many stamps and is so versatile for creating birthday or party themed cards. The little critters are so cute and the dies are so versatile with a tag die and party banners. And coupled with the pretty Birthday Bonanza designer series paper, you have perfect compliments to make cheerful, fun projects for kids of all ages!


January 1 – 15 Host Code: FB6MBVE3

January 16 – 31 Host Code: EFVWTZUQ

Use this host code when you order $50 or more and receive a free gift from me!  The gift is your choice of any item valued up to $10.00 in the 2019-20 Annual Catalog or in the 2019 Holiday Catalog!  That includes some of the Host Exclusive stamp sets!

If your order is over $150, please do not use the host code since you’ll receive your own Host Dollars plus I’ll send you the free gift!  This host code can be used by anyone, no commitment required.  Let me know if you have any questions.


If you need any stamping supplies, I’d be very happy to be your Demonstrator.  Just click on the Shop Now button on the right side of the screen to go directly to my online store or contact me if you have any questions.  Happy Stamping!

Thanks for stopping by and have a great day!

Akiko

  • Visit my online store here
  • See the current Stampin’ Up! clearance rack specials here
  • Earn FREE Stampin’ Up! products through my Wildflower Frequent Shopper Program – my way of saying thank you to my frequent shopper online customers.
  • Sign up for my weekly newsletter here
  • Have any questions? I’d be happy to help, click here to contact me.

Cardstock Cuts for this project:

  • Bermuda Bay – 4 1/4″ x 11″ scored at 5 1/2″ (card base), 1/2″ x 3″ (label)
  • Whisper White – 2 1/2″ x 4 1/2″ (lion die cuts) , 3 7/8″ x 5 1/8″
  • Birthday Bonanza DSP – 4″ x 5 1/4″ (little critters and presents background), 1 1/2″ x 4 3/4″ (balloons), (2) 2 1/4″ x 4″ (light Bermuda Bay confetti and candles for tags), (2)1 1/2″ x 4 1/2″ (Grapefruit Grove stars and Daffodil Delight confetti for pennant banners), 1/2″ x 3 7/8″ (inside trim)

Stampin’ Up! products used in this project:


Stampin’ Up! Timeless Tropical Birthday Card

Good Morning! Today I have birthday card made with the Stampin’ Up! Timeless Tropical bundle. I used the hibiscus stamp and die from this set to make a yellow flower to send a warm, tropical happy birthday message during this cold season. You can find the supplies used to create this card at the bottom of my post along with the sizes of cardstock used.

I stamped the hibiscus flower and three large leaves from the Stampin’ Up Timeless Tropical cling stamp set using Sahara Sand ink on Thick Whisper White card stock. I used the coordinating dies from the In The Tropics dies to cut them out. I colored the flower with Mango Melody and Daffodil Delight Stampin’ Blends and the leaves with Mossy Meadow and Old Olive Stampin’ Blends.

I embossed a panel of Soft Suede card stock with the Coastal Weave embossing folder and adhered it to a Terracotta Tile card base with multipurpose liquid glue. I cut a panel of Whisper White card stock with the Stitched Lace die and adhered it to the embossed panel with multipurpose liquid glue. I arranged the leaves on the lace panel and adhered them with multipurpose liquid glue.

I stamped the birthday sentiment from the Stampin’ Up Timeless Tropical cling stamp set on a panel of Sahara Sand card stock with Soft Suede ink. I cut it out using the Stitched Rectangle die. I adhered the label to the card front with multipurpose liquid glue over the leaves.

I brushed the flower with clear Wink of Stella to give the flower some sparkle – so pretty! I cut a short length of Braided Burlap trim and unraveled the ends. I folded it and adhered it to the card front with glue dots. I added the yellow hibiscus flower to the card front with dimensionals and finished the card front with Crushed Curry crinkled seam binding ribbon.

I stamped the hibiscus flower from the Stampin’ Up! Timeless Tropical stamp set with Sahara Sand ink on a panel of Whisper White after stamping off twice. I made a mask by stamping the flower on copy paper and cutting it out. I laid the mask on the flower and stamped two leaves, also using Sahara Sand ink after stamping off twice. I adhered the panel to a Soft Suede mat and then to the inside of the card with multipurpose liquid glue.

I wanted to combine tropical rustic with soft feminine in this birthday card. The rustic is embodied in the coastal weave embossed background and burlap ribbon and the feminine is represented by the lace overlay and sparkle. I think the hibiscus combines the best of both! I hope you like it!


January 1 – 15 Host Code: FB6MBVE3

Use this host code when you order $50 or more and receive a free gift from me!  The gift is your choice of any item valued up to $10.00 in the 2019-20 Annual Catalog or in the 2019 Holiday Catalog!  That includes some of the Host Exclusive stamp sets!

If your order is over $150, please do not use the host code since you’ll receive your own Host Dollars plus I’ll send you the free gift!  This host code can be used by anyone, no commitment required.  Let me know if you have any questions.


If you need any stamping supplies, I’d be very happy to be your Demonstrator.  Just click on the Shop Now button on the right side of the screen to go directly to my online store or contact me if you have any questions.  Happy Stamping!

Thanks for stopping by and have a great day!

Akiko

  • Visit my online store here
  • See the current Stampin’ Up! clearance rack specials here
  • Earn FREE Stampin’ Up! products through my Wildflower Frequent Shopper Program – my way of saying thank you to my frequent shopper online customers.
  • Sign up for my weekly newsletter here
  • Have any questions? I’d be happy to help, click here to contact me.

Cardstock Cuts for this project:

  • Terracotta Tile – 4 1/4″ x 11″ scored at 5 1/2″ (card base)
  • Soft Suede 3 7/8″ x 5 1/8″ (inside mat), 5 1/4″ x 4″ (embossed background)
  • Thick Whisper White – 2 1/4″ x 6″ (leaf die cuts), 2 3/4″ x 2 3/4″ (hibiscus die cut)
  • Whisper White – 3 3/4″ x 5″ (inside panel), 2 1/4″ x 4 1/2″ (stitched lace die cut)
  • Sahara Sand – 2″ x 3″ (label)

Stampin’ Up! products used in this project:


Stampin’ Up! Timeless Tulips Happy Birthday Card

Good Morning on the last day of 2019! Today I have another sneak peek of the pretty Stampin’ Up! Timeless Tulips bundle that will be available on Friday when the January-June 2020 Mini Catalog becomes available. You can find the supplies used to create this card at the bottom of my post along with the sizes of cardstock used.

I adhered a panel of the Perennial Essence designer series paper to a Blackberry Bliss card base. I cut a panel of Balmy Blue card stock with the Stitched Rectangle die. I stamped three stems and some leaves in Mossy Meadow ink on the die cut panel. I ran it through the Scripty embossing folder.

I stamped 3 of the large tulips from the Stampin’ Up! Timeless Tulips stamp set in Blackberry Bliss ink on a panel of Whisper White. I cut out the flowers using the Tulip Builder punch and then colored them with the Clear Wink of Stella glitter brush. I attached them to the embossed panel with dimensionals. It’s too bad the shine from the Wink of Stella doesn’t show very well because the effect is dramatic!

I stamped the happy birthday sentiment on a strip of Whisper White and cut it out with another Stitched Rectangle Die. I adhered it to the embossed panel with Multipurpose Liquid Glue and trimmed it with a pink Noble Peacock rhinestone gem. I adhered the panel to the card base with dimensionals.

On the inside of the card, I stamped the tulip flower from the Stampin’ Up! Timeless Tulips stamp set in Blackberry Bliss ink on a panel of Whisper White. I brushed the Wink of Stella over it like the flowers on the card front. I added a stem and leaf in Mossy Meadow. I stamped the sentiment in Blackberry Bliss ink and trimmed the bottom with a strip of Perennial Essence DSP. I adhered the decorated panel to the inside of the card with Multipurpose Liquid Glue. I also stamped the tulip, stem and leaves on the left side of a Whisper White Medium Envelope to coordinate with the card.

I love the dark purple tulips in the Springtime, but sadly, there are deer nearby, so I can’t grow them very well. So instead, when the snows melt, I will be greeted by the happy yellow daffodils instead. Can we just skip the snow part?

Have fun and be safe if you are celebrating the New Year’s Eve tonight!


December 16 – 31 Host Code: A99JPHA3

January 1 – 15 Host Code: FB6MBVE3

Use this host code when you order $50 or more and receive a free gift from me!  The gift is your choice of any item valued up to $10.00 in the 2019-20 Annual Catalog or in the 2019 Holiday Catalog!  That includes some of the Host Exclusive stamp sets!

If your order is over $150, please do not use the host code since you’ll receive your own Host Dollars plus I’ll send you the free gift!  This host code can be used by anyone, no commitment required.  Let me know if you have any questions.


If you need any stamping supplies, I’d be very happy to be your Demonstrator.  Just click on the Shop Now button on the right side of the screen to go directly to my online store or contact me if you have any questions.  Happy Stamping!

Thanks for stopping by and have a great day!

Akiko

  • Visit my online store here
  • See the current Stampin’ Up! clearance rack specials here
  • Earn FREE Stampin’ Up! products through my Wildflower Frequent Shopper Program – my way of saying thank you to my frequent shopper online customers.
  • Sign up for my weekly newsletter here
  • Have any questions? I’d be happy to help, click here to contact me.

Cardstock Cuts for this project:

  • Blackberry Bliss – 4 1/4″ x 11″ scored at 5 1/2″ (card base)
  • Balmy Blue – 2 1/2″ x 4″ (embossed panel)
  • Whisper White – 3 3/4″ x 5″ (inside panel), 3/4″ x 3″ (label), 2 1/4″ x 5″ (tulip flowers)
  • Perennial Essence DSP – 3 3/4″ x 5″ (front background), 1/2″ x 3 3/4″ (inside trim)

Stampin’ Up! products used in this project:


Stampin’ Up! The Gang’s All Meer Sneak Peek

Good Morning! Today I have another sneak peek of a stamp set that will be featured in Sale-A-Bration starting on January 3, 2020. It is the Stampin’ Up! The Gang’s All Meer cling stamp set and it is so cute! You can find the supplies used to create this card at the bottom of my post along with the sizes of cardstock used.

My card is a birthday card from a group of people, like something for a co-worker from the rest of the office. I started by stamping the group of meerkats from the Stampin’ Up! The Gang’s All Meer stamp set in Memento Tuxedo Black ink on a Whisper White panel. I stamped the from all of us sentiment underneath in Tuxedo Black ink. I colored the meerkats with the Crumb Cake Stampin’ Blends and the ground with the Light Granny Apple Green Stampin’ Blend. I outlined the little critters with the Light Pool Party Stampin’ Blend.

I adhered the meerkats to a Basic Black mat with multipurpose liquid glue and tied Grapefruit Grove twine around it and made a bow. I cut a panel of the Birthday Bonanza designer series paper and adhered strips of the other prints in the Birthday Bonanza DSP pack on top of it with multipurpose liquid glue. I adhered the panel to a Basic Black mat and adhered the layered panel to a Grapefruit Grove card base with dimensionals.

I adhered the meerkat panel to the card base with dimensionals.

On the inside of the card, I adhered a strip of the present paper from the Birthday Bonanza DSP pack to the bottom of a Whisper White panel. I stamped the Happy Birthday sentiment from the Stampin’ Up! The Gang’s All Meer stamp set along with the single meerkat (this is the Birthday Person!). I colored the meerkat with the Crumb Cake Stampin’ Blends and adhered the panel to a Basic Black mat before adhering it to the inside of the card.

The Stampin’ Up! The Gang’s All Meer cling stamp set is one of the Sale-A-Bration choices that is FREE with a $50 purchase (before shipping and taxes). Sale-A-Bration starts on January 3, 2020 with the start of the new Mini Catalog. It is the biggest Stampin’ Up! sale of the year. And these little meerkats are sooo cute!!!


This image has an empty alt attribute; its file name is stampin-up-2020-jan-jun-mini-catalog-stampininthemeadows.com_.jpeg

Stampin’ In The Meadows January – June 2020 Mini Catalog Product Shares

I’m doing my first Stampin’ Up! Product Share to get ready for the new January-June 1010 Mini Catalog and I invite you to join me! A share is a good way to get a sample of the new products before committing to purchase full packages of each product. See my New Mini Catalog Product Shares page to get a complete details of the options and their costs, a complete listing of all the products you will be getting, and how to sign up. Let me know if you have any questions.


Stampin’ In The Meadows Online Host Club Starting in January 2020

Starting in January, I am going to start the Stampin’ In The Meadows Online Host club. Club members commit to spending $25 on supplies each month for 6 months, Each club member gets to be the host for a month during the period. See my Online Host Club page for complete details. Contact me if you have questions.


December 16 – 31 Host Code: A99JPHA3

Use this host code when you order $50 or more and receive a free gift from me!  The gift is your choice of any item valued up to $10.00 in the 2019-20 Annual Catalog or in the 2019 Holiday Catalog!  That includes some of the Host Exclusive stamp sets!

If your order is over $150, please do not use the host code since you’ll receive your own Host Dollars plus I’ll send you the free gift!  This host code can be used by anyone, no commitment required.  Let me know if you have any questions.


If you need any stamping supplies, I’d be very happy to be your Demonstrator.  Just click on the Shop Now button on the right side of the screen to go directly to my online store or contact me if you have any questions.  Happy Stamping!

Thanks for stopping by and have a great day!

Akiko

  • Visit my online store here
  • See the current Stampin’ Up! clearance rack specials here
  • Earn FREE Stampin’ Up! products through my Wildflower Frequent Shopper Program – my way of saying thank you to my frequent shopper online customers.
  • Sign up for my weekly newsletter here
  • Have any questions? I’d be happy to help, click here to contact me.

Cardstock Cuts for this project:

  • Grapefruit Grove – 4 1/4″ x 11″ scored at 5 1/2″ (card base)
  • Whisper White – 3 3/4″ x 5″ (inside panel), 2 3/4″ x 3 1/4″ (meerkat panel)
  • Basic Black – (2) 3 7/8″ x 5 1/8″ (front background and inside mat), 2 7/8″ x 3 3/8″ (meerkat panel mat)
  • Birthday Bonanza DSP – 3 3/4″ x 5″ (Coastal Cabana background), 3/4″ x 3 3/4″ (candles), 1″ x 3 3/4″ (balloons), 1/2″ x 3 3/4″ (Grapefruit Grove stars), 1″ x 3 3/4″ (presents), 1/2″ x 3 3/4″ (inside presents)

Stampin’ Up! products used in this project:


Stampin’ Up! Breathtaking Bouquet and Happy Birthday To You Sneak Peeks

Good Morning! Today I have another sneak peek for stamp sets in the new Mini Catalog and Sale-A-Bration brochure. My card is made with the new Stampin’ Up! Breathtaking Bouquet stamp set from the new January-June 2020 Mini Catalog and the Stampin’ Up! Happy Birthday To You stamp set from the new Sale-A-Bration Brochure. Both of these will be available on January 3, 2020. You can find the supplies used to create this card at the bottom of my post along with the sizes of cardstock used.

The background is made with the Stampin’ Up! Breathtaking Bouquet stamp set from the Mini Catalog. Isn’t it pretty? It is a background cling stamp set with line images just bursting with flowers. For this card, I mounted it in my Stamparatus and stamped it in Versamark ink on a Balmy Blue panel. I sprinkled it with white embossing powder and heat set.

Then I cut a strip of vellum with one of the Delicate Lace Dies and wrapped it around the panel, adhering it in the back with snail. I wrapped a length of the new Whisper White crinkled seam binding ribbon around the edge and adhered it in the back with snail. I adhered the panel to a Balmy Blue card base with multipurpose liquid glue.

I stamped the floral cake from the Stampin’ Up! Happy Birthday To You stamp set in smoky slate ink on a panel of Whisper White. This is one of the Sale-A-Bration stamp sets that will be available FREE with a $50 purchase (before shipping and taxes) starting January 3, 2020! I colored the image with Balmy Blue, Smoky Slate, Granny Apple Green, So Saffron and Flirty Flamingo Stampin’ Blends. I accented the Balmy Blue flowers with Wink of Stella (too bad you can’t see the shimmer very well) and popped it on the card with dimensionals. I added the bow made with the crinkle seam binding ribbon and three pearls.

I stamped the Happy Birthday sentiment from the Stampin’ Up! Happy Birthday To You stamp set in Balmy Blue on a panel of Whisper White. I stamped and heat embossed a strip of Balmy Blue to match the front and adhered it to the bottom of the panel. I adhered the panel to the inside of the card.

The Stampin’ Up! Breathtaking Bouquet is going to be an awesome addition to the lineup of background stamps, providing lots of versatility in creating a feminine florals. And one of the stamps that it coordinates with perfectly is the birthday cake in the Stampin’ Up! Happy Birthday To You Sale-A-Bration stamp set. Both will be available on January 3, 2020.


This image has an empty alt attribute; its file name is stampin-up-2020-jan-jun-mini-catalog-stampininthemeadows.com_.jpeg

Stampin’ In The Meadows January – June 2020 Mini Catalog Product Shares

I’m doing my first Stampin’ Up! Product Share to get ready for the new January-June 1010 Mini Catalog and I invite you to join me! A share is a good way to get a sample of the new products before committing to purchase full packages of each product. See my New Mini Catalog Product Shares page to get a complete details of the options and their costs, a complete listing of all the products you will be getting, and how to sign up. Let me know if you have any questions.


Stampin’ In The Meadows Online Host Club Starting in January 2020

Starting in January, I am going to start the Stampin’ In The Meadows Online Host club. Club members commit to spending $25 on supplies each month for 6 months, Each club member gets to be the host for a month during the period. See my Online Host Club page for complete details. Contact me if you have questions.


December 16 – 31 Host Code: A99JPHA3

Use this host code when you order $50 or more and receive a free gift from me!  The gift is your choice of any item valued up to $10.00 in the 2019-20 Annual Catalog or in the 2019 Holiday Catalog!  That includes some of the Host Exclusive stamp sets!

If your order is over $150, please do not use the host code since you’ll receive your own Host Dollars plus I’ll send you the free gift!  This host code can be used by anyone, no commitment required.  Let me know if you have any questions.


If you need any stamping supplies, I’d be very happy to be your Demonstrator.  Just click on the Shop Now button on the right side of the screen to go directly to my online store or contact me if you have any questions.  Happy Stamping!

Thanks for stopping by and have a Merry Christmas!

Akiko

  • Visit my online store here
  • See the current Stampin’ Up! clearance rack specials here
  • Earn FREE Stampin’ Up! products through my Wildflower Frequent Shopper Program – my way of saying thank you to my frequent shopper online customers.
  • Sign up for my weekly newsletter here
  • Have any questions? I’d be happy to help, click here to contact me.

Cardstock Cuts for this project:

  • Balmy Blue – 4 1/4″ x 11″ scored at 5 1/2″ (card base), 3 3/4″ x 5″ (embossed panel), 1/2″ x 3 3/4″ (inside embossed strip)
  • Vellum card stock – 2″ x 8″ (lace die cut)
  • Whisper White – 3 3/4″ x 5″ (inside panel), 3 1/2″ x 4 1/4″ (cake)

Stampin’ Up! products used in this project:


Stampin’ Up! Timeless Tulips Sneak Peek for the Happy Inkin’ Thursday Blog Hop

Good Morning! Welcome to another Happy Inkin’ Thursday Blog Hop! I have another sneak peek of the beautiful Stampin’ Up! Timeless Tulips stamp set along with the Parisian Blossoms specialty designer series paper and the Parisian Flourish embossing folder. Here is my card:

We have a sketch challenge this week, and here is the sketch we are using:

I started by embossing a Petal Pink panel with the Parisian Flourish embossing folder. This embossing folder does cause a little shrinkage, so I trimmed the embossed panel to 4 1/8″ x 5 3/8″ after it was embossed. After trimming, I adhered it to a Petal Pink card base with multipurpose liquid glue.

Next I stamped the 3 medium tulip flowers from the Stampin’ Up! Timeless Tulips stamp set across a Whisper White panel using Petal Pink ink. Then I stamped the stems and leaves using Pear Pizzazz ink. I cut it out using the Stitched Rectangles die. I cut out a panel 0f Parisian Blossoms specialty designer series paper using the two-step die cutting technique with the next larger size Stitched Rectangles die so that it was 1/4″ shorter. I cut a panel of Thick Whisper White paper the same size using the same technique and adhered it to the back of the Parisian Blossoms DSP to make the DSP stiffer. I adhered the DSP to the card with dimensionals.

I stamped a strip of Petal Pink cardstock with the happy birthday sentiment from the Stampin’ Up! Timeless Tulips stamp set in Versamark ink. I sprinkled it with white embossing powder and heat set. I cut it out with the small long label die from the Stitched Rectangles die. I made a bow with the Petal Pink metallic edged ribbon and adhered it to the label with glue dots. I adhered the label to the flower panel with multipurpose liquid glue. I adhered the flower panel to the DSP panel with multipurpose liquid glue. I finished the card off with three petal pink sequins.

I decorated the inside of the card by stamping a tulip and stem on a Whisper White panel. I stamped the tulip in Petal Pink after stamping off once and I stamped the leaves and stem in Pear Pizzazz after stamping off twice. I added a strip of the Parisian Blossoms DSP to the bottom and adhered it to the inside of the card.

The new Mini Catalog has so many beautiful new products to make pretty cards for all the special birthdays coming up! And I love the Champagne metallic touches in the Parisian Blossoms DSP and ribbon – they are so soft and pretty!

On with the Hop! Click the Next button below to visit Karen Ksenzakovic’s blog.

And just in case you get lost along the way, here’s a list of the team members participating in the hop today:


December 16 – 31 Host Code: A99JPHA3

Use this host code when you order $50 or more and receive a free gift from me!  The gift is your choice of any item valued up to $10.00 in the 2019-20 Annual Catalog or in the 2019 Holiday Catalog!  That includes some of the Host Exclusive stamp sets!

If your order is over $150, please do not use the host code since you’ll receive your own Host Dollars plus I’ll send you the free gift!  This host code can be used by anyone, no commitment required.  Let me know if you have any questions.


If you need any stamping supplies, I’d be very happy to be your Demonstrator.  Just click on the Shop Now button on the right side of the screen to go directly to my online store or contact me if you have any questions.  Happy Stamping!

Thanks for visiting!

Akiko

  • Visit my online store here
  • See the current Stampin’ Up! clearance rack specials here
  • Earn FREE Stampin’ Up! products through my Wildflower Frequent Shopper Program – my way of saying thank you to my frequent shopper online customers.
  • Sign up for my weekly newsletter here
  • Have any questions? I’d be happy to help, click here to contact me.

Cardstock Cuts for this project:

  • Petal Pink – 4 1/4″ x 11″ scored at 5 1/2″ (card base), 4 1/4″ x 5 1/2″ (embossed panel), 3/4″ x 4″ (label)
  • Whisper White – 4″ x 5 1/4″ (inside panel), 3 1/2″ x 4 1/2″ (tulip panel)
  • Parisian Blossoms DSP – 4″ x 3 1/2″, 1/2″ x 4″ (inside strip)
  • Thick Whisper White – 4″ x 3 1/2″

Stampin’ Up! products used in this project: