Stampin’ Up! Round We Go with Wildflower Birthday Card

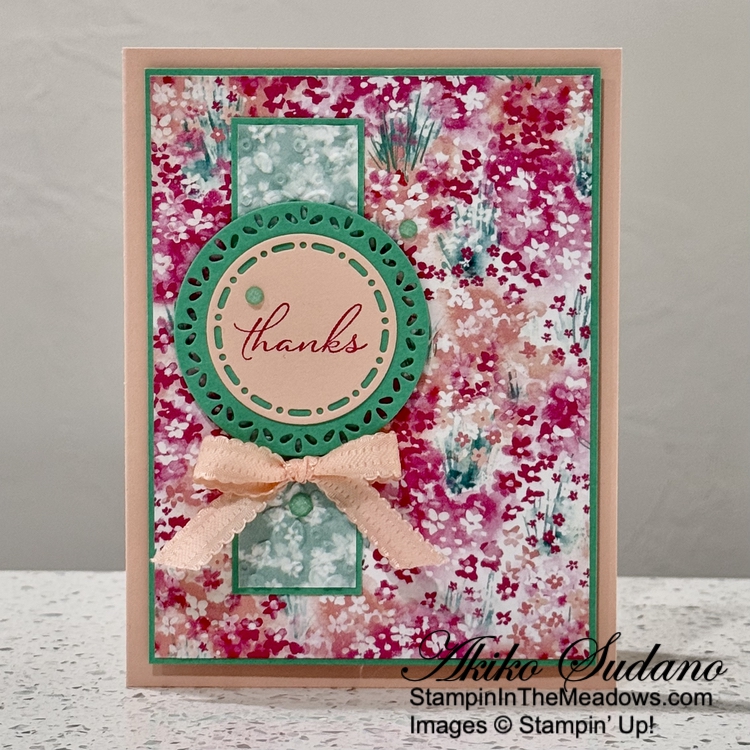
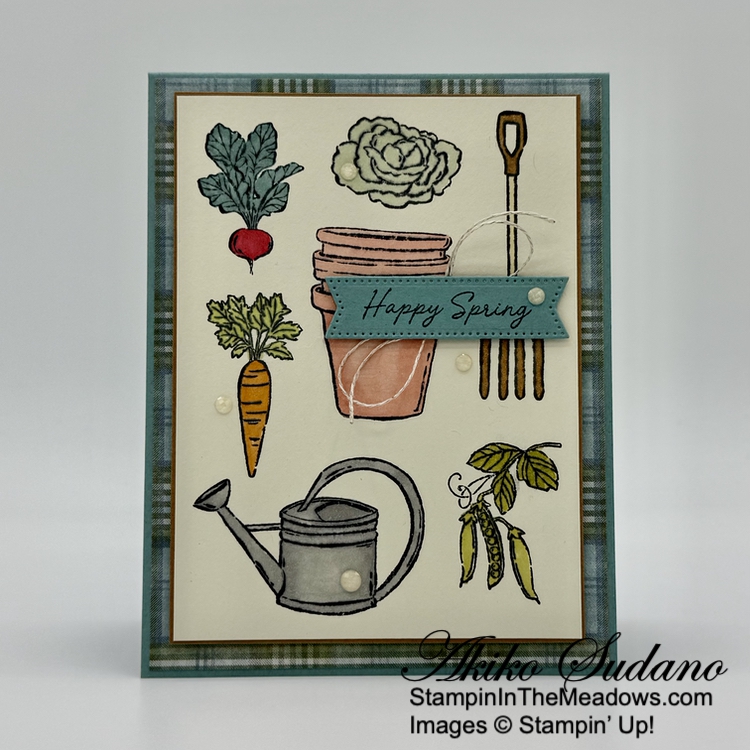
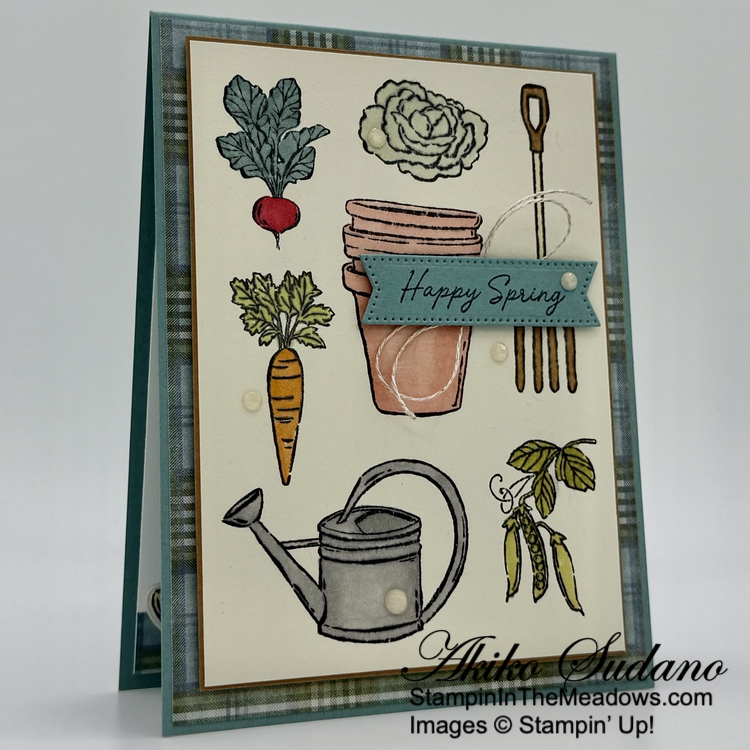
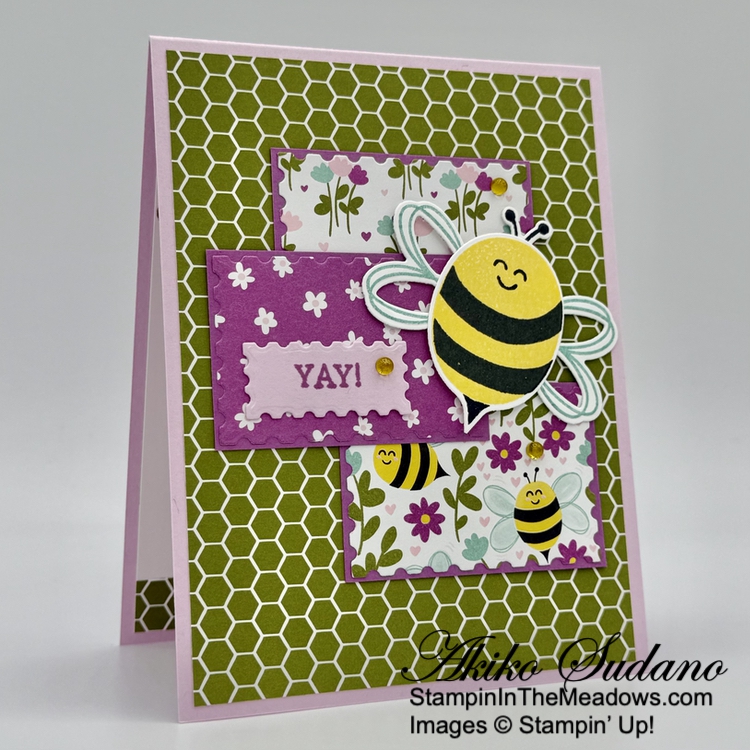
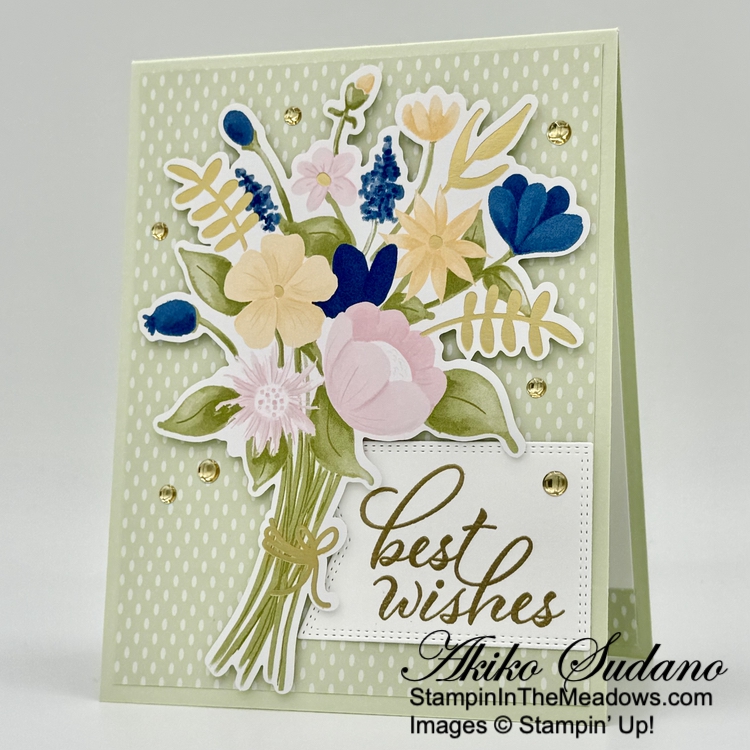
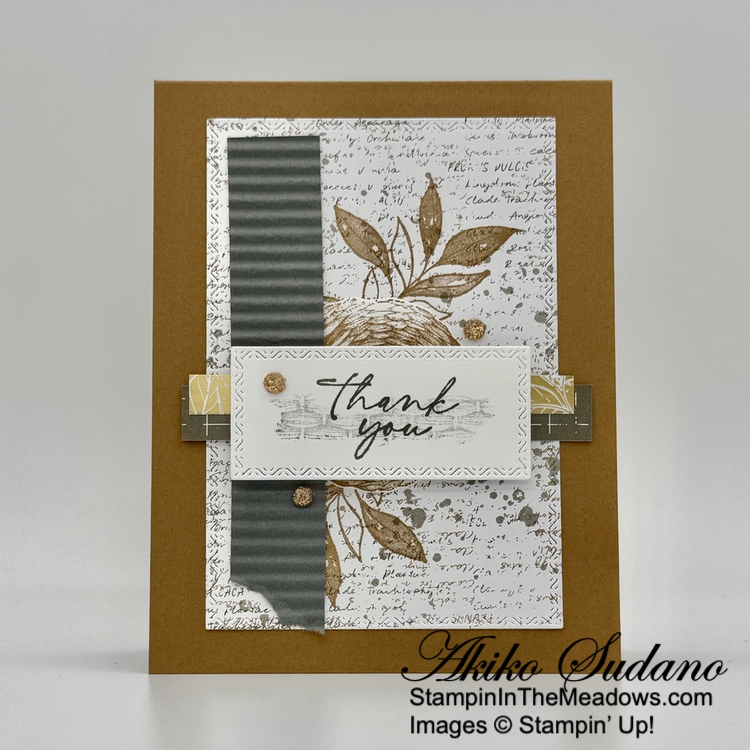
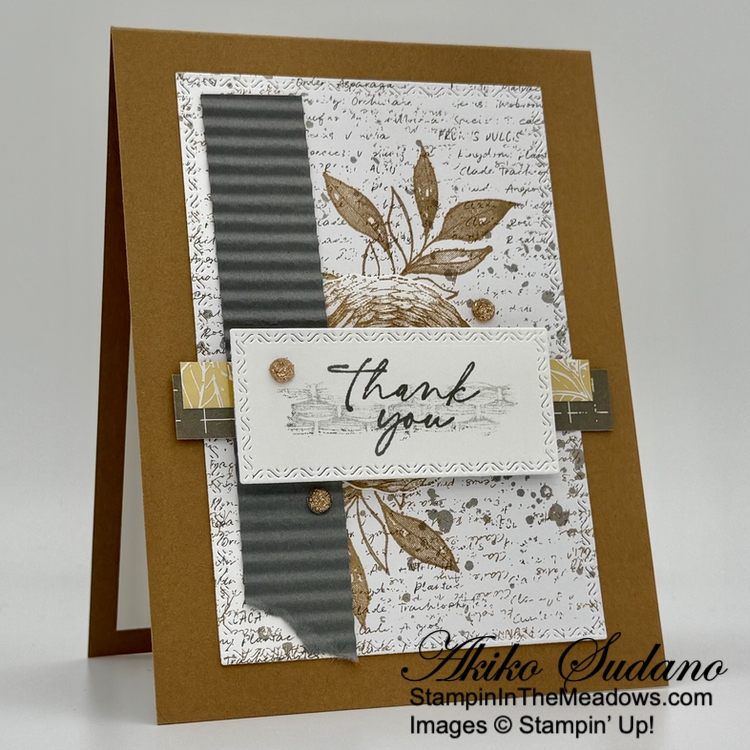
Good Morning! Here is a quick birthday card made with the pretty sentiments from the Stampin’ Up! Round We Go stamp set and the beautiful Wildflower Birthday specialty designer series paper. You can find the products I used at the bottom of my post along with the card stock sizes.

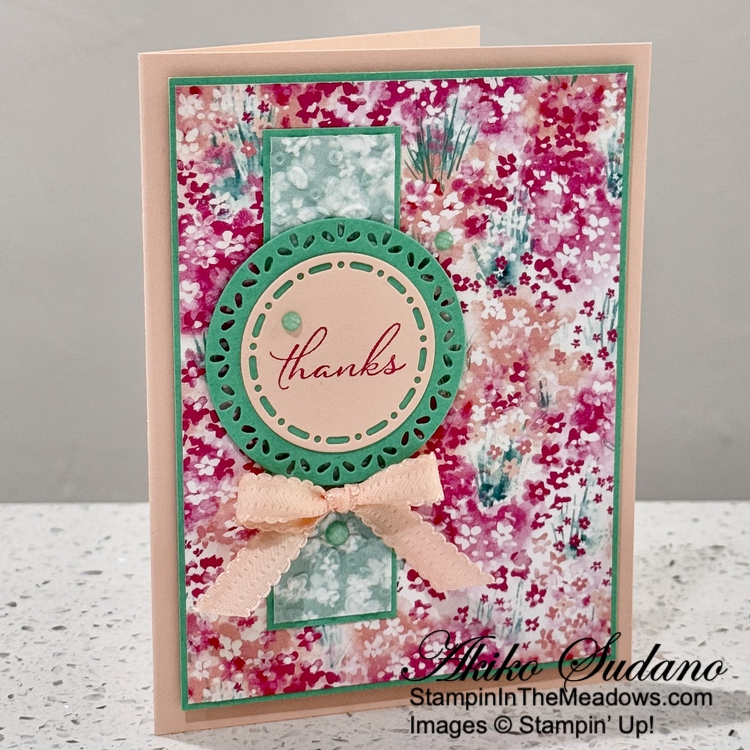
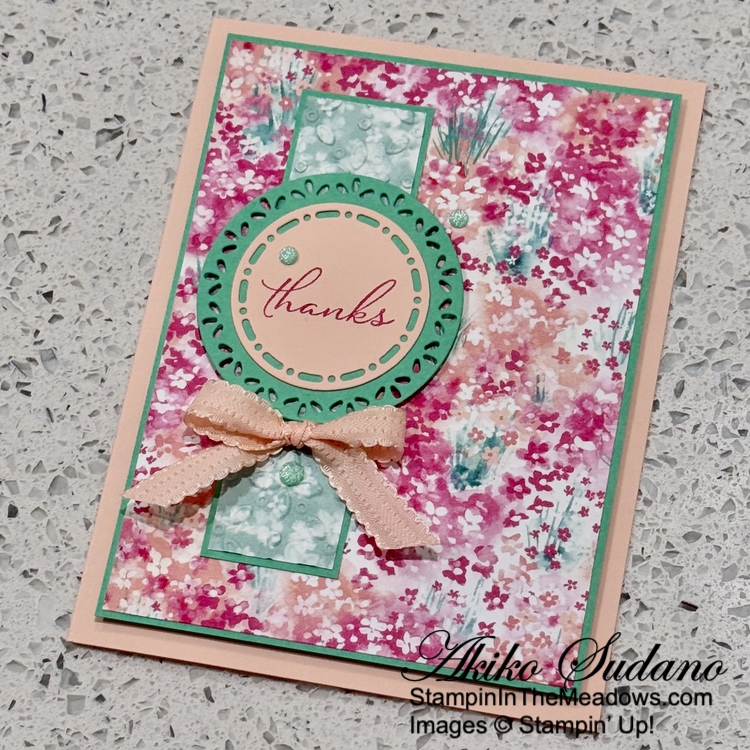
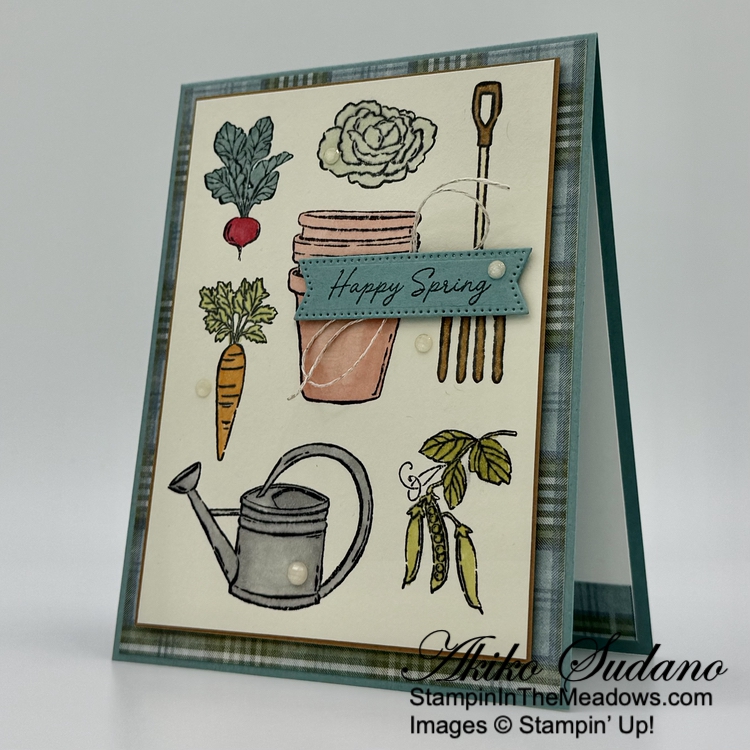
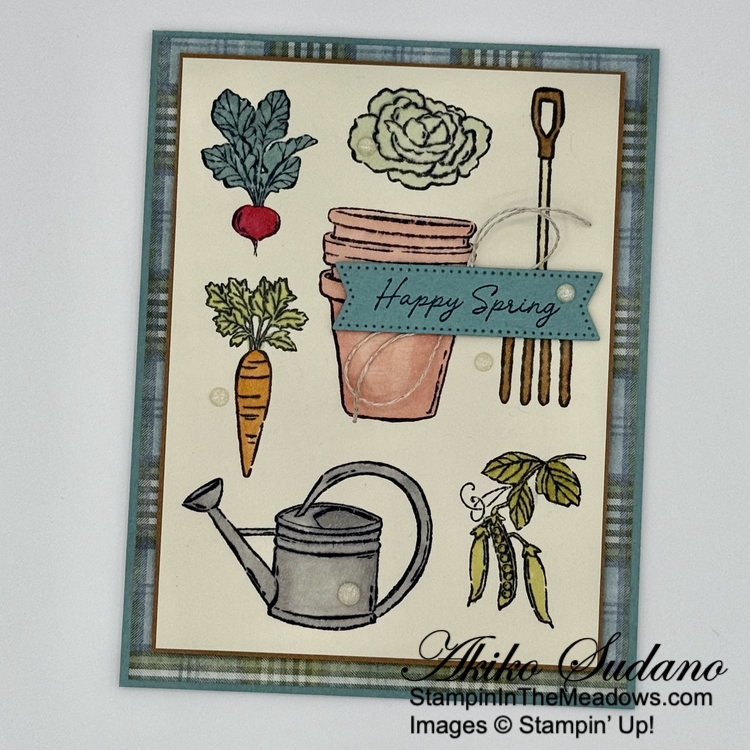
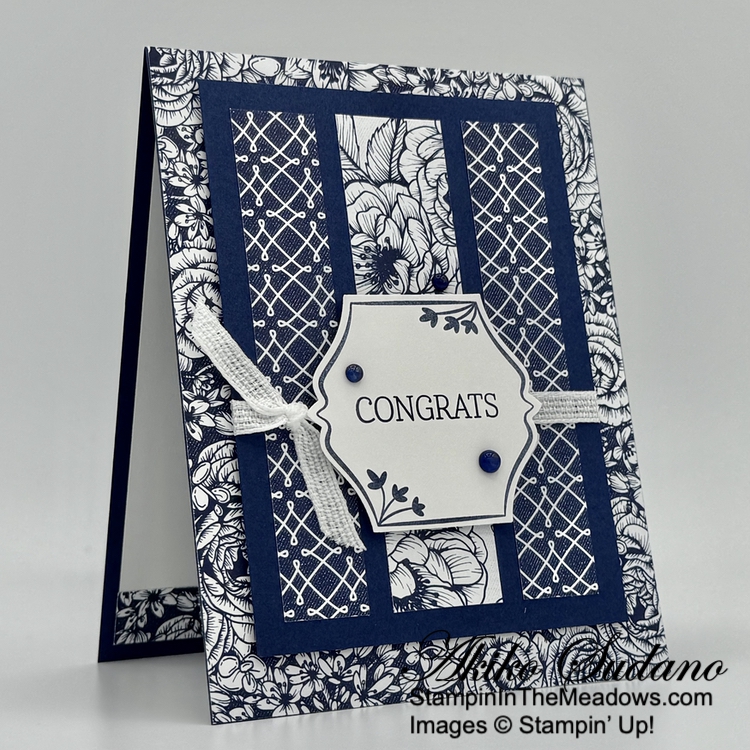
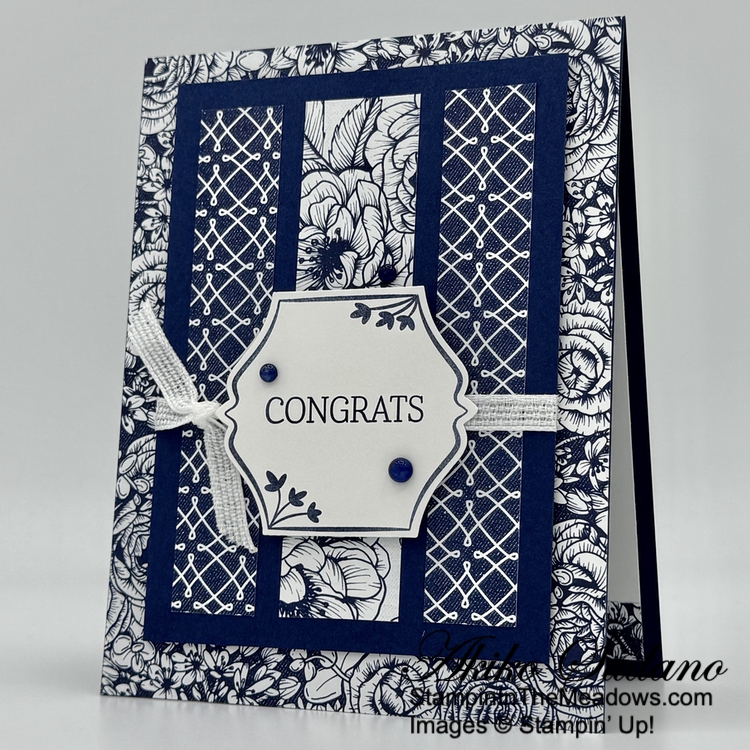
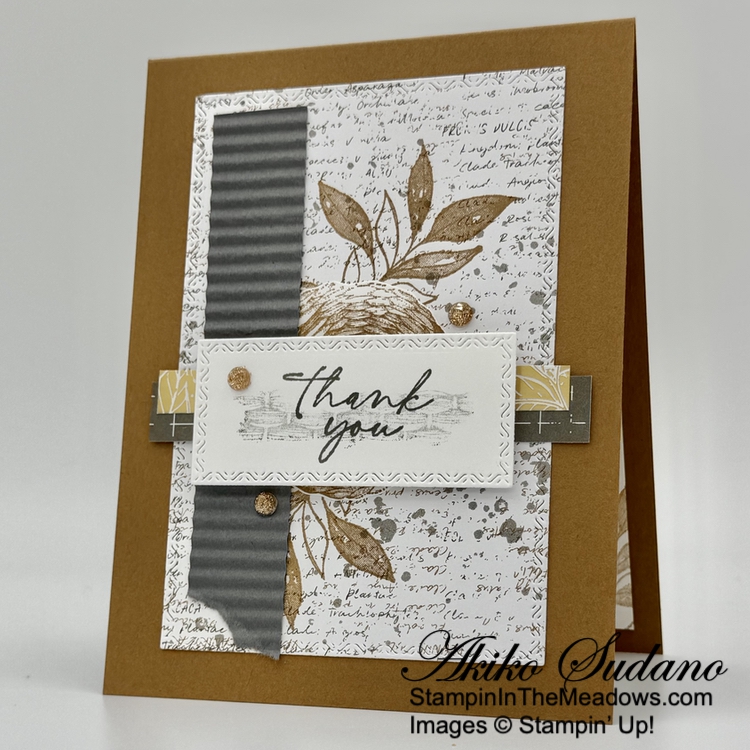
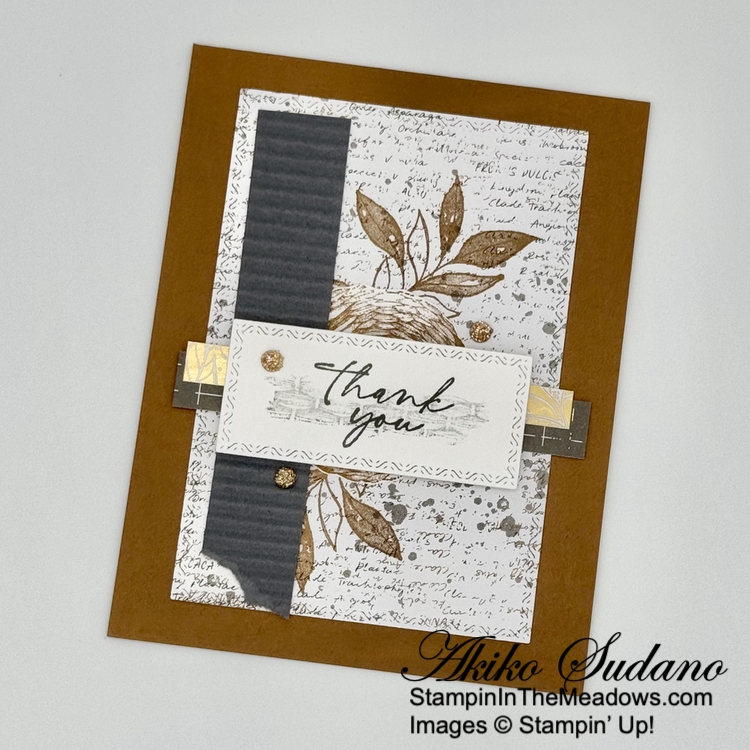
I adhered a Peach Pie panel of the beautiful Wildflower Birthday specialty designer series paper to the side of a floral panel with gold foil accents. I adhered the layered panel to a Night of Navy mat and popped it on the front of a Pretty In Pink card base with dimensionals.

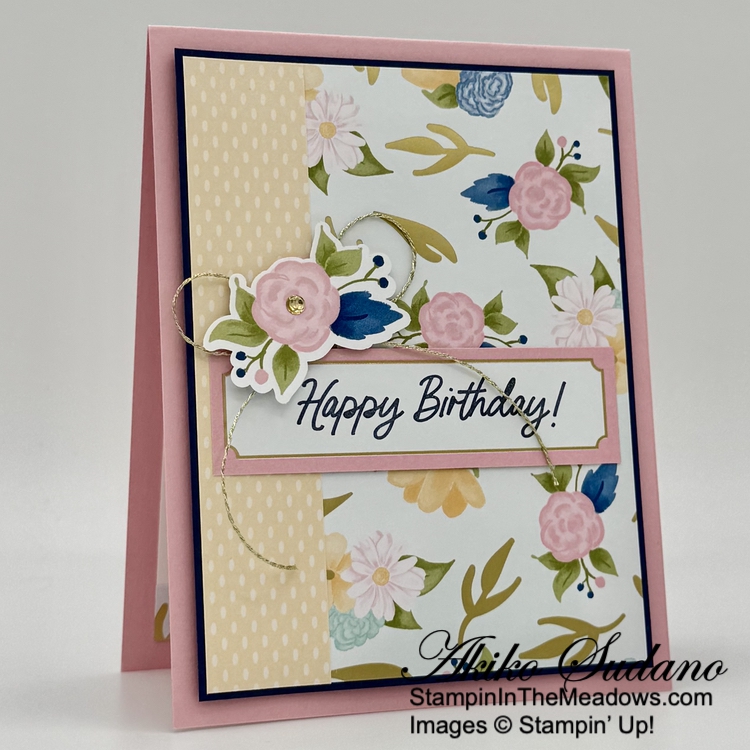
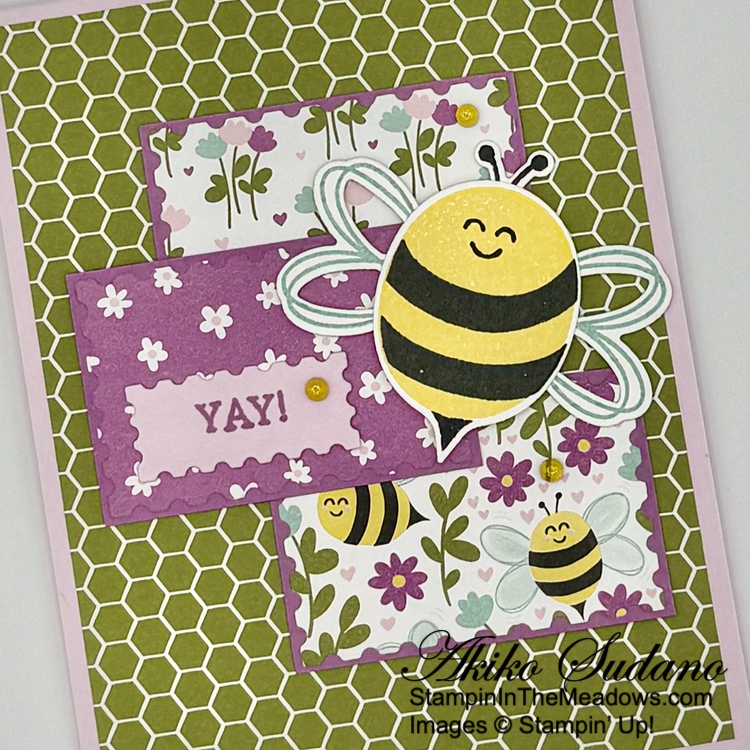
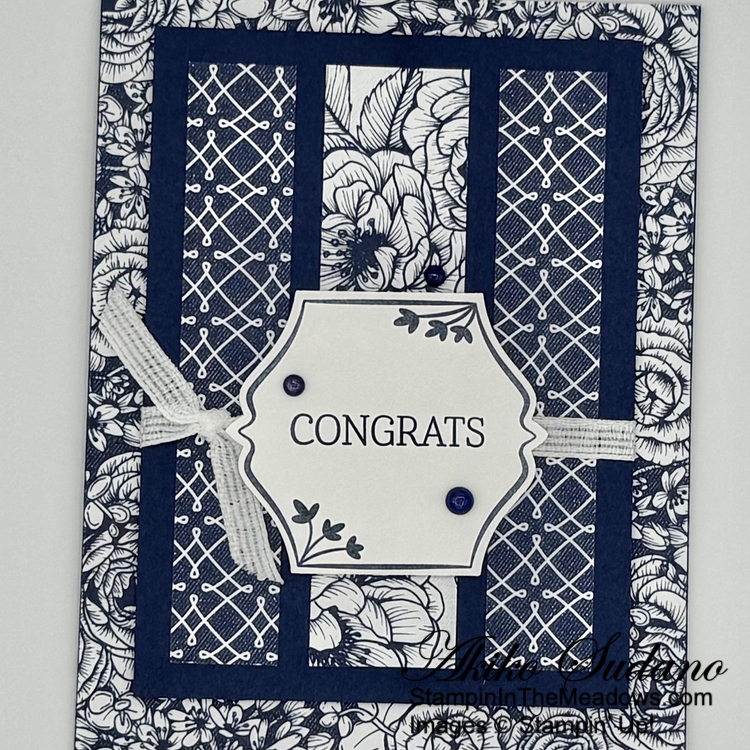
I stamped the sentiment from the Stampin’ Up! Round We Go stamp set using Night of Navy Ink on one of the label panels of the Wildflower Birthday specialty DSP and adhered it to the card with glue dots.

I used gold trim to make a bow and adhered it with a glue dot and adhered one of the small floral cut outs from the Wildflower Birthday specialty DSP with dimensionals. I finished with a gold dot in the center of the flower.

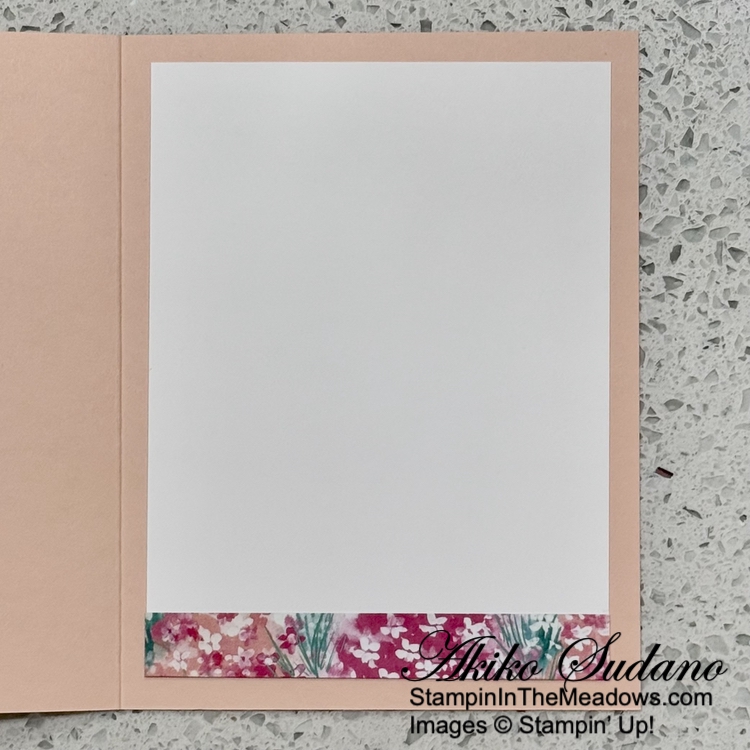
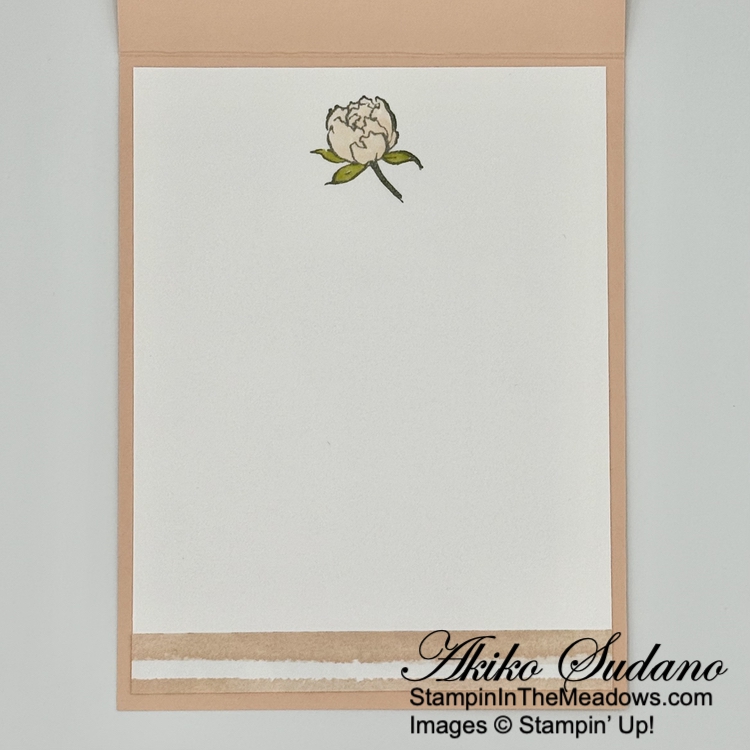
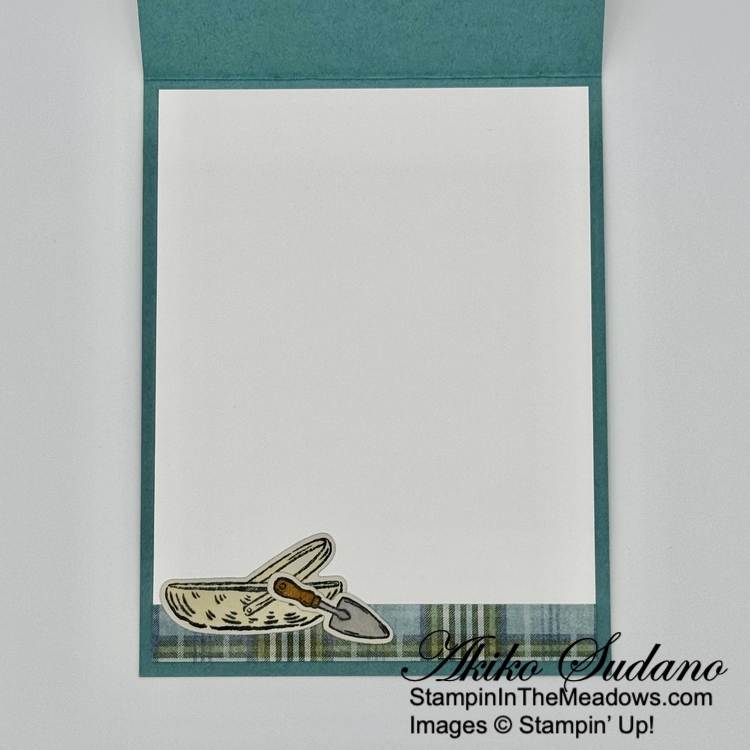
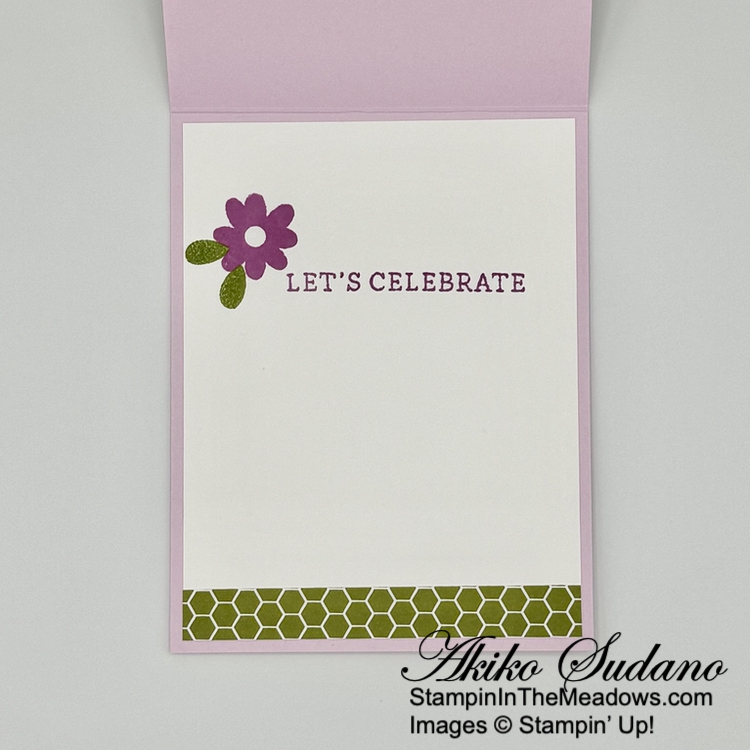
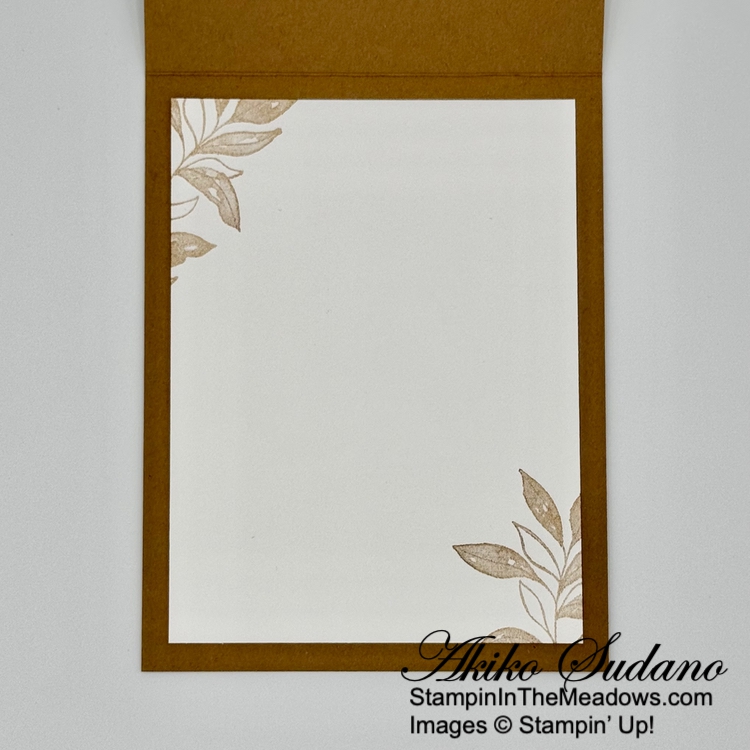
For the inside panel, I stamped the the sentiment from the Stampin’ Up! round We Go stamp set using Night of Navy ink on a Basic White panel. I adhered a tiny flower to the top of the panel and trimmed the bottom with DSP. I adhered the panel to the inside of the card with Stampin’ Seal.

I love the birthday sentiments from the Stampin’ Up! Round We Go stamp set – they are so festive and go with anything. And the Wildflower Birthday designer series paper is just beautiful!


If you need any stamping supplies, I’d be very happy to be your Demonstrator.  Just click on the Shop Now Button on the right side of the screen to go directly to my Online store or contact me if you have any questions.  Happy Stamping!

Thanks for stopping by and have a great day!

Akiko

  • Visit my online store here
  • See the current Stampin’ Up! Last Chance items here
  • Have any questions? I’d be happy to help, click here to contact me.

Cardstock Cuts for this project:

  • Pretty In Pink – 4-1/4″ x 11″ card base scored at 5-1/2″
  • Night of Navy – 3-7/8″ x 5-1/8″ (front mat)
  • Basic White – 3-3/4″ x 5-1/4″ (inside panel)
  • Wildflower Birthday specialty DSP – 1″ x 5″ (side stripe), 3-3/4″ x 5″ (floral background), 1/2″ x 3-3/4″ (inside trim), medium bouquet, small bouquet, label

Stampin’ Up! products used in this project:


Stampin’ Up! Poised Peony Hello Card for the Happy Inkin’ Thursday Blog Hop

Good Morning and welcome to the Happy Inkin’ Thursday Blog Hop! The Stampin’ Up! Poised Peony stamp set from the current Annual Catalog has pretty flowers and sentiments and I used it along with a striped pattern from the Mixed Media Florals designer series paper to make a simple Hello card for today. You can find the supplies I used along with card stock cuts at the bottom of my post.

We have a fun sketch challenge this week:

I adhered a panel of Mixed Media Florals designer series paper to a Basic White mat and popped it onto the front of a Petal Pink card base with dimensionals.

I stamped the sentiment from the Stampin’ Up! Poised Peony stamp set using Smoky Slate ink on Petal Pink and cut it out with one of the circle dies from the Spotlight On Nature dies. I adhered it to the card with liquid glue. I stamped the medium sized flower from the Stampin’ Up! Poised Peony stamp set using Smoky Slate ink and colored it with the Petal Pink and Old Olive Stampin’ Blends. I cut it out with another, smaller circle die and adhered it to the card with dimensionals.

I used the small butterfly die from the Sketched Butterflies dies to cut Gray Granite card stock, gently turned the wings up and adhered it to the card with a rolled up glue dotstuck to it’s body. I finished the card with a small white bow and Petal Pink dots.

For the inside of the card, I stamped the small flower from the Stampin’ Up! Poised Peony stamp set using Smoky Slate ink at the top of a Basic White panel. I colored it with Petal Pink and Old Olive Stampin’ Blends and trimmed the bottom with DSP. I adhered the panel to the inside of the card with Stampin’ Seal.

The Stampin’ Up! Poised Peony stamp set is simple with pretty flowers and sentiments.

On with the Hop! Click on the Next Blog button to move forward to see the beautiful project Karen Ksenzakovic has created.

If you get lost along the way, here are the participants for the hop:


If you need any stamping supplies, I’d be very happy to be your Demonstrator.  Just click on the Shop Now button on the right side of the screen to go directly to my online store or contact me if you have any questions. 

Thanks for stopping by and Happy Stamping!

Akiko

  • Visit my online store here
  • See the current Stampin’ Up! Last Chance items here
  • Have any questions? I’d be happy to help, click here to contact me.

Cardstock Cuts for this project:

  • Petal Pink – 4-1/4″ x 11″ card base, scored at 5-1/2″, 3″ x 3″ (die cut circle)
  • Gray Granite – 1″ x 4-1/2″ (die cut butterfly)
  • Basic White – 4″ x 5-1/4″ (inside panel), 3-7/8″ x 5-1/8″ (front mat), 2-1/2″ x 2-1/2″ (die cut circle)
  • Mixed Media Florals DSP – 3-3/4″ x 5″ (front background), 1/2″ x 4″ (inside trim)

Stampin’ Up! products used in this project:

Stampin’ Up! Memorable Blooms Thank You Card for the Happy Inkin’ Thursday Blog Hop

Good Morning and welcome to the Happy Inkin’ Thursday Blog Hop! The Stampin’ Up! Memorable Blooms bundle pretty floral stamp and die bundle with pretty sentiments and I used used it with the pretty Mixed Media floral designer series paper to make today’s thank you card. You can find the supplies I used along with card stock cuts at the bottom of my post.

We have a theme challenge this week and it was easy for me as I love floral cards.

I embossed a Shy Shamrock panel of Mixed Media Florals designer series paper with the Dashing Designs 3D embossing folder and adhered it to the side of a floral panel of the DSP, I adhered the layered panel to the front of a Calypso coral card base.

I stamped the sentiment from the Stampin’ Up! Memorable Blooms stamp set using Shy Shamrock ink on Basic White and cut it out with the octagon die. I adhered it to the card with liquid glue. I cut the leaf sprig from Old Olive and cut it in two. I adhered the two sprigs to the card with glue dots.

I stamped the large floral spray from the Stampin’ Up! Memorable Blooms stamp set using Memento Tuxedo Black ink on Basic White and colored it with light Calypso Coral, light Daffodil Delight, light Shy Shamrock, light Old Olive and light Shaded Spruce Stampin’ Blends. I cut it out with the coordinating die and popped it on the card with dimensionals. I finished the card with a Daffodil Delight bow and Shaded Spruce dots.

I left the inside of the card simple, trimming the bottom of a Basic White panel with DSP and adhering the panel to the inside of the card with Stampin’ Seal.

The the flowers in the Stampin’ Up! Memorable Blooms are so pretty and are easy to color in any color palette. And the beautiful Mixed Media Florals designer series paper goes with so many floral stamp sets!

On with the Hop! Click on the Next Blog button to move forward to see the beautiful project Karen Ksenzakovic has created.

If you get lost along the way, here are the participants for the hop:


If you need any stamping supplies, I’d be very happy to be your Demonstrator.  Just click on the Shop Now button on the right side of the screen to go directly to my online store or contact me if you have any questions. 

Thanks for stopping by and Happy Stamping!

Akiko

  • Visit my online store here
  • See the current Stampin’ Up! Last Chance items here
  • Have any questions? I’d be happy to help, click here to contact me.

Cardstock Cuts for this project:

  • Calypso Coral – 4-1/4″ x 11″ card base, scored at 5-1/2″
  • Old Olive – 1-3/4″ x 4-1/4″ (die cut leaves)
  • Basic White – 4″ x 5-1/4″ (inside panel), 3″ x 4-1/2″ (die cut flowers), 3-3/4″ x 3-3/4″ (die cut octagon)
  • Mixed Media Florals DSP – 4″ x 5-1/4″ (front background), 1/2″ x 4″ (inside trim), 1″ x 5-1/4″ (embossed strip)

Stampin’ Up! products used in this project:

Stampin’ Up! Storybook Garden Patch for the Inkin’ Krew Blog Hop

Good Morning! Welcome to the March Inkin’ Krew Team Blog Hop! The theme for this month’s hop is “Celebrate Spring” and I used the Stampin’ Up! Storybook Garden Patch bundle to make a Happy Spring card. The fun garden tools and veggies make me excited to clean up my garden and plant new things in the dirt! You can find the supplies I used along with card stock cuts at the bottom of my post.

I adhered a panel of Timeless Plaid 6″ x 6″ designer series paper to the front of a Lost Lagoon card base with liquid glue.

I stamped the veggies and tools from the Stampin’ Up! Storybook Garden Patch stamp set using Memento Tuxedo Black ink on Basic Beige. In order to get the veggies and tools lined up, I arranged most of them (everything but the carrot) on a single large block and stamped on typing paper make sure I had the arrangement just right (I test stamped several times) and filled in with the carrot afterward. Then I colored each with Stampin’ Blends. Here are the colors I used:

  • Radish – light Pretty Peacock and light Real Red
  • Lettuce – dark Soft Sea Foam
  • Pitchfork – light Crumb Cake and light Pecan Pie
  • Carrot – light Granny Apple Green and light Pumpkin Pie
  • Clay Pots – light Calypso Coral
  • Watering Can – light Smoky Slate
  • Peas – light Old Olive

I adhered the stamped panel to a Pecan Pie mat and popped it on the card front with dimensionals.

I stamped the pretty sentiment from the Storybook Friends stamp set using Memento Tuxedo Black ink on Lost Lagoon and cut it out with a banner die from the Stylish Shapes dies. I made a Linen Thread bow and adhered it to the back of the label before popping the label on the card with dimensionals. I finished the card with Basic Beige shimmer gems..

For the inside of the card, I stamped the basket and shovel from the Stampin’ Up! Storybook Garden Patch stamp set using Memento Tuxedo Black ink on Basic Beige. I colored them with the light Crumb Cake, light Pecan Pie and light Smoky Slate Stampin’ Blends and cut them out with the coordinating die. I trimmed the bottom of a Basic White panel with DSP and adnered the die cuts with liquid glue. I adhered the panel to the inside of the card with Stampin’ Seal.

I was inspired by a card in the current Mini Catalog for the layout of this card because I just love all these cute garden images from the Stampin’ Up! Storybook Garden Patch bundle. And I think the weather is warming up enough to begin Spring garden clean up – Let the planting begin!

On With The Hop! Click on the Next Blog button to move forward to Tara Carpenter’s project or click the Previous Blog button to move back to see the project that Mary Deatherage created.

If you get lost along the way, here are the participants for the hop:


If you need any stamping supplies, I’d be very happy to be your Demonstrator.  Just click on the Shop Now button on the right side of the screen to go directly to my online store or contact me if you have any questions.  Happy Stamping!

Thanks for stopping by and have a great week!

Akiko

  • Visit my online store here
  • See the current Stampin’ Up! Last Chance items here
  • Have any questions? I’d be happy to help, click here to contact me.

Cardstock Cuts for this project:

  • Lost Lagoon – 4-1/4″ x 11″ card base, scored at 5-1/2″,1″ x 3″ (label)
  • Basic Beige 3-5/8″ x 4-7/8″ (stamped panel), 1″ x 4″ (inside die cuts)
  • Pecan Pie – 3-3/4″ x 5″ (stamped panel mat)
  • Basic White – 4″ x 5-1/4″ (inside panel)
  • Timeless Plaid 6″ x 6″ DSP – 4-1/8″ x 5-3/8″ (front background), 1/2″ x 4″ (inside trim)

Stampin’ Up! products used in this project:

Stampin’ Up! Meant To Bee Celebrate Card

Good Morning! The Stampin’ Up! Meant To Bee bundle is part of the January Scrapbooking Brochure release and has cute bees, flowers and octagon dies. I used the large bee with the Cute As Can Bee designer series paper and Perennial Postage dies for an any occasion Celebrate card. You can find the products I used at the bottom of my post along with the card stock sizes.

My card was inspired by the cute sketch in the current Sunday Stamps Challenge – SSC 355 Layered Up:

I adhered a panel of Cute As Can Bee designer series paper to the front of a Bubble Bath card base. I cut three floral panels of the DSP with a rectangular Perennial Postage die and adhered them to Petunia Pop mats before adhering them to the card front.

I stamped the large bee from the Stampin’ Up! Meant To Bee stamp set using Daffodil Delight and Memento Tuxedo Black inks on Basic White. I stamped the Wings using Pool Party ink and cut them all out (including the antenna) with the coordinating dies. I ahdered the wings and antenna to the back of the bee and popped it on the card with dimensionals.

I stamped the sentiment from the Simply Said stamp set using Petunia Pop ink on Bubble Bath card stock and cut it out with the small Perennial Postage die. I adhered it to the card with glue dots and finished the card with yellow gems.

For the inside panel, I stamped the sentiment from the Simply Said stamp set using Petunia Pop ink on Basic White. I stamped the flower from the Stampin’ Up! Meant To Bee stamp set using Petunia Pop ink and leaves using Old Olive. I trimmed the bottom with DSP and adhered the panel to the inside of the card with Stampin’ Seal.

The Stampin’ Up! Meant To Bee bundle is a wonderful and happy set and goes well with the Cute As Can Bee DSP. With it’s bright, cheerful colors, these are perfect for Spring cards.


If you need any stamping supplies, I’d be very happy to be your Demonstrator.  Just click on the Shop Now Button on the right side of the screen to go directly to my Online store or contact me if you have any questions.  Happy Stamping!

Thanks for stopping by and have a great day!

Akiko

  • Visit my online store here
  • See the current Stampin’ Up! Last Chance items here
  • Have any questions? I’d be happy to help, click here to contact me.

Cardstock Cuts for this project:

  • Bubble Bath – 4-1/4″ x 11″ card base scored at 5-1/2″, 1″ x 2″ (label)
  • Petunia Pop – three 1-5/8″ x 2-7/16″ (DSP mats)
  • Basic White – 4″ x 5-1/4″ (inside panel), 2″ x 4-1/2″ (bee die cuts)
  • Cute As Can Bee DSP – 4″ x 5-1/4″ (front background), three 1-3/4″ x 2-1/2″ panels (postage stamp die cuts), 1/2″ x 4″ (inside trim)

Stampin’ Up! products used in this project:


Stampin’ Up! Wildflower Birthday for the Happy Inkin’ Thursday Blog Hop

Good Morning and welcome to the Happy Inkin’ Thursday Blog Hop! The Stampin’ Up! Wildflower Birthday specialty designer series paper is a beautiful patterned paper pack with gold foil accents and pretty birthday floral die cuts. I used a floral bouquet die cut and background paper with the pretty sentiment from the Layering Leaves stamp set for a best wishes card. You can find the supplies I used along with card stock cuts at the bottom of my post.

We have a pretty color challenge this week and most of the colors appear in the designer series paper:

I adhered a panel of Stampin’ Up! Wildflower Birthday specialty designer series paper to the front of a Soft Sea Foam card base with liquid glue.

I stamped the sentiment from the Layering Leaves stamp set using Versamark ink on Basic White and sprinkled it with gold embossing powder. I shook off the excess and heated the powder with my heat tool until it was bright and shiny. I cut out the sentiment with banner die from the Nested Essentials dies and adhered it to the card with glue dots.

I punched out the beautiful floral bouquet from the Stampin’ Up! Wildflower Birthday specialty DSP and popped it on the card with dimensionals. I finished the card with gold dots.

For the inside, I adhered a flower, gold sprig and leaf from the Stampin’ Up! Wildflower Birthday specialty DSP to the corner of a Basic White panel with liquid glue. . I trimmed the bottom with DSP and adhered the panel to the inside of the card with Stampin’ Seal.

So simple and pretty! The designs from the Stampin’ Up! Wildflower Birthday specialty DSP are so pretty and the die cuts make cardmaking so easy! There are designs for flowers, cakes, streamers and balloons – everything you need to celebrate a birthday or any special occasion.

On with the Hop! Click on the Next Blog button to move forward to see the beautiful project Karen Ksenzakovic has created.

If you get lost along the way, here are the participants for the hop:


If you need any stamping supplies, I’d be very happy to be your Demonstrator.  Just click on the Shop Now button on the right side of the screen to go directly to my online store or contact me if you have any questions. 

Thanks for stopping by and Happy Stamping!

Akiko

  • Visit my online store here
  • See the current Stampin’ Up! Last Chance items here
  • Have any questions? I’d be happy to help, click here to contact me.

Cardstock Cuts for this project:

  • Soft Sea Foam – 4-1/4″ x 11″ card base, scored at 5-1/2″
  • Basic White – 4″ x 5-1/4″ (inside panel), 2-1/2″ x 3″ (label)
  • Wildflower Birthday specialty DSP – 4-1/4″ x 5-1/2″ (front background), 1/2″ x 4″ (inside trim), large bouquet, small flower, leaf, gold sprig

Stampin’ Up! products used in this project:

Stampin’ Up! Bright Borders Congratulations Card

Good Morning! The Stampin’ Up! Bright Borders stamp set is a pretty all occasion stamp stamp set that coordinates with the new To The Point label punch. I used it with the Serene Love designer series paper to make a simple blue and white congratulations card. You can find the products I used at the bottom of my post along with the card stock sizes.

I adhered a panel of Serene Love designer series paper to the front of a Night of Navy card base with liquid glue.

I cut three strips of the Serene Love DSP and adhered them to a Night of Navy panel, a floral strip in the middle and graphic strips on the ends. I wrapped the panel with white ribbon (available March 4 with the new Online Exclusives) and tied a knot. I adhered the panel to the card front with dimensionals.

I stamped the frame from the Stampin’ Up! Bright Borders stamp set using Night of Navy ink on Basic White. I stamped the sentiment in the middle in Night of Navy and punched the label out with the To The Point label punch. I adhered the label to the card with dimensionals and finished it with Night of Navy dots.

For the inside panel, I stamped the sentiment from the Stampin’ Up! Bright Borders stamp set using Night of Navy ink on a Basic White panel. I trimmed the bottom with DSP and adhered it to the inside of the card with Stampin’ Seal.

I love that the Stampin’ Up! Bright Borders coordinates with the To The Point label punch. I think a stamped border is a great, easy way to dress up a punched label and the sentiments are so versatile. This simple design really shows off the different designs of the pretty Serene Love designer series paper which is a wonderful deal on the Last Chance Products list, so be sure to check it out.


Final Days For Sale-A-Bration!!

Sale-A-Bration is the biggest Stampin’ Up! promotion of the year and it’s coming to an end. The best part of Sale-A-Bration is that you earn FREE items for every $60 worth of products you purchase. There are items that you get for $60 and there are items you can get for $120. All the details are in the Sale-A-Bration Brochure. Click on the picture of the brochure below to download a copy to view the items and details.

Another benefit of Sale-A-Bration is when you host a workshop with sales over $300 or have an individual order over $300, you get to choose an additional $30 worth of products from the Stampin’ Up! catalog or Online Store for FREE!

And Sale-A-Bration is the best time to join Stampin’ Up! as a new Demonstrator. During Sale-A-Bration, new Demonstrators who purchase a starter kit by choosing $125 worth of products for only $99 (includes shipping) have two FREE bonus options to add to your starter kit.

  • Option 1: Your choice of TWO marker sets from our Stampin’ Write Marker Assortments (Brights, Neutrals, Regals, Subtles), PLUS the Handmade Designs stamp set, a beautiful stamp set exclusively designed to work with them.
  • Option 2: Your Choice of an additional $30 in FREE products

Sale-A-Bration runs through February 28, 2025. Visit my Online Store to start shopping now.


Current Host Code: CCXFTCJQ

Use this host code when you order $50 or more and receive a Thank You gift from me!  The free gift is your choice of any item currently available valued up to $10.00.

If your order is over $150, please do not use the host code since you’ll receive your own Host Dollars plus I’ll still send you the Thank You gift!  This host code can be used by anyone, no club or commitment required. Let me know if you have any questions.


If you need any stamping supplies, I’d be very happy to be your Demonstrator.  Just click on the Shop Now Button on the right side of the screen to go directly to my Online store or contact me if you have any questions.  Happy Stamping!

Thanks for stopping by and have a great day!

Akiko

  • Visit my online store here
  • See the current Stampin’ Up! Last Chance items here
  • Earn FREE Stampin’ Up! products through my Wildflower Frequent Shopper Program – my way of saying thank you to my online frequent shopper customers.
  • Have any questions? I’d be happy to help, click here to contact me.

Cardstock Cuts for this project:

  • Night of Navy – 4-1/4″ x 11″ card base scored at 5-1/2″, 3-1/2″ x 4-3/4″ (center panel)
  • Basic White – 4″ x 5-1/4″ (inside panel), 2-1/2″ x 2-3/4 (label)
  • Serene Love DSP – 4-1/4″ x 5-1/2″ (front background), 1/2″ x 4″ (inside trim), two 3/4″ x 4-1/4″ strips (side strips), 1″ x 4-1/4″ (center strip)

Stampin’ Up! products used in this project:


Stampin’ Up! Textured Notes Sneak Peek

Good Morning! Next week a new set of Online Exclusives will be released on March 4 and one of the new bundles is the Stampin’ Up! Textured Notes bundle. This is stamp and die bundle featuring a stamp set with wonderful texture elements and sentiments along with a fabulous set of rectangle dies with fancy textured edges. I used the bundle with the Nature’s Sweetness specialty designer series paper for today’s card. You can find the currently available products I used at the bottom of my post along with the card stock sizes. And you can find a link further down to download a PDF with all the details of the Botanical Textures suite that includes this awesome new bundle.

I stamped a panel of Nature’s Sweetness specialty designer series paper with the large leaf sprig from the pretty Stampin’ Up! Textured Notes stamp set using Pecan Pie ink. I stamped the image twice so that the image flowed on a diagonal across the panel. I cut it out with one of the awesome rectangle dies and adhered it to the front of a Pecan Pie card base.

I stamped the basket from the Stampin’ Up! Textured Notes stamp set using Pecan Pie ink on Basic White. I fussy cut it out with my paper snips and adhered it to the card with liquid glue. I tore the end of a strip of Pebbled Path card stock and embossed it with the new Mini Corrugated 3D embossing folder. I adhered it to the card with liquid glue. I adhered two strips of Nature’s Sweetness specialty DSP to the card with glue dots.

I stamped the woven image from the Stampin’ Up! Textured Notes stamp set using stamped off Pebbled Path ink on Basic White. I stamped the sentiment in full strength Pebbled Path and cut it out with a rectangle die – isn’t the edge just gorgeous!

For the inside panel, I stamped the leaf from the Stampin’ Up! Textured Notes stamp set using stamped off Pecan Pie ink in the corners of a Basic White panel and adhered it to the inside of the card with Stampin’ Seal.

The pretty Stampin’ Up! Textured Notes bundle will be available on March 4 with the new release of Online Exclusives. Click on the picture below to download a flyer with details of this bundle and other items in the Botanical Textures Suite Collection.


Last Week For Sale-A-Bration!!

Sale-A-Bration is the biggest Stampin’ Up! promotion of the year. The best part of Sale-A-Bration is that you earn FREE items for every $60 worth of products you purchase. There are items that you get for $60 and there are items you can get for $120. All the details are in the Sale-A-Bration Brochure. Click on the picture of the brochure below to download a copy to view the items and details.

Another benefit of Sale-A-Bration is when you host a workshop with sales over $300 or have an individual order over $300, you get to choose an additional $30 worth of products from the Stampin’ Up! catalog or Online Store for FREE!

And Sale-A-Bration is the best time to join Stampin’ Up! as a new Demonstrator. During Sale-A-Bration, new Demonstrators who purchase a starter kit by choosing $125 worth of products for only $99 (includes shipping) have two FREE bonus options to add to your starter kit.

  • Option 1: Your choice of TWO marker sets from our Stampin’ Write Marker Assortments (Brights, Neutrals, Regals, Subtles), PLUS the Handmade Designs stamp set, a beautiful stamp set exclusively designed to work with them.
  • Option 2: Your Choice of an additional $30 in FREE products

Sale-A-Bration runs through February 28, 2025. Visit my Online Store to start shopping now.


Current Host Code: FYMGA4AN

Use this host code when you order $50 or more and receive a Thank You gift from me!  The free gift is your choice of any item currently available valued up to $10.00.

If your order is over $150, please do not use the host code since you’ll receive your own Host Dollars plus I’ll still send you the Thank You gift!  This host code can be used by anyone, no club or commitment required. Let me know if you have any questions.


If you need any stamping supplies, I’d be very happy to be your Demonstrator.  Just click on the Shop Now Button on the right side of the screen to go directly to my Online store or contact me if you have any questions.  Happy Stamping!

Thanks for stopping by and have a great day!

Akiko

  • Visit my online store here
  • See the current Stampin’ Up! Last Chance items here
  • Earn FREE Stampin’ Up! products through my Wildflower Frequent Shopper Program – my way of saying thank you to my online frequent shopper customers.
  • Have any questions? I’d be happy to help, click here to contact me.

Cardstock Cuts for this project:

  • Pecan Pie – 4-1/4″ x 11″ card base scored at 5-1/2″
  • Pebbled Path – 3/4″ x 5″ (embossed strip)
  • Basic White – 3-3/4″ x 5″ (inside panel), 1-1/2″ x 3 (label), 2″ x 2″ (fussy cut basket)
  • Nature’s Sweetness specialty DSP – 3-1/2″ x 5″ (die cut background), 1/2″ x 3-3/4″ (pebbled path strip), 3/8″ x 3″ (gold foil strip

Stampin’ Up! products used in this project:


Stampin’ Up! Spotlight On Nature Card for the Happy Inkin’ Thursday Blog Hop

Good Morning and welcome to the Happy Inkin’ Thursday Blog Hop! Here is a simple thank you card made with the Stampin’ Up! Spotlight On Nature bundle and the pretty Bloom Impressions Sale-A-Bration designer series paper. You can find the supplies I used along with card stock cuts at the bottom of my post.

We have a sketch challenge this week:

I adhered a panel of Bloom Impressions designer series paper to a Shy Shamrock mat and adhered it to the front of a Petal Pink card base with dimensionals. I embossed a strip of Bloom Impressions DSP with the Eyelet 3D embossing folder and adhered it to a Shy Shamrock mat before adhering it to the card front.

I stamped the sentiment from the Stampin’ Up! Spotlight on Nature stamp set using Melon Mambo ink on Petal Pink card stock. I cut it out with the dashed circle die. I cut the next largest circle from Shy Shamrock and adhered the sentiment with liquid glue. I popped the layered sentiment on the card with dimensionals.

I made a Petal Pink bow and adhered it to the card under the sentiment and finished with Shy Shamrock shimmer gems.

I left the inside panel plain, simply trimming the bottom of a Basic White panel with DSP and adhering it to the inside of the card with Stampin’ Seal.

I only used the sentiment from the pretty Stampin’ Up! Spotlight On Nature stamp set, but the gorgeous dies are one of my favorites. The Bloom Impressions DSP is an item that you can get for FREE with a $60 order during Sale-A-Bration which runs through February 28.

On with the Hop! Click on the Next Blog button to move forward to see the beautiful project Karen Ksenzakovic has created.

If you get lost along the way, here are the participants for the hop:


Current Host Code: FYMGA4AN

Use this host code when you order $50 or more and receive a free gift from me!  The free gift is your choice of any item currently available valued up to $10.00!

If your order is over $150, please do not use the host code since you’ll receive your own Host Dollars plus I’ll still send you the free gift!  This host code can be used by anyone, no club or commitment required. Let me know if you have any questions.


If you need any stamping supplies, I’d be very happy to be your Demonstrator.  Just click on the Shop Now button on the right side of the screen to go directly to my online store or contact me if you have any questions. 

Thanks for stopping by and Happy Stamping!

Akiko

  • Visit my online store here
  • See the current Stampin’ Up! Last Chance items here
  • Earn FREE Stampin’ Up! products through my Wildflower Frequent Shopper Program – my way of saying thank you to my online frequent shopper customers.
  • Have any questions? I’d be happy to help, click here to contact me.

Cardstock Cuts for this project:

  • Petal Pink – 5-1/2″ x 8-1/2″” card base, scored at 4-1/4″, 2″ x 2″ (label)
  • Shy Shamrock – 3-7/8″ x 5-1/8″ (front mat), 1-1/8″ x 4-1/8″ (accent DSP mat)
  • Basic White – 3-3/4″ x5″ (inside panel)
  • Bloom Impressions DSP – 3-3/4″ x 5″ (front background), 1″ x 4″ (accent DSP), 1/2″ x 3-3/4″ (inside trim)

Stampin’ Up! products used in this project:


Stampin’ Up! Celebrate Love Valentine’s Day Cards

Good Morning! The Stampin’ Up! Celebrate Love Mix & Match Ephemera Pack is perfect for Valentine’s Day cards. It has so many pretty die cuts that you can combine in different ways to make Valentines and it even has sentiments so you won’t have to do any stamping. You can find the products I used at the bottom of my post and I’ve embedded card stock cuts in the description of the cards.

For my first card, I used a Basic White note card for my card base and embossed a 3″ x 4-1/2″ panel of Fresh Freesia with the Eyelet 3D embossing folder. I adhered a 2″ x 4-1/4″ panel of Lemon Lime Twist Bright & Beautiful 6″ x 6″ DSP to the side. I adhered the white lattice and flower from the Stampin’ Up! Celebrate Love ephemera pack to the card with glue dots. I broke apart a white nested heart and adhered the larger hearts to the card with glue dots. I adhered the tulip die cut heart to a Melon Mambo heart and popped it on the center and finished with a sentiment from the Stampin’ Up! Celebrate Love ephemera pack and three clear dots.

I used leftover Christmas DSP for my next card – a 2-3/4″ x 2-3/4″ panel of Take A Bow 6″ x 6″ DSP adhered to the front of a Real Red 3″ x 3″ card front (3″ x 6″ card base, scored at 3″). I adhered the two large white heart die cuts from the Stampin’ Up! Celebrate Love ephemera pack to the card with tiny dots of liquid glue and popped a sentiment on top with dimensionals. I wrapped the fold with Real Red and White baker’s twine and made a bow and finished with three Cherry Cobbler dots. On the inside I adhered a 2-1/2″ x 2-1/2″ Basic White panel.

I scored and burnished a 3″ x 6″ panel of Pretty In Pink card stock for my next 3″ x 3″ card. I cut a 2-1/2″ x 2-1/2″ Basic White panel with the second largest Stylish Shapes square die and applied Pretty In Pink ink with a blending brush. I adhered a floral stem from the Stampin’ Up! Celebrate Love ephemera pack with glue dots and the heart and sentiment with dimensionals. I finished the card with Berry Burst tinsel gems and adhered a 2-1/2″ x 2-1/2″ Basic White panel to the inside.

The last card uses a 3″ x 6″ panel of Thick Basic White, scored and burnished at 3″. I die cut a circle from a 2-2/4″ x 2-3/4″ panel of Basic White and applied Granny Apple Green ink with a blending brush. I adhered two white tulip die cuts from the Stampin’ Up! Celebrate Love ephemera pack to two real red hearts and adhered them to the card with glue dots. I popped a little floral spray to the bottom with dimensionals and adhered a sentiment with glue dots. I finished with Old Olive faux glass dots.

I like the 3″ x 3″ card size and there are lots of resources online for making envelopes or purchasing them if you need. Of course you can also make the standard 4-1/4″ x 5-1/2″ card size using the Stampin’ Up! Celebrate Love ephemera pack.

The cutouts in the Stampin’ Up! Celebrate Love Mix & Match Ephemera Pack are so pretty and I love that they come in so many different color palettes! It’s fun to combine the pretty die cuts with each other and other items in your stash and arrange them on your cards. And it’s a quick and easy (and fun) way to make several pretty Valentines.


Sale-A-Bration Is Going On Now!!

Sale-A-Bration is the biggest Stampin’ Up! promotion of the year. The best part of Sale-A-Bration is that you earn FREE items for every $60 worth of products you purchase. There are items that you get for $60 and there are items you can get for $120. All the details are in the Sale-A-Bration Brochure. Click on the picture of the brochure below to download a copy to view the items and details.

Another benefit of Sale-A-Bration is when you host a workshop with sales over $300 or have an individual order over $300, you get to choose an additional $30 worth of products from the Stampin’ Up! catalog or Online Store for FREE!

And Sale-A-Bration is the best time to join Stampin’ Up! as a new Demonstrator. During Sale-A-Bration, new Demonstrators who purchase a starter kit by choosing $125 worth of products for only $99 (includes shipping) have two FREE bonus options to add to your starter kit.

  • Option 1: Your choice of TWO marker sets from our Stampin’ Write Marker Assortments (Brights, Neutrals, Regals, Subtles), PLUS the Handmade Designs stamp set, a beautiful stamp set exclusively designed to work with them.
  • Option 2: Your Choice of an additional $30 in FREE products

Sale-A-Bration runs through February 28, 2025. Visit my Online Store to start shopping now.


Current Host Code: S37YBRUS

Use this host code when you order $50 or more and receive a Thank You gift from me!  The free gift is your choice of any item currently available valued up to $10.00.

If your order is over $150, please do not use the host code since you’ll receive your own Host Dollars plus I’ll still send you the Thank You gift!  This host code can be used by anyone, no club or commitment required. Let me know if you have any questions.


If you need any stamping supplies, I’d be very happy to be your Demonstrator.  Just click on the Shop Now Button on the right side of the screen to go directly to my Online store or contact me if you have any questions.  Happy Stamping!

Thanks for stopping by and have a great day!

Akiko

  • Visit my online store here
  • See the current Stampin’ Up! Last Chance items here
  • Earn FREE Stampin’ Up! products through my Wildflower Frequent Shopper Program – my way of saying thank you to my online frequent shopper customers.
  • Have any questions? I’d be happy to help, click here to contact me.

Stampin’ Up! products used in this project: