Stampin’ Up! Moving Along Birthday Card

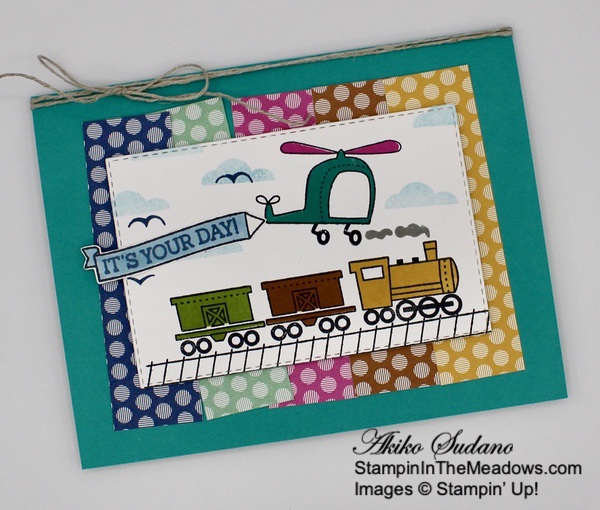
Good morning! Today I have a fun birthday card made with the Stampin’ Up! Moving Along stamp set – a cute transportation themed set that is great for making children’s cards. I used the train and helicopter stamps to make the cute little scene. You can find the supplies used to create this card at the bottom of my post along with the sizes of cardstock used.

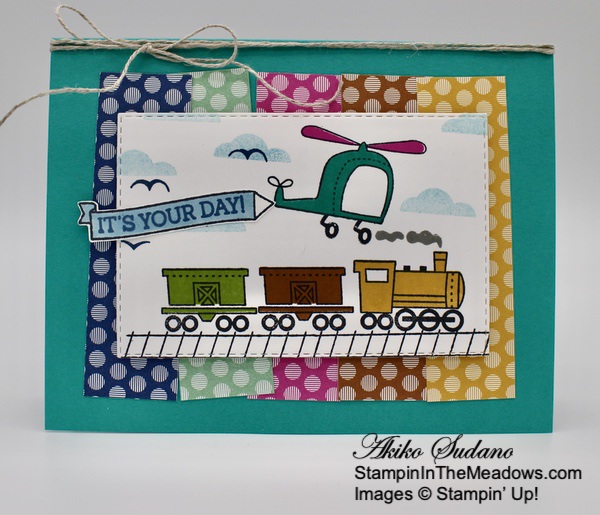
I started out by creating a fun whimsical background with the 2020-2022 In Color designer series paper. I cut a strip of each with the circle designs and adhered them to the front of a Bermuda Bay card base.

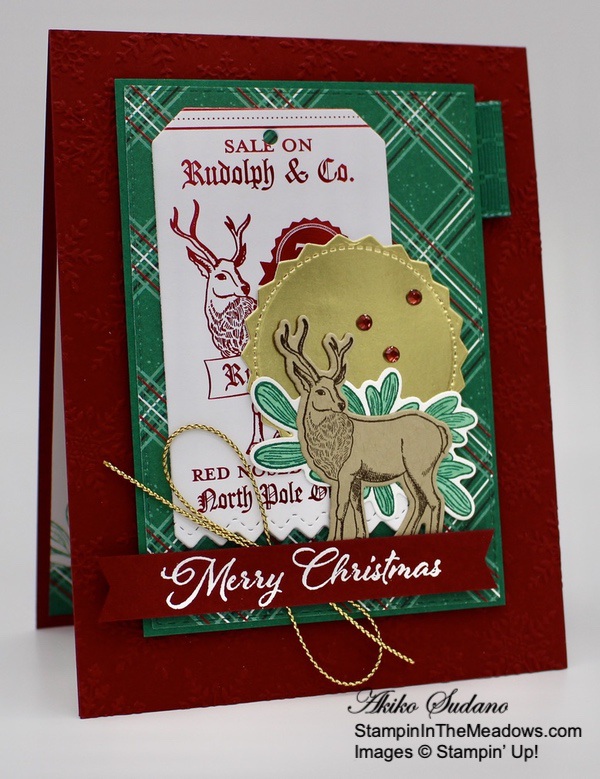
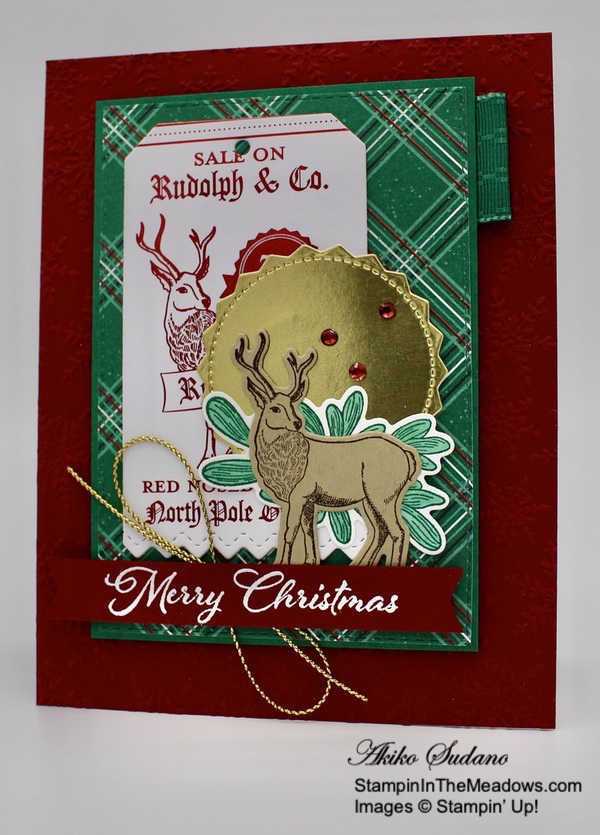
I stamped the images from the Stampin’ Up! Moving Along photopolymer stamp set on a Thick Whisper White panel in Memento Tuxedo Black, Bermuda Bay, Magenta Madness, Bumblebee, Cinnamon Cider, Granny Apple Green, Balmy Blue and Misty Moonlight ink. I used the two step stamping technique to color the helicopter and train, and it was pretty easy with the photopolymer stamps. I cut the image out with the Stitched Rectangles Die and popped it on the card front with dimensionals.

I stamped the little banner in Memento Tuxedo Black ink and colored it with the Balmy Blue Stampin Blend. I stamped the sentiment in Misty Moonlight ink and fussy cut it out. I adhered it to the back of the helicopter. I finished off the card by wrapping a length of Linen Thread around the top of the card and tying a bow.

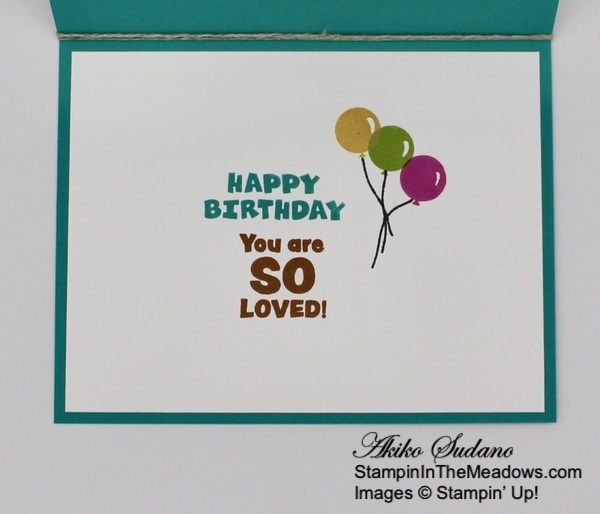
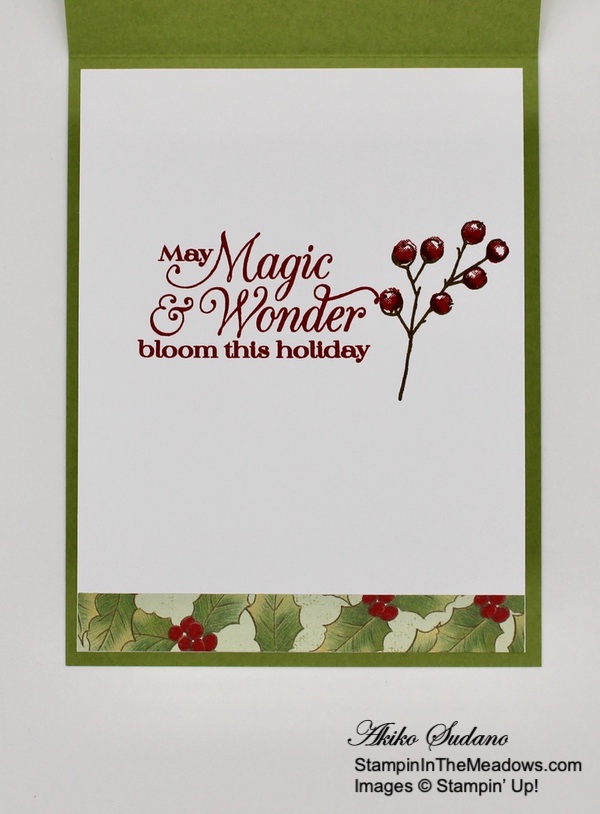
For the inside, I stamped the balloons and string from the Hippo Happiness stamp set in Bumblebee, Granny Apple Green and Magenta Madness on a Whisper White panel. I stamped the sentiments from the A Grand Kid cling stamp set on the inside of the card in Bermuda Bay and Cinnamon Cider inks and adhered the panel to the inside of the card.

The Stampin’ Up! Moving Along stamp set has cute images that are really great for children’s cards. And the two-step stamps give you the flexibility to stamp the images in different colors as opposed to coloring them. I need to use the cute car next time! Check it out in my Online Store by clicking on the picture below:


FREE Bonus Curvy Celebrations Project Tutorials With Videos When You Purchase The Bundle From Me!!

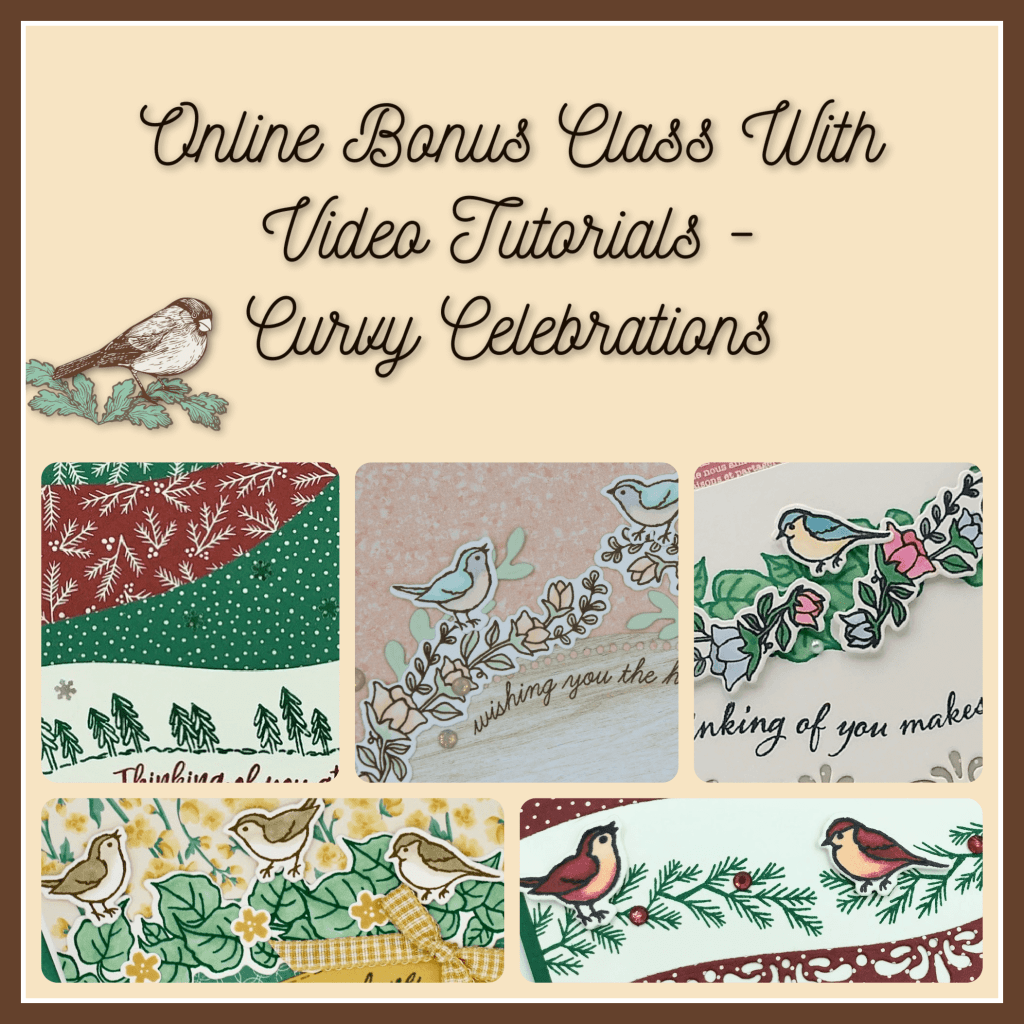
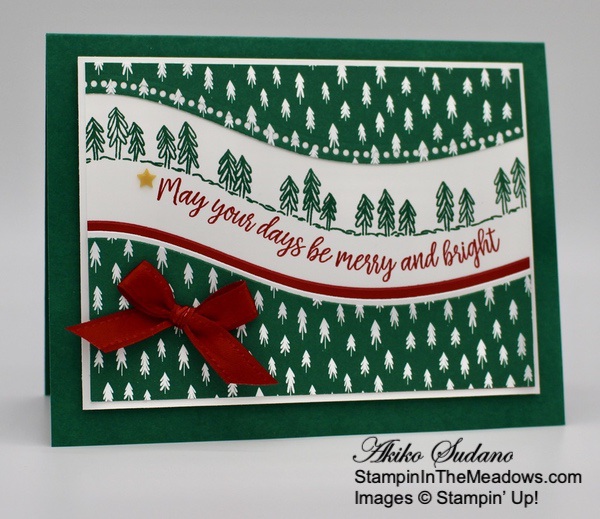
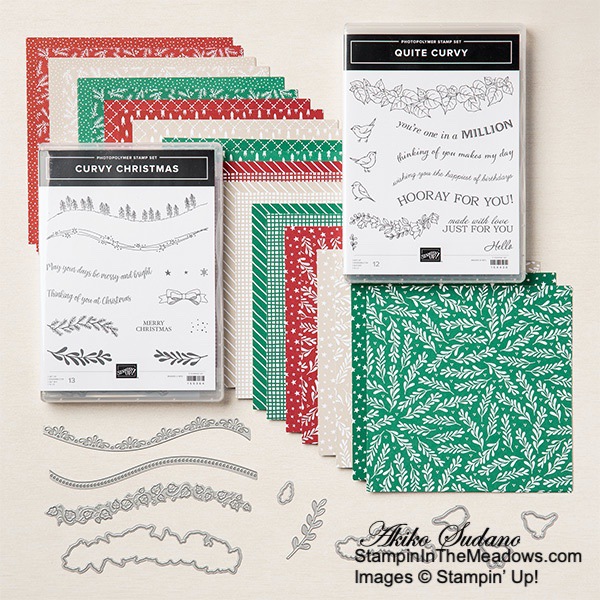
The Curvy Celebrations special products are now available, and a group of us worked together to create 5 awesome tutorials using the Curvy Celebrations special release products with videos!  You can get this set of exclusive tutorials when you purchase either the Quite Curvy Variety Bundle (item 158396) or the Quite Curvy Bundle (item 156228) from me between now and January 4!


November 1-15 Host Code: N7E9DGB9

Use this host code when you order $50 or more and receive a free gift from me!  The gift is your choice of any item valued up to $10.00 in the 2020-21 Annual Catalog or the Aug – Dec 2020 Mini Catalog. This includes some of the host exclusive sets!

If your order is over $150, please do not use the host code since you’ll receive your own Host Dollars plus I’ll still send you the free gift!  This host code can be used by anyone, no commitment required.  Let me know if you have any questions.


If you need any stamping supplies, I’d be very happy to be your Demonstrator.  Just click on the Shop Now Button on the right side of the screen to go directly to my Online store or contact me if you have any questions.  Happy Stamping!

Thanks for stopping by and have a great day!

Akiko

  • Visit my Online store here
  • See the current Stampin’ Up! clearance rack specials here
  • Earn FREE Stampin’ Up! products through my Wildflower Frequent Shopper Program – my way of saying thank you to my frequent shopper online customers.
  • Sign up for my monthly newsletter here
  • Have any questions? I’d be happy to help, click here to contact me.

Cardstock Cuts for this project:

  • Bermuda Bay – 5-1/2″ x 8-1/2″ card base scored at 4-1/4″
  • Thick Whisper White – 2-3/4″ x 4-1/4″ (art piece)
  • Whisper White – 4″ x 5-1/4″ (inside panel), 3/4″ x 2-1/2″ (banner)
  • 2020-2022 In Color 6″ x 6″ DSP – 1″ x 3-1/2″ strip of each color (strip layer)

Stampin’ Up! products used in this project:


Stampin’ Up! Curvy Christmas Card

Good morning! Today is the start of the Curvy Celebrations, so I made a Christmas Card using the pretty new Stampin’ Up! Curvy Christmas stamp set that is available starting today! You can find the supplies used to create this card at the bottom of my post along with the sizes of cardstock used.

I cut a panel of Classic Christmas designer series paper with the curvy dotted die from the Curvy Dies so that the dots are on the top. I adhered the top pair to the top of a Whisper White panel and stamped the curvy trees from the Stampin’ Up Curvy Christmas stamp set in Shaded Spruce ink on the Whisper White panel. I stamped the sentiment in Real Red ink under the trees.

I layered the Real Red and Whisper White panels so that the tops were even and aligned the cut DSP and die so that the curves would match. I removed the DSP and cut the Real Red and Whisper White cards stock together. I aligned the curves and adhered the Whisper White curve on top of the Real Red and finished with the DSP on top. I trimmed the bottom even with the DSP layer and adhered the layers on the bottom of the stamped Whisper White panel.

I adhered the layered panel to a Whisper White mat and popped it on the front of a Shaded Spruce card base with dimensionals. I decorated the card front with a Bumblebee star and Real Red bow.

For the inside, I stamped the sentiment from the Stampin’ Up! Curvy Christmas stamp set in Real Red ink. I stamped some stars in Bumblebee ink and some trees at the bottom in Shaded Spruce ink. I trimmed the bottom with a strip of Classic Christmas DSP and adhered the panel to a Real Red mat. I adhered to layered panel to the inside of the card.

The Stampin’ Up! Curvy Christmas stamp set is so much fun with the curvy images and sentiments. And they go so well with the Curvy Dies!


Create with Stampin’ Up! Curvy Celebrations!

The Stampin’ Up! Curvy Celebrations starts today and runs through January 4, 2021. This will include the Quite Curvy bundle, which is an early release of the upcoming January – June 2021 Mini Catalog along with the Curvy Christmas stamp set and Classic Christmas 6″ x 6″ designer series paper. Click on the picture above to view PDF Flyer with all the details. And here are all the products available!

Curvy Celebrations Bonus Online Class Tutorial

As a bonus, a group of us worked together to create 5 awesome tutorials using the Curvy Celebrations special release products with video tutorials!  You can get this set of exclusive tutorials from me when you purchase either the Quite Curvy Variety Bundle (item 158396) or the Quite Curvy Bundle (item 156228) between now and January 4!


November 1-15 Host Code: N7E9DGB9

Use this host code when you order $50 or more and receive a free gift from me!  The gift is your choice of any item valued up to $10.00 in the 2020-21 Annual Catalog or the Aug – Dec 2020 Mini Catalog. This includes some of the host exclusive sets!

If your order is over $150, please do not use the host code since you’ll receive your own Host Dollars plus I’ll still send you the free gift!  This host code can be used by anyone, no commitment required.  Let me know if you have any questions.


If you need any stamping supplies, I’d be very happy to be your Demonstrator.  Just click on the Shop Now Button on the right side of the screen to go directly to my Online store or contact me if you have any questions.  Happy Stamping!

Thanks for stopping by and have a great day!

Akiko

  • Visit my Online store here
  • See the current Stampin’ Up! clearance rack specials here
  • Earn FREE Stampin’ Up! products through my Wildflower Frequent Shopper Program – my way of saying thank you to my frequent shopper online customers.
  • Sign up for my monthly newsletter here
  • Have any questions? I’d be happy to help, click here to contact me.

Cardstock Cuts for this project:

  • Shaded Spruce – 5-1/2″ x 8-1/2″ card base scored at 4-1/4″
  • Real Red – 2-1/4″ x 4-3/4″ (die cut front panel), 3-7/8″ x 5-1/8″ (inside mat)
  • Whisper White – 3-1/2″ x 4-3/4″ (stamped front panel), 3-5/8″ x 4-7/8″ (front mat), 2-1/8″ x 4-3/4″ (die cut front panel), 3-3/4″ x 5″ (inside panel)
  • Classic Christmas 6″ x 6″ DSP – 2″ x 4-3/4″ (front), 1/2″ x 5″ (inside trim)

Stampin’ Up! products used in this project:


Stampin’ Up! Dove of Hope Floral Christmas Card Video Tutorial

Good Morning! Today I’m sharing another Christmas card – a floral card made with the Stampin’ Up! Dove of Hope bundle that I made during my Facebook Live video tutorial yesterday afternoon. So you might think that the Dove of Hope cling stamp set isn’t a floral stamp set, but look closely and you will spot the doves. You can find the supplies used to create this card at the bottom of my post along with the sizes of cardstock used.

Here is the Facebook Live video showing how I made the card:

I will post an edited version of how I made the card in my YouTube channel later this week so you can view a quickie version.

I started by randomly stamping the doves from the Stampin’ Up! Dove of Hope stamp set in Crumb Cake ink on a crumb cake panel and adhered it to a Real Red mat. This gives me a textured background for my flowers like you would get if you embossed it or used designer series paper. I die cut the petals from the Magnolia Memory Dies using Whisper White card stock, I cut two of each petal cluster giving me six total. I gently curled the petals up with my fingers and adhered them together with liquid glue.

I cut two small centers from the Magnolia Memory Dies and adhered them together. I bent the stamens up and adhered it to the center of the Whisper White flower. I cut two large flowers from the Wreath Builder Dies from Real Red card stock and three large leaves from the Magnolia Memory Dies from Mossy Meadow card stock. I cut a label using the Stitched Nested Labels Dies from Crumb Cake card stock and stamped the sentiment from the Stampin’ Up! Dove of Hope stamp set in Real Red ink in the lower left corner. I adhered a Mossy Meadow die cut leaf sprig from the Detailed Dove Dies to the label.

I popped the label to the stamped panel with dimensionals. I adhered the leaves and Real Red flowers with liquid glue and popped the large Magnolia Memory Dies Whisper White flower on with dimensionals. I made a bow with Real Red braided twine and adhered it with a glue dot and finished the flowers with resin dots. I popped the finished panel on the front of a Crumb Cake card base with dimensionals.

I stamped the sentiment from the Stampin’ Up! Dove of Hope stamp set in Real Red ink on a Whisper White panel. I stamped a dove in the upper corner and adhered a die cut sprig under the sentiment. I adhered the panel to the inside of the card.

I love rustic Christmas cards with Crumb Cake card card stock! They have such a natural homespun feel. And I love floral Christmas cards because they’re different, but express the joy of the holiday. And I’m so glad to be able to use the pretty flower from the Magnolia Memory Dies! Have a great week!!


Stampin’ Up! Curvy Celebrations Coming Tomorrow!

The Stampin’ Up! Curvy Celebrations starts on November 3, 2020 and runs through January 4, 2021. This will include the Quite Curvy bundle, which is an early release of the upcoming January – June 2021 Mini Catalog along with the Curvy Christmas stamp set and Classic Christmas 6″ x 6″ designer series paper. Click on the picture above to view PDF Flyer with all the details.


November 1-15 Host Code: N7E9DGB9

Use this host code when you order $50 or more and receive a free gift from me!  The free gift is your choice of any item valued up to $10.00 in the 2019 – 2020 Annual Catalog or in the Aug-Dec 2020 Mini Catalog!  That includes some of the Host Exclusive stamp sets!

If your order is over $150, please do not use the host code since you’ll receive your own Host Dollars plus I’ll still send you the free gift!  This host code can be used by anyone, no club or commitment required.  Let me know if you have any questions.


If you need any stamping supplies, I’d be very happy to be your Demonstrator.  Just click on the Shop Now button on the right side of the screen to go directly to my online store or contact me if you have any questions.  Happy Stamping!

Thanks for stopping by and have a great week!

Akiko

  • Visit my online store here
  • See the current Stampin’ Up! clearance rack specials here
  • Earn FREE Stampin’ Up! products through my Wildflower Frequent Shopper Program – my way of saying thank you to my online frequent shopper customers.
  • Sign up for my weekly newsletter here
  • Have any questions? I’d be happy to help, click here to contact me.

Cardstock Cuts for this project:

  • Crumb Cake – 4-1/4″ x 11″ card base scored at 5-1/2″, 3-3/4″ x 5″ (stamped background), 2″ x 3-1/2″ (label)
  • Mossy Meadow – 1″ x 6-1/2″ (die cut leaves)
  • Bumblebee – 1″ x 2″ (flower centers)
  • Whisper White – 4″ x 5-1/4″ panel (inside panel), 4-1/2″ x 6″ (die cut flower petals)

Stampin’ Up! products used in this project:


Stampin’ Up! Festive Post Happy Haunting Card

Happy Halloween! Of course I have a Halloween card today and it’s made with the Stampin’ Up! Festive Post stamp set along with the Rectangular Postage Stamp punch. You can find the supplies used to create this card at the bottom of my post along with the sizes of cardstock used.

I used the Rectangle Postage Stamp punch to punch out two pieces of the Blackberry Bliss spider paper from the Magic In This Night designer series paper pack. I stamped the witches’ brooms from the Stampin’ Up! Festive Post stamp set in Memento Tuxedo black ink on the punched DSP. I punched two pieces of Blackberry Bliss card stock with the same punch and adhered the stamped DSP to the front. I die cut the pretty spider from the Little Treat Box Dies from the fun Black Glitter paper and the spider web from the Peek-a-Hoot dies from vellum and adhered it to the punched layered papers.

I stamped the date sentiment from the Stampin’ Up! Festive Post stamp set in Memento Tuxedo Black ink on a Pumpkin Pie panel and punched it out with the Rectangle Postage Stamp punch. I adhered a strip of the gothic spider web paper to the panel of the black striped Magic in this Night DSP paper and then adhered them both to a Basic Black mat I adhered it to the front of a Basic Black card base with dimensionals.

I adhered the three punched postage stamps to the card front with dimensionals, with the Pumpkin Pie in the middle.

For the inside of the card, I stamped the the sentiment from the Celebration Tidings in Memento Tuxedo Black ink on a Whisper White panel. I adhered another spiderweb and spider next to the sentiment and trimmed the bottom with a strip of the black striped Magic in this Night DSP. I adhered the panel to the inside of the card.

The Stampin’ Up! Festive Post stamp set has cute images for Christmas and Valentine’s Day as well as Halloween. And they fit perfectly with the Rectangle Postage Stamp punch, for a cute look. Check it out in my Online Store by clicking on the picture below:


Today is the Last Day for the Stampin’ Up! Designer Series Paper Sale!

Stampin’ Up! has beautiful Designer Series Paper and during the Month of October they’re putting a select list of those on sale with a 15% discount! This is a fantastic opportunity for you to stock up and save on paper. And the sale includes some of the designs from the August-December 2020 Mini Catalog too! Get the details on my Promotions Page or click on the image above to download a printable PDF with all the selections. Click Here to shop the Designer Series Paper Sale in My Online Store now! BUT HURRY – TODAY IS THE LAST DAY!


Stampin’ Up! Curvy Celebrations Coming November 3!

The Stampin’ Up! Curvy Celebrations starts on November 3, 2020 and runs through January 4, 2021. This will include the Quite Curvy bundle, which is an early release of the upcoming January – June 2021 Mini Catalog along with the Curvy Christmas stamp set and Classic Christmas 6″ x 6″ designer series paper. Click on the picture above to view PDF Flyer with all the details.


October 16-31 Host Code: 3VJWYCTP

November 1-15 Host Code: N7E9DGB9

Use this host code when you order $50 or more and receive a free gift from me!  The gift is your choice of any item valued up to $10.00 in the 2020-21 Annual Catalog or the Aug – Dec 2020 Mini Catalog. This includes some of the host exclusive sets!

If your order is over $150, please do not use the host code since you’ll receive your own Host Dollars plus I’ll still send you the free gift!  This host code can be used by anyone, no commitment required.  Let me know if you have any questions.


If you need any stamping supplies, I’d be very happy to be your Demonstrator.  Just click on the Shop Now Button on the right side of the screen to go directly to my Online store or contact me if you have any questions.  Happy Stamping!

Thanks for stopping by and have a great day!

Akiko

  • Visit my Online store here
  • See the current Stampin’ Up! clearance rack specials here
  • Earn FREE Stampin’ Up! products through my Wildflower Frequent Shopper Program – my way of saying thank you to my frequent shopper online customers.
  • Sign up for my monthly newsletter here
  • Have any questions? I’d be happy to help, click here to contact me.

Cardstock Cuts for this project:

  • Basic Black – 5-1/2″ x 8-1/2″ card base scored at 4-1/4″, 4″ x 5-1/4″ (front mat)
  • Pumpkin Pie – 1-1/2″ x 2-1/4″ (center punch)
  • Blackberry Bliss – 2-1/4″ x 3″ (side punches backing)
  • Whisper White – 4″ x 5-1/4″ (inside panel)
  • Vellum – 1-3/4″ x 5″ (spider webs)
  • Black glitter – 1″ x 3-1/4″ (spider die cuts)
  • Magic in this Night DSP – 3-7/8″ x 5-1/8″ (front background), 1″ x 5-1/8″ (front DSP strip), 2-1/4″ x 3″ (side punches) 1/2″ x 5-1/4″ (inside trim)

Stampin’ Up! products used in this project:


Stampin’ Up! Cherish The Season for the Happy Inkin’ Thursday Blog Hop

Silver Bells, Silver Bells!!

Hello and welcome to the Happy Inkin’ Thursday Blog Hop! I’m finally getting to make the Silver Bells from the Stampin’ Up! Cherish The Season bundle! These jingle bells are so pretty and really make a Christmas card cheerful! You can find the supplies used to create this card at the bottom of my post along with the sizes of cardstock used.

We have a sketch challenge this week, and here is the sketch we are using for our projects:

Adhere a panel of the holly ‘Tis The Season 6″ x 6″ designer series paper to the front of A Thick Whisper White card base. Use the Triple Banner punch to make a banner tail on the Shaded Spruce plaid ‘Tis The Season DSP panel and adhere it to the card front.

Cut a Real Red panel with a scalloped rectangle from the Stitched So Sweetly Dies. Adhere a red panel of the ‘Tis The Season DSP to the center. Cut out the two largest jingle bells from the Sounds of the Season Dies in the Stampin’ Up! Cherish the Season bundle from Silver Foil. Cut out the corresponding seam covers from Silver Foil and adhere them to the bells. I placed a piece of scotch tape behind the bells to keep the holly die cuts from falling out. Cut three of the large pine sprigs from Just Jade card stock and adhere them together with liquid glue. Adhere the sprigs to the scalloped rectangle with liquid glue. Adhere the bells using liquid glue for the small bell and dimensionals for the large bell.

Stamp the sentiment from the Itty Bitty Christmas stamp set in Real Red ink on the strip of Whisper White. Trim the end and adhere it to the scalloped rectangle with liquid glue. Adhere a Real Red braided linen trim bow to the bells with a glue dot.

Stamp the sentiment from the Dove of Peace stamp set in Real Red ink on a Whisper White panel. Adhere a strip of the holly Tis The Season DSP to the bottom and a holly sticker from the Wonder of the Season Memories and More card pack to the top. Adhere the panel to a Real Red mat and then to the inside of the card with Stampin’ Seal.

The Stampin’ Up! Cherish The Season stamp set is one of my favorites from the August – December 2020 Mini Catalog, and I’m so glad to use the pretty jingle bells. I can hear them now, and it really puts me in the mood for Christmas!

On with the Hop! Click the Next button below to visit Karen Ksenzakovic’s blog.

And just in case you get lost along the way, here’s a list of the team members participating in the hop today:


Stampin’ Up! Designer Series Paper Sale Ending Soon!

Stampin’ Up! has beautiful Designer Series Paper and during the Month of October they’re putting a select list of those on sale with a 15% discount! This is a fantastic opportunity for you to stock up and save on paper. And the sale includes some of the designs from the August-December 2020 Mini Catalog too! Get the full details on my Promotion Page or click on the image above to download a printable PDF with all the selections.  Click Here to shop the Designer Series Paper Sale in My Online Store now! But Hurry – the sale ends on Saturday!


October 16-31 Host Code: 3VJWYCTP

Use this host code when you order $50 or more and receive a free gift from me!  The gift is your choice of any item valued up to $10.00 in the 2019-20 Annual Catalog or in the 2020 January-June Mini Catalog!  That includes some of the Host Exclusive stamp sets!

If your order is over $150, please do not use the host code since you’ll receive your own Host Dollars plus I’ll still send you the free gift!  This host code can be used by anyone, no commitment required.  Let me know if you have any questions.


If you need any stamping supplies, I’d be very happy to be your Demonstrator.  Just click on the Shop Now Button on the right side of the screen to go directly to my online store or contact me if you have any questions.  Happy Stamping!

Thanks for visiting!

Akiko

  • Visit my online store here
  • See the current Stampin’ Up! clearance rack specials here
  • Earn FREE Stampin’ Up! products through my Wildflower Frequent Shopper Program – my way of saying thank you to my frequent shopper online customers.
  • Sign up for my weekly newsletter here
  • Have any questions? I’d be happy to help, click here to contact me.

Cardstock Cuts for this project:

  • Thick Whisper white – 4-1/4″ x 11″ card base scored at 5-1/2″
  • Real Red – 2-5/8″ x 3-3/4″ (scalloped rectangle die cut), 4″ x 5-1/4″ (inside mat)
  • Just Jade – 1-1/2″ x 2-1/4″ (die cut pine sprigs)
  • Silver Foil – 2″ x 3″ (die cut jingle bells)
  • Whisper White – 3-7/8″ x 5-1/8″ (inside panel), 3/8″ x 2 (label)
  • ‘Tis The Season DSP – 4-1/4″ x 5-1/2″ (front background), 2-1/8″ x 3-5/16″ (jingle bell background), 2″ x 5″ (plaid banner), 1/2″ x 3-7/8″ (inside trim)
  • Wonder of the Season Memories & More card pack – holly sticker

Stampin’ Up! products used in this project:


Stampin’ Up! Lovely You Grateful Card

Good Morning! Today I want to share a fun card made with lots of different dies but features one of the pretty sentiments from the Stampin’ Up! Lovely You bundle. This stamp set has so many different sentiments, but the fonts are perfect for the light hearted, fun nature of the card design. You can find the list of supplies supplies I used to create this card at the bottom of my post along with the sizes of cardstock used.

I cut the two funky birds from the Birds & More dies from red Felt from the Festive Felt pack. I ran it through the die cutting machine about 4 times to get a good cut, but there were still a few places where I had to trim some felt with my snips. These dies are pretty detailed, and my cutting plate is pretty well used, but I was still pretty happy to be able to get crisp die cuts from the felt!! Yay!

I cut the branch from the Birds & More dies and Just Jade card stock. I cut the bird house from the Home Together dies and Crumb Cake card stock. Then I punched the flowers from Bumblebee card stock with the Confetti Flowers border punch and added pearls to the largest three flowers. I adhered these to the branch with liquid glue. Then I assembled my card base by adhering a panel of Balmy Blue Subtles 6″ x 6″ designer series paper to a Whisper White mat and then to the front of a Whisper White card base with liquid glue.

I punched the ends of the Whisper White panel with the Lovely Labels Pick a Punch and stamped the sentiment from the Stampin’ Up! Lovely You cling stamp set in Crumb Cake ink. I positioned the elements on the card front and adhered them to the front with liquid glue, starting with the label and finishing with the birds. I was careful to apply the liquid glue to the back of the birds in small dots and tried to get good coverage – I wanted good adhesion, but no gushing glue, because it would be much messier with felt than with paper. I finished the card front with a short length of red braided trim knotted and adhered to the label.

I left the inside pretty simple so that there is plenty of room to write a message. I trimmed the bottom of a Whisper White panel with a strip of the Balmy Blue Subtles 6″ x 6″ DSP and adhered it to the inside of the card.

The Stampin’ Up! Lovely You stamp set has so many different sentiments, and I think that any of them would be perfect for this card. And I’m so glad that the bird die cuts worked so well on the felt – it really makes this card special!


Stampin’ Up! Designer Series Paper Sale Going on Now!

Stampin’ Up! has beautiful Designer Series Paper and during the Month of October they’re putting a select list of those on sale with a 15% discount! This is a fantastic opportunity for you to stock up and save on paper. And the sale includes some of the designs from the August-December 2020 Mini Catalog too! Get the details on my Promotions Page or click on the image above to download a printable PDF with all the selections. Click Here to shop the Designer Series Paper Sale in My Online Store now!


The November Paper Pumpkin Kit is Jolly Gingerbread!

The Paper Pumpkin kit for November is a cute, gingerbread-themed kit with enough supplies to make 15 gift card carriers. The kit’s contents can also be used to make traditional cards or gift tags. This kit allows you to customize your Christmas crafting to create one-of-a-kind Christmas crafts!

If you’re interested in subscribing to Paper Pumpkin, you can either sign up for a subscription where you are billed monthly for your kit or you can purchase a prepaid subscription in my online store. To see more information and to sign up for the monthly subscription click here. To see the options for prepaid subscriptions in my online store, click here.

Get the complete details about the November Paper Pumpkin Kit on my Promotions Page. Sign up deadline for the November 2020 kit is November 10, 2020. Supplies may be limited toward the end of the subscription period.


October 16-31 Host Code: 3VJWYCTP

Use this host code when you order $50 or more and receive a free gift from me!  The gift is your choice of any item valued up to $10.00 in the 2020-21 Annual Catalog or the Aug – Dec 2020 Mini Catalog. This includes some of the host exclusive sets!

If your order is over $150, please do not use the host code since you’ll receive your own Host Dollars plus I’ll still send you the free gift!  This host code can be used by anyone, no commitment required.  Let me know if you have any questions.


If you need any stamping supplies, I’d be very happy to be your Demonstrator.  Just click on the Shop Now Button on the right side of the screen to go directly to my Online store or contact me if you have any questions.  Happy Stamping!

Thanks for stopping by and have a great day!

Akiko

  • Visit my Online store here
  • See the current Stampin’ Up! clearance rack specials here
  • Earn FREE Stampin’ Up! products through my Wildflower Frequent Shopper Program – my way of saying thank you to my frequent shopper online customers.
  • Sign up for my monthly newsletter here
  • Have any questions? I’d be happy to help, click here to contact me.

Cardstock Cuts for this project:

  • Balmy Blue – 4-1/4″ x 11″ card base scored at 5-1/2″
  • Just Jade – 2″ x 5″ (branch)
  • Crumb Cake – 1-1/2″ x 2″
  • Bumblebee – 1/2″ x 4″ (punched flowers)
  • Whisper White – 3-3/4″ x 5″ (inside panel), 1″ x 3″ (label), 3-7/8″ x 5-1/8″ (front mat)
  • Subtles 6″ x 6″ DSP – 3-3/4″ x 5″ (front background), 1/2″ x 3-3/4″ (inside trim)
  • Festive Felt – 1-1/2″ x 4″ (red birds)

Stampin’ Up! products used in this project:


Stampin’ Up! Poinsettia Petals for the Happy Inkin’ Thursday Blog Hop

Hello and welcome to the Happy Inkin’ Thursday Blog Hop! For today’s hop, I used the beautiful Stampin’ Up! Poinsettia Petals bundle with the pretty Poinsettia Place designer series paper to make a simple Christmas Card. You can find the supplies used to create this card at the bottom of my post along with the sizes of cardstock used.

We have a color challenge this week, and here is the color palette we are using for our projects:

Adhere a panel of the holly Poinsettia Place designer series paper to a Soft Suede mat and pop it on the front of an Old Olive card base. Stamp the Merry Christmas greeting from the Stampin’ Up! Poinsettia Petals photopolymer stamp set in Real Red ink on Soft Sea Foam card stock and cut it out with the Tasteful Labels die. Adhere it to the lower part of the card.

Cut out three of the leaves from the Poinsettia Dies (two large and one small) from Garden Green card stock. Use both the cutting and embossing dies. Cut out three berry sprigs from Bumblebee card stock and six poinsettia petals from Real Red. Cut out two of the smallest and two of the largest and one of each to the other sizes. Use both the cutting and embossing dies.

Gently bend the poinsettia petals backwards with your fingers and adhere the layers with liquid glue. Position the petals so that the upper layer falls between the petals on the lower layer with the largest on the bottom. Gently bend the tips of the leaves backwards with your fingers. Adhere the leaves and berry branches with liquid glue and the flower with glue dots. Finish the flower center with a beaded pearl and trim the label with a Real Red bow.

Stamp the sentiment from the Stampin’ Up! Poinsettia Petals stamp set in Real Red ink on a Whisper White panel. Stamp the berry sprig in Soft Suede ink next to the sentiment and stamp the berries in Real Red. Trim the bottom with a strip of Poinsettia Place designer series paper and adhere the panel to the inside of the card.

The Poinsettia Dies from the Stampin’ Up! Poinsettia Petals bundle make the most beautiful dimensional poinsettias that are great for cards and tags and any other Christmas project! And they are a perfect when paired with the Poinsettia Place designer series paper, which is currently on sale this month at a 15% discount!

On with the Hop! Click the Next button below to visit Karen Ksenzakovic’s blog.

And just in case you get lost along the way, here’s a list of the team members participating in the hop today:


Stampin’ Up! Designer Series Paper Sale Going on Now!

Stampin’ Up! has beautiful Designer Series Paper and during the Month of October they’re putting a select list of those on sale with a 15% discount! This is a fantastic opportunity for you to stock up and save on paper. And the sale includes some of the designs from the August-December 2020 Mini Catalog too! Get the full details on my Promotion Page or click on the image above to download a printable PDF with all the selections.  Click Here to shop the Designer Series Paper Sale in My Online Store now!


October 16-31 Host Code: 3VJWYCTP

Use this host code when you order $50 or more and receive a free gift from me!  The gift is your choice of any item valued up to $10.00 in the 2019-20 Annual Catalog or in the 2020 January-June Mini Catalog!  That includes some of the Host Exclusive stamp sets!

If your order is over $150, please do not use the host code since you’ll receive your own Host Dollars plus I’ll still send you the free gift!  This host code can be used by anyone, no commitment required.  Let me know if you have any questions.


If you need any stamping supplies, I’d be very happy to be your Demonstrator.  Just click on the Shop Now Button on the right side of the screen to go directly to my online store or contact me if you have any questions.  Happy Stamping!

Thanks for visiting!

Akiko

  • Visit my online store here
  • See the current Stampin’ Up! clearance rack specials here
  • Earn FREE Stampin’ Up! products through my Wildflower Frequent Shopper Program – my way of saying thank you to my frequent shopper online customers.
  • Sign up for my weekly newsletter here
  • Have any questions? I’d be happy to help, click here to contact me.

Cardstock Cuts for this project:

  • Old Olive – 4-1/4″ x 11″ card base scored at 5-1/2″
  • Soft Suede – 3-3/4″ x 5″ (front mat)
  • Garden Green – 2-1/2″ x 4-1/4″ (die cut leaves)
  • Bumblebee – 1-1/2″ x 5-1/2″ (die cut berry sprigs)
  • Soft Sea Foam – 2-1/4″ x 4-1/4″ (label)
  • Real Red – 3-1/2″ x 10″ (poinsettia petals)
  • Whisper White – 4″ x 5-1/4″ (inside panel)
  • Poinsettia Place DSP – 3-5/8″ x 4-7/8″ (front background), 1/2″ x 4″ (inside trim)

Stampin’ Up! products used in this project:


Stampin’ Up! Tag Buffet

Good Morning! Today I want to show you a pair of versatile Christmas products called the Stampin’ Up! Tag Buffet kit and Stampin’ Up! Tag Buffet photopolymer stamp set. The Tag Buffet kit has supplies to make 30 gorgeous tags – five each of 6 different designs. You can see the contents of the kit in the picture below. The tags are double layered, with gold foil accents, gorgeous images and laser cuts. Plus it all comes in the cute holly box!

Here is the tag that I made featuring the Christmas Tree. It’s a gorgeous tree and I added some red rhinestones and made it pretty much according to the instructions included. Note the pretty sentiment – it’s from the Stampin’ Up! Tag Buffet photopolymer stamp set. The labels in the kit are perfectly sized to fit the sentiments in the stamp set.

Before I talk more about the stamp set, I want to show that the tags can easily be made into cards. Here I made a Real Red card base and adhered a Real Red panel that was embossed with the Winter Snow 3D embossing folder. I made the pretty stocking tag according to the kit instructions and adhered it to the front of the embossed card base. Rather than using the sentiment from the Stampin’ Up! Tag Buffet stamp set, I used a sentiment from Itty Bitty Christmas and stamped it on a pretty circle die cut from Tasteful Labels dies. I wanted to show that you can use the tags with many different Christmas stamp sets, including some that you may have in your current stash!

But I think the Stampin’ Up! Tag Buffet stamp set is perfect for the tag project kit. And when you’ve completed all the tags, you can still use the stamp set on it’s own! Here’s a card that I made with the stamps, along with the Heartwarming Hugs designer series paper and the Painted Labels Dies. Isn’t that Merry Christmas sentiment beautiful!!

Here is the inside of the card showing the wonderful inside Christmas greeting.

Here is a closeup of the pretty stamp set. You can see how beautifully the stamps coordinate with the images in the Stampin’ Up! Tag Buffet kit. With both, you can pretty Christmas cards with coordinating tags for all your special holiday gift needs.

And the pretty Heartwarming Hugs designer series paper that I used in my last card is on sale this month!


Stampin’ Up! Designer Series Paper Sale Going on Now!

Stampin’ Up! has beautiful Designer Series Paper and during the Month of October they’re putting a select list of those on sale with a 15% discount! This is a fantastic opportunity for you to stock up and save on paper. And the sale includes some of the designs from the August-December 2020 Mini Catalog too! Get the details on my Promotions Page or click on the image above to download a printable PDF with all the selections. Click Here to shop the Designer Series Paper Sale in My Online Store now!


The November Paper Pumpkin Kit is Jolly Gingerbread!

The Paper Pumpkin kit for November is a cute, gingerbread-themed kit with enough supplies to make 15 gift card carriers. The kit’s contents can also be used to make traditional cards or gift tags. This kit allows you to customize your Christmas crafting to create one-of-a-kind Christmas crafts!

If you’re interested in subscribing to Paper Pumpkin, you can either sign up for a subscription where you are billed monthly for your kit or you can purchase a prepaid subscription in my online store. To see more information and to sign up for the monthly subscription click here. To see the options for prepaid subscriptions in my online store, click here.

Get the complete details about the November Paper Pumpkin Kit on my Promotions Page. Sign up deadline for the November 2020 kit is November 10, 2020. Supplies may be limited toward the end of the subscription period.


October 16-31 Host Code: 3VJWYCTP

Use this host code when you order $50 or more and receive a free gift from me!  The gift is your choice of any item valued up to $10.00 in the 2020-21 Annual Catalog or the Aug – Dec 2020 Mini Catalog. This includes some of the host exclusive sets!

If your order is over $150, please do not use the host code since you’ll receive your own Host Dollars plus I’ll still send you the free gift!  This host code can be used by anyone, no commitment required.  Let me know if you have any questions.


If you need any stamping supplies, I’d be very happy to be your Demonstrator.  Just click on the Shop Now Button on the right side of the screen to go directly to my Online store or contact me if you have any questions.  Happy Stamping!

Thanks for stopping by and have a great day!

Akiko

  • Visit my Online store here
  • See the current Stampin’ Up! clearance rack specials here
  • Earn FREE Stampin’ Up! products through my Wildflower Frequent Shopper Program – my way of saying thank you to my frequent shopper online customers.
  • Sign up for my monthly newsletter here
  • Have any questions? I’d be happy to help, click here to contact me.

Cardstock Cuts for this project:

  • Tag Buffet kit Christmas Tree Tag uses supplies from the Tag Buffet Kit
  • Tag Buffet kit Stocking Card
    • Tag Buffet Kit stocking tag supplies
    • Real Red – 5-1/2″ x 8-1/2″ card base scored at 4-1/4″, 4-1/4″ x 5-1/2″ (embossed front)
    • Whisper White – 4″ x 5-1/4″ (inside panel), 2″ x 2″ (label)
  • Tag Buffet Stamped Ornament Card
    • Real Red – 4-1/4″ x 11″ card base scored at 5-1/2″, 3″ x 3″ (circle die cut), 1/2″ x 3″ (fancy die cut trim)
    • Whisper White – 4″ x 5-1/4″ (inside panel), 2″ x 3″ (fussy cut ornament & leaf), 2″ x 2″ die cut circle), 1″ x 4″ (label)
    • Heartwarming Hugs DSP – 3-3/4″ x 5″ (front background), 2″ x 3-3/8″ (contrasting band), 1/2″ x 4″ (inside trim)

Stampin’ Up! products used in this project:


Stampin’ Up! Wishes & Wonder Christmas Card

Good Morning! Today I made a Christmas card with the Stampin’ Up! Wishes & Wonder cling stamp bundle. The reindeer in this bundle are so cute, both the stamped version and the die cut one. Today’s card features the stamped deer. You can find the supplies used to create this card at the bottom of my post along with the sizes of cardstock used.

Emboss a panel of Cherry Cobbler with the Winter Snow embossing folder and adhere it to the front of a Cherry Cobbler card base. Cut the plaid panel of the ‘Tis The Season 6″ x 6″ designer series paper with the third largest Stitched Rectangles Die and adhere it to a Shaded Spruce mat. Adhere a folded piece of Shaded Spruce ribbon to the top right corner and adhere the panel to the card front with dimensionals.

Cut a panel of Wonder of the Season specialty designer series paper with the tag die from the North Pole Wonder Dies from the Stampin’ Up! Wishes & Wonder bundle and adhere it to the panel. I used a piece with the Rudolph feed image in red foil. Cut a gold foil circle with the North Pole Dies. Stamp the mistletoe from the Stampin’ Up! Wishes & Wonder cling stamp set in Shaded Spruce ink on a small Whisper White panel and color it with the Light Shaded Spruce Stampin’ Blend. Cut it out with the coordinating die and adhere it to the bottom of the gold circle.

Stamp the reindeer from the Stampin’ Up! Wishes & Wonder stamp set in Early Espresso ink on Crumb Cake and cut it out with the coordinating die. Adhere it to the mistletoe and adhere the layered piece to the card front. Adhere a gold trim loopy bow to the front. Stamp the sentiment from the Cherish the Season stamp set in Versamark ink on a Cherry Cobbler strip and heat emboss it with white embossing powder. Trim the ends with the Banners Pick A Punch and adhere it to the card front with dimensionals. Finish the card front with three red rhinestones.

Stamp the sentiment from the Stampin’ Up! Wishes & Wonder cling stamp set in Cherry Cobbler ink on a Whisper White panel. Stamp the mistletoe in Shaded Spruce ink in the corners and trim the bottom of the panel with a strip of the plaid paper from the ‘Tis The Season 6″ x 6″ designer series paper. Adhere the panel to the inside of the card.

The Stampin’ Up! Wishes & Wonder stamp bundle has a number of unique nostalgic Christmas images and the wonderful reindeer. Click on the image below to shop for this bundle in my Online Store.

The images coordinate nice with the Wonder of the Season specialty designer series paper. And the pretty ‘Tis The Season 6″ x 6″ designer series paper is on sale this month at a 15% discount!!


Stampin’ Up! Designer Series Paper Sale Going on Now!

Stampin’ Up! has beautiful Designer Series Paper and during the Month of October they’re putting a select list of those on sale with a 15% discount! This is a fantastic opportunity for you to stock up and save on paper. And the sale includes some of the designs from the August-December 2020 Mini Catalog too! Get the details on my Promotions Page or click on the image above to download a printable PDF with all the selections. Click Here to shop the Designer Series Paper Sale in My Online Store now!


The November Paper Pumpkin Kit is Jolly Gingerbread!

The Paper Pumpkin kit for November is a cute, gingerbread-themed kit with enough supplies to make 15 gift card carriers. The kit’s contents can also be used to make traditional cards or gift tags. This kit allows you to customize your Christmas crafting to create one-of-a-kind Christmas crafts!

If you’re interested in subscribing to Paper Pumpkin, you can either sign up for a subscription where you are billed monthly for your kit or you can purchase a prepaid subscription in my online store. To see more information and to sign up for the monthly subscription click here. To see the options for prepaid subscriptions in my online store, click here.

Get the complete details about the November Paper Pumpkin Kit on my Promotions Page. Sign up deadline for the November 2020 kit is November 10, 2020. Supplies may be limited toward the end of the subscription period.


October 16-31 Host Code: 3VJWYCTP

Use this host code when you order $50 or more and receive a free gift from me!  The gift is your choice of any item valued up to $10.00 in the 2020-21 Annual Catalog or the Aug – Dec 2020 Mini Catalog. This includes some of the host exclusive sets!

If your order is over $150, please do not use the host code since you’ll receive your own Host Dollars plus I’ll still send you the free gift!  This host code can be used by anyone, no commitment required.  Let me know if you have any questions.


If you need any stamping supplies, I’d be very happy to be your Demonstrator.  Just click on the Shop Now Button on the right side of the screen to go directly to my Online store or contact me if you have any questions.  Happy Stamping!

Thanks for stopping by and have a great day!

Akiko

  • Visit my Online store here
  • See the current Stampin’ Up! clearance rack specials here
  • Earn FREE Stampin’ Up! products through my Wildflower Frequent Shopper Program – my way of saying thank you to my frequent shopper online customers.
  • Sign up for my monthly newsletter here
  • Have any questions? I’d be happy to help, click here to contact me.

Cardstock Cuts for this project:

  • Cherry Cobbler – 4-1/4″ x 11″ card base scored at 5-1/2″, 1/2″ x 2″ (label), 4-1/4″ x 5-1/2″ (embossed front background)
  • Shaded Spruce – 3-1/8″ x 4-1/2″ (DSP mat)
  • Crumb Cake – 2″ x 2-1/2″ (die cut reindeer)
  • Gold Foil – 2-1/4″ x 2-1/4″ (gold circle)
  • Whisper White – 4″ x 5-1/4″ (inside panel), 3-1/4″ x 4-1/4″ (scalloped rectangle), 1/2″ x 3″ (label)
  • ‘Tis The Season DSP – 3-1/4″ x 4-5/8″ (front panel), 1/2″ x 4″ (inside trim)
  • Wonder of the Season Specialty DSP – 2-1/4″ x 4″ (tag)

Stampin’ Up! products used in this project:


Stampin’ Up! Itty Bitty Christmas With Wonders of the Season Christmas Card

Good Morning! Today I made a Christmas card with the Wonder of the Season Memories & More card pack and used several coordinating products, including the Happy Holidays sentiment from the Stampin’ Up! Itty Bitty Christmas cling stamp set. You can find the supplies used to create this card at the bottom of my post along with the sizes of cardstock used.

The white Christmas tree from the Memories & More card pack matches perfectly with the tree paper from the ‘Tis The Season 6″ x 6″ designer series paper. Cut a panel of it and adhere it to the front of a Shaded Spruce card base. Emboss a strip of Shaded Spruce card stock with the Winter Snow embossing folder and adhere it to the card front.

Cut a Whisper White panel with the Stitched So Sweetly scalloped rectangle die. Trim 1/8″ off the top and two sides of the tree card from the Wonder of the Season Memories & more card pack and adhere it to the front of the die cut card. Fold a length of Shaded Spruce Ribbon and adhere it to the card front and trim the ends. Pop the layered tree panel on top of the ribbon with dimensionals.

Punch the end of a 1/2″ strip of Whisper White with the Banners Pick A Punch and stamp the sentiment from the Stampin’ Up! Itty Bitty Christmas stamp set in Shaded Spruce ink. Trim the end and adhere it to the card front with liquid glue. Accent the banner with a green rhinestone.

Stamp the sentiment from the Wishes & Wonder cling stamp set in Real Red ink on a Whisper White panel. Stamp the pine sprigs from the Cherish The Season stamp set in Shaded Spruce ink under the sentiment and trim the bottom of the panel with a strip of the tree paper from the ‘Tis The Season 6″ x 6″ designer series paper. Adhere the panel to the inside of the card.

The Stampin’ Up! Itty Bitty Christmas stamp set has so many different small Christmas greetings that go well with other products. For this card, the sentiment is the perfect size to accent the tree without covering too much of it. And the pretty ‘Tis The Season 6″ x 6″ designer series paper is on sale this month at a 15% discount!!


Stampin’ Up! Designer Series Paper Sale Going on Now!

Stampin’ Up! has beautiful Designer Series Paper and during the Month of October they’re putting a select list of those on sale with a 15% discount! This is a fantastic opportunity for you to stock up and save on paper. And the sale includes some of the designs from the August-December 2020 Mini Catalog too! Get the details on my Promotion Page or click on the image above to download a printable PDF with all the selections. Click Here to shop the Designer Series Paper Sale in My Online Store now!


The November Paper Pumpkin Kit is Jolly Gingerbread!

The Paper Pumpkin kit for November is a cute, gingerbread-themed kit with enough supplies to make 15 gift card carriers. The kit’s contents can also be used to make traditional cards or gift tags. This kit allows you to customize your Christmas crafting to create one-of-a-kind Christmas crafts!

If you’re interested in subscribing to Paper Pumpkin, you can either sign up for a subscription where you are billed monthly for your kit or you can purchase a prepaid subscription in my online store. To see more information and to sign up for the monthly subscription click here. To see the options for prepaid subscriptions in my online store, click here.

Get the complete details about the November Paper Pumpkin Kit on my Promotion Page. Sign up deadline for the November 2020 kit is November 10, 2020. Supplies may be limited toward the end of the subscription period.


October 1-15 Host Code: F4UK7V36

October 16-31 Host Code: 3VJWYCTP

Use this host code when you order $50 or more and receive a free gift from me!  The gift is your choice of any item valued up to $10.00 in the 2020-21 Annual Catalog or the Aug – Dec 2020 Mini Catalog. This includes some of the host exclusive sets!

If your order is over $150, please do not use the host code since you’ll receive your own Host Dollars plus I’ll still send you the free gift!  This host code can be used by anyone, no commitment required.  Let me know if you have any questions.


If you need any stamping supplies, I’d be very happy to be your Demonstrator.  Just click on the Shop Now Button on the right side of the screen to go directly to my Online store or contact me if you have any questions.  Happy Stamping!

Thanks for stopping by and have a great day!

Akiko

  • Visit my Online store here
  • See the current Stampin’ Up! clearance rack specials here
  • Earn FREE Stampin’ Up! products through my Wildflower Frequent Shopper Program – my way of saying thank you to my frequent shopper online customers.
  • Sign up for my monthly newsletter here
  • Have any questions? I’d be happy to help, click here to contact me.

Cardstock Cuts for this project:

  • Shaded Spruce – 4-1/4″ x 11″ card base scored at 5-1/2″ 2″ x 4-1/4″ (embossed strip)
  • Whisper White – 4″ x 5-1/4″ (inside panel), 3-1/4″ x 4-1/4″ (scalloped rectangle), 1/2″ x 3″ (label)
  • ‘Tis The Season DSP – 4-1/4″ x 5-1/2″ (front background), 1/2″ x 4″ (inside trim)
  • Wonder of the Season Memories & More – Tree 3″ x 4″ card

Stampin’ Up! products used in this project: