Stampin’ Up! Beautiful Bouquet Anniversary Card Video Tutorial

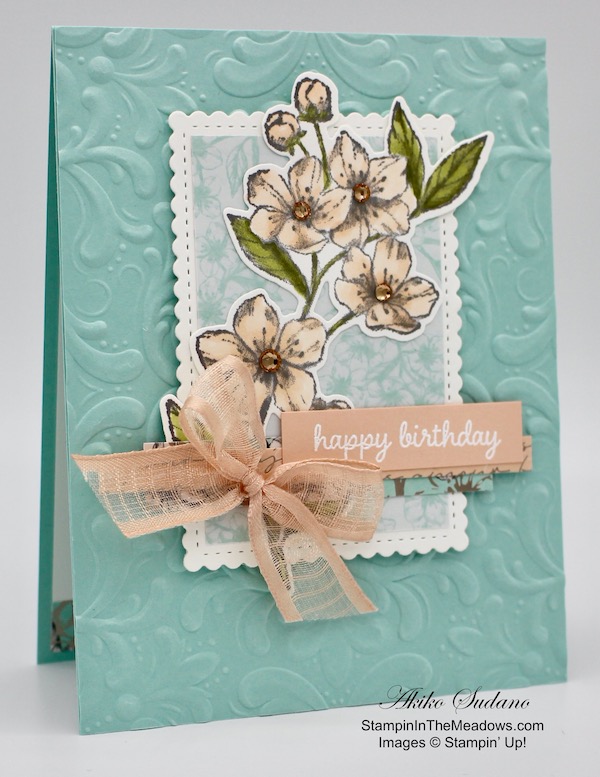
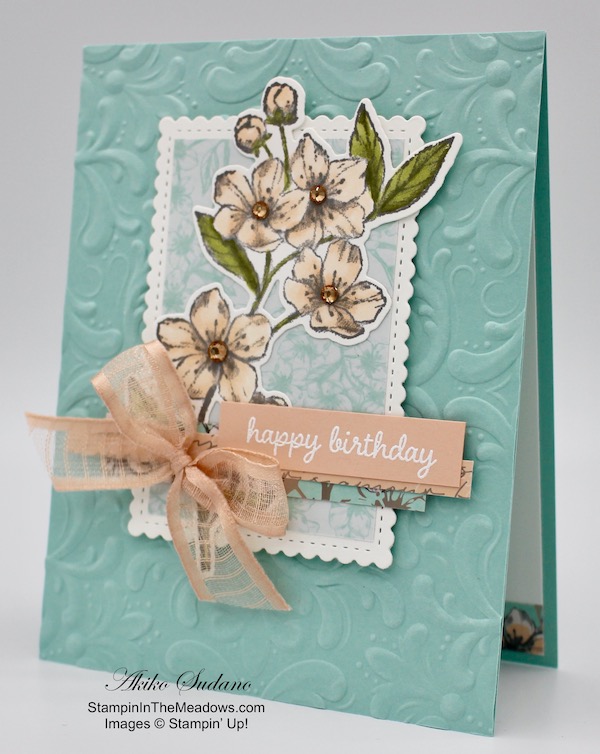
Good Morning! I hope Mother’s Day was fabulous for you! Today I’m sharing a card that I made Saturday afternoon during my Facebook Live Tutorial. It’s made with one of my all time favorites – the Stampin’ Up! Beautiful Bouquet photopolymer stamp set and Bouquet Bunch Dies. I have made so many beautiful birthday and Mother’s Day cards with this set and I’m sad to see it retiring, so I need to show it off again before it’s gone. You can find the supplies used to create this card at the bottom of my post along with the sizes of cardstock used.

Here is the Facebook Live video showing how I made the card:

I also posted the video to my YouTube Channel and you can view it here.

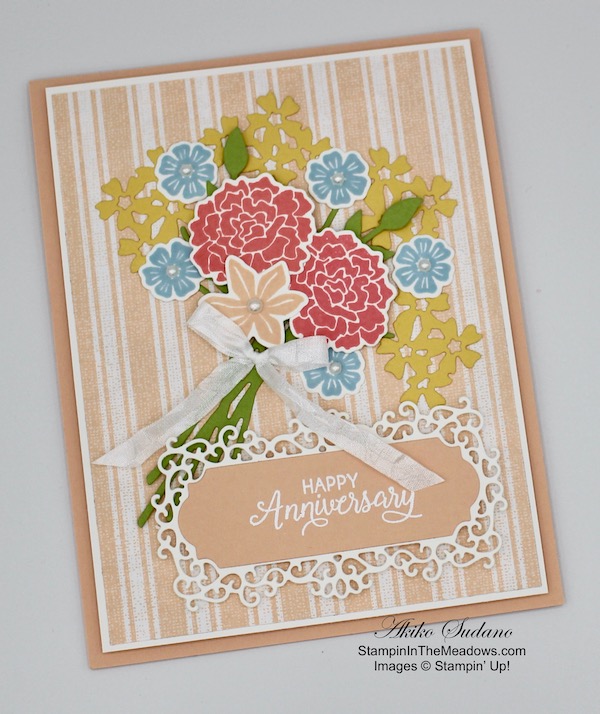
I started by creating the die cuts for the bouquet. I stamped the large roses from the Stampin’ Up! Beautiful Bouquet photopolymer stamp set in Flirty Flamingo, the lily flower in Petal Pink and the small blue posies in Seaside Spray. I cut the out with the coordinating dies from the Bouquet Bunch Dies. I cut 4 large flower clusters from the Bouquet Bunch Dies in So Saffron, the bouquet stems from Pear Pizzazz along with two leaf clusters. I stamped the Happy Anniversary sentiment from the Stampin’ Up! Beautiful Bouquet stamp set in VersaMark Ink on a strip of Petal Pink card stock. I sprinkled it with white embossing powder and shook off the excess. I heat set the embossing powder until it was shiny. I cut the sentiment out with the die from the Ornate Frames Dies. I cut the coordinating filigree frame from the Ornate Frames Dies from a Whisper White panel and adhered the label to the top with multipurpose liquid glue. I adhered the striped Petal Pink paper from the Magnolia Lane designer series paper to a Whisper White panel and began to arrange my bouquet on top.

I positioned the stems and adhered it down with multipurpose liquid glue. Next came the So Saffron petal clusters and the long leaves. After adhering the leaves, I trimmed the excess stems. I arranged the top three Seaside Spray flowers and adhered them with multipurpose liquid glue. Next I arranged the Flirty Flamingo Roses and Petal Pink lily to fill in the space and adhered them with dimensionals. This gives the bouquet depth and really makes it special. I adhered the last two Seaside Spray posies on the bottom of the bouquet with multipurpose liquid glue. I adhered the label with dimensionals and attached a flowing Whisper White crinkle ribbon bow. I finished the flower centers with faux pearls and adhered the panel to a Petal Pink card base.

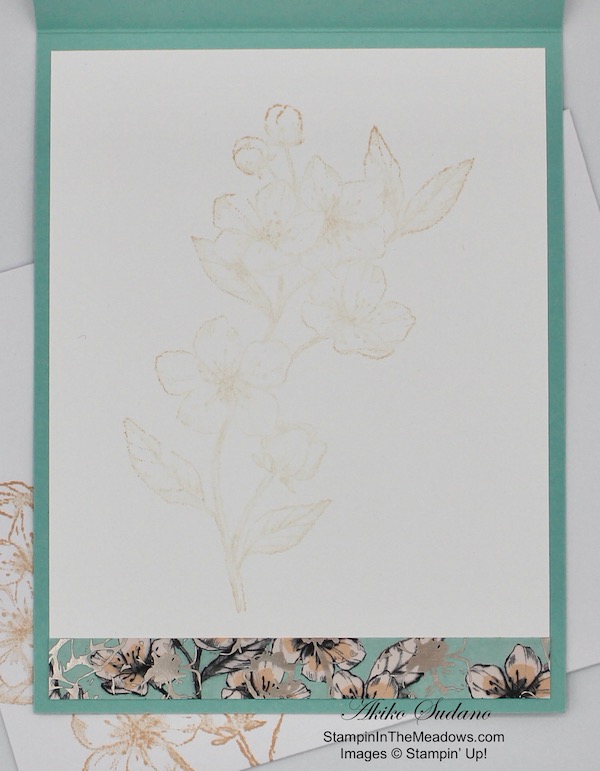
For the inside of the card, I simply added another strip of the Petal Pink striped Magnolia Lane DSP to the bottom of a Whisper White panel and adhered it to the inside of the card.

The Stampin’ Up! Beautiful Bouquet stamp set is is so much fun to play with and is very versatile with all the flowers and leaves and wonderful sentiments! The detail and dimension make for stunningly beautiful cards for that very special occasion. Hurry over to my Online Store to check it out!


Stampin’ In The Meadows 2020-2021 Annual Catalog Shares are OPEN!

Do you want all of the great new products in the new 2020-2021 Annual Catalog but can’t afford everything?  The Stampin’ In The Meadows 2020-2021 Annual Catalog shares are now open! I am offering shares for designer series paper and ribbon/embellishments. Check out my  New Catalog Product Shares page for details. Let me know if you have any questions.


Stampin’ Up! 2019-20 Annual Catalog and January-June 2020 Mini Catalog Retiring Lists Have Posted!

Stampin’ Up has posted the retirement lists for the 2019-2020 Annual Catalog and January-June 2020 Mini Catalog today in preparation for the release of the new 2020-2021 Annual Catalog. The items on the lists are only available while supplies last from now through June 2!  And some of the items are available at a discount!!

Click on the picture below to head over to my Online Store to shop the retiring products:

Have fun shopping and let me know if you have any questions!


Stampin’ Up! Making a Difference: Share Sunshine

Stampin’ Up! announced a product giveback opportunity to support organizations that are helping COVID-19 frontline responders and communities vulnerable to the pandemic as part of their Making a Difference Program!

The Share Sunshine PDF Download is a digital stamp set that’s packed with both lighthearted and heartfelt sentiments and imagery relevant to the unique COVID-19 and social distancing situation we’re currently experiencing. You can use the download in your cardmaking and papercrafting projects. Simply print the imagery on cardstock and cut it out using our Paper Trimmer, punches, or dies. Since we are physically distanced from each other, now is a perfect time to share sunshine with our friends and family by sending cards!

And all the proceeds are being donated to two organizations and you can choose who to donate your dollars to.

Click Here to Purchase the Share Sunshine PDF Download.

Get your digital download today and make a difference!!


May 1 – 15 Host Code: T323M33B

Use this host code when you order $50 or more and receive a free gift from me!  The free gift is your choice of any item valued up to $10.00 in the 2019 – 2020 Annual Catalog or in the 2020 Mini Catalog!  That includes some of the Host Exclusive stamp sets!

If your order is over $150, please do not use the host code since you’ll receive your own Host Dollars plus I’ll still send you the free gift!  This host code can be used by anyone, no club or commitment required.  Let me know if you have any questions.


If you need any stamping supplies, I’d be very happy to be your Demonstrator.  Just click on the Shop Now button on the right side of the screen to go directly to my online store or contact me if you have any questions.  Happy Stamping!

Thanks for stopping by and have a great week!

Akiko

  • Visit my online store here
  • See the current Stampin’ Up! clearance rack specials here
  • Earn FREE Stampin’ Up! products through my Wildflower Frequent Shopper Program – my way of saying thank you to my online frequent shopper customers.
  • Sign up for my weekly newsletter here
  • Have any questions? I’d be happy to help, click here to contact me.

Cardstock Cuts for this project:

  • Petal Pink – 4-1/4″ x 11″ card base scored at 5-1/2″, 1-1/4″ x 3-1/2″ (die cut label)
  • Whisper White – (2) 4″ x 5-1/4″ panels (inside and front mat), 2″ x 3-1/2″ (filigree frame), 3″ x 4-1/2″ (stamped flower die cuts)
  • So Saffron – 2″ x 3″ (petal cluster die cuts)
  • Pear Pizzazz – 4″ x 4″ (stems and leaves die cuts)
  • Magnolia Lane DSP – 3-7/8″ x 5-1/8″ (front background), 1/2″ x 4″ (inside trim)

Stampin’ Up! products used in this project:


Stampin’ In The Meadows 2020-2021 Annual Catalog New Product Share

Hello! I have a special post to announce a product share for the upcoming Stampin’ Up! 2020-2021 Annual Catalog.

Do you want all of the great new products in the new 2020-2021 Annual Catalog but can’t afford everything?  Let’s do a share!  I’m placing an order early on June 3 for all the papers, ribbons and embellishments and I’m going to use the expedited shipping option so I should be able to have the shares cut, bundled and back out to you during the week of June 14. I will offer options so you can choose between Designer Series Paper or Ribbons & Embellishments or both. See the details below. Please note, I can only ship to addresses within the US. Deadline to sign up for a share is June 2, 2020.


Stampin’ In The Meadows Designer Series Paper Share – $33 + $7 Priority Shipping

You will receive one 6×6 sheet of each design from the following DSP packs (the number behind the name indicates how many 6×6 sheets of that paper pack you will receive), an acetate 3×3 note card box, a mini Paper Pumpkin box and 2 square vellum doilies:

  • Artistry Blooms – 6
  • Flowers For Every Season – 12
  • Forever Greenery – 6
  • In Good Taste – 12
  • Ornate Garden Specialty – 6
  • Peony Garden – 6
  • Playing With Patterns – 12
  • Playful Pets – 6
  • Whale Of A Time – 12
  • World Of Good Specialty – 6
  • 2020-2021 In Color DSP – 10
  • Color Velveteen Paper – 3
  • Brass Foil – 1
  • Rainbow Glimmer – 2
  • Acetate 3×3 note card box – 1
  • Mini Paper Pumpkin box – 1
  • Square Vellum Doilies – 2

In all you will receive 100 6” x 6” sheets of designer or specialty designer paper, an acetate 3×3 note card box, a mini Paper Pumpkin box and 2 square vellum doilies!


Stampin’ In The Meadows Double DSP Share – $66 + $7 Priority Shipping

If you’d like double shares of the designer paper, that’s fine too.  I’ll cut the designer paper sheets into 6″×12″ so that you’ll be able to get 3 full A2 size card fronts from each sheet (except for the Flowers For Every Season, Playing With Patterns, Whale of a Time and 2020-2021 In Color DSP, you’ll get double sheets of those since they’re already precut 6″×6″). You’ll also get 2 acetate 3×3 note card boxes, 2 mini Paper Pumpkin boxes and 4 square Vellum Doilies.


Stampin’ In The Meadows Ribbon & Embellishment Share – $31 +$7 Priority Shipping

You will receive a length of each of the new ribbons (lengths are approximate) and a sample of the new embellishments as follows:

  • Bumblebee 1/4” Ribbon – 2 yds
  • Cinnamon Cider 1/4” Ribbon – 2 yds
  • Just Jade 1/4” Ribbon – 2 yds
  • Magenta Madness 1/4” Ribbon – 2 yds
  • Misty Moonlight 1/4” Ribbon – 2 yds
  • Pool Party 3/8” Sheer Ribbon – 2 yds
  • Playful Pets Trim Combo – 2 yds (1 yd each type)
  • Ornate Garden Ribbon Combo– 2 yds (1 yd each color)
  • Gray Granite 1/4” Shimmer Ribbon – 2 yds
  • Flowers for Every Season Ribbon Combo – 3 yds (1 yd each type)
  • Forever Greenery Trim Combo – 2 yds (1 yd each type)
  • Early Espresso 1/4” Faux Suede Trim – 1 yd
  • Playing With Patterns Ribbon Combo – 3 yds (1 yd each type)
  • Bumblebee 1/4” Gingham Ribbon – 2 yds
  • Gold Hoops – 1
  • Butterfly Gems – 10 (2 each of 5 colors)
  • Antiqued corners and slides – 3 (2 corners and 1 slide)
  • Playing with Patterns Resin Dots – 15 (5 each of 3 colors)
  • Elegant Faceted Gems – 12 (4 each of 3 colors)
  • Gilded Gems – 9
  • Artistry Blooms Sequins – 40 (10 each of 4 colors)
  • Playful Pets Trinkets – 2

In all you will receive 29 feet of ribbon/twine and 102 embellishments


Stampin’ In The Meadows I WANT IT ALL Share – $64 + $7 Priority Shipping

The I WANT IT ALL! share includes a single Designer Series Paper Share AND a Ribbon & Embellishment Share. You will receive 100 6×6 sheets of designer series and specialty paper. You will also receive 29 feet of ribbon/twine and 102 embellishments, an acetate 3×3 note card box, a mini Paper Pumpkin box and 2 square vellum doilies.


A product share is a good way to get a sample of new products before you place an order. If you’d like to join, either go to my New Catalog Product Shares page to fill out the order form or drop me an email with the following information:

  • Your first and last name
  • Your email address
  • Your complete shipping address

Deadline to sign up for my share is June 2 at 8:00 PM ET.  Payments must be received by June 4 at midnight to be included in my share. I only accept PayPal for payment. I will send out PayPal invoices on or about May 29 for orders I have received.

Let me know if you have any questions.  Thanks!


May 1 – 15 Host Code: T323M33B

Use this host code when you order $50 or more and receive a free gift from me!  The gift is your choice of any item valued up to $10.00 in the 2019-20 Annual Catalog or in the 2020 January-June Mini Catalog!  That includes some of the Host Exclusive stamp sets!

If your order is over $150, please do not use the host code since you’ll receive your own Host Dollars plus I’ll still send you the free gift!  This host code can be used by anyone, no commitment required.  Let me know if you have any questions.


If you need any stamping supplies, I’d be very happy to be your Demonstrator.  Just click on the Shop Now button on the right side of the screen to go directly to my online store or contact me if you have any questions.  Happy Stamping!

Thanks for stopping by and have a great weekend!

Akiko

  • Visit my online store here
  • See the current Stampin’ Up! clearance rack specials here
  • Earn FREE Stampin’ Up! products through my Wildflower Frequent Shopper Program – my way of saying thank you to my frequent shopper online customers.
  • Sign up for my weekly newsletter here
  • Have any questions? I’d be happy to help, click here to contact me.

Stampin’ Up! Believe You Can Thank You Card

Good Morning! Today’s card uses the Stampin’ Up! Believe You Can stamp set which is one of the retiring Stampin’ Up! Hostess Exclusive stamp sets for parties with sales over $150. You can find the supplies used to create this card at the bottom of my post along with the sizes of cardstock used.

I stamped the large floral label from the Stampin’ Up! Believe You Can photopolymer stamp set in Memento Tuxedo Black ink on a Whisper White panel and colored it with Pretty Peacock, Balmy Blue, Mango Melody, Pumpkin Pie, Flirty Flamingo, Granny Apple Green, Lovely Lipstick and Rich Razzleberry Stampin’ Blends. I cut it out with the Stitched Nested Labels Dies.

I stamped the corner with the rose in Memento Tuxedo Black ink on a smaller scrap of Whisper White and colored it with the Lovely Lipstick Stampin’ Blends. I fussy cut the flower and popped it on the label with a dimensional. I stamped the middle of the label with the banner again on a strip of Flirty Flamingo card stock with Memento Tuxedo Black ink. I stamped the Thank You sentiment from the Stampin’ Up! Believe You can stamp set in the banner – since the stamp is photopolymer, you can easily see through to get good placement. I fussy cut the banner and adhered it to the label with multipurpose liquid glue. Since I cut directly on the line, I used my Basic Black Stampin’ Write marker to carefully color the cut ends of the card stock so that it would blend with the black stamped line.

I cut a Pretty Peacock panel with the next largest die from the Stitched Nested Labels Dies and adhered the label with multipurpose liquid glue. I adhered a panel of the striped paper from the Come Sail Away designer series paper to a Balmy Blue card base and popped the label on with dimensionals. I made a Crushed Curry bow and adhered it with a glue dot and accented the flowers on the label with colored rhinestones.

I stamped several flowers and leaves from the Stampin’ Up! Believe You Can stamp set on a Whisper White panel and colored them with Stampin’ Blends to match the colors on the card front. I trimmed the bottom of the panel with a strip of the striped Come Sail Away DSP and adhered the panel to the inside of the card.

The Stampin’ Up! Hostess Exclusive sets can only be purchased with Stampin’ Rewards on individual orders over $150 or as a hostess with a party or workshop with sales over $150. During these days of Social Distancing, virtual parties are becoming more and more popular as opportunities for friends to virtually come together and craft. And there are a couple of different alternatives ways to do this. Contact me if you have any questions or if you are interested in hosting a virtual party.

Thanks for stopping by and have a Happy Mother’s Day Weekend!!😊


Stampin’ Up! 2019-20 Annual Catalog and January-June 2020 Mini Catalog Retiring Lists Have Posted!

Stampin’ Up has posted the retirement lists for the 2019-2020 Annual Catalog and January-June 2020 Mini Catalog today in preparation for the release of the new 2020-2021 Annual Catalog. The items on the lists are only available while supplies last from now through June 2!  And some of the items are available at a discount!!

Click on the picture below to head over to my Online Store to shop the retiring products:

Have fun shopping and let me know if you have any questions!


May 1 – 15 Host Code: T323M33B

Use this host code when you order $50 or more and receive a free gift from me!  The gift is your choice of any item valued up to $10.00 in the 2019-20 Annual Catalog or in the 2020 January-June Mini Catalog!  That includes some of the Host Exclusive stamp sets!

If your order is over $150, please do not use the host code since you’ll receive your own Host Dollars plus I’ll still send you the free gift!  This host code can be used by anyone, no commitment required.  Let me know if you have any questions.


If you need any stamping supplies, I’d be very happy to be your Demonstrator.  Just click on the Shop Now Button on the right side of the screen to go directly to my Online store or contact me if you have any questions.  Happy Stamping!

Thanks for stopping by and have a great day!

Akiko

  • Visit my Online store here
  • See the current Stampin’ Up! clearance rack specials here
  • Earn FREE Stampin’ Up! products through my Wildflower Frequent Shopper Program – my way of saying thank you to my frequent shopper online customers.
  • Sign up for my monthly newsletter here
  • Have any questions? I’d be happy to help, click here to contact me.

Cardstock Cuts for this project:

  • Balmy Blue – 5-1/2″ x 8-1/2″ card base scored at 4-1/4″
  • Flirty Flamingo – (label)
  • Pretty Peacock – 2-3/4″ x 4-3/4″ (label mat)
  • Whisper White – 4″ x 5-1/4″ (inside panel), 2-1/2″ x 4-1/4″ (label), 1-1/2″ x 1-1/2″ (fussy cut flower)
  • Come Sail Away DSP – 4″ x 5-1/4″ (front background), 1/2″ x 5-1/4″ (inside trim)

Stampin’ Up! products used in this project:


Stampin’ Up! Forever Blossoms Birthday Card for the Happy Inkin’ Thursday Blog Hop

Good Morning! Welcome to the Happy Inkin’ Thursday Blog Hop! I have several birthdays coming up so I made a birthday card to share today and I had to use the beautiful Stampin’ Up! Forever Blossoms bundle. You can find the supplies I used to create this card at the bottom of my post along with the sizes of cardstock used.

We have a sketch challenge for the hop this week, and here is the sketch we are using:

I embossed a Pool Party panel with the Parisian Flourish 3D embossing folder and adhered it to a Pool Party card base with multipurpose liquid glue. I cut a stitched scalloped rectangle from Whisper White card stock with the Stitched So Sweetly Dies. I cut a panel of the pool party cherry blossoms paper from the Parisian Blossoms specialty designer series paper and adhered it to the die cut with multipurpose liquid glue. I adhered the panel on the card front with dimensionals.

I stamped the cherry blossom branch from the Stampin’ Up! Forever Blossoms cling stamp set in Basic Gray ink on a Whisper White panel and cut it out with the coordinating die from the Cherry Blossoms Dies. I colored the flowers and buds with the Petal Pink Stampin’ Blends and the leaves and stems with the Old Olive Stampin’ Blends. I brushed the clear Wink of Stella on the flowers and buds to give it a little sparkle and added Champagne rhinestones to the flower centers. I adhered the branch to the middle panel with multipurpose liquid glue.

I stamped the happy birthday sentiment from the Timeless Tulips stamp set on a strip of Petal Pink card stock using VersaMark Ink. I sprinkled it with white embossing powder and heat set until shiny. I layered it on strips of Parisian Blossoms DSP and adhered them all together with glue dots. I adhered the strips on the panel with more glue dots and finished it off with a pretty Petal Pink bow!

For the inside of the card, I stamped the cherry blossom branch in Petal Pink ink (after stamping off once) on a Whisper White panel. I trimmed the bottom with a strip of the foil cherry blossom DSP and adhered the panel to the inside of the card with multipurpose liquid glue. I also stamped the cherry blossom branch on a Whisper White envelope in Petal Pink ink so that it would match.

The Stampin’ Up! Forever Blossoms stamp set and Cherry Blossoms Dies make the most beautiful feminine birthday cards! I am so glad that they will be carrying over into the new 2020-2021 Annual Catalog.

On with the Hop! Click the Next button below to visit Karen Ksenzakovic’s blog.

And just in case you get lost along the way, here’s a list of the team members participating in the hop today:


May 1 – 15 Host Code: T323M33B

Use this host code when you order $50 or more and receive a free gift from me!  The gift is your choice of any item valued up to $10.00 in the 2019-20 Annual Catalog or in the 2020 January-June Mini Catalog!  That includes some of the Host Exclusive stamp sets!

If your order is over $150, please do not use the host code since you’ll receive your own Host Dollars plus I’ll still send you the free gift!  This host code can be used by anyone, no commitment required.  Let me know if you have any questions.


If you need any stamping supplies, I’d be very happy to be your Demonstrator.  Just click on the Shop Now Button on the right side of the screen to go directly to my online store or contact me if you have any questions.  Happy Stamping!

Thanks for visiting!

Akiko

  • Visit my online store here
  • See the current Stampin’ Up! clearance rack specials here
  • Earn FREE Stampin’ Up! products through my Wildflower Frequent Shopper Program – my way of saying thank you to my frequent shopper online customers.
  • Sign up for my weekly newsletter here
  • Have any questions? I’d be happy to help, click here to contact me.

Cardstock Cuts for this project:

  • Pool Party – 4-1/4″ x 11″ card base scored at 5-1/2″, 4-1/4″ x 5-1/2″ (embossed panel)
  • Whisper White – 4″ x 5-1/4″ (inside panel), 2-5/8″ x 3-3/4″ (scalloped rectangle), 2-1/2″ x 4-1/2″ (cherry blossom branch die cut)
  • Petal Pink – 1/2″ x 2″ (label)
  • Parisian Blossoms DSP – 2-1/8″ x 3-1/4″ (blossom panel), 1/2″ x 4″ (inside trim), 1/2″ x 3″ (foil flowers), 1/4″ x 4″ (foil words)

Stampin’ Up! products used in this project:


Stampin’ Up! Welcome Easter New Baby Card

Good Morning! Today I am sharing a fun new baby card made with the cute little lamb from the Stampin’ Up! Welcome Easter cling stamp set. This set has three really cute baby animals, some accent stamps and wonderful sentiments for Easter or celebrating little ones. Sadly is it being retired, so I just had to make a colorful baby card. You can find the supplies I used to create this card at the bottom of my post along with the sizes of cardstock used.

I adhered a panel of the polka dot paper from the Best Dressed designer series paper to a Pear Pizzazz mat and layered Dinoroar designer series paper pieces on top of it at wonky angles. I cut three stitched hearts using the little heart die from the retiring Stitched Labels Dies from Pear Pizzazz, Mango Melody and Lovely Lipstick card stock and adhered them around the card because babies and hearts go together – right? I adhered the decorated panel to a Daffodil Delight Card base with dimensionals.

I stamped the sentiment in Pear Pizzazz ink on a Whisper White panel and cut it out with the die from the Stitched Rectangle Dies. I added glue dots on the back and attached some ribbon and added a Pretty Peacock rhinestone before adhering it to the card with more glue dots.

I stamped the little lamb from the Stampin’ Up! Welcome Easter stamp set in Basic Gray ink on a Whisper White. I colored it with Light Old Olive, Light Petal Pink and Ivory Stampin’ Blend markers and cut it out with a Layering Circle Die. I cut a scalloped circle from Pretty Peacock and adhered it to the back and popped the lamb on the card with dimensionals.

I adhered a strip of the polka dot Best Dressed DSP to the bottom of a Whisper White panel and added three more hearts to the top corner. I adhered the panel to a Pear Pizzazz mat and then to the inside of the card with multipurpose liquid glue.

Baby cards are always good for a smile and I think any of the baby animals from the Stampin’ Up! Welcome Easter stamp set would have been cute. And fun, colorful designer series paper always goes great in a baby card! Thanks for stopping by and have a great day!


Stampin’ Up! 2019-20 Annual Catalog and January-June 2020 Mini Catalog Retiring Lists Have Posted!

Stampin’ Up has posted the retirement lists for the 2019-2020 Annual Catalog and January-June 2020 Mini Catalog today in preparation for the release of the new 2020-2021 Annual Catalog. The items on the lists are only available while supplies last from now through June 2!  And some of the items are available at a discount!!

Click on the picture below to head over to my Online Store to shop the retiring products:

Have fun shopping and let me know if you have any questions!


May 1 – 15 Host Code: T323M33B

Use this host code when you order $50 or more and receive a free gift from me!  The gift is your choice of any item valued up to $10.00 in the 2019-20 Annual Catalog or in the 2020 January-June Mini Catalog!  That includes some of the Host Exclusive stamp sets!

If your order is over $150, please do not use the host code since you’ll receive your own Host Dollars plus I’ll still send you the free gift!  This host code can be used by anyone, no commitment required.  Let me know if you have any questions.


If you need any stamping supplies, I’d be very happy to be your Demonstrator.  Just click on the Shop Now Button on the right side of the screen to go directly to my Online store or contact me if you have any questions.  Happy Stamping!

Thanks for stopping by and have a great day!

Akiko

  • Visit my Online store here
  • See the current Stampin’ Up! clearance rack specials here
  • Earn FREE Stampin’ Up! products through my Wildflower Frequent Shopper Program – my way of saying thank you to my frequent shopper online customers.
  • Sign up for my monthly newsletter here
  • Have any questions? I’d be happy to help, click here to contact me.

Cardstock Cuts for this project:

  • Daffodil Delight – 4-1/4″ x 11″ card base scored at 5-1/2″
  • Pear Pizzazz – (2) 4″ x 5-1/4″ (mats), 1″ x 2″ (heart die cuts)
  • Mango Melody – 1″ x 2″ (heart die cuts)
  • Lovely Lipstick – 1″ x 2″ (heart die cuts)
  • Pretty Peacock – 3″ x 3″ (lamb mat)
  • Whisper White – 3-7/8″ x 5-1/8″ (inside panel), 1-3/4″ x 2-1/4″ (label), 3″ x 3″ (lamb)
  • Best Dressed DSP – 3-7/8″ x 5-1/8″ (front background), 1/2″ x 3-7/8″ (inside trim)
  • Dinoroar DSP – 2″ x 3-3/4″ (triangles), 3/4″ x 4″ (semicircles)

Stampin’ Up! products used in this project:


Stampin’ Up! 2020-2021 Annual Catalog Pre-Order Starts Today!

Woohoo!!!  Demonstrators get to start ordering from a select list of Annual Catalog preorder items TODAY!  I’ve already put in my first order and I placed an order for catalogs for my customers!!

If you’ve ordered from me within the last year, you will automatically be on my mailing list to receive a new catalog!  I’ll be packing them up and shipping them back out just as soon as they arrive (fingers crossed for a speedy delivery!) and my customers should start seeing the catalogs in their mailboxes in mid-May!

If you are not a current customer of mine but would like to be and want a copy of the upcoming catalog, drop me a note with your current mailing address to: apsudano@stampininthemeadows.com and I’ll pack up a catalog for you too!!

Ordering from the new catalog begins on June 3, 2020. Be sure to watch for sneak peeks!!

Now Is A Great Time To Join As A Demonstrator!!

If you have ever considered joining as a Demonstrator, now is a great time to jump in!!  You can choose items from the pre-order list for your Starter Kit and you can also order additional preorder items once you join!  Yay!!!

When you join, you get to pick $125 in Stampin’ Up! merchandise of your choice and you only pay $99 + taxes and your kit ships for free!  So it’s a great deal AND you get your hands on new catalog goodies before anyone else can order!

If you are interested in joining and have questions, please contact me at apsudano@stampininthemeadows.com or stop by my information page on my blog here.  If you’re ready to join, click here to go over to my Stampin’ Up! website (scroll down the “join now” button in the center at the bottom) to put in your order for your Starter Kit!!


Stampin’ Up! 2019-20 Annual Catalog and January-June 2020 Mini Catalog Retiring Lists Have Posted!

Stampin’ Up has posted the retirement lists for the 2019-2020 Annual Catalog and January-June 2020 Mini Catalog in preparation for the release of the new 2020-2021 Annual Catalog. The items on the lists are only available while supplies last from now through June 2!  And some of the items are available at a discount!!

Click on the picture below to head over to my Online Store to check out the retiring products:

Have fun shopping and let me know if you have any questions!


May 1 – 15 Host Code: T323M33B

Use this host code when you order $50 or more and receive a free gift from me!  The gift is your choice of any item valued up to $10.00 in the 2019-20 Annual Catalog or in the 2020 January-June Mini Catalog!  That includes some of the Host Exclusive stamp sets!

If your order is over $150, please do not use the host code since you’ll receive your own Host Dollars plus I’ll still send you the free gift!  This host code can be used by anyone, no commitment required.  Let me know if you have any questions.


If you need any stamping supplies, I’d be very happy to be your Demonstrator.  Just click on the Shop Now button on the right side of the screen to go directly to my Online store or contact me if you have any questions.  Happy Stamping!

Thanks for stopping by and have a great day!

Akiko

  • Visit my Online store here
  • See the current Stampin’ Up! clearance rack specials here
  • Earn FREE Stampin’ Up! products through my Wildflower Frequent Shopper Program – my way of saying thank you to my frequent shopper online customers.
  • Sign up for my weekly newsletter here
  • Have any questions? I’d be happy to help, click here to contact me.

Stampin’ Up! Share Sunshine Cards

Good Morning! Have you seen the special Stampin’ Up! Share Sunshine COVID-19 Giveback Digital Stamps? Well, let me tell you more and show you how to Share Sunshine during these trying times. You can find the supplies used to create this card at the bottom of my post along with the sizes of cardstock used.

Here are the cards that I’ve made so far. All the proceeds from the COVID-19 Giveback promotion are donated to one of 2 organizations and you choose which (or both) to donate to. You can go here to purchase the set for $12 + tax. Then you download the PDF file containing 15 pages of stamped images. It also has a couple of pages that tell you additional information so you can design your cards. It tells you:

  • The colors that are on each page
  • The punches and die cuts that fit the images on each pages
  • Stamp sets that coordinate with a matching font.

Once you download the PDF, you can print out what you want on card stock and punch or die cut the image to add to your card. For today’s card, I printed the sentiments from page 3 of the PDF on Whisper White card stock using my Epson color printer.

On this card, I cut a panel of the Woven Threads DSP and adhered it to a pool party mat. Then I adhered it to a larger Pretty Peacock mat with dimensionals and finally to a pool party card base. I cut a strip of Pretty Peacock card stock and embossed it with the Subtle embossing folder and adhered it to the card. I cut the printed digital stamp with a Stitched Rectangle Die and adhered it to a Pool Party mat and then to the embossed strip with dimensionals. I finished it off by decorating the DSP medallion with Pretty Peacock Rhinestones.

I added anther strip of the Woven Threads DSP to the bottom of a Whisper White panel and adhered it to the inside of the card.

For this card, I cut the sentiment with the die from the Stitched So Sweetly Dies and adhered it to a Lovely Lipstick die cut of the larger die from the same set. I colored the Whisper White Crinkle Ribbon with the Light Purple Posy Stampin’ Blend and made a little bow that I attached with a glue dot. I adhered the striped paper from the Best Dressed DSP pack to a Whisper White mat. I adhered the floral paper on top with multipurpose liquid glue. I used the teeny border die from the Ornate Borders Dies to cut a strip of Whisper White and adhered it to the seam with multipurpose liquid glue. I adhered the layered panel to a Lovely Lipstick card base with dimensionals and adhered the layered label with dimensionals.

Again, I added a strip of DSP to the bottom of a Whisper White panel before adhering it to the inside of the card.

These two cards came together pretty quickly and it’s nice to have something to send out to my loved ones who are far away that is relevant to our situation. I hope you stay safe and have a great week!


Stampin’ Up! Making a Difference: Share Sunshine

Stampin’ Up! announced a product giveback opportunity to support organizations that are helping COVID-19 frontline responders and communities vulnerable to the pandemic as part of their Making a Difference Program!

The Share Sunshine PDF Download is a digital stamp set that’s packed with both lighthearted and heartfelt sentiments and imagery relevant to the unique COVID-19 and social distancing situation we’re currently experiencing. You can use the download in your cardmaking and papercrafting projects. Simply print the imagery on cardstock and cut it out using our Paper Trimmer, punches, or dies. Since we are physically distanced from each other, now is a perfect time to share sunshine with our friends and family by sending cards!

And all the proceeds are being donated to two organizations and you can choose who to donate your dollars to.

Click Here to Purchase the Share Sunshine PDF Download.

Please note:  Since this is a special promotion from Stampin’ Up! and isn’t orderable through the regular online store, I will not be notified when you order this set and it can’t be added in with your regular orders through the online store. 

Get your digital download today and make a difference!!


May 1 – 15 Host Code: T323M33B

Use this host code when you order $50 or more and receive a free gift from me!  The gift is your choice of any item valued up to $10.00 in the 2019-20 Annual Catalog or in the 2020 January-June Mini Catalog!  That includes some of the Host Exclusive stamp sets!

If your order is over $150, please do not use the host code since you’ll receive your own Host Dollars plus I’ll still send you the free gift!  This host code can be used by anyone, no commitment required.  Let me know if you have any questions.


If you need any stamping supplies, I’d be very happy to be your Demonstrator.  Just click on the Shop Now Button on the right side of the screen to go directly to my Online store or contact me if you have any questions.  Happy Stamping!

Thanks for stopping by and have a great day!

Akiko

  • Visit my Online store here
  • See the current Stampin’ Up! clearance rack specials here
  • Earn FREE Stampin’ Up! products through my Wildflower Frequent Shopper Program – my way of saying thank you to my frequent shopper online customers.
  • Sign up for my monthly newsletter here
  • Have any questions? I’d be happy to help, click here to contact me.

Cardstock Cuts for this project:

Socially Distant Card:

  • Pool Party – 4-1/4″ x 11″ card base scored at 5-1/2″, 3-5/8″ x 4-7/8″ (mat), 1″ x 3″ (label mat)
  • Pretty Peacock – 5/8″ x 3-1/2″ (embossed strip), 4″ x 5-1/4″ (mat)
  • Whisper White – 4″ x 5-1/4″ (inside panel), die cut digital stamp
  • DSP – 3-1/2″ x 4-3/4″ (front background), 1/2″ x 4″ (inside trim)

Sending Joy Card:

  • Lovely Lipstick – 5-1/2″ x 8-1/2″ card base scored at 4-1/4″, 2-3/4″ x 4″ (label mat)
  • Whisper White – (2) 4″ x 5-1/4″ (inside panel and front mat), 1/2″ x 5-1/8″ (die cut border), die cut digital stamp
  • DSP – 1″ x 5-1/8″ (striped bottom), 3″ x 5-1/8″ (floral top), 1/2″ x 5-1/4″ (inside trim)

Stampin’ Up! products used in this project:


Stampin’ Up! Abstract Impressions Sending Hugs Card Video Tutorial

Good Morning! Today I’m sharing a card that I made yesterday afternoon during my Facebook Live Tutorial. It’s made with the versatile Stampin’ Up! Abstract Impressions photopolymer stamp set and it’s on the retiring list. It’s one of my favorites and on Friday I posted a card with the coordinating dies. Today’s card is all about stamping – specifically two step stamping where two coordinating stamps are used to create one image. You can find the supplies used to create this card at the bottom of my post along with the sizes of cardstock used.

Here is the Facebook Live video showing how I made the card:

I also posted the video to my YouTube Channel and you can view it here.

I started by embossing a Balmy Blue card stock panel with the Coastal Weave embossing folder and adhering it to a Balmy Blue card base with multipurpose liquid glue. I stamped the flowers and leaves from the Stampin’ Up! Abstract Impressions photopolymer stamp set on a panel of Whisper White. I stamped each using the two step stamping method, by stamping off once with the fuller image to get a lighter color and stamping full strength with the corresponding highlight image. I used Lovely Lipstick for the large rose, Balmy Blue for the three medium flowers and Daffodil Delight for the cluster of small round flowers. I stamped the Leaves in Granny Apple Green and the sentiment in Shaded Spruce.

I added clear Wink of Stella to give the flowers some sparkle and adhered the stamped panel to a Lovely Lipstick mat. I tied a double strand of Linen thread around the panel and tied a bow and then adhered it to the card with dimensionals. I finished it off with three small epoxy drops.

For the inside of the card, I stamped the same flowers at the bottom corner of a Whisper White panel and adhered it to the inside of the card.

The Stampin’ Up! Abstract Impressions stamp set is one of my all time favorites for creating stamped flowers. There are a variety of flower shapes and sizes and the sentiments are wonderful! And it is on sale at 20% discount as one of the retiring products. Hurry over to my Online Store to check it out!


Stampin’ Up! 2019-20 Annual Catalog and January-June 2020 Mini Catalog Retiring Lists Have Posted!

Stampin’ Up has posted the retirement lists for the 2019-2020 Annual Catalog and January-June 2020 Mini Catalog today in preparation for the release of the new 2020-2021 Annual Catalog. The items on the lists are only available while supplies last from now through June 2!  And some of the items are available at a discount!!

Click on the picture below to head over to my Online Store to shop the retiring products:

Have fun shopping and let me know if you have any questions!


Stampin’ Up! Making a Difference: Share Sunshine

Stampin’ Up! announced a product giveback opportunity to support organizations that are helping COVID-19 frontline responders and communities vulnerable to the pandemic as part of their Making a Difference Program!

The Share Sunshine PDF Download is a digital stamp set that’s packed with both lighthearted and heartfelt sentiments and imagery relevant to the unique COVID-19 and social distancing situation we’re currently experiencing. You can use the download in your cardmaking and papercrafting projects. Simply print the imagery on cardstock and cut it out using our Paper Trimmer, punches, or dies. Since we are physically distanced from each other, now is a perfect time to share sunshine with our friends and family by sending cards!

And all the proceeds are being donated to two organizations and you can choose who to donate your dollars to.

Click Here to Purchase the Share Sunshine PDF Download.

Please note:  Since this is a special promotion from Stampin’ Up! and isn’t orderable through the regular online store, I will not be notified when you order this set and it can’t be added in with your regular orders through the online store. 

Here are some examples using the Share Sunshine Digital Stamps:

Get your digital download today and make a difference!!


May 1 – 15 Host Code: T323M33B

Use this host code when you order $50 or more and receive a free gift from me!  The free gift is your choice of any item valued up to $10.00 in the 2019 – 2020 Annual Catalog or in the 2020 Mini Catalog!  That includes some of the Host Exclusive stamp sets!

If your order is over $150, please do not use the host code since you’ll receive your own Host Dollars plus I’ll still send you the free gift!  This host code can be used by anyone, no club or commitment required.  Let me know if you have any questions.


If you need any stamping supplies, I’d be very happy to be your Demonstrator.  Just click on the Shop Now button on the right side of the screen to go directly to my online store or contact me if you have any questions.  Happy Stamping!

Thanks for stopping by and have a great week!

Akiko

  • Visit my online store here
  • See the current Stampin’ Up! clearance rack specials here
  • Earn FREE Stampin’ Up! products through my Wildflower Frequent Shopper Program – my way of saying thank you to my online frequent shopper customers.
  • Sign up for my weekly newsletter here
  • Have any questions? I’d be happy to help, click here to contact me.

Cardstock Cuts for this project:

  • Balmy Blue – 4-1/4″ x 11″ card base scored at 5-1/2″, 4″ x 5-1/4″ (embossed panel)
  • Lovely Lipstick – 3-1/4″ x 4-1/2″ (flower panel mat)
  • Whisper White – 4″ x 5-1/4″ (inside panel), 3-1/8″ x 4-3/8″ (flower panel)

Stampin’ Up! products used in this project:


Stampin’ Up! Abstract Impressions Thank You Card

Good Friday Morning! Today I am sharing a Thank You card made with the retiring Stampin’ Up! Abstract Impressions photopolymer stamp set and Springtime Impressions Dies. This set is one of my all time favorites because of it’s versatility and wonderful sentiments – and of course the gorgeous die cut butterfly! You can find the supplies used to create this card at the bottom of my post along with the sizes of cardstock used.

I adhered a panel of the Purple Posy paper from the Best Dressed designer series paper to a Highland Heather card base with multipurpose liquid glue. I die cut the floral background from the Springtime Impressions Dies from Whisper White card stock and adhered it to the card front with small dots of multipurpose liquid glue.

Then I die cut the butterfly from Highland Heather card stock and adhered it to the card front with glue dots under the butterfly body so that the wings are free. I finished the butterfly off with two Highland Heather Glitter dots.

I stamped the Thank You sentiment from the Stampin’ Up! Abstract Impressions photopolymer stamp set on a Whisper White and cut it out with the long label die from the Ornate Frames Dies. I adhered the label to the card front with multipurpose liquid glue and finished it off with another Highland Heather glitter enamel dot.

I adhered a strip of the Purple Posy DSP to the bottom of a Whisper White panel. I cut the little flower from the Springtime Impressions Dies from Purple Posy card stock and adhered it to the bottom corner and adhered the panel to the inside of the card.

The die cut butterfly is so dramatic, yet this card was so simple to make. And yet I haven’t really begun to explore the many features of the Stampin’ Up! Abstract Impressions stamp set. I think that will be the next project. Lets play more with this set before it’s gone!


May 1 – 15 Host Code: T323M33B

Use this host code when you order $50 or more and receive a free gift from me!  The gift is your choice of any item valued up to $10.00 in the 2019-20 Annual Catalog or in the 2020 January-June Mini Catalog!  That includes some of the Host Exclusive stamp sets!

If your order is over $150, please do not use the host code since you’ll receive your own Host Dollars plus I’ll send you the free gift!  This host code can be used by anyone, no commitment required.  Let me know if you have any questions.


If you need any stamping supplies, I’d be very happy to be your Demonstrator.  Just click on the Shop Now button on the right side of the screen to go directly to my Online store or contact me if you have any questions.  Happy Stamping!

Thanks for stopping by and have a great day!

Akiko

  • Visit my Online store here
  • See the current Stampin’ Up! clearance rack specials here
  • Earn FREE Stampin’ Up! products through my Wildflower Frequent Shopper Program – my way of saying thank you to my frequent shopper online customers.
  • Sign up for my weekly newsletter here
  • Have any questions? I’d be happy to help, click here to contact me.

Cardstock Cuts for this project:

  • Highland Heather – 4-1/4″ x 11″ card base scored at 5-1/2″, 2-1/4″ x 4-1/4″ panel (butterfly die cut)
  • Purple Posy – 1-1/2″ x 1-1/2″ (flower die cut)
  • Whisper White – 4″ x 5-1/4″ (inside panel), 4-1/4″ x 5-1/2″ (flower corner and label die cuts)
  • Best Dressed DSP – 4″ x 5-1/4″ (front background), 1/2″ x 4″ (inside trim)

Stampin’ Up! products used in this project:


Stampin’ Up! Floral Essence Miss You Card for the Happy Inkin’ Thursday Blog Hop

Good Morning! Welcome to another Happy Inkin’ Thursday Blog Hop! I have a whimsical miss you card to brighten your day using the sweet Stampin’ Up! Floral Essence stamp bundle along with the Well Written Dies.

We have a color challenge this week, and here is the bright, fun color palette we are using:

My card also fits with the current challenge at TGIF Challenges – #TGIFC261- Use Your Words. Check it out – it’s a fun challenge and the cards are so cute.

I adhered a panel of the Daffodil Delight sprinkles paper from the Birthday Bonanza designer series paper pack to a Grapefruit Grove mat and then to a thick Whisper White card base with multipurpose liquid glue. I cut a panel of Whisper White with a Stitched So Sweetly Dies scalloped rectangle and embossed it with the Scripty embossing folder. I adhered it to the card front with multipurpose liquid glue.

I stamped 9 three petal flower clusters from the Stampin’ Up! Floral Essence photopolymer stamp set in VersaMark Ink on the Grapefruit Grove starburst paper from the Birthday Bonanza DSP pack. I sprinkled them with white embossing powder and shook off the excess. I heat set until shiny and punched them out with the Perennial Flower Punch. I gently curved the petals with my fingers and made three flowers by adhering the centers with multipurpose liquid glue – each flower has three sets of petals. I added a fun, fuzzy Perennial Essence Floral Center to each flower. I stamped 6 leaf clusters from the Stampin’ Up! Floral Essence stamp set using Bermuda Bay ink on the Bermuda Bay confetti paper from the Birthday Bonanza DSP pack and punched them out with the Leaf Punch.

I cut out the sentiment from Bermuda Bay card stock using the Well Written Dies. I also cut two Well Written Dies butterflies from Daffodil Delight card stock. With all the pieces cut out, I arranged them on the card front and started assembly by adhering the Bermuda Bay words with multipurpose liquid glue – Don’t lose the tiny dot for the ‘I’! I adhered the leaves with multipurpose liquid glue and the flowers with glue dots. Lastly, I adhere a little butterfly and finished it off with Calypso Coral enamel dots.

I adhered the second butterfly to the top corner of a Whisper White panel and added the strip of Daffodil Delight DSP. I adhered the decorated panel to a Grapefruit Grove mat and then to the inside of the card.

What do you think of stamping on the designer series paper? It’s a little different, giving a little extra texture to the flowers and leaves. Too bad I didn’t die cut the butterflies from the Daffodil Delight sprinkle paper – next time.

On with the Hop! Click the Next button below to see the project that Karen Ksenzakovic created for today’s blog hop.

And just in case you get lost along the way, here’s a list of the team members participating in the hop today:


April 16 – 30 Host Code: SJ9ZJ46Z

May 1 – 15 Host Code: T323M33B

Use this host code when you order $50 or more and receive a free gift from me!  The gift is your choice of any item valued up to $10.00 in the 2019-20 Annual Catalog or in the 2020 January-June Mini Catalog!  That includes some of the Host Exclusive stamp sets!

If your order is over $150, please do not use the host code since you’ll receive your own Host Dollars plus I’ll send you the free gift!  This host code can be used by anyone, no commitment required.  Let me know if you have any questions.


If you need any stamping supplies, I’d be very happy to be your Demonstrator.  Just click on the Shop Now button on the right side of the screen to go directly to my online store or contact me if you have any questions.  Happy Stamping!

Thanks for visiting!

Akiko

  • Visit my online store here
  • See the current Stampin’ Up! clearance rack specials here
  • Earn FREE Stampin’ Up! products through my Wildflower Frequent Shopper Program – my way of saying thank you to my frequent shopper online customers.
  • Sign up for my weekly newsletter here
  • Have any questions? I’d be happy to help, click here to contact me.

Cardstock Cuts for this project:

  • Thick Whisper White – 4-1/4″ x 11″ card base scored at 5-1/2
  • Grapefruit Grove – (2) 4″ x 5-1/4″ (mats)
  • Bermuda Bay – 1″ x 3″ (miss you die cuts)
  • Daffodil Delight – 1″ x 1″ (2 butterfly die cuts)
  • Whisper White – 3-7/8″ x 5-1/8″ (inside panel), 2-3/4″ x 3-3/4″ (scalloped rectangle)
  • Birthday Bonanza DSP
    • Daffodil Delight Sprinkles – 3-7/8″ x 5-1/8″ (front background), 1/2″ x 3-7/8″ (inside trim)
    • Grapefruit Grove Starbursts – 6″ x 6″ (punched flower petals)
    • Bermuda Bay Confetti – 4″ x 6″ (punched leaves)

Stampin’ Up! products used in this project: