Stampin’ Up! Simply Said Masculine Birthday Card

Good Morning! The Country Woods designer series paper has several different wood grain designs that are great for adding a rustic touch to your projects. I’ve used a few of the patterns to make a simple layered masculine birthday card and paired it with the Stampin’ Up! Simply Said sentiment stamp set. You can find the card stock cuts along with supplies at the bottom of my post.

Adhere a Misty Moonlight panel of Country Woods DSP to the front of a Crumb cake card base. Adhere two more panels of the DSP to Early Espresso mats and adhere them to the card front with liquid glue. This gives you a fairly flat card that can easily be mailed.

Stamp the birthday sentiment from the Stampin’ Up! Simply Said stamp set using Versamark ink on another panel of Country Woods DSP. Since I wanted the sentiment to be short and wide and the stamp is long and skinny, I had to do something different.

  • Ink up the ‘happy’ and stamp it
  • Sprinkle it with white embossing powder and shake off the excess so you can see it
  • Clean off the stamp and ink up the ‘birthday’ and stamp it under the ‘happy’
  • Sprinkle the ‘birthday’ with white embossing powder and shake off the excess
  • Heat set the whole sentiment until the powder is bright and shiny

Adhere the stamped DSP to the left side of an Early espresso mat and tear the right edge to make it more rustic. Wrap the right side with Crumb Cake baker’s twine and tie a knot. Adhere the sentiment to the card with dimensionals and finish with a Crumb Cake dot.

Adhere another Misty Moonlight pannel of the country Woods designer series paper to the inside of the card. Stamp the sentiment from the Stampin’ Up! Simply Said stamp set using early Espresso ink on a Basic White panel. Adhere the panel to the inside of the card with Stampin’ Seal.

Layering designer series paper on cards is easy when you use coordinating papers from the same designer series paper pack. And there are so many different card sketch ideas on the internet, Pinterest and even the Stampin’ Up! Catalogs to help you find the right layout.

Thanks so much for stopping by and Happy Stamping!!

Akiko

Cardstock Cuts for this project:

  • Crumb Cake – 5-1/2″ – 8-1/2″ card base, scored at 4-1/4″
  • Early Espresso – 2-1/8″ x 4-1/8″ (DSP mat), 1-5/8″ x 2-7/8″ (DSP mat), 1″ x 3″ (label mat)
  • Basic White – 3″ x 4-1/2″ (inside panel)
  • Country Woods DSP – two 3-3/4″ x 5″ panels (front background and inside mat), 2″ x 4″ (vertical panel), 1-1/2″ x 2-3/4″ (horizontal panel), 7/8″ x 2″ (label)

Stampin’ Up! products used in this project:


Stampin’ Up! Simply Said Hello Card for the Happy Inkin’ Thursday Blog Hop

Good Morning and welcome to the Happy Inkin’ Thursday Blog Hop! Here’s a simple hello card made with the Stampin’ Up! Simply Said stamp set and the pretty Celebration Sips designer series paper. You can find the supplies I used along with card stock cuts at the bottom of my post.

We have a pretty sketch challenge this week:

Adhere a panel of Celebration Sips designer series paper to a Berry Burst card base with liquid glue. Cut another panel of DSP with one of the Textured Notes rectangle dies and adhere it to a Timid Tiger mat. Adhere the layered DSP panel to the card with dimensionals.

Stamp the sentiment from the Stampin’ Up! Simply Said stamp set using Blackberry Bliss ink on Timid Tiger. Cut it out using the Textured Notes die using the two step method so that it is shorter and fits the sentiment.

Use the light Berry Burst Stampin’ Blends marker to color a length of white ribbon. Fold the ribbon and adhere it to the back of the sentiment label with Stampin’ Seal. Adhere the label to the card with dimensionals and finish with Blackberry Bliss Shimmer Gems.

For the inside, use the small flower dies from the Impressions Abloom dies to cut Berry Burst, Daffodil Delight and Timid Tiger flowers. Use the Black Stampin’ Write marker to color the center and adhere them to a corner of a Basic White panel. Adhere a strip of DSP to the bottom of the panel and adhere it to the inside of the card with Stampin’ Seal.

The Stampin’ Up! Simply Said stamp set is my go to set for simple sentiments. They are the most commonly used sentiments and the fonts will go with many different styles.

On with the Hop! Click on the Next Blog button to move forward to see the beautiful project Tara Carpenter has created.

If you get lost along the way, here are the participants for the hop:

Thanks for stopping by and Happy Stamping!

Akiko


Cardstock Cuts for this project:

  • Berry Burst – 4-1/4″ x 11″ card base, scored at 5-1/2″, 1″ x 1″ (die cut flowers)
  • Timid Tiger – 2-7/8″ x 4-3/8″ (floral DSP mat), 1-1/4″ x 2-1/2″ (label), 1″ x 1″ (die cut flowers)
  • Daffodil Delight – 1″ x 1″ (die cut flowers)
  • Basic White – 4″ x 5-1/4″ (inside panel)
  • Celebratory Sips DSP – 4″ x 5-1/4″ (front background), 3″ x 4-1/2″ (floral panel), 1/2″ x 4″ (inside trim)

Stampin’ Up! products used in this project:

Stampin’ Up! Pretty Florals for the Happy Inkin’ Thursday Blog Hop

Good Morning and welcome to the Happy Inkin’ Thursday Blog Hop! The Stampin’ Up! Pretty Florals bundle is a new bundle from the upcoming Stampin’ Up! 2025-2026 Annual Catalog that will be available next week on May 6, 2025. I used it with the pretty Florals In Bloom designer series paper to make a hello card with a pretty bouquet. You can find the currently available supplies I used along with card stock cuts at the bottom of my post.

We have a color challenge this week and I used four of the colors:

I adhered a floral panel of Flowers In Bloom DSP to the front of a Summer Splash card base. I cut a Petunia Pop panel with the third largest Textured Notes rectangle die and adhered a Basic White panel to the inside with liquid glue. I popped it onto the card front with dimensionals.

I stamped the flowers from the Stampin’ Up! Pretty Florals stamp set on Basic White and cut them out with the coordinating die. These are two-step stamping flowers and I used the same color for both stamps. I used Darling Duckling, Summer Splash and Petunia Pop inks where I stamped the outline first using full strength ink and stamped off before stamping the filler stamp. For the last flower, I used the new In Color Secret Sea, but stamped off the filler stamp three times before stamping. I cut four single stems from Garden Green card stock and adhered them to the back of the flowers.

I used the leaf cluster die from the Stampin’ Up! Pretty Florals stamp set to cut two Granny Apple Green clusters and a Garden Green cluster. I adhered a Granny Apple Green Green cluster with glue dots and adhered the Secret Sea and Petunia Pop flowers on top. I adhered the Garden Green leaf cluster and the last Granny Apple Green leaf cluster with glue dots and finished with the Summer Splash and Darling Duckling flowers adhered with glue dots and dimensionals. I stamped the sentiment from the Simply Said stamp set using Secret Sea ink on Summer Splash and cut it out with the second smallest Textured notes rectangle die using the two step method. I adhered the label to the card with dimensionals and finished with new Secret Sea In Color dots.

For the inside of the card I stamped the single stem from the Stampin’ Up! Pretty Florals stamp set using Garden Green ink on Basic White. I stamped the flower using Petunia Pop like the flowers on the card front and adhered the panel to the inside of the card with Stampin’ Seal.

The Stampin’ Up! Pretty Florals bundle is really pretty and makes so many different flowers. And the Florals In bloom DSP even has some flowers that can be cut out with the dies. So there are so many creative options. Here’s the bundle:

And here’s the pretty Florals In Bloom DSP:

These pretty new items will be available on May 6.

On with the Hop! Click on the Next Blog button to move forward to see the beautiful project Karen Ksenzakovic has created.

If you get lost along the way, here are the participants for the hop:


If you need any stamping supplies, I’d be very happy to be your Demonstrator.  Just click on the Shop Now button on the right side of the screen to go directly to my online store or contact me if you have any questions. 

Thanks for stopping by and Happy Stamping!

Akiko

  • Visit my online store here
  • See the current Stampin’ Up! Last Chance items here
  • Have any questions? I’d be happy to help, click here to contact me.

Cardstock Cuts for this project:

  • Summer Splash – 4-1/4″ x 11″” card base, scored at 5-1/2″, 1″ x 2-1/2″ (label)
  • Petunia Pop – 2-1/2″ x 4-1/4″ (floral panel)
  • Granny Apple Green – 2-1/4″ x 2″ (die cut leaf clusters)
  • Garden Green – 3″ x 3-1/2″ (die cut leaf cluster and flower stems)
  • Basic White – 3-3/4″ x 5″ (inside panel), 1-7/8″ x 3-3/8″ (flower panel), 2″ x 4″ (die cut flowers)
  • Florals in Bloom DSP – 3-3/4″ x 5″ (front background)

Stampin’ Up! products used in this project:

Stampin’ Up! Pretty Florals Note Card

Good Morning! Here’s another sneak peek of the new Stampin’ Up! Pretty Florals bundle from the upcoming 2025-2026 Annual Catalog. This is such a versatile bundle with different flowers to stamp using a two step stamp method. There are also outline dies for the stamped images and coordinating floral dies. I used the bundle with the pretty Florals In Bloom designer series paper that it coordinates with. You can find the currently available products I used at the bottom of my post along with the card stock sizes.

I embossed Petunia Pop card stock with the Forever Plaid 3D embossing folder and adhered it to a panel of Florals in Bloom designer series paper. I adhered the layered DSP to the front of a Blackberry Bliss card base with liquid glue.

I stamped the sentiment from the Simply Said stamp set on the right side of a Basic White panel using Petunia Pop ink and cut it out with one of the Textured Notes rectangle dies. I adhered it to the card with dimensionals.

I cut a Bubble Bath panel with the large flower die from the Stampin’ Up! Pretty Florals dies and cut a Petunia Pop panel with the detailed die. I adhered the detailed die to the large flower with dots of liquid glue. I cut two large leaves from Garden Green. I adhered the leaves to the card with glue dots and dimensionals and popped the flower on top with dimensionals. I finished with a white bow and Petunia Pop dots.

For the inside of the card, I stamped the daisy like flower from the Stampin’ Up! Pretty Florals stamp set. I started with the detailed flower stamp in Petunia Pop. I stamped the background flower stamp in Bubble Bath ink and finished with the stem in stamped off Garden Green. I adhered the panel to the inside of the card with Stampin’ Seal.

It’s also great that the dies cut out some of the images in the DSP as well as stamped images. The Stampin’ Up! Pretty Florals bundle and Florals in Bloom designer series paper will be available May 6, 2025 when the new Annual Catalog opens for ordering.

The pretty Stampin’ Up! Florals In Bloom designer series paper is 12″ x 12″ and here are the patterns in the pack:

And here’s the Pretty Florals bundle – so many options for stamped and die cut flowers:


If you need any stamping supplies, I’d be very happy to be your Demonstrator.  Just click on the Shop Now Button on the right side of the screen to go directly to my Online store or contact me if you have any questions.  Happy Stamping!

Thanks for stopping by and have a great day!

Akiko

  • Visit my online store here
  • See the current Stampin’ Up! Last Chance items here
  • Have any questions? I’d be happy to help, click here to contact me.

Cardstock Cuts for this project:

  • Blackberry Bliss – 5-1/2″ x 8-1/2″ card base scored at 4-1/4″
  • Petunia Pop – 1-1/4″ x 5″ (embossed strip), 1-3/4″ x 2-1/4″ (die cut flower detail)
  • Bubble Bath – 2″ x 2-3/4″ (die cut flower)
  • Garden Green – 1″ x 4″ (die cut leaves)
  • Basic White – 3-3/4″ x 5″ (inside panel), 2″ x 3-1/2″ (label)
  • Florals In Bloom DSP – 3-3/4″ x 5″ (front background)

Stampin’ Up! products used in this project:


Stampin’ Up! Simply Said Thank You Card

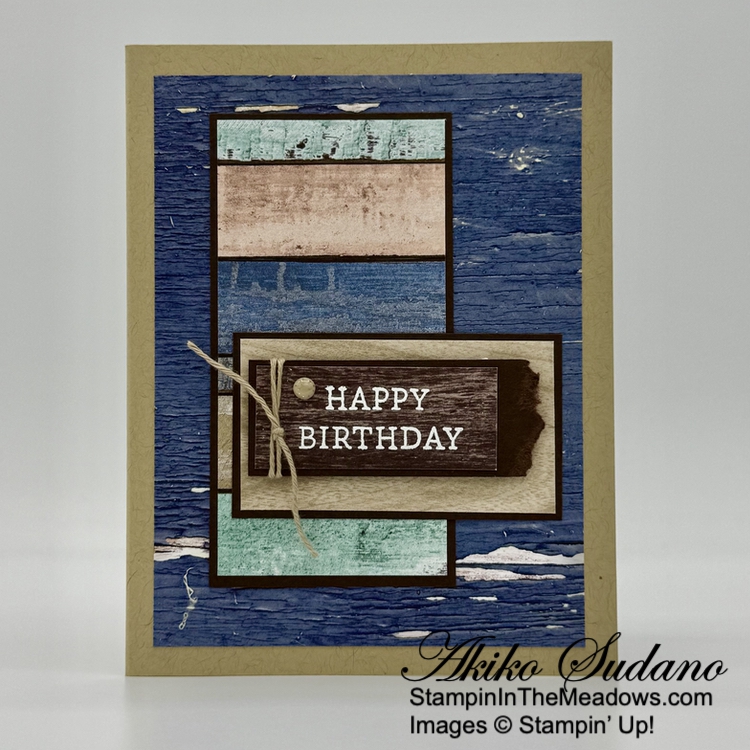
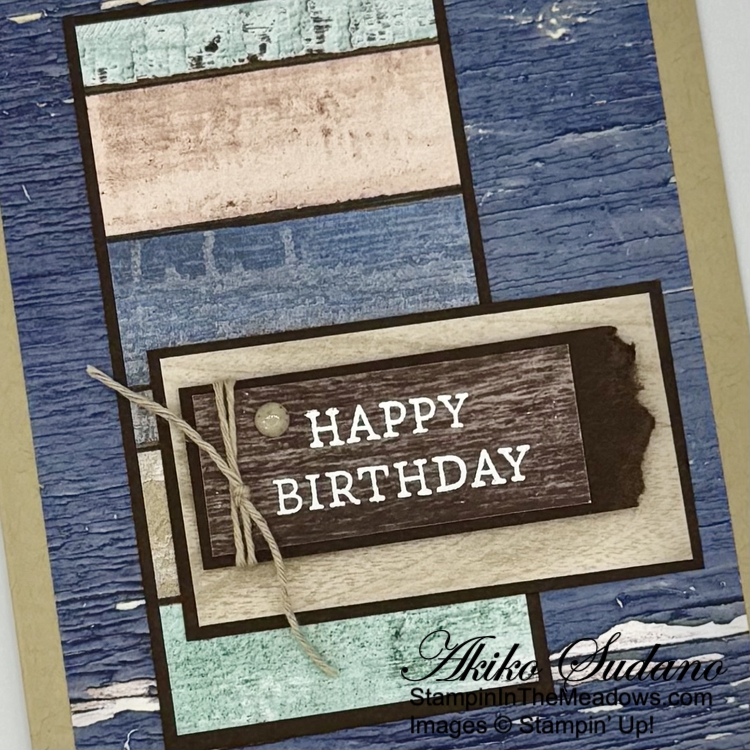
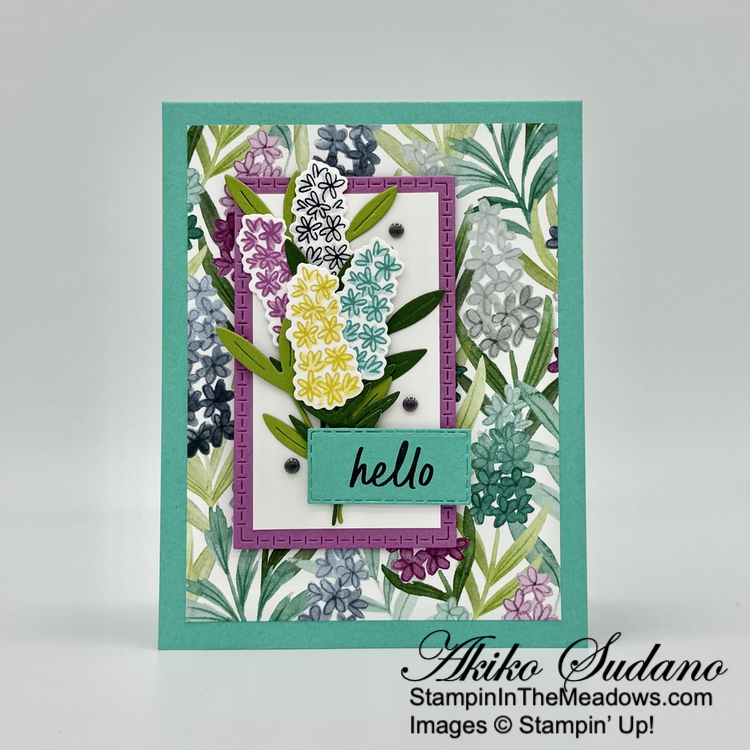
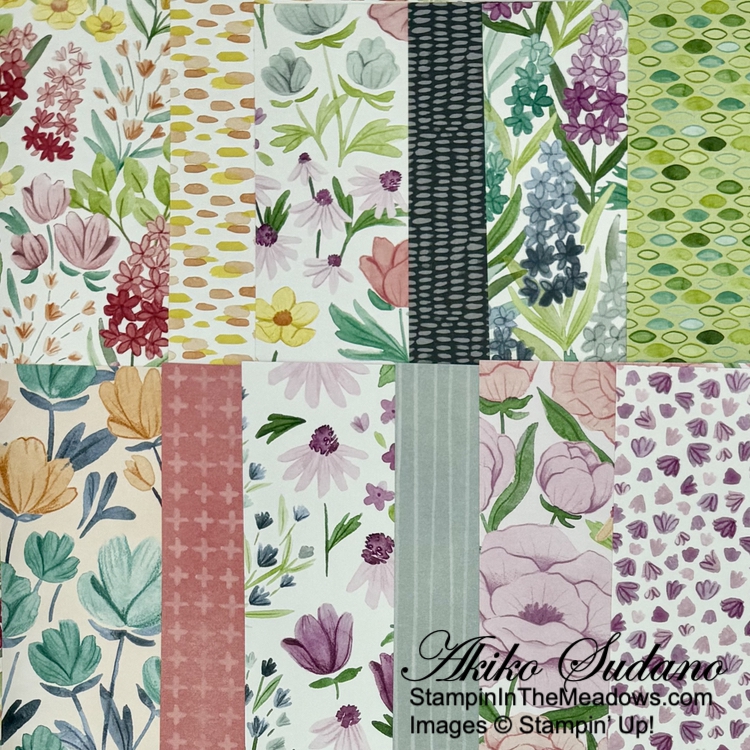
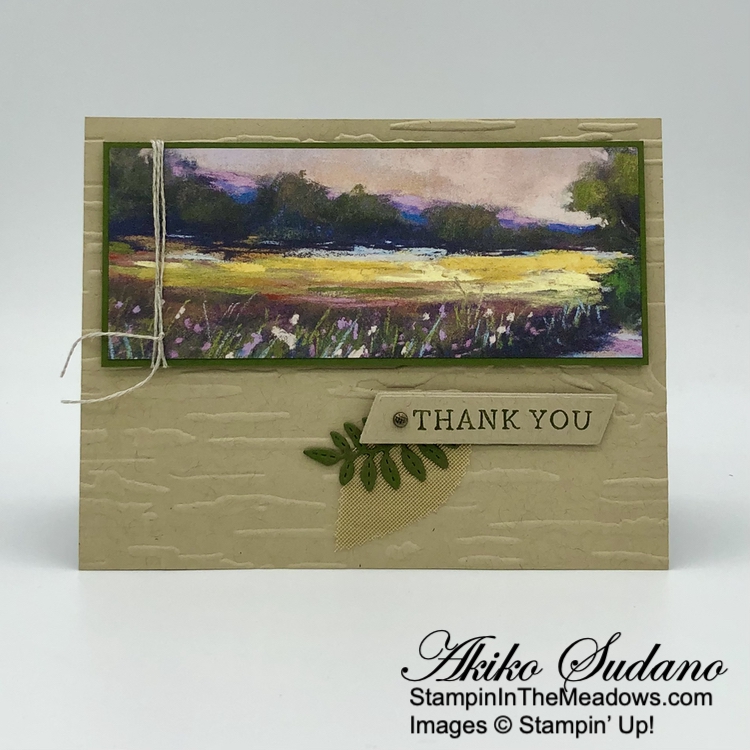
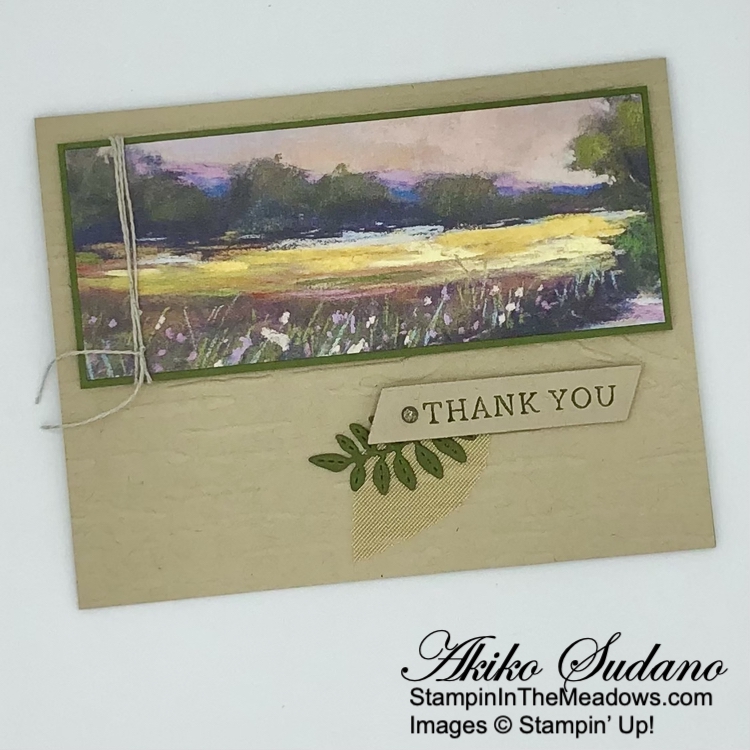
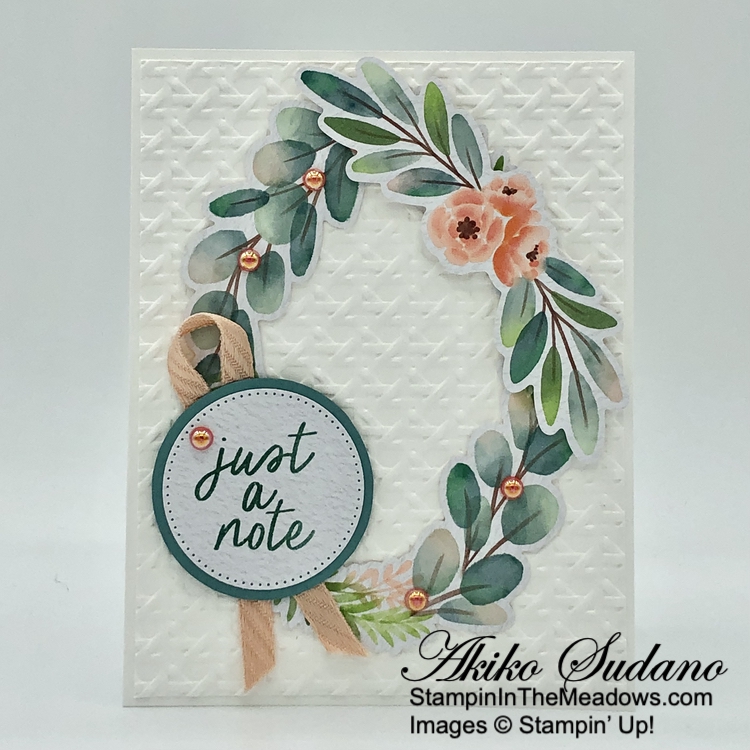
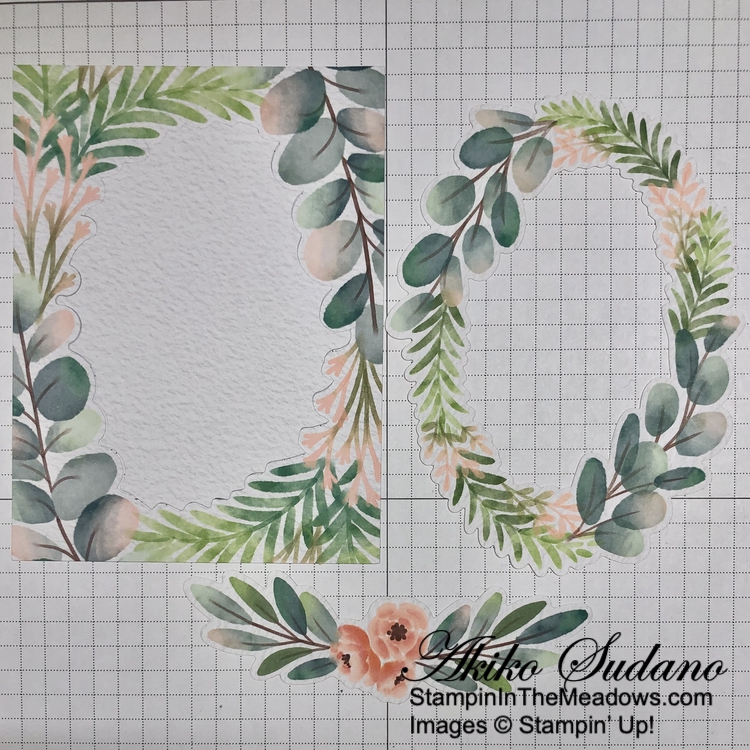
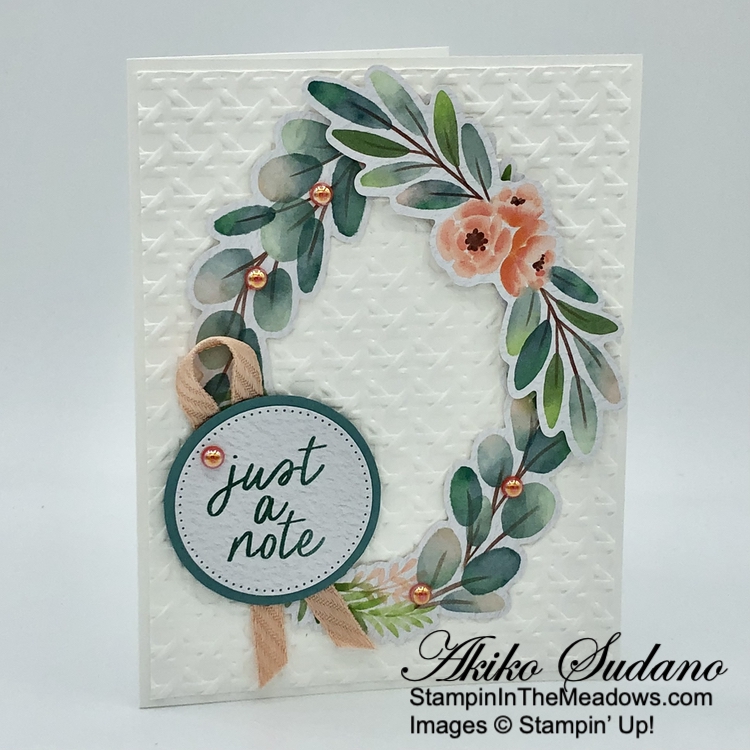
Good Morning! The Splendid Autumn 6″ x 6″ designer series paper has so many beautiful images of Fall meadows and woods that are great focal points for beautiful cards. For today’s card, I used a long horizontal image with a sentiment from the Stampin’ Up! Simply Said stamp set to make a rustic Thank You card. You can find the products I used at the bottom of my post along with the card stock sizes.

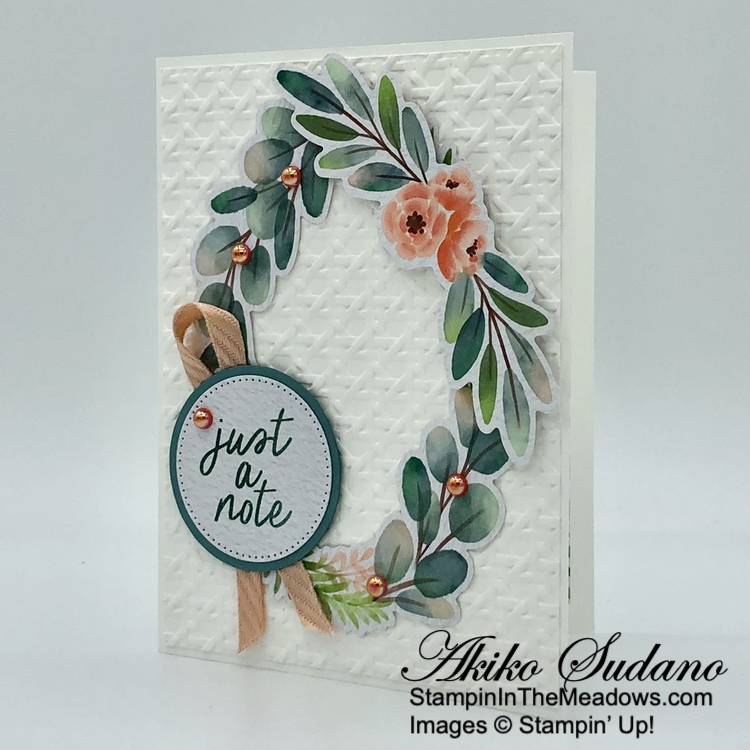
I embossed a panel of Crumb Cake card stock with the Birch Wood 3D embossing folder and adhered it to the front of a Crumb Cake card base. I adhered my Splendid Autumn DSP panel to a Mossy Meadow mat and wrapped it with Linen Thread and tied a knot. I adhered the panel to the card base with dimensionals.

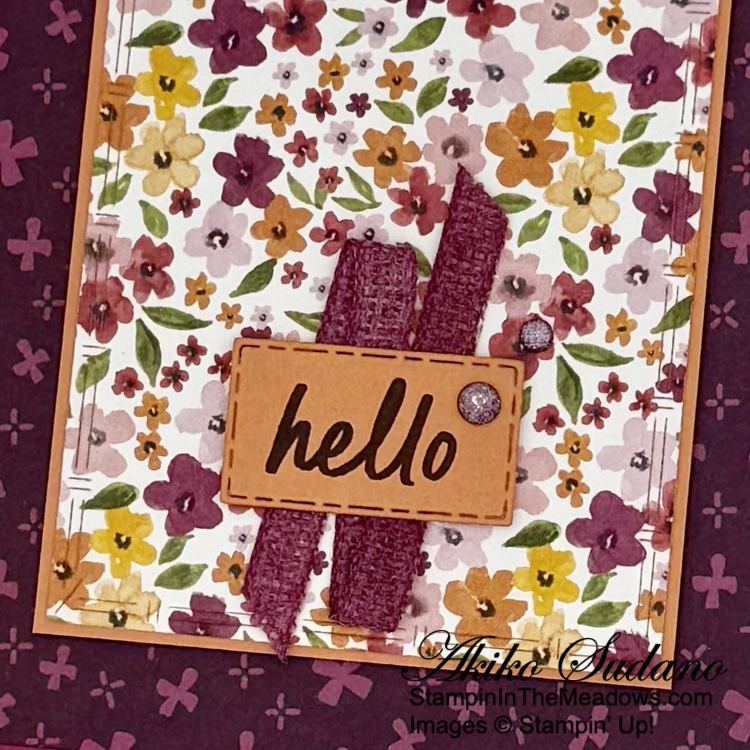
I stamped the sentiment from the Stampin’ Up! Simply Said stamp set using Mossy Meadow ink on Crumb Cake and cut it out with the Something Fancy die.

I cut a leaf sprig from Mossy Meadow using the Autumn Expressions die and adhered it to a golden woven leaf with glue dots. I adhered the layered leaves to the card with glue dots and popped the label on top with dimensionals. I accented the label with a textured metallic dot.

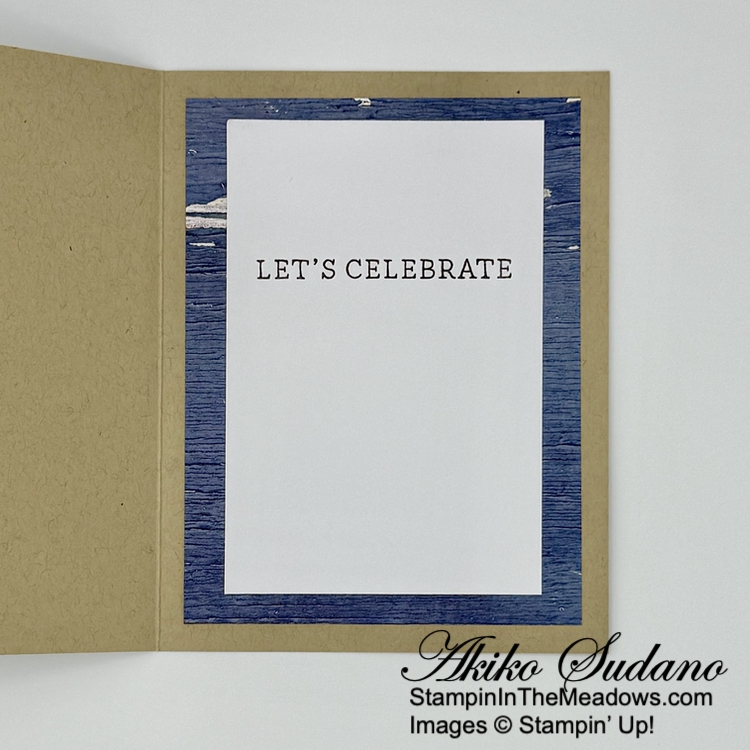
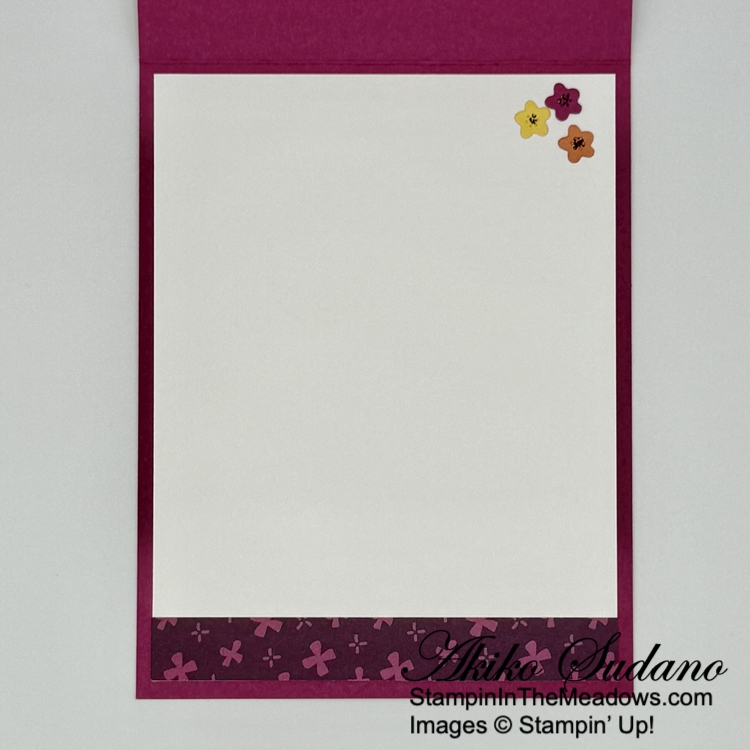
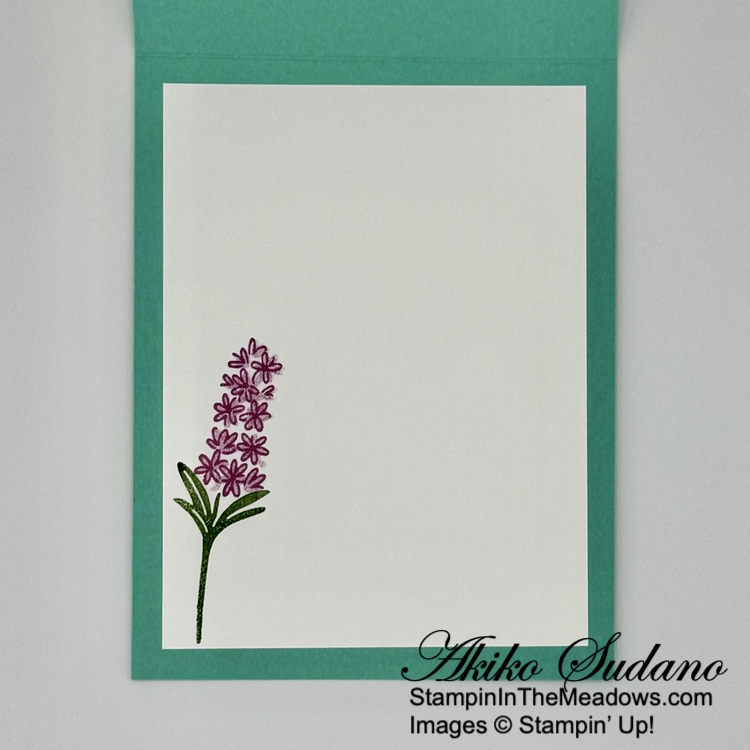
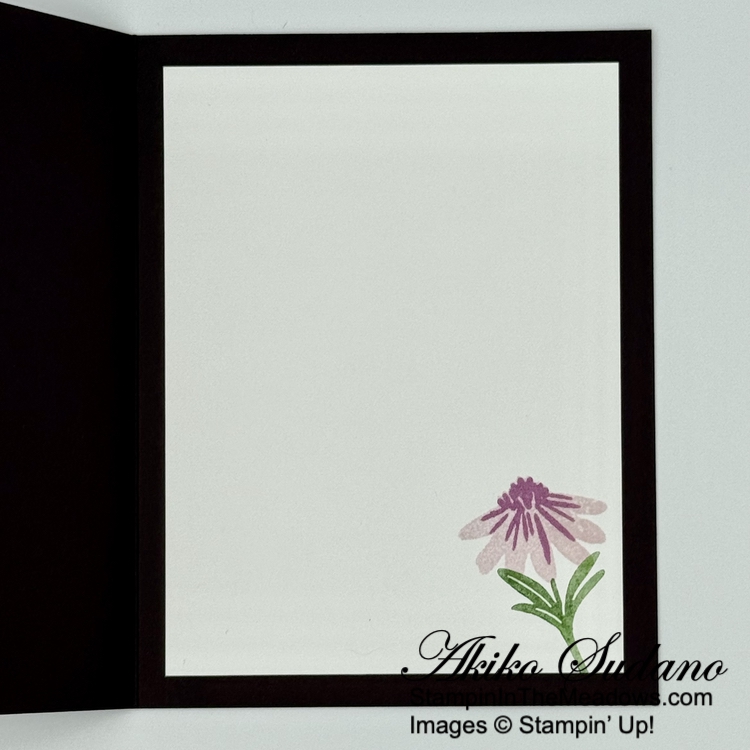
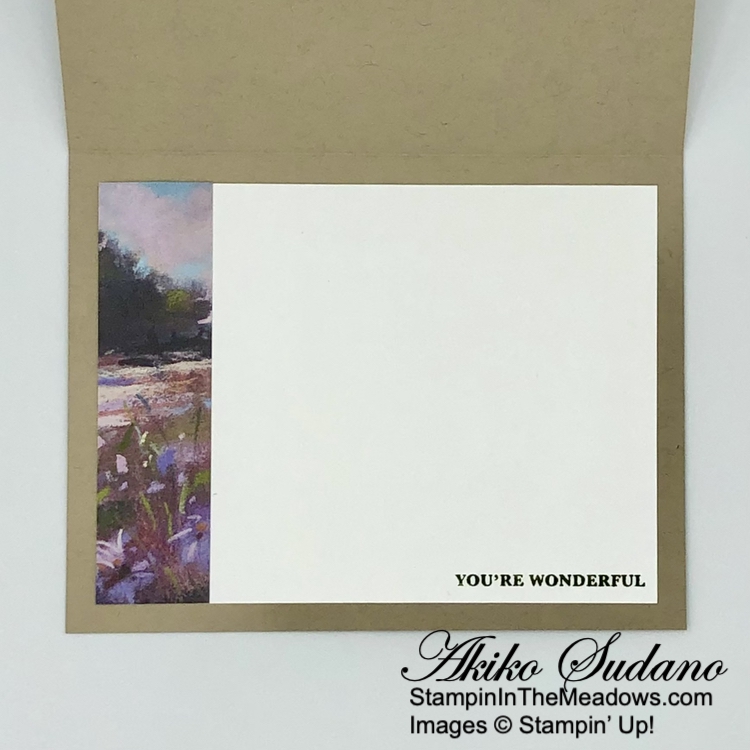
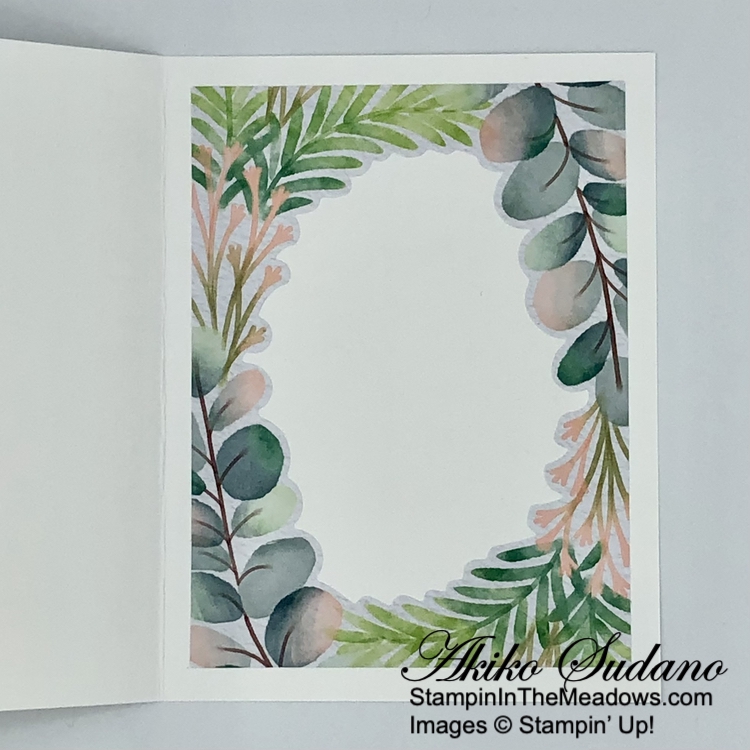
For the inside of the card, I stamped part of the sentiment from the Wonderful Thoughts stamp set using Mossy Meadow ink on Basic White. I trimmed the side with DSP and adhered the panel to the inside of the card with Stampin’ Seal. For the DSP, I chose a different pattern, as if this is another scene during a country walk.

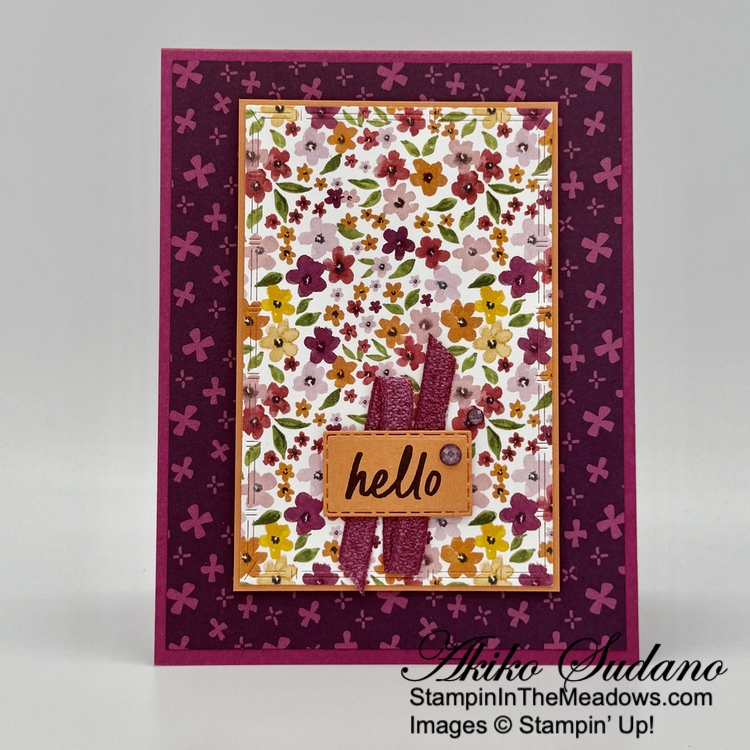
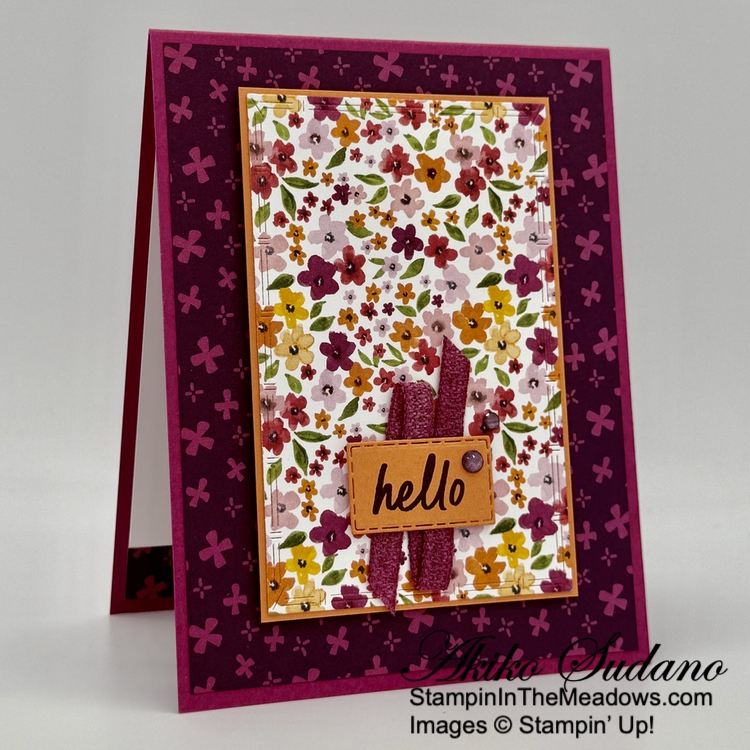
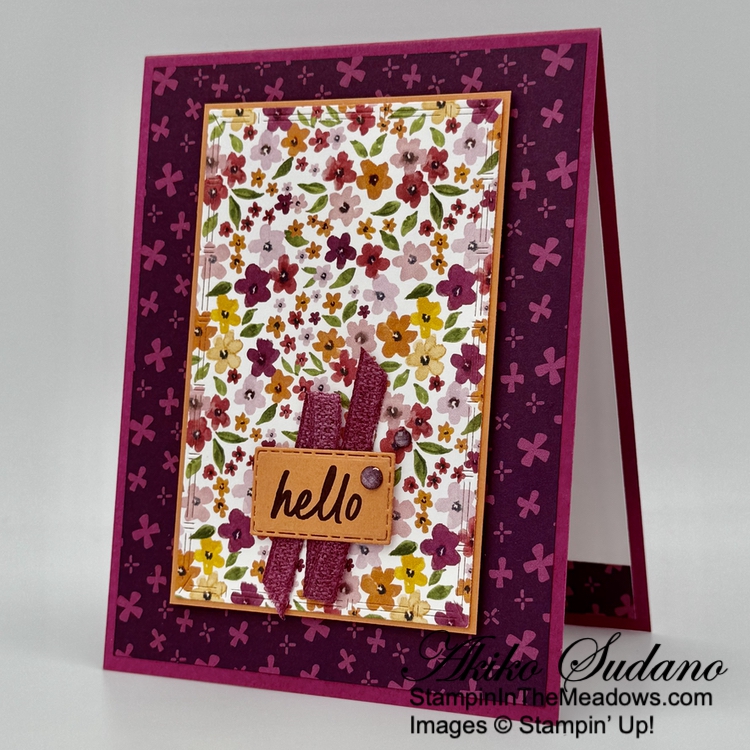
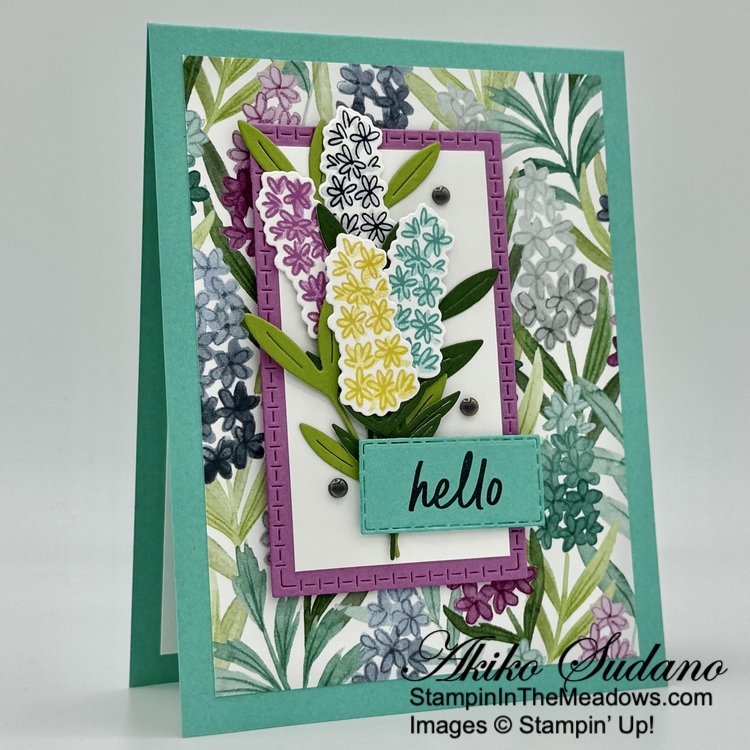
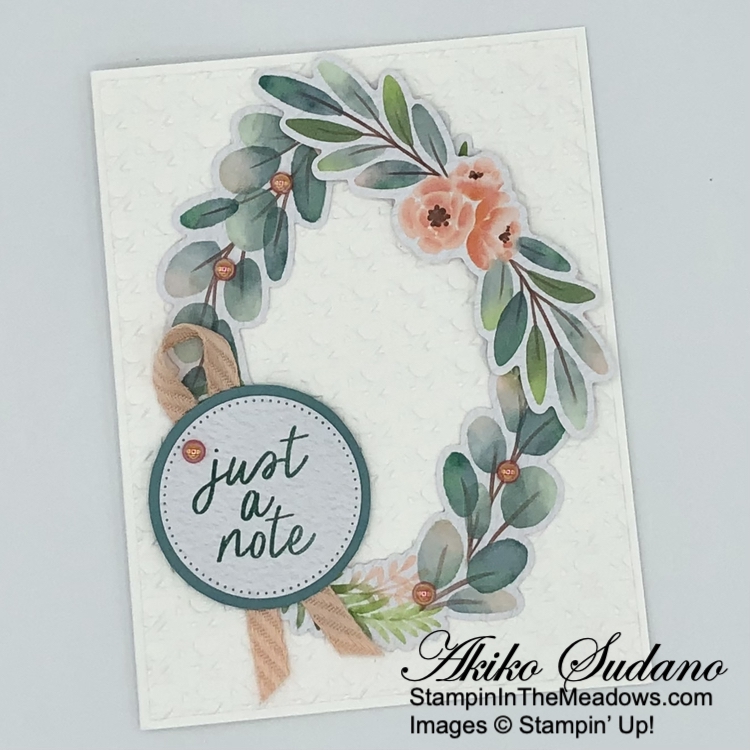
The simple sentiments in the Stampin’ Up! Simply Said stamp set are great for all occasions and work well with sentiments from other stamp sets. I used parts from a lot of different sets for today’s card, and I apologize. But I love how you can pull pieces from different sets and still make a cohesive, pretty card!


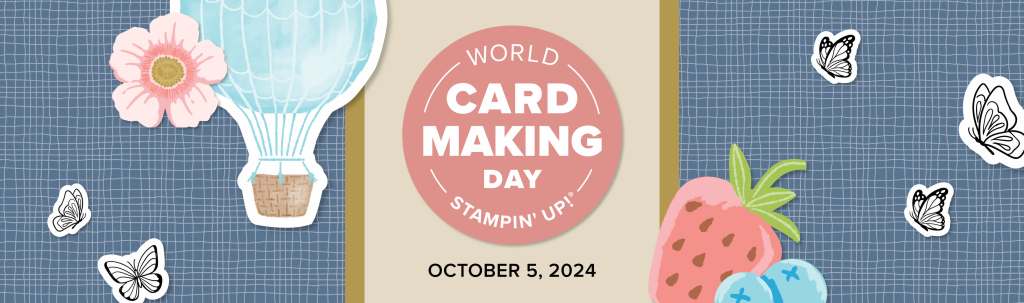
Celebrate World Cardmaking Day with Stampin’ Up!

World Cardmaking Day is October 5, 2024, and Stampin’ Up! is celebrating with a FREE Online Virtual event! They’ll create five simple cards and show you some additional fun projects. Crafters of all skill levels are invited and welcome to join. And the event and registration are FREE! 

You must register for this event in order to receive a link to view it. Also, those who register will receive a gift after the event ends.

Register Here

Everyone is invited! The date is October 5, 2024 from 2:00 PM – 3:00 PM (MT). The event will be recorded, so if you miss it, you will be able to view it afterward.


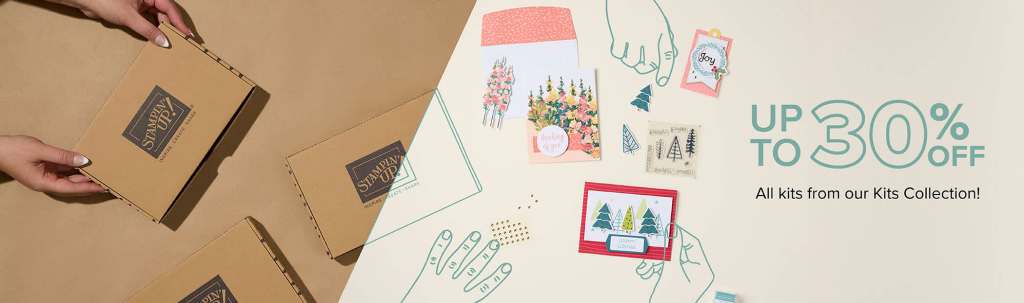
Stampin’ Up! Kits Collection on Sale During October

Save up to 30% off on all your favorite kits October 1–31! The Kits Collection by Stampin’ Up! come with everything you need to create a unique paper craft. There are crafting options for card kits, treat packaging, home decor, and so much more! Start shopping today, as kits are only available while supplies last.

Details:

  • Sales Period: October 1 – 31, 2024
  • ALL kits from our collection qualify for the discount. 
  • There is no limit on how many kits you can order, as long as product is available. 
  • Orders must be opened and placed during the promotion dates. Orders opened before October 1 will not qualify for the sale. 
  • Kits can be added to a Starter Kit at their discounted rate. 
  • Coupon codes can also be used with discounted kits.
  • Ordering Deadline: October 31 at 11:59 PM (MT)

New Kits In Kits Collection!

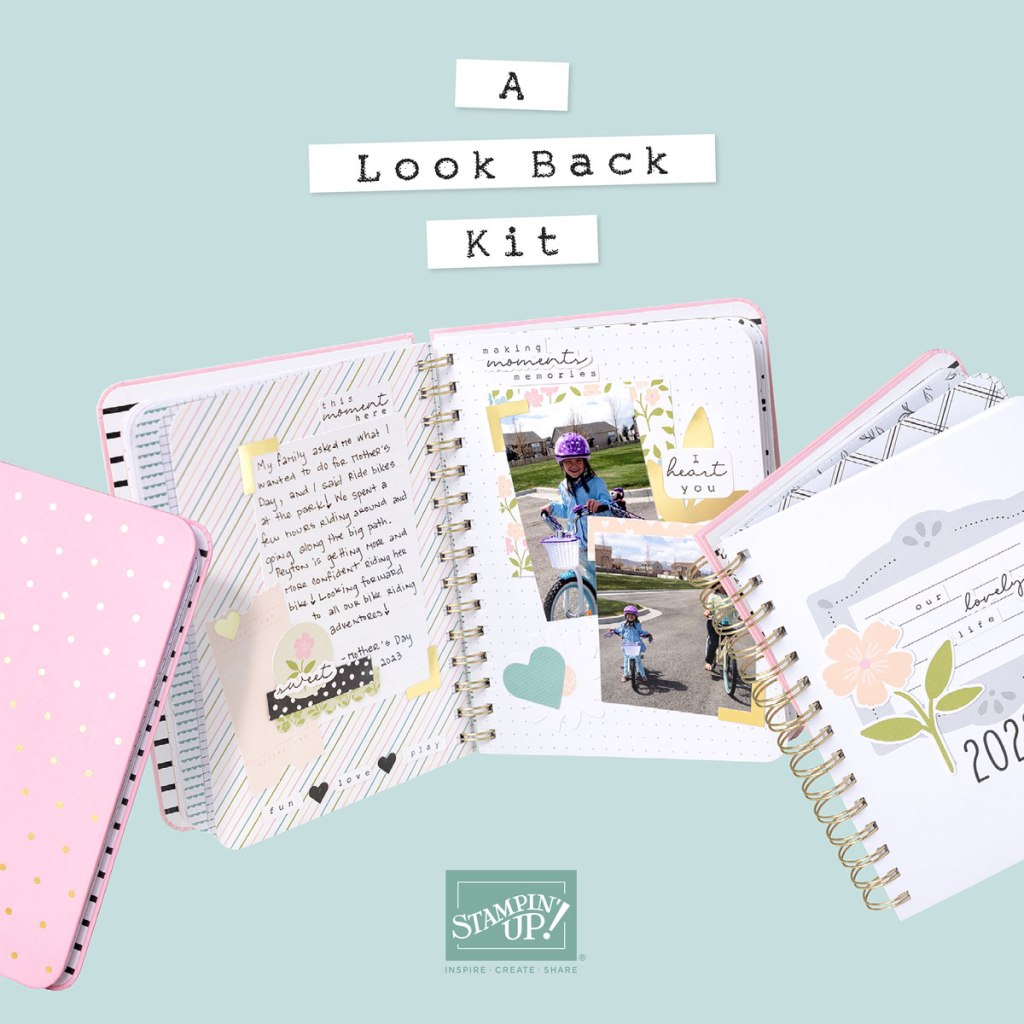
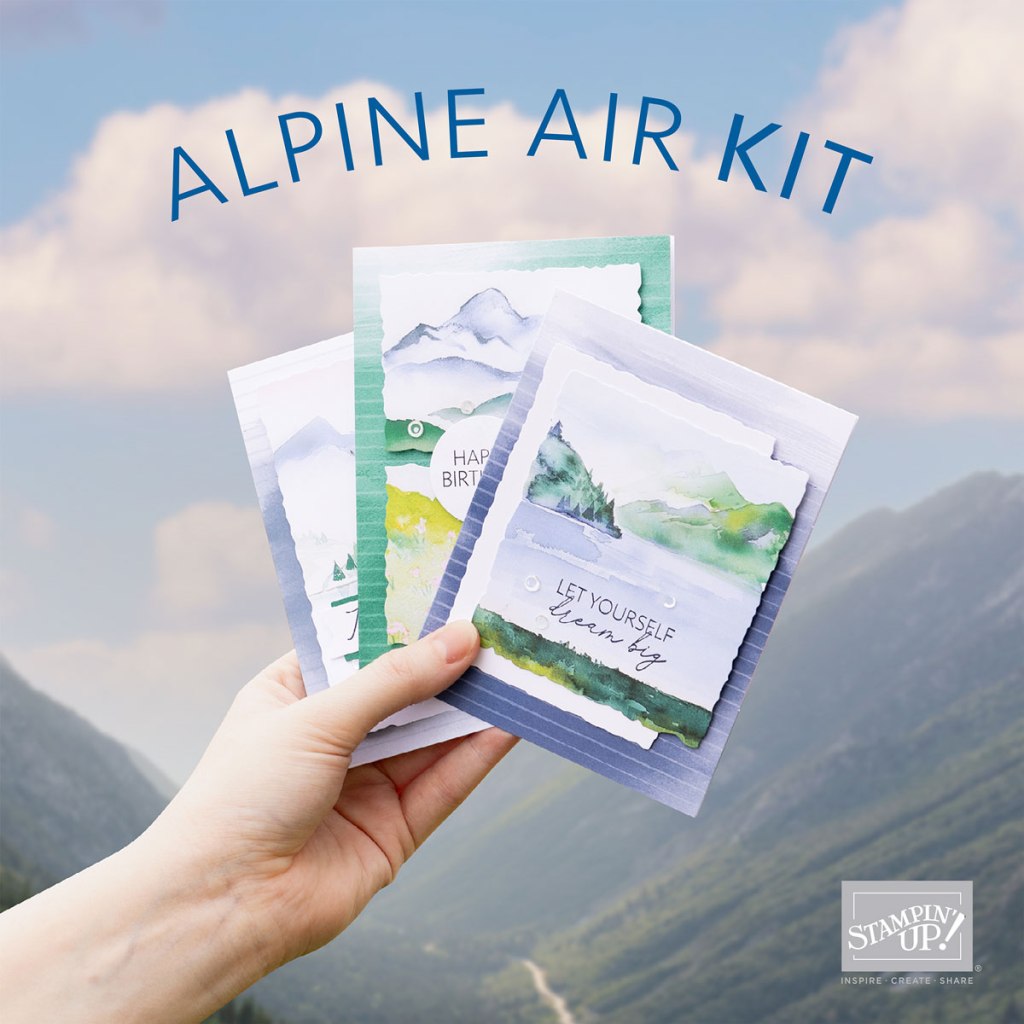
The new kits for October are the sweet A Look Back Kit and the wonderful Alpine Air Kit. The A Look Back kit includes a variety of precut paper pieces, stickers, paper pockets, and other ephemera and a spiral-bound notebook for memory keeping, journaling, and more. The Alpine Air Kit includes everything you need to make 9 all-occasion cards with an elegant mountain theme.

To check the availability of these kits or past kits, visit my Online Store. 


Current Host Code: BTWRDNAU

Use this host code when you order $50 or more and receive a Thank You gift from me!  The free gift is your choice of any item currently available valued up to $10.00.

If your order is over $150, please do not use the host code since you’ll receive your own Host Dollars plus I’ll still send you the Thank You gift!  This host code can be used by anyone, no club or commitment required. Let me know if you have any questions.


If you need any stamping supplies, I’d be very happy to be your Demonstrator.  Just click on the Shop Now Button on the right side of the screen to go directly to my Online store or contact me if you have any questions.  Happy Stamping!

Thanks for stopping by and have a great day!

Akiko

  • Visit my online store here
  • See the current Stampin’ Up! clearance rack specials here
  • Earn FREE Stampin’ Up! products through my Wildflower Frequent Shopper Program – my way of saying thank you to my online frequent shopper customers.
  • Have any questions? I’d be happy to help, click here to contact me.

Cardstock Cuts for this project:

  • Crumb Cake – 5-1/2” x 8-1/2” card base, scored at 4-1/4″, 4-1/4″ x 5-1/2″ (embossed background), 1″ x 3″ (label)
  • Mossy Meadow – 2-1/8″ x 5-1/8″ (DSP mat), 1″ x 1-3/4″ (die cut leaves)
  • Basic White – 3-3/4” x 5” (inside panel)
  • Splendid Autumn 6″ x 6″ DSP – 2″ x 4-5″ (DSP panel), 1″ x 3-3/4″ (inside trim)

Stampin’ Up! products used in this project:


Stampin’ Up! Simply Said Just A Note Card

Good Morning! I’ve been away from the craft room for a while, so on my return, I made this simple card with the Stampin’ Up! Simply Said stamp set and the beautiful Frames and Flowers specialty DSP. You can find the products I used at the bottom of my post along with the card stock sizes.

Here are the die cuts from the Frames and Flowers specialty DSP that I used for this card. Note the center of the frame – I used it to stamp the sentiment!

I embossed a Basic White panel with the Cane Weave 3D embossing folder and adhered it to the front of a Thick Basic White card base with liquid glue. I adhered the oval wreath die cut from the Frames and Flowers specialty DSP to the card front with glue dots.

I adhered the rose trio spray die cut to the oval card with dimensionals. I stamped the sentiment from the Stampin’ Up! Simply Said stamp set using Lost Lagoon ink on the center wreath DSP and cut it out with a circle die from the Stylish Shapes dies. I traced the outline of the circle die on a Lost Lagoon panel and fussy cut it with my paper snips. I flipped it over and adhered the die cut sentiment with liquid glue.

I folded a length of Petal Pink ribbon and adhered it with a glue dot. I adhered it to the card with a glue dot and adhered the layered label on top with dimensionals. I finished the card with pink pearls. Don’t you love the cane weave embossing with the pretty leaves and flowers?

I did something different for the inside of the card. I adhered the frame from the Frames and Flowers specialty DSP to the inside of the card with Stampin’ Seal. This leaves a little writing area in the center of the panel for a personal message. It’s probably not enough space for a long message, but it’s pretty!

The Stampin’ Up! Simply Said stamp set has great simple sentiments in different fonts. These are some of the most commonly used sentiments and they go well with any label die. Luckily Stampin’ Up! has lots of new options like the Frames and Flowers specialty DSP to make simple cards. I needed something quick and easy to get my mojo back!


Time to Redeem Bonus Days Coupons!

It’s time to redeem Bonus Days Coupons. All the coupons that you earned in July can be redeemed through August 31! 

Promotion Details:

  • There is no limit to the number of coupon codes you can redeem on an order during the redemption period. If using multiple codes, they must be separated by a space. 
  • Coupon codes may be redeemed one time only. They cannot be redeemed after August 31, 2024.
  • Coupon codes may be redeemed for any product (excluding Starter Kits). They cannot be used on exchanges.
  • Bonus Days coupon codes can be applied to month-to-month Paper Pumpkin subscriptions and new prepaid subscriptions.

Designer Series Paper Sale This Month!

This month, you can shop select Designers Series Paper from the 2024–2025 Annual Catalog at 15% off! It’s the perfect time to stock up and save on your favorite paper.

Stampin’ Up! Designer Series Paper is perfect for card making, gift packaging, scrapbooking, and more! The in-house artists create Designer Series Paper using different mediums. They work to create paper for every design you’d need for your paper crafts. Some of the designs coordinate with different products, such as die cuts and punches. It’s also made up of Stampin’ Up! colors, ensuring perfect color coordination with other products.

Promotion Details:

  • Sales Period: August 6, 2024 – August 31, 2024
  • Specialty paper, cardstock assortments, Designer Series Paper stacks, and paper not yet live is not included in the sale.
  • Customers must open and close the order during the allotted dates to receive the discount. 
  • There are NO limits on ordering. However, product is only available while supplies last. 
  • Designer Series Paper purchased with Stampin’ Rewards or as part of a Starter Kit WILL qualify for the discount.  
  • Ordering Deadline: August 31, 2024 at 11:59 PM (MT)

Click on the image below to download a PDF with the details and the lists of Designer Series Paper that are included in the sale:

While there are no limits to order quantity, product is only available while supplies last.


Current Host Code: 37AE7ZXV

Use this host code when you order $50 or more and receive a Thank You gift from me!  The free gift is your choice of any item currently available valued up to $10.00.

If your order is over $150, please do not use the host code since you’ll receive your own Host Dollars plus I’ll still send you the Thank You gift!  This host code can be used by anyone, no club or commitment required. Let me know if you have any questions.


If you need any stamping supplies, I’d be very happy to be your Demonstrator.  Just click on the Shop Now Button on the right side of the screen to go directly to my Online store or contact me if you have any questions.  Happy Stamping!

Thanks for stopping by and have a great day!

Akiko

  • Visit my online store here
  • See the current Stampin’ Up! clearance rack specials here
  • Earn FREE Stampin’ Up! products through my Wildflower Frequent Shopper Program – my way of saying thank you to my online frequent shopper customers.
  • Have any questions? I’d be happy to help, click here to contact me.

Cardstock Cuts for this project:

  • Thick Basic White – 5-1/2″ x 8-1/2″ card base scored at 4-1/4″
  • Lost Lagoon – 2″ x 2″ (label mat)
  • Basic White – 4-1/8″ x 5-3/8″ (embossed background)
  • Frames and Flowers specialty DSP – oval frame, oval wreath, rose spray frame inside

Stampin’ Up! products used in this project: