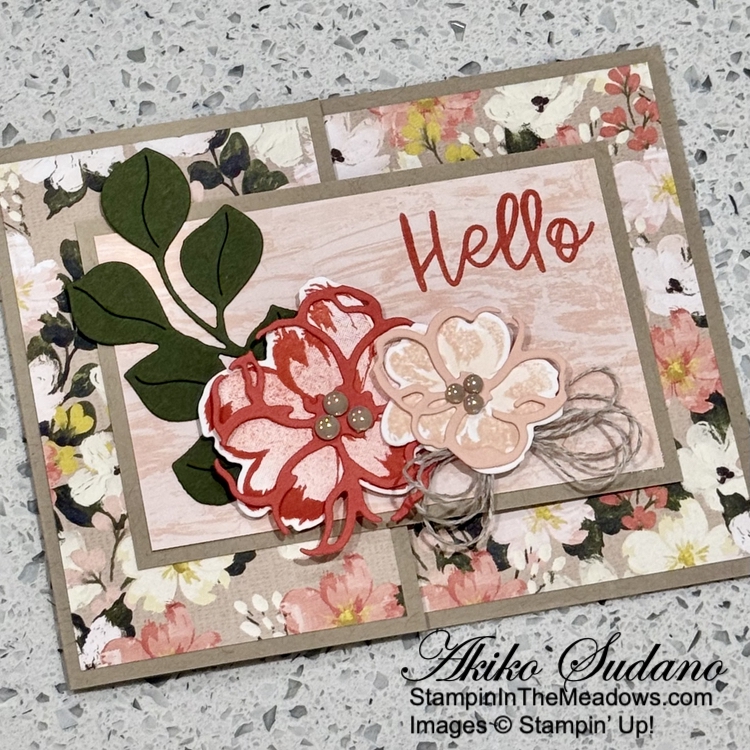
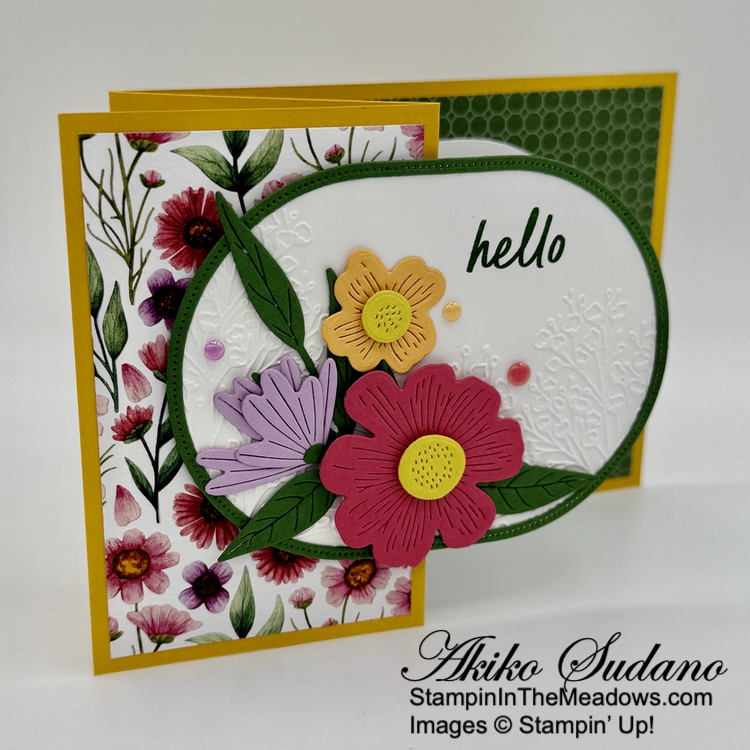
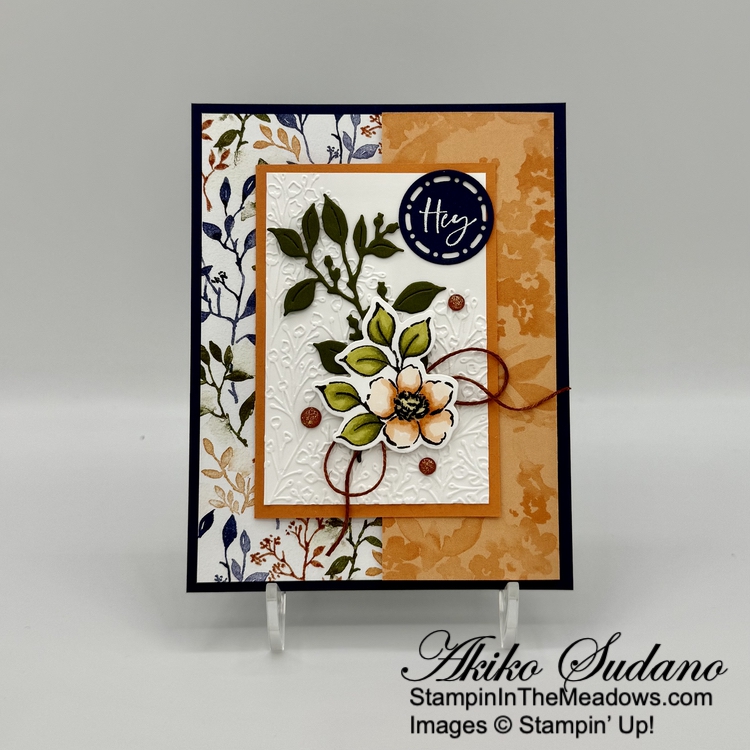
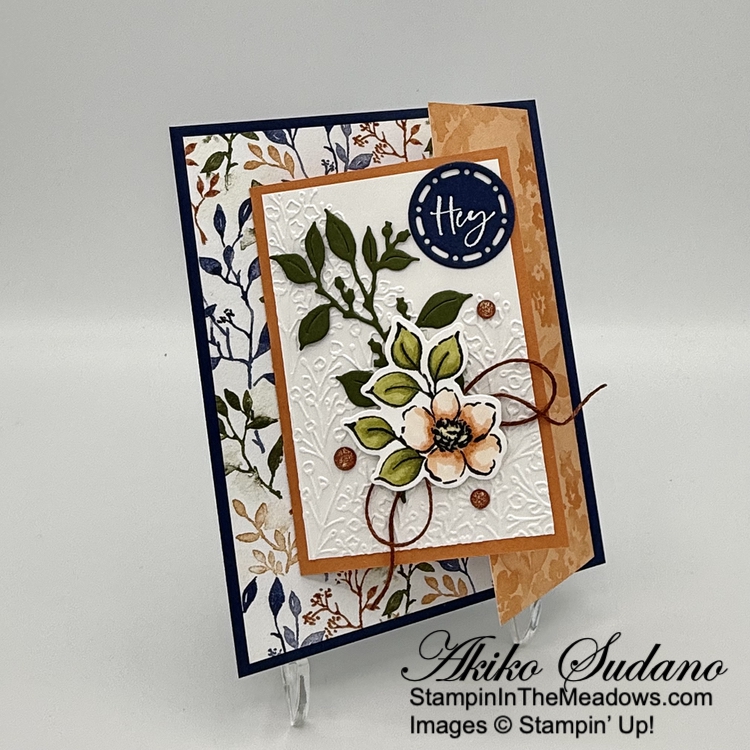
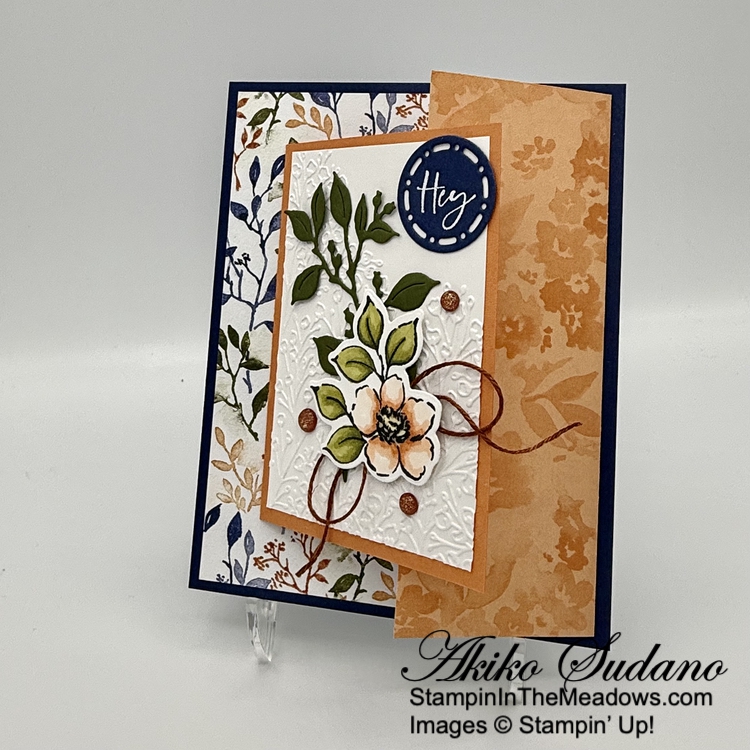
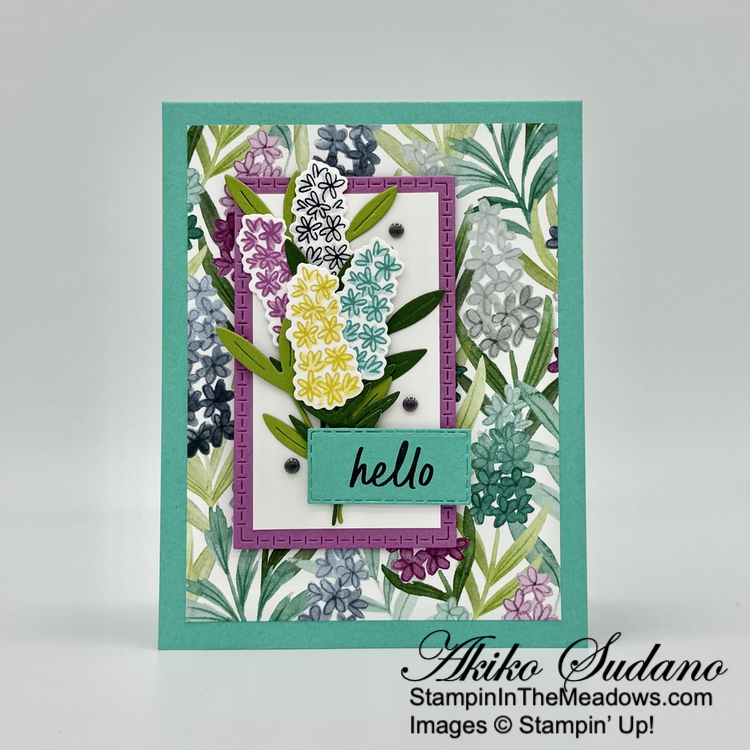
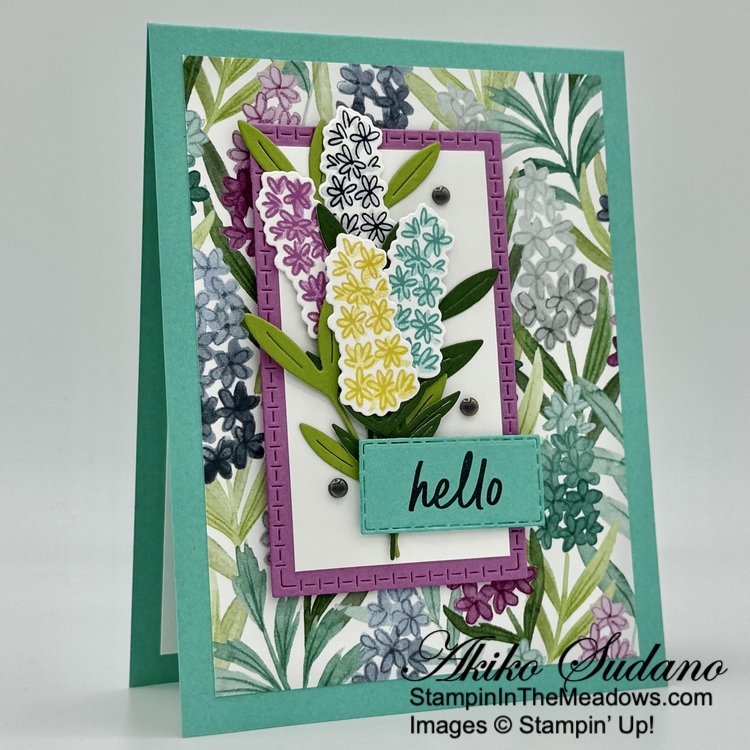
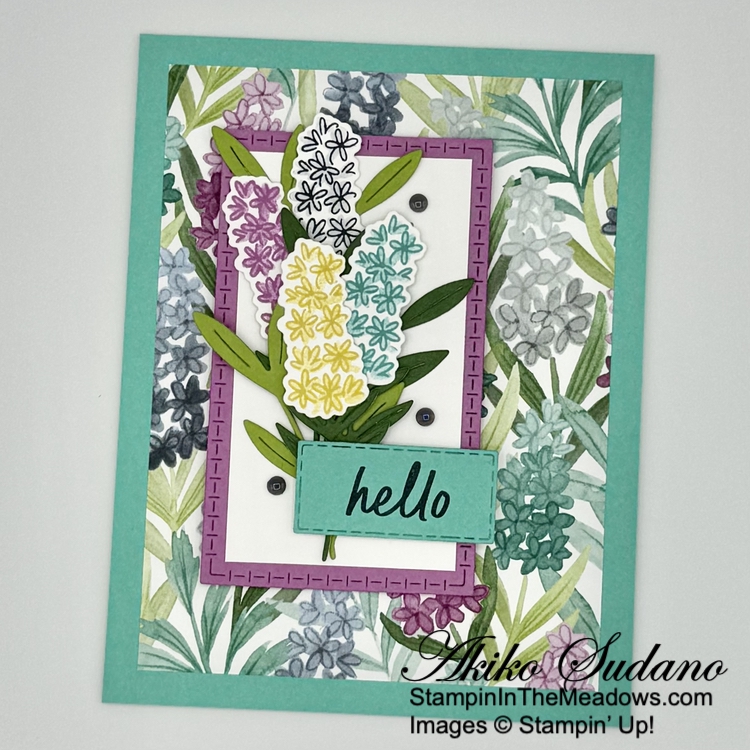
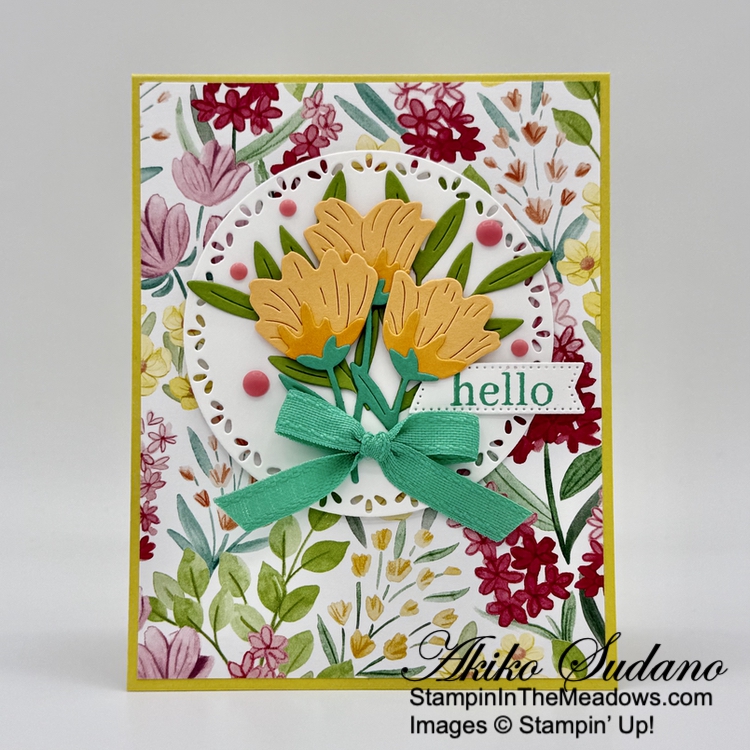
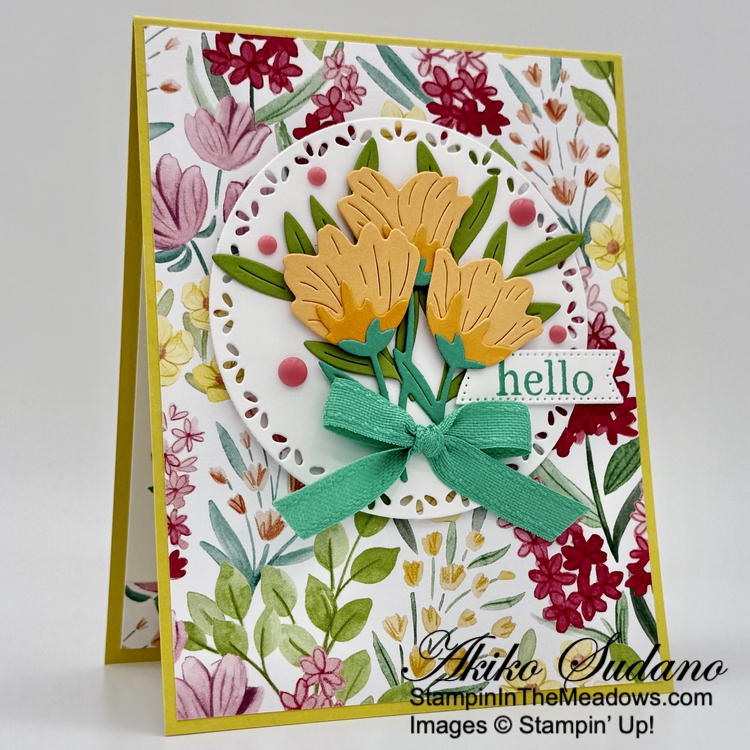
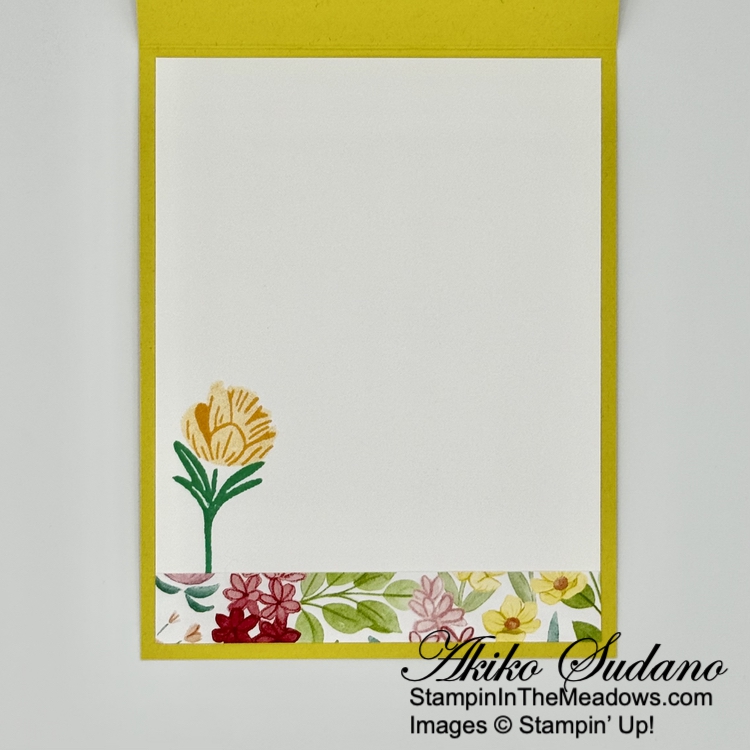
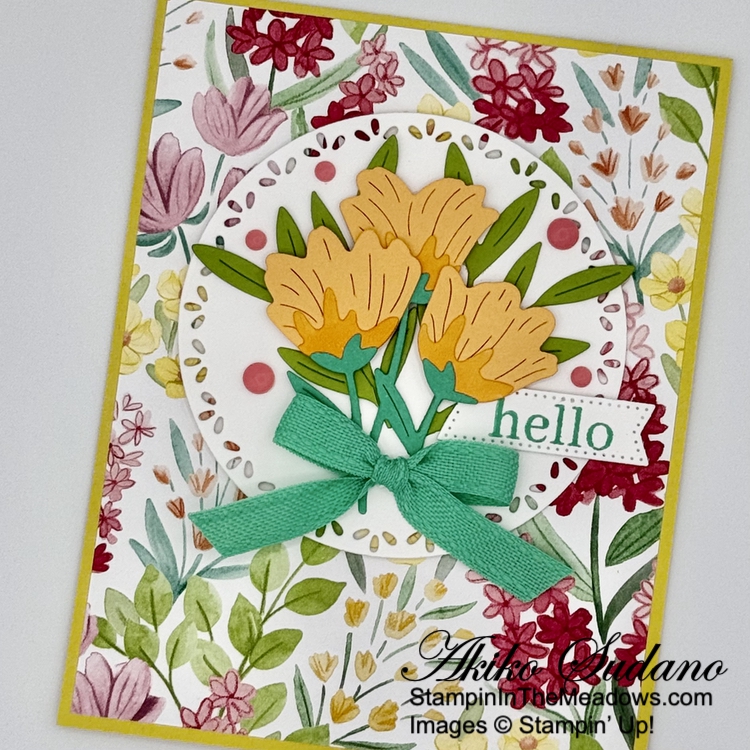
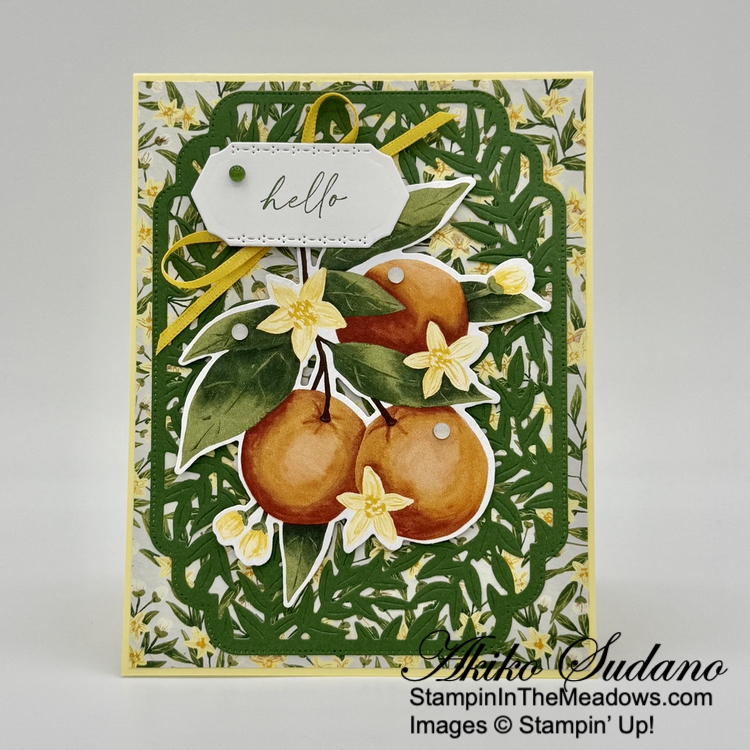
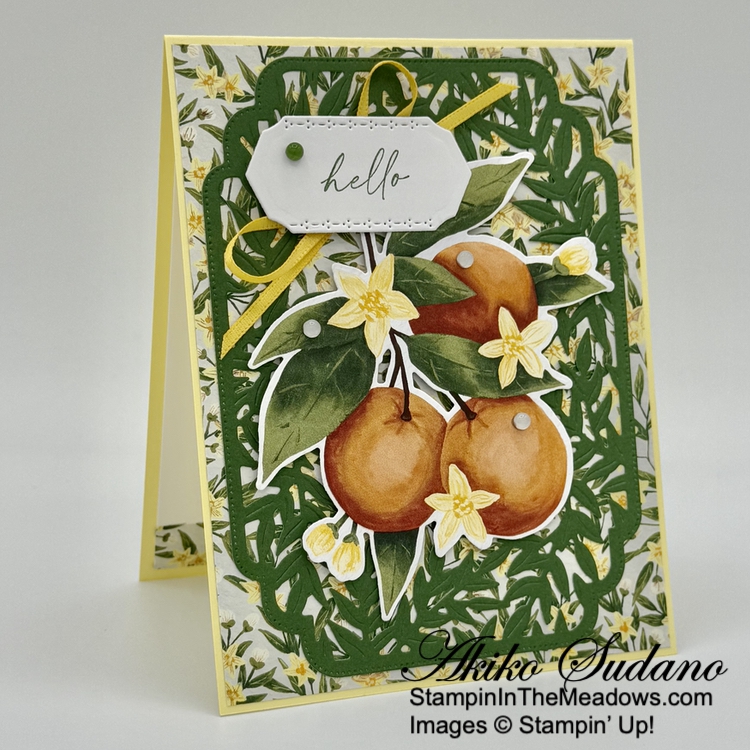
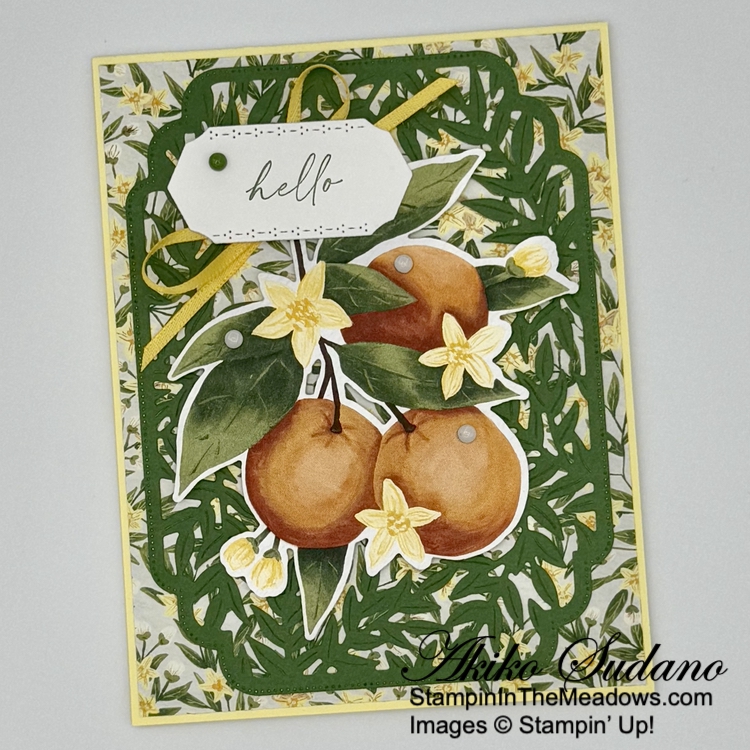
Good Morning! Here’s a sneak peek of a new bundle that is coming out next month – the Stampin’ Up! Petals Of Beauty bundle. This bundle is part of the new Brushed with Beauty Suite collection that will be available on November 4, 2025 when the next set of Online Exclusives is released. You can find the currently available card stock cuts along with supplies at the bottom of my post.
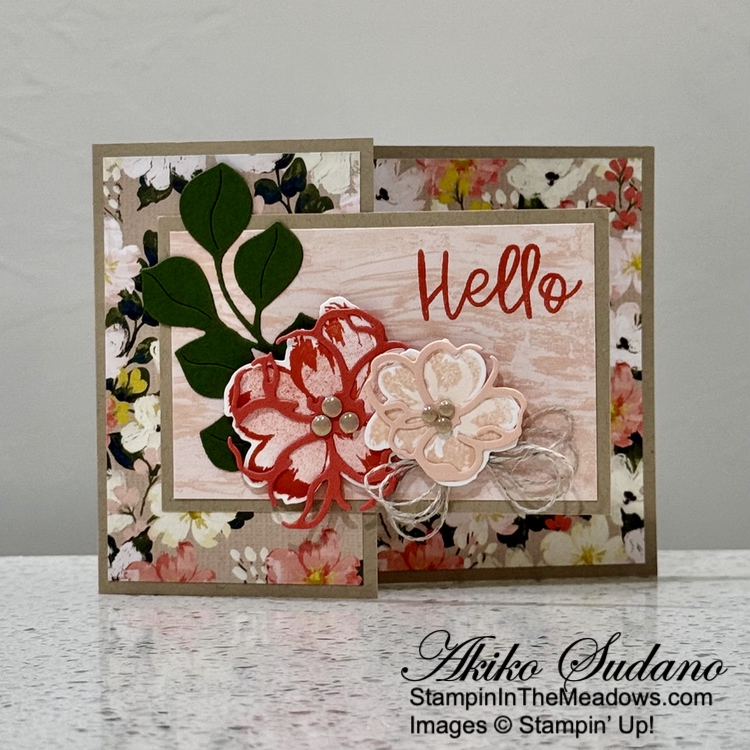
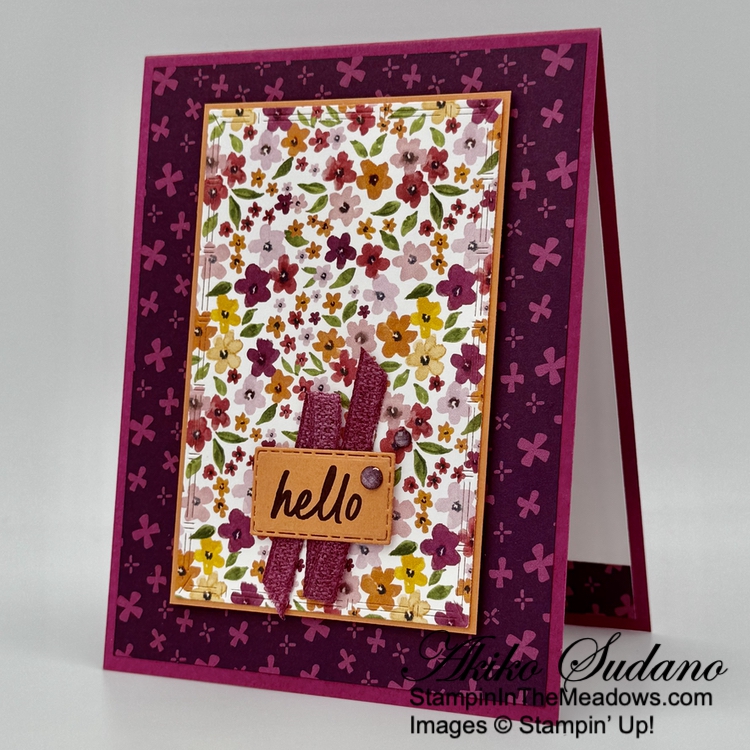
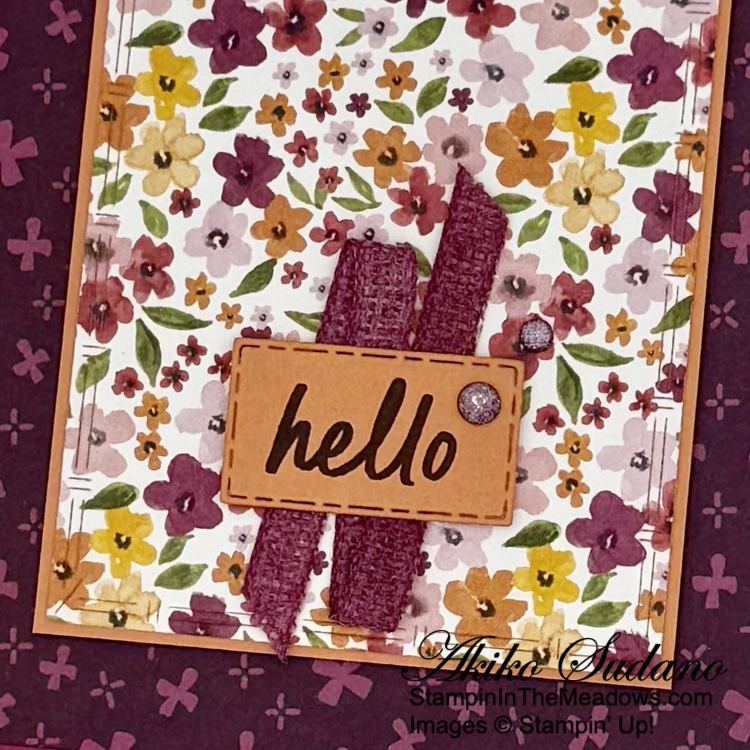
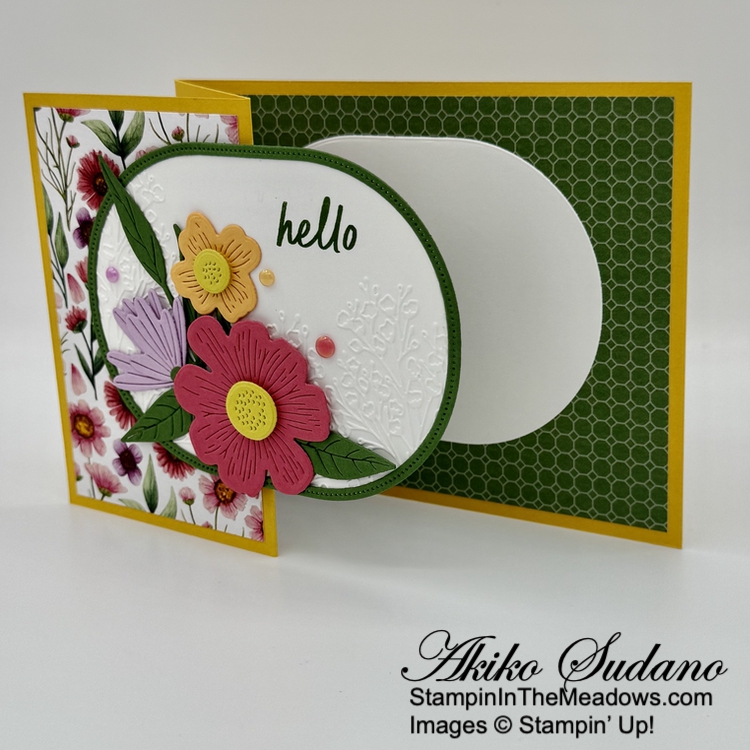
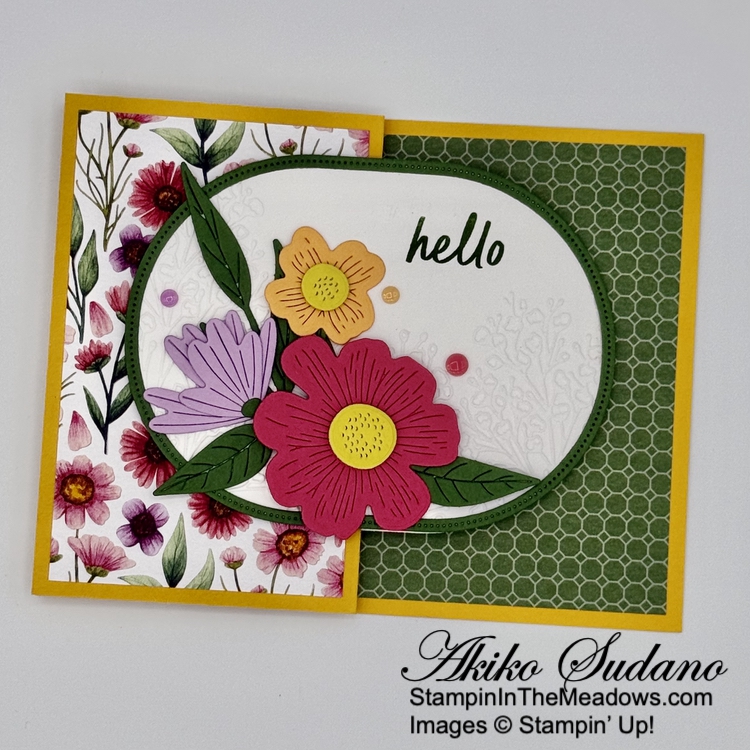
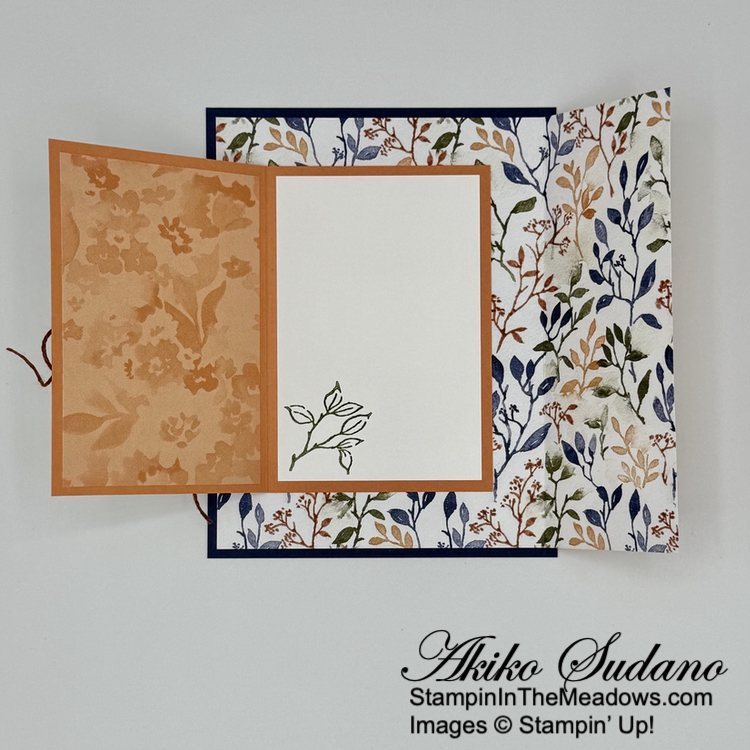
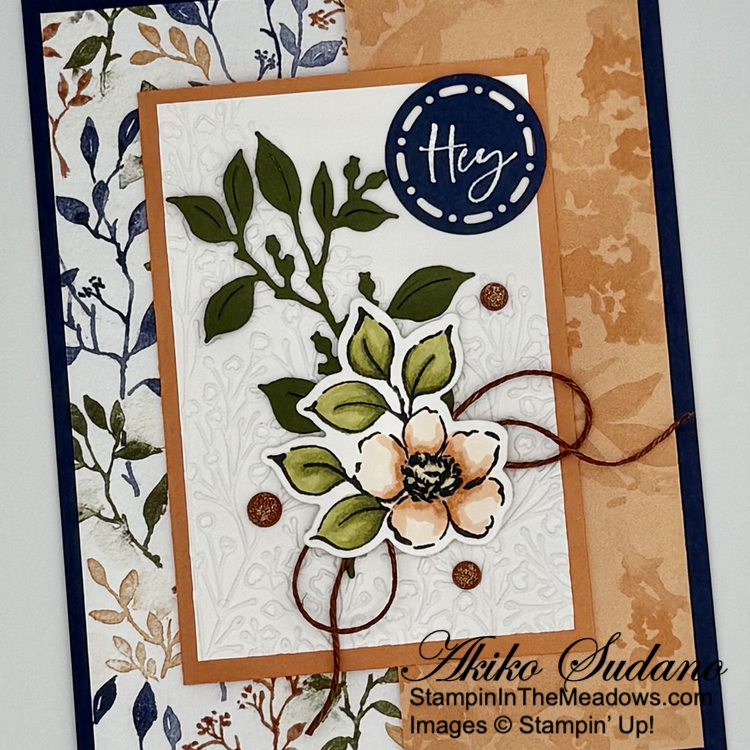
This is a simple fun fold where you take a top folding A2 card base (4-1/4″ x 11″ scored at 5-1/2″) and cut the front in half and flip the bottom piece 90 degrees. So after scoring and burnishing the main card base, adhere pretty floral panels of the new Brushed With Beauty designer series paper (available Nov 4) to the front flap and inside back panel. Stamp the sentiment in the top right corner of a plain panel of the Brushed With Beauty DSP. I used the fun hello sentiment from the Branching Out stamp set in Calypso Coral ink. Adhere the stamped DSP to a Crumb Cake panel and adhere it to the front flap with liquid glue.

Cut a Mossy Meadow panel with with leaf sprig die from the new Stampin’ Up! Petals Of Beauty dies and adhere it to the card with glue dots. Stamp the large flower from the Stampin’ Up! Petals of Beauty stamp set using Calypso Coral ink on Basic White. Stamp the detailed stamp first using full strength ink and then stamp the background stamp using stamped off ink. Cut the flower out with the coordinating die. Stamp the detailed medium flower using stamped off Petal Pink ink on Basic White. Color the inside using the light Petal Pink Stampin’ Blend and cut it out with the coordinating die.
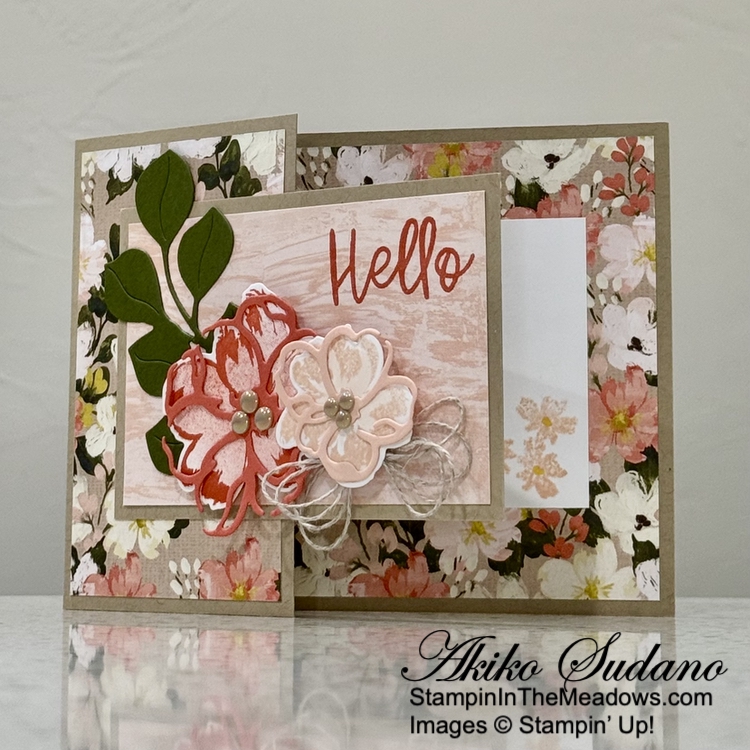
Cut the large outline flower die from Calypso Coral card stock and the small outline flower die from Petal Pink card stock. Adhere the die cut outline flowers to the stamped flowers using glue dots. Adhere the layered flowers to the card using dimensionals and add Crumb Cake Pearls of Beauty dots (available Nov 4) to the flower centers. Use Linen Thread to make a quadruple loop bow and adhere it to the card with a glue dot, tucked under the small flower.

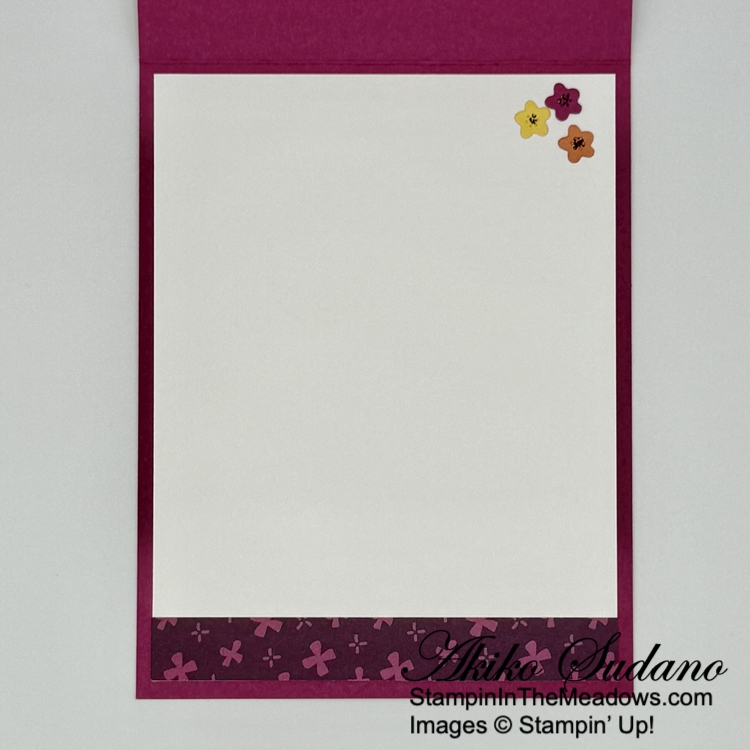
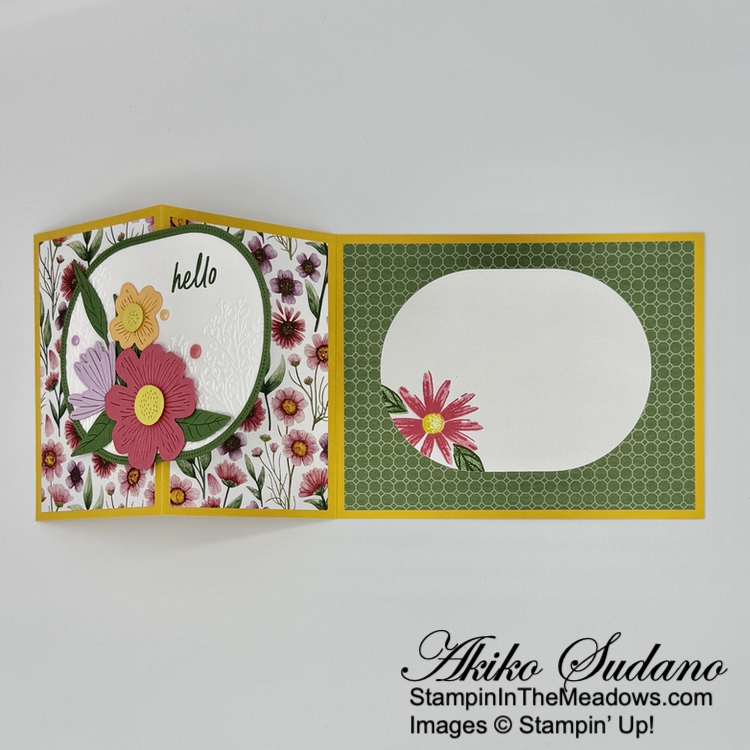
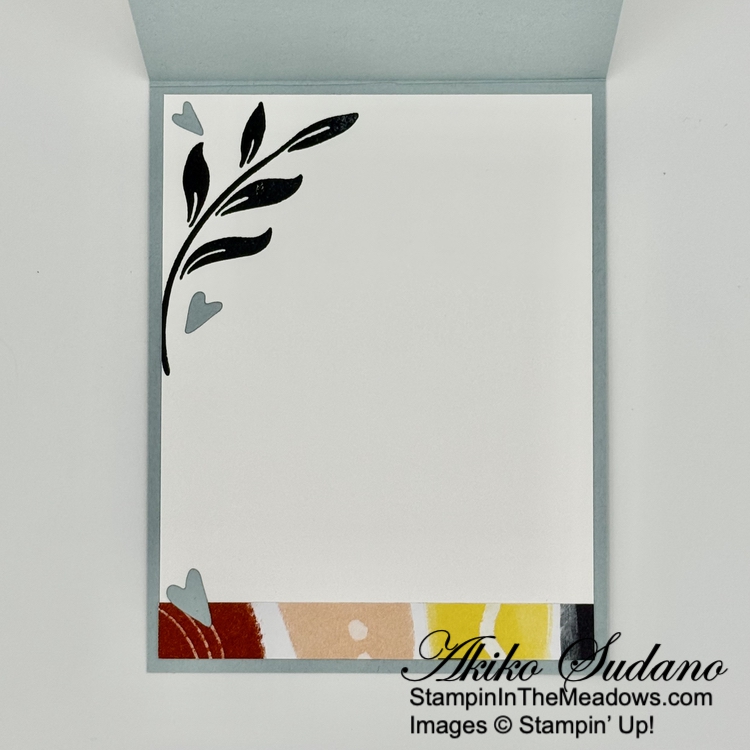
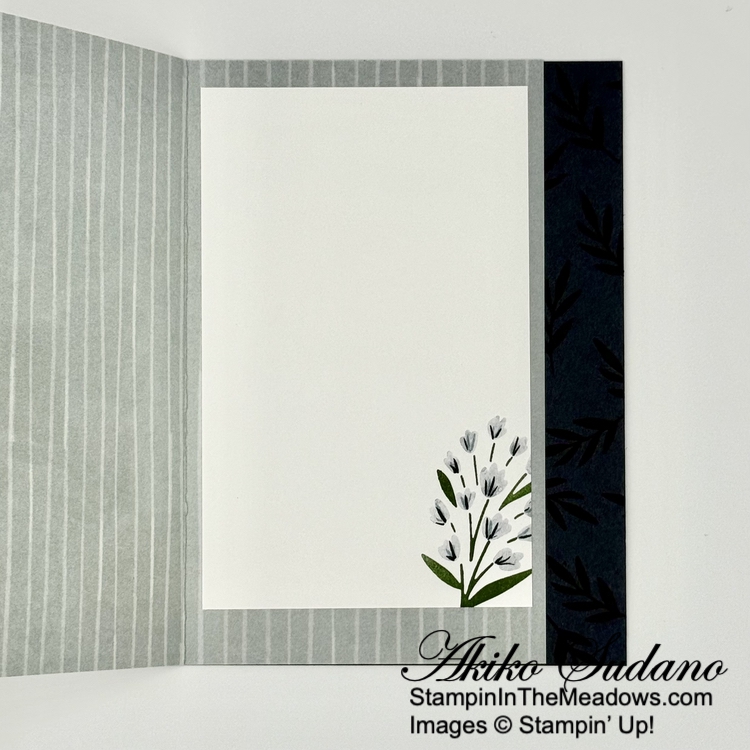
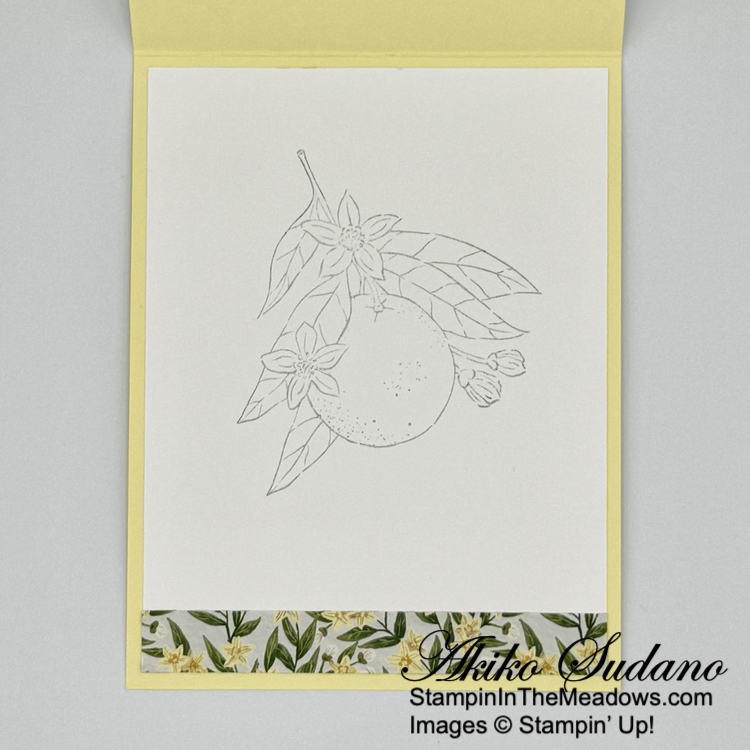
For the inside panel, stamp the background image of the small triple flower from the Stampin’ Up! Petals Of Beauty stamp set using stamped off Petal Pink ink on Basic White. Use the Dark Daffodil Delight Stampin’ Blend to color the centers and adhere the panel to the inside of the card with Stampin’ Seal.
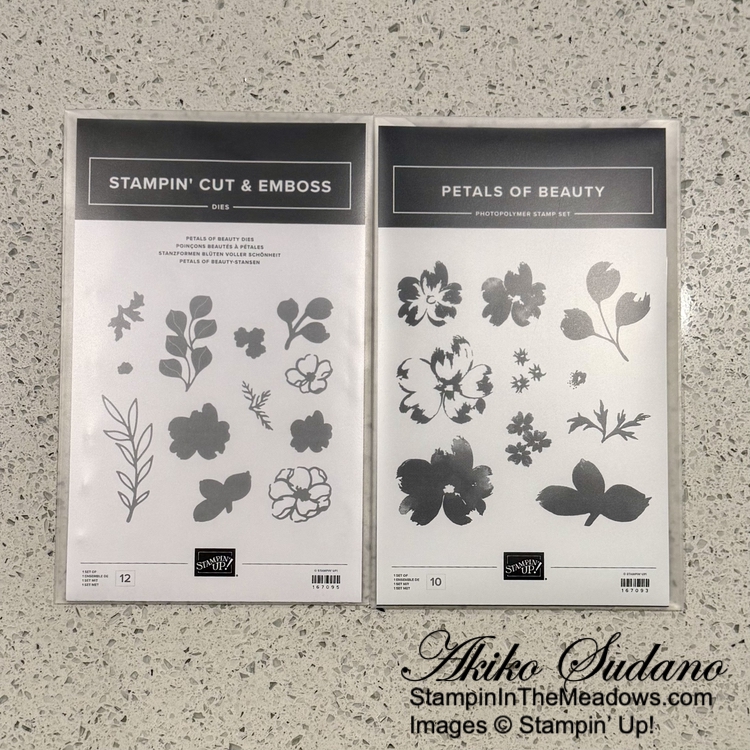
The Stampin’ Up! Petals of Beauty bundle is a pretty floral set with two step stamping and dies to cut the stamped images and cardstock. Here is the stamp set and dies that are in the bundle. Note that these come in the new larger Stampin’ Up! packaging. Also, these new plastic packages will be available in packs of 10 for $16 on Nov 4!
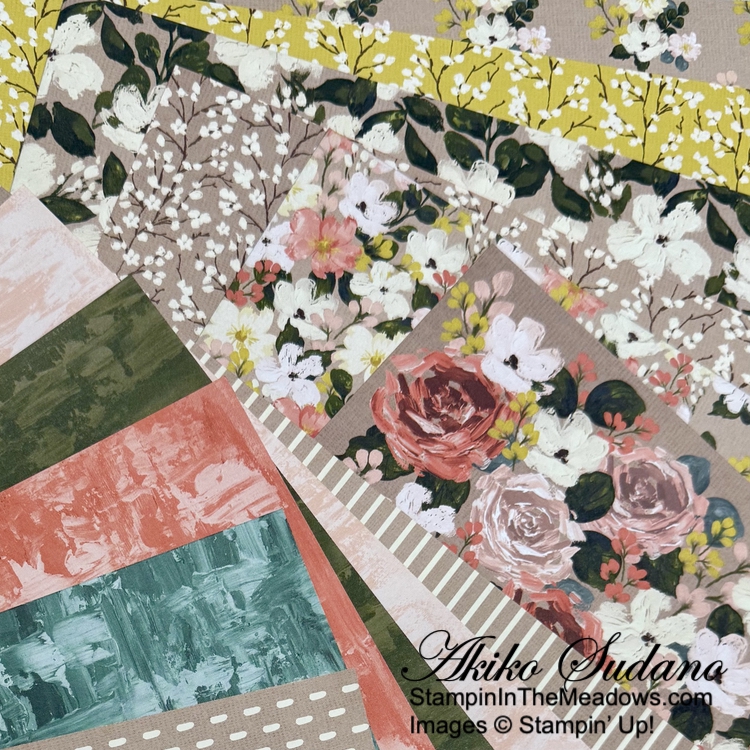
And here is the beautiful Brushed with Beauty designer series paper that will also be available.
I hope you’ve enjoyed this little sneak peek of some of the new things that will be available in the next Online Exclusives release. Thanks so much for stopping by and Happy Stamping!!
Akiko
Cardstock Cuts for this project:
- Crumb Cake – 4-1/4″ x 8-1/4″ card base, scored at 5-1/2″, 2-3/4″ x 4-1/4″ (front flap)
- Mossy Meadow – 2-1/4″ x 3-1/4″ (die cut leaf sprig)
- Calypso Coral – 2-1/4″ x 2-1/2″ (die cut flower)
- Petal Pink – 1-1/2″ x 1-3/4″ (die cut flower)
- Basic White – 2-1/2″ x 4″ (inside panel), 2-1/2″ x 3-1/2″ (stamped flowers)
- Brushed With Beauty DSP – 4″ x 5-1/4″ (inside background), two 2-1/2″ x 4″ panels (front panels)
Stampin’ Up! products used in this project:
![Crumb Cake 8-1/2" X 11" Cardstock [ 120953 ]](https://assets1.tamsnetwork.com/images/EC042017NF/120953s.jpg "Crumb Cake 8-1/2\" X 11\" Cardstock [ 120953 ]")
![Mossy Meadow 8-1/2" X 11" Cardstock [ 133676 ]](https://assets1.tamsnetwork.com/images/EC042017NF/133676s.jpg "Mossy Meadow 8-1/2\" X 11\" Cardstock [ 133676 ]")
![Calypso Coral 8-1/2" X 11" Cardstock [ 122925 ]](https://assets1.tamsnetwork.com/images/EC042017NF/122925s.jpg "Calypso Coral 8-1/2\" X 11\" Cardstock [ 122925 ]")
![Petal Pink 8-1/2" X 11" Cardstock [ 146985 ]](https://assets1.tamsnetwork.com/images/EC042017NF/146985s.jpg "Petal Pink 8-1/2\" X 11\" Cardstock [ 146985 ]")
![Basic White 8 1/2" X 11" Cardstock [ 166780 ]](https://assets1.tamsnetwork.com/images/EC042017NF/166780s.jpg "Basic White 8 1/2\" X 11\" Cardstock [ 166780 ]")
![Calypso Coral Classic Stampin' Pad [ 147101 ]](https://assets1.tamsnetwork.com/images/EC042017NF/147101s.jpg "Calypso Coral Classic Stampin' Pad [ 147101 ]")
![Petal Pink Classic Stampin' Pad [ 147108 ]](https://assets1.tamsnetwork.com/images/EC042017NF/147108s.jpg "Petal Pink Classic Stampin' Pad [ 147108 ]")
![Petal Pink Stampin' Blends Combo Pack [ 154893 ]](https://assets1.tamsnetwork.com/images/EC042017NF/154893s.jpg "Petal Pink Stampin' Blends Combo Pack [ 154893 ]")
![Daffodil Delight Stampin' Blends Combo Pack [ 154883 ]](https://assets1.tamsnetwork.com/images/EC042017NF/154883s.jpg "Daffodil Delight Stampin' Blends Combo Pack [ 154883 ]")
![Linen Thread [ 104199 ]](https://assets1.tamsnetwork.com/images/EC042017NF/104199s.jpg "Linen Thread [ 104199 ]")
![Multipurpose Liquid Glue [ 110755 ]](https://assets1.tamsnetwork.com/images/EC042017NF/110755s.jpg "Multipurpose Liquid Glue [ 110755 ]")
![Stampin' Dimensionals [ 104430 ]](https://assets1.tamsnetwork.com/images/EC042017NF/104430s.jpg "Stampin' Dimensionals [ 104430 ]")
![Mini Glue Dots [ 103683 ]](https://assets1.tamsnetwork.com/images/EC042017NF/103683s.jpg "Mini Glue Dots [ 103683 ]")
![Stampin' Seal [ 152813 ]](https://assets1.tamsnetwork.com/images/EC042017NF/152813s.jpg "Stampin' Seal [ 152813 ]")
![Stampin' Cut & Emboss Machine [ 149653 ]](https://assets1.tamsnetwork.com/images/EC042017NF/149653s.jpg "Stampin' Cut & Emboss Machine [ 149653 ]")


![Simply Said Mix & Match Photopolymer Stamp Set (English) [ 163756 ]](https://assets1.tamsnetwork.com/images/EC042017NF/163756s.jpg "Simply Said Mix & Match Photopolymer Stamp Set (English) [ 163756 ]")
![Textured Notes Dies [ 165555 ]](https://assets1.tamsnetwork.com/images/EC042017NF/165555s.jpg "Textured Notes Dies [ 165555 ]")
![Impressions Abloom Dies [ 165610 ]](https://assets1.tamsnetwork.com/images/EC042017NF/165610s.jpg "Impressions Abloom Dies [ 165610 ]")
![Celebratory Sips 12" X 12" (30.5 X 30.5 Cm) Designer Series Paper [ 165586 ]](https://assets1.tamsnetwork.com/images/EC042017NF/165586s.jpg "Celebratory Sips 12\" X 12\" (30.5 X 30.5 Cm) Designer Series Paper [ 165586 ]")
![Berry Burst 8-1/2" X 11" Cardstock [ 144243 ]](https://assets1.tamsnetwork.com/images/EC042017NF/144243s.jpg "Berry Burst 8-1/2\" X 11\" Cardstock [ 144243 ]")
![Timid Tiger 8 1/2" X 11" Cardstock [ 165626 ]](https://assets1.tamsnetwork.com/images/EC042017NF/165626s.jpg "Timid Tiger 8 1/2\" X 11\" Cardstock [ 165626 ]")
![Daffodil Delight 8-1/2" X 11" Cardstock [ 119683 ]](https://assets1.tamsnetwork.com/images/EC042017NF/119683s.jpg "Daffodil Delight 8-1/2\" X 11\" Cardstock [ 119683 ]")
![Blackberry Bliss Classic Stampin' Pad [ 147092 ]](https://assets1.tamsnetwork.com/images/EC042017NF/147092s.jpg "Blackberry Bliss Classic Stampin' Pad [ 147092 ]")
![Berry Burst Stampin’ Blends Combo Pack [ 161681 ]](https://assets1.tamsnetwork.com/images/EC042017NF/161681s.jpg "Berry Burst Stampin’ Blends Combo Pack [ 161681 ]")
![Basic Black Stampin' Write Marker [ 162481 ]](https://assets1.tamsnetwork.com/images/EC042017NF/162481s.jpg "Basic Black Stampin' Write Marker [ 162481 ]")
![Purple Fine Shimmer Gems [ 162611 ]](https://assets1.tamsnetwork.com/images/EC042017NF/162611s.jpg "Purple Fine Shimmer Gems [ 162611 ]")
![White 1/4" (6.4 Mm) Ribbon [ 165562 ]](https://assets1.tamsnetwork.com/images/EC042017NF/165562s.jpg "White 1/4\" (6.4 Mm) Ribbon [ 165562 ]")

![Impressions Abloom Bundle (English) [ 165611 ]](https://assets1.tamsnetwork.com/images/EC042017NF/165611s.jpg "Impressions Abloom Bundle (English) [ 165611 ]")
![Floral Impressions 12" X 12" (30.5 X 30.5 Cm) Designer Series Paper [ 165603 ]](https://assets1.tamsnetwork.com/images/EC042017NF/165603s.jpg "Floral Impressions 12\" X 12\" (30.5 X 30.5 Cm) Designer Series Paper [ 165603 ]")
![Pressed Flowers Embossing Folder [ 165614 ]](https://assets1.tamsnetwork.com/images/EC042017NF/165614s.jpg "Pressed Flowers Embossing Folder [ 165614 ]")
![Crushed Curry 8-1/2" X 11" Cardstock [ 131199 ]](https://assets1.tamsnetwork.com/images/EC042017NF/131199s.jpg "Crushed Curry 8-1/2\" X 11\" Cardstock [ 131199 ]")
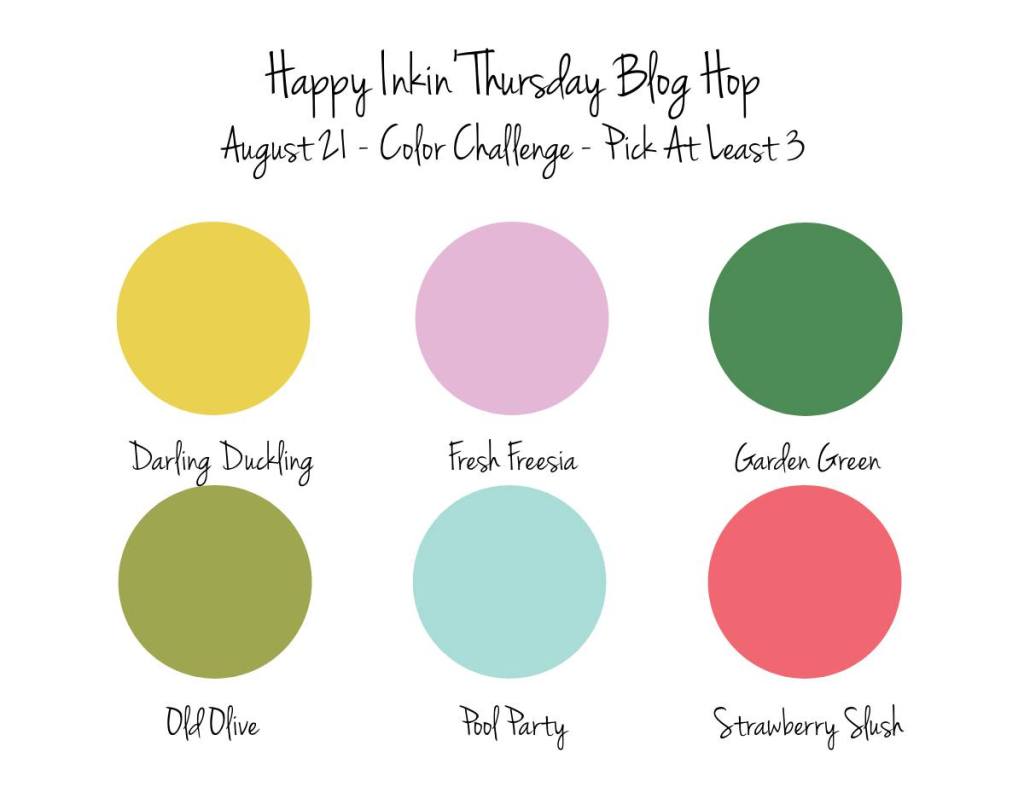
![Garden Green 8-1/2" X 11" Cardstock [ 102584 ]](https://assets1.tamsnetwork.com/images/EC042017NF/102584s.jpg "Garden Green 8-1/2\" X 11\" Cardstock [ 102584 ]")
![Fresh Freesia 8 1/2" X 11" Cardstock [ 155613 ]](https://assets1.tamsnetwork.com/images/EC042017NF/155613s.jpg "Fresh Freesia 8 1/2\" X 11\" Cardstock [ 155613 ]")
![Strawberry Slush 8 1/2" X 11" Cardstock [ 165625 ]](https://assets1.tamsnetwork.com/images/EC042017NF/165625s.jpg "Strawberry Slush 8 1/2\" X 11\" Cardstock [ 165625 ]")
![Peach Pie 8 1/2" X 11" Cardstock [ 163799 ]](https://assets1.tamsnetwork.com/images/EC042017NF/163799s.jpg "Peach Pie 8 1/2\" X 11\" Cardstock [ 163799 ]")
![Darling Duckling 8 1/2" X 11" Cardstock [ 165622 ]](https://assets1.tamsnetwork.com/images/EC042017NF/165622s.jpg "Darling Duckling 8 1/2\" X 11\" Cardstock [ 165622 ]")
![Strawberry Slush Classic Stampin' Pad [ 165286 ]](https://assets1.tamsnetwork.com/images/EC042017NF/165286s.jpg "Strawberry Slush Classic Stampin' Pad [ 165286 ]")
![Darling Duckling Classic Stampin' Pad [ 165277 ]](https://assets1.tamsnetwork.com/images/EC042017NF/165277s.jpg "Darling Duckling Classic Stampin' Pad [ 165277 ]")
![Garden Green Classic Stampin' Pad [ 147089 ]](https://assets1.tamsnetwork.com/images/EC042017NF/147089s.jpg "Garden Green Classic Stampin' Pad [ 147089 ]")
![2024 2026 In Color™ Flat Pearls [ 165266 ]](https://assets1.tamsnetwork.com/images/EC042017NF/165266s.jpg "2024 2026 In Color™ Flat Pearls [ 165266 ]")
![2025–2027 In Color™ Flat Pearls [ 165192 ]](https://assets1.tamsnetwork.com/images/EC042017NF/165192s.jpg "2025–2027 In Color™ Flat Pearls [ 165192 ]")

![Charming Day Bundle (English) [ 166136 ]](https://assets1.tamsnetwork.com/images/EC042017NF/166136s.jpg "Charming Day Bundle (English) [ 166136 ]")
![Floral Charm 12" X 12" (30.5 X 30.5 Cm) Designer Series Paper [ 166125 ]](https://assets1.tamsnetwork.com/images/EC042017NF/166125s.jpg "Floral Charm 12\" X 12\" (30.5 X 30.5 Cm) Designer Series Paper [ 166125 ]")
![Spotlight On Nature Dies [ 163580 ]](https://assets1.tamsnetwork.com/images/EC042017NF/163580s.jpg "Spotlight On Nature Dies [ 163580 ]")
![Night Of Navy 8-1/2" X 11" Cardstock [ 100867 ]](https://assets1.tamsnetwork.com/images/EC042017NF/100867s.jpg "Night Of Navy 8-1/2\" X 11\" Cardstock [ 100867 ]")
![Tuxedo Black Memento Ink Pad [ 132708 ]](https://assets1.tamsnetwork.com/images/EC042017NF/132708s.jpg "Tuxedo Black Memento Ink Pad [ 132708 ]")
![Mossy Meadow Classic Stampin' Pad [ 147111 ]](https://assets1.tamsnetwork.com/images/EC042017NF/147111s.jpg "Mossy Meadow Classic Stampin' Pad [ 147111 ]")
![Versamark Pad [ 102283 ]](https://assets1.tamsnetwork.com/images/EC042017NF/102283s.jpg "Versamark Pad [ 102283 ]")
![Mossy Meadow Stampin' Blends Combo Pack [ 154890 ]](https://assets1.tamsnetwork.com/images/EC042017NF/154890s.jpg "Mossy Meadow Stampin' Blends Combo Pack [ 154890 ]")
![Old Olive Stampin' Blends Combo Pack [ 154892 ]](https://assets1.tamsnetwork.com/images/EC042017NF/154892s.jpg "Old Olive Stampin' Blends Combo Pack [ 154892 ]")
![Crumb Cake Stampin' Blends Combo Pack [ 154882 ]](https://assets1.tamsnetwork.com/images/EC042017NF/154882s.jpg "Crumb Cake Stampin' Blends Combo Pack [ 154882 ]")
![Timid Tiger Stampin’ Blends Combo Pack [ 165291 ]](https://assets1.tamsnetwork.com/images/EC042017NF/165291s.jpg "Timid Tiger Stampin’ Blends Combo Pack [ 165291 ]")
![Basics Wow! Embossing Powder [ 165679 ]](https://assets1.tamsnetwork.com/images/EC042017NF/165679s.jpg "Basics Wow! Embossing Powder [ 165679 ]")


![Sunshine Vibes Bundle (English) [ 165152 ]](https://assets1.tamsnetwork.com/images/EC042017NF/165152s.jpg "Sunshine Vibes Bundle (English) [ 165152 ]")
![Boho Vibes 6" X 6" (15.2 X 15.2 Cm) Designer Series Paper [ 165144 ]](https://assets1.tamsnetwork.com/images/EC042017NF/165144s.jpg "Boho Vibes 6\" X 6\" (15.2 X 15.2 Cm) Designer Series Paper [ 165144 ]")
![Cloud Cover 8 1/2" X 11" Cardstock [ 165621 ]](https://assets1.tamsnetwork.com/images/EC042017NF/165621s.jpg "Cloud Cover 8 1/2\" X 11\" Cardstock [ 165621 ]")
![Secret Sea 8 1/2" X 11" Cardstock [ 165624 ]](https://assets1.tamsnetwork.com/images/EC042017NF/165624s.jpg "Secret Sea 8 1/2\" X 11\" Cardstock [ 165624 ]")
![Cajun Craze 8-1/2" X 11" Cardstock [ 119684 ]](https://assets1.tamsnetwork.com/images/EC042017NF/119684s.jpg "Cajun Craze 8-1/2\" X 11\" Cardstock [ 119684 ]")
![Secret Sea Classic Stampin' Pad [ 165285 ]](https://assets1.tamsnetwork.com/images/EC042017NF/165285s.jpg "Secret Sea Classic Stampin' Pad [ 165285 ]")
![Muted Palette Dots [ 165155 ]](https://assets1.tamsnetwork.com/images/EC042017NF/165155s.jpg "Muted Palette Dots [ 165155 ]")
![Natural Tones Linen Thread [ 164071 ]](https://assets1.tamsnetwork.com/images/EC042017NF/164071s.jpg "Natural Tones Linen Thread [ 164071 ]")
![Heat Tool (Us And Canada) [ 129053 ]](https://assets1.tamsnetwork.com/images/EC042017NF/129053s.jpg "Heat Tool (Us And Canada) [ 129053 ]")


![Sweet Blooms Bundle (English) [ 165189 ]](https://assets1.tamsnetwork.com/images/EC042017NF/165189s.jpg "Sweet Blooms Bundle (English) [ 165189 ]")
![Florals In Bloom 12" X 12" (30.5 X 30.5 Cm) Designer Series Paper [ 165175 ]](https://assets1.tamsnetwork.com/images/EC042017NF/165175s.jpg "Florals In Bloom 12\" X 12\" (30.5 X 30.5 Cm) Designer Series Paper [ 165175 ]")
![Blackberry Bliss 8-1/2" X 11" Cardstock [ 133675 ]](https://assets1.tamsnetwork.com/images/EC042017NF/133675s.jpg "Blackberry Bliss 8-1/2\" X 11\" Cardstock [ 133675 ]")
![Petunia Pop Classic Stampin Pad [ 163811 ]](https://assets1.tamsnetwork.com/images/EC042017NF/163811s.jpg "Petunia Pop Classic Stampin Pad [ 163811 ]")
![2025–2027 In Color™ Stampin' Write Markers [ 165292 ]](https://assets1.tamsnetwork.com/images/EC042017NF/165292s.jpg "2025–2027 In Color™ Stampin' Write Markers [ 165292 ]")
![Adhesive Sheets [ 152334 ]](https://assets1.tamsnetwork.com/images/EC042017NF/152334s.jpg "Adhesive Sheets [ 152334 ]")


![Summer Splash 8 1/2" X 11 Cardstock [ 163797 ]](https://assets1.tamsnetwork.com/images/EC042017NF/163797s.jpg "Summer Splash 8 1/2\" X 11 Cardstock [ 163797 ]")
![Petunia Pop 8 1/2" X 11" Cardstock [ 163801 ]](https://assets1.tamsnetwork.com/images/EC042017NF/163801s.jpg "Petunia Pop 8 1/2\" X 11\" Cardstock [ 163801 ]")
![Granny Apple Green 8-1/2" X 11" Cardstock [ 146990 ]](https://assets1.tamsnetwork.com/images/EC042017NF/146990s.jpg "Granny Apple Green 8-1/2\" X 11\" Cardstock [ 146990 ]")
![Summer Splash Classic Stampin Pad [ 163809 ]](https://assets1.tamsnetwork.com/images/EC042017NF/163809s.jpg "Summer Splash Classic Stampin Pad [ 163809 ]")


![Shy Shamrock 8 1/2" X 11" Cardstock [ 163795 ]](https://assets1.tamsnetwork.com/images/EC042017NF/163795s.jpg "Shy Shamrock 8 1/2\" X 11\" Cardstock [ 163795 ]")
![Shy Shamrock Classic Stampin Pad [ 163808 ]](https://assets1.tamsnetwork.com/images/EC042017NF/163808s.jpg "Shy Shamrock Classic Stampin Pad [ 163808 ]")
![Peach Pie Classic Stampin Pad [ 163810 ]](https://assets1.tamsnetwork.com/images/EC042017NF/163810s.jpg "Peach Pie Classic Stampin Pad [ 163810 ]")
![Peach Pie Stampin’ Blends Combo Pack [ 163827 ]](https://assets1.tamsnetwork.com/images/EC042017NF/163827s.jpg "Peach Pie Stampin’ Blends Combo Pack [ 163827 ]")
![Shy Shamrock 3/8" (1 Cm) Bordered Ribbon [ 163787 ]](https://assets1.tamsnetwork.com/images/EC042017NF/163787s.jpg "Shy Shamrock 3/8\" (1 Cm) Bordered Ribbon [ 163787 ]")
![Rainbow Adhesive Backed Dots [ 162758 ]](https://assets1.tamsnetwork.com/images/EC042017NF/162758s.jpg "Rainbow Adhesive Backed Dots [ 162758 ]")


")


")

 Designer Series Paper")
 Two Tone Cardstock")


 Satin Ribbon")

